Article Contents:
- Why Lighting Changes the Appearance of Wall Molding
- Grazing light makes a profile legible
- Distinguish architectural light from task light
- Let the wall have a clear focal point
- Make a measured elevation, not just a mood board
- Mark the light's actual viewing position
- Keep required service access clear
- One sconce within a tall wall panel
- Two sconces on either side of a central field
- Applied frames are not structural fixtures
- 1. The living-room accent wall behind the sofa
- 2. Symmetrical bedside sconces and a wide headboard
- 3. A dining room with a quiet central panel
- 4. A hallway with repeated sconce bays
- 5. A backlit decorative niche
- 6. A mirror flanked by soft wall lights
- 7. A restrained feature wall with vertical light
- Confirmed sizes for the four reference models
- Choosing MLDPU-002 for a sconce composition
- Choosing MLDPU-003 when the room is larger
- Pairing two profiles without creating clutter
- Polyurethane is different from wood and MDF
- An applique is optional, not a required center
- Decorative corners and prefabricated concepts
- Select the light distribution before selecting color temperature
- Dimming and controls affect how the wall feels
- Concealed LED systems need their own installation details
- Avoid reflections and glare in the primary viewing direction
- Measure the outer or inner line consistently
- Layout A: one 32-by-60-inch frame
- Layout B: two 36-by-70-inch frames
- Layout C: three 31-by-78-inch panels
- From cut list to purchase checklist
- Step 1: settle electrical locations first
- Step 2: complete a full-size dry layout
- Step 3: prepare the surface and cut carefully
- Step 4: attach trim without trapping equipment
- Step 5: finish, then test with the actual light
- Make the shadows intentional
- Plan cleaning before you add detail
- Should the sconce go inside the molding frame or beside it?
- Does polyurethane molding need a special light fixture?
- Can I install LED strip lighting behind any wall molding?
- Which STAVROS molding works around a compact sconce?
- How much trim should I order for two tall panels?
- What if the wall has a switch or an outlet in the frame?
- Can a bedroom use sconces, molding, and an ornamental applique together?
- What is the most important mistake to avoid?
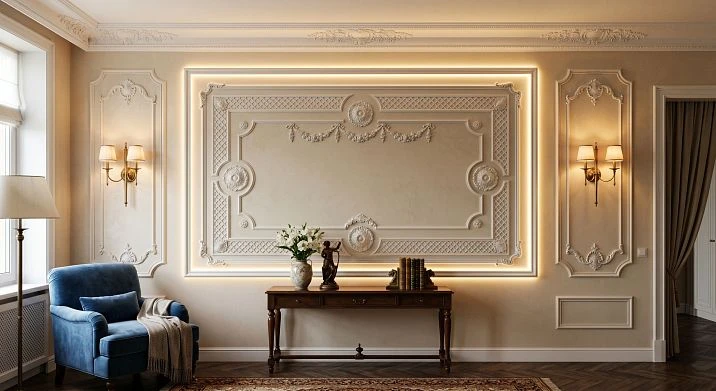
A thoughtfully lit wall does not require elaborate plasterwork. A simple sconce, a carefully proportioned frame of polyurethane molding, and a finish that lets light reveal the profile can give a plain drywall surface architectural depth. The important decision is not how many ornaments to buy. It is where the light falls, how the fixture relates to the trim, and whether the finished assembly remains practical to clean and service.
This American guide explains how to plan wall molding with sconces, combine decorative wall molding with LED accent lighting, select actual STAVROS profiles, estimate stock lengths, and coordinate installation with a qualified electrician. It follows the Russian original's discussion of sconces, niches, bedroom walls, living rooms, dining areas, corridors, mirrors, and decorative appliques, but translates those ideas into measurements and construction decisions suitable for U.S. interiors. Dimensions and layouts below are worked examples, not universal installation standards.
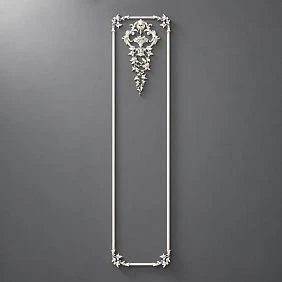
Why Lighting Changes the Appearance of Wall Molding




Grazing light makes a profile legible
The same profile can read as a faint outline at noon and as a substantial architectural detail after sunset. Light arriving almost perpendicular to the wall distributes illumination fairly evenly across the molding face. Light arriving from one side creates a brighter edge and a shadow inside each groove. That shadow is what tells the eye whether a molding is rounded, stepped, or deeply sculpted. A wall sconce is useful not because it automatically looks luxurious, but because its position can make otherwise subtle details visible.
A small bead profile may need a shallow viewing angle and close-range light to show its contour. A broader stepped profile is easier to read from across a room, but can also create stronger shadows that compete with artwork or a mirror. Do a mockup before ordering. Hold a 12-inch piece of trim against the painted wall, move a lamp to several plausible fixture locations, and view the result from a doorway and from the main chair or sofa. Photographs made with the same exposure help compare alternatives more reliably than memory.
Наша фабрика также производит:
Смотреть весь Каталог продукции
Distinguish architectural light from task light
A reading sconce beside a bed should serve the reader first. A decorative sconce beside a picture-frame molding panel can instead contribute softly to room ambience. These jobs are not interchangeable. A shallow shade that spreads light along the wall may give beautiful trim shadows while doing little for a book. An adjustable reading light may deliver the task illumination perfectly while casting an irregular patch on the decorative frame.
Separate the requirements in the plan: functional illumination, glare control, visual balance, and maintenance. With two luminaires, the wall may still have one primary ornamental composition. Conversely, one sconce can supply the visual center while the ceiling or an adjacent floor lamp handles functional brightness. For product selection, begin with the actual polyurethane wall molding collection, then judge each profile under light rather than assuming every decorative strip works the same way.
Получить консультацию
Let the wall have a clear focal point
The strongest composition has a hierarchy. Usually the eye should notice the room's primary object, then the light fixture, and finally the detail of the molding. Overlapping a deeply carved applique, a glittering fixture, an elaborate frame, and a bright LED perimeter produces several competing centers. If the sconce is ornate, simplify the frame. If the frame is bold, use a quieter luminaire and a restrained paint finish. A plain field of wall between the fixture and its decorative border is often the most valuable part of the design.
The frame does not always need to surround the light. A pair of sconces can flank one large central rectangle; a single sconce may sit above a narrow vertical molding panel; or the light fixture can remain outside a group of repeated frames. Begin with the room's architecture and furniture before deciding how the moldings connect. The objective is a wall that still looks intentional when the lights are off.
Survey the Wall Before Placing a Sconce
Make a measured elevation, not just a mood board
Record overall wall width and height in inches, ceiling and baseboard positions, and distances from corners, doors, windows, switches, vents, outlets, furniture, and existing art. Draw a front-facing elevation and mark the actual fixture dimensions. Do not substitute the nominal dimension of an electrical box for the diameter of the wall plate or decorative backplate. The backplate, shade, and mounting hardware control the clearance around the fixture, and they are not interchangeable with the box behind it.
On an ordinary 12-foot wall, a 20-inch-deep sconce shade can appear very different from a 6-inch-deep fixture even if their backplates are similar. Note the projection from the finished wall, the route people walk past it, and whether the shade is vulnerable to contact. In a hallway or near a doorway, placement must be coordinated with applicable local electrical and accessibility requirements. This is not merely a proportional decision; clear width and protruding-object limits can matter in certain spaces.
Mark the light's actual viewing position
Set the proposed fixture height against the use of the room rather than copying a generic number from a design photograph. Beside a sofa, assess the seated view, the position of people's faces, and the possibility of glare from a bare lamp. In a bedroom, establish the mattress and headboard heights, pillow position, and access to the switch. In a dining room, check how the wall reads from the table and whether guests can reach the sconce without leaning across furniture.
Painter's tape can show the frame outline, but it does not show the luminous distribution. Use a temporary portable light to simulate the intended effect without attempting temporary fixed electrical wiring. Test daylight, evening light, and the view from the primary entry. Move the taped outline until its vertical axis relates to the furniture or wall bay, then check that the proposed sconce belongs on that same axis. For a fuller planning discussion of switches and outlets, see the STAVROS guide to wall molding around electrical devices.
Keep required service access clear
An electrical junction box, fixture canopy, removable shade, serviceable LED driver, or ventilation grille should never be sealed behind decorative trim. Mark these zones with a different tape color. The molding should meet the wall without crossing an access cover, relying on the fixture to hold it, or obstructing a bulb replacement. Leave the sconce's manufacturer-required separation from adjacent materials and keep heat-producing parts away from unknown adhesives or coatings.
Where a future sconce has not yet been installed, do not cut a decorative opening and guess where its box will land. Ask the electrician to establish the final location first. Existing wiring and wall cavities may constrain the placement. Mounting a heavy fixture securely is a separate requirement from attaching lightweight trim to paint or drywall; the adhesive holding the molding must never be treated as an electrical-fixture support.
Plan Picture-Frame Molding Around One or Two Sconces
One sconce within a tall wall panel
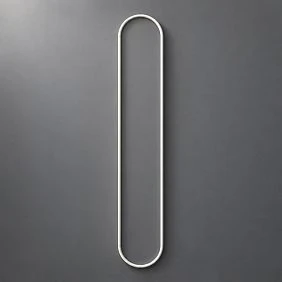
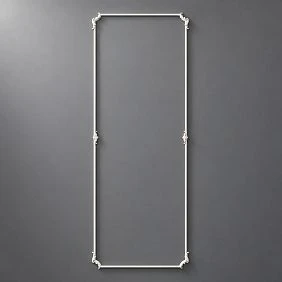
A single luminaire can occupy the upper third of a tall, narrow frame with an intentional field of blank wall below it. Start by selecting the sconce and locating its backplate, not by purchasing four pieces of molding. Set a clear margin around the backplate so a person can reach its fasteners and remove the fixture without cutting the frame. A broad panel can sit behind a compact fixture; a smaller panel might be better positioned below the sconce rather than enclosing it.
For a sample 9-foot wall, an applied rectangle 30 inches wide by 62 inches high may read as a vertical architectural bay, but its placement depends on furniture and existing trim. Avoid treating those dimensions as a prescribed ratio. If the wall is only 40 inches wide, a 30-inch frame leaves 5 inches at either side before accounting for its own molding width. That can feel cramped beside a door casing. A taped mockup will reveal the issue immediately.
Two sconces on either side of a central field
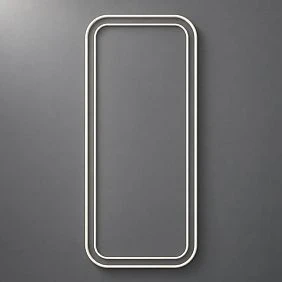
A familiar American living-room arrangement uses two matching fixtures flanking a central framed field. The panel's center should align with the fireplace, sofa, console, or other dominant object. The two lights can sit outside the frame's vertical sides rather than inside separate frames. This solution usually creates fewer seams, preserves service clearance, and makes it easier to adjust the lighting later. It can also reduce the number of strips required for the project.
When each fixture sits inside its own applied panel, measure the space between backplates and adjacent moldings, not just the spacing between fixture centers. Small inaccuracies become obvious when the lights repeat in a symmetrical composition. If the wall is not perfectly square, establish a level reference line and choose whether the eye should follow the architectural center or a central furnishing. Do not split a quarter-inch irregularity into a series of accidental-looking gaps.
Applied frames are not structural fixtures
Picture frame molding on walls is an applied decorative outline. It does not replace a wall plate, backer board, wall anchor, or appropriately rated electrical box. The frame is allowed to be visually connected to the sconce while remaining physically independent. This distinction also helps with repainting: the trim can stay in place while a qualified person removes or services the fixture as intended by its manufacturer.
For a slender secondary line, the verified MLDPU-001 polyurethane molding has a 10 x 6 mm cross-section, approximately 0.39 x 0.24 inch. A fine bead may look graceful around a small sconce, while a wide profile can overwhelm the same fixture. Size the molding with the actual sample at eye level before turning a diagram into a purchase order.
Seven Lighting-and-Trim Layouts for American Rooms
1. The living-room accent wall behind the sofa
An accent wall behind a sofa benefits from horizontal calm. Two sconces at either side of a broad central panel can create balance without making the sofa look trapped inside a giant picture frame. Measure the back height, the sofa width, and any nearby end tables. Keep the lower panel edge visible above the furniture if it is supposed to read as a continuous rectangle. Alternatively, allow a simplified vertical border to disappear behind the sofa, producing a less formal effect.
A matte or low-sheen finish prevents a bright light source from producing distracting reflected highlights on the wall. Try the molding in the same paint color as the background before selecting contrast. Tone-on-tone trim often gives enough relief under sconce light and leaves artwork, upholstery, and decorative pillows in charge. For a long living-room wall, two generous fields generally read more clearly than numerous tiny, equally weighted frames.
2. Symmetrical bedside sconces and a wide headboard
Beside a bed, the geometry should follow the actual headboard and nightstands. A pair of wall-mounted reading lights can sit within tall outer panels while a quiet, larger center field spans the bed. For example, a queen bed is 60 inches wide, but the headboard may be wider and the nightstands add more visual mass. Aligning trim simply to the mattress center can miss the real composition. Mark the combined furniture arrangement first.
Keep each fixture operable from the bed and avoid placing decorative corners where someone might brush them while reaching for a switch. If the light is adjustable, trace its movement and maximum extension with an unpowered paper template before setting the molding. A decorative applique above the headboard may be appropriate in a traditional room, but it should not crowd the sconces or distract from the reading function. This is also a good place for a shallow profile and a calm wall color rather than heavy ornament.
3. A dining room with a quiet central panel
A dining-room sconce may be used more as an accent than as task lighting, particularly when a chandelier already lights the table. An applied rectangular frame can support a mirror or painting, with matching sconces to each side. Establish the artwork or mirror's final size before choosing trim. If the art is tall, a horizontal panel around it may seem forced; a larger architectural field can hold everything while remaining distinct from the artwork's own frame.
Watch the reflection in glossy table surfaces and mirrors. A beautiful wall can feel uncomfortable if exposed bulbs produce intense reflections at a seated guest's eye level. Test several lamp and shade types. When the room has an ornate chandelier, slim MLDPU-004 polyurethane molding at 15 x 8 mm (about 0.59 x 0.31 inch) can provide a measured background contour without creating a second decorative centerpiece.
4. A hallway with repeated sconce bays
A hallway becomes more interesting when its decorative rhythm relates to doors, rather than when every available foot is filled with ornament. Draw the door swings, trim locations, switches, and the path people actually walk. Repeated vertical frames can mark two or three bays; sconces may alternate with empty panels or sit inside only the wider sections. Variations in bay width are acceptable when they respond to the architecture rather than arbitrary spacing.
The fixture's projection is a particular concern here. Avoid creating a series of objects that catch coats, bags, or shoulders. In a shared or publicly accessible hallway, the applicable accessibility and egress requirements deserve professional review before decorative choices are made. Trim should not mask fire alarm devices, emergency equipment, or information signage. The best hallway project often uses modest molding with carefully placed, low-glare fixtures, not the largest possible decorative elements.
5. A backlit decorative niche
A niche introduces a different type of illumination: light may originate from a recessed channel rather than a visible sconce. Applied molding can outline the niche's external face while an appropriately designed LED system illuminates the inside. Keep the LED channel, power supply, wiring access, and maintenance plan separate from the decorative molding assembly. The trim should not become an improvised enclosure for heat-generating electronics.
The light may reveal joint imperfections more strongly than ambient illumination does. Trial-fit all sections, inspect the corners with a portable grazing light, and finish the wall surface before adding accent light. For a detailed breakdown of niche proportions and placement, the related STAVROS article on molding and lighting for decorative wall niches provides a useful design reference. A niche with art or sculpture should prioritize the displayed object rather than the outline around it.
6. A mirror flanked by soft wall lights
The mirror itself creates another source of perceived brightness, so excessive relief around its edges can make the composition busy. Choose whether the mirror has a separate physical frame or whether wall molding creates an architectural border outside it. Neither wall trim nor an ornamental applique should be used to carry the weight of the glass. The mirror's approved mounting hardware must be designed for its weight, substrate, and location.
Position the lights to support the mirror's function. In a dressing area, side illumination can be more flattering than a single strong light above the head, but placement still depends on mirror size and the user's height. In an entryway, the goal may be atmosphere rather than grooming. Stand in the actual viewing position and check whether a lamp is visible as an unpleasant bright spot in the mirror. A frame that works in a photograph may not work for a person using the space every morning.
7. A restrained feature wall with vertical light
Vertical LED light lines can sit beside narrow applied trim, especially in a contemporary den or home office. Place the luminous feature and the molding so their edges do not fight for attention. A narrow indirect light can emphasize one side of a panel while the other side remains quiet. The better result may be a single illuminated vertical element rather than symmetrical brightness on every border.
For a more classical room, substitute a conventional sconce or a shaded wall light and let the molding perform the architectural role. Neither approach requires a special molded channel unless the actual product is designed for the LED assembly. A conventional polyurethane molding is a decorative profile, not a listed LED raceway or electrical enclosure. If indirect illumination is required, specify a compatible manufactured lighting channel and keep its documentation with the project.
Compare Real STAVROS Polyurethane Molding Profiles
Confirmed sizes for the four reference models
Product dimensions matter more than generic descriptions such as "small," "premium," or "deep." The current U.S.-facing STAVROS pages identify the following four linear decorative profiles as polyurethane, with a common nominal stock length of 2600 mm. Width and projection below are the published cross-sectional dimensions; they do not describe a concealed electrical channel, fixture mounting system, or built-in lighting feature.
| STAVROS profile | Cross-section | Approximate U.S. size | Published length | Best visual role |
|---|---|---|---|---|
| MLDPU-001 | 10 x 6 mm | 0.39 x 0.24 in | 102.36 in | Fine outlines and secondary contours |
| MLDPU-004 | 15 x 8 mm | 0.59 x 0.31 in | 102.36 in | Small and medium wall frames |
| MLDPU-002 | 22 x 11 mm | 0.87 x 0.43 in | 102.36 in | Clear relief near a wall sconce |
| MLDPU-003 | 35 x 12 mm | 1.38 x 0.47 in | 102.36 in | More substantial formal wall fields |
The profile cross-section is only part of the visual result. A 35 mm face can be appropriate on an expansive feature wall, yet too heavy for a narrow panel beside a door. A 10 mm bead may look delicate in a product photograph but virtually disappear from a far corner of a large dining room. Test the intended sample under the planned lamp and from the distance at which the wall will normally be viewed.
Choosing MLDPU-002 for a sconce composition
A mid-scale profile is often easier to coordinate with a conventional decorative wall fixture than either extreme. The published MLDPU-002 molding measures 22 x 11 mm, about 0.87 x 0.43 inch. Its stepped form produces an edge that can catch side light while remaining slender enough for repeated rectangular panels. For a traditional living room with paired sconces, consider it as the primary outer contour rather than automatically adding an applique in every corner.
A panel that looks balanced with an 18-inch-tall wall fixture may not look right with a much smaller minimalist lamp. Establish the visible dimensions of the fixture and the frame together. Leave enough empty wall around both to keep their identities distinct. A good practical test is to print the luminaire silhouette at full size, tape it to the wall with the proposed molding profile, and check the effect in natural and evening light.
Choosing MLDPU-003 when the room is larger
The verified MLDPU-003 polyurethane profile is 35 x 12 mm, approximately 1.38 x 0.47 inch. Its larger face creates a more obvious architectural border. It can suit a broad paneled field in a formal dining room or a spacious entry. That does not mean it should frame a fixture closely. The more relief a profile has, the more room it generally needs to breathe around a backplate, mirror, or artwork.
There is also a maintenance reason to avoid crowding. Dust settles along deep changes of plane, and a nearby wall light makes surface flaws conspicuous. A profile placed a comfortable distance from the light usually looks better and is easier to wipe without touching electrical equipment. Order by the actual catalog specification, not by assuming a similarly named profile on another site has the same dimensions or material.
Pairing two profiles without creating clutter
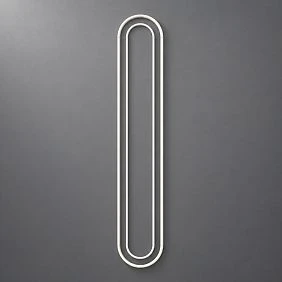
A narrow inner contour paired with a moderate outer contour can create a subtle layered frame, particularly on a large wall with simple furniture. Leave a consistent band of painted surface between the two molding runs. If the panel is only 24 inches wide, a second border can consume too much of the interior. If it is six feet wide, the additional line may help establish scale. Do not add a second molding merely to increase the quantity of product used.
Keep the two profiles' depths compatible and inspect the paint transition under grazing light. For precise detailing, hold the slender MLDPU-001 or MLDPU-004 inside a taped outline of the larger profile. The relationship between the two is a design exercise; it does not imply that the items mechanically interlock or belong to a manufacturer-approved electrical lighting kit.
Choose Materials and Decorative Accents Honestly
Polyurethane is different from wood and MDF
Polyurethane linear molding is appropriate when the project calls for a molded decorative contour, but not every adjacent ornament should automatically be described as polyurethane. Solid wood trim can be stained and displays real grain, though its movement and finishing requirements differ. MDF offers a consistent manufactured substrate commonly used for painted millwork, but needs particular attention to edges, moisture exposure, and compatible primers. Plaster may be more appropriate when reproducing historic work, while polystyrene and PVC have their own specifications and installation limits.
Do not select by an assumed lifetime, universal water resistance, fire rating, or suitability for an unventilated fixture cavity. Check the actual product specification and the conditions of the room. In a laundry area or bathroom, the complete assembly includes substrate, adhesive, joint treatment, paint, and electrical installation; a property attributed to the decorative profile alone does not qualify the whole wall for wet or high-heat service.
An applique is optional, not a required center
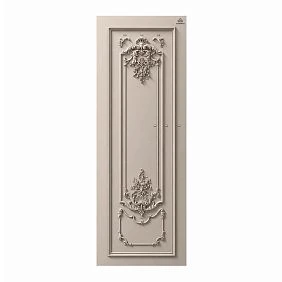
A carved or molded ornament can draw the eye toward a sconce composition, but a raised floral center beneath a contemporary cylinder light may look inconsistent. A simpler wall often achieves better balance by using trim only. When an ornament is desired, place a paper template first. Test whether the shadow from the sconce makes the ornament too visually dense, and check that its projection will not interfere with removing the light's shade.
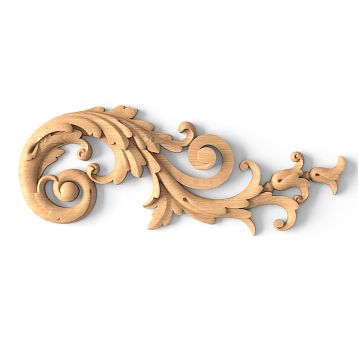
STAVROS has a distinct category of polyurethane decorative onlays and appliques, and a separate selection of carved wooden molding ornaments. Those materials should not be merged in a purchase specification: each component needs the correct substrate preparation, finish, and fastening approach. In a mixed-material composition, a matching paint color can unify the appearance without changing the technical requirements.
Decorative corners and prefabricated concepts
A decorative corner insert should fit the actual mating profile and layout. Similar SKU numbers do not establish compatibility. Some wood corner pieces have recesses matched to specific wooden moldings, not to every linear polyurethane trim. Compare cross-sections and manufacturer details before combining them. If a decorative concept includes multiple components, request a complete itemized bill of materials instead of assuming one catalog photograph represents a ready-to-install set for the selected wall.
The original Russian material also discusses coordinated molding sets. Such sets can be a visual starting point, but their individual material, dimensions, attachment method, and intended location still need confirmation. For a U.S. project, verify what a quoted set actually includes and whether any electrical components are included at all. Most architectural decoration should be treated as separate from the lighting manufacturer's listed product.
LED Accent Lighting: What the Trim Can and Cannot Do
Select the light distribution before selecting color temperature
Light color is important, but beam direction determines how a molding reads. A wall-washing fixture may spread illumination across a broad area, while a more directional sconce concentrates the effect above and below its body. Neither is automatically better. For a narrow vertical frame, a broad pool can keep the geometry legible; for a deep ornament, oblique light may reveal more detail. Try a mockup at night with the actual or a comparable luminaire and record the result.
Many homeowners prefer warm ambient lighting in living rooms and bedrooms, but a single prescribed Kelvin value would be misleading. Consider the existing lamps, natural light, paint undertones, and intended activity. For makeup or color-sensitive tasks, evaluate color rendering and fixture placement separately. Mixing several visibly different color temperatures on one wall can undermine the architectural effect even when the decorative scheme is otherwise coherent.
Dimming and controls affect how the wall feels
A wall light at full brightness may produce hard, distracting contrast. Lowering it can make relief gentle and allow the room's main furniture or artwork to remain dominant. Verify that the luminaire, lamp, driver, and control are mutually compatible before choosing a dimmer. Not every LED device can be dimmed with every switch. An electrician can help specify controls and prevent unreliable operation or flicker.
Think about control locations while the wall is still being planned. A bedside sconce should be operable without climbing out of bed; a hallway light should work with its circulation pattern. Decorative trim should never overlap a switch plate or create a hard-to-clean pocket around it. If the wall has smart lighting, test both the normal and the lowest intended settings. What looks refined at 30 percent output may appear harsh at 100 percent.
Concealed LED systems need their own installation details
A continuous luminous line can be beautiful, but a standard ornamental molding is not a substitute for an LED channel, a heat-management solution, or a wiring enclosure. Use an appropriate manufactured system with the required electrical approvals and follow its instructions. Keep drivers and connections accessible, and do not bury them behind adhered trim. Heat generation, ventilation, power supply location, and low-voltage conductor routing are parts of the lighting design, not aesthetic afterthoughts.
Even low-voltage lighting involves electrical installation decisions that may fall under local code and permit requirements. Decorative adhesives are not designed to secure live wiring. Do not route cables through an improvised notch in a profile or conceal a junction box behind a permanent frame. If the wall is already finished and the desired effect would require unsafe concealment, choose a different lighting approach instead of forcing the design.
Avoid reflections and glare in the primary viewing direction
The wall can look perfectly composed from the doorway and uncomfortable from the sofa. Sit or stand where the room will be used. Look at reflective artwork, a polished console, the television screen, and nearby glass. Bright sources appearing at eye level, even briefly, deserve adjustment. A shielded fixture or softer distribution is often more useful than lowering the light and adding more moldings to distract from the problem.
For a media room, the need to protect screen contrast is especially important. Warm accent light around the perimeter can help navigation, but direct light across a projector screen is usually undesirable. A decorative scheme for ordinary living-room sconces is not a universal projector-wall design. The related STAVROS home theater wall molding guide explains that separate scenario.
Calculate Wall Molding in Inches and Linear Feet
Measure the outer or inner line consistently
An applied rectangular frame has two vertical pieces and two horizontal pieces. At the simplest estimating level, its linear length is twice its width plus twice its height. But where exactly are those dimensions taken? The outside edge of a wide profile is not the same as the inside edge, and the long point of a miter is not the short point. Choose one convention, draw it on the cut list, and use it consistently. For buying stock, plan from the finished longest dimension of each piece, including any cut allowance required by the selected joint.
One standard MLDPU stock length is 2600 mm, approximately 102.36 inches or 8.53 linear feet. Dividing the sum of all required pieces by 102.36 gives only a lower bound. It does not prove the pieces will fit into that number of strips. A useful cut list includes quantity, finished length, cut orientation, and the allocation of each piece to a purchased strip. Cut width, damaged ends, and miter corrections need their own reasonable allowance.
Layout A: one 32-by-60-inch frame
Suppose the finished longest-point dimensions are 32 inches wide and 60 inches tall. Two vertical pieces total 120 inches; two horizontal pieces total 64 inches. The complete frame requires 184 linear inches, or 15.33 linear feet. The arithmetic minimum is two stock strips because 184 divided by 102.36 rounds up to two. In this case the cutting plan is also feasible: one 60-inch vertical plus one 32-inch horizontal fits in each 102.36-inch strip, with more than 10 inches left for end trim and saw kerfs.
Two strips are therefore a plausible minimum if the measurements are final, the profile is straight, and the corner cuts are handled correctly. A buyer may still want a third strip for a visible match, later repair, or mistakes, particularly when reordering could delay the work. That is a project decision rather than a universal 10-percent rule. The mounting location of the sconce does not change this perimeter math, provided the fixture is separate from the decorative outline.
Layout B: two 36-by-70-inch frames
Now consider two tall panels flanking a central area. Each panel needs two 70-inch verticals and two 36-inch horizontals. Across both panels, the list is four 70-inch lengths and four 36-inch lengths. Total material is 280 plus 144, or 424 inches (35.33 linear feet). A simple calculation gives five stock strips as the arithmetic minimum because 424 divided by 102.36 is just over four.
But a 70-inch piece leaves only 32.36 inches, too short for a 36-inch horizontal. The four long pieces therefore occupy four strips. The four 36-inch pieces can be cut two per additional strip, requiring two more. Six strips are the cutting-plan minimum, not five, before additional contingency. This is exactly why an attractive total in linear feet does not automatically translate into an order quantity.
Layout C: three 31-by-78-inch panels
For three narrow decorative bays, the cut list contains six pieces at 78 inches and six pieces at 31 inches. The combined length is 468 plus 186, or 654 inches, equal to 54.5 linear feet. Dividing by 102.36 suggests seven strips. But each 78-inch vertical leaves less than 25 inches, which cannot produce a 31-inch horizontal. Six strips are needed for the verticals. The six horizontal pieces fit two per strip, adding three strips.
That means nine strips are required by this cut plan, rather than the seven suggested by total length. A minor layout adjustment that shortens the long pieces or reduces the frame width could change the waste substantially, but change the design only if the result still suits the room. Record the final long-point dimensions and check saw kerf and end trimming before purchasing. If a wall is not square, the installer should also confirm whether small variations require an intentional scribe or a revised frame layout.
From cut list to purchase checklist
For each SKU, record the dimensions from its actual product page, number of purchased lengths, required joint pieces, proposed finish, and any accessory whose compatibility has been checked. Do not add unlike profiles into one quantity total; a 0.39-inch bead and a 1.38-inch panel molding are not interchangeable stock. Keep a photograph of the dry-fitted sample and a clean plan showing the junctions with the sconces. A well-documented order helps the person cutting the moldings and the person installing the fixtures work from the same assumptions.
Installation Sequence: Coordinate the Electrician and Trim Installer
Step 1: settle electrical locations first
Establish fixture centers, mounting height, switch controls, and the location of any separately listed LED equipment before applying decorative material. Where fixed wiring is involved, work with a qualified electrician and follow local requirements. The electrician should confirm that boxes, supports, wiring, and fixture clearances suit the actual wall. Never assume an adhesive strip, an ornamental corner, or a thin drywall patch can carry the mechanical load of a sconce.
If existing wiring dictates a location that breaks the ideal symmetry, reconsider the decorative panel geometry instead of disguising the issue. A slightly wider center field or an intentionally offset grouping often looks more thoughtful than a nominally symmetrical frame interrupted by an access plate. Do not cover electrical boxes with permanent trim, even when the covered area seems unlikely to need maintenance.
Step 2: complete a full-size dry layout
Mark the horizontal datum with a level and transfer the frame corners to the wall. Apply low-tack painter's tape along the intended molding centerlines, then temporarily position the actual samples where they will go. Verify that the luminaire backplate remains accessible and that the fixture's projection does not interfere with an adjacent decorative element. Use a portable light to check the appearance of both the main face and the miters. A dry layout is less expensive to change than an adhered frame.
Measure each opening separately rather than cutting everything from the first nominal dimensions. Walls can vary, baseboards may be out of level, and furniture rarely sits in precisely the position shown on a plan. Label each piece with its location and end-cut orientation. Where decorative molding meets a different material, plan a clean transition rather than forcing incompatible shapes to butt together.
Step 3: prepare the surface and cut carefully
Remove loose coating, dust, and contaminants from the installation zone, and confirm that the paint and wall substrate are sound. Adhesive performance depends on the complete system, not just the molding material. Follow the molding and adhesive manufacturers' instructions for surface preparation, set time, and any temporary support. For painted or glossy walls, perform an inconspicuous compatibility test before committing to a full installation.
For rectangular frames, use a suitable miter saw and measure the longest finished points when working from outside dimensions. Check the first corner on scrap material. Do not assume the face of every profile sits squarely against the saw fence; support the piece consistently in its intended orientation. Review the STAVROS polyurethane molding range for the exact dimensions of the chosen SKU before preparing the cut list.
Step 4: attach trim without trapping equipment
Dry-fit each rectangle on the floor or against the taped wall. Attach according to the specified adhesive or fastening method, working from the chosen level reference. Keep joints even, remove excess adhesive safely, and avoid contaminating finished fixture surfaces. Molding joints and the sconce backplate should remain independent. If a separate electrical inspection is required, schedule it at the appropriate stage rather than hiding work behind decoration.
Allow the assembly to reach the specified cure condition before applying filler or paint. A bead that is too thick, a compressed joint, or a corner filled while the pieces are moving can leave visible shadows under grazing light. Do not treat caulk as a replacement for careful cutting. The best-lit molding walls tend to reveal craftsmanship, including its weaknesses.
Step 5: finish, then test with the actual light
Fill small imperfections with a compatible product, remove sanding residue, prime where required, and finish the molding and adjoining wall as a coordinated system. Check the fixture's removal path before the final coat. Once the electrician has completed and approved the lighting work, view the wall under its normal light settings. A small area of uneven paint may be invisible in ambient daylight and highly visible when a sconce sends light across it. Correct only what the light genuinely reveals rather than adding decorative elements to distract from a finishing problem.
Paint, Sheen, and Everyday Maintenance
Make the shadows intentional
A matte wall and matching painted molding often produce a refined tone-on-tone result. Satin or semi-gloss trim against a flat wall adds a different kind of contrast, but can also highlight every filled joint. Test both in a small area under the intended fixture. The paint system must be compatible with the actual polyurethane surface and any primer supplied on the product; do not assume a factory-colored or prefinished appearance is universal across the collection.
Choose contrast based on the room rather than a rule. Dark trim on light walls may frame a pair of sconces dramatically, while the same treatment beside a decorative mirror could become crowded. The related STAVROS article on decorative molding for painted walls explores that broader finish decision. Preserve the fixture manufacturer's required separations, and do not paint over removable electrical covers or lighting components.
Plan cleaning before you add detail
Sconces draw attention to dust on ledges and small chips at exposed corners. Choose a profile that can be cleaned with methods appropriate to its finish. In hallways and high-contact rooms, fewer, broader fields may age more gracefully than a dense arrangement of narrow frames and corner accents. Keep the original SKU, paint identification, and leftover lengths in the project record for repairs. An extra matching section may be more valuable later than a decorative ornament the room never needed.
What to Buy for a Wall With Sconces
Start the purchase list with the actual lighting fixture, its installation plan, and an approved support and wiring arrangement. Then add the decorative profiles from the cut list; a verified MLDPU-001 fine molding or MLDPU-002 stepped molding can be chosen after the full-size mockup. If larger rooms require more definition, compare the published MLDPU-003 profile rather than simply multiplying the number of thin frames.
Add compatible adhesive, surface preparation materials, appropriate filler or caulk, primer if required, paint, masking materials, and cut-length contingency. Optional ornaments are a separate decision: inspect the intended polyurethane decorative applique category and confirm individual material and attachment details. A wood decorative insert from the carved molding accessories assortment must not be represented as a polyurethane component. Check current product specifications and availability with the seller; no U.S. warehouse, delivery date, warranty, or price is assumed here.
Frequently Asked Questions
Should the sconce go inside the molding frame or beside it?
Either can work. Placing it inside emphasizes one architectural bay but requires careful clearance around the backplate and shade. Placing two sconces outside a central frame is often simpler to service and can make artwork or a mirror the clear focal point. The fixture's actual geometry, the electrical location, and the furniture matter more than a fixed design rule.
Does polyurethane molding need a special light fixture?
Not inherently. A standard decorative molding is a wall finish, not an electrical mounting product. The luminaire must be supported and installed according to its own requirements. Its location, heat and service clearances, and beam distribution should be considered before mounting trim. Molding cannot make an unsuitable fixture installation safe.
Can I install LED strip lighting behind any wall molding?
No. A decorative profile is not automatically an electrical channel or heat-dissipating LED housing. Choose a purpose-designed, compatible system and maintain appropriate access to connections and drivers. Have the electrical design reviewed where required. If no safe, maintainable mounting route exists, use an ordinary sconce or another fixture style.
Which STAVROS molding works around a compact sconce?
The smallest verified reference profile, MLDPU-001, measures 10 x 6 mm, or about 0.39 x 0.24 inch. MLDPU-004 is 15 x 8 mm and gives slightly more visual definition. Neither choice is automatic: hold a real sample next to the specific fixture, test the shadow, and decide whether the result is legible from the main viewing position.
How much trim should I order for two tall panels?
Measure and list each cut rather than ordering solely by linear footage. For the worked example of two panels measuring 36 x 70 inches, the pieces total 424 inches, but require six 102.36-inch stock strips under the stated cut plan. Different dimensions or a different profile length can change the answer. Add contingency based on the complexity of the miters and the cost of replacing a damaged piece.
What if the wall has a switch or an outlet in the frame?
Include the device in the measured drawing before cutting. The cover must remain accessible and correctly installed. You may need to move the decorative border, shift a panel division, or have an electrician relocate equipment where permitted. Never conceal a required cover or electrical box behind glued-on molding. The dedicated STAVROS article on planning trim around outlets and switches is a useful companion.
Can a bedroom use sconces, molding, and an ornamental applique together?
Yes, if the composition retains a clear hierarchy and the fixtures remain functional. In most bedrooms the headboard should still be the main visual element. Try quiet framing around the bed, adequate reading-light placement, and only one modest ornamental accent if the room's style supports it. Dense ornament close to adjustable reading lights can become awkward to clean or service.
What is the most important mistake to avoid?
Treating the decorative plan as more important than the electrical and furniture plan. Fixtures have practical mounting and service requirements; people also need comfortable light without glare. Establish these first, tape out the frames, calculate the cuts, and verify the finish under the actual lamps. The resulting wall should look coherent at night and in daylight, without requiring a future installer to remove decorative trim to reach equipment.
A successful sconce wall is not measured by the number of profiles it contains. It is measured by how naturally light, architecture, furniture, and practical access work together. Begin with a measured layout and one reliable profile, then add detail only when it improves the composition.