
































Article Contents:
- Where to buy a medallion to match an existing cornice in Saint Petersburg
- First, determine exactly which plaster molding needs to be preserved
- How to match ornaments: don't look for a literal copy
- Three approaches to choosing the central design
- When surviving plaster can't be treated like ordinary trim
- Plaster and polyurethane on the same ceiling: what must match
- How to correctly measure the ceiling field and the existing cornice
- CRPU-070: a central accent without excessive scale
- CRPU-069: a dense pattern next to old floral moulding
- RPU.VRS-001: eight large elements instead of many small ones
- CRPU-068 and CRPU-071: two large options that need to be checked especially carefully
- Selection matrix: first the cornice, then the model, then the estimate
- Make a scale mock-up before changing the ceiling
- The chandelier sets the centre, but it should not be mounted on a decorative rosette
- How light changes the impression of new and old relief
- When the same paint finish does not make two ornaments a single whole
- Surface preparation: where the boundary between decorative and installation work lies
- What is actually included in the purchase and what you can skip ordering
- Estimate: the price of the ceiling rose, ceiling work and delivery are separate line items
- How to draw up an accurate specification without buying extra parts
- Delivery and acceptance of the set in St. Petersburg and the region
- Mistakes that make a new ceiling rose clash with an old cornice
- Customer questions about ceiling roses for surviving stucco
- Can a plaster cornice and a polyurethane ceiling rose be combined?
- Do you need to look for an exact copy of the cornice ornament?
- Which of the five models is best for a small room?
- How many parts will come in the set?
- Can I buy the ceiling rose first and choose the chandelier later?
- Does an old plaster cornice need to be repainted?
- Can I buy just individual overlays instead of the full set?
- How can I check whether the socket is too close to the cornice?
- Is it worth ordering an installation template?
- Can I buy a socket for an apartment with protected finishes?
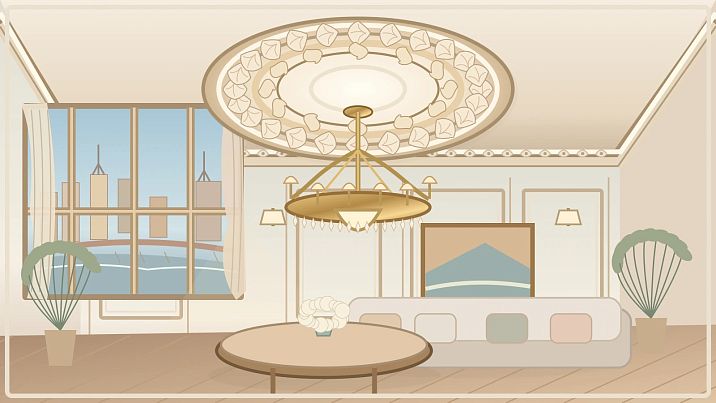
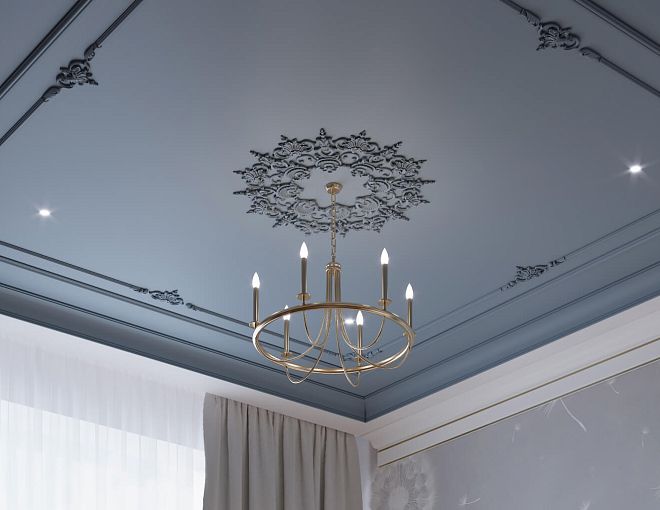
A St. Petersburg apartment has retained a plaster cornice with leaves and small beads. You don't want to touch it: the profile is even, the corners are intact, and the pattern is clearly visible even after several repaintings. But above the chandelier there is a smooth ceiling. If you simply order a large modern ceiling medallion from a photo, the new decor may look noticeably out of place: it has a different leaf scale, a different curl depth, and a completely different rhythm of ornament.
For such a room, what you need to buy is not a new "ceiling stucco system" but one coordinated central composition. First, the existing cornice is described and the free ceiling area is measured, then two or three models are selected for comparison and you check how each pattern will look next to the plaster. Finally, the independent mounting of the light fixture, the installation of the decorative elements, and the finishing paint are agreed upon. If the existing finish has historical value, a preliminary assessment of whether changes are permissible is added to the usual purchase.
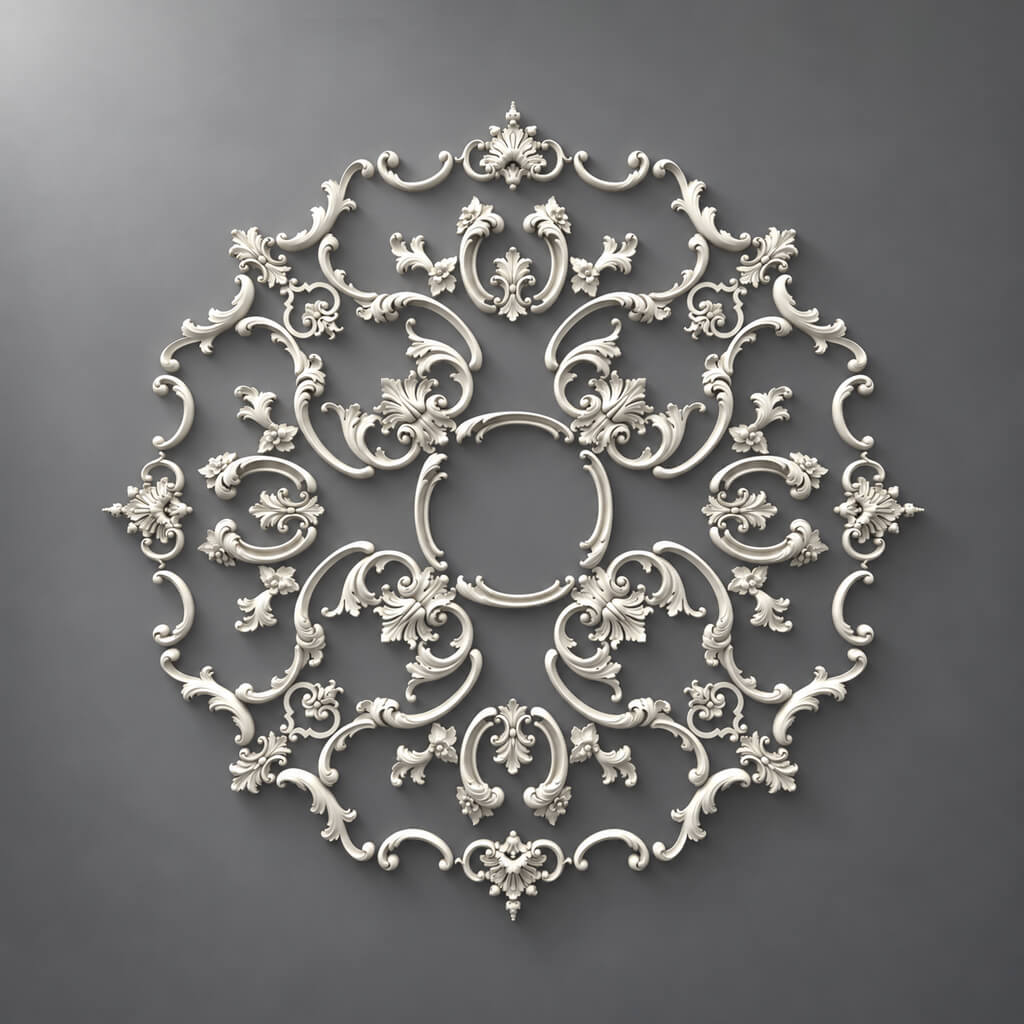
The STAVROS catalog includes composite polyurethane ceiling medallions ranging from 765 to 1365 mm among the five models under consideration. The outer dimension helps rule out obviously unsuitable options, but it does not answer the main question: will the central ornament continue the character of the plaster cornice or clash with it. To decide, it is more useful to compare the profile, motifs, spacing, actual light, and the layout of the parts.


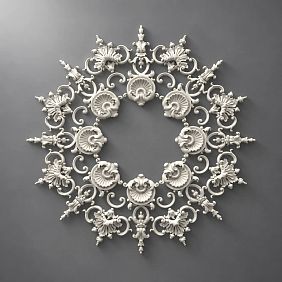


Where to buy a medallion to match an existing cornice in Saint Petersburg
In an apartment with surviving stucco, the task of ordering is narrower than when finishing a new home. The buyer does not need an additional perimeter cornice if the old one is in good condition and is being preserved. There is no need to add wall moldings, corner overlays, or a full ceiling set in advance just because they are presented nearby in the catalog. The main product is a single polyurethane medallion, for which you can obtain dimensions, composition, and a installation layout. This is exactly where the shopping list should begin.
View the assortment and buy a ceiling medallion in St. Petersburg through the official STAVROS catalog. In the request, specify the selected item code and ask to confirm the contents of the full set, the current price, availability of the parts layout diagram, base requirements, and a possible installation template. The latter should not be assumed to be included in the box automatically: for some composite compositions it is offered separately.
It makes sense to approach the seller not with the phrase "I need a beautiful antique-style medallion," but with a brief description of the ceiling. For example: "Living room 5.2 × 4.8 m, plaster cornice with a floral motif, projection into the ceiling field of about 160 mm, chandelier in the center, cornice unchanged." Attach photos of the general view and two close-up sections of the profile to this description. Such a request is far more informative than a photo of a single light fixture: the manager and installer immediately see the boundaries of the choice.
if necessary Buy molding for another purpose can be found in a separate section, but in this project it is needed more to check the material and possible finish. Do not add products just to complete a full set. If the old cornice is in good condition, buying new perimeter elements will increase costs and may disrupt the very thing the ceiling center update was undertaken for.


First determine exactly which plaster stucco needs to be preserved
In old apartments, the single word "cornice" covers different things. Sometimes it is a strict profile made of several smooth steps, sometimes a wide band of leaves and flowers, and sometimes a combination of a smooth upper band with rich ornament below. For a central medallion, not only the overall width of the old profile matters. What is far more telling is which pattern a person sees from a normal distance, how often it repeats, and what shadows it creates.
Start with a single straight section at least one meter long. Photograph it frontally without changing the phone's position between shots. Place a scale reference nearby without attaching anything to the plaster. Separately photograph the outer corner and the junction where the cornice meets the ceiling. Three shots will show more than a single wide shot of the room, in which the relief turns into an almost flat strip.
For further selection, record eight details. First — the maximum projection of the cornice into the ceiling. Second — the height of the visible vertical part. Third — the presence of floral, plant, or geometric ornament. Fourth — the size of an individual repeating motif. Fifth — the repeat spacing, if it can be determined. Sixth — the condition of corners and seams. Seventh — the color and degree of surface matte. Eighth — the distance from light sources to the cornice and the direction of shadows.
A small repeat with an acanthus leaf every 180 mm is perceived differently from a long continuous wave of scrolls. In the first case, a central rosette can support the size of the leaf without literally repeating the pattern. In the second, it is more important to match the direction of the ornament's movement: at the edge it flows along the wall, while in the center the pattern turns around the chandelier. Too abrupt a change in character can create the impression of two independent interiors on one ceiling.
The condition of the plaster is a separate issue. If there are opening cracks, loosely held fragments, traces of dampness, or peeling of several paint layers, the decorative task cannot be considered isolated from the condition of the finish. First, specialists assess the preservation of the cornice and the substrate. A new rosette should not mask defects or serve as a reason for unjustified removal of old parts.
Our factory also produces:


How to match ornaments: don't look for a literal copy
A well-preserved plaster cornice does not require the new rosette to consist of exactly the same leaves and beads. What matters more is consistency of scale, density, and plasticity. First compare the most noticeable motif: for example, a leaf, a shell, a flower, or a rounded scroll. Then assess the free gaps between the details. The last step is to look at how shadows form in evening light. These features are usually more useful than the general label "classic style."
With a strict cornice featuring smooth steps and sparse decorative inserts, a dense central composition sometimes draws too much attention. It can look appropriate if the chandelier itself has expressive proportions and the ceiling field is sufficiently spacious. But if the fixture is small, it is better to first check a more restrained option. In a room where the old cornice is already rich in leaves, there is the opposite risk: the central field becomes overloaded, especially when the distance from the ornament to the perimeter is small.
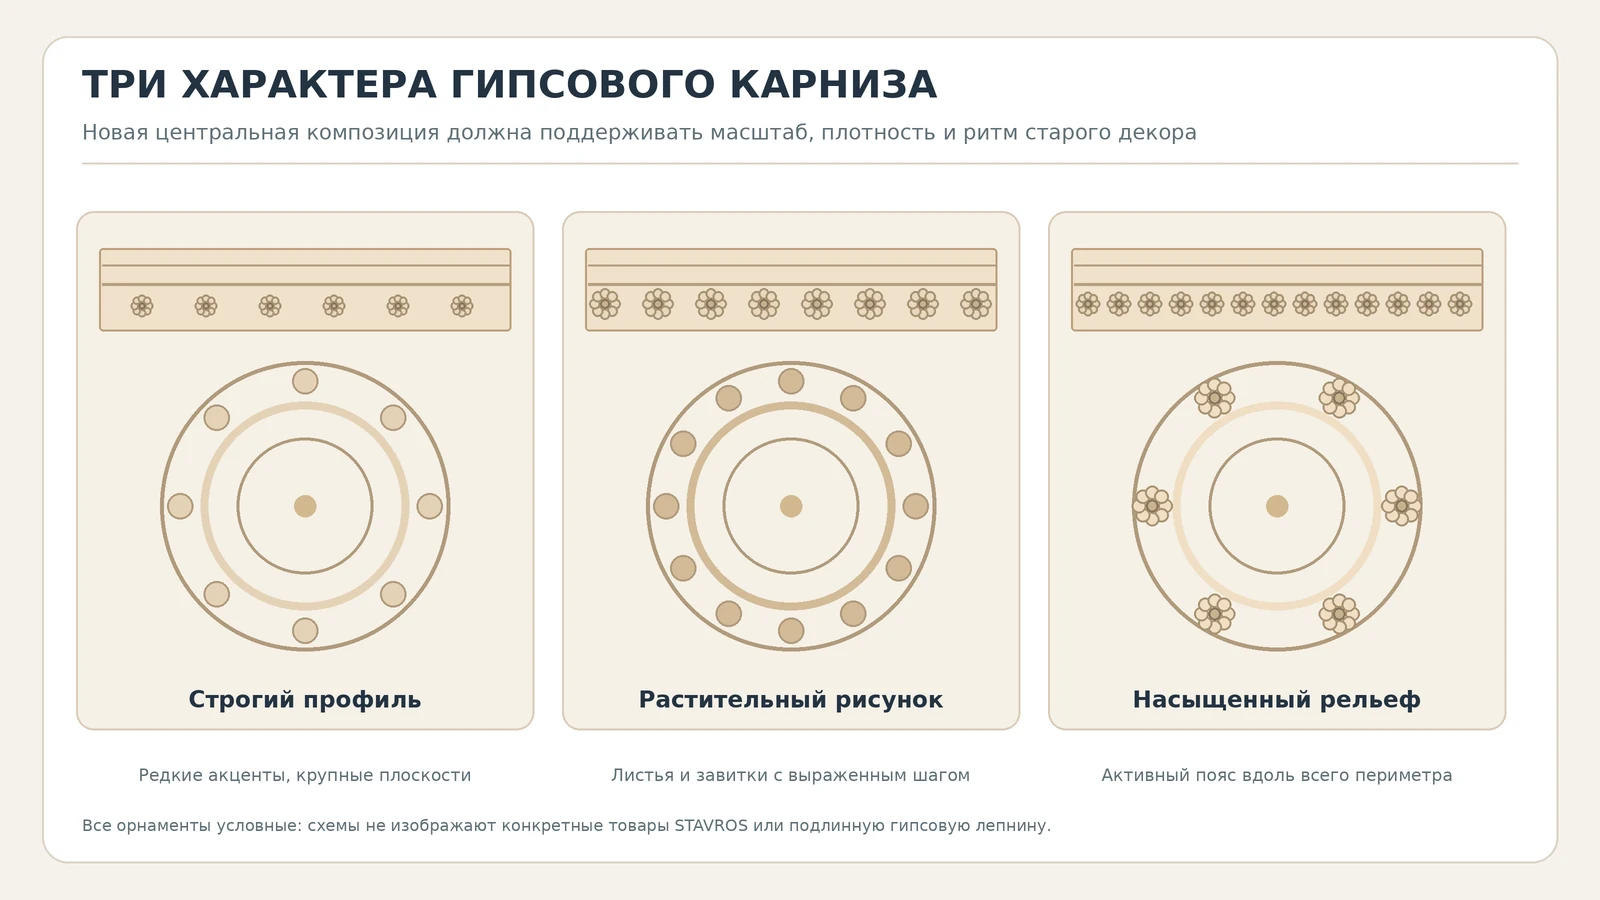
| Character of the existing cornice | What to check on a new socket | Which sign is concerning |
|---|---|---|
| Smooth steps and sparse ornament | Clear shape of the central motif and open space around it | Many small details with no compositional center |
| Pronounced leaves and flowers | Comparable size and plasticity of the main motifs | Pattern too small, lost next to the plaster |
| Deep multi-tiered relief | Balance of large and calm areas | A second, equally active band almost flush against the cornice |
Do not tie your choice to a single motif name. A botanical cornice can pair well with a geometrically organized rosette if the overall pattern is clear and the details do not compete for attention. Conversely, two similar leaves may look out of place because of a sharply different size. Suitability is checked on the overall ceiling plan, not by comparing two separately cropped product photos.
Do one simple check: cover the central rosette on the sketch and assess the cornice; then cover the perimeter and look at the composition around the chandelier. With both layers restored, ask whether a common axis and a unified rhythm have emerged, or whether the two parts continue to exist independently. This is not a laboratory test or a universal style rule, but a useful way to notice an overly dominant pattern before paying.
Get Consultation
Three approaches to choosing the central pattern
The first approach is to support the character of the old stucco. If the cornice is decorated with large acanthus leaves and smooth scrolls, you can consider a rosette with sufficiently expressive botanical forms. The match should not be literal: a common scale of leaves, similar smoothness of lines, and comparable depth of perceived relief are enough. In such a pair, it is better to check whether equally dense areas repeat too often.
The second — to make the center calmer than the perimeter. For a wide relief cornice that already forms a decorative frame for the room, compositions with open gaps and more clearly readable axes are sometimes suitable. Then the eye reads the chandelier as the center and the old plasterwork as the completion of the ceiling. But an open composition does not necessarily mean simple installation: individual elements must be laid out and fixed precisely, and the visible gaps require careful marking.
The third approach is a deliberate contrast of patterns. It is possible, for example, when a geometric cornice sits next to a floral rosette, or vice versa. Here, credibility comes from scale and the overall discipline of the composition: the new decor does not repeat the old, but submits to the center of the chandelier and the proportions of the room. Such a solution cannot be considered successful based on a catalog. It especially needs a mockup that allows you to view the ceiling as a whole.
Do not turn these approaches into three ready-made kits for any interior. In one room, a few large elements with a large free gap may be enough. In another, a denser ornament is justified by the size of the chandelier and the distance to the cornice. The choice is influenced not only by architectural style, but also by the direction of natural light. A flat ornament near a window is sometimes more clearly visible than a deep relief that is lit only frontally.
A useful control technique is to evaluate the pattern first without color. Convert photographs of the plaster profile and the two candidates to grayscale, keeping the overall scale. This makes it easier to notice the density and distribution of shadows; color does not distract yet. After that, restore the actual coloring and check not only the overall tone, but also the possible difference in gloss between the old plaster and the new polyurethane.
When surviving plaster cannot be treated as ordinary finish
Old stucco may be an ordinary part of a later renovation, or it may belong to a historic interior. The year the building was constructed does not by itself indicate the status of a particular cornice or whether changes are permissible. In one room, the profile was made recently from an old sample; in another, an authentic pattern connected to the original design has survived. These situations cannot be combined under a general instruction to "glue a new rosette to the ceiling."
Before planning a change in a room with potentially valuable finish, determine whether the apartment itself or the interior is part of a protected site and what requirements apply to the specific work. If necessary, consult a relevant specialist and obtain the required approvals. The purchase of a new decorative element should not justify damaging authentic plaster, dismantling the old profile, or irreversibly altering a protected surface.
Not every new central element will be historically accurate. If a rosette did not exist before, one cannot claim without evidence that the chosen modern model "restores the original appearance." It is more accurate to call the project an addition to the preserved decor. Even with a very close pattern, the new polyurethane composition remains a modern product made of a different material using a different technology.
If the client has archival photographs of the ceiling, old drawings, or traces of a former central decoration, they should be shown to a specialist before choosing a product. They may indicate a lost composition that requires a completely different approach. If there are no documents, the main task is not to create a legend about a historic ornament, but to provide a careful modern solution that preserves the existing cornice and does not pass off something new as authentic.
When in doubt, it is better not to rush the order. The cost of a wrongly chosen product is usually measured in purchase and installation; the cost of interfering with valuable trim can be far more serious. No attractive photographs of ceiling medallions cancel out this difference.
Gypsum and polyurethane on the same ceiling: what must match
A gypsum cornice and a polyurethane medallion can be in the same room, but the material does not make them a single factory system. An old cornice has its own base, accumulated layers of finish, and possible traces of repair. A new composition consists of modern decorative elements, each of which needs the fastening intended for it to a suitable ceiling base. One material should not be attached to another merely for the illusion of a continuous structure.
The main task is to coordinate the visible part. Even if two products are painted with the same paint, light can reveal different surface smoothness: on gypsum, traces of handwork and old layers are sometimes noticeable, while a new polyurethane part looks smoother. An attempt to hide this difference with excessive paint thickness can soften the fine details of the old relief. Therefore, a finish sample is first checked on an acceptable area, and only then is the treatment of the entire medallion specified.
Compare not only the color but also the boundaries of the details. A cornice forms a long continuous profile; a medallion is assembled from modules that join at a distance from the perimeter. It is important that the joint lines in the center are not perceived as random breaks in the pattern. If the chosen model assumes open areas between the overlays, they must remain consistent with the compositional design, rather than arise from inaccurate marking.
Polyurethane Moldings allows the central part to be decorated without necessarily replacing the existing gypsum cornice. This is an advantage of ordering independently, but not a promise of identical structure or historical accuracy. The method of surface preparation, fastening, and painting is checked against the requirements of the product manufacturer, the installation compound, and the condition of the base. For ceiling installation, it is especially important not to transfer methods for working with small wall overlays without verification.
If the cornice was covered with different paints in different rooms, do not copy the color of one medallion to all rooms. Sometimes in the living room a calm matte shade of the ceiling is preserved, while in the dining room the profile has a noticeable semi-gloss. A single finish composition should be chosen after inspecting the specific surfaces, not based on the product name in the catalog. The chemical compatibility of the chosen system with the materials is confirmed separately.
How to correctly measure the ceiling field and the existing cornice
Record the ceiling dimensions not only between the walls, but also between the inner edges of the preserved cornice. The cornice protrudes toward the center, so the area available for the new composition is smaller than the total area of the room. If the profile is complex and the protrusion varies, take several measurements on each side. The largest protrusion is used for a preliminary check, while the final position of the modules is determined by the actual contour.
In the training example, the living room measures 5.2 × 4.8 m. Suppose the plaster cornice protrudes into the ceiling by 160 mm on all sides. Then the free field is 5,200 − 2 × 160 = 4,880 mm in length and 4,800 − 2 × 160 = 4,480 mm in width. These are the dimensions of the inner rectangle. They do not indicate where exactly the chandelier is located or how much space remains to the ornament on each side.
If the suspension point is located exactly at the center of the free field, the distance to its nearest boundary along the short axis is 2,240 mm. For the CRPU-070 rosette, half of the outer dimension is 382.5 mm, and the nominal remainder to the cornice is 1,857.5 mm. For the large CRPU-071, half of the dimension is 682.5 mm; the remainder is 1,557.5 mm. These values help to understand the scale, but they do not describe the actual contour of individual overlays and do not serve as installation clearance.
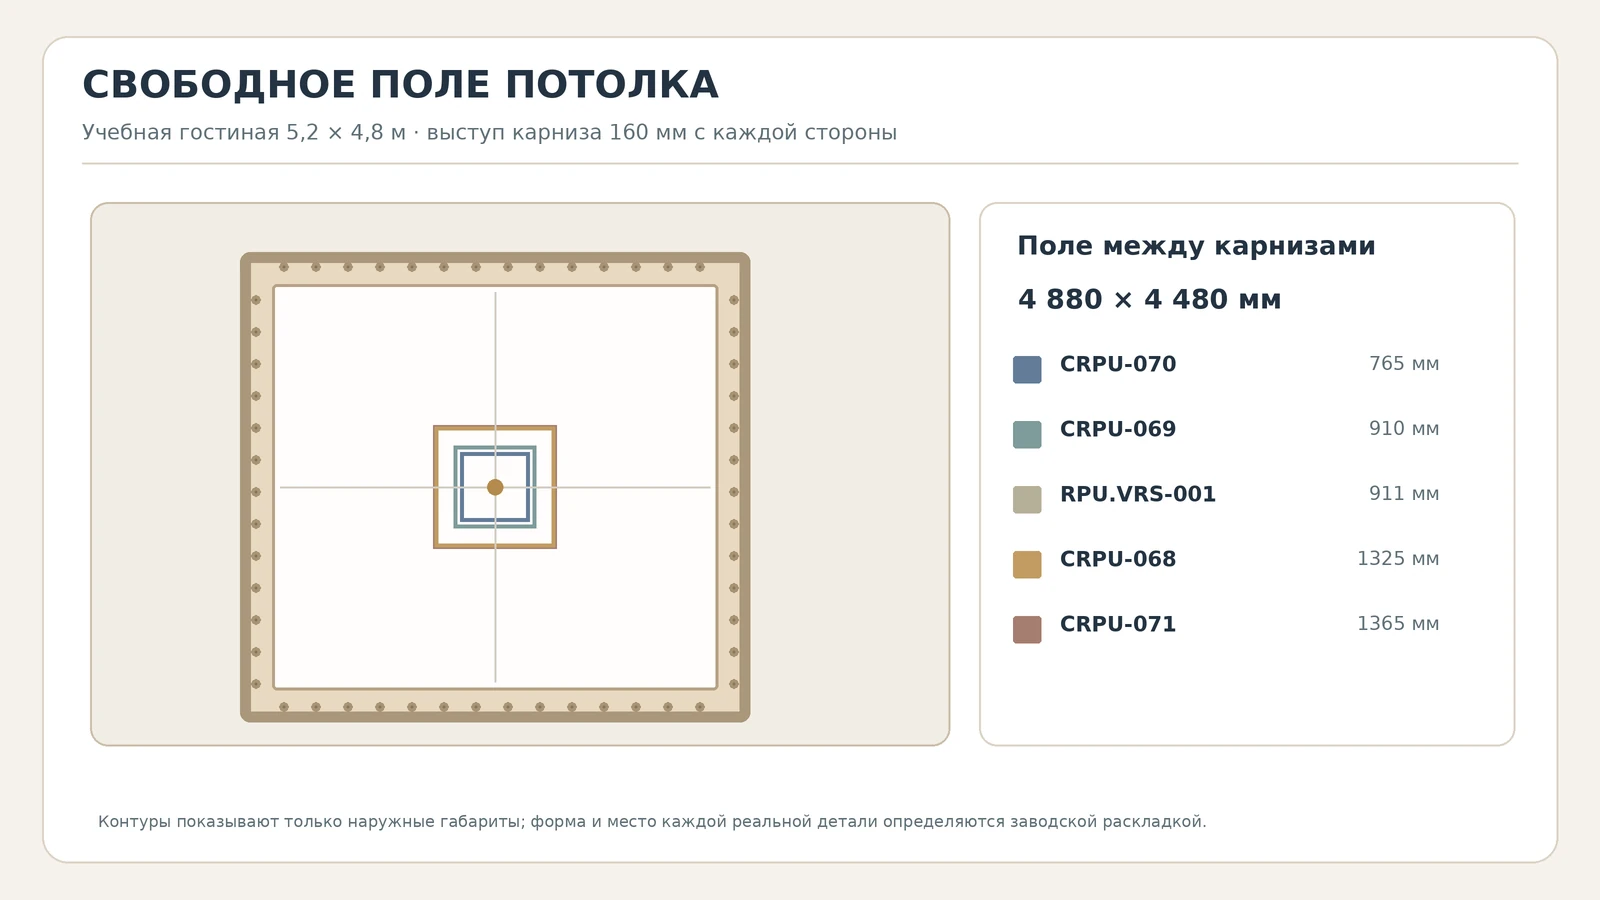
| Model | Composition overall dimensions, mm | Half width, mm | Nominal remainder to the cornice along the short axis, mm |
|---|---|---|---|
| CRPU-070 | 765 | 382,5 | 1 857,5 |
| CRPU-069 | 910 | 455 | 1 785 |
| RPU.VRS-001 | 911 | 455,5 | 1 784,5 |
| CRPU-068 | 1325 | 662,5 | 1 577,5 |
| CRPU-071 | 1365 | 682,5 | 1 557,5 |
In a real apartment, the chandelier center is often offset from the geometric center due to furniture placement or existing wiring. If the offset along the short axis is 350 mm, the nearest remainder for CRPU-071 decreases from 1,557.5 to 1,207.5 mm. For CRPU-070 it becomes 1,507.5 mm. The rule is simple: measure the distance from the actual fixture axis to the inner edge of the cornice separately in each direction, rather than subtracting one averaged value from the room dimensions.
A tight room gives a different result. In a nominal room 2.4 m wide with a cornice protrusion of 220 mm on each side, the free field is 1,960 mm. A rosette with an overall dimension of 1,365 mm leaves 297.5 mm to the field boundary when precisely centered. By dimensions it formally fits, but two dense decorative bands may appear visually too close. Installation requires not only a geometric but also a compositional assessment.
CRPU-070: a central accent without excessive scale
Model Ceiling rosette CRPU-070 has a catalog overall dimension of 765 × 765 × 18 mm. As of the verification date of November 5, 2026, the price of the main set in the official catalog is 35,680 ₽. The composition consists of 24 elements of three types and is organized in a radial pattern. This construction is useful to consider as one of the candidates for a room with a preserved cornice, but not as automatically the "simplest" model.
In a strict interior, its relatively compact outer dimension leaves a significant amount of clean ceiling plane between the center and the cornice. This can be an advantage when the existing plaster already has a noticeable repeating ornament. But here too the detail of the pattern matters: 24 elements can form a fairly active center if the leaves and directional rays are clearly lit. Ask for the installation layout and look at the composition at the scale of the whole room.
If the cornice contains several plant motifs, check whether the rhythm of the main elements of CRPU-070 matches the character of the existing pattern. It is enough to compare two or three large motifs at the same scale: a real leaf on the cornice and the main ray of the rosette. There is no need to look for a complete match of all details. The goal is to achieve a common logic: the cornice supports the boundaries of the room, and the rosette gathers the eye around the pendant.
There is a particular practical difficulty: since the composition is modular, the number of small details does not indicate the shape of the free central zone and the glue application points. Before purchasing, you need to obtain the actual placement plan. Check that the chandelier's ceiling cup does not overlap the decorative relief and that the fixture retains its own attachment to the structural base. The cup must not serve as a device for pressing the overlays.
CRPU-070 is reasonable to keep on a short list for a calm and moderately rich plaster cornice. But if the old profile has very large acanthus leaves, the small details of the center may appear visually disproportionate. Then comparison with a wider composition is essential: saving on size alone is not a sufficient argument.
CRPU-069: dense pattern next to old plant stucco
Size the ceiling socket CRPU-069 measures 910 × 910 × 15 mm; the price as of November 5, 2026 is 62,560 ₽. It comprises 64 decorative elements of fifteen types. When choosing for an old plaster cornice, it is precisely the composite construction and the rhythm of the large number of details that become more important than the 145 mm difference between its width and that of CRPU-070.
CRPU-069 has paired elements designated as right- and left-hand versions. Their presence helps build a mirrored pattern, but complicates visual and item-by-item verification. During acceptance, a missing left element must not be replaced with a similar right one, even if they look identical in a quick photo. The quantity and location of each variety must correspond to the current factory specification and layout.
If the old plaster cornice is covered with fine plant tracery, CRPU-069 can support the complexity of the pattern without turning the central part into a single large figure. But here the risk of excessive density appears. In photographs separate from the ceiling, such compositions look beautiful due to the many details; in a small room at a height of several meters, the details may merge, and the cornice and rosette may form two equally active ornamental frames. Evaluate the mockup from a normal eye level, not just an enlarged fragment of the product.
A thickness of 15 mm does not mean that the pattern will necessarily look weaker than that of an 18 mm thick product. Visual expressiveness depends on the shape of the protrusions, side light, the direction of the scrolls, and the contrast of the paint. If the old cornice is lit by a fixture along the wall, its shadows may be deeper than those of the rosette, even with a comparable maximum thickness of the details. Therefore, a trial mockup under evening lighting is useful for the decision.
Before ordering, request a layout drawing showing the axes, the position of the mirror modules and the free center. Since a complete set is being purchased, the cost of individual NPUs should not be added again on top of the rosette price. Individual items are needed only in the case of a confirmed shortage, damage or an agreed change to the configuration, and not as a mandatory additional purchase.
RPU.VRS-001: eight large pieces instead of many small ones
У ceiling rosette RPU.VRS-001 dimensions 911 × 911 × 18 mm, price — 67,360 ₽. It differs from the nearly equal-width CRPU-069 in the structure of its pattern: the complete set consists of eight elements of two types. Four NPU-507 and four NPU-508 form large plant motifs and open gaps between them.
Being adjacent to a rich plaster cornice makes this feature especially interesting. The perimeter can remain a continuous, saturated line, while the central decor will be perceived as separate stucco pieces united by a common axis. In such a solution, the ceiling between the elements does not disappear behind the ornament, so the center sometimes looks lighter than in a dense composition. This is a visual impression, not a property of the material confirmed by any universal scale.
The number of pieces is easy to remember: four NPU-507 measuring 392 × 336 × 18 mm and four NPU-508 measuring 369 × 419 × 18 mm. But these dimensions refer to the individual modules. The sum of the widths does not give the diameter of the finished rosette: the elements are rotated and positioned according to a specified layout. What is required for ordering is the complete RPU.VRS-001 set with the factory specification sheet, not eight arbitrary overlays with a similar ornament.
A large module has more visible surface, so at close range the peculiarities of the painting may be more noticeable. On the other hand, there are fewer joints between individual elements than in the 64-component system. One cannot draw a direct conclusion about installation cost from this. A large overlay requires precise positioning and correct fixing, while the decorative gaps impose their own requirements on symmetry and the condition of the ceiling base.
If the cornice is strict and very thin, the open RPU.VRS-001 may turn out to be too expressive in the size of its motifs. But if the existing plaster has large flowers, scrolls and shells, the comparison becomes promising. Choose after viewing the general drawing and real photographs of the product from the manufacturer; do not consider any similar decorative overlays interchangeable.
CRPU-068 and CRPU-071: two large options that need to be checked especially carefully
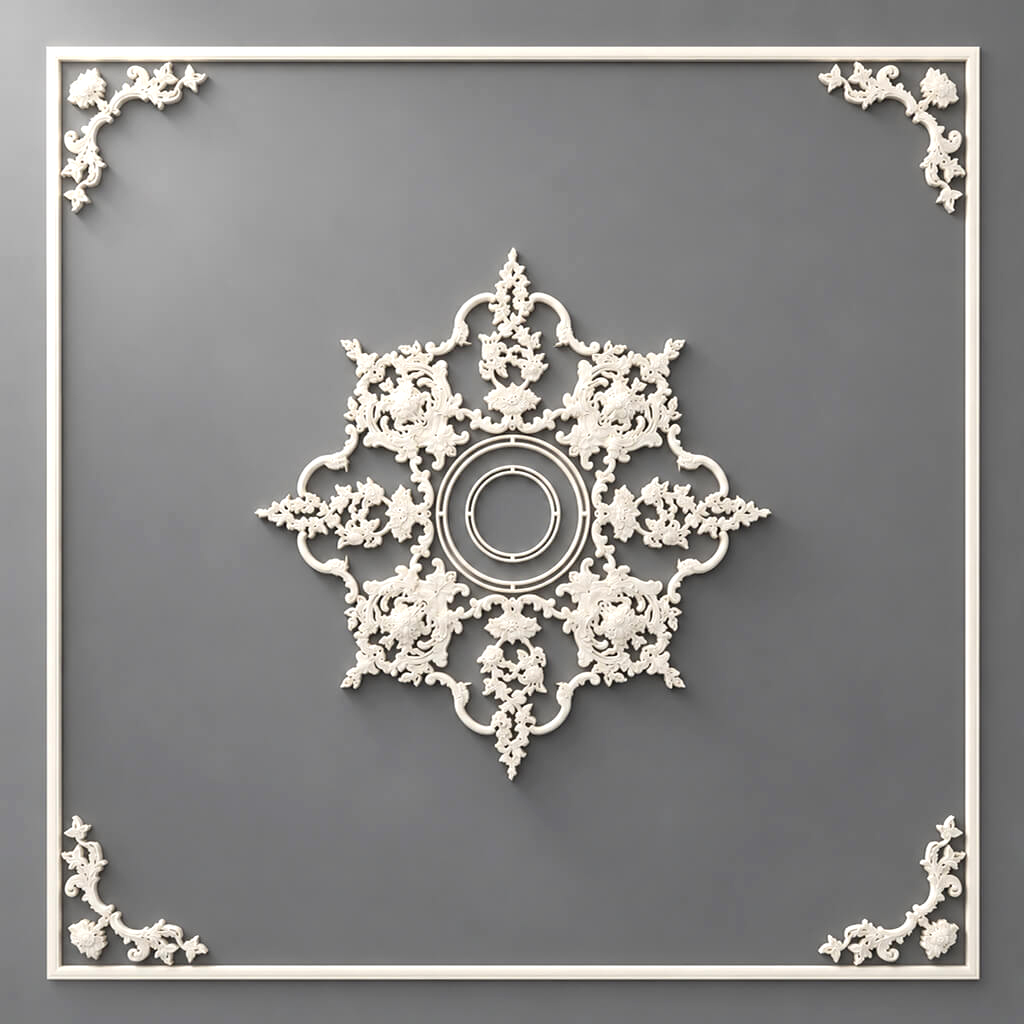
CRPU-068 measures 1325 × 1325 × 18 mm and is priced at 50,480 ₽ according to the catalog as of November 5, 2026. CRPU-071 measures 1365 × 1365 × 19 mm at a price of 72,880 ₽. The difference in outer dimensions is only 40 mm, yet these are not two versions of the same composition. What matters is the pattern itself, the number and orientation of the modules, and how the assembled rosette occupies the central part of the ceiling next to an already active plaster cornice.
Ceiling rosette CRPU-068 described by the manufacturer as a large modular composition. There is a discrepancy in the public specification: the text states 72 elements, whereas the sum of quantities in the published bill of materials gave 68 in a previous check. Before completing the purchase, an up-to-date itemized bill of materials must be requested. In the article and the estimate, this check must not be replaced with a confident statement about the final number of modules.
CRPU-071 uses a large eight-ray pattern around central rings. It is capable of creating a pronounced decorative center, especially with a large chandelier. If the plaster cornice already has a wide multi-tiered relief, such a center should be evaluated with caution. Two rich bands can visually reduce the calm field of the ceiling, even when there is more than enough geometric space. For a spacious hall this is sometimes justified, but in a room with a large amount of furniture and an active cornice it may prove excessive.
When comparing these products, look at the amount of free ceiling space between the outer modules and the existing plaster. The overall square of 1325 or 1365 mm should not be taken as the exact boundary of the relief in all directions. Some stucco parts protrude further than others, and open areas remain between them. The shape of the decorative spot matters for the visual solution, while the shape of the actual mounting areas matters for the installation technology.
For the room from the calculation example with a field of 4,880 × 4,480 mm, both models fit geometrically with a large margin. But if the ceiling height is low, the light fixture is modest, and the cornice is richly decorated, buying the largest product may worsen the composition. In that case, it is wiser to return to ceiling medallions about 900 mm wide or to abandon the central decor if no layout gives a convincing result.
Selection matrix: first the cornice, then the model, then the estimate
To avoid confusing technical suitability with a matter of taste, use two separate columns. The first records measurable information: size, cost, and composition. The second records the status of coordination with the existing plaster: “a suitable layout option exists,” “drawing comparison required,” “not suitable for this interior.” The last column cannot be filled in from a catalog alone: the specific cornice and chandelier must be seen.
| Product | Dimensions, mm | Product price as of 05.11.2026 | Structural reference point | What to compare with the plaster |
|---|---|---|---|---|
| CRPU-070 | 765 × 765 × 18 | 35 680 ₽ | 24 parts of three types | Scale of directional rays and central motifs |
| CRPU-069 | 910 × 910 × 15 | 62 560 ₽ | 64 pieces, 15 types | Density of the fine floral pattern |
| RPU.VRS-001 | 911 × 911 × 18 | 67 360 ₽ | 8 large pieces of two types | Proportion of leaves and open gaps |
| CRPU-068 | 1325 × 1325 × 18 | 50 480 ₽ | Verify the composition with the seller | Overall footprint and general rhythm of the large composition |
| CRPU-071 | 1365 × 1365 × 19 | 72 880 ₽ | Large eight-ray scheme | Interaction of the rich center with the cornice |
The prices in the table refer to one main item without installation, paint, template, or delivery. These are alternative purchases: you should not add up the cost of five rosettes if the apartment will have only one. Going forward, choose only one SKU for the estimate, keeping the others in a comparison list. For a correct decision, save images of two or three candidates at the same scale next to a photo of the existing cornice.
Also pay attention to the orientation of the decor. An eight-ray composition may look symmetrical on a separate drawing, but in the room its directions will relate to the windows, doors and main axes of the furniture. If the old cornice has large repeating fragments, it is useful to compare how the centre looks when the layout is rotated. You must not change the orientation of the modules relative to the factory scheme without approval: this concerns rotating the entire approved composition, not individual parts in arbitrary order.
Make a scale mock-up before changing the ceiling
To compare five models, you do not have to buy all five. At first, installation drawings, photographs of real products and the dimensions of the surviving cornice are enough. On the ceiling plan, mark the four inner boundaries of the plaster profile, the actual axis of the chandelier and the overall areas of the candidates. Then overlay the pattern of one or two of the most convincing options onto the general plan. This separates the purchasing decision from the work that will later be carried out at height.
A mock-up is more useful if it contains two views: a top-down plan and a view from a normal observation point in the room. The plan will show the axes and distances; the view from the side of the door or sofa will show the perception of scale. You do not have to create a complex three-dimensional model. You can place a photograph of the ceiling, a drawing of the cornice and a schematic image of the ceiling rose on one page, keeping the correct size ratios. It is important not to stretch one illustration for the sake of a pretty result.
There is a technique for assessing the degree of saturation: remove the chandelier from the image, compare only the two ornaments, then put the light fixture back. If, without the chandelier, the new details clash with the old profile, it is unlikely to fix the composition. If the patterns are consistent, but after the massive cup appears the central part stops being legible, the problem already lies in the combination with the specific light fixture. That is why one mock-up should show all three components.
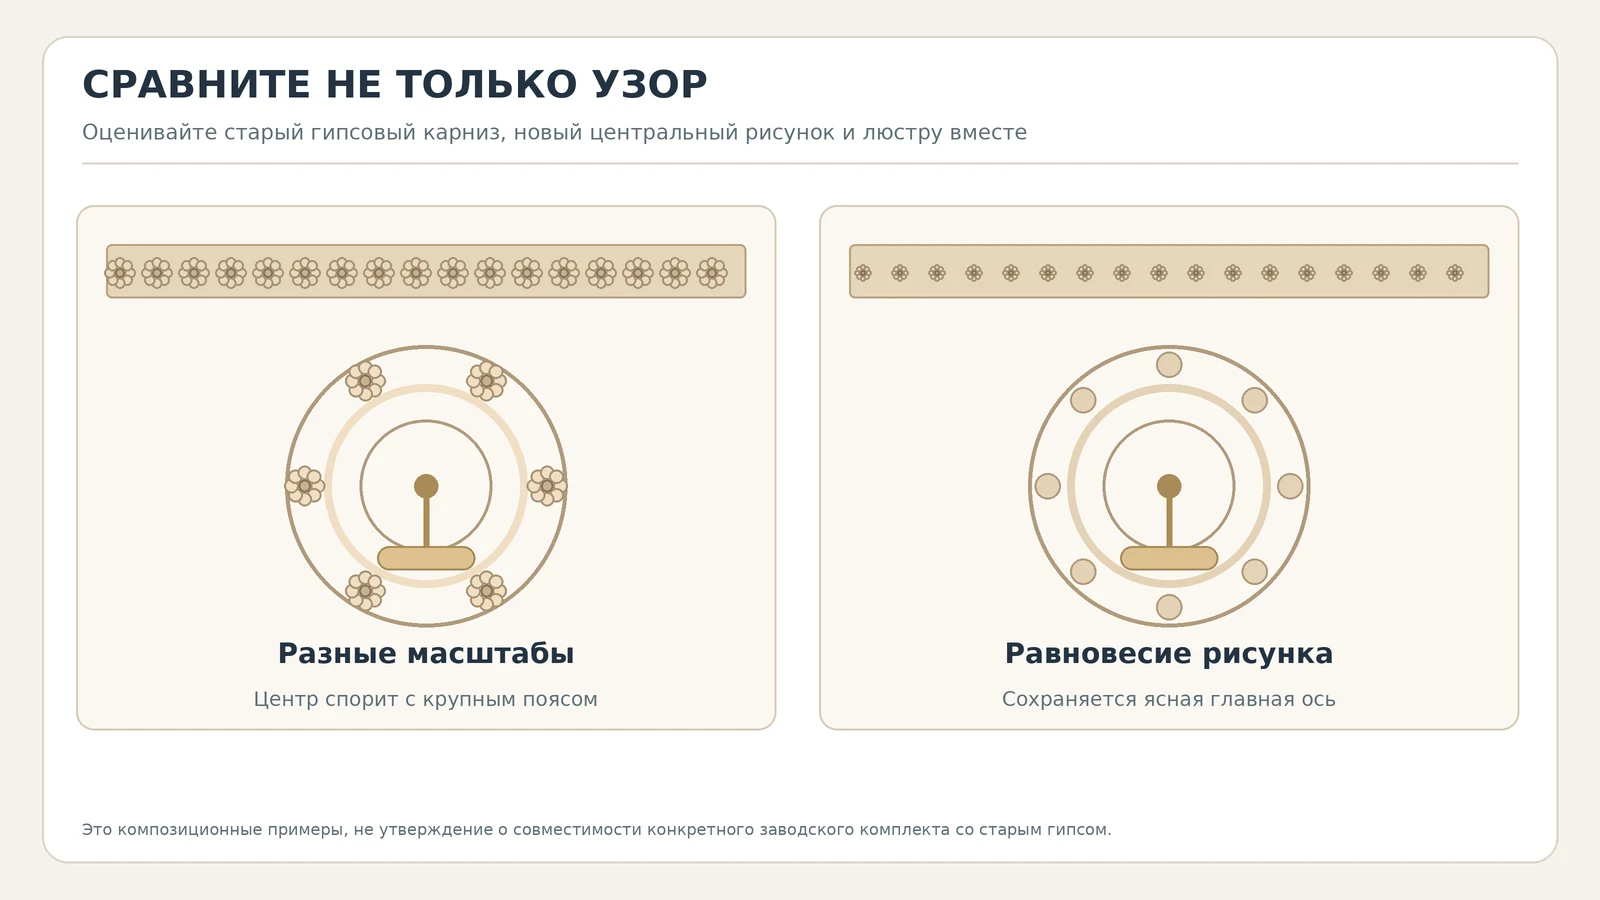
Do not transfer the conventional white background from a catalogue illustration to a real apartment without allowing for the lighting. In a product photo, the relief may be emphasised by studio lighting. On surviving plaster, the shadows are determined by the window, the cornice and the light from the chandelier, so the real difference will be different. For the final choice, it is useful to make a full-size paper trial outline and assess it on the ceiling without damaging the finish; agree the placement and method of temporary fixing with the installer.
If the mock-up is convincing only at high magnification, and from a normal distance the decorative centre is barely visible, reconsider the scale or the character of the pattern. If it dominates so much that the cornice seems like a random frame, try a composition of smaller width or a more open one. Both observations are better made on a screen or on paper than after full installation.
The chandelier sets the centre, but it must not be supported by the decorative ceiling rose
A ceiling rose is intended to decorate the area around the light fixture. The weight of the chandelier must be borne by a rated load-bearing assembly connected to a suitable structural base, not by a decorative polyurethane part. This rule should be taken into account when choosing the product: the central ring in the image does not replace the mounting bracket, hook or other standard fixture of the light. The technical arrangement depends on the specific chandelier and project.
Before ordering, measure the outer size of the ceiling cup. If it is round, record its diameter; if it has another shape, record its maximum width and height. Then compare the cup with the actually free central space of the chosen composition. This cannot be done from a single outer CRPU dimension. In one model the parts sit close to the center, in another a larger open area remains between them. You need a layout diagram, and sometimes a full-size mock-up check.
The position of the chandelier may not coincide with the center of the geometric ceiling field. In St. Petersburg apartments with a longitudinal layout, the fixture is often oriented toward the table or seating area. If the center is offset, it is important to check all four distances to the cornice. Decorative symmetry around the chandelier should not force you to relocate the existing safe suspension point just for a beautiful pattern.
Keep access to electrical connections to the extent provided by the design and applicable requirements. A serviced connection must not be covered with a non-removable decorative element or filled with installation compound. If the ceiling structure does not allow the cup, ornament, and access to the junction to be combined, the socket is not chosen until the electrical installation solution has been agreed. Hiding a technical problem with a decorative part does not make it safe.
The shape of the chandelier itself also matters. With a wide-cup fixture, the central ring of the socket may remain almost invisible, so the buyer pays for a pattern that will be partly obscured. With a small cup, by contrast, an expressive empty zone appears between it and the first row of the ornament. Such a distance may look intentional, but it is worth seeing on a sketch before purchase, especially if the plaster cornice already has its own medallions and projections.
How light changes the impression of new and old relief
The same ceiling decor can look calm by day and very expressive in the evening. It comes down to the direction of light. On an old plaster cornice, the side part is often lit by windows or wall lights; the central rosette receives light from below from the chandelier. These surfaces show relief differently, even if their color is the same. That is why comparing ornaments only in daylight is half the job.
Take two photos of the room from the same spot: one by day, the second with the chandelier on and normal evening lighting. Compare the character of the cornice shadows. If the relief stands out strongly in the evening, a new rosette with dense ornament may also create an additional rich area. If the ceiling remains soft and almost even in tone, the central parts will be perceived through silhouette and contrast with the fixture cup, rather than through deep shadows.
You should not assign an artificial "relief depth" based on a single maximum thickness of the model. A size of 15, 18, or 19 mm describes an overall dimension but does not fully convey the profile of each sheet. In a multi-part composition, individual parts may have different local shapes. For visual verification you need large images of the original products and trial lighting of a mock-up, not a simple comparison of thicknesses in a table.
If a plaster cornice has been painted many times, its fine grooves may be less noticeable than on a new product. With the same paint, the new center will seem "too sharp." This should not be corrected by deliberately filling the relief with a thick layer of paint. First try a correct color and lighting solution and agree with the finisher on an acceptable method of finishing. Preserved plaster should not fall victim to matching a new product.
If the interior has different lighting scenarios — general light, wall sconces, light near paintings — look at each option. Sometimes a rosette looks good under a central chandelier but becomes overly contrasting under oblique light from the wall. It is better to identify this before choosing a rich, large model than to try later to reduce the visibility of an ornament that is already fixed.
When the same paint color does not make two ornaments a single whole
White gypsum and white polyurethane on the same ceiling can look harmonious, but color alone does not eliminate the difference in pattern. If the old cornice is built on large, calm planes, while the new rosette consists of dozens of small flowers, the same paint will not change the density of elements. If the reliefs are nearly matched in scale, a slight difference in shade is sometimes less noticeable than a sharp mismatch in the direction of lines.
It is better to first make a compositional decision, and only then select the coating. For the preserved gypsum, it is reasonable to determine the current color and sheen, and to check the possibility of local cleaning or correct restoration without damaging the old material. For new polyurethane elements, clarify the permissible primer and paint compositions with the manufacturer and the contractor. It is impossible to universally recommend a single recipe for both substrates: the history of the old surface may be unknown.
The difference in texture is often especially noticeable. After several repairs, a gypsum cornice sometimes has barely discernible traces of sanding, brushwork, or hand molding. New elements may look smoother. This is not necessarily a defect: materials do not have to pretend to be one and the same. What matters is that the new rosette does not look like a random insert that disrupts the character of the entire ceiling. Evaluate the surface under real lighting, not based on a promise of a "complete match" in shade.
To check, you can make a separate paint sample on an agreed test surface made of the appropriate material. Do not experiment with the single important part of the rosette, and even more so with the authentic gypsum cornice. If the chosen paint or preparation method performs poorly on the new product, it is better to find that out on a sample. If there are doubts about the composition of old coatings, the decision is made by a specialist after inspection.
There is also a quite economic conclusion: there is no need to include repainting the entire preserved cornice in the mandatory part of the order solely so that the new decor becomes equally white. Sometimes it is enough to correctly select the color of the central rosette; sometimes a coordinated refresh of a wider ceiling area is required. These options should be compared based on the actual condition of the finish, not on the principle of "redo everything for uniformity."
Substrate preparation: where the boundary between decorative and installation work lies
Before installation, it is necessary to determine exactly what the rosette elements will be attached to. The ceiling may be plastered, painted, have old leveling layers, or individual damaged areas. The condition of the gypsum cornice around the perimeter does not prove the strength of the central plane. And conversely: a good substrate in the center does not mean that load can be applied to the preserved gypsum profile.
A composite rosette requires the precise position of each part. For marking, axes are determined, the layout is transferred, and permissible attachment points are marked. The installation technology must take into account the specific polyurethane, the condition of the ceiling, the characteristics of the composition used, and its instructions. It is impossible to derive the thickness of the adhesive layer, the holding time, or the need for additional fasteners from a single price or the external width of the model.
If the ceiling has old peeling paint, installation over it does not become reliable just because the decorative element is lightweight. First, the condition of the layer is checked and the permissible preparation is determined. Any actions near protected decor require especially careful coordination. There is no need to propose rough stripping or arbitrary holes in the old gypsum for the convenience of attaching the new composition.
At the estimate stage, base preparation, marking, the actual installation of modules, joint treatment, finishing paintwork, and protection of the retained cornice are itemized separately. These are not the same action, and different contractors may price them differently. This breakdown helps clarify why the price of a decorative set does not equal the cost of a finished ceiling and makes quality control of the work easier.
If you are planning to look for general instructions on assembling a new cornice and rosette, STAVROS has a resource on its website on the contents of ceiling stucco. Here the situation is the opposite: the old cornice is retained, so installing new additional bands is not part of the task. Any new moldings must have an independent justification rather than being purchased out of habit.
What is actually included in the purchase and what you can skip ordering
For an apartment with a sound plaster cornice, the main product item is one complete set of the selected polyurethane rosette. Остальные расходы появляются по результатам проверки: нужен ли монтажный шаблон, какие расходные материалы допускает технология, требуется ли подготовка центрального потолочного поля, как будет выполнена окраска. Не стоит заранее покупать «по одной штуке» всех декоративных накладок из состава комплекта: это приведёт к двойной оплате уже входящих элементов.
| Position | Decision before ordering | Why |
|---|---|---|
| A complete set of one selected rosette | Required after model approval | Main item of the project |
| Item-by-item module list | Request required | Completeness check upon receipt |
| Installation layout | Obtain and approve | Check the pattern, axes and chandelier location |
| Paper template | Confirm availability and price | May simplify marking, not always included in the kit |
| Compatible mounting materials | After checking the base | Cannot assign by a single socket size |
| Paint and preparation of the ceiling center | According to the agreed technology | Finishing must account for old layers and new material |
| New cornice around the perimeter | Usually not required | The existing plaster cornice is preserved |
| Additional NPU overlays | Only with a justified additional order | Do not duplicate the contents of the factory kit |
In a finishing project, there is sometimes a temptation to add a new border between the old cornice and the central rosette in order to "tie together" different patterns. Such a solution sometimes creates a third decorative layer that makes the ceiling feel overloaded. Before buying a border, show the layout without it. If the composition already holds together on the pairing of "old perimeter — new center," an additional element is not needed.
For the apartment owner, the main advantage of such a purchase is not in the advertising formula about the material, but in preserving what already works well. The preserved plaster cornice does not become a consumable; the central part is supplemented exactly as much as the interior requires. The purchase range is reduced, the specification is simplified, and the installation organization's attention is focused on the precise layout of a single composition.
Estimate: the price of the socket, ceiling work and delivery are separate lines
For a specific buyer, it is useful to compare the cost of alternatives, rather than adding up the prices of all the models you like. As of November 5, 2026, CRPU-070 costs 35,680 ₽, CRPU-068 — 50,480 ₽, CRPU-069 — 62,560 ₽, RPU.VRS-001 — 67,360 ₽, CRPU-071 — 72,880 ₽. The difference between the most affordable and the most expensive of the five options is 37,200 ₽. But a more expensive socket will not necessarily require more installation hours, and a lower kit price does not guarantee lower ceiling preparation costs.
It is reasonable to draw up the estimate in two parts. The first is the goods: the price of one kit, a separately agreed template, packaging and delivery. The second is the work: inspection and, if necessary, preparation of the central base, precise marking, fastening of parts, treatment of joints and painting. The latter part can include protection of the preserved plaster cornice during the work. The data should not be replaced with random average rates for Saint Petersburg, since the condition of the ceiling is not yet known.
For the calculation example, let's take CRPU-069 at 62,560 ₽. The total cost can be represented as 62,560 ₽ plus the agreed template price, the sum of installation materials, the cost of preparation and work, painting and delivery. Until the contractor has inspected the ceiling and the seller has provided terms, each additional number should be replaced with the line “requires a quote.” This is more honest than drawing a beautiful but unproven total.
It makes sense to compare the two renovation options before paying for the goods. In the first, the contractor prepares only the fastening areas without changing the surrounding finish, if this is permissible by technology and the condition of the base. In the second, a wider part of the central field must be prepared and repainted so that the new composition looks cohesive. The difference in costs is determined not by the size of the socket packaging, but by the volume of actual finishing work, the agreed materials and the complexity of access.
If the plaster cornice requires separate restoration work, include it in another budget section and do not present it as a mandatory cost of installing the new ceiling rose. This way the client will understand which part of the expenses was caused by the new purchase and which by the existing condition of the property. When comparing quotes, check that the scope of work is identical; otherwise, a cheaper estimate may simply not account for preparation, protection, or painting.
How to prepare an accurate specification without buying unnecessary parts
After choosing a model, give the seller one verifiable request. In it, specify: the full article number of the ceiling rose, the quantity — one factory set, the catalogue dimensions, the need for an installation drawing, the condition of the central ceiling, and the type of existing plaster cornice. Ask them to separately confirm the number of modules of each type, the possible cost of a paper template, and the list of documents included with shipment. For CRPU-068, verifying the contents is especially important due to a discrepancy in the public bill of materials.
It is useful to attach to the request not only a photo of the room but also a diagram with four distances from the chandelier axis to the inner edge of the cornice. If you use a mock-up, mark it as a design mock-up, not as approved installation documentation. What you need from the seller is the current product drawing; from the installer — a decision on the substrate and fastening. Do not confuse these two documents: a beautiful layout says nothing about the strength of the ceiling.
The buyer can prepare a short approval table. In the first row — the ornament is compared with the plaster; in the second — the free field is measured; in the third — the chandelier cup is checked; in the fourth — the contents of the full set are confirmed; in the fifth — the fastening method is agreed; in the sixth — finishing and delivery costs are calculated separately. If any technical field remains empty, it makes sense to postpone the final purchase, especially for a large composite model.
In a historically valuable interior, the request is accompanied by the result of an assessment of the admissibility of new intervention. A useful reference on how to preserve stucco in a Stalin-era building, does not replace a survey of a specific apartment. In our task, the old plaster cornice is retained, and the new ceiling rose should become a neat addition, not a reason to interfere with the authentic decor.
Delivery and acceptance of the set in Saint Petersburg and the region
Agree to accept delivery only after the article number and contents are confirmed. Check with STAVROS about the availability of the selected ceiling rose, the number of packages, the method of protecting the relief parts, and the delivery cost to the specific address. For orders to the Leningrad Region, the conditions may differ from delivery within Saint Petersburg; it is impossible to promise a single rate or an exact number of days without a carrier's calculation.
If the apartment is on a high floor, find out the dimensions of the packages and the possibility of carrying them up in advance. This is especially noticeable for large modular compositions, but the number of decorative elements does not equal the number of cargo pieces. A separate STAVROS material on delivery of composite rosettes to the floor helps sort out this logistical task; the main thing here is not to mix up the products upon receipt.
Upon acceptance, check the name of the main product, the invoice and the actual modules. Inspect not only the visible front sides, but also the corners, thin leaves, long scrolls and the back surface. If a shortage or damage is found, record it in photographs together with the packaging and markings, then contact the supplier in the established manner. Do not substitute a missing part with a similar one without approval.
Store the received set according to the manufacturer's instructions until installation and do not lay out the overlays mixed with saved gypsum fragments if restoration work is going on in the room at the same time. A separate labeled area for the new polyurethane will reduce the risk of confusion. Installation begins after the layout has been approved and all parts have been checked, not just because the first box has been delivered.
Mistakes that make a new rosette clash with an old cornice
Choosing based on only one photo. In the photo the product is shown close up, but in the room it will be next to the existing cornice, chandelier and furniture. First compare the patterns at the same scale.
Buying the largest composition "for solidity." Size does not equal artistic appropriateness. Measure the free field and check how much visually calm space will remain between the ornaments.
Ignoring an existing motif. If the cornice consists of large leaves and the center consists of many small flowers, the same color does not guarantee harmony. Compare the density, direction of lines, and size of the main elements.
Replacing serviceable gypsum for the sake of a new model. Such a decision can destroy a valuable part of the interior and greatly expand the budget. First look for an outlet that matches the preserved finish, not the other way around.
Ordering additional NPUs on top of a complete set. If the elements are already included in CRPU or RPU.VRS, buying them again leads to overpayment. Check the factory bill of materials and pay for an additional order only when the need is confirmed.
Deciding based on a single thickness. The difference between 15 and 18 mm does not describe the strength of the pattern. Look at the actual geometry of the modules and the character of the shadows under daytime and evening lighting.
Lack of installation coordination. Polyurethane does not serve as a support for the chandelier, and an old gypsum cornice cannot be arbitrarily used to mount the central decor. The installation scheme and the condition of the base require separate verification.
Attempting to paint everything with a single paint without testing. Old plaster and a new product may have different substrates and textures. First confirm the finishing technology, then decide on the shade.
Customer questions about rosettes for surviving stucco
Can a plaster cornice and a polyurethane rosette be combined?
Yes, the materials can be used within a single decorative concept. But the existing plaster and the new rosette remain different products, each requiring its own correct substrate and technology. Selection is based on composition, dimensions and ceiling condition.
Do I need to find an exact copy of the cornice ornament?
No. It is usually more useful to compare the scale of the leaves, the density of the pattern, the direction of the lines and the light and shadow. Literally identical motifs are not required; however, two patterns of completely different scale can conflict even with a common classical character.
Which of the five models is best for a small room?
It is impossible to answer based on square footage alone. CRPU-070 has the smallest dimensions in the selected five, but its radial composition can be quite expressive. Check the free field, the size of the chandelier and the density of the old cornice.
How many pieces come in the set?
CRPU-070 is listed with 24 elements, CRPU-069 with 64, and RPU.VRS-001 with eight. For CRPU-068, the current per-SKU composition needs to be clarified due to a discrepancy in the public specification. For CRPU-071, request the full bill of materials when placing an order.
Can I buy the socket first and then choose the chandelier?
This order is possible if the technical constraints of the future pendant are known. But it is better to match both items at the same time: the lamp cup and the mount must align with the central space of the decorative composition, and the weight of the chandelier must not be transferred to the polyurethane.
Does an old plaster cornice need to be repainted?
Not necessarily. If the finish is intact and the color of the new center can be matched without intervention, repainting around the perimeter may be unnecessary. The technique and feasibility of the work are assessed based on the actual condition of the old coatings.
Can I buy only individual overlays instead of the full set?
For the factory-provided socket, it is safer to order the full composition under the main SKU. Buying individual NPU items makes sense with a confirmed add-on order or an individually agreed composition; a random selection does not guarantee the factory pattern.
How can I check whether the socket is too close to the cornice?
Measure the four distances from the chandelier axis to the inner edge of the cornice and overlay the overall area of the socket on the plan. Then evaluate the layout from a normal distance: a geometrically sufficient gap does not always look compositionally balanced.
Is it worth ordering a mounting template?
For modular compositions, a template can facilitate precise marking, especially with a large number of parts. Check availability, contents and cost with STAVROS. A paper template does not replace checking the substrate, the chandelier cup and the kit contents.
Can I buy a ceiling rose for an apartment with protected finishes?
The possibility of changes depends on the status of the property and the nature of the proposed work. Before purchasing the product, you need to clarify the applicable requirements and, if necessary, obtain a specialist assessment and the required approvals. The purchase itself does not grant permission to alter a historic interior.
Decision before payment: not everything that fits in size is worth installing
For a preserved plaster cornice, it is reasonable to keep two or three models that genuinely match its pattern. Then compare the actual installation layouts, check the chandelier position and agree on the finish. After that, you can order one set under the main article number. If there is no convincing match, declining a new ceiling rose is a fully valid design decision: a preserved ceiling does not have to receive additional decoration.
The final request must include: photos and dimensions of the existing cornice, the chandelier axis, the selected article number, the ceiling rose dimensions, the verified kit contents, the installation diagram and separate delivery terms. The estimate is prepared for one product, not for the entire list of candidates. The old plaster decoration is preserved, and no extra mouldings are added.
Then the purchase has a clear result. The central composition appears not because another beautiful element has been found in the catalogue, but because its pattern, scale and technical conditions genuinely suit a specific ceiling. This is the criterion by which the decision on a new polyurethane ceiling rose in a St Petersburg apartment should be made.