Article Contents:
- Why do you need a set at all: what changes when elements work together
- What does a ceiling stucco set consist of: complete anatomy
- Ceiling rosette
- Ceiling Cornice
- Moldings
- Decorative overlays and stucco
- Installation materials
- Rosette and cornice: how to create a unified visual language
- Principle of relief coordination
- Scale principle
- Principle of style
- Moldings on the ceiling: when they are needed and how to use them
- Molding frame around the rosette: "French ceiling"
- Multiple frames: ceiling zoning
- Linear moldings as a ceiling "skeleton"
- Moldings as a transition from rosette to cornice
- How to choose a set for a specific room
- Set for the living room
- Set for the bedroom
- Set for the hall
- Set for the kitchen-living room
- Set for the study
- Set for a low ceiling
- How not to overload the ceiling: a system of checks and balances
- Rule of total activity
- Rule of single paint
- Proportion Rule
- Ceiling height rule
- The material that makes everything possible: polyurethane as the basis of the kit
- Step-by-step logic of assembling the kit: from chandelier to finished ceiling
- Step one: determine the room style
- Step two: evaluate the chandelier
- Step three: choose the rosette
- Step four: choose the cornice
- Step five: decide on moldings
- Step six: choose decorative overlays
- Step seven: assemble the mounting kit
- Installation order of the kit: what goes after what
- Five ready-made kits: real scenarios
- What to buy for a complete kit: final checklist
- Basic set
- Extended set
- Frequently Asked Questions
- About the Company STAVROS
There is a moment during renovation when a person looks at the finished ceiling and realizes: something is wrong. The chandelier is hanging. The socket is in place. But the ceiling looks unfinished — as if it is missing one important detail. Or several. Most often, the reason is exactly this: the socket was bought separately, the cornice separately, and moldings were not planned at all. Three good elements — and no system between them.
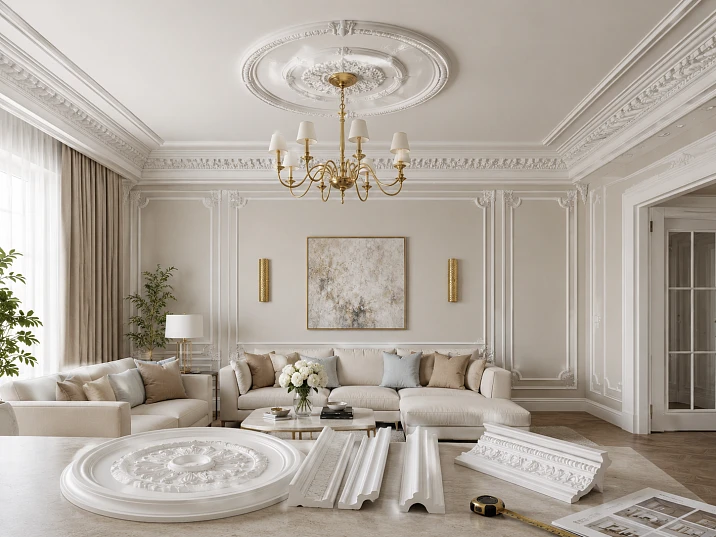
A polyurethane ceiling rosette works best as part of a kit: the rosette frames the chandelier, the cornice completes the perimeter, the moldings align the ceiling lines, and a unified paint job turns individual elements into a cohesive ceiling stucco. This is not theory — it is an observation confirmed every time the ceiling features not a set of parts, but a well-thought-out system. Let's break it down piece by piece.
Why a kit is needed at all: what changes when elements work together
Ask yourself: why do ceilings in historical interiors — palaces, estates, classic mansions — look so convincing? Not because there is more stucco. But because there is a system. A rosette in the center. A cornice along the perimeter. Moldings define the lines. Decorative elements connect the center with the perimeter. Each element is in its place, each speaks the same language as its neighbor.
This is exactly what is called a ceiling stucco kit.
When ceiling rose made of polyurethane It stands alone on the ceiling — it looks like a separate detail. Beautiful, but separate. When a molding frame appears around it, the rosette becomes the center of the ceiling composition. When a cornice in the same style runs along the perimeter, the ceiling acquires architectural logic. When everything is painted with a single color, the set becomes a complete interior solution.
This is not a matter of the amount of decor. It is a matter of system.




What does a ceiling stucco set consist of: complete anatomy
Before talking about selection, you need to understand what elements a set consists of. Because "ceiling stucco" is not one item, but a family of elements, each of which performs its own function.
Our factory also produces:



Ceiling rosette
Central element. Located at the chandelier attachment point. Function — to design the transition between the light fixture and the ceiling, hide the mounting unit, create a decorative "center" of the ceiling plane.
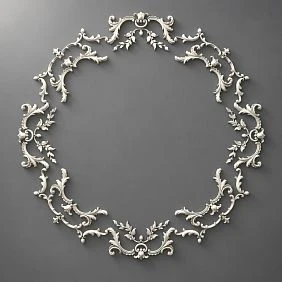
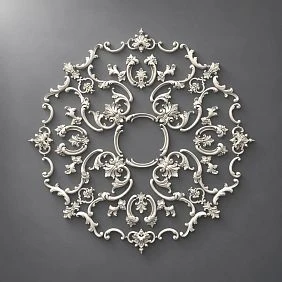
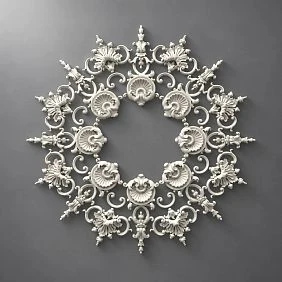
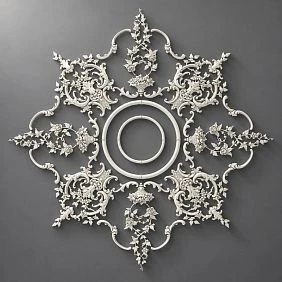
Rosettes under chandeliers made of polyurethane Available in a wide range of diameters — from compact 180–200 mm to monumental 600–700 mm and more. Shape — round, oval, square. Relief — from a smooth profile ring to a rich acanthus ornament.
Get Consultation
Ceiling cornice
Perimeter element. Attached along the line where the wall and ceiling meet — or lower, creating a "ceiling belt". Function — to complete the ceiling plane, hide the joint, add architectural scale.
The cornice sets the "frame" for the entire ceiling. Without a cornice, even a beautiful rosette exists in an "unclosed" space. Polyurethane moldings and cornices — is a key element of any complete ceiling set.
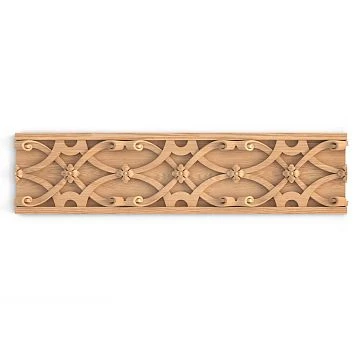
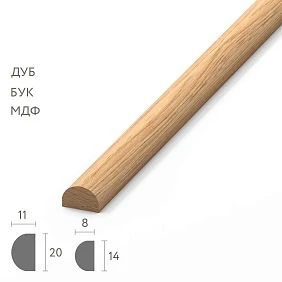
Moldings are linear profiles used to create framed compositions, zone walls, and frame openings. They come in various widths (from 20 to 150 mm) and relief complexity — from smooth to richly decorated.
Linear decorative profiles. Attached to the ceiling to create frames, straight lines, zoning contours. Function — to structure the ceiling plane, create a "French ceiling", designate zones, connect the rosette with the cornice.
Polyurethane moldings can be: flat (profile with one face), corner (for transition between wall and ceiling), frame (special profiles for creating rectangular contours).
Decorative overlays and stucco
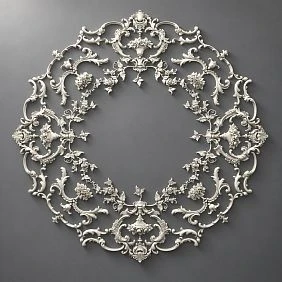
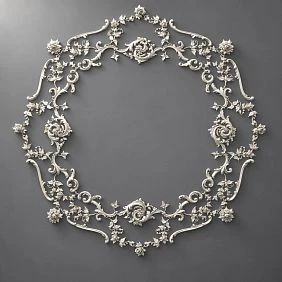
Corner rosettes, floral medallions, decorative overlays for frame corners — these are details that give the ceiling set a "jewel-like" precision. Decorative stucco turns an ordinary molding frame into an architectural object.
Installation materials
Adhesive for polyurethane stucco, acrylic sealant, primer, paint. Without the right installation materials, even a perfectly selected set looks sloppy.
Rosette and cornice: how to create a unified visual language
The most common mistake when assembling a ceiling set is inconsistency between the rosette and the cornice. An actively embossed rosette with a laurel ornament + a flat smooth corner cornice. Or, conversely, a heavy baroque cornice with acanthus leaves + a modest smooth rosette with a diameter of 200 mm. Both options create one feeling: "something is wrong."
The principle of relief coordination
The relief of the rosette and the relief of the cornice should be in the same "octave." Not necessarily the same ornament — but similar decorative richness.
-
Rich embossed rosette → rich cornice with ornament.
-
Moderately embossed rosette → cornice with a moderate profile.
-
Smooth rosette → smooth or slightly profiled cornice.
There is no need to copy the ornament exactly. The amount of decor per unit area should be comparable.
Scale principle
The width of the cornice should correspond to the diameter of the rosette. A narrow cornice 40–50 mm + a rosette 500 mm is an imbalance. A wide cornice 120–150 mm + a rosette 220 mm is the same imbalance, only in the opposite direction.
Guideline: the width of the cornice is approximately 15–20% of the rosette diameter. Rosette 400 mm — cornice 60–80 mm. Rosette 500 mm — cornice 80–100 mm.
Style Principle
The ornament style must be uniform for the entire set. Organic motifs (acanthus, laurel, leaves) in all elements. Or geometric motifs (meander, Greek key, concentric profiles) in all elements. Mixing organic and geometric motifs in one set is risky without a clear design rationale.
Buy ceiling molding It is easier to maintain a unified style when you determine the ornamental language of the entire set in advance, rather than selecting each element individually.
Ceiling Moldings: When They Are Needed and How to Use Them
Moldings are an element that most buyers do not include in their initial list. A rosette — yes. A cornice — possibly. Moldings — 'later, if there is budget left.' This is a mistake. It is moldings that transform a ceiling from a 'ceiling with decor' into ceiling architecture.
Molding frame around the socket: «French ceiling»
The most famous technique is a rectangular or square frame made of moldings, with a socket and chandelier in the center. This is the «French ceiling» — a classic architectural technique known since the 18th century.
How it works: Moldings made of polyurethane create a frame that visually «highlights» the chandelier area as a separate ceiling plane. The socket inside the frame looks not just like a decorative overlay, but like the center of an architectural «panel».
Frame size: approximately 60–70% of the ceiling area it frames. For a room 4 × 5 m — a frame about 2.5 × 3 m.
Multiple frames: ceiling zoning
If the room has several lighting zones (kitchen-living room, long living room with two chandeliers), moldings can create several frames — one for each zone. This is an architectural way to zone an open space without walls or partitions.
Linear moldings as a ceiling «skeleton»
Moldings can create not frames, but straight lines — parallel to walls, radial from the center, diagonal. This is a rarer and bolder technique that requires a clear design plan. But such ceilings make the maximum impression.
Moldings as a transition from the socket to the cornice
In high rooms (ceiling 3.0 m and higher), a problem arises: the socket in the center and the cornice around the perimeter are too far from each other, with an empty ceiling plane between them. The molding frame «fills» this distance, creating an intermediate decorative level.
How to choose a set for a specific room
There is no universal set. There is logic that works for each type of room.
Set for the living room
The living room is the main room. Here the ceiling set can be the most complete and expressive.
What to include:
-
ceiling rose made of polyurethane — large or medium diameter, with an ornament matching the interior style.
-
Cornice — expressive, proportionate to the ceiling height and room scale.
-
Molding frame around the chandelier — "French ceiling".
-
Decorative Inserts in the corners of the frame.
-
Uniform white painting of all elements.
Result: a living room with a palace-level ceiling — without plaster, without wet plastering, without special equipment.
Set for the bedroom
The bedroom requires delicacy. The ceiling should not press down — it should frame.
What to include:
-
A small or medium rosette with a soft relief.
-
A cornice of moderate profile — without heavy ornamentation.
-
A molding frame — optional, with a ceiling height of 2.8 m or more.
-
White paint strictly matching the ceiling tone.
What to avoid: too large a rosette, heavy relief, rich ornamentation on the cornice. The bedroom is a relaxation space, and the ceiling should create a feeling of lightness.
Hall set
The hall is the first impression. Here, the ceiling set works as a "business card" of the interior.
What to include:
-
A noticeable rosette with expressive relief, proportionate to the space.
-
The cornice is wide, with ornamentation.
-
Decorative overlays at the corners of the cornice.
Feature: in the hall, the ceiling is visible "entirely" from the threshold. Mismatch of elements is noticeable immediately. Therefore, a unified style and uniform painting are critical here.
Set for kitchen-living room
An open space with several lighting zones requires a special approach.
What to include:
-
Two sockets in the same style (for the table zone and the sofa zone) — buy polyurethane ceiling rosettes can be in the required quantity.
-
Moldings for zoning — two separate frames for each zone.
-
Cornice around the perimeter — a unifying element for the entire space.
Principle: moldings zone, cornice unifies.
Set for study
A study is a space of concentration. The ceiling set here should be strict and precise.
What to include:
-
Socket — with geometric or moderate ornament.
-
Cornice — profiled, without excessive ornament.
-
Moldings — if space allows, a strict rectangular frame.
-
Painting strictly in the color of the ceiling — no contrasts.
Kit for low ceiling
Low ceiling (2.5 m and below) — a special case. Every centimeter of relief height matters here.
Principles:
-
Socket with low relief — no more than 10–12 mm.
-
Cornice thin — 40–60 mm wide, with minimal projection.
-
Moldings only at heights from 2.6 m.
-
Socket diameter — no more than 300–350 mm.
-
Painting strictly to match the ceiling tone — so that elements "dissolve" into the ceiling plane.
| Room | Rosette | Crown Molding | Moldings |
|---|---|---|---|
| Living room | Large, textured | Expressive | Frame around the chandelier |
| Bedroom | Medium, soft relief | Moderate | optional |
| Hall | Noticeable, with ornament | Wide | Corner accents |
| Kitchen-living room | Two rosettes in the same style | Perimeter | Zoning frames |
| Office | Strict, geometric | Profile | Rectangular frame |
| Low ceiling | Small, low relief | Thin | No |
How not to overload the ceiling: a system of checks and balances
One of the main fears when assembling a ceiling kit is "too much decor." This is a real risk. But overload is not about the number of elements. It's about their inconsistency.
Rule of total activity
The more active the central element (chandelier), the calmer the peripheral ones (rosette, cornice) should be. The richer the rosette, the simpler the cornice. The more expressive the cornice, the more neutral the moldings.
This is the principle of "total activity": the overall decorative tension of the ceiling should remain within limits perceived as harmonious. If every element "screams" — the ceiling turns into decorative noise.
Rule of uniform painting
All elements of the kit — one paint, one batch, one painting session. White matching the ceiling "unifies" different elements into a single plane. Contrast painting (white moldings on a colored ceiling, or vice versa) emphasizes each element — and requires precise design calculation.
For most interiors — white uniform painting. For a classic interior with gold fittings — delicate gilding of rosette details, no more than 20–30% of the surface.
Proportion Rule
The height of the cornice relief, the depth of the rosette relief, the thickness of the moldings — all these parameters must be in a reasonable proportion. If the cornice protrudes from the wall by 80 mm, the frame moldings should be 15–20 mm thick — not 5 mm (too thin against a massive cornice) and not 40 mm (too heavy).
Ceiling height rule
The lower the ceiling, the more modest the set. This is not up for discussion. High relief in a low space creates a feeling that the ceiling is "pressing down." Low relief in a high space — the ceiling "breathes."
The material that makes everything possible: polyurethane as the basis of the set
Why polyurethane specifically — and why specifically for a set?
Polyurethane combines qualities that make it ideal for ceiling decor:
Lightness. Even a large rosette with a diameter of 600 mm weighs a few hundred grams. This means installation without special equipment, without reinforced anchors, without risk to the ceiling slab.
Precision of relief. Polyurethane allows reproducing historical ornaments with the highest detail — thin leaves, openwork curls, multi-tiered profiles.
Material compatibility. A rosette, cornice, and moldings made from the same material are installed with the same adhesive, filled with the same sealant, and painted with the same paint. No "technical incompatibility."
Ease of cutting. A sharp knife — and any element is adjusted to size, angle, radius. This is especially important for molding frames, where precision of corner cutting is critical.
Uniform painting. All polyurethane elements accept paint uniformly — evenly, without spots, without differences in texture.
Full range polyurethane products for the ceiling kit — in the STAVROS catalog.
Step-by-step logic for assembling the kit: from chandelier to finished ceiling
How to properly 'assemble' the kit — where to start?
Step one: determine the room's style
Classic, neoclassical, Provence, modern style, art deco? This determines the ornamental language of the entire kit.
Step two: evaluate the chandelier
The type, scale, and decorative richness of the light fixture — this is the starting point for the entire kit.
Step three: choose the ceiling rose
polyurethane rosettes — the first and main element of the kit. Diameter, relief, shape — in accordance with the chandelier type and interior style.
Step four: choose the cornice
Buy polyurethane moldings and cornices must be in the same style as the rosette. The width of the cornice is proportional to the diameter of the rosette and the ceiling height.
Step five: decide on moldings
Do you need a molding frame? If the ceiling is high, the room is spacious, the style is classic — yes. If the ceiling is low, the room is small, the style is modern — moldings can be omitted.
Step six: choose decorative overlays
Corner elements for frames, decorative medallions, accent overlays from the section Ceiling molding — the final 'jewelry' layer of the set.
Step seven: assemble the installation kit
Glue, acrylic sealant, primer, paint matching the ceiling color. With a reserve.
Installation order of the set: what goes after what
The correct installation sequence is half the result. Incorrect — a ruined ceiling or rework.
First, install the cornice. Around the entire perimeter of the room. This is the "frame" for the entire ceiling. After installation — sealant on the joints, drying.
Second, install the molding frame (if provided). Marking — strictly by level and symmetry. Corner cutting — with precision to the degree.
Third, install the rosette. After marking the center, checking symmetry, and dry fitting. Apply glue to the back of the rosette — evenly, over the entire contact area.
Decorative overlays — last. After all main elements have fully dried.
Priming and painting — in a single session for the entire set.
Chandelier — only after the paint has fully dried.
Complete installation algorithm for each element — in the guide for installing polyurethane molding.
Five ready-made kits: real scenarios
Kit one: classic living room 28 m², ceiling 2.9 m, classic chandelier.
-
Round rosette 460 mm, acanthus relief.
-
Cornice with acanthus band, width 90 mm.
-
Molding frame 2.8 × 3.8 m, corner rosettes in the corners.
-
Decorative overlays in the corners of the frame.
-
The entire system is white to match the ceiling.
Second set: bedroom 18 m², ceiling 2.7 m, pendant chandelier.
-
Round smooth rosette 300 mm.
-
Profile cornice, width 55 mm.
-
Moldings — none (low ceiling).
-
White paint.
Third set: grand hall 4 × 6 m, ceiling 3.2 m.
-
Round rosette 400 mm, laurel relief.
-
Wide cornice with laurel ornament, width 110 mm.
-
Decorative overlays at the corners of the cornice.
-
Delicate gilding of rosette details.
Fourth set: kitchen-living room 42 m².
-
Two rosettes 380 and 340 mm, same ornament.
-
Profile cornice along the perimeter.
-
Two molding contours — zoning of living room and dining room.
-
White uniform painting.
Fifth set: study 14 m², ceiling 2.8 m.
-
Round socket 320 mm, geometric profile.
-
Cornice with Greek key pattern, width 65 mm.
-
Rectangular molding frame 1.8 × 2.4 m.
-
White paint strictly matching the ceiling tone.
What to buy for a complete set: final list
Basic set
-
ceiling rose made of polyurethane — of the required diameter and relief.
-
a polyurethane cornice — with a margin of 10–15% of the room perimeter.
-
Glue for stucco molding.
-
Acrylic sealant.
-
Acrylic primer.
-
Water-based paint matching the ceiling color.
Extended set
-
Moldings made of polyurethane for frames — with a margin for cutting corners.
-
Decorative Inserts for corners of frames and cornice.
-
Additional sockets when there are multiple light points.
-
ceiling decor — medallions, accent elements.
| Task | What to buy |
|---|---|
| Install a chandelier | Polyurethane rosette |
| Complete the perimeter | Polyurethane cornice |
| Create a frame | Polyurethane moldings |
| Add corner accents | Decorative overlays |
| Classic ceiling | Rosette + cornice + moldings + overlays |
| Buy correctly | The whole set + mounting materials with a reserve |
Frequently asked questions
Do I need to buy a cornice and moldings together with the rosette?
Not necessarily — but it's advisable. Especially if the room is spacious, the ceiling is high, or the interior is classic. The cornice completes the ceiling, the moldings give it architectural logic. Without them, the rosette works as a separate detail — not as part of a system.
How can I ensure the cornice matches the rosette?
Check three parameters: ornament style (same category), scale (cornice width proportional to rosette diameter), relief height (comparable decorative richness).
How much glue is needed for the set?
Glue consumption depends on the total length of the cornice and moldings, plus the rosette. For a room of 20 m² with a full set — approximately 2–3 tubes of specialized polyurethane glue. Buy with a reserve.
Can I Buy ceiling molding A set — so everything is together at once?
Yes. The STAVROS catalog offers all elements for a complete ceiling set: rosettes, cornices, moldings, decorative overlays — in a wide range of styles and sizes.
How to properly paint a polyurethane set?
First — prime all elements. Then — one or two coats of water-based paint in the ceiling color. Paint all elements in one session with the same paint. If a decorative accent (gilding) is needed — only after the base layer is completely dry.
What is more important: a socket or a cornice?
Every element is important in its place. The socket is the center. The cornice is the frame. Without the center, the frame is empty. Without the frame, the center is lonely. The best result is when both elements work in a system.
Are moldings needed in a small room?
In a room up to 12–14 m², a molding frame on the ceiling can create a feeling of tightness. For small rooms, it is better to limit yourself to a socket and a thin cornice. Moldings are suitable from 16–18 m² with a ceiling height from 2.7 m.
About the company STAVROS
STAVROS — professional manufacturer and supplier polyurethane products for creating complete ceiling sets. The STAVROS catalog has the entire necessary range: Polyurethane ceiling rosettes of all diameters and styles, cornices and moldings for any type of interior, decorative molding and overlays for corner accents, ceiling decor — medallions, elements for ceiling compositions.
STAVROS operates throughout Russia, provides professional consultations on selecting sets, delivery, and assistance in calculating the required amount of materials. When you need not just one element, but a ready-made ceiling system that works, STAVROS knows how to assemble it correctly.