Article Contents:
- Two walls of one apartment: why a single line starts with a different check
- Buy mouldings in Vladivostok: what to choose in the STAVROS catalogue
- Why the search term "moulding" can be a trap
- Measurement sheet: what to measure before payment and what to check on site
- Plastered wall: diagnosing more than just evenness
- Drywall partition: looking at the finishing layer and stability
- One profile does not necessarily mean one adhesive technology
- The seam between two structures: where the decorative line should stop
- Critical points: where not to place decor
- How to connect two zones without identical finishing on each wall
- Three alternative profiles: comparing more than just price
- Polyurethane or gypsum: the task matters more than the advertising comparison
- Conditional schedule for two walls: where exactly the six lines run
- Cutting four strips: why linear footage is not yet a finished order
- Four or five strips: how to choose a reserve without automatic overpayment
- Three budgets: paying for the cross-section, not for extra meters
- Commercial choice: narrow, medium, or textured profile
- Painting two bases: the same color does not cancel preparation
- Decorative overlays: the add-on after choosing the main line
- Ceiling moulding: when the pattern does not need to continue
- Order specification: which lines must not be left blank
- Base inspection as a separate renovation stage
- Delivery of moulding to Vladivostok: verification logic instead of a promised rate
- Primorsky Krai: one product, different collection conditions
- What to check when receiving a long-length order
- Test area: one small job instead of two big mistakes
- Installation in stages: bases first, then a single line
- Mistakes that are especially costly with two bases
- Frequently asked questions about buying and installation
- Can I order a single molding for plaster and drywall?
- How many full strips are needed for six pieces?
- What should I choose for a calm interior: MLDPU-001 or MLDPU-004?
- Is MLDPU-002 suitable for any drywall partition?
- Can the profile be glued directly over wallpaper?
- Where can I find prices and delivery terms for Vladivostok?
- The search says "buy stucco Vladivostok": which section do I need?
- What should I do if a short line falls on a sheet seam?
- Can the leftover offcuts be used?
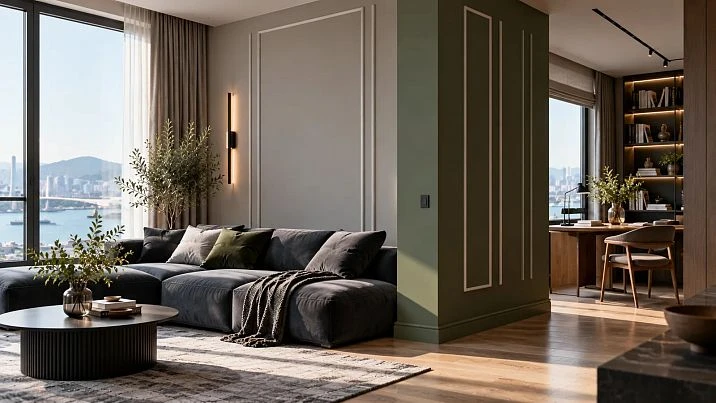
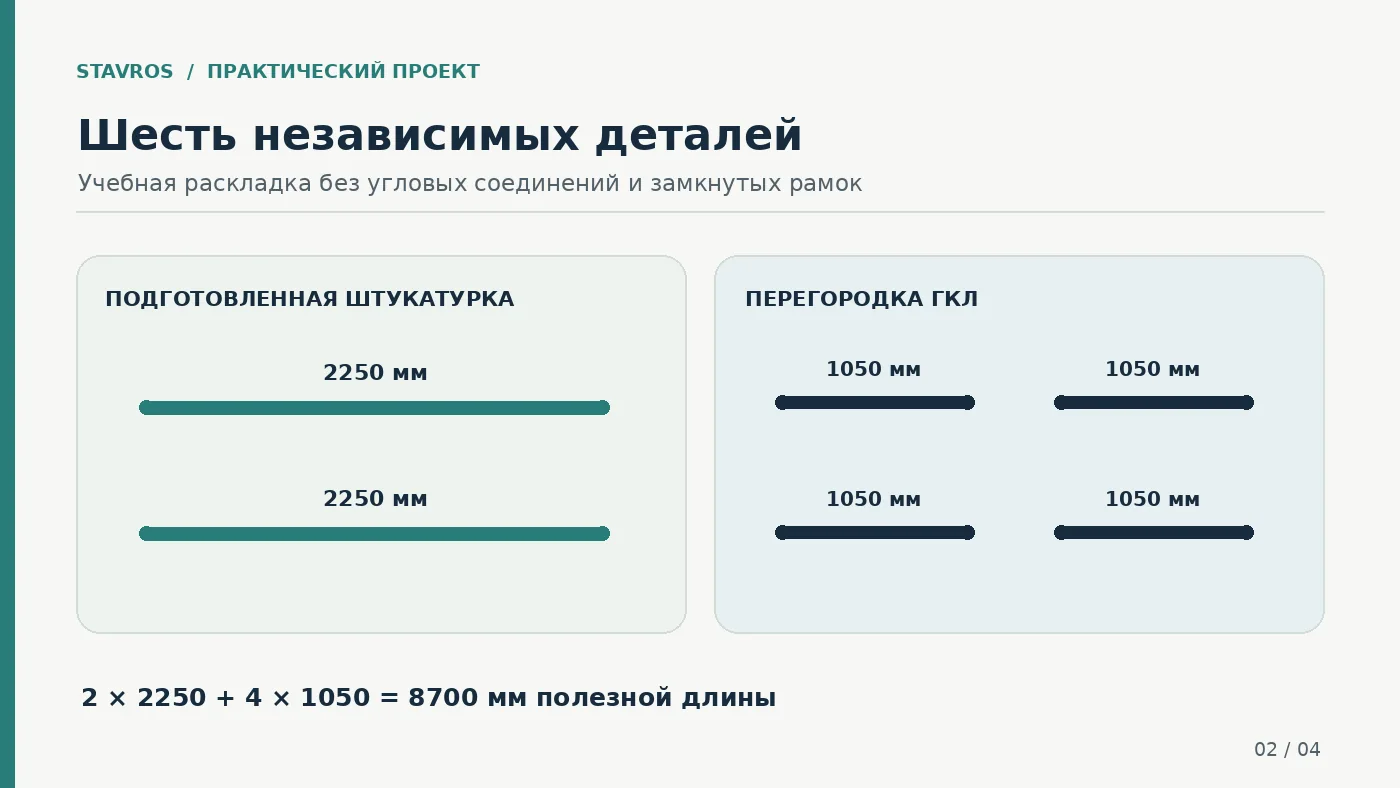
In an apartment after renovation, two walls may look equally flat but behave differently. Behind the sofa is prepared plaster on a solid substrate; at the workspace is a drywall partition, filled and painted in the same shade. In the visualization, the designer drew identical thin lines across both planes. In reality, such a project is checked twice: first for geometry, then for substrate strength. It is precisely on this discrepancy that the purchase of interior decor is built. Moldings should look like a single system, but its fastening technology must take into account the material under the finish paint.
Let us consider a training apartment in Vladivostok. The living room is separated from the work corner by a lightweight partition. On the plastered wall, two straight lines of 2250 mm each are planned, while on the drywall, four independent pieces of 1050 mm each. This gives six finished elements with a total length of 8700 mm. All of them are made from the same STAVROS polyurethane profile. With a factory length of 2600 mm, the actual cutting requires four strips, not a mechanical division of the total footage by the length of one blank.
If the task is — Buy molding for an apartment without rework after installation, it is more useful to start not with a photo of the finished interior, but with two verification sheets: "plastered wall" and "drywall". The first records the condition of the plaster, primer, and coating; the second records the quality of joint filling, the stability of the plane, and the compatibility of the adhesive with the finish. Only after this do you choose the profile, the number of strips, the cutting method, and the delivery conditions.
Two walls of one apartment: why a single line begins with different checks
In a sketch, the building material usually disappears behind color. The molding is perceived as a continuous architectural line; the adjacent opening, table, and light fixture form a composition. But the adhesive does not work with the picture, and not even only with the polyurethane: it interacts with a specific surface layer. On a plastered wall, that layer may be leveling filler, primer, and paint. On drywall, it is cardboard, filled joints, finish filler, and coating. The strength and adhesion of these substrates can differ significantly.
Therefore, one cannot stop at the statement "polyurethane is lightweight, so it will stick anywhere." The low weight of the decorative profile reduces the load but does not fix peeling paint, weak filling, or a moving joint. If the wall finishing is not yet complete, it is reasonable to choose the following sequence: inspect the substrate, make a test attachment according to the manufacturer's instructions for the compound, approve the design lines, and only then proceed to full installation.
In our example, the decorative segments do not cross the boundary between the two structures. This is a fundamental decision. Walls may respond differently to minor deformations; a rigid decorative joint across the seam can eventually develop a crack. Two independent compositions built from the same profile and the same color visually connect the space without the risky promise that different walls will behave as a single monolithic surface.




Buying stucco in Vladivostok: what to choose in the STAVROS catalog
Commercial search should be clarified right away: this project requires interior polyurethane profiles, not exterior facade products or car decorative elements. To buy stucco in Vladivostok, in the STAVROS catalog you first select the polyurethane products section, then the specific molding by article number and cross-section. The product page must confirm the material, the factory strip length, and the price per piece. Do not rely only on a similar name: the supplier may have visually related MDF variants or other sizes.
Three alternatives were selected for this calculation: MLDPU-001, MLDPU-004, and MLDPU-002. These are not three mandatory items in one order. You choose one profile, then order four strips of exactly that profile — or five if you need a reserve. This rule protects against mixing cross-sections, where the left wall would get one shadow line and the partition another. If the order is placed remotely, before paying it is advisable to check not only the price but also the final name of the selected option in the cart.
A separate nuance is the phrase "in Vladivostok." It describes the buyer's location and the delivery address, but by itself does not prove that STAVROS has a warehouse or showroom in the city. The manufacturer's website publishes ordering and delivery options across Russia; the possibility of transporting long-length cargo to a specific address, packaging, and the final rate should be agreed upon at the time of purchase, not taken from average advertising promises.
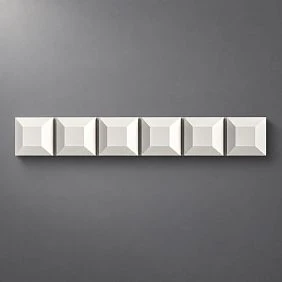
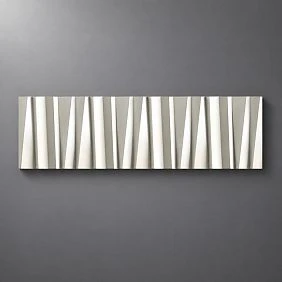
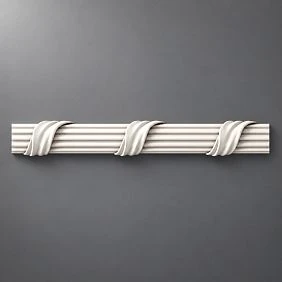
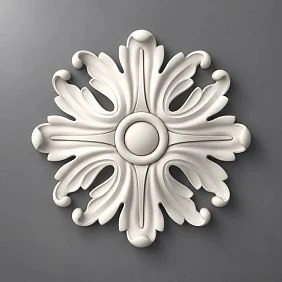
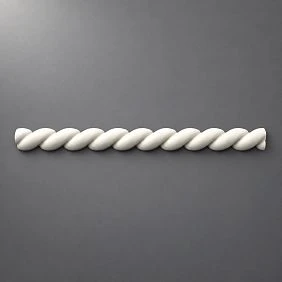
Our factory also produces:
Why the search term "molding" can be a trap
In Vladivostok's semantics, there is a competition of meanings. A buyer enters "moldings," and the search may show car trim, car door overlays, windshield elements, and body parts. This is not the same product as a thin interior polyurethane strip. Even if the broad search volume looks impressive, it does not fully translate into demand for decorative wall stucco.
A practical wording for the catalog should include the material and purpose: "polyurethane wall moldings," "wall decorative profile," STAVROS article number. If you need Moldings made of polyurethanego to the relevant category rather than the general list of automotive accessories. Check the purpose of each listing you find and do not take a similar name as confirmation of the same material. If the results show an interior polyurethane profile, an automotive trim piece, and an MDF product side by side, you cannot compare their prices and installation as if they were one product.
A convenient check before buying is to formulate a query with three clarifications: “wall molding,” “polyurethane,” and a specific item code. Then open the manufacturer's listing and verify the dimensions, length, and material. If instead of interior trim the results show car parts, do not look for a lower price there: change your search wording. For wall decor, compatibility with the chosen substrate, profile geometry, and the number of full strips matter. Pay special attention to similar names: a product code may differ by one letter yet denote a completely different material. This kind of filter helps you avoid receiving the wrong set even with a remote order.
Get Consultation
Measurement sheet: what to record before payment and what to check on site
The first layer of measurement is architectural: the lengths of available sections, ceiling height, the position of doors, windowsills, and furniture, and the horizontals of the worktop. The second is installation-related: the actual plane of the wall, local irregularities, areas of previous repairs, and coatings. The third is operational: sockets, switches, junction boxes, possible shelf mounting points, and permissible service zones. These three lists cannot be replaced by a single figure from the apartment plan.
For two long sections of 2250 mm each, measure each line independently at the future installation site. Check the horizontal with a laser level and mark it relative to the visible edge of the furniture, not relative to an uneven floor line. On gypsum board, prepare four sections of 1050 mm each: they are all independent, do not form a closed rectangle, and do not cross a joint with another structure. It is precisely this type of layout that allows you to maintain control over the behavior of different substrates.
It is useful to draw up the schedule in millimeters. Write down not “approximately 2.25 m” but the required length of the finished piece, the method of finishing the ends, the presence of a joint, the room, and the installation surface. If one line will be shortened after furniture placement, update the specification and cutting plan before ordering. An error of 10–20 mm may seem insignificant on a large wall, but with symmetrical decor and limited clearances it is noticeable.
Plastered wall: diagnosing more than just flatness
Adhesive bonding begins with checking the layer that will bear the adhesive. Visually smooth plaster may have weak areas, especially near former chases, on local patches, and where the previous coating did not hold well. Light tapping and inspection for cracks, dust, and delamination help identify areas that need repair. Make sure the substrate is dry within the requirements of the selected materials and that the plaster and filler have had the recommended curing time.
A separate problem is old glossy paint. The adhesive may bond perfectly to the paint, while the paint itself adheres poorly to the filler. The result is that the molding comes away not from the adhesive but together with the finish coat. The solution is not universal: sometimes the preparation recommended by the manufacturer of the compound is required; sometimes the weak layer must be removed and the substrate restored. You cannot prescribe one primer or solvent for all walls based solely on the word “plaster.”
In our training project, both long lines relate specifically to this wall. They are conveniently made from solid strips with a minimum number of joints: each 2250 mm section is cut from its own 2600 mm blank, leaving nominally 350 mm before accounting for the saw kerf and possible end finishing. Trial marking is especially important here: a long horizontal accentuates the visibility of even a slight wave or skew in the wall under side lighting.
Drywall partition: examining the finishing layer and stability
Gypsum board is not a synonym for a "weak wall," but it is also no guarantee of suitability for any adhesive. After assembling the partition, it is especially important to assess the joint filling, the quality of sanding, the absence of loose sections, and the condition of the finish paint. If a joint is visible, loose, or regularly cracks, gluing a continuous rigid decorative profile over it is a bad idea: the molding is not reinforcing tape and does not replace joint repair.
Four short independent runs of 1050 mm each are planned on the partition. Unlike long sections of a plastered wall, here it is easier to visually check that the offsets from the sockets and the desk are even. However, you should not cover areas where furniture fixings, hidden access panels, or wiring changes will later be located. If a wall-mounted shelf is planned, its load-bearing system is calculated separately and fixed according to the requirements of the structure's manufacturer; the decorative profile does not participate in bearing loads.
Pay attention to the adhesion of the finishing layer. On a new drywall wall, the difference between the factory surface of the board and the filled joint strips is sometimes especially noticeable. After painting, both areas may look the same but have different absorbency properties. A test attachment and agreed preparation reduce the risk of stains, color variation, or local detachment; they do not replace the instructions for the specific adhesive.
One profile does not necessarily mean one gluing technology
The simplified instruction "apply liquid nails and press" does not take into account two important questions: what surface the compound must bond and what coating it will end up on. Mounting adhesive for polyurethane must be compatible with the substrate, primer, and finishing layer. Porous mineral coatings and painted gypsum board surfaces may require different preparation regimes, adhesive layer thickness, or temporary fixing. This is determined not by the name of a city or a beautiful texture, but by the adhesive's technical documentation.
Before purchasing, ask the adhesive seller for written recommendations for use on a mineral substrate, gypsum board, and the chosen paint. Clarify whether preliminary cleaning, sanding, and priming are needed and how much time is required before subsequent painting. Compounds with aggressive components should not be used without confirmed compatibility with polyurethane. If the system provides for an adhesion test, perform it on a inconspicuous area after the original finish has fully dried.
And one more limitation: an unsuitable surface does not become suitable by increasing the amount of adhesive. A thick bead of compound does not fix a loose gypsum board, peeling putty, or grease-contaminated paint. First the cause is eliminated, then the mounting system is selected. This is exactly how the same molding item can work correctly in two parts of a room without assumptions about a "magic universal adhesive."
Joint of two structures: where the decorative line should stop
If a drywall partition stands next to a load-bearing wall, the interior often calls for one continuous horizontal line. Visually this looks clean, especially with a single paint color. However, the transition between structures is a potential zone of relative movement. The degree of deformation depends on the junction detail, assembly quality, material, and operating conditions, so the decorative strip should not automatically cover a construction or expansion joint.
In our project, the line on the plastered wall and the set of short lines on the partition are not joined by a rigid element. Visual continuity is created by the same cross-section, color level, direction, and rhythm. The exact offset from the boundary is determined by the architecture of the room and the mounting assembly; therefore, a universal offset in millimeters would be incorrect. If a connection through a complex assembly is required, a separate design solution must be obtained, taking into account the requirements of the structure manufacturers.
This is an important difference from classic closed frames. Here the decorative system honestly shows that the surfaces are independent. It can look more elegant than a heavy continuous strip and leaves the possibility of local repair: if the partition needs to be updated, the two-meter line on the adjacent solid wall will not have to be disturbed.
Critical points: where it is better not to place decor
The first zone prohibited for arbitrary decor is access to electrical equipment. Molding must not cover distribution box covers, electrical maintenance points, sockets, and switches that require dismantling. The second is the areas where cabinets, sliding system guides, and other equipment are fastened. The third is movement and expansion joints. Here, a beautiful pattern gives way to the ability to safely maintain the room.
Even if the electrical wiring is hidden behind the finish, you must not drill or fasten auxiliary elements without checking where cables may run. For adhesive mounting, this is not a reason to ignore the location of the wiring: during future disassembly or repair, it is important to understand where the hidden routes are. Keep a photograph of the walls before finishing and mark on the measurement sheet the areas that should not be covered either now or during the next furniture rearrangement.
If the partition surface vibrates when the door is opened, first understand the structure. There is no need to turn decorative polyurethane into a means of rigidity: it is intended for finishing, not for reinforcing the partition or compensating for assembly errors. Application moldings for walls is effective where the base finish is already in good condition and ready for the decorative layer.
How to connect two zones without identical finishing on each wall
Interior consistency does not require every wall to receive the same number of lines. In the living room, a long horizontal supports the proportions of the sofa and low chest of drawers, while in the work area, short parallel segments set a more frequent rhythm. Unity is achieved by repeating the profile cross-section, the painting principle, and the offsets relative to architectural reference points. This is more flexible than copying the same frame pattern onto every available wall section.
In the training composition, two long pieces are placed on a prepared plaster base. Four short pieces are on a drywall partition. They do not touch each other and do not form structural connections through the corner between the walls. This solution allows the work to be staggered in time: for example, first complete the plaster inspection and install the long sections, and after separate acceptance of the drywall, proceed to the short ones.
Light matters. On a plastered wall, a side sunbeam can highlight any deviation of the line from a perfect horizontal. On a partition, a work light creates local shadows from the relief. Hold a real sample against both surfaces in the morning and in the evening: the same moulding can look graphic in one area and too heavily textured in another. If the difference is irritating, correct it with lighting and placement rather than by replacing some of the profiles in an already ordered set.
Three alternative profiles: comparing more than just price
Three real alternatives from the STAVROS range were selected for the project. Molding MLDPU-001 has a cross-section of 10 × 6 mm and a length of 2600 mm. This is the most delicate option: its small visible width suits calm lines, when the main attention should be held by the furniture and the texture of the walls. The price of one factory-made strip on the date checked is 1740 ₽.
Molding MLDPU-004 with a cross-section of 15 × 8 mm and a length of 2600 mm — the middle solution. It is more noticeable on a plain painted surface, but it will not necessarily become the main accent of the room. Its published price is 3190 ₽ per strip. For a project with several separated sections, this is a compromise between light graphics and a line that reads clearly at a distance.
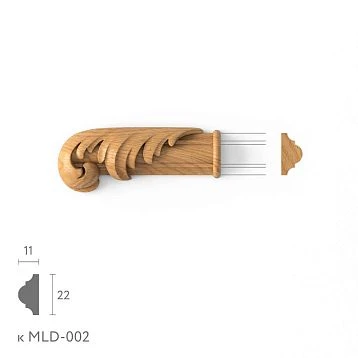
Molding MLDPU-002 has a cross-section of 22 × 11 mm, a factory length of 2600 mm and a price of 5460 ₽. The more pronounced profile creates a strong shadow and requires more careful placement: near a small desk or in a narrow gap between pieces of furniture it may look too massive. It is more useful to compare options using a real sample on the wall rather than enlarged website images, where the scale of the profile is not obvious.
| Profile | Section | Plank | Price per 1 pc. | Four strips |
|---|---|---|---|---|
| MLDPU-001 | 10 × 6 mm | 2600 мм | 1 740 ₽ | 6 960 ₽ |
| MLDPU-004 | 15 × 8 mm | 2600 мм | 3 190 ₽ | 12 760 ₽ |
| MLDPU-002 | 22 × 11 mm | 2600 мм | 5 460 ₽ | 21 840 ₽ |
The table describes three alternative sets of the same geometry. These prices should not be added together. Individual decorative overlays, cornices, adhesive, primer, installation and transport costs are not included here. If a product page offers variants, select exactly the specified cross-section and check the price in the cart before paying: information in the online catalogue may change.
Polyurethane or gypsum: the task matters more than the advertising comparison
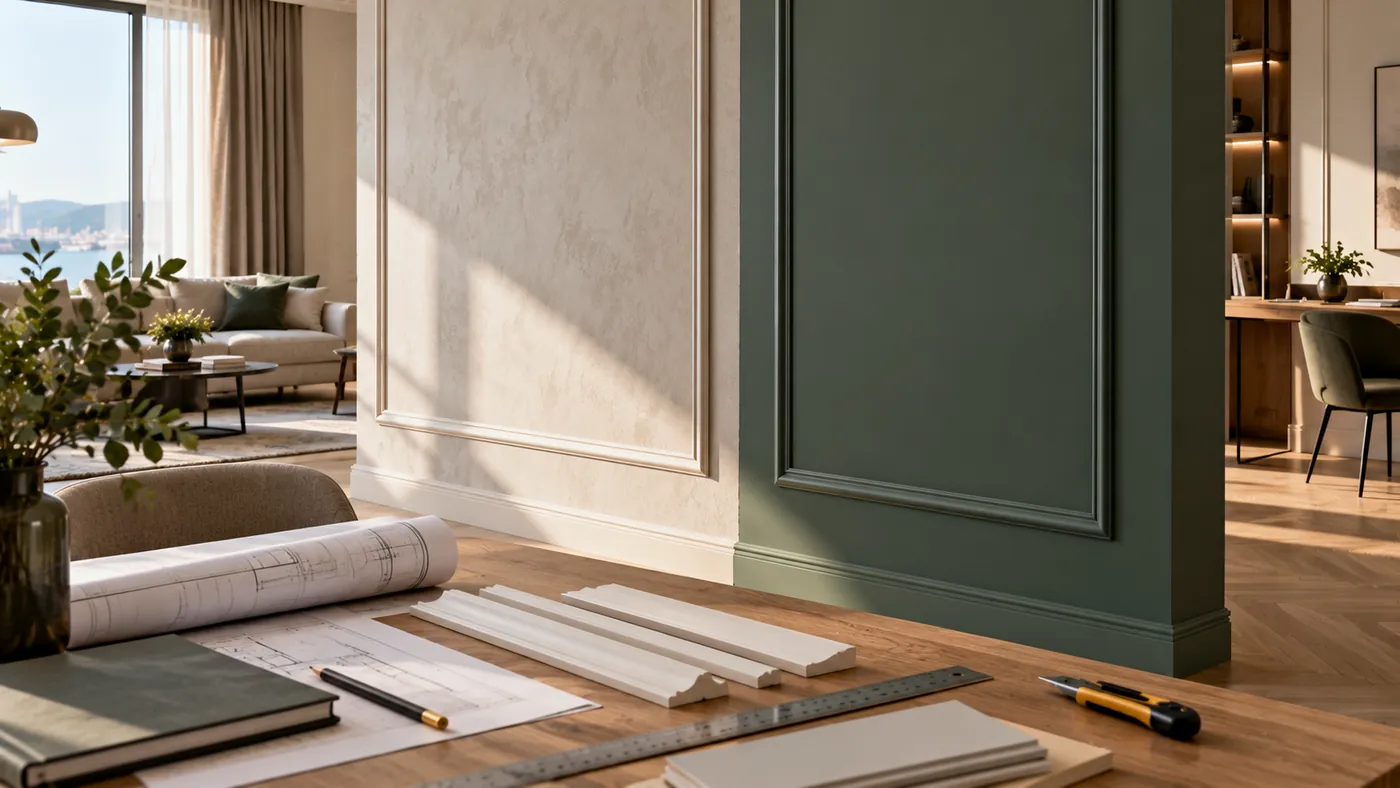
Gypsum and polyurethane have different properties, and no material is unconditionally the best. Gypsum allows expressive relief to be created and is widely used in historical and bespoke stucco work; however, specific products may be heavier, and their processing and fixing require a more complex substrate and greater skill. Ready-made polyurethane profiles are convenient where a repeatable size, a light load and finishing over existing walls are needed. But convenience does not exempt you from checking the adhesive and the surface.
If the buyer enters the phrase polyurethane moldings buy, they are usually interested specifically in the catalog of ready-made products with a known factory length. This is a suitable path for the six straight segments of our project. If, however, the task is to create a unique ceiling ornament or restore complex historical decor, the comparison will be different: here what matters is not only the price per meter, but also the weight of the product, substrate preparation, fastening, pattern repeatability, and the restorer's work.
In an apartment with a drywall partition, one should not automatically consider gypsum impossible and polyurethane permitted. For any specific product and installation method, it is necessary to check the permissible load, the substrate, the fastening assembly, and the manufacturer's restrictions. In our example, the choice of polyurethane is due to the short straight lines and ready-made SKUs, not to the claim that one coating always supports any decor while the other never does.
Conditional schedule of two walls: where exactly the six lines run
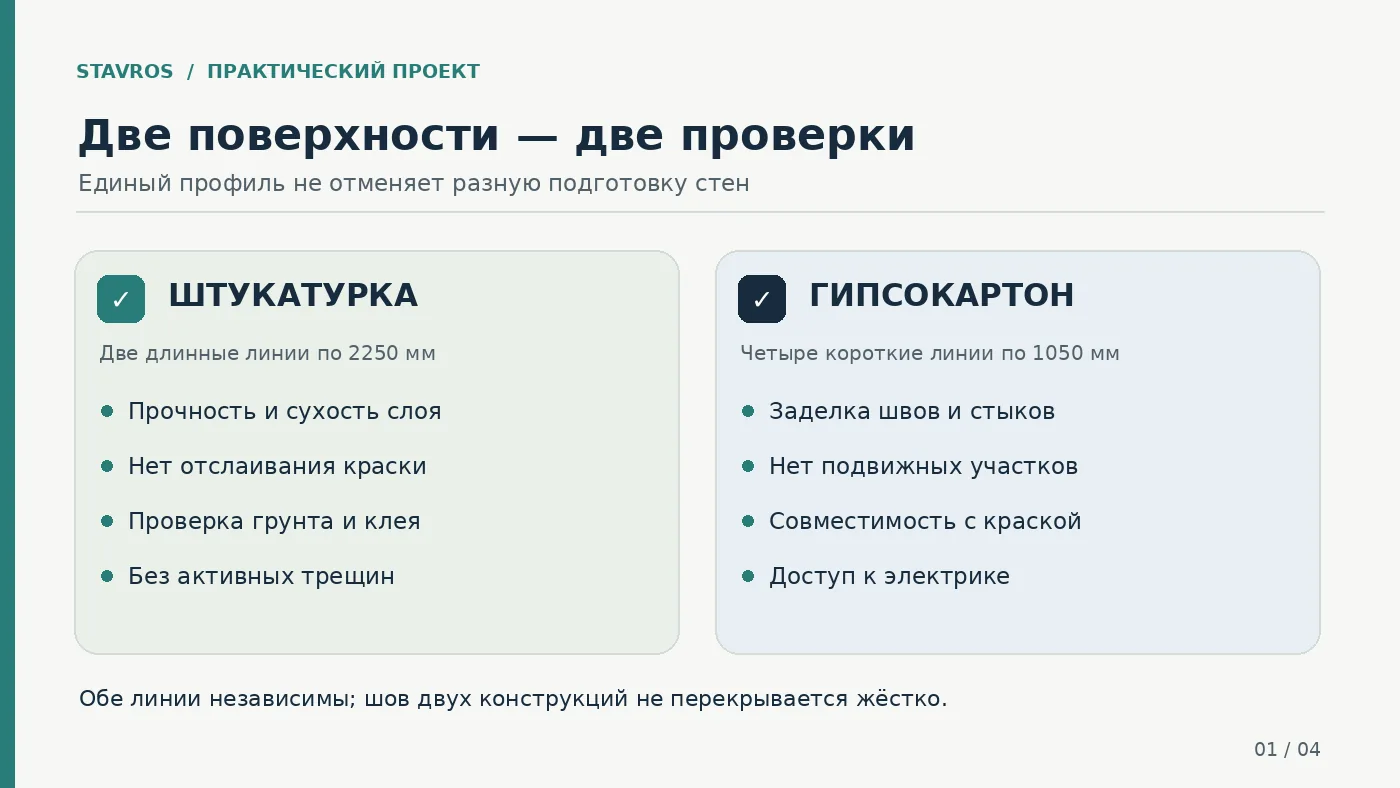
Let's imagine a living room with a calm finish and an adjacent work area. Two long lines of 2250 mm each run along a prepared plastered wall and serve as a common horizontal accent. Four short lines of 1050 mm each are located on the drywall partition, in places where there are no switches, service hatches, or planned shelf mounting points. Their exact heights and intervals are set according to actual measurements, not a universal template.
| Zone | Base | Ready-made parts | Total length |
|---|---|---|---|
| Living room | Prepared plaster | 2 × 2250 mm | 4500 мм |
| Work area | Prepared drywall partition | 4 × 1050 mm | 4200 мм |
| TOTAL | Two different bases | 6 parts | 8700 мм |
There are no closed rectangular panels, 45-degree joints, or transitions around a corner here. Therefore, the dimensions of each part refer to its straight finished length. If the designer later adds a frame, a turn, or a continuous line between surfaces, the cutting map will immediately cease to be valid. It is important not to transfer the calculation from this table to another interior simply because the total length is similar.
The particular value of the bill of materials is that it ties quantity to the base. The plaster wall specialist will receive two long parts and a separate tolerance for the condition of the coating; the drywall specialist will receive four short ones, a joint inspection, and restrictions on access to electrical wiring. This helps to understand which part of the work is delayed if one surface is not yet ready, without mixing profile procurement with installation decisions.
Cutting four strips: why the linear footage is not yet a finished order
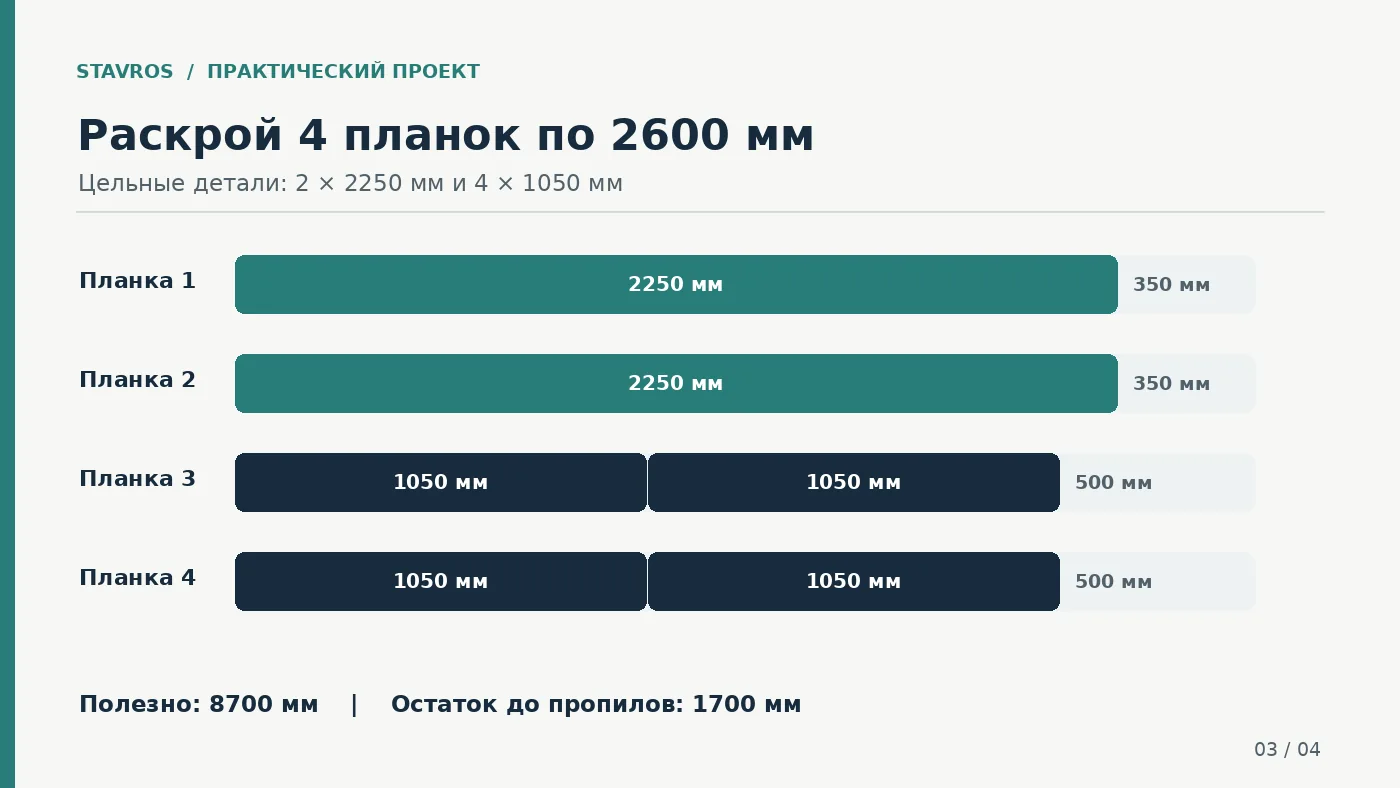
The entire geometry occupies 8700 mm. Mathematically dividing 8700 by 2600 gives slightly more than three strips, and rounding up gives four. In this case, the result matches the working order, but this coincidence alone proves nothing. It is necessary to lay out each finished part on the actual blank and check whether there is room left for the saw kerf, end processing, and technological allowances.
Two long segments of 2250 mm each cannot be placed on a single strip. They occupy two separate blanks and leave a nominal 350 mm each. Four short segments of 1050 mm each are conveniently cut in pairs: 1050 + 1050 = 2100 mm, with a remainder of 500 mm from each such strip. The combination is not suitable for three short parts because 3150 mm is greater than the factory length of 2600 mm. No intermediate joints are required in the project.
| Plank 2600 mm | Cutout | Nominal remainder before cuts |
|---|---|---|
| № 1 | 2250 мм | 350 мм |
| № 2 | 2250 мм | 350 мм |
| № 3 | 1050 + 1050 mm | 500 мм |
| № 4 | 1050 + 1050 mm | 500 мм |
| TOTAL | 8700 mm of usable parts | 1700 мм |
Such cutting is possible with a normal technological allowance, but the actual remnants will be smaller than the nominal ones. For example, when separating two short parts, the cutting tool will remove some material, and the cleanliness of the end faces will need to be checked. Without confirmation of the equipment dimensions, the exact number of millimetres of loss cannot be stated in advance. The fifth strip is not mandatory here from a geometry standpoint, but it can be a reasonable reserve if the base is uneven, the project may change, or the buyer does not want to depend on a repeat delivery.
Four or five strips: how to choose a reserve without automatic overpayment
In the absence of complex joints, the working minimum is four strips. An additional fifth one will increase the reserve not because it is technically impossible to get six parts from four, but because it protects against a possible cutting error and changes after the final measurement. For short independent lines, such a reserve is especially clear: an additional blank allows one damaged part to be replaced without changing the pattern and the article number.
The decision on the reserve is best made after signing the measurement sheet. If the apartment is already finished, the walls have been checked, the furniture is in place according to plan, and the installer is confident in the equipment and the lengths, four strips may be sufficient. If renovation is still ongoing, the work area will be reconfigured, and the dimensions of one or two lines remain preliminary, an additional strip provides flexibility. The main thing is to choose it in the same material and cross-section, rather than later buying a visually similar item from a photo.
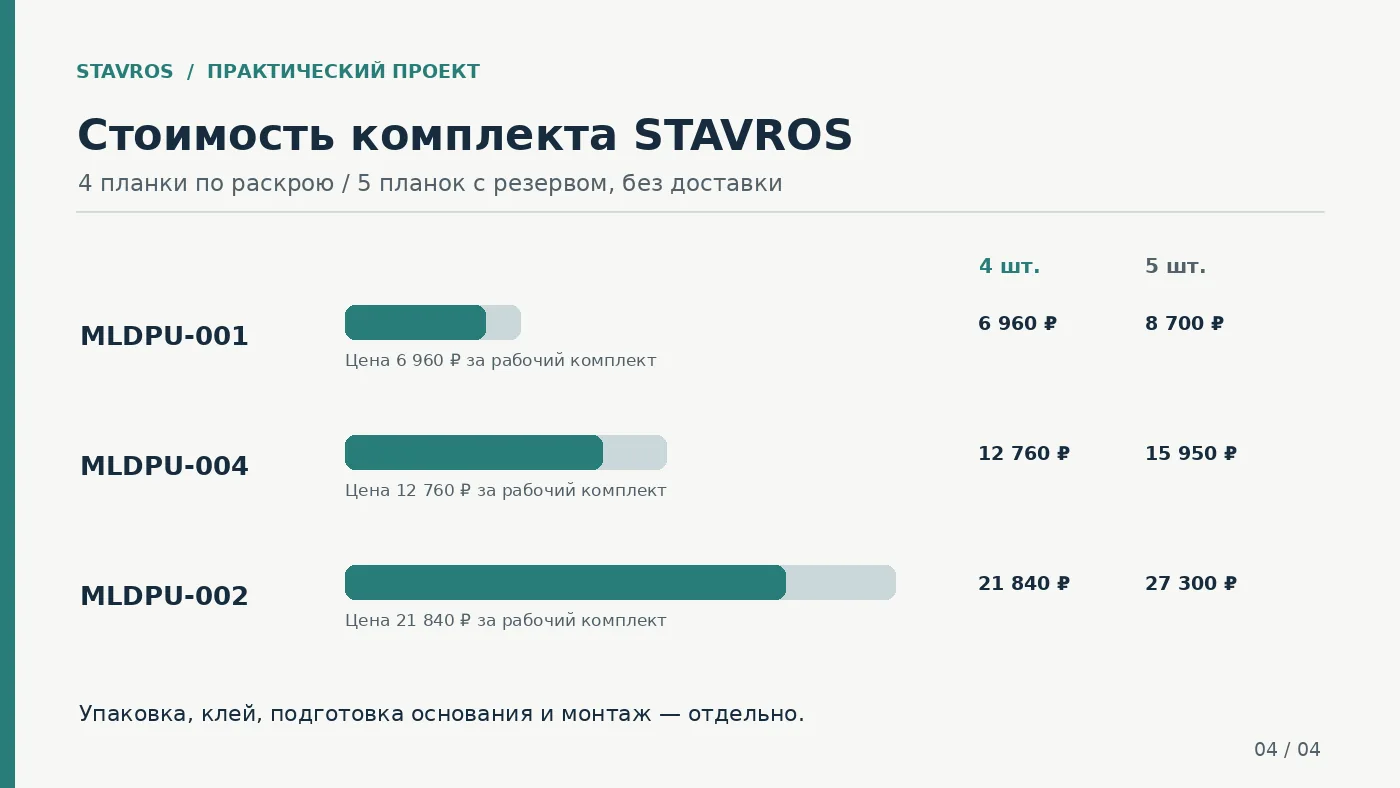
Comparing the price per reserve shows the real cost of peace of mind. For MLDPU-001, adding a fifth strip increases the cost of the items from 6960 to 8700 ₽; for MLDPU-004 — from 12 760 to 15 950 ₽; for MLDPU-002 — from 21 840 to 27 300 ₽. This is not a universal recommendation to overpay: an expensive relief profile especially needs an honest assessment of the risk of error. The cost of a repeat shipment is sometimes significant, but without a destination-specific tariff, an invented “saving on delivery” cannot be substituted into the calculation.
Three budgets: we pay for the cross-section, not for extra metres
The estimate begins with the number of whole items. All three profiles are produced in strips of 2600 mm and are not sold strictly in the required 8700 mm. Therefore, comparing the “price per metre of useful length” can be misleading: the buyer pays for four or five physical units, and the remnants remain part of the order. They can be kept for a small repair or subsequent decorative accents, but they cannot be considered both used and free at the same time.
| Set of one article number | 4 strips — basic | 5 strips — with a reserve | Difference |
|---|---|---|---|
| MLDPU-001, 10 × 6 mm | 6 960 ₽ | 8 700 ₽ | 1 740 ₽ |
| MLDPU-004, 15 × 8 mm | 12 760 ₽ | 15 950 ₽ | 3 190 ₽ |
| MLDPU-002, 22 × 11 mm | 21 840 ₽ | 27 300 ₽ | 5 460 ₽ |
Do not mix this table with the general renovation estimate. Glue, sealing materials, preparation of the plastered wall, repair of drywall joints, painting, consumables and the craftsman's labor are priced as separate line items. The transport backing, if added to the invoice, is also not included in the price of the four strips. When choosing an expensive profile, it is worth requesting a sample and evaluating it in the interior before purchasing the full set.
Commercial choice: narrow, medium or textured profile
For a light wall behind a sofa, a thin line is often sufficient, especially if there is a large painting or soft fabric texture nearby. On a dark partition in an office, a thin profile may, on the contrary, almost disappear when painted to match. This does not mean you need to buy two different SKUs. If the project requires unity, it is better to assess the lighting conditions and, if necessary, change the color or placement while keeping a single profile.
MLDPU-001 works well as a graphic accent without a large protrusion. MLDPU-004 is more noticeable and can be the optimal middle ground for two zones. MLDPU-002 has a more pronounced texture; it is worth choosing if there is enough free surface nearby and the shadow is truly needed as a decorative effect. It is important not to transfer the "more expensive is better" judgment onto the quality of the project. An expensive profile next to a narrow desk sometimes looks worse than a thin one, because it starts to compete with the furniture and the task lighting.
When a specific order is needed, the phrase buy moldings in Vladivostok should lead to the interior category, after which the buyer checks three fields: material "polyurethane", SKU code and cross-section. For our project, it is not recommended to mix MLDPU-001 with MLD-001-MG made of MDF just because the numbers are similar. The materials, finishes and installation conditions are not equivalent. If the right color is not available, compatible painting is planned, rather than replacing part of the product with a different material without revising the project.
Painting two bases: the same color does not eliminate the need for preparation
A single matte surface can visually unite a plastered wall and a partition. But the path to it differs. On a mineral substrate, preparation of the absorbent or previously painted layer matters; on gypsum board, it is the uniformity of the skim coat, the quality of the joints, and the compatibility of the primer with the finish paint. Even a single color from a single bucket can look different on surfaces with different textures and lighting.
After installation and full curing of the adhesive according to its instructions, assess the quality of the joints and ends. Choose filling materials that are compatible with both the polyurethane and the future finishing system. Excessive sealing is not a way to hide a moving joint; it is used only where it is provided for by the design and finish. Before painting, it is useful to make a test on a small piece of the profile to see how the chosen composition reveals the texture and relief.
The painting regime should also not be turned into a fixed universal formula of "one primer and two coats." It depends on the condition of the factory surface of the profile, the requirements of the paint manufacturer, and the substrate. On a finished site, color and gloss are checked under the actual light of the living room and the workspace. An exact match of shades does not replace straight lines, but it helps two independent compositions be perceived as a single interior.
Decorative overlays: an addition after choosing the main line
Once the main moldings have been chosen, there is a temptation to add ornament to every free gap. For a room with two types of walls, this is especially risky: on gypsum board, a light decorative overlay may end up in the center of a future furniture fixing point, and on plaster it may emphasize the visual asymmetry of a window or doorway. Start with six straight lines and see whether architecturally justified free spaces remain after marking them out.
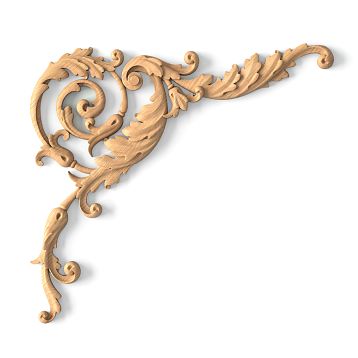
Catalog section Decorative Inserts is useful as a source of individual accents, but the dimensions, ornament, and fixing of a specific element must be checked separately. The mere fact that an overlay and a molding are both made of polyurethane does not confirm that they match in cross-section. This is especially important if the overlay is intended to be placed at the end of the profile or to create the appearance of a single relief node.
Additional overlays are not purchased for the training estimate. This is an honest calculation boundary: the four strips are calculated for six straight parts only, and the price of any overlay will increase the budget. If the project changes and a decorative element appears above the desk, add it as a separate line with the article number, size, purpose, substrate check, and fixing method. Do not treat overlays as a free "decoration included."
Ceiling molding: when the pattern does not need to continue
Wall lines do not oblige you to decorate the ceiling. In a room with a low ceiling and a complex layout, an additional cornice sometimes creates too many parallel contours. In another situation, a moderate ceiling profile can visually pull the room together, especially if a common color palette is maintained on both walls. The decision depends on height, junction points, light placement, built-in wardrobes, and the actual geometry of the ceiling.
In the manufacturer's assortment Ceiling molding forms a separate group. But it should not be automatically included in the calculation made for the wall-mounted MLDPU-001, MLDPU-004 or MLDPU-002. A ceiling cornice often has a special mounting cross-section and is calculated along the perimeter or a specific section, and its junction with the ceiling and wall must be checked against the drawing and the materials of both surfaces.
For our apartment, the most restrained option is to leave the ceiling without additional decor. This allows attention to be focused on the two prepared wall substrates and avoids mixing ceiling junction issues with the gluing of wall lines. If the customer later chooses a cornice, a new length schedule, separate corner elements or mitre cuts, and a separate estimate will be required. Using leftover wall mouldings as a "ready-made ceiling cornice" without checking the purpose and junction is not advisable.
Order specification: which lines must not be left empty
The STAVROS order is best presented as a short technical document rather than a screenshot of the shopping cart. It records the selected item code, material, cross-section, factory strip length, number of pieces, purpose on site and the recipient's contact details. The delivery address, the expected completion date of the renovation and the question of transport protection are specified separately. Such a document is easier to verify upon receipt and to hand over to the craftsman who will carry out the cutting.
The entry "polyurethane moulding, 8.7 m" is insufficient for a full purchase. It does not reveal which profile is required, how many factory units are being paid for, and whether there is a reserve. A correct line for the base project looks like this: "MLDPU-004, polyurethane, 15 × 8 × 2600 mm, 4 strips; ready-made parts — 2 × 2250 mm and 4 × 1050 mm; four strips from one selected model". If a different profile is chosen, the item code and its cross-section change, but not automatically the number of lines.
In the appendix to the specification, it is useful to separate the work by substrate: plaster — two long parts, gypsum board — four short ones. The lines "adhesive", "primer", "finish repair", "sealant", "painting" are for now left without quantities until the location and the instructions of the compound manufacturers have been checked. It is impossible to calculate the adhesive requirement from the external perimeter of the product alone without knowing the application method and the substrate. However, it is possible to check in advance who is responsible for the compatibility of materials and for keeping the documents for the mounting systems.
Acceptance of the substrate as a separate stage of renovation
Usually, inspection begins on the day the strips have already been delivered and the craftsman has laid them out on the floor. This is too late if the plaster has not yet dried or a poor-quality joint has been found on the partition. It is better to arrange two separate acceptances before ordering: the first records the readiness of the plastered wall, the second — the quality of the gypsum board surface. The result can be a simple sheet with a date, photographs and notes on areas requiring correction.
For plaster, record the absence of loose areas, dust, peeling and active cracks; check the compatibility of the preparatory primer and the finish. For the partition, inspect the joint sealing areas, the fastening of the sheets, local movement, transitions to adjacent structures and the distribution of loads from furniture. These checks do not in themselves confirm compliance with building codes — they help to separate out visible problems before decorative installation.
If a discrepancy is found, the project schedule should show the actual delay for that specific wall, not a note saying "everything is done except the small stuff." The buyer can agree on the range and price of the trims in advance, but installation should not be promised until the substrate has been restored. After corrections, the measurement is repeated: a layer of repair filler and new paint can slightly change the actual readings, especially near a door reveal or a desk.
Delivery of stucco moulding to Vladivostok: a verification logic instead of a promised rate
STAVROS offers order placement via the website, by phone and through other methods specified by the manufacturer; the delivery page lists transport company options and courier delivery. But for an actual address in Vladivostok, you need to separately confirm the possibility of shipping the 2600 mm long profiles specifically, the external dimensions of the transport packaging, the permitted pickup location and the final cost calculation. Published general information about Contact us to confirm shipping to your destination. does not replace an address-specific quote.
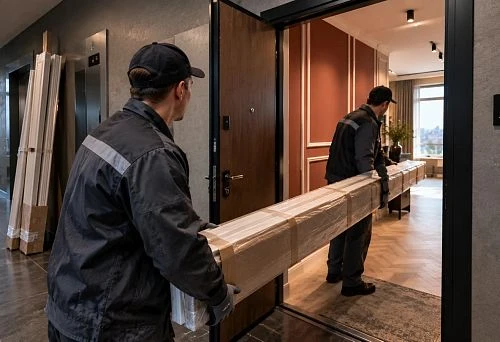
It is especially important to consider end protection. A trim that is small in thickness is still 2.6 m long, which means the shipment may require a rigid backing. The product pages for the selected range mention a pine transport backing costing 390 ₽ for small orders, but the thresholds may differ between SKUs. Therefore, it is better to ask for confirmation of the charge and the final amount in the cart than to automatically add exactly 390 ₽ to each individual trim.
Conditions payment and delivery should be read before transferring funds. Clarify the packaging dimensions, order preparation times, whether a separate rigid frame is needed, the address of the pickup point or courier collection, and the procedure in case the packaging is damaged. Do not promise that a specific order will arrive within a certain number of days: the timing depends on actual stock, production and the carrier's route.
Primorsky Krai: one product, different collection conditions
For a resident of Vladivostok and a buyer from Artyom, Ussuriysk or Nakhodka, the profile characteristics will be the same, but the route and collection conditions may differ. Therefore, you cannot name a single delivery rate for the whole region in advance or assume that STAVROS has a local warehouse. When choosing pickup from a transport company, you need to check whether a long cargo item can be issued and how it can be transported to the apartment.
The practical scenario looks like this: the buyer first approves the geometry of the six pieces, then selects one SKU and four or five factory trims, and after that gives the manager the exact address or locality. The seller clarifies the available transport methods and the external dimensions of the packaging. Only after receiving the quote does the full order cost become available. If a different pickup point or additional packaging is required, that is a new line in the estimate, not a change to the price of the moulding itself.
Transport should not dictate incorrect cutting. Sometimes the buyer is offered to cut the long trim in advance to make the packaging more compact. For our project, two pieces of 2250 mm must remain whole; cutting them into short parts would deprive the composition of its original advantage. If the delivery format raises questions, first ask the seller whether the whole 2600 mm items can be shipped and how they will be protected, rather than agreeing to arbitrary division of the material.
What to check when receiving a long-length order
It is best to begin acceptance before the packaging is finally removed. Check the number of cargo places, the integrity of the protective backing, and the absence of noticeable mechanical damage. After careful opening, compare the number of strips, the article number, the length, and the profile pattern with the documents. Small cracks at the ends, deformation, and chips are especially unpleasant for parts that must remain whole and exposed to view.
Do not evaluate the set only by its external white color. MLDPU-001, MLDPU-004, and MLDPU-002 differ in cross-section: two products may appear similar in photographs but produce different shadows after installation. If in doubt, lay the profiles parallel, check the dimensions against the drawing, and record the problem before cutting. A mixed set cannot be turned into a full decorative system merely because the lengths of all strips match.
If damage is found, follow the recording procedure specified in the carrier's and seller's documents: keep the packaging, photographs, transport documents, and information about the condition of the goods. You should not automatically begin installation and then try to prove a transport defect using an already cut part. After acceptance, store long profiles under conditions that comply with the manufacturer's recommendations, without overloading them or subjecting them to accidental impacts in the repair area.
Test area: one small job instead of two big mistakes
Before installing all six parts, it is useful to perform a separate test. Its purpose is not to create a decorative masterpiece in half an hour, but to check the trio of “polyurethane profile — adhesive — specific finishing base.” For a plastered surface and gypsum board, the procedure may differ; the exact method of test bonding, holding time, and evaluation criteria must comply with the instructions for the installation compound. If the manufacturer does not permit work on this coating, an experiment cannot override the prohibition.
On plaster, check adhesion to the prepared surface and the absence of a visible reaction of the coating. On gypsum board, check adhesion to the finishing layer and the absence of local detachment of putty or paint. After drying according to the instructions, evaluate the appearance of the seam, adhesive traces, and the quality of painting. Since the check may potentially damage the finish, it is done on an agreed, inconspicuous area or on a separate sample that reproduces the real structure.
The test also solves an aesthetic problem. On one wall, the chosen profile may look narrow due to strong daylight; on another, it may look heavy due to a directional light fixture. If the client is unsure among three article numbers, it is better to resolve this question first with samples. It is much cheaper to reject the wrong cross-section before buying four strips than to replace the entire set after installation and painting.
Installation in stages: first the bases, then a single line
The first stage is to accept the condition of the walls and approve the measurement sheet. The second is to check on each surface the compatibility of the chosen bonding system and prepare a test area. The third is to mark all six lines with a laser level and coordinate them with the furniture, sockets, and lighting. The fourth is to cut the four strips according to a separate map, preserving a possible technological allowance at the ends.
After that, installation can be carried out in two passes. On a plastered wall — two long parts of 2250 mm each; on gypsum board — four short ones of 1050 mm each. The method of applying adhesive, temporary fixation, temperature, humidity, and curing time depend on the chosen compound. They should not be described as identical for all brands. When working with a newly painted surface, it is especially important not to damage it with masking tape or auxiliary fixings.
The final stage is inspection, acceptable treatment of the ends, painting and recording the actual dimensions in the as-built schedule. Any appearance of cracks, movement of a partition section or peeling of the finishing layer requires identifying the cause rather than masking it with a thick bead of sealant. This approach is useful for self-monitoring even with professional installation: the customer understands at which stage the problem arose and which material is involved in fixing it.
Mistakes that are especially costly with two substrates
The first mistake is choosing from a photograph and not noticing that one wall is plaster and the other is drywall. The second is using a single universal preparation method without reading the instructions. The third is gluing the profile over weak paint and assuming that an extra layer of adhesive will solve the problem. The fourth is closing the decorative line across a moving joint, even though the project called for independent finishing.
The fifth mistake relates to the commercial side: the buyer calculates 8700 mm, divides by 2600, gets four and does not draw a cutting plan. Here four do indeed fit, but in another geometry the same linear meterage may require more strips if the parts must remain whole. The sixth is substituting a polyurethane item with a similar MDF moulding. The seventh is treating the cost of one profile as the full order total, without accounting for transport protection, adhesive and wall preparation.
Finally, the eighth mistake is transferring outdoor decor recommendations into the interior simply because it is the same city and the same material. STAVROS has published a separate article about façade stucco in Vladivostok and wooden decor. It addresses a different task: selecting façade finishes. Its technical arguments about outdoor structures do not replace checking the plaster, drywall, finish paint and adhesive inside the apartment.
Frequently asked questions about purchase and installation
Can I order a single moulding for both plaster and drywall?
Yes, the very idea of the project assumes a single cross-section of the decorative profile on two different walls. However, suitability for adhesive mounting is checked separately for each substrate and its finish coating. Matching profile material does not make the primer, paint condition, or seam preparation the same.
How many whole strips are needed for six pieces?
For two straight segments of 2250 mm and four of 1050 mm, four strips of 2600 mm length are required. The long pieces take up two strips, and the four short ones are placed in pairs on the other two. The fifth is an additional reserve, which makes sense to assess after measuring.
What to choose for a calm interior: MLDPU-001 or MLDPU-004?
The 10 × 6 mm cross-section of MLDPU-001 gives a thinner line. The MLDPU-004 option at 15 × 8 mm is more prominent and may read better at a distance. Make the final decision on samples under real lighting: the same color and profile are perceived differently on adjacent walls.
Is MLDPU-002 suitable for any drywall partition?
There are no grounds to promise universal compatibility. The profile has a 22 × 11 mm cross-section, but for mounting the condition of the finish coating, the stability of the partition, and the requirements of the chosen adhesive are more important. The substrate, fastening points, and locations of the intended decor must be checked separately.
Can the profile be glued directly over wallpaper?
The assessment depends on the type of wallpaper, its adhesion to the substrate, and the instructions of the mounting system. Any wallpaper should not be considered a guaranteed suitable substrate. If the coating is not strong enough, the profile may come off along with it. The decision is made after checking the specific finish.
Where can I see prices and delivery terms to Vladivostok?
Product prices are shown in the STAVROS product cards. The terms of transportation for long-length profiles, packaging, the final tariff and delivery to the address are agreed separately. Do not confuse the published price of the strip with the full price of the delivered and installed set.
The search query says "buy stucco molding Vladivostok": which section is needed?
It is useful to convert such a wording into a precise product query: "interior polyurethane moldings". A commercial anchor Buy moldings leads to the catalog of polyurethane products; there you select the moldings category and check the material, item code and dimensions. Automotive moldings are not included in this specification.
What should be done if a short line falls on a sheet seam?
Before installation, it is necessary to check that the seam is correctly constructed and sealed, that there is no movement, and the requirements of the structural system. The decorative profile must not conceal a defect. Sometimes it is reasonable to move the line to a free, solid area; changing the dimensions will require updating the schedule and, if necessary, the cutting plan.
Can the remaining offcuts be used?
After four strips, the nominal remainders are 350, 350, 500 and 500 mm before cuts. They can be used for future local tasks if the actual dimensions and the quality of the ends allow it. But they do not replace the calculation of a new product with its own joints and must not be listed simultaneously in two different projects.
Three documents that make the finishing reproducible
After selecting the profile, the order should retain three independent documents. The first is a measurement sheet with the dimensions of all six elements, indicating the substrate and the installation location. The second is a product specification recording the item code, cross-section, length of factory strips, quantity and reserve. The third is a preparation and installation map recording which coatings were actually used on the plaster and drywall, which adhesive is approved for use, and which tests were performed before installation.
Эти документы не должны противоречить друг другу. Например, если в спецификации стоит MLDPU-004 15 × 8 мм, а мастер привёз более широкий профиль 22 × 11 мм, нельзя молча принять его «почти таким же». Если после уточнения электрики короткую линию пришлось переместить, новая отметка должна появиться на чертеже, а при изменении длины — в карте раскроя. Система полезна не только при работе с подрядчиком: она помогает покупателю вспомнить через год, какой точно профиль установлен, где остались обрезки и какой материал применялся для их крепления.
Особенно внимательно сохраняйте сведения о финишных покрытиях. Окрашенная поверхность перегородки может выглядеть идентично оштукатуренной стене, но при будущей замене молдинга потребовать другого способа подготовки. Фотографии скрытых узлов и расположения инженерных трасс храните отдельно от интерьерных снимков: это рабочая документация, а не декоративное портфолио. Такой архив уменьшает риск случайно повредить основание при последующих работах.
Когда лучше отказаться от части декоративного проекта
У хорошей спецификации есть возможность уменьшиться. Если проверка показывает, что одна из коротких линий попадает на нестабильный шов ГКЛ или конфликтует с выключателем, правильное решение — перенести её, сократить или вовсе исключить, а не заставить отделку подчиниться исходной картинке. Точно так же сильная волна на длинной штукатурной стене может сделать световую тень неровной; иногда разумнее сначала исправить основание или выбрать менее заметное сечение, чем маскировать дефект более толстым молдингом.
Отказ от одной линии меняет не только композицию, но и закупку. Нельзя просто удалить деталь из обмерного листа, оставив прежнюю смету как «гарантированно правильную». Проверьте раскрой заново. В некоторых проектах исключение короткого участка не уменьшит количество целых планок, потому что длинные детали всё равно занимают отдельные заготовки. В других случаях новая схема позволит сэкономить планку. Экономия определяется размерами, а не количеством линий в описании.
Наконец, не стоит компенсировать недостаток художественной идеи количеством накладок, потолочных розеток и карнизов. Один аккуратный профиль на прочной подготовленной стене — законченный результат. Если после полного обмера выяснилось, что рабочая перегородка перегружена мебелью и электроточками, оставьте на ней меньше декора. Общий язык интерьера можно поддержать оттенком окраски, текстилем и освещением, не превращая молдинг в препятствие для нормального использования комнаты.
Итоговый контрольный лист для заказчика
Для покупателя во Владивостоке важнее не абстрактное обещание красивой отделки, а ясная схема комплектации: один выбранный профиль для двух разных внутренних оснований. Оба основания должны быть проверены, профиль выбран по сечению, шесть длин внесены в ведомость, четыре заводские планки рассчитаны по карте раскроя, а резерв и монтажные материалы — выделены отдельно.
Перед оплатой проверьте согласованную геометрию, артикул, число целых планок и состояние каждой стены. Перед монтажом — инструкции к клею, качество покрытия, отсутствие конфликтов со швами и электрикой. При получении — транспортную упаковку, количество, торцы и соответствие профиля заказу. Так покупка превращается из вдохновляющей картинки в контролируемый проект, в котором два разных основания действительно дают один продуманный интерьер.
Начать подбор можно в каталоге STAVROS. Для учебной схемы пригоден любой из трёх рассмотренных профилей как отдельная альтернатива; оптимальное сечение определяется реальным светом, мебелью и качеством основания, а не общими обещаниями о свойствах материала. Перед оформлением заказа сверьте артикул, сечение, количество и цену в корзине, а после доставки сохраните накладную и карту раскроя. Это пригодится, если понадобится заменить один повреждённый отрезок или продолжить декор в другой комнате: можно будет подобрать действительно тот же профиль, не ориентируясь на приблизительно похожую фотографию.