Article Contents:
- Why paintings and stucco molding should be designed together
- Where to buy stucco molding in Penza for a home gallery
- What to measure before ordering: not just the wall width
- Which polyurethane stucco molding to choose for an exhibition wall
- Polyurethane or gypsum: a comparison for a wall with paintings
- Three home gallery scenarios: how to choose without excess decor
- First option: vertical lines if the paintings are frequently rearranged
- Second option: horizontal accents for works of different heights
- Third option: a combined composition with a separate center
- How to choose a cross-section: three real STAVROS molding models
- Light for paintings: how molding changes shadow and contrast
- Where decorative elements must not be placed: fasteners, sockets, and painting rotation zones
- Decorative overlays: how to add an accent without overloading the collection
- Do you need ceiling molding next to a home gallery?
- Practical project: seven lines on a 4.8-meter-wide wall
- Cutting map: why 9.3 meters require four planks
- How much does it cost to buy molding in Penza: three confirmed sets
- Mixed profiles and partial purchasing: where the mistake hides
- How to Prepare a STAVROS Request: A Specification Instead of a Verbal Description
- Delivery of Stucco Molding to Penza: Long Packaging and Preserving the Relief
- Delivery Across Penza Region: Why the Address Must Be Confirmed Separately
- Installing Moldings Next to Paintings: A Safe Sequence
- Seven Mistakes When Decorating a Wall with a Home Collection
- Frequently Asked Questions About Stucco Molding for a Gallery Wall in Penza
- Can Paintings Be Changed After Decorative Moldings Are Installed?
- Where Is It More Convenient to Buy Moldings for Such a Composition?
- How Many Strips Are Needed for Seven Lines with a Total Length of 9.3 Meters?
- Is the Same Profile Required Across the Entire Wall?
- Do I need to buy decorative overlays together with the moldings?
- Can moldings be installed over a painted wall?
- Which profile is best for small graphic works?
- How much does delivery of stucco to Penza and the region cost?
- Can molding be used as a rail for hanging pictures?
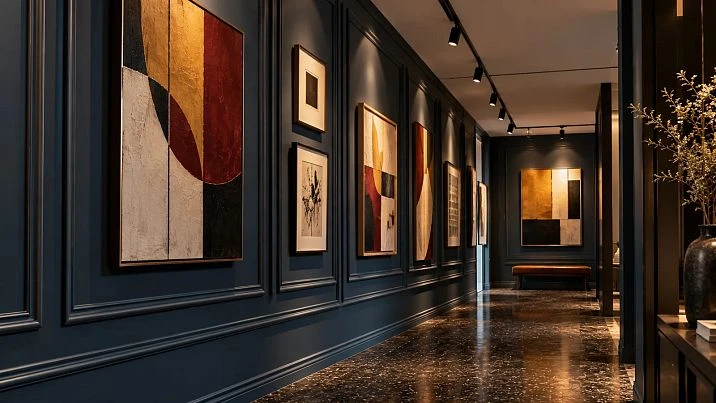
In the living room of a Penza apartment, the owners plan to place family photographs, several graphic sheets, two paintings, and an image that the owners change periodically. The 4.8-meter-wide wall has already been painted, but so far it looks like an ordinary flat surface with scattered frames. There is a temptation to outline each picture with a decorative frame, but after the very first rearrangement such an interior will lose its logic. A more reliable solution is to first organize the architecture of the wall, and only then place a movable display within it. In this task Moldings it serves as a background and a system of visual reference points, rather than a rival to the works of art.
For homeowners, three things matter: a tidy rhythm, the ability to change pictures without redoing the finish, and clear purchase costs. That is why we consider not abstract options of a "beautiful classic interior" but a sequence of concrete decisions: measure the wall, mark permanent obstacles, choose the character of the lines, draw up a cutting plan for the strips, and only then place the order. For a collection of varying formats, this is more practical than buying moulded decor based on a single photo you like. Below is a training project: the room dimensions are conditional, and the specifications and prices of the selected STAVROS products have been verified against the product cards as of October 30, 2026.
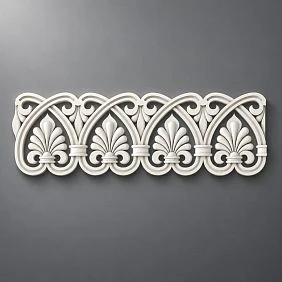
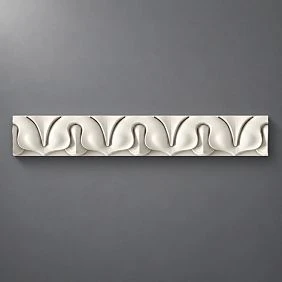
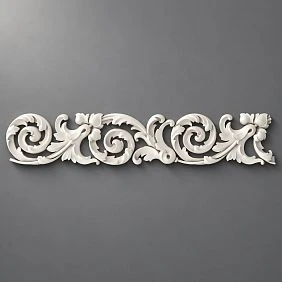
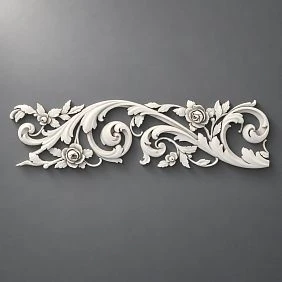
Why paintings and mouldings should be designed together
Paintings and architectural decor have different functions. An artwork forms the semantic center; a wall profile organizes the space around it. If both systems are equally active, it is difficult for the viewer to determine what is primary. This is especially noticeable next to small graphic sheets in thin frames: a voluminous moulding can turn out to be more expressive than the image itself. Therefore, the initial question is not "which moulding to buy" but "how often will the collection change and which items should stay in place".
Divide the paintings into permanent and changeable ones. A large painting can be permanent, for which lighting and placement are chosen in advance. Changeable ones are photographs, children's drawings, seasonal graphics, or small gifted works. For the former, a more precise architectural accent is acceptable; for the latter, a neutral area is better, where fastenings can be moved without conflicting with decorative lines. This is a fundamental distinction: decor is fixed for years, while the display may change several times a season.
Before marking out, it is useful to lay the images out on the floor or make full-size paper templates. On each sheet, write the frame width, height, intended hanging point, and distance to the neighboring work. This makes visible not only the sizes of the paintings but also the gaps between them. The absence of a decorative profile on part of the wall is a normal design tool, not an unfinished job. Sometimes one calm vertical works better than a full four-sided outline.




Where to buy mouldings in Penza for a home gallery
For a buyer who cares about Buy molding for a specific composition, a simple list of beautiful products is not enough. You need cards with the material, actual strip length, cross-section, price per unit, and product address. In the STAVROS online catalog, you can compare several polyurethane profiles, prepare quantities based on the cutting plan, and then agree on shipping terms to Penza. The availability of the selected item and the final order price should be confirmed before payment.
Request buy mouldings in Penza does not mean that the manufacturer necessarily has a local store or warehouse. The catalog allows you to select products remotely; the shipping location and method of receipt depend on the confirmed terms of the seller and carrier. In the order, it is worth listing the item numbers and quantities rather than limiting yourself to the phrase "mouldings for one wall". When working with paintings, it is also important to agree on whether the relief will interfere with opening the door of a neighboring cabinet or fall under a light fixture.
The website has a separate article «moldings in Penza» with a general overview of the types, styles and uses of moldings. We will not repeat those topics here. Our subject is the standalone task of a home gallery: compositional freedom, the safety of hanging pictures, the choice of a specific profile and an itemized estimate.
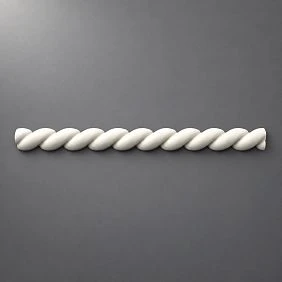
Our factory also produces:
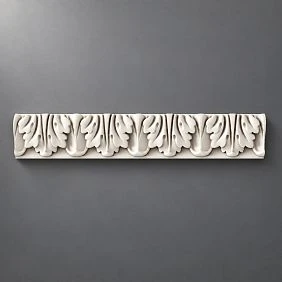
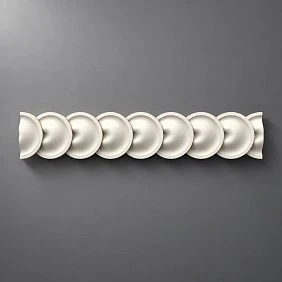
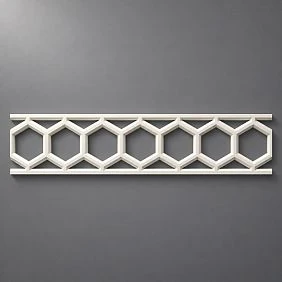
What to measure before ordering: not just the wall width
The training wall is 4800 mm wide. But you cannot rely on this number alone. Measure the overall height, the skirting level, the height of the intended composition, the setbacks from adjacent walls, and the position of switches and sockets. Mark the top edge of the chest of drawers or bench, the depth of the opening door, and the possible route of concealed wiring. Any of these details can change the architectural layout before the first strip is even purchased.
After that, create three layers of the drawing. The first is the fixed architecture of the room: openings, skirting boards, utility points. The second is the approximate dimensions of all the pictures and their hanging locations. The third is the future molding lines. Overlay the layers on top of each other and check whether the fastening zones intersect, whether the profile covers a switch, and whether a light fixture ends up too close to the protruding relief. If the pictures are expected to be changed frequently, an extended clear margin should be left around their working area.
Do not rely solely on a laser level: it helps to draw an axis but does not determine the condition of the wall. Place a long straight batten against it, check for local bulges and hollows, and test the strength of the paint or filler. A weak coating may come away together with the adhesive seam. Before decorative installation, you need to understand exactly which substrate the profile will be glued to and whether the chosen mounting system allows such an application.
A small table is useful for accurate ordering: line number, position on the wall, length of the clean piece, selected article, orientation and a note about the end. Separately indicate whether a continuous segment is required or a joint is acceptable. Even if all the decorative lines look identical, their installation conditions may differ because of a window reveal, furniture or lighting.
Get Consultation
Which polyurethane stucco to choose for an exhibition wall
The choice begins with the purpose of each element. A wall molding sets a straight architectural line. A decorative applique creates a standalone accent that can be placed between works of art, but should not be automatically attached to any profile. A ceiling cornice addresses the separate task of transitioning from wall to ceiling. A rosette usually accents the ceiling area and, in a home gallery, is needed only when it suits the overall composition. These functions cannot be mixed in a single calculation.
The phrase "polyurethane moldings buyin search should, in practice, lead to checking the material of a specific product card. Polyurethane, polystyrene, gypsum and other materials differ in properties and processing methods. All white decorative pieces cannot be considered identical. For our wall with small graphic works, it makes sense to first consider thin and moderate polyurethane profiles, and only then check whether additional relief is necessary.
When making a visual choice, compare not only the catalog image but also the proportion of the actual cross-section to the picture frame. A 10 mm wide profile next to a thin frame creates a quiet contour; a 22 mm wide profile is perceived as a standalone architectural detail. This is not a universal assessment of beauty: a large painting in a heavy frame can withstand a noticeable molding, while a collection of intimate graphic works requires a calm setting. It is important that the profile does not create new false boundaries around each item.
Polyurethane or gypsum: a comparison for a wall with paintings
Gypsum is suitable for expressive traditional stucco, complex relief and interiors where a certain material texture matters. But gypsum elements usually require greater care during transport and installation, and the load and fastening method are determined by the specific structure. In an apartment with paintings already in place, this can complicate the work: installation is harder to organize, and the finish and neighboring works of art must be protected more carefully. The choice cannot be made based on a general claim that one material is always better than another.
We consider polyurethane moldings a practical option for independent straight lines. Their factory dimensions are listed in the product cards, and the required lengths can be planned in advance. But the word "polyurethane" does not give the right to glue the product to any surface. Adhesive compatibility, the nature of the paint finish, the geometry of the base and operating conditions must be checked separately. Particular care should be taken near delicate plaster, fabric coverings and places where heavy paintings have long been mounted.
The economic comparison of materials must also be honest. The cost of a single molding is only the first line of the budget. A gypsum solution may require specific installation operations, while a polyurethane one requires a suitable adhesive, joint treatment, painting and surface preparation. We do not provide actual prices for gypsum products here without specific item codes. It is more useful for the buyer to calculate a confirmed STAVROS set and add separate expense lines than to compare incomparable offers by price per linear meter.
Three home gallery scenarios: how to choose without excess decor
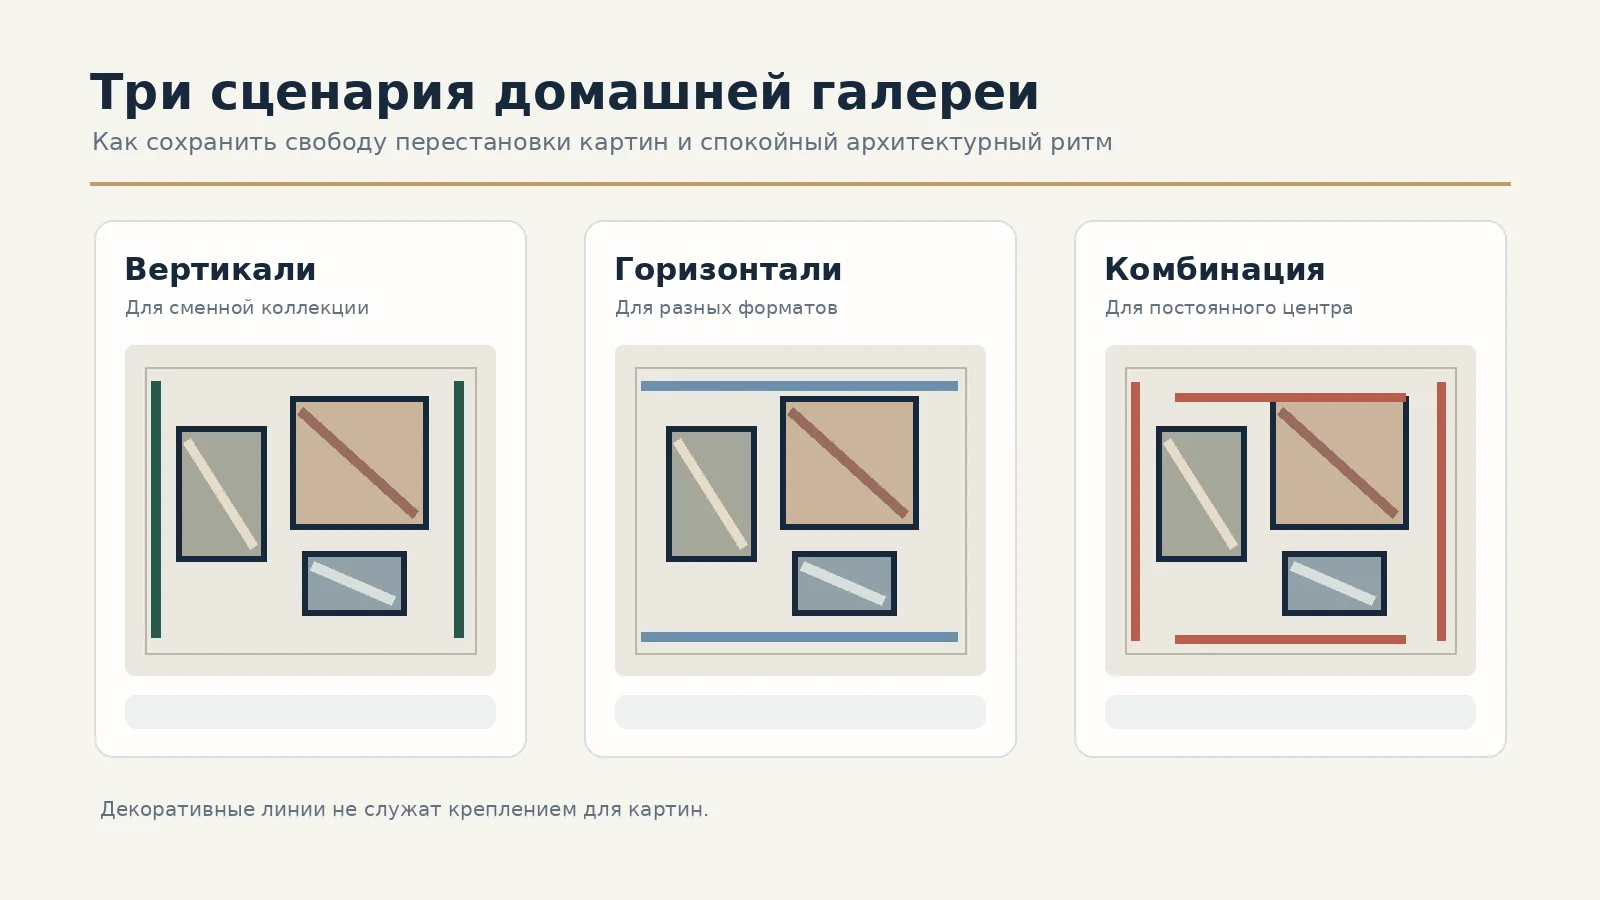
Completely different architectural solutions are possible in the same room. You cannot choose between them based only on a catalog picture: everything depends on how the collection is used. First determine whether the paintings will often be moved, whether there is one permanent main object, and whether additional lighting is planned. Based on these answers, we will compare three scenarios — verticals, horizontal accents and a combined system.
All options share a common principle: the molding lines remain standalone elements and do not serve as support or fastening for frames. If a painting is heavy, its hanging points are checked against the wall structure and the requirements of the selected fasteners. Neither a thin profile nor a decorative applique is a load-bearing system. These issues should be resolved before purchase, not after the finish is complete.
First option: vertical lines if the paintings are frequently rearranged
Two long verticals can divide a wide surface into three visual zones without prescribing the exact position of each frame. This technique is especially convenient for a family collection: today a large work may hang in the center, in a month a group of three photographs, while small graphic sheets remain at the edges. The architecture will continue to work because it is tied to the overall geometry of the wall, not to a single set of images.
In the training project, the two vertical pieces are each 2350 mm long. This is a nominal segment length, not an automatically suitable height for any apartment. It is chosen only after measuring the ceiling, the baseboard, the height of the furniture and the potential location of the light fixtures. There is no need to observe an artificial "museum standard" of spacing between the lines; it is enough to leave a practical band that accommodates various frame formats with reasonable margins. The decor must not cross the plane of an opening door or interfere with the movement of tall furniture.
The strength of this option is the durability of the composition when the display changes. Its weakness is that verticals placed too close together turn the central area into a narrow niche and force you to choose paintings of a certain width. To avoid this mistake, cut paper strips of the intended molding width, tape them temporarily to a safe section of the wall and test several painting arrangements. It is better to evaluate the result not from arm's length but from the entrance to the room and from a normal viewing point.
Second option: horizontal accents for works of different heights
A horizontal line unites the display differently. It can emphasize the common lower boundary of a group of paintings or create a calm pause between two bands of works. It is important not to confuse the decorative line with a hanging rail system: the molding remains a finish and does not bear load. If the owners want to change the height of the paintings, the fastening system and the free zone above the line must be provided for independently.
When a narrow vertical drawing, a wide landscape and a small square sheet sit side by side in a collection, aligning all the top frames often creates a sense of randomness. Aligning to a chosen visual axis — for example, the center of the composition — while keeping the works at different sizes is often clearer. The molding is positioned so that it supports the chosen axis but does not touch the frames. The specific offset is determined by the most protruding frame, the mat and the angle from which the display will be viewed.
Our calculation provides for three segments of 1100 mm each. They should not automatically be turned into a continuous band across the entire wall: that would require different pieces and a different cutting plan. Three separate accents give more freedom and allow you not to force the art into a single outline. If the collection changes completely, such pieces will remain architectural markers rather than empty "frames" on the wall.
The downside of this solution is the risk of getting too many horizontals. The paintings themselves have top and bottom edges, the furniture forms another line, the baseboard a third. Adding a decorative band without checking the whole system is dangerous for the composition. Take a photo of the wall from the doorway, overlay a sketch on it and assess the number of parallel boundaries. If attention starts to shift from the paintings to the finish, reduce the number of accents.
Third option: a combined composition with a separate center
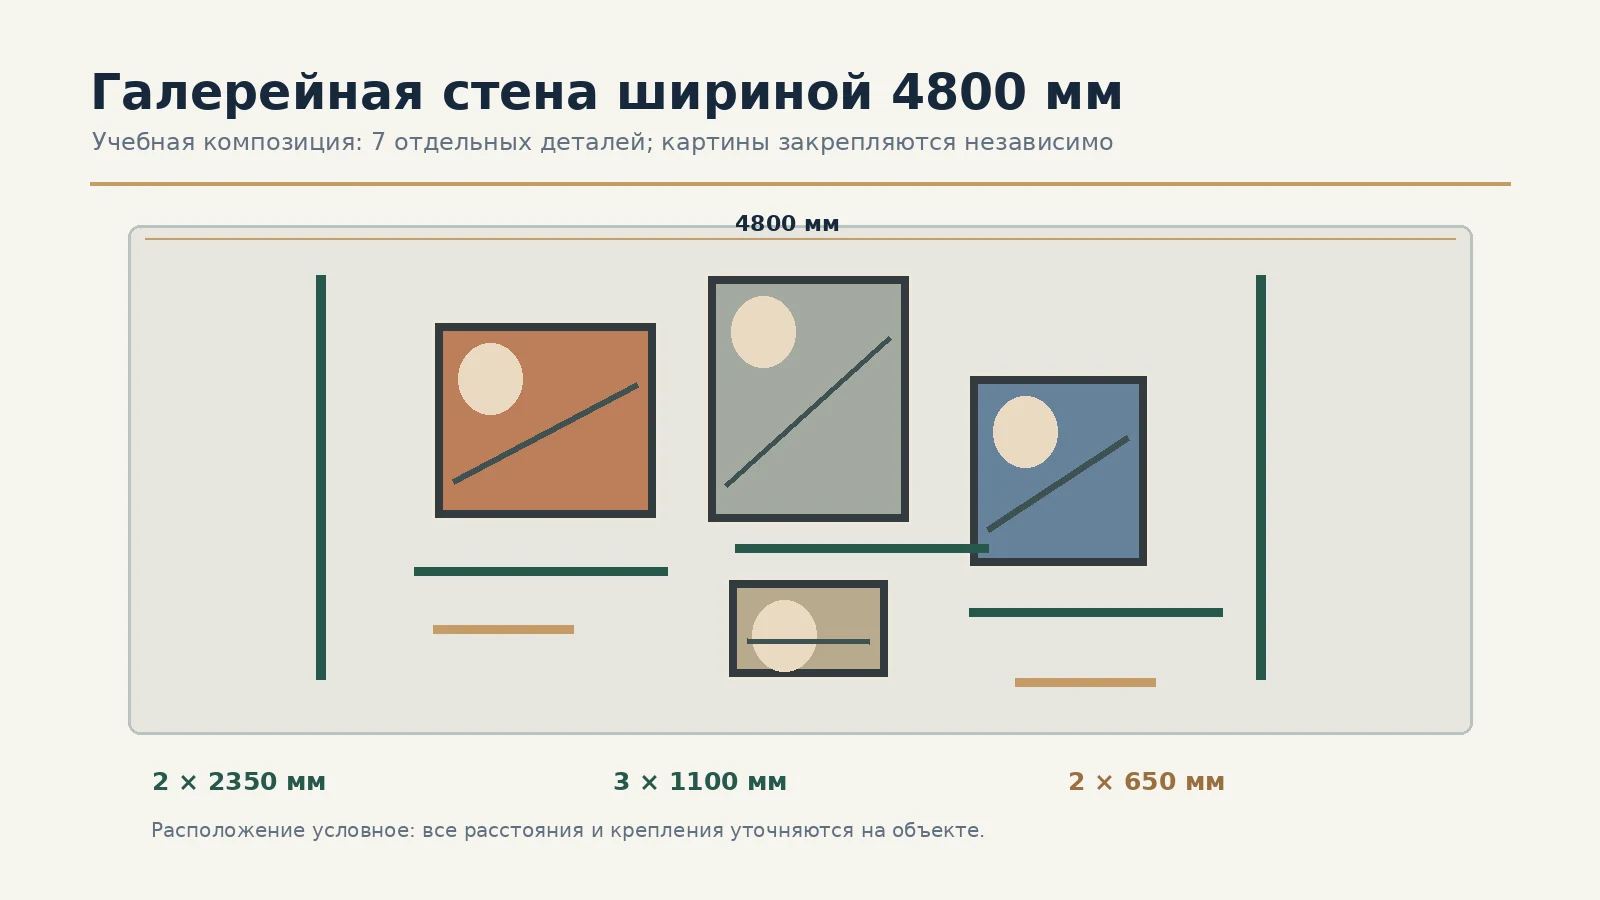
A combined layout is needed when one picture stays in a permanent place and small works are planned to be changed around it. Two verticals define a large central area; three horizontal accents organize additional sections; two short lines of 650 mm each help balance the asymmetry. These are not rectangular frames around each picture, but seven independent elements with free space remaining between them.
You do not have to use all seven lines. Treat them as a maximum starter kit from which some details can be removed after a trial layout. For example, if the central painting itself has an expressive gold frame, the two short lines next to it may be unnecessary. If, on the other hand, the composition consists of monochrome graphics of equal intensity, short accents will add the necessary rhythm. The advantage of the project is that the solution can be tested before fixing it to the wall.
For a combined scheme, it is useful to separate the "fixed" from the "movable" in advance. The position of the long verticals and, possibly, one central work remains fixed. The movable parts are the number of small pictures, the intervals, and their adjacency. During an annual rearrangement, this will save the walls from having to remove and re-glue the moldings. Marks from picture fasteners, if they appear, can be dealt with locally, but they must not fall on the decorative profile.
There is also a price for this convenience: a complex scheme requires more precise coordination. You need to coordinate the relief with the lighting, make sure the short lines do not accidentally end up opposite sockets, and check that the composition does not appear broken when viewed from the hallway. If even one of these points raises doubt, it is easier to return to the two-vertical option.
How to choose a cross-section: three real STAVROS molding models
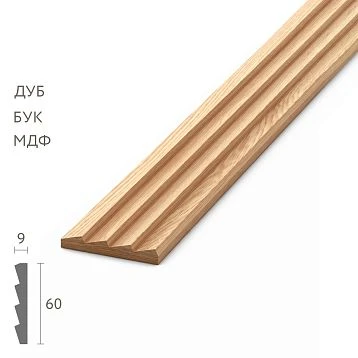
Suitable for comparison Moldings made of polyurethane 2600 mm long. We take three SKUs of the same purpose but different scale. Length matters for the cutting plan; cross-section matters for visual expressiveness. The products differ in geometry, so they cannot be considered interchangeable in one continuous line without additional verification.
| Product | Cross-section and length | Price per bar as of 30.10.2026 | How it is perceived next to graphics |
|---|---|---|---|
| MLDPU-001 | 10 × 6 × 2600 mm | 1 740 ₽ | A narrow, calm line with slight projection |
| MLDPU-004 | 15 × 8 × 2600 mm | 3 190 ₽ | Moderate relief, more noticeable in side lighting |
| MLDPU-002 | 22 × 11 × 2600 mm | 5 460 ₽ | An architectural accent with pronounced light and shadow |
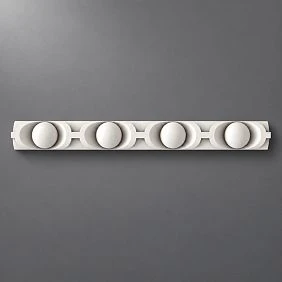
MLDPU-001 has a semicircular slim form, MLDPU-004 has a more prominent rounded central section with stepped transitions, and MLDPU-002 has a multi-level profile with a pronounced central bead. These properties describe the specific STAVROS cards. The prices shown refer to one whole strip, not to a linear metre and not to a delivered set. Before paying, check product availability, price, transport packaging and shipping terms.
For a collection of small images, the first profile is often the logical starting point for comparison: it does not add unnecessary visual volume. The second gives more noticeable light and shadow and may suit a high ceiling or calm flat frames. The third is justified if the architectural relief is intended as an equal part of the interior and there remains enough empty space around the artwork. These are design recommendations, not a technical guarantee of compatibility with specific fixings.
If, after assessment, you decide to use different sections on one wall, make two independent groups of lines and draw up separate cutting plans for each. Metres of different SKUs cannot be combined into a single schedule. Separate deliveries may also differ in the shade of the original surface, so it is better to plan the final painting as a separate finishing stage rather than trying to match a mixture solely from photographs in the catalogue.
Lighting for paintings: how moulding changes shadow and contrast
The position of the lights affects how the moulding works no less than its section. Low side lighting makes a three-dimensional profile more contrasty: a bright edge appears on one side and a narrow shadow on the other. This can emphasise the architecture, but at the same time distract from the painting. With soft frontal light, the decorative line looks calmer. So you should not choose a profile from an image without taking into account the actual lighting in the room.
Check the exposure in the daytime and in the evening. Daylight from a window can create reflections on protective glass, while in the evening it can, conversely, reveal the stepped relief. A temporary strip or a cardboard mock-up of the profile thickness will help you see how close it will be to the edge of the frame. If the light sources are already fixed, do not try to hide the wiring behind the decorative product without a technical solution. A specialist should be involved in electrical installation and lighting safety matters.
Particularly valuable or light-sensitive works require separate storage and display conditions. It cannot be promised that decorative trim will protect paper from fading. Avoid direct sunlight and heat, and follow the requirements for the specific items and light fittings. The technical lighting conditions are determined regardless of whether a slim profile or a more textured one is chosen.
In a home gallery, it is more useful to achieve even legibility of the paintings than to create a lighting effect on every moulding. If, during an evening check, the shadows from the decor turn out to be more noticeable than the pictures, change the direction of the light or reduce the projection of the profile. One such decision can save more rework than trying to correct the situation with additional painting.
Where decorative elements must not be placed: fasteners, sockets and picture-change zones
The most dangerous misconception when designing a gallery wall is to treat moulding as a substitute for a hanging rail. A decorative profile must not bear the weight of a picture, serve as an attachment point for a bracket, or block access to the standard hanger. If hanging a picture requires dowels and anchors, their type is chosen based on the wall material, the weight of the item and the instructions for the fastening system. A hollow partition, solid brick and reinforced concrete require different solutions, and the appearance of the paint says nothing about the strength of the substrate.
In addition to the fastener itself, leave working space for removing the picture. Some frames need to be lifted slightly during removal, others are turned at an angle. If the moulding is too close to the top edge, it may be impossible to remove the item without damage. Walk around the planned composition with the conditionally largest frame, and check not only its final position but also its path of movement when hanging. This is especially important if the owners frequently update the collection.
Near switches, sockets and low-voltage outlets, leave room for removing decorative covers and for maintenance. Do not glue the profile directly to the socket mechanism. If there is a junction box, an inspection hatch or equipment requiring access on the wall, the decorative line must be routed to the side. Separately check the presumed hidden cable routes: any new holes in the wall must be made only after verifying that the chosen location is safe.
The area around the doorway should also be considered a working zone. An opening door leaf may catch on a protruding element, and a picture frame's protrusion may end up in people's path of movement. This is especially relevant for a narrow hallway where part of the display may be moved over time. It is better to forgo a decorative detail in advance than to try to fix its placement after painting.
Decorative overlays: how to add an accent without overloading the collection
A small decorative detail can mark the central axis of the wall or separate one part of the gallery from another. But each such detail demands attention. If the collection consists of items from different periods, materials and frames, additional complex ornamentation often makes the wall visually noisy. Before buying, try doing without overlays: evaluate the composition using only the pictures and simple lines, then add a paper template of the accent and compare the impression.
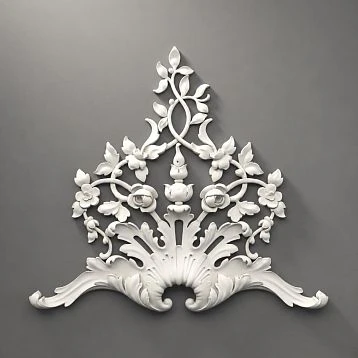
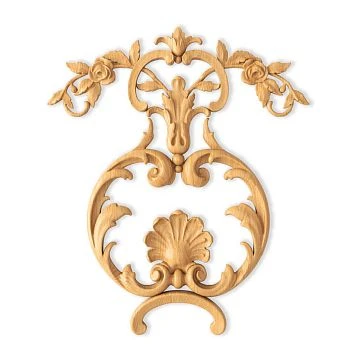
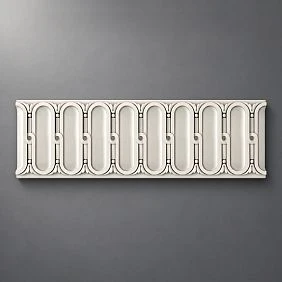
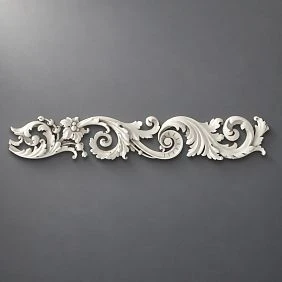
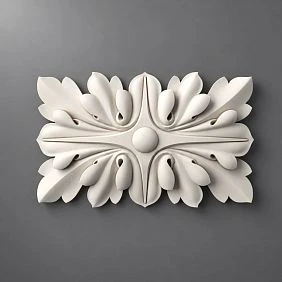
STAVROS offers Decorative Inserts and separate decor for mouldings. Some products belong to specific series. A matching word "polyurethane" or a similar pattern does not prove that the selected overlay aligns geometrically with MLDPU-004 or MLDPU-002. If you need a system insert specifically, compatibility should be sought in the product page of the specific item or confirmed with the seller. For a standalone small accent, also check the dimensions and the mounting surface.
The option with a central overlay is most justified when the display is stable. For example, if a large picture permanently stays on the wall's axis, the accent can be placed above or below its zone, but not above the attachment point. If the collection's composition changes frequently, it is better to keep such a detail optional. It can be included in the estimate as a separate line item rather than in the base price of four mouldings.
It is important to avoid decorative "framing for framing's sake." If the chosen painting already has an expressive frame, an applique next to it may create a competing focal point. If the paintings are quite small and understated, a single calm accent can unite the composition. The final decision should be made on the wall with the actual images, not on a separate product photo in the catalog.
Is ceiling molding needed next to a home gallery?
A ceiling cornice can visually finish the wall, but it is not a mandatory component of a painting composition. In a room with a low ceiling and a dense display, additional relief in the upper zone can create a feeling of overload. In a spacious living room with soft general lighting, a moderate ceiling cornice line, on the contrary, can neatly mark the boundary of the wall and not compete with the paintings.
If you need Ceiling molding, do not transfer the dimensions of the wall molding to the cornice. These are different types of products, with different cross-sections, installation bases, and abutment rules. If there is a stretch ceiling, agree on the mounting structure with the ceiling system installer in advance; decorative elements must not be arbitrarily glued to the fabric. If LED lighting is planned, separate safe placement of the equipment and the possibility of maintenance are required.
Ceiling decor is not included in our base estimate. This separation is useful: you can first buy and install the wall lines, evaluate them together with the collection, and make the decision about the cornice after a general viewing of the room. This does not mean that the cornice must necessarily be installed later; if all work is carried out within a single renovation, it is more logical to design them together. It is simply that costs should be calculated by independent product groups.
Practical project: seven lines on a 4.8-meter-wide wall
Let's imagine a living room with a painted wall 4800 mm wide and a nominal height of 2700 mm. Paintings of various formats will be placed on it, and in the middle there will be a space for a changeable composition. For calculation practice, let's take seven independent straight lines. Two verticals of 2350 mm mark the overall boundaries of the display. Three horizontals of 1100 mm support groups of images. Two short pieces of 650 mm serve as additional accents where there is enough empty space on the wall.
| Element type | Number of parts | Length of one part | Total length |
|---|---|---|---|
| Long verticals | 2 | 2350 мм | 4700 мм |
| Horizontal accents | 3 | 1100 мм | 3300 мм |
| Short lines | 2 | 650 мм | 1300 мм |
| Total | 7 | — | 9300 мм |
These numbers describe a hypothetical project, not the dimensions of a real apartment, nor a recommendation to place seven lines on any 4.8 m wide wall. The position of the elements must be clarified after trying out the paintings, checking the placement of the light fixtures, and assessing the free space. It is important that each piece has straight ends and does not form a closed frame with the other pieces. If it is decided to join the lines at an angle or to make frames, a completely different cut map will be required.
Before cutting, label the lines with conventional indices: V1 and V2 — long verticals; H1, H2 and H3 — horizontals; K1 and K2 — short elements. On the worksheet, indicate their actual position and the top side of the profile. A visually identical segment, when flipped, may be perceived differently in side lighting if the cross-section is asymmetrical. Therefore, each segment is first placed against its designated spot in the project, and then the cut line is marked.
This composition is convenient specifically for a gallery: the central painting can be changed without reinventing the entire architecture. The long verticals continue to form three calm areas, while the short lines allow neighboring works to be moved within the free sections. However, if it is known in advance that the collection will consist of a single large work, seven elements are not needed — they can be reduced to two or three, recalculating the order.
Cut map: why 9.3 meters require four strips
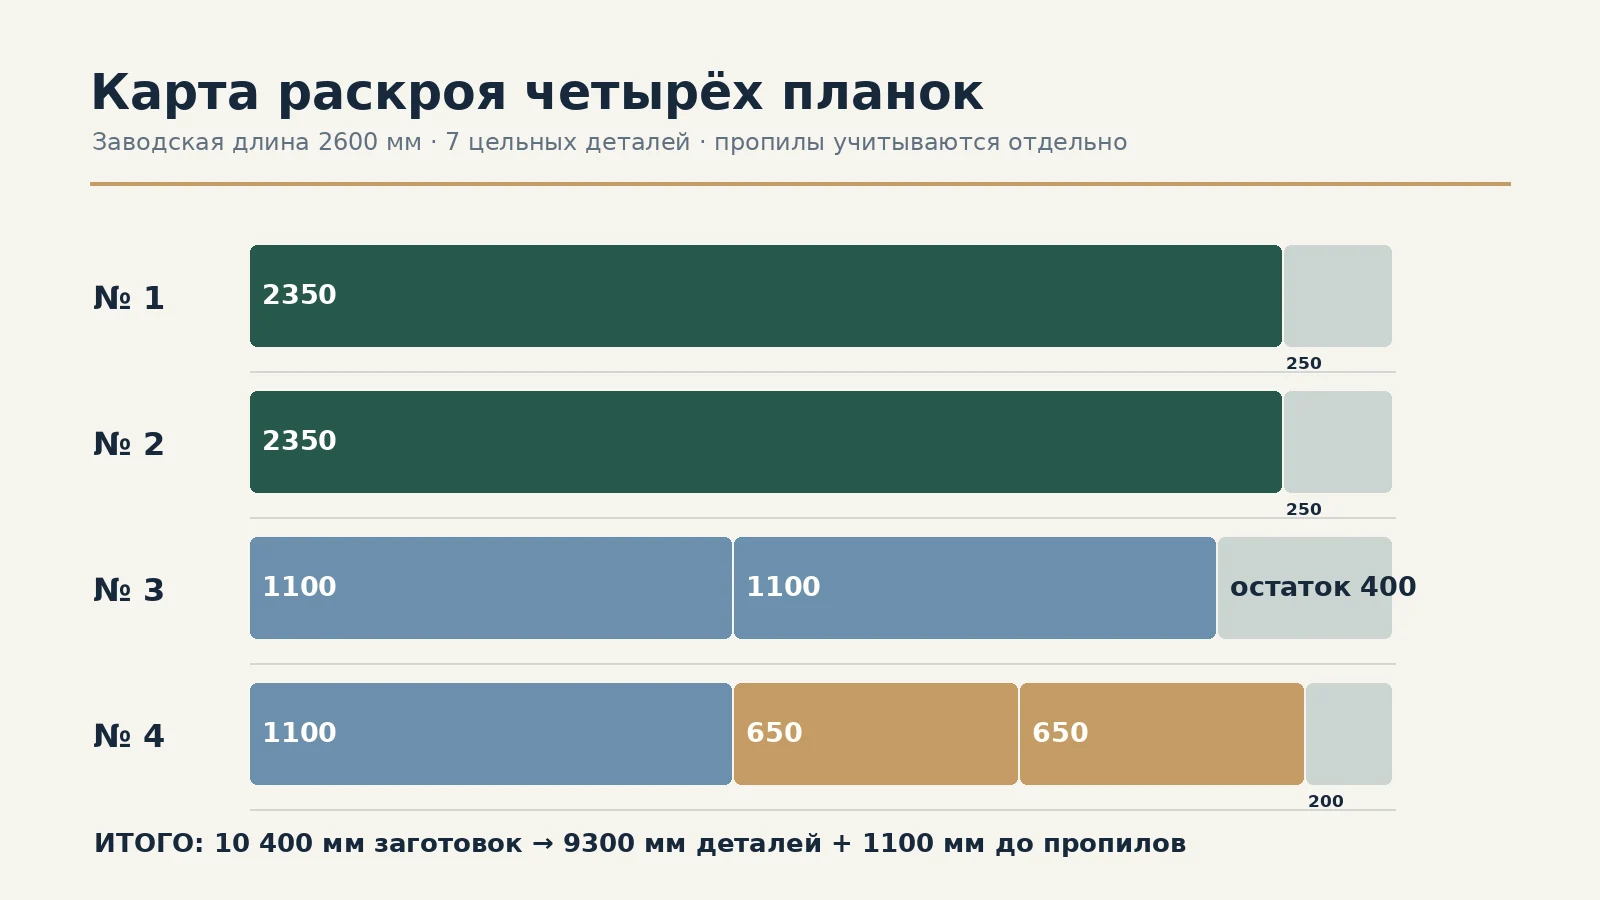
All three STAVROS moldings under consideration are available in a 2600 mm length. Dividing 9300 by 2600 gives approximately 3.58, but arithmetic of the total linear meters alone is not enough. It is important to place seven solid pieces within the factory strips so as to avoid additional visible joints and preserve cutting allowances. The following cut plan suits our project:
| Plank 2600 mm | Which pieces to obtain | Remainder before accounting for saw kerfs |
|---|---|---|
| № 1 | V1 — 2350 mm | 250 мм |
| № 2 | B2 — 2350 mm | 250 мм |
| № 3 | G1 — 1100 mm; G2 — 1100 mm | 400 мм |
| № 4 | G3 — 1100 mm; K1 — 650 mm; K2 — 650 mm | 200 мм |
| Total | 9300 mm of usable parts | 1100 mm before kerfs |
Four source planks yield 10,400 mm of material. After producing parts with a total length of 9300 mm, 1100 mm remains before deducting kerf thickness. Длина последней группы — 2400 мм, так что при обычной аккуратной резке она помещается в 2600 мм с запасом на технологические потери. Но фактическую ширину пропила и необходимость торцевания обязательно учитывают при окончательной разметке. Нельзя объявлять остаток пригодным для другой детали до завершения резки.
The fifth plank is not required by this map. It may be needed as a reserve if the installer has not yet worked with the selected profile, if there is a risk of damage during transport, or if the composition of the display may change already at the installation stage. Such a reserve should be stated separately: “4 planks — the calculated set; 1 — additional at the buyer's discretion.” Without this caveat, the estimate will create a false impression that five planks are technically necessary.
Complex joints require a new calculation. When moving from separate lines to a closed frame, lengths have to be measured at specific points on the profile, especially for angled cuts. Parts that together fit within a plank may no longer fit after adding allowances. Therefore, you cannot first order four planks based on a training calculation and then, without recalculating, decide to frame each picture with a separate rectangle.
How much does it cost to buy moulding in Penza: three confirmed sets
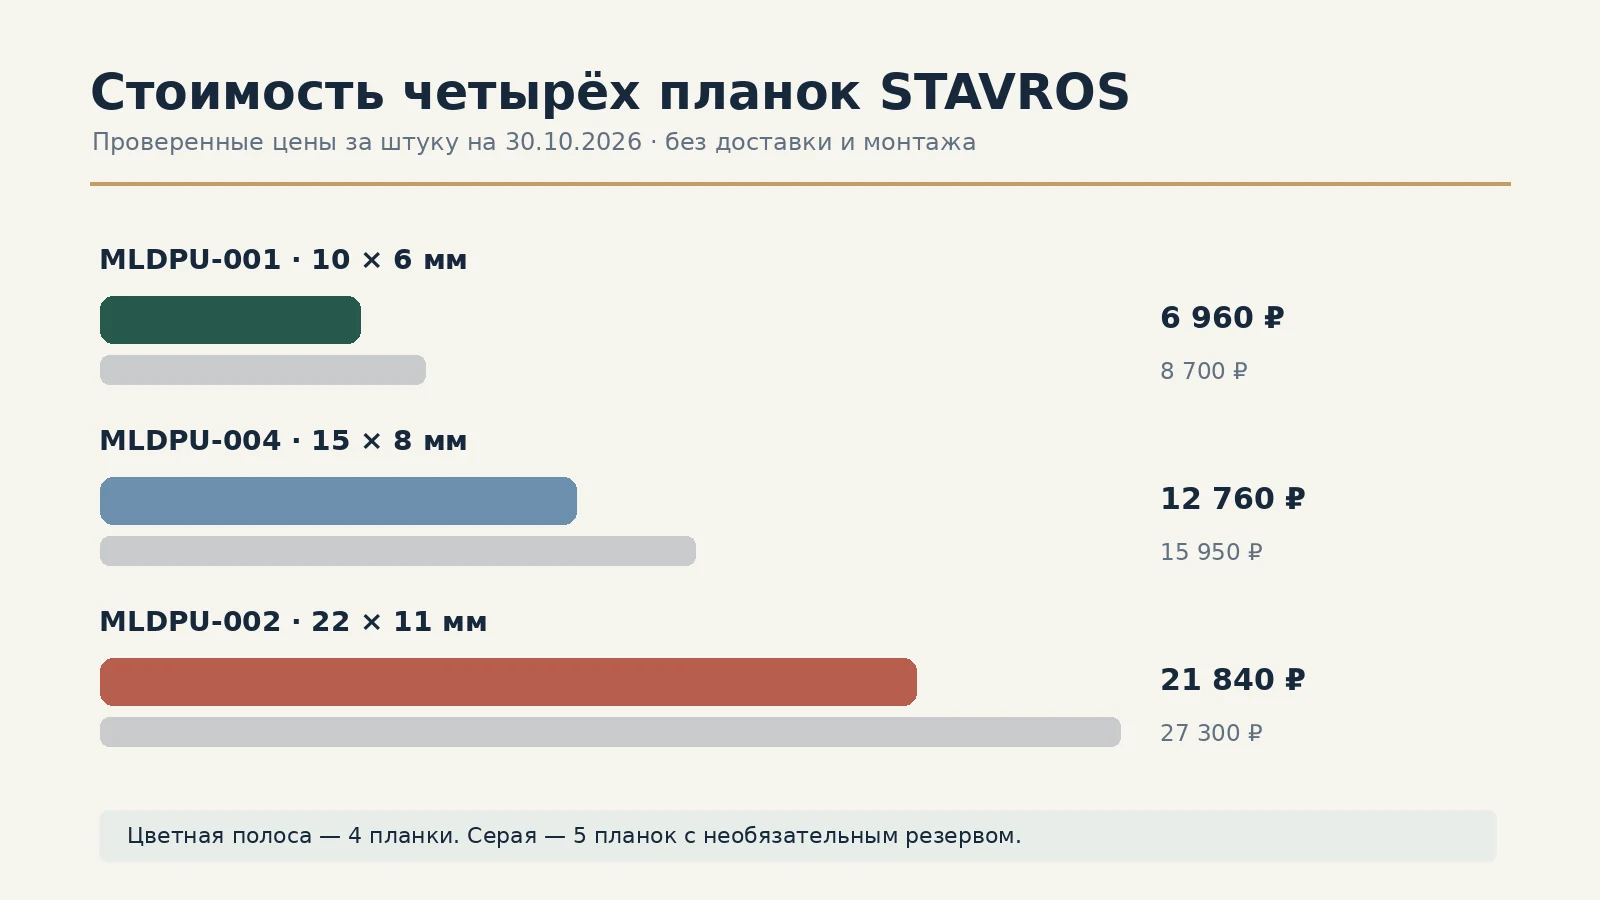
The cost of decorating a home gallery depends on the specific profile and the number of whole factory-made items. You cannot get an exact price by multiplying the length of decorative lines by an arbitrary cost per metre: the selected product cards show the price per one 2600 mm strip. For the training project, four strips of the same SKU were calculated. This allows an honest comparison of three visual approaches with unchanged geometry. Prices were verified against STAVROS product cards as of 30 October 2026; they may change before the actual order.
| Profile | Price per 1 strip | 4 strips — basic set | 5 strips with a reserve |
|---|---|---|---|
| MLDPU-001, 10 × 6 mm | 1740 ₽ | 6960 ₽ | 8700 ₽ |
| MLDPU-004, 15 × 8 mm | 3190 ₽ | 12 760 ₽ | 15 950 ₽ |
| MLDPU-002, 22 × 11 mm | 5460 ₽ | 21 840 ₽ | 27 300 ₽ |
The difference between the extreme options in the basic set is 14,880 ₽. But this difference does not mean that the more expensive composition is necessarily better. For a small graphics collection, the thin MLDPU-001 may be visually more precise than the pronounced MLDPU-002. If finishing in a rich colour is planned and the relief should be readable from the far end of the room, a more noticeable profile may make sense. The choice is about proportions, not just the price category.
The table above does not include decorative overlays, ceiling cornices, individual picture fasteners, glue, primer, paint, consumables, packaging, delivery and craftsman services. For some product cards, a protective backing with a separate cost may apply for transport; its availability and price must be checked when generating the invoice. The table total should not be presented as the final price of a delivered and installed set. For an honest family budget, it is useful to split all costs into goods, logistics, installation and finishing.
If the budget is limited, reduce not the quality of surface preparation but the number of decorative lines. For example, to start with you can decorate only two long verticals: the initial cutting requirement for them is two 2600 mm strips. The rest of the composition is best considered after placing the pictures. But if later an exact match of pattern, batch or shade is required, a repeat order must be coordinated separately; saving at the first stage may lead to additional delivery costs.
Mixed profiles and partial purchasing: where the mistake lies
Sometimes you want to buy a more noticeable profile for the central area and a thin one for the side sections. This option is acceptable as an independent design decision if the groups of lines are not supposed to join each other. However, the single calculation "only 9.3 metres in total — so four strips" does not work for a mixed order. Each group must be cut separately according to its SKU. The offcut of one section cannot be used for a part designed from another.
Suppose two vertical pieces of 2350 mm each should be MLDPU-002, and five short lines should be MLDPU-001. The two long pieces require two MLDPU-002 strips. The remaining three horizontal pieces of 1100 mm and two accents of 650 mm have a total length of 4600 mm. They can be obtained from two MLDPU-001 strips: the first will fit two pieces of 1100 mm, the second — 1100 + 650 + 650 mm. Such a set also consists of four strips, but of two different article numbers; it does not provide for joining dissimilar profiles.
The cost of only these four items at confirmed prices will be 2 × 5460 + 2 × 1740 = 14 400 ₽. This is an intermediate price option, not a replacement for the base estimate. Before ordering, check how the two sections look next to real frames, whether a disjointed pattern is created, and whether different profiles require separate finishing. If it is decided to paint both types in one color, first make a test coat on inconspicuous areas or separate samples.
How to prepare a STAVROS request: a specification instead of a verbal description
A simple list will be useful to the buyer. Its first part relates to the product: article number, material, size, quantity of whole strips, unit price, and a link to the product page. The second part relates to installation: seven project pieces, their lengths, purpose, and cutting map. The third relates to delivery: address in Penza, recipient contact, preferred method of receipt, question about transport packaging, lifting options, and the procedure for inspection upon handover. With such a division, the seller does not have to guess how many strips are needed from the design description.
For the base option, you can write: “MLDPU-001; polyurethane; 10 × 6 × 2600 mm; four whole strips for self-cutting; training scheme 2350 × 2, 1100 × 3, 650 × 2; additional strip — only by separate agreement.” For the second and third options, the article number and price are replaced, but the dimensions of the pieces are not changed without a new design decision. A separate list of compatible installation compounds and finishing materials will also be required.
The phrase "Buy moldings” in the search is too general for such an order. After going to the catalog, you need to select a specific product page and verify the factory length. Do not order profiles based only on visual similarity: different series may have different geometry, and sometimes different purpose. If information is insufficient, it is better to request confirmation from the seller than to invent compatibility based on a picture.
Before payment, save the final cart, dimensions and article numbers, agreed delivery terms, availability information, and contacts. This is also useful for installation: the installer receives exactly the version of the list for which the products were purchased. If the composition changes after payment, first recalculate the pieces and only then decide on an additional purchase. Otherwise, you may end up with extra strips of the wrong series.
Delivery of stucco moldings to Penza: long packaging and preservation of the relief
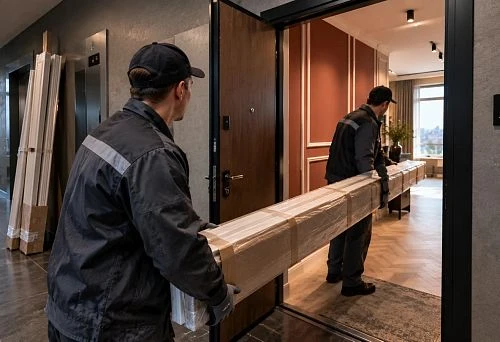
The factory length of the moldings under consideration is 2600 mm, but the outer transport packaging may be longer. Even if the buyer plans to receive four strips, the packaging issue should be resolved before shipment. The profiles must be protected from impacts, bending, and damage to the ends during transport. The specific dimensions of the parcel, possible surcharges for length, and available methods of receipt are agreed with the seller and the carrier — they cannot be derived from the product dimensions alone.
According to the official STAVROS page, an order can be placed on the website, by phone or by email; CDEK, Delovye Linii and DPD pickup points and courier delivery are listed. The actual availability of a specific method for an address in Penza must be confirmed at checkout. A fixed timeframe or free delivery should not be promised in advance. The rules for inspecting the cargo package are also important: long packaging may look intact on the outside, but checking the ends and the surface texture remains necessary.
It is better to verify payment, checkout and receipt questions via the official section «Payment and delivery». If the order is intended for an apartment that has already been furnished, prepare in advance a place where the planks can be unpacked and inspected without bending. Remove paintings, glass, sharp objects and small furniture from the passage. Do not store the profiles in an inconvenient vertical position just to save space; follow the transportation and storage requirements for the specific product.
Upon acceptance, check the item code and quantity against the delivery note, inspect the ends, the textured surface and any visible deformations. If damage or a shortage is found, record it according to the carrier's rules before the acceptance procedure is completed and contact the seller. Be sure to keep photos of the packaging and documents. This procedure is especially important for thin profiles: a defective section may only become apparent during cutting, when it will be difficult to determine whether the defect arose before delivery or later.
Delivery across Penza Oblast: why the address needs to be clarified separately
A purchase for Penza and an order to Kuznetsk, Zarechny or another settlement in the oblast do not necessarily have the same logistics options. Address delivery, a pickup point, oversized cargo and the availability of lifting are different conditions. When placing an order, provide the full address, the method of receipt, the contact person and the ability to accept long-length packaging. For restricted-access areas and facilities with a pass system, agree on access requirements separately, without assuming that the courier will automatically be able to enter the site.
If the products are received by an installation crew, determine who checks the quantity and condition before the profiles are handed over to the installer. When an order is first brought to an apartment and then transported to a dacha or another site, an additional stage of risk appears. The planks should not be moved out of their protective packaging for the convenience of a second transport unless necessary. It is better to agree on the final address and a plan for further storage of the material from the outset.
Even within a single city, the cost of transportation may vary due to dimensions, the delivery method and additional services. That is why the article does not contain a fictional rate for delivering stucco across Penza Oblast. The final invoice should be assessed as a whole: the product, packaging, transportation and, if necessary, an agreed lift or assistance with unloading.
Installing moldings near paintings: a safe sequence
The work sequence begins not with adhesive but with clearing the wall. Take down the paintings, mark their places and move the artworks to a safe room. Wrap the corners of the frames in suitable protective material, remove glass objects, and cover the furniture and floor. Paintings must not be left near dust from cutting or work with installation compounds. This is especially important for graphics under glass and canvases in open frames. If the items are valuable, the storage and removal conditions should be agreed with an art conservation specialist.
Then check the substrate: dryness, evenness, cleanliness, paint stability, and suitability of the chosen adhesive. Not all finishes have the same adhesion. A small test in an inconspicuous spot will help identify the risk of peeling, but it does not replace the manufacturer's instructions for the mounting compound. If the surface is weak, it should be prepared rather than trying to hold the decor with excess adhesive. Any holes for new picture fixings must first be checked against hidden utility lines.
For marking out, it is convenient to use the already prepared list of seven parts. Draw the axes and hold the whole strips against the wall without adhesive. Check how the profile looks in daylight and evening lighting, and whether the relief falls within the picture-hanging zone. Then transfer the lengths to the blanks and saw them with a suitable tool, taking into account the geometry of the specific material. It is not recommended to cut the entire order at once without a trial fit of the first part: a small orientation error will be repeated on several strips.
If selected Moldings for walls, they are installed according to the instructions for the chosen fixing system. Ensure even contact and do not press the part so hard that squeezed-out compound soils the finished finish. The setting and full-curing time are determined by the specific adhesive and room conditions; universal figures would be incorrect here. Joints and ends are treated with compatible materials only after the profile has reached its final position.
Plan the final painting separately from hanging the pictures. The profile and all filling compounds must go through the curing stages specified by the manufacturer. Make sure the paint does not smudge the frames and that new fixings will not be installed through the decorative element. Only after that should you return the pictures, checking against the paper plan and the actual distances. This order reduces the likelihood of scratches on the frames and of having to remove part of the finish again.
Seven mistakes when decorating a wall with a home collection
Mistake one — framing every picture with moulding. This scheme looks convincing in a photograph with a fixed display, but it handles swapping works poorly. If the frame sizes change, the empty architectural outlines become noticeable. For a family gallery, several independent lines with spare free space are more practical than seven rigid frames for seven specific images.
Mistake two — buying only by linear metreage. Nine-plus metres of decor does not mean you can cut any seven parts from four strips. A real cutting plan is needed. In the training project, four strips are suitable precisely because the longest part is 2350 mm, two such parts are obtained separately, and the rest fit into the remaining two strips. With a different arrangement of lines, the result will change.
Mistake three — placing a bulky profile next to small graphics. A 22 mm wide molding can be more expressive than a thin frame, especially in side light. The solution is not to give up on relief forever, but to test it next to the smallest pieces. Sometimes it is better to use a narrow MLDPU-001, sometimes to reduce the number of decorative lines, and sometimes to leave the wall bare.
Mistake four — combining the picture mounting with a decorative element. Neither polyurethane molding nor an overlay becomes a load-bearing fastener just because it looks rigid. The weight of the work is held by the chosen mounting system and a suitable wall base. Check the hanging requirements before finishing work. If the picture needs a special hanger, consult a specialist and position the molding separately.
Mistake five — not taking light into account. Frames with glass can reflect a window, and protruding decor creates additional shadows. When planning based on a daytime photo alone, you can get an unexpected result in the evening. Make at least two test assessments from the intended viewing point — in daylight and with the lights on.
Mistake six — ordering an unconfirmed compatible overlay. A similar product shape and the same material do not yet guarantee a precise joint. In this case, it is wiser to order a standalone overlay with verified dimensions or to skip it altogether than to mask an accidental gap with a large amount of filler. For products in a specific series, compatibility is confirmed separately.
Mistake seven — forgetting about delivery and the safety of the profile. Even four strips require careful packaging and inspection upon receipt. If the profile is damaged and no reserve is provided, installation will stop. Checking item codes, quantities, and ends upon acceptance is far cheaper than redoing a finished wall. Also, do not promise that an order will definitely arrive on a specific day without confirmation from the carrier.
Frequently asked questions about stucco for a gallery wall in Penza
Can paintings be changed after decorative moldings are installed?
Yes, if the composition provides for free margins and the painting mounts are independent of the decor. That is precisely why the training project uses separate verticals and short horizontal accents instead of a frame around each artwork. When rearranging, you need to control the new hanging points and not drill into the wall at random. The molding itself stays in place and performs a visual rather than a load-bearing function.
Where is it more convenient to buy moldings for such a composition?
For those planning buy moldings in Penza, it is useful to compare not general advertising descriptions but specific item numbers with dimensions and prices. Prepare a plan, indicate the number of full-length strips, and request delivery terms to the chosen address. The availability of a local warehouse or STAVROS showroom in Penza should not be assumed without separate confirmation.
How many strips are needed for seven lines with a total length of 9.3 meters?
For the seven conventional straight parts listed in the calculation, four strips of 2600 mm are sufficient. This is confirmed by the cutting map: 2350; 2350; 1100 + 1100; 1100 + 650 + 650 mm. The fifth strip is a possible reserve, not a mandatory line item. If the lengths, number of parts, or joint angles change, the calculation is performed anew.
Is the same profile required on the entire wall?
No. The composition can be divided into independent groups, for example, making two verticals from a more expressive profile and the short lines from a thin one. But each item number needs its own cutting plan. The remainder of MLDPU-002 cannot be used instead of MLDPU-001, and they should not be joined without a confirmed solution. Before purchasing, evaluate the difference in relief on a paper mockup and under real lighting.
Do decorative overlays need to be purchased together with the moldings?
No, it is an optional element. For an actively changing home collection, overlays may prove redundant. If an accent is truly needed, check its dimensions, material, mounting plane and compatibility with the selected profile. The cost of the overlay should be calculated separately: the prices of the four-profile set do not include it.
Can moldings be installed over a painted wall?
Sometimes this is acceptable, but it is decided by the condition of the coating and the instructions for the mounting compound. The wall must be sound and prepared; a weak layer of paint can come off together with the decor. An adhesion test and preliminary cleaning help assess the risks. One should not claim that any polyurethane profile will adhere to any paint without preparation.
Which profile is best for small graphic works?
Start the comparison with the thin MLDPU-001 measuring 10 × 6 mm, then try samples or mock-ups of larger profiles. The result depends on the format of the paintings, the thickness of their frames, the wall color and the lighting. A more expensive or wider molding does not always improve the interior. The best choice is the one where the artwork is seen first and the architectural framing only afterward.
How much does delivery of stucco to Penza and the region cost?
There is no universal confirmed amount. The rate depends on the carrier, the length of the package, the specific address and additional services. When placing an order, specify the number of strips and ask to clarify the dimensions of the cargo unit and the handover procedure. The cost of delivery and lifting cannot be automatically included in the price of the four profiles from the table.
Can a molding be used as a rail for hanging paintings?
No, the products discussed here are intended for decorative finishing. The actual load is borne by a separate suspension system selected for the wall and the weight of the artwork. Even if the line seems rigid enough, using it as a load-bearing element without special confirmation is unacceptable. It is especially important to explain this to the installer before marking begins.
Summary: the finished specification and the next step
For our conventional wall 4.8 m wide, a set of seven independent decorative pieces was chosen: two verticals of 2350 mm, three horizontals of 1100 mm, and two short lines of 650 mm. The total usable length is 9300 mm; the verified base cutting plan fits into four factory strips of 2600 mm. When choosing MLDPU-001, the cost of the products is 6960 ₽, MLDPU-004 — 12 760 ₽, MLDPU-002 — 21 840 ₽ at prices as of the verification date. Additional materials and delivery are not included in these amounts.
Before ordering, determine which paintings will remain permanently, where interchangeable works are planned, how the mounts are constructed, and what light falls on the wall. On this basis, reduce or keep the seven lines, choose one profile, mark the actual dimensions on the diagram, and agree on the delivery method. Good architectural trim does not turn art into a hostage of its own geometry: it makes the space cohesive while leaving room to change the collection.
After checking the dimensions and compatibility of the mounting materials, you can go to the STAVROS catalog, select the required item, and build an order by quantity whole strips , and not by an abstract linear meterage. Verify the final specification with the seller and the installer before payment. This approach helps create a calm home gallery where the paintings remain the main focus and the polyurethane molding works to enhance their perception.