Article Contents:
- Why a double-height space cannot be designed like an ordinary room
- One volume — three viewing distances
- What gives away a failed composition
- What to record with a tape measure and a floor plan
- Measuring the upper zone cannot be done "from a photo"
- The edge of the gallery is not necessarily a line for decor
- How to work with a large empty wall
- Geometry first, glue later
- When to seal joints and how to protect the finished trim
- Can two strips be joined to get a vertical height above 2600 mm?
- Are four strips enough for an entire double-height living room?
- Should you choose the widest molding for the mezzanine?
- Can polyurethane profile be glued to an already painted wall?
- Where can I confirm the delivery price to the Nizhny Novgorod region?
- How to tell a wall molding from a ceiling cornice?
- What should I do if, after ordering, I decide to cancel the upper lines?
- Do I need to order overlays and rosettes separately?
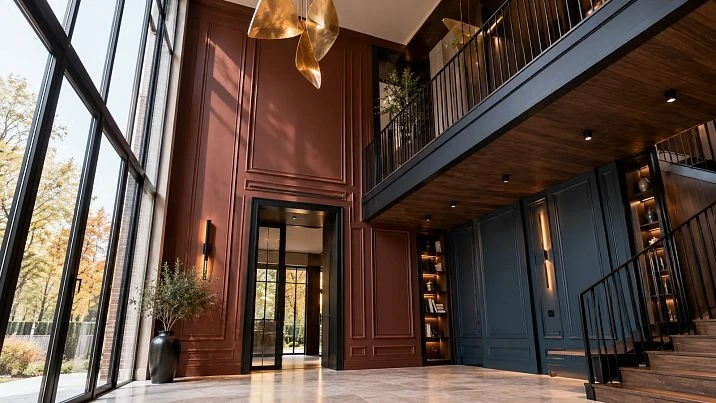
In a double-height living room, the same decorative strip can look convincing on the lower wall and almost disappear above the mezzanine. The reason is not the quality of the product. A person looks at the lower part of the space from two or three meters away, while they see the upper part from below, through the railing and often in the backlight of a large window. That is why the question "which stucco should I choose?" here does not begin with choosing a pattern. First you need to understand which lines should be visible from the first floor, which from the mezzanine, and where the decorative rhythm should end.
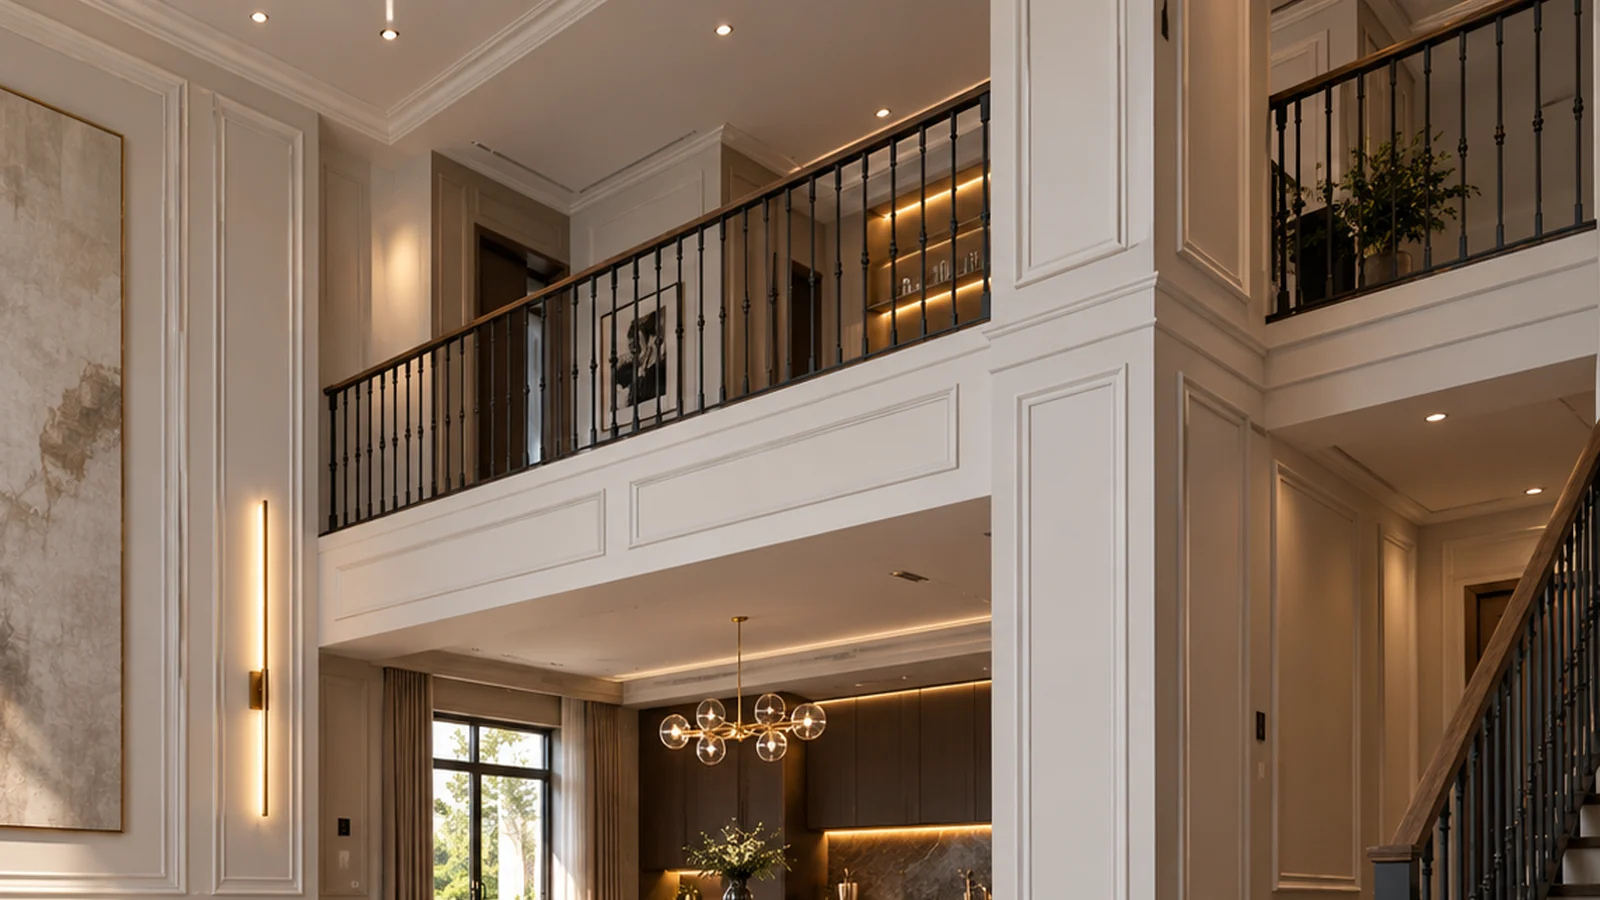
Let's imagine a townhouse in Nizhny Novgorod: the open upper level is visible from the living room, a gallery with a railing runs along one wall, and opposite is a large window. There is no solid floor slab across the entire area between the levels. The drawing provides for six separate decorative lines rather than the usual rectangular frames behind the sofa. In such a situation Moldings it is needed to emphasize the architecture, not to fill every free centimeter. Below we will go through the selection procedure, the verified cutting plan and the estimate that can be used when placing an order.
Why a double-height space should not be decorated like an ordinary room




One volume — three viewing distances
An ordinary living room has a clear scale: skirting board, door, furniture, ceiling line. In a room with a mezzanine, another horizon appears — the edge of the upper gallery. It may sit at roughly second-floor level, yet it reads as an independent architectural boundary. If you thoughtlessly repeat identical frames at the bottom and at the top, some will end up hidden behind the railing, while others will look too short relative to the wall height.
A decorative profile should be assessed from at least three points: from the living room entrance, from the main seating area, and from the mezzanine itself. At the first level, the viewer tends to notice the overall vertical first, then the light and shadow of the relief. From the upper platform the viewing direction changes: distances to the handrail, reveals and joints become especially noticeable. On a wall visible from both levels, it is better to define in advance the axis, the overall rhythm and the untouchable zones — the fixing points for railings, light fixtures and service devices.
This does not mean that all lines must be the same length. On the contrary, the two lower accents can be longer and the upper ones shorter: that way they support the composition without pretending to be continuous columns. What matters is that the difference is designed in, rather than happening by accident after cutting.
Our factory also produces:
What betrays a poor composition
If you look up from below and see three unrelated horizontals, the decorative grid turns into visual noise. If a large moulding breaks off exactly beneath the lower edge of the railing, its end may be mistaken for a structural element. If the upper lines sit level with the wall lights, their shadows may intersect with the pools of light. That is why, before ordering, it is worth drawing a scaled elevation of each wall and supplementing it with a simple photo marked with the proposed lines.
Get Consultation
Where to buy stucco in Nizhny Novgorod and what to find out before ordering
For a remote purchase, it is more convenient to start with the official STAVROS range: choose the material, open the profile drawing and note the article number with the size. The option Buy molding does not replace a project specification: on a tall wall, what matters is not only the appearance of the strip but also its factory length, the number of whole pieces and access to the installation point.
The catalog presents various product groups, but in our example the calculation covers only straight polyurethane moldings 2600 mm long. Cornices, rosettes and overlays are separate products with their own geometry and price. If they are mixed into a single order line under the general name "decor", it will be difficult to verify both the estimate and the completeness of the order upon receipt.
A buyer from Nizhny Novgorod should record not the address of an assumed local warehouse, but the exact delivery address, the unloading method, the ability to accept long packaging and the contact of the person who will check the item codes. On the STAVROS website, order placement and Contact us to confirm shipping to your destination. are available. However, the lead time, rate and availability of a specific model must be confirmed at the time of purchase. Mentioning the city in the title of the material does not mean there is a showroom or stock of products directly in the city.
For the search query buy stucco in Nizhny Novgorod this is exactly the right route: first the product and drawing, then the cutting plan, then delivery and coordination of installation. The reverse order often leads to purchasing a beautiful but unusable set.
Measurements before purchase: not just ceiling height
What to record with a tape measure and a floor plan
For the training project, let us assume a total height of the open part of the living room of about 5.2 m, a mezzanine level approximately at the middle of this height, and several separate free sections of wall. These are conditional dimensions of the scenario, not a description of a specific house. A real site requires measurement after the finishing substrates are prepared: the actual height at different corners may differ, and protruding skirting boards and architraves change the length of the available straight line.
Start with the height of each section, then measure the distance from the wall to the railing and the position of its fastening points. Separately note the position of doors, windows, curtains, built-in lighting, sensors and ventilation openings. On a top-view plan these elements may not interfere; on a wall elevation they will fall exactly on the line of the intended molding.
Then measure not only the width of the free field, but also its visible width. A cabinet can conceal the lower 400 mm; a tall curtain can cover the left edge. You should not buy profiles for areas that will be invisible after the furniture is arranged. Conversely, a narrow wall section opposite the entrance deserves precise marking, since the slightest asymmetry is more noticeable there than on a long wall.
Measuring the upper zone cannot be done "from a photograph"
The perspective of a photo distorts verticals. It is more reliable to obtain the marks from a drawing, verify them with an available measuring tool, and agree with a specialist on a safe way to access the mezzanine wall. The height to the surface and the height of the working point are different values. The worker needs not only to reach the line but also to hold a straight batten, check the level, apply the compound, and correct the position before it sets.
At this stage it is useful to mark the areas as "can be worked on from a platform," "a separate platform is needed," and "installation not yet agreed." The last status is not a technical trifle: if safe access cannot be arranged, it is better to exclude the corresponding decorative area from the project before purchasing.
How to choose polyurethane molding for two levels
Wall moldings and ceiling elements have different tasks. A straight wall profile emphasizes a vertical, the boundary of a color field, or the axis of a wall section. A cornice works at the junction of the ceiling and wall, while a decorative overlay becomes a local focal point. There is no need to order all types at once — for a high living room, a few straight lines are often enough to make the architecture feel more cohesive.
When a buyer enters the phrase into search polyurethane moldings buy, it is important for them to distinguish polyurethane from polystyrene products, which may be shown nearby in the general category. Their specific properties, geometry, and installation rules differ; the material of each item must be read in the product card, not guessed from the white color in the photo.
For a project with a mezzanine, there are three sensible approaches. The first is a thin, repeated profile everywhere if the goal is to emphasize proportions without an active pattern. The second is two scales, where the distant high wall gets a more expressive batten while the areas near a person remain calm. The third is to forgo decor on some surfaces: highlight the lower level and leave only paint, light, and the gallery structure above. This option is also a full-fledged design solution, not a cost-saving "leftover" approach.
Polyurethane or gypsum: a comparison specifically for high walls
Gypsum decor is valued for its mineral character, the possibilities of complex sculpting and historical expressiveness. But a finished gypsum product requires especially careful handling during transportation, fitting and fastening. At height, the large mass and fragility complicate the organization of work; the requirements for the substrate and fastening are determined by the specific product and project. Therefore, you cannot simply replace a gypsum part with a polyurethane one of the same visible width without checking the other parameters.
The polyurethane moldings from the assortment under consideration are straight decorative elements of small cross-sections. They are convenient to cut to lengths according to the drawing, and the set can be described with exact article numbers. At the same time, the phrase "easy installation" does not cancel the requirements for wall strength, the adhesive system and safe access. The adhesive must be compatible with both the profile and the substrate; its instructions are checked before work, not after the first signs of peeling appear.
The advantage of gypsum will show where the concept requires deep, complex stucco modeling. Polyurethane is often more practical for neat linear accents that need to be repeated in several areas. For our conditional project with six straight lines and small cross-sections, it is rational to compare specifically the three STAVROS polyurethane moldings, rather than draw a conclusion about the superiority of the material in general.
Three STAVROS moldings: how the visible scale differs
Let us consider three article numbers for which the official product cards as of October 30, 2026 indicate the material "polyurethane" and a factory length of 2600 mm. The cross-section dimensions and prices refer to one product, not to a linear meter:
| Profile | Cross-section size and length | Price per plank | Practical role |
|---|---|---|---|
| MLDPU-001 | 10 × 6 × 2600 mm | 1 740 ₽ | A thin line next to a person |
| MLDPU-004 | 15 × 8 × 2600 mm | 3 190 ₽ | A medium-expressive accent |
| MLDPU-002 | 22 × 11 × 2600 mm | 5 460 ₽ | A more noticeable line on a high wall |
The numbers 10, 15 and 22 mm describe the cross-section size, not the permitted installation height. A wider profile does not automatically become "better for a high ceiling". If the surface is lit from the side, even a thin relief can cast a noticeable shadow; in diffused light, a large strip is sometimes perceived as calmer than expected. Therefore, the visual check is carried out from the actual viewing point and under actual lighting.
If required buy moldings in Nizhny Novgorodyou need to compare specific product cards, not an abstract name like "polyurethane baguette." Size, relief, and the shape of the end cut affect both the shadow and the treatment of joints. An important caveat: a standard straight strip is not intended for arbitrary bending along a curved wall without conditions confirmed by the manufacturer.
Option one: one profile on both levels
A single thin line seems like the simplest solution: one SKU, one relief height, identical technical requirements. For a living room where the railing, the large staircase, and the tall window already play a prominent role, this is a fully deliberate choice. For example, MLDPU-001 can mark the vertical axes of the wall piers and not compete with the metal railing posts. If the molding is painted the same color as the wall, the decorative work will be noticeable more by the soft side shadow than by contrast.
The advantage of a shared SKU also shows up in purchasing. The remainder after one cut can be used on another section if the cutting plan allows it. There is no need to separately sort parts by two cross-sections, and the installer will not mix up the tool for fitting different profiles. However, obvious logistics do not mean an unconditionally good result: on a distant wall, a thin strip may visually disappear. This is especially noticeable under frontal diffused lighting.
The check is simple: attach temporary non-damaging paper mockups of the appropriate width to the lower and upper walls, or safely place test cut pieces on accessible areas in agreement with the installer. Take an overall view from the main viewpoints. There is no need to climb onto unprepared supports just to check. If the upper accent does not read in the composition, its absence may be better than a disappointing thin line.
A single profile is especially appropriate when the interior is restrained, the walls have a complex texture, or there is already a strong architectural rhythm. In a space with many contrasting elements, you can use one color for the profiles and walls, while leaving the railing and staircase as the main graphic accents.
Option two: two scales of decor, but one composition
At first glance, mixing cross-sections is risky. In practice, it helps distribute visual weight: the lower part, which is seen up close, can get a medium profile; the high, distant plane can get a more noticeable one. At the same time, the solution must correspond to different viewing distancesrather than the principle of "the higher, the thicker." For example, MLDPU-004 is used on the lower section with pronounced side lighting, while MLDPU-002 is used on the far high wall if a layout check shows that this is necessary.
Such a scheme requires two separate material schedules. Each section has its own end pattern, so they cannot be joined into a single continuous decorative contour without a pre-developed transition node. In our project, the lines are independent, that is, they do not intersect. This simplifies the solution: the difference in sections reads as a hierarchy of spaces rather than a random joint of two incompatible profiles.
Not only the width matters, but also where the line begins. If the upper accent hangs off to the side of the lower axis, the viewer may mistake it for an error. It is better to tie both elements to one clear reference point: the window axis, the edge of an architectural opening, the line of the exterior wall, or the geometric center of the wall pier. Then the two scales exist within a single coordinate system.
There is no need to overcomplicate the wall: if the tall profile requires additional small overlays, complex corners, and decorative finials, while the lower one remains a simple line, the composition will start to look like it was assembled from different catalogs. First approve the position of the straight elements, and only then decide whether a more complex pattern is needed.
Solution three: a minimal set on key planes
There are rooms where expressiveness is already provided by the ceiling geometry, the staircase, and the window opening. There, the decorative work may consist of just two lower verticals. This approach leaves the upper wall clean and makes subsequent maintenance easier: high areas do not require cleaning of relief, and complex installation work is eliminated. At the same time, the interior does not become "unfinished" if the lines at the bottom are neatly coordinated with the door reveals, the baseboard, and the rest of the finishes.
To keep the option from looking forced, determine what exactly the remaining two lines emphasize: the entrance to the lounge area, the boundary of a tall opening, or the symmetry of a free wall pier. There is no need to place them simply where you can reach by hand. The concept of minimal decor works only with a clear connection to the architecture.
The financial benefit is also real, but it does not come down to saving on two strips. Eliminating the high sections reduces the need for special safe access, decreases the number of installation operations, and lowers the risk of damaging the finished surfaces. However, the cost of the work must be calculated separately: neither the price of a professional platform nor the cost of its delivery can be derived from the price of the molding.
For a future buyer, it is useful to keep all three schemes on a single comparison sheet. In each one, mark the unchanged elements of the house in one color and the proposed decor in another. Then the decision will be made based on the same space rather than on the impression of three different beautiful images.
Sight axes: how to tie moldings to the mezzanine
The edge of the gallery is not necessarily a line for decoration
The horizontal of the mezzanine is already strong enough. If you run another closely spaced decorative stripe directly beneath it, you get a double contour that may look heavy from below. Instead of automatically duplicating, check the interval between the structural and decorative lines: it is important that it be noticeable from a normal viewing point and not resemble an accidental gap.
When choosing a vertical pattern, focus on permanent axes, not on the arrangement of temporary furniture. A sofa can be replaced, a coffee table can be moved, but the window pier and the railing fastenings will stay in place. Therefore it is better to make the boundaries of openings and structures the main reference points. If necessary, the layout can be shifted from the geometric center if that is how the balance of the visible wall sections is preserved.
From the mezzanine, the view toward the lower floor also matters. A profile on the lower wall that looks good in a frontal shot may be partially hidden by the railing when seen from above. Before final approval of the layout, it is worth photographing the future composition from the gallery. On the photo, mark the actual sightline over the railing; the part of the decor that remains hidden behind the railing for a long time should logically be excluded from the purchase.
How to work with a large empty wall
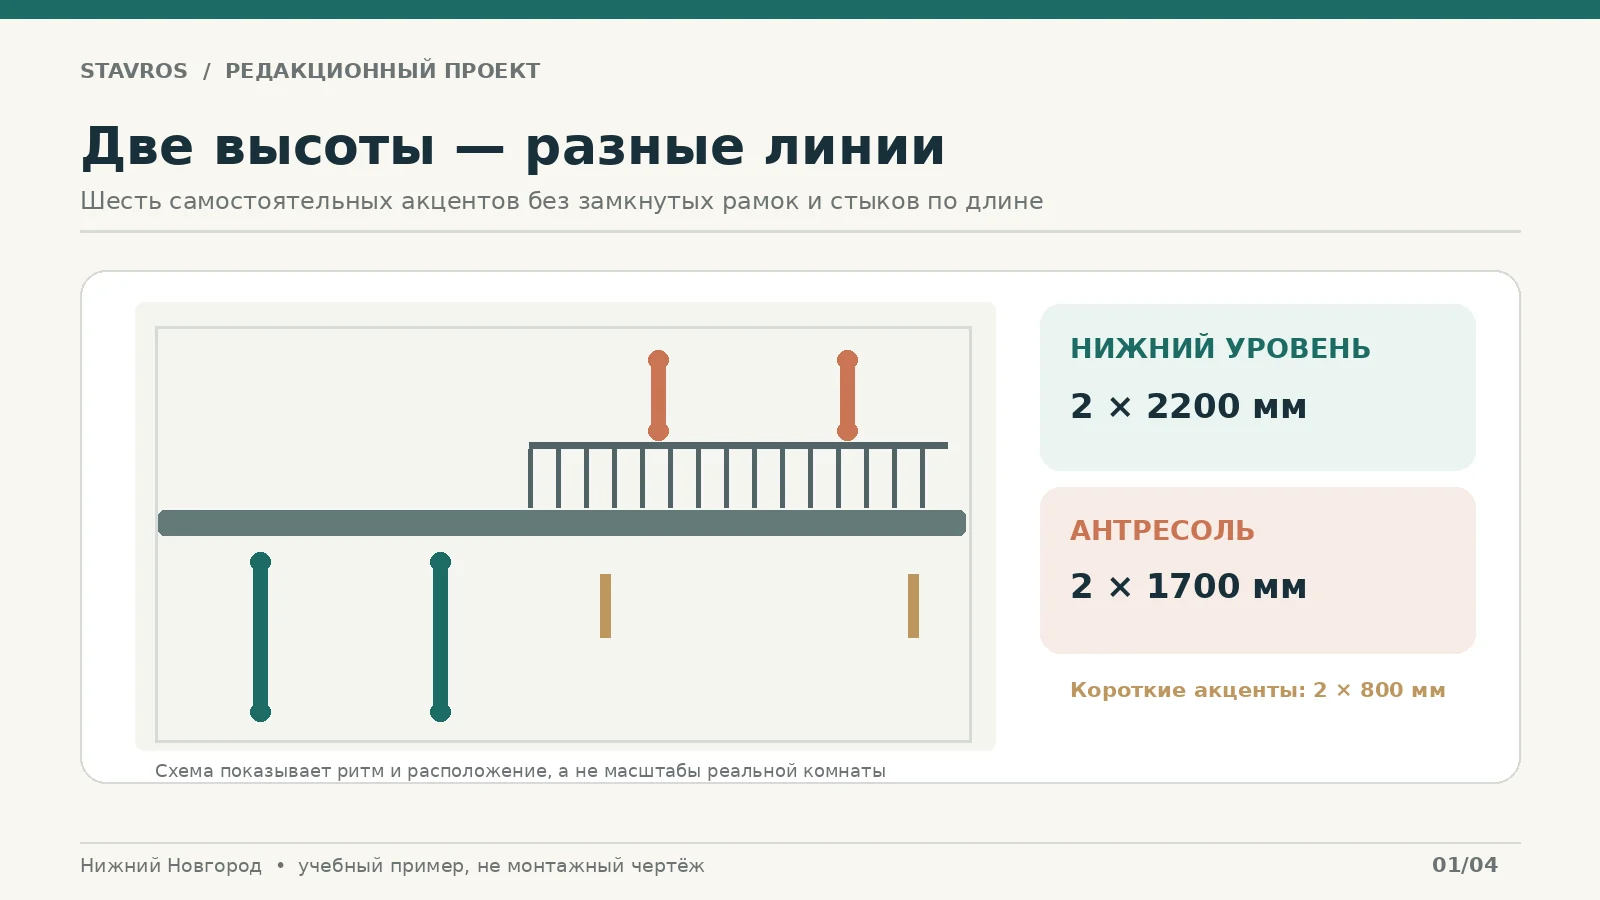
A tall empty plane provokes the desire to fill in the decor all the way to the ceiling. But if the factory strip is 2600 mm long, a solid vertical two stories high requires joining several elements with pre-calculated joints. In our training variant there is no such task: the long lines are 2200 mm each and are located on accessible segments, the upper ones are 1700 mm each, and the small accents are 800 mm each. These dimensions are chosen so that the parts remain self-contained and can be manufactured without transverse splicing along the length.
If another concept requires a continuous vertical of 4–5 m, it is necessary to develop a completely new cutting plan, joint arrangement, and installation operations. You cannot mechanically use the four strips given below and expect the result to be the same.
Light, curtains, and railing: three sources of visual conflicts
A decorative line does not exist on its own but in real lighting. In the evening, side light from a wall sconce can unexpectedly accentuate the shadow of the relief, whereas daylight from a tall window will practically wash it out. That is why it is useful to evaluate a sample at least twice — under daytime and evening lighting. On a light matte wall, a narrow profile sometimes reads more calmly than on a dark semi-matte one, but there is no universal rule: the specific angle of light incidence decides.
Curtains require free movement. A tall window is often dressed with long panels from the ceiling or from the mezzanine level. If the molding is placed too close to the curtain rod mounting point or to the line of fabric movement, it will look cut off, and the drapery will catch on the protruding relief. The drawing must show not only the window opening but also the edge of the gathered curtain, the distance to the tracks, and space for servicing the curtain rod.
A mezzanine railing is a safety element, not a decorative accessory. Neither moldings nor overlays may replace its fasteners, cover inspection joints, or become a support. The profile ledge must be positioned so as not to obstruct movement on the upper platform or cleaning of the space near the railing. For areas in direct contact with hands and objects, it is better to avoid protruding decor regardless of how striking it looks in the visualization.
How to coordinate wall lines with ceiling stucco
At the upper level, the transition from wall to ceiling is especially noticeable. Sometimes you want to continue the wall composition with a cornice around the entire perimeter. But Ceiling molding — a standalone category of elements: a true cornice has its own cross-section, bearing conditions, and abutment geometry. It cannot be substituted with a straight wall molding simply because both products are made of polyurethane.
If the ceiling of a double-height area is high enough, a continuous cornice can emphasize the completion of the volume. But first determine its visibility from all levels. A deep profile on a distant boundary can support the architecture; one that is too massive can visually "lower" the ceiling. With a complex height difference, a separate cornice is sometimes terminated at a logical architectural boundary rather than drawn across the entire volume at the cost of awkward corners and unpredictable abutments.
Particular attention is required for stretch or suspended ceilings. A decorative product must not transfer load to the membrane; the support and sequence of work are agreed with the ceiling system contractors. Wires, air ducts, and access points to utilities may also run through the wall and ceiling area. Their location is identified before drilling, cutting, and gluing begin, so that future maintenance of communications does not turn into dismantling the finish.
Are decorative overlays and rosettes needed?
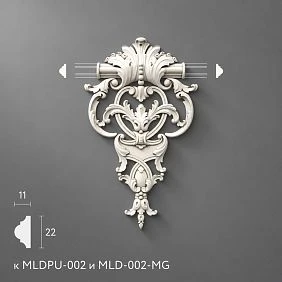
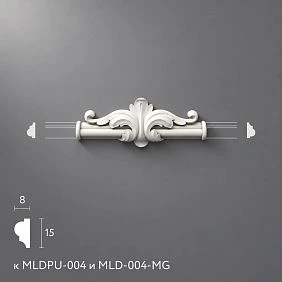
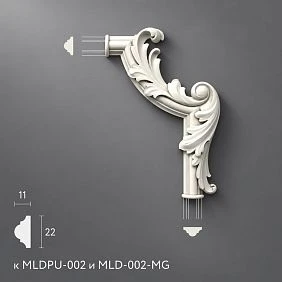
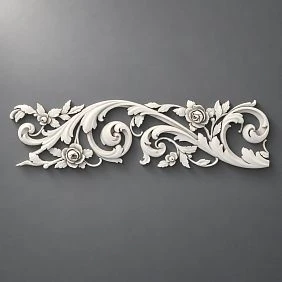
For our project, straight lines play the main role, so overlays are an optional feature. They make sense only where an architectural center needs to be marked: for example, on a free section of wall without railings or light fixtures. The buyer can look at the section Decorative Insertsbut one should not assume that any pattern suits any moulding.
Compatibility is determined by the specific product's card, the series, the mating shape and the actual geometry; a similar name is not proof. For a self-adhesive overlay, the substrate, size and permissible placement must be checked separately. If the decor is to adjoin the moulding line, a connector confirmed by the system or an individually engineered joint will be required, rather than randomly gluing parts together.
Ceiling medallions are considered when there is a pendant light fixture and its mounting has been planned in advance. The medallion is decorative, not load-bearing; it does not replace the suspension point specified by the design. In a double-height living room this principle is especially important: the distance to the light fixture is large, servicing the assembly is difficult, and a calculation error will later require repeated high-level access.
From a practical standpoint, it is worth first completing the design of the straight profiles, assessing the resulting scale, and only then adding local accents. A composition of six independent lines may be quite sufficient; added complexity should solve a separate visual task, not serve as a way to use up leftover material.
Practical project: six independent lines on two levels
Before drawing up an estimate, let us fix the geometry. We are working with a conventional living room in which two long decorative lines of the lower level are located on free sections of the wall. On the mezzanine, two shorter lines are provided, and two more small accents are placed in the wall piers that do not intersect with the railing. There are no closed rectangles, continuous transitions through a corner, or composite verticals two storeys high here.
| Project detail | Pieces | Length of one | Total length |
|---|---|---|---|
| Main lines of the lower level | 2 | 2200 мм | 4400 мм |
| Lines on the mezzanine level | 2 | 1700 мм | 3400 мм |
| Short accents | 2 | 800 мм | 1600 мм |
| Total | 6 | — | 9400 мм |
The length of 9400 mm is not a purchase size but the sum of finished segments. Factory strips are supplied at 2600 mm; we need to find a cutting plan in which each finished part fits within a single source strip. This is especially important for long verticals: if one 2200 mm line is artificially split into two segments, an additional joint will appear, which may be noticeable in side light.
It makes sense to first mark out such a project with painter's tape on the accessible walls, and to verify the upper marks against the working elevation drawing, tied to the existing building axes. Short accents must not be randomly added offcuts. Their position is determined by the composition, and only after the dimensions are approved does the craftsman assess whether they can be cut from the leftovers without altering the pattern.
Cutting plan: why four factory planks are enough
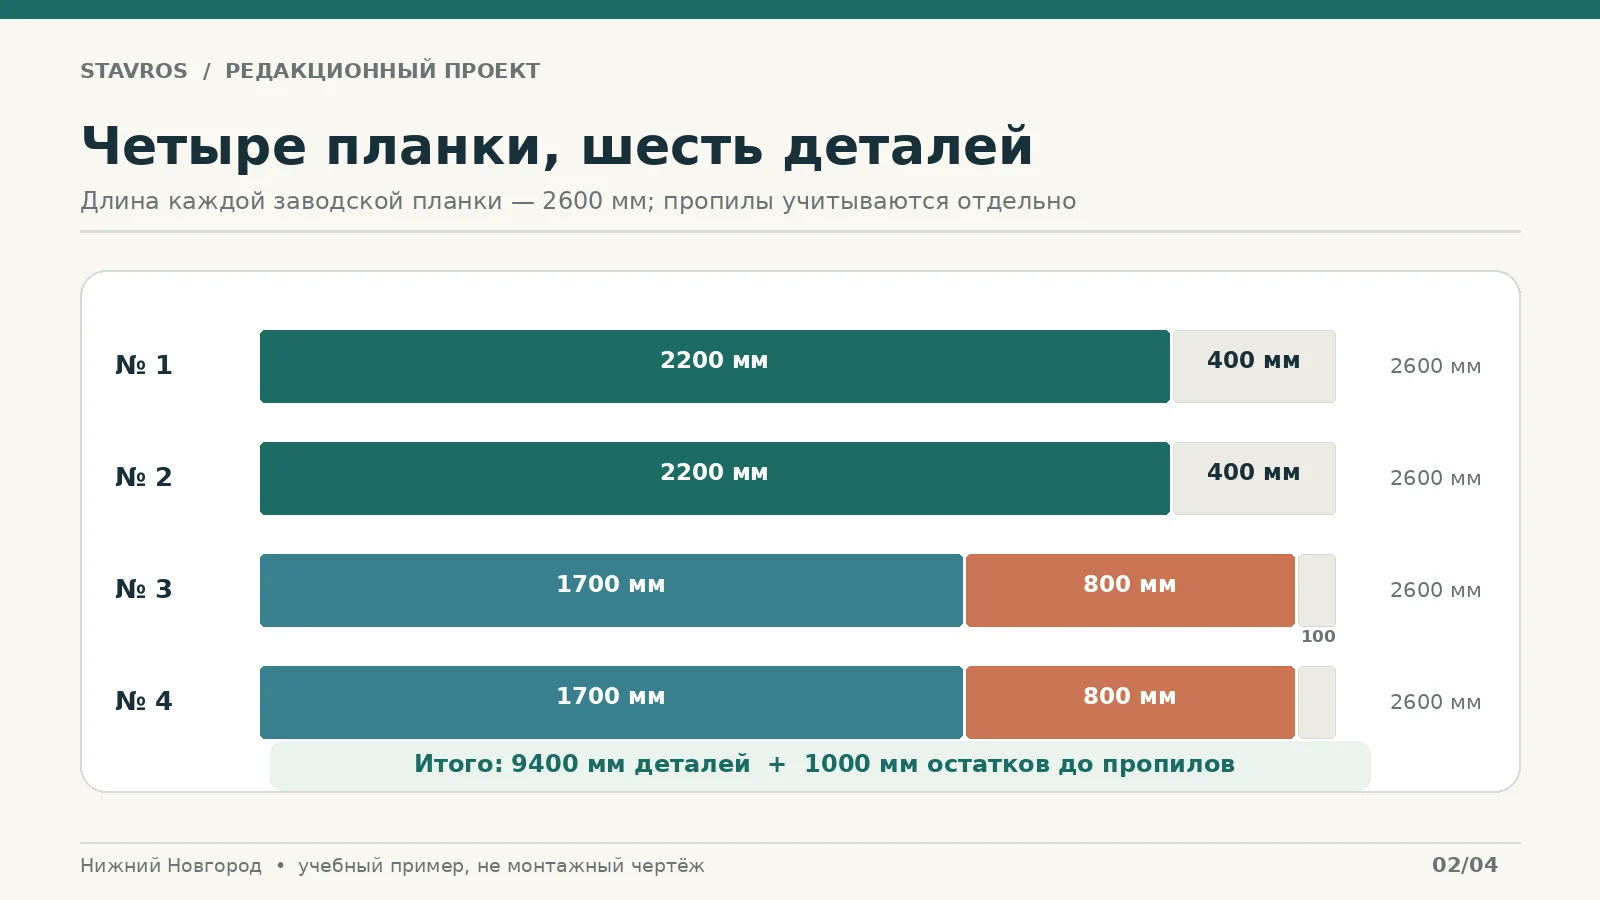
The simplest division of 9400 by 2600 gives 3.62 planks. Rounding up to four is indeed correct in this case, but only because there is a real layout scheme for all six segments. In many other projects such arithmetic is not enough: if there are three parts of 2300 mm and several long elements, the leftovers may not be suitable for the required segments.
Here is a verifiable bill of materials. We assume finished straight segments of the specified length, while we clarify technological saw cuts and precise end finishing according to the tool and the installer's instructions.
| Factory plank 2600 mm | Placed parts | Remaining allowance for saw cuts |
|---|---|---|
| № 1 | 2200 мм | 400 мм |
| № 2 | 2200 мм | 400 мм |
| № 3 | 1700 + 800 mm | 100 мм |
| № 4 | 1700 + 800 mm | 100 мм |
| Total | 9400 mm of finished parts | 1000 mm total remainder |
In strips No. 3 and No. 4, the total of the parts is 2500 mm, meaning 100 mm remains up to the factory size. With ordinary precise cutting, this margin is sufficient for technological kerfs and minor fitting, but it is ultimately assessed by the kerf width, the condition of the factory ends, and the required geometry of each edge. If on site all ends need to be re-cut or complex angled cuts made, a new map with dimensions at the long points should be drawn up.
Strips No. 1 and No. 2 leave 400 mm each. These offcuts can be kept for paint samples or for checking the composition on a small area, but they do not necessarily have to be turned into additional decor. The total 1000 mm of offcut is not "one extra metre-long strip"; the offcuts are separate and have different lengths. They cannot be swapped or glued together without a design decision.
The fifth factory strip is a separate possible safeguard against damage, complicated delivery, or measuring errors. In the training cut plan it is not mandatory. The buyer should choose between four and five strips based on the real condition of the walls and confidence in the technique, not on the universal rule "always take plus fifteen percent."
How much a set of one profile costs
It is convenient to calculate not by the price per linear metre, but by the actual number of strips purchased. Three SKUs from the selected group give the following amounts at official catalogue prices verified on 30 October 2026:
| Selected profile | 4 strips — the main set | 5 strips — with a reserve |
|---|---|---|
| MLDPU-001 | 6 960 ₽ | 8 700 ₽ |
| MLDPU-004 | 12 760 ₽ | 15 950 ₽ |
| MLDPU-002 | 21 840 ₽ | 27 300 ₽ |
This is the cost of straight mouldings only. В таблицу не включены декоративные накладки, потолочные карнизы, расходные материалы, возможная жёсткая упаковка, доставка в Нижний Новгород, подъём, инструменты, аренда безопасной платформы и оплата труда. Некоторые карточки изделий STAVROS отдельно сообщают о подложке для транспортировки небольших партий; возможное начисление и сумму нужно сверять в окончательном счёте. Не стоит принимать табличную стоимость молдингов за цену законченного интерьера «под ключ».
Prices also cannot be transferred to other sections or materials. In the general mouldings section, MDF and polystyrene products with similar size figures sit side by side, but a different letter in the SKU means a different product. When ordering, it is important to re-check the final line: SKU, material, size, quantity, price, manufacturing terms, and handover to the carrier.
Mixed and minimal set scenarios
If the two lower lines are made from MLDPU-004, and the two upper cabinet lines and two short ones are made from MLDPU-002, the cutting plan will remain as follows: for the lower parts you will need two strips of the first item, and for the upper and short ones — two strips of the second. The cost of the products themselves will be 2 × 3190 + 2 × 5460 = 17 300 ₽. What matters here is that each MLDPU-002 strip accommodates 1700 and 800 mm; items cannot be "mixed" within a single factory strip.
There is also the reverse visual solution: two lower lines in MLDPU-002 and the other four in MLDPU-001. The set costs 2 × 5460 + 2 × 1740 = 14 400 ₽. But such a choice is justified only if the thin upper decor is actually legible from the required distance. Numbers do not replace a visibility check.
The minimal scheme with two lower lines of 2200 mm each requires two strips of the selected profile. For MLDPU-001 this is 3480 ₽, for MLDPU-004 — 6380 ₽, for MLDPU-002 — 10 920 ₽Saving on material is understandable, but before choosing you should assess whether the composition will become unbalanced. If a wide window and railing already set a vertical and horizontal rhythm, the reduced version may look the most cohesive.
For mixed solutions, the reserve is calculated per specific item code. One additional thin strip will not help if a long section of a wide profile is damaged. Therefore, in the request it is convenient to have a separate column for the "main set" and a separate one for the "possible reserve," without reducing them to a single total without a breakdown.
How to place a STAVROS order without confusion
A correct request begins with a table that the buyer, manager, and installer understand alike. It lists the name, item code, material, cross-section, factory length, and quantity, and as a separate attachment, a cutting map with part codes. For the universal option made of four MLDPU-004, this will be one product line and six lines of finished parts. For a mixed composition, there are already two product lines.
Key caveat: the supplier ships factory strips, not the six finished parts of our training composition. The official STAVROS description states that the service of cutting products to individual size is not provided. Therefore, the cutting map is passed to the installer or to the contractor whom the buyer engages separately. When ordering, it is important not to enter "six" in the quantity column just because there are six parts: the purchase consists of four factory units.
Separately agree on priming, surface preparation, the adhesive system, joint filling, and painting. If the high walls are already painted, it is necessary to check the adhesion of the old coating and the compatibility of the chosen compound. The presence of a smooth polyurethane relief does not guarantee that it can be safely glued to a flaking layer of paint or loose putty.
Buyers sometimes have a search-style phrasing Buy moldings. The practical translation of such a phrase into action looks specific: select the product by item code, compile a list of the required factory units, check the estimate, and pass the approved drawing to the contractor. This is exactly the sequence that is more convenient to use for a complex two-level room.
Delivery of stucco moldings to Nizhny Novgorod: what to clarify before payment
STAVROS lists delivery options via CDEK, Delovye Linii, DPD, courier delivery, and pickup subject to the issuance conditions. Details are provided in the section Payment and deliveryThe specific method for long-length packaging is chosen after confirming the address and dimensions, not based on the transport company's name alone.
A 2600 mm strip may be packed with protective elements; the actual length of the cargo unit sometimes differs from the dimensions of the profile itself. For a double-height living room, an order may consist of just four strips, but the requirements for protecting the ends remain important. Ask whether a rigid backing is provided, how many cargo units will be in the shipment, and what the inspection procedure looks like upon delivery.
Even before choosing address delivery, measure the passages in the building and the temporary storage space. Do not automatically assume that cargo longer than 2.6 m will fit in a standard elevator or pass through a staircase with a tight turn. If access is limited, an alternative lifting method and the cost of the corresponding service must be agreed upon. Cutting products yourself for transportation without recalculating the cutting plan is risky: you may lose the ability to get a continuous 2200 mm line.
As of the date this article was prepared, we do not state a fixed delivery time and cost to Nizhny Novgorod: they depend on the shipping method, address, availability, packaging, and current tariffs. Production times are clarified separately if the selected item is not in stock.
Delivery across Nizhny Novgorod Oblast: the destination city changes the calculation
An order for an address in Nizhny Novgorod, Dzerzhinsk, Bor, or another locality in the oblast may have different pickup points, routes, and available lifting services. Do not transfer a tariff calculated for the regional center to the oblast. Even within a single city, a private house with convenient unloading and a multi-story complex with a long corridor present different organizational challenges.
For delivery to Bor, for example, it is important to give the carrier the final address, not just specify Nizhny Novgorod Oblast. For Dzerzhinsk and other cities, exactly the same applies. Clarify the need for transshipment, access to the work site, temporary storage, and the recipient's presence. If delivery is to a terminal, decide in advance who will collect the long-length packaging and whether they can transport it without creases or impacts.
In the specification, it is useful to separate four cost lines: products, protective packaging, transport service, and lifting/moving within the property. Such transparency does not guarantee the lowest price, but it allows offers to be compared without hidden assumptions and prevents logistics errors from being blamed on the quality of the moldings themselves.

Installation at the lower and upper levels: different working conditions
An installer who is used to gluing moldings at shoulder height cannot automatically apply the same procedure to a wall above an open space. Lower sections are usually accessible from the floor or from stable approved work equipment. The upper part of a double-height living room requires a separate solution: which platform can be placed, how to organize its access to the wall, what is below, and who is responsible for the safety of people and the preservation of the finishes.
Do not work on the mezzanine by leaning over the guardrail or shifting your weight onto the railing. It is not permitted to use makeshift supports, stacks of materials, or furniture in place of proper access equipment. For high and hard-to-reach areas, qualified installers, suitable equipment, and compliance with the manufacturer's instructions and applicable safety requirements are required. If conditions do not allow safe access to the location, the architectural composition is revised rather than looking for a way to "reach it somehow."
A separate issue is moving a long strip into the work area. Even a lightweight profile is awkward to turn in a tight opening and to hold during fitting. The place for lifting, carrying, temporary storage, and protection of finished surfaces should be planned together with the installation sequence. A good result begins not with a tube of adhesive, but with an organized workplace.

The correct sequence: from the base to painting
Geometry first, adhesive second
Work is carried out according to the approved wall elevation drawing. The installer transfers the axes and reference marks, checks verticality, and correlates them with window and door openings. After that, the parts are dry-fitted without adhesive to make sure that the ends, distances, and logic of the composition match the plan. An error of 10–15 mm, almost imperceptible on a single profile lying separately, can become obvious when two long verticals stand side by side.
The base must be strong, dry, cleaned of contaminants, and compatible with the chosen installation system. On a painted wall, check the strength of the old layer and whether adhesion is possible; on a plastered wall, check the quality of the base. Do not expect the adhesive to compensate for loose filler, significant unevenness, or a poorly secured coating. In doubtful conditions, the technology is selected based on the recommendations of the adhesive manufacturer and the installer.
After preparation, perform a test cut of a separate piece or the remaining sample. It shows the quality of the end and helps assess possible burrs. Decorative profile should be cut with a suitable tool, taking its shape into account. The availability of long factory-made parts does not mean that straight ends are suitable for every composition: if turns and angled junctions are introduced into the project, the cutting plan and installation operations will change.
When to address joints and how to protect the finished trim
In our basic calculation, six independent lines have no transverse joints along their length, but there remain points where the ends terminate and where they adjoin the painted wall. After bonding, they are carefully finished with compounds permitted by the technology used. Sealant must not substitute for precise geometry: a thick layer in a crooked gap is usually more noticeable than a properly executed end.
The final finish is applied after the adhesive has had the time specified in the instructions to gain strength and the materials have dried. When painting to match the wall, it is easier to maintain a calm perception of several levels; contrasting paint is chosen only after a visual check. For a tall room, an evening inspection is especially useful: directional light quickly reveals uneven joints and small deviations of the lines from the common axis.
While work is underway, the floor, staircase, railings and built-in furniture are protected. In a project with a mezzanine, you need to account not only for paint drips, but also for the potential fall of tools or offcuts into the lower zone. Therefore, the area beneath the location of the high-level work is fenced off and outsiders are not allowed to pass through. Preparing the space is a full part of the technology, not an optional afterthought following installation.
Why the upper wall cannot be done before the entire drawing is approved
On a construction site it is often more convenient to start with the section where the platform has already been set up. However, if the upper markings have not yet been coordinated with the lower ones, you can end up with a visual break. For example, the mezzanine line may end up 70 mm to the left of the axis of the corresponding lower accent. At one level this seems like an acceptable offset, but when viewed as a whole from below it is a compositional error. Fixing it will require dismantling, re-preparing the base and, possibly, a new product.
The working documentation must include an elevation drawing of both zones with shared coordinates. Mark the fixed reference points: the window axis, the edge of the opening, the vertical of the load-bearing wall. For each decorative element, specify the distance to these reference points and the height of its ends from the chosen design floor level. Such data allows the levels to be marked out independently and then the composition to be checked for alignment.
It is convenient to divide the check into two stages. First, the drawing is used to confirm that the lines do not conflict with structures and openings. Then, using photographs from pre-selected viewpoints, their scale and balance are assessed. If at the second stage it becomes clear that the upper decor is not needed, it can still be abandoned without dismantling. Once it has been glued on, such a decision will be significantly more expensive.
Seven mistakes that force you to redo your purchase
- Substituting the project with square footage. They buy four planks without cutting, and then it turns out that the required continuous lengths do not fit into them. The solution is to lay out the parts for each factory length before paying.
- Using a single profile just because it is cheaper. On a distant high wall, a thin line may not be visible. You need to check the scale from a real viewpoint, not from a large product photo.
- Mixing profiles without a transition solution. Two different profiles meet in one continuous line and form an unattractive end. If there is no coordinated junction, keep the lines independent.
- Marking out from furniture instead of architecture. Today the sofa stands in the middle, tomorrow it is replaced, and the "center" of the decor disappears. Anchor the main axes to openings and permanent structures.
- Not accounting for light fixtures, curtains, and railings. The line looks clean in the visualization, but on site it intersects with a fastener or is hidden by fabric. A full wall elevation eliminates this risk.
- Ordering high-level decor without an access solution. After delivery it becomes clear that the element cannot be safely installed. High-level work arrangements are confirmed before purchase, and if necessary the project is scaled back.
- Treating the table price of profiles as a final estimate. Packaging, transport, additional consumables, painting, and labor are added to the material cost. These items must be agreed separately, not declared included without justification.
A useful habit is to put next to each error not just a ticked "noted" box, but a link to a document: a cutting plan, a measurement, a photograph, a delivery calculation, or an agreed work technology. This turns the list of risks into a genuine order-control tool.
Quality control after installation: what the customer will see
Even a strip cut perfectly to the millimetre can look unsuccessful if it was installed without regard for the overall perspective. That is why acceptance of the decor in a double-height living room includes two distinct levels of control. Up close, assess the cleanliness of the ends, the absence of noticeable gaps and drips, the evenness of the paint, and the fit against the wall. From a distance, assess the correctness of the vertical axes, the repeatability of the offsets, and the relationship of the decor to the mezzanine, the staircase, and the window. One does not replace the other.
It is useful to agree on three shooting points in advance. The first is at the entrance to the living room, the second is in the area of normal everyday viewing, and the third is on the upper landing. After installation, take photographs from the same positions and compare them with the approved sketch. You should not evaluate the result only from a wide-angle photograph: the camera can stretch the edges and create a false impression of tilted verticals. It is better to compare the visual impression with an instrumental check of the layout.
The lighting conditions should also replicate normal use. During the day by a tall window, the lines may look flatter; in the evening under a wall light, they may look considerably more pronounced. If the customer expected a restrained finish in the same tone as the wall, but after turning on the light got harsh shadows, the problem may not be the quality of manufacture but a lighting scenario that was not checked in advance. Correcting this after installation is more difficult, so the sample and the light need to be agreed before purchasing the entire set.
Who checks the project before ordering and before installation
The buyer, the manager, and the installer have different tasks. The buyer determines the desired architectural composition, approves the number of lines, and provides access to accurate information about the room. The manager confirms the products, item codes, prices, method of ordering, and delivery terms. The installer is responsible for measurement, the cutting map, the choice of a suitable fixing technology, and the organisation of safe work. This is not a default legal allocation of responsibility, but a practical scheme of approvals that the parties can formalise in the order and the contract.
The most dangerous situation is when each person believes that one of the others has already checked the key parameter. The buyer is sure that four strips were ordered with a reserve, the manager sees only four identical items, and the installer on site learns about six segments and additional corners. To avoid such discrepancies, the same schedule should accompany the order from the first request to acceptance. It is advisable to sign off the revision of the drawing in it: if the sketch has changed, the old cutting map is not applied automatically.
Separately record who provides safe equipment for the upper wall and who is responsible for coordinating access on the day of the work. A finished decorative line does not compensate for the absence of such coordination. If installation at height is not yet secured, you can order only the confirmed lower parts and temporarily leave the upper part of the project as a separate stage. Such a division is often more sensible than trying to buy the whole set at once without a clear execution plan.
Frequently asked questions from buyers in Nizhny Novgorod
Can two planks be joined to get a vertical height above 2600 mm?
Technically, a project with joints is possible, but it requires a separate calculation of the joint, preparation of the base, and a method for concealing the joint. Our 9400 mm training kit does not provide for this. A solid long vertical requires a new parts list; it cannot be considered equivalent to two short independent accents.
Are four planks enough for the entire double-height living room?
Only for the specific layout of two 2200 mm segments, two 1700 mm segments, and two 800 mm segments. On another wall, the number of segments, lengths, joints, and actual linear footage may change. The four planks here are a verified cutting result, not a universal consumption rate for a living room.
Should you choose the widest molding for the mezzanine?
Not necessarily. The MLDPU-002 profile is more prominent in cross-section than MLDPU-001, but the result depends on light, wall color, distance, and railing. On some walls it will emphasize the architecture; on others it will be excessive. Before buying, it is useful to try a fragment and compare one and two scales.
Can a polyurethane profile be glued to an already painted wall?
It depends on the strength of the coating and the compatibility of the adhesive with the base and the profile material. The surfaces must be checked and prepared according to the instructions. No universal promise can be given that the paint will remain untouched and no local touch-up will be required.
Where can I confirm the delivery price to the Nizhny Novgorod region?
At the time of placing a specific order with STAVROS and the selected carrier. The delivery address, order contents, dimensions of the protective packaging, method of handover, and lifting services, if required, are needed. Values from someone else's estimate for Nizhny Novgorod should not be automatically transferred to Dzerzhinsk, Bor, or a small settlement.
How can you tell a wall molding from a ceiling cornice?
Study the purpose and drawing of the product. A standard wall profile is used for a decorative line on a flat surface, whereas a cornice has the geometry of the wall-to-ceiling junction. Even if both products are made of polyurethane, it is wrong to consider them interchangeable based on material alone.
What should I do if, after ordering, I decide to drop the upper lines?
Before starting work, recalculate the specification: the remaining strips can be used on agreed sections or kept as a reserve if this is acceptable. But you should not automatically fill empty walls with them. The absence of decor at height is often better than a random set of short lines. The possibility of changing the order or returning items depends on the purchase terms and the condition of the goods; check this with the seller.
Do I need to order overlays and rosettes separately?
Only if the project includes such elements and their dimensions, purpose and compatibility have been checked. Six straight lines can form a complete decor without additional details. In a double-height room, each new accent is checked from both viewing points and with regard to maintenance accessibility.
Final schedule before purchase
For a hypothetical project with a mezzanine, six independent straight decorative lines with a total length of 9400 mm were selected. With a standard factory strip length of 2600 mm, the verified cutting plan uses four pieces, and the fifth is an optional reserve. As of the check date, the cost of four identical STAVROS strips is 6,960, 12,760 or 21,840 rubles for the three reviewed item codes respectively. If profiles are mixed, the schedule and cost are recalculated separately.
Before making a final decision, you need to approve the viewing axes, the clear zones near railings and windows, the safety of installing the upper level, the quality of the base, the set of consumables and logistics. If at least one of these points is not confirmed, it is wiser to adjust the layout than to buy extra material. After that Moldings made of polyurethane you can choose by actual item codes and dimensions, and assemble the order as a precise set of parts for a specific architecture, rather than as an abstract number of meters of stucco.