Article Contents:
- Spread one: the bookcase is already built, but the wall isn't yet
- A mistake you can only see on the installation diagram
- Furniture layout first, catalog search second
- Where to buy stucco molding in Samara: don't confuse the catalog with a local warehouse
- Editor's note: the shelving unit dictates the scale
- Polyurethane or gypsum: comparing the task, not the status of the material
- What exactly to order: one system, three categories
- Verticals between sections: three lines, not three frames
- Upper horizontals: why they shouldn't "rest" on the cabinet
- Two short accents: their job is to stop the rhythm
- When the cabinets are rearranged: testing the future scenario
- Cornice above the books: should the line continue to the ceiling
- Plates and sockets: the art of giving up the unnecessary
- Three STAVROS profiles: a short editorial selection
- Reading a profile on a narrow wall section: a test without catalog illusions
- Choosing a color is not a catalog's job
- Light: the shadow from the profile may turn out to be a second line
- Three ways to style one wall: minimal, graphic, composed
- What to measure on site rather than take from the construction plan
- Which surfaces to leave empty: a list of rejections
- Seven details on the wall: a schedule you can verify
- Cutting map: why five strips are enough and four are not
- Estimate: three prices, but the same cutting layout
- The sixth strip: insurance or an unnecessary purchase
- Order list: the item code matters more than the artistic description
- Delivery of stucco to Samara: they ship strips, not 10.2 meters on paper
- Acceptance: four questions before cutting begins
- Installation: what happens between the drawing and the painted wall
- Boundaries of responsibility: the furniture maker, the finisher and the client
- Nine questions worth asking before paying
- Can I order moldings if the shelving units haven't been assembled yet?
- Why doesn't the search "buy stucco molding" help you choose the right trim?
- How should you interpret the search "buy polyurethane stucco molding" when choosing a material?
- How many meters of moldings are needed for three wall sections and two upper lines?
- Which of the three profiles looks best next to the book sections?
- Can the profile be glued directly onto the side of a bookcase?
- Should I get a sixth plank as a spare?
- Can a cornice and decorative overlays be included in this estimate?
- What should I check when receiving it in Samara or another city in the region?
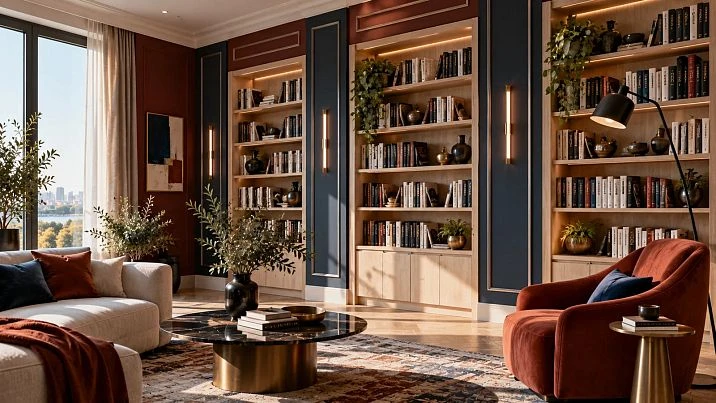
In a library, everything starts with books, but most often the project comes to a halt at an empty strip of wall twenty centimeters wide. The furniture has already been designed, the shelves are calculated for a collection of art albums and novels, and the light is aimed at the armchair. The designer suggests adding thin vertical lines between the cabinets. The furniture maker objects: this is exactly where the fastenings to the structural wall must run. And the client shows a photo from a catalog and asks why it can't be done "exactly the same way." This is how a task arises in which Moldings must be subordinate to the work of the library, not the other way around.
Let's take a typical modern apartment in Samara. One wall is occupied by built-in book sections, while the others retain narrow wall piers, spaces for light, and short free strips above the furniture. This does not call for a row of identical classic frames. What is needed is a system of seven independent straight pieces: three verticals of 2100 mm, two horizontals of 1350 mm, and two small accents of 600 mm. In total that is 10.2 meters of decor, but ordering it will require five factory strips 2600 mm long. This discrepancy is where the practical part of the article grows from.
If you are going to Buy molding for such a room, first establish where the furniture fastenings, cables, opening fronts, and ceiling lights run. Only after that does it make sense to compare the price and pattern of the profile. Below is an editorial breakdown of one project: seven pieces, five strips, three possible cross-sections, and a number of decisions that depend not on an interior photo but on precise measurement.
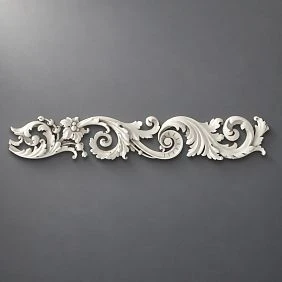
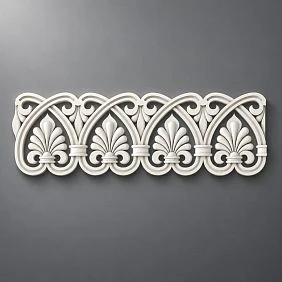
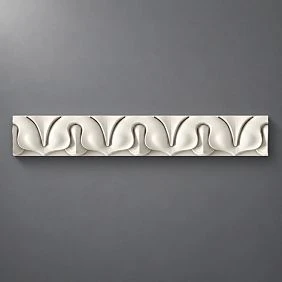
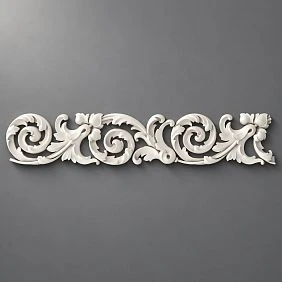
Spread one: the library is already built, but the wall is not yet
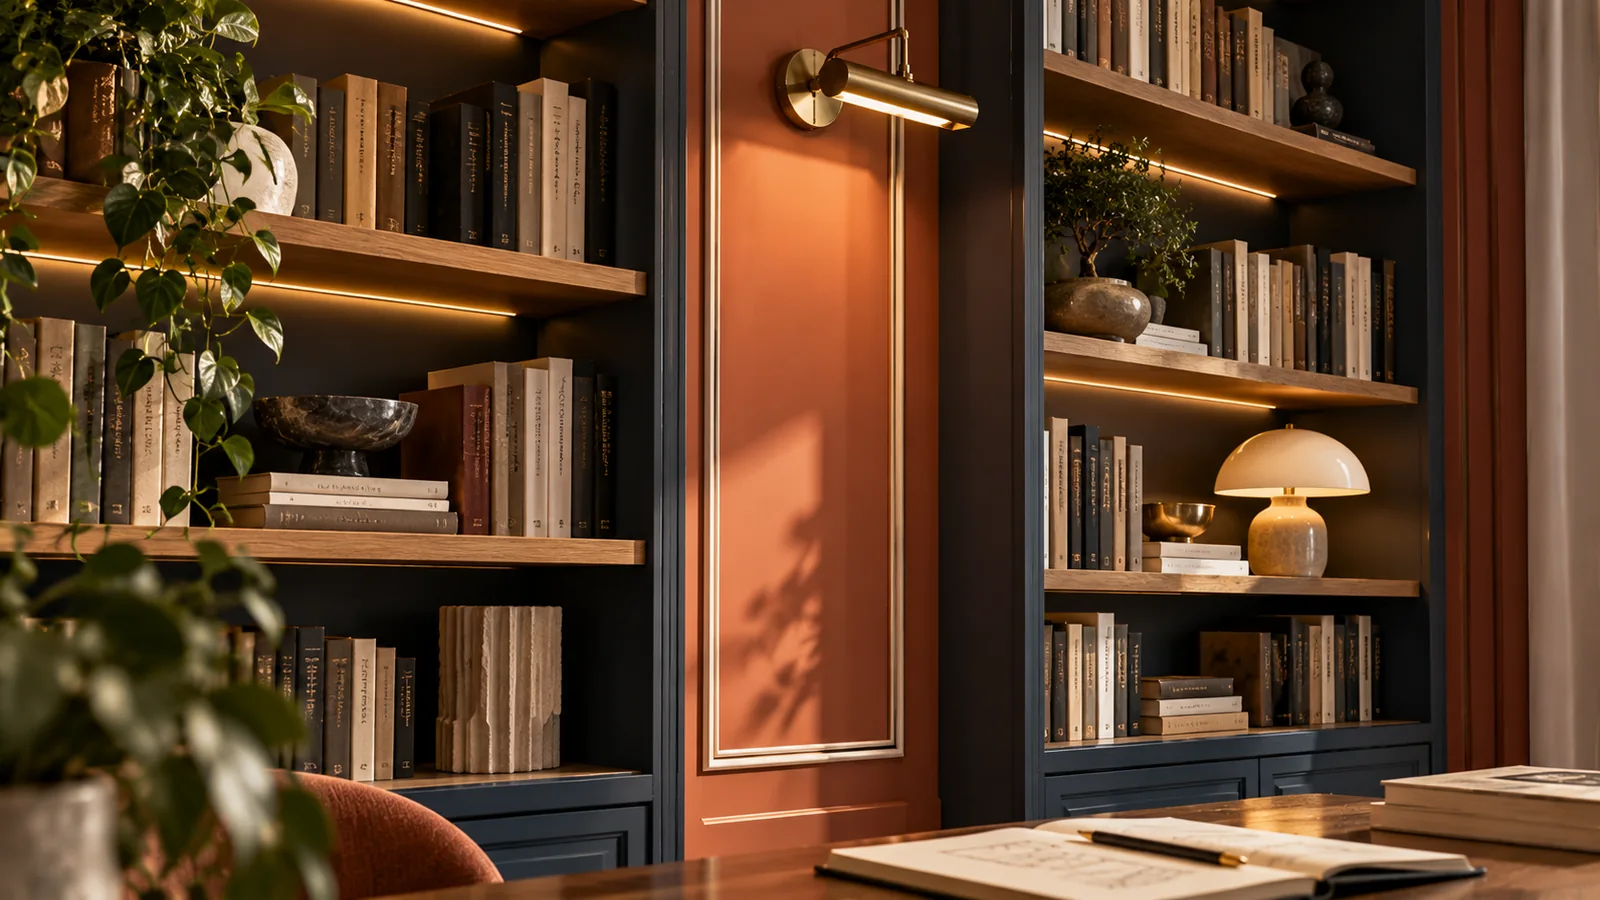
Let's imagine the moment when the assemblers have installed the bookcases but have not yet secured the upper sections. Externally everything looks finished: the vertical posts are aligned, the fronts cover the lower compartments, and the lighting is ready. However, for decorative finishing this is not the end but the beginning of the survey. Between the cabinets, sections of painted wall remain, and each differs in width by a few millimeters. One wall pier is lit by the sun, the second falls into shadow, and the third sits next to a furniture fastening. A single line cannot be drawn here automatically while ignoring the details.
The main insight of the project is to abandon the idea of outlining all the furniture with a polyurethane profile. Such an attempt would tie the finish to the exact position of the cabinets and, if the furniture is changed, would leave random fragments of contours on the walls. Instead, we treat the wall lines as independent architectural elements: each has a beginning, an end, and a safe installation zone. They belong to the wall, not to the bookcase. Thanks to this, the room retains its integrity both today and after the furniture is rearranged.
There is a useful contradiction in this approach. On the one hand, three vertical pieces of equal length create a regular rhythm; on the other, equal length does not mean equal clearances from the furniture. The working drawing must leave room for hinges, fastening points, possible cabinet expansion, and access to outlets. If a strip forces the anchors to be repositioned for the sake of beauty, it is the decorative scheme that should change, not the safety requirements for heavy book sections.




A mistake that is visible only on the installation drawing
In the visualization, the molding sits between two tall cabinets, but on the cabinetmaker's plan this same wall section is occupied by a mounting plate. The contradiction cannot be resolved with the phrase "we'll work around it later." A decorative profile must not block the ability to tighten the fasteners, inspect the joint, or remove a cabinet module. This is especially important for tall shelving loaded with books: the mass of the furniture and its contents is unrelated to the mass of lightweight wall decor.
The correct sequence is simple in meaning but requires coordination: first the furniture's load-bearing fastenings and the cable route are checked, then the free planes are identified, and only then are the axes of the future decorative elements marked out. If anchors run along the chosen axis, it is moved or removed altogether. Neither glue nor a decorative overlay replaces the standard system for fastening furniture to the base. At the same time, the result can look more composed: a small free field is often better than a tight set of lines around every shelf.
A distinction must be made between a facing strip and an engineering tolerance. Molding can mask a minor visual unevenness of a painted background, but it does not correct wall curvature, does not turn a weak base into a strong one, and does not serve as a mechanical fastener for the shelving. If the furniture stands flush against the wall, the junction is checked separately: the carcass must not press on the profile, and the profile must not interfere with opening a door or pulling out a drawer.
Our factory also produces:
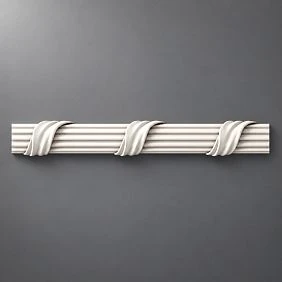
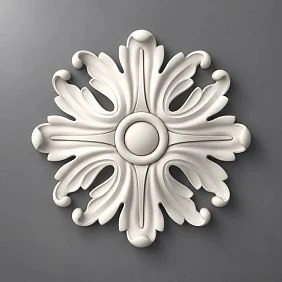
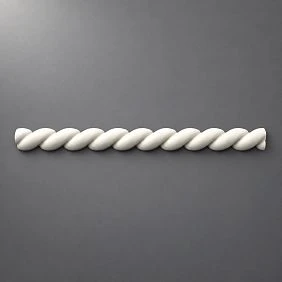
First the furniture layout, then the catalog search
For a library, it is convenient to prepare two simple sheets. The first is the "survey": wall heights, distances between sections, widths of free wall sections, the visible area above the cabinets, and the location of light fixtures. The second is the "no-go zones": anchors, cable outlets, outlets, ventilation grilles, service areas, and the paths of opening parts. This is not formal bureaucracy. Such a set reduces the likelihood that a perfectly cut strip will turn out to be superfluous on site.
To achieve a clear architectural composition, a third thing is needed: a control line. It is not set "by eye" from the floor or from the top edge of an individual cabinet, which may stand with a technological gap. Height and verticality are checked with a level, and the starting point is coordinated with the actual geometry of the wall and furniture. Sometimes it is reasonable to keep the upper horizontal on only one section, instead of trying to continue it around the entire room across different cabinet heights.
Before buying, it is useful to apply paper or painter's tape of the future profile's width to the wall. In a photograph taken from two or three steps away, the density of the pattern is clearly visible, but it is even better to assess it in the room itself: this makes it easier to notice that the line runs too close to a switch, interferes with a painting, or creates unnecessary visual noise next to book spines. A trial layout is an inexpensive check that is especially valuable before long-length items are delivered.
Get Consultation
Where to buy stucco in Samara: don't confuse the catalog with a local warehouse
The purchasing journey for this task begins with the STAVROS catalog. To buy stucco molding in Samara, there is no need to assume the existence of a separate warehouse or showroom in the city: on the manufacturer's website you can select the item code, size and quantity, then clarify the shipping terms for a specific address. The possibility of Contact us to confirm shipping to your destination. is published, but the cost, timing and availability of the required option must be confirmed at checkout, especially if the order includes several long strips.
The catalog clearly distinguishes straight moldings, ceiling elements and overlays. For a study library, the main product will be a single straight profile, identical on all seven lines. Attempting to replace a missing strip with a similar cross-section from a different item code creates a noticeable difference in relief under side lighting. Therefore, the specification should not say "thin white molding" but give the exact model designation and the dimensions of the selected option.
A separate point is buying a sample or checking the drawing. A product photo does not always show the real depth of the relief next to a vertical furniture post. Two items of the same length can look completely different on a narrow wall section. Before paying for the entire order, compare the selected cross-section with the width of the free field and the distance to the cabinet hardware. The unit price matters, but an error in the profile pattern will cause more inconvenience than the difference between two item codes.
Editorial note: the shelving unit dictates the scale
A large book section almost always already contains a strong rhythm. It is created by vertical posts, horizontal shelves, book spines and the light inside the cells. When adding wall decor, it is easy to end up with yet another competing grid. The more complex the filling of the shelving unit, the calmer the pattern on the free wall should be. What matters here is not the number of decorative elements, but their ability to tie the separate wall sections into a single composition.
Scale should be checked at a specific eye level. Standing at the entrance, a person perceives the whole wall at once: a profile that is too wide can turn a narrow section into a heavy column. Sitting in an armchair, they see the details from the side and notice the shadow from the relief. With side lighting, even a small protrusion becomes more noticeable. That is why a 10 mm wide profile sometimes works more convincingly than a 22 mm one, even though the latter looks more impressive on the product card.
The distance between the cabinet and the molding also matters. There is no single universal millimeter tolerance for any library furniture: the distance is determined by the design of the section, the presence of doors, attachment points and the actual protrusion of the profile. Artificial "beauty standards" are not needed here. What is needed is measurement, a trial fit and verification that the new element does not interfere with the use of the room.
Polyurethane or gypsum: comparing the task, not the status of the material
For a home library, both materials can provide a quality decorative surface. Gypsum is valued for its traditional mineral character and the ability to create complex shapes, but it is heavier and usually more demanding to handle with thin, long elements. Polyurethane profiles are easier to move and cut, and the range of ready-made sections allows you to choose a sufficiently thin line for a cramped wall section. This is an argument in favor of polyurethane specifically in our scenario, not a claim that gypsum is always worse.
A gypsum element may be appropriate in an interior that calls for deep historical relief, where a stable substrate is ready and suitable installation is provided for. But if the narrow field between cabinets requires a thin straight line without complex ornament, the extra weight and greater depth of the element often improve nothing. When choosing, one should consider not only the cost of the product but also labor costs, joint finishing, the fastening method, and the risk of damage during transport.
Polyurethane also does not exempt you from technical verification. It cannot be regarded as a universal building structure: it does not support bookshelves, does not repair insufficiently strong plaster, and does not allow a rigid molding to be arbitrarily bent along a curved wall. The substrate must be suitable for adhesive fastening, and the finishing materials must comply with the manufacturer's recommendations and the conditions of the room. Before making the final choice, it is useful to compare not "the strength of the material in general" but the specific installation point next to the cabinet post.
What exactly to order: one system, three categories
The project includes a wall decorative line — it is what forms the measurable set. Additionally, a ceiling cornice and local overlays may appear. These are different categories that should not automatically be considered part of one set. First, choose Moldings made of polyurethane for seven elements, then, if the design truly requires it, separately specify the cornice with its own profile and length. Overlays may turn out to be entirely optional: a room filled with books usually does not need additional ornament on every wall pier.
Another useful boundary is between wall decor and furniture decor. Here we are considering fixed painted surfaces. If the buyer wants to place an element on a cabinet facade, the facade material, its finish coating, and the gluing method require separate agreement. One should not transfer a recommendation for a mineral wall to laminated furniture just because the profile visually suits both options.
To prepare an order, it is convenient to immediately divide the specification into the main contour, the reserve, and the options. The main contour is five factory strips of one article number. The reserve is a sixth, if there is a chance of a cutting error or a change in measurement. The options are the cornice, overlays, glue, primer, finishing paint, and packaging. This division gives the buyer the right to reduce the estimate without accidentally losing necessary elements.
Verticals between sections: three lines, not three frames
Let us imagine three free wall sections between tall book sections. On each, an independent vertical 2100 mm long is marked. Unlike an ordinary rectangular frame, this stroke does not require corner joining, does not enclose the space, and does not force all field widths to be equalized. Its purpose is to create a repetition of the direction already set by the vertical posts of the furniture, but on a calmer wall surface.
However, it is not always possible to place all three elements strictly along the central axes of the wall sections. One area may have a cabinet bracket, another a light switch, and a third may be too narrow for the chosen profile. Therefore, the clear strip is first checked along the entire height of the future element, and then a decision is made about where the line will run. Shifting one molding is acceptable if the composition ultimately reads as coherent and the safe installation zone is not compromised. Symmetry is useful, but it is not more important than access to the fasteners.
The length of 2100 mm in the training calculation is given for a finished straight element. It must not be confused with the height of the room or the cabinet. The start and end of the line must have a clear architectural meaning: for example, a consistent offset from the visible upper and lower boundaries of the furniture composition. Before ordering, the craftsman records the finished size and the method of finishing the ends. If the ends remain straight, cutting is simpler; if the project adds angled cuts, the actual length of the blank may change.
Upper horizontals: why they should not "rest" on the cabinet
Two short horizontal sections of 1350 mm each are placed above the selected sections where there is enough free painted background. Their task is to gently bring the top of the composition together, not to depict a load-bearing lintel. It is wrong to extend such a line onto an overhead cabinet door or to glue it across the joint between the furniture and the wall. Materials may move differently, and subsequent furniture maintenance will become more difficult.
The height of the upper accent is chosen after coordinating the ceiling light and the cornice. If there is a small gap between the cabinet and the ceiling, an additional horizontal may only emphasize the tightness. Sometimes it is reasonable to move it to another wall or omit it. You must not automatically copy the line height from a photograph: in the depicted interior the ceiling may be higher and the upper modules lower. Here the correct composition relies on the actual height of the free plane.
Think about how the look of the wall changes in the evening. Lighting built into the shelf can make the profile relief more noticeable or, conversely, plunge it into shadow. Therefore, it is useful to evaluate the trial marking with the work lights on and daylight off. If the fixture casts a sharp double shadow, reducing the depth of the molding may give a calmer result than changing its color.
Two short accents: their task is to stop the rhythm
Two segments of 600 mm each remain on the plan. They are easy to mistake for random offcuts, although in the composition they play a separate role. A short line helps mark the boundary of a free area, for example near a reading spot or a small painting. But if it is placed too close to the painting, there will be a competition of decorative frames. If it is right next to the switch, it is a visual error and a maintenance problem.
Short elements should be designed last. First the three verticals and two upper horizontals are checked, then you look at whether there really are surfaces left that need an additional touch. If the library is already visually rich, the two accents can be omitted. This is not a designer's defeat but a sign of discipline: a smaller set sometimes reveals the texture of wood, books, and light better than a carefully drawn but overloaded grid.
For our training calculation, the two segments are retained to show the difference between the total length and the actual cutting layout. They are placed alongside the two horizontal elements on the fourth and fifth factory shelves. But this means only a technical possibility of inclusion in the set. Their installation location, like the location of all other lines, is approved based on measurements and a mock-up of the specific library.
When the cabinets are rearranged: testing the future scenario
A library rarely stays unchanged for decades. First books and documents are stored there, then a workspace is added, shelf heights are changed, closed sections are installed for storage. If a molding line outlines a specific cabinet, it loses its meaning after rearrangement. But if it is applied to a relatively independent wall section, the interior can change without fully redoing the wall finish. This is the main argument in favor of separate verticals and short horizontals.
The test is simple: mentally remove the largest shelving unit from the visualization. Will the decorative details remain part of a meaningful composition? If not, the length, number, or position of the lines needs to be reconsidered. Then swap the armchair and the low cabinet: won't one short detail end up completely hidden by furniture? Finally, imagine that instead of an open section, a cabinet with hinged doors appears. The decor must not interfere with their movement or end up in the path of the handle.
Such mental rearrangement is important specifically for a library, where not only the furniture but also the load changes. Books have significant combined weight, and the fastenings of tall cabinets sometimes have to be reconsidered. Wall decor should leave this possibility open. In a photograph it may appear to be part of the joinery; in the project documentation it is better to show it as a separate layer and note that it is fastened to a suitable fixed wall, not to the shelving sections.
Cornice above the books: should the line continue to the ceiling?
A ceiling cornice can complete a room if there is enough free space above the shelving and its pattern is consistent with the rest of the interior. But there are also opposite situations: the cabinets reach almost to the ceiling, the upper lighting is built into the furniture, and a ventilation grille or lighting track is located close to where the surfaces meet. In that case the cornice will not improve the composition but will create technical inconvenience. The decision should be made on the basis of the profile and actual geometry, not the area of the room.
Ceiling molding in the STAVROS catalog it is presented as separate elements. They cannot be automatically substituted into the calculation of the seven wall lines: for a cornice you need to know the lengths of the wall-to-ceiling junction sections, internal and external corners, cutting conditions, the position of the light fixtures, and compatibility with the chosen finish. A wall molding and a ceiling cornice have different functions; a similarity in color does not make them interchangeable.
If a cornice is still needed, first determine whether it will continue above the shelving or only along the free walls. A break at the visible boundary of the furniture should be designed deliberately, not left as the result of an accidental calculation. In a library it is reasonable to choose a visually calm solution: a clearly readable top line without complex carving usually interacts better with numerous book spines. But the specific profile must be confirmed with a sample or drawing.
Appliques and rosettes: the art of giving up the unnecessary
Let's imagine that a beautiful central wall section remains between two shelving units. The client is tempted to complement it with an ornament. In the first sketch such a detail looks festive; in the second, when bright books appear on the shelves, the ornament begins to compete with the contents of the cabinet. Moreover, the additional purchase will increase not only the budget: the scale will need to be coordinated, the position correctly set, and the joint with the background finished to a high standard.
If needed Decorative Inserts, they are best selected for a specific product system, not just by overall color. A narrow molding has its own projection depth, and an applique has another. Their placement may require free space that effectively does not exist between the book sections. The applique must also not cover furniture fastenings, sockets, or access to electrical connections. Before ordering, the size and profile of each additional element must be checked.
Ceiling medallions in a library are a separate matter. They make sense if the light fixture and the ceiling plane truly form a compositional center. When the lighting is organized with recessed points and lines inside the shelving, a decorative medallion may turn out to be an extraneous detail. In our training calculation, overlays and medallions are not included in the base set. They can be added after choosing the furniture and lighting, when it becomes clear what exactly remains too empty.
Three STAVROS profiles: a short editorial selection
For seven standalone lines, let us compare three products actually presented in the catalog with a length of 2600 mm. Molding MLDPU-001 has a cross-section of 10 × 6 mm and is suitable for a very fine graphic accent. Molding MLDPU-004 with a cross-section of 15 × 8 mm is more noticeable, but not as pronounced. Molding MLDPU-002 has a cross-section of 22 × 11 mm, and it is worth checking especially carefully on narrow wall sections next to bulky furniture.
All three items are straight polyurethane profiles, not flexible products for arbitrary curved paths. In our project, we are dealing with short straight segments with finished ends. The choice is not determined by the width number alone: under side lighting, a relief cross-section creates its own shadow, which affects how the wall section is perceived. On a dark painted wall, a deeper profile may stand out noticeably; on a light matte background, it reads more softly, but the actual conditions need to be checked on site.
Published prices as of the preparation date: 1,740 rubles for MLDPU-001, 3,190 rubles for MLDPU-004, and 5,460 rubles for MLDPU-002, with the stated factory length of 2,600 mm. The price applies to a whole strip, not to the usable meter after cutting. This matters for comparison: all options have the same number of strips, but the cost of the decor itself differs. Costs for adhesive, finishing, transport, and any possible backing are calculated separately.
| Profile | Section | Plank length | Price per plank | A look for the library |
|---|---|---|---|---|
| MLDPU-001 | 10 × 6 mm | 2600 мм | 1 740 ₽ | Barely noticeable architectural touches |
| MLDPU-004 | 15 × 8 mm | 2600 мм | 3 190 ₽ | A calm, legible rhythm |
| MLDPU-002 | 22 × 11 mm | 2600 мм | 5 460 ₽ | Pronounced shadow, requires free scale |
Reading a profile on a narrow wall section: a test without catalog illusions
Suppose the wall section looks wide enough until there is no molding on it. You place MLDPU-002 and notice that its cross-section draws attention away from the books to the narrow strip of wall. Then you try MLDPU-004, which marks the vertical but leaves free space on the sides. Finally, MLDPU-001 almost disappears in diffused daylight and becomes visible when the side lighting is turned on. All three results can be appropriate, but they serve different purposes.
So the choice is not reducible to the rule "the smaller the room, the thinner the profile." What matters is not only the size of the room, but also the length of the visible wall, the spacing of the shelves, the color of the material, the density of book spines, and the position of the light sources. A small room with uniform, solid-color shelving can sometimes handle a more expressive profile; a spacious library with a vivid book collection may require an extremely quiet wall finish. The decision is made after trying it out and comparing under real lighting.
On narrow margins, first check the usable width after deducting the setbacks. If the standard profile size falls outside the agreed installation zone, it should not be used, even if the item seems advantageous in price. Do not trim the product's relief along its length without technical justification: this will change the cross-section and may ruin the finish. It is better to choose a profile with suitable geometry or reduce the number of decorative lines.
Choosing a color is not a catalog task
White molding on a dark wall looks crisp and contrasting, but next to books such graphics sometimes turn into an overly active pattern. Painting the profile the same color as the wall creates a calmer impression: the relief remains, but is perceived through light and shadow. A third option is a shade one tone lighter or darker than the main surface. It helps separate the lines from the background without a harsh white outline on every wall section.
Here it is important to check the actual paintability of the chosen surface and the compatibility of the primer and the finish material. Recommendations for one paint should not be transferred to another without verification. If the walls already have decorative plaster or a special coating, the installer assesses adhesion and selects the appropriate installation system. One should not promise that any polyurethane profile will adhere equally well to any painted wall without preparation.
Book furniture has its own color role. If the shelving is made of pronounced wood, the wall molding is best evaluated next to its texture, not separately on a white sheet. And vice versa: calm painted cabinets allow a more noticeable contour. In a composition where books provide the most information, the color of the profile should be perceived as a means of adjusting the volume, not as a standalone design effect.
Light: the shadow from the profile can become a second line
A library usually has several types of lighting: general ceiling light, light by the armchair, and built-in shelf lighting. Each source shows the relief differently. It happens that one vertical line is planned on the drawing, but in the evening, under a raking beam, a distinct shadow appears next to it, visually doubling it. With a deep profile this effect is more noticeable. This situation must be checked before installation, otherwise you will have to change the fixtures or repaint the wall, even though the problem was the scale of the decor.
For a test, it is enough to temporarily attach a small sample of the material in the intended zone and turn on the main lighting scenarios. It is important to assess the appearance not only up close, but also from the armchair, from the entrance, and from the side of the window. If the profile is right next to a sconce, side lighting can amplify the relief so much that it becomes the main object of the wall. This is not a mistake in itself, but it must be intentional. In our project, the decorative lines should support the book sections, so excessive light activity is undesirable.
Fixtures also affect the technical accessibility of the walls. Do not cover sconce mounting cups, electrical boxes, or removable covers with profile strips. If necessary, first coordinate the electrical work, then the free geometry of the decorative pattern. An experienced installer will check compatibility and the ability to service without damaging the finish. This is especially relevant when the lighting is built into the book sections and access to its power supply remains from the back of the furniture.
Three layout options for a single wall: minimal, graphic, composed
The first option is to leave only three verticals between the sections. This is the minimal set for a room with dense library furniture, bright books and complex lighting. The advantage is not the saving itself: the wall strips preserve breathing room, and the role of the decor is perfectly clear. However, it does not correspond to the full study specification of seven pieces; if you choose this option, the quantity and the estimate must be recalculated separately. You cannot use the cutting map for a different set of elements.
The second option is three verticals and two upper horizontals. It creates a graphic rhythm on the wall, linking the top of the furniture with the vertical gaps. This option may be suitable if there is a free painted surface above the shelving and it is not occupied by light fixtures. It is also worth assessing separately whether a false cornice line will result: horizontal mouldings must have their own architectural logic rather than accidentally duplicating the ceiling decor.
The third option is seven separate pieces, that is, three verticals, two upper horizontals and two short accents. It is the most saturated and was chosen for the full study estimate. Its strength is the rhythm between the high and low zones of the room; its weakness is the need for precise marking. Two short segments easily become superfluous, so they should be kept only where they genuinely complement the composition. If, after trial marking, they get in the way, the project should be adjusted without regret.
What to measure on site rather than take from the construction plan
For an accurate purchase, the length of one wall is missing. You need the finished height, the width of the three wall strips at several points, the actual positions of the anchors, the top of the furniture, the visible part of the ceiling joint and the clearances to the light fixtures. Even in a new apartment, the drawing may not account for small deviations of the actual surface or the thickness of the finishing layer. Therefore, measurements are taken after deciding which surfaces will be finished, and re-checked after installing the main furniture modules.
Particular attention is paid to the finished size of each of the seven pieces. For a 2100 mm vertical, the question matters: is this the distance between two marks on the wall, the length of the blank, or the visual length after installing the decorative tip? In the study project it is assumed that all dimensions refer to finished straight pieces with standard end treatment. If shaped ends or overlays appear, the linear footage and the cutting method will change.
The craftsman must also agree on the cutting allowance. The kerf width depends on the tool used; extra millimetres may go towards squaring and removing chipping. In this set, the remainders on the different strips are fairly large, but this does not eliminate the need for a dry fit and a test cut. You should check the actual length of the factory products upon receipt rather than relying unconditionally on the figure in the preliminary table.
Which surfaces to leave empty: a list of exclusions
A design plan benefits not only from a shopping list but also from a list of prohibitions. Do not place a decorative element directly over a socket, a removable hatch, a tall cabinet fixing, or a mounting plate. Do not route the moulding so that it prevents removing a shelf, adjusting a door, or dismantling one section. Do not cover the furniture's ventilation openings and do not use the profile as a substitute for a cable duct.
It is convenient to mark the restricted zones on the drawing in a different colour: outline the access points and show the movement boundaries of furniture parts. Only after that is the decor drawn in the free fields. In the library, this is especially useful for upper fixings: in photographs they are often hidden, but in reality they must remain accessible or be serviced according to an agreed scheme. The final position of the line is determined by whether the installer can perform the necessary actions with the furniture without damaging the wall finish.
If the composition becomes too fragmented because of these restrictions, there is no need to rescue it with a dozen short profiles. It is better to abandon one line entirely. An empty wall next to densely filled shelves can be an asset to the interior rather than a shortcoming of the project. Our training set of seven pieces is a specific scheme for calculation, not an instruction to install the entire set in any room under any conditions.
Seven parts on the wall: a schedule you can verify
Let's move from impressions to numbers. For the training library, three vertical lines of 2100 mm, two horizontal lines of 1350 mm, and two short accents of 600 mm are provided. These are individual straight pieces; in our example there are no closed rectangles or additional corner elements. Their total length is 6300 + 2700 + 1200 = 10,200 mm. No dimension should be considered ready for a real apartment without measuring after the furniture is installed.
| Parts group | Quantity | Finished length of one, mm | Total length, mm | Where it is planned |
|---|---|---|---|---|
| V1–V3 — verticals | 3 | 2100 | 6300 | Free wall sections between the book sections |
| H1–H2 — horizontals | 2 | 1350 | 2700 | Painted wall areas above the shelving units |
| A1–A2 — accents | 2 | 600 | 1200 | Clear areas outside mounting and electrical zones |
| Total | 7 | — | 10 200 | Independent straight elements |
In the bill of materials, a distinction must be made between a part and a factory length. An installed vertical of 2100 mm is one part, but it is purchased within a stock piece 2600 mm long. The remaining 500 mm does not automatically become another required item. Two short accents of 600 mm each, by contrast, can conveniently be cut together with the horizontals. If even one design length is changed, the craftsman recalculates the entire layout: an attempt to simply buy "one more metre" can result in an extra full length and a new delivery.
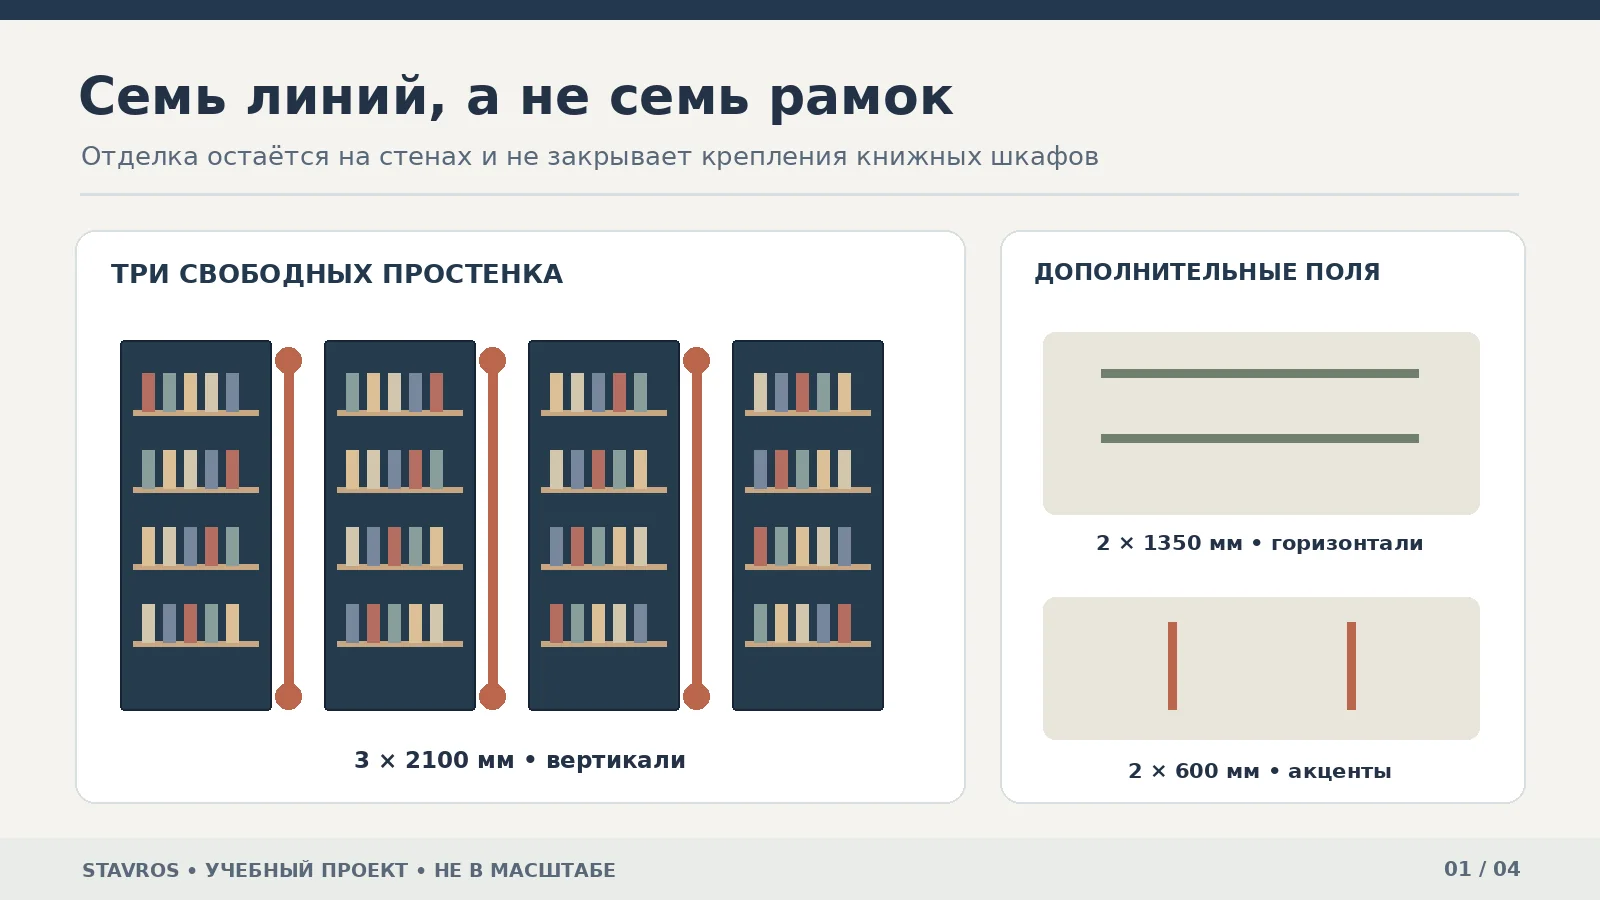
Cutting plan: why five strips are enough, but four are not
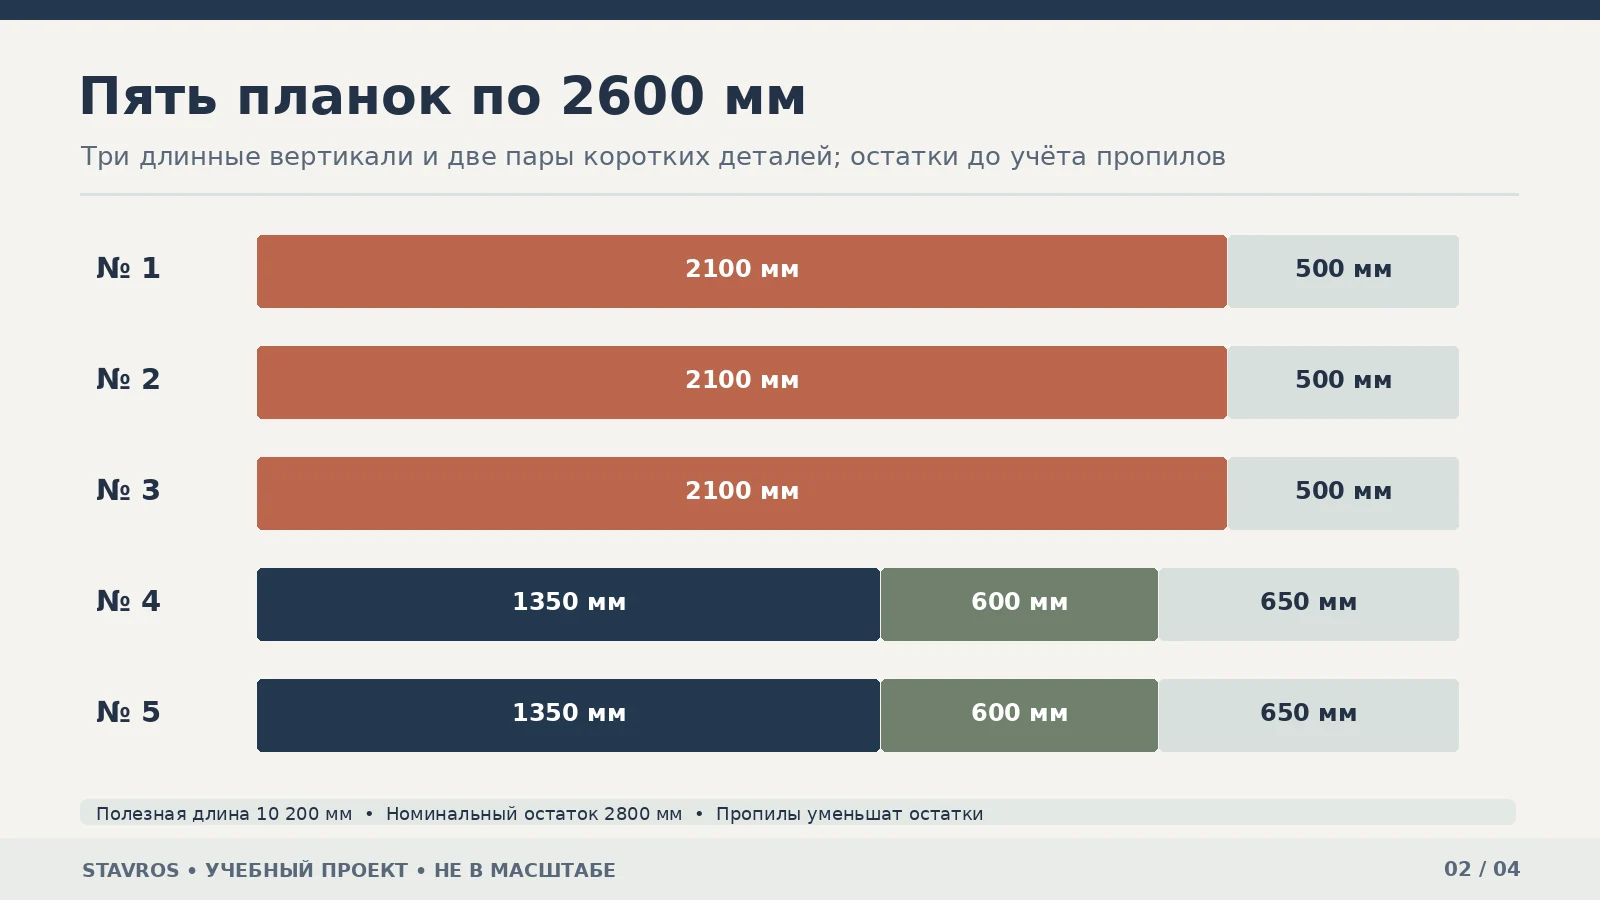
Five factory mouldings of 2600 mm each give 13,000 mm of source material. Of this, 10,200 mm become seven finished elements; the nominal remainder before all cuts and trims is 2800 mm. But what matters more than the total difference is the placement of each part. Three long verticals of 2100 mm require separate strips: none of them can share a single 2600 mm blank with 600 or 1350 mm offcuts. The fourth and fifth strips each accommodate pairs of 1350 + 600 mm.
| Plank 2600 mm | What to cut | Nominal remainder before sawing |
|---|---|---|
| № 1 | V1 — 2100 mm | 500 мм |
| № 2 | V2 — 2100 mm | 500 мм |
| № 3 | V3 — 2100 mm | 500 мм |
| № 4 | H1 — 1350 mm and A1 — 600 mm | 650 мм |
| № 5 | H2 — 1350 mm and A2 — 600 mm | 650 мм |
| Total | 7 pieces, 10,200 mm | 2800 мм |
This layout includes allowance for saw cuts and end finishing: 500 mm on each of the first three strips and 650 mm on each of the last two. Nevertheless, the nominal offcuts cannot be promised as usable spare parts. After cutting they will be smaller, and additional material may be needed for mitre cuts or to remove chipping. Final dimensions are confirmed on site and agreed according to how the mouldings terminate.
You may wonder why not order four strips, since 4 × 2600 = 10,400 mm, which is 200 mm more than the total length of the parts. The answer lies in the impossibility of fitting the cut pieces. Three verticals of 2100 mm each occupy three separate blanks and leave 500 mm offcuts. The single remaining strip cannot accommodate two horizontals of 1350 mm and two accents of 600 mm: these require 3900 mm. Therefore four factory-made items will not yield the required set without undesirable joins; the working minimum is five.
Estimate: three prices, but the same cutting plan
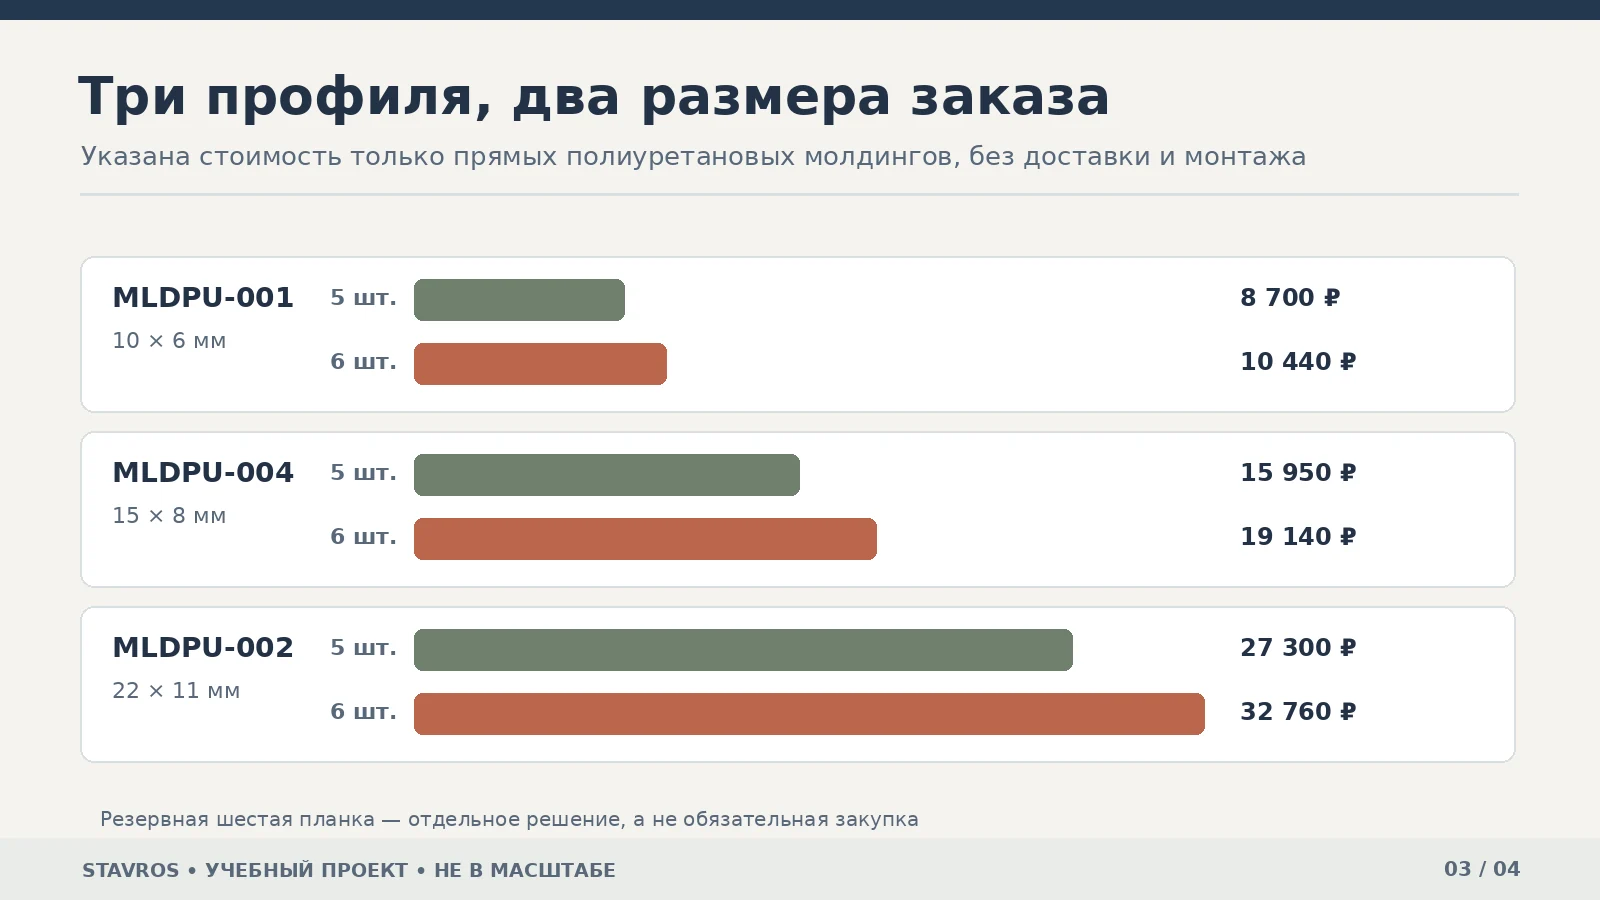
For all compared SKUs the original length is the same, so the five-strip layout does not change when the profile changes. The price does. For MLDPU-001 it is 8,700 rubles for five items, for MLDPU-004 — 15,950 rubles, for MLDPU-002 — 27,300 rubles. If the project is complex, a sixth strip can be included as a reserve: adding it will increase the cost of the set by 1,740, 3,190 or 5,460 rubles respectively. It is important to call these amounts the cost of the mouldings themselves, not of the finished wall.
| Article | Base order — 5 planks | With reserve — 6 strips | Reserve surcharge |
|---|---|---|---|
| MLDPU-001 | 8 700 ₽ | 10 440 ₽ | 1 740 ₽ |
| MLDPU-004 | 15 950 ₽ | 19 140 ₽ | 3 190 ₽ |
| MLDPU-002 | 27 300 ₽ | 32 760 ₽ | 5 460 ₽ |
Behind these figures are costs that cannot honestly be included in advance: glue, sealant or joint compound, primer, paint, protective film, installation, transport packaging and delivery to a specific address. Some molding cards list a pine backing at 390 rubles for a small order. The presence of such a line and its final charge must be checked in the cart or agreed with the manager. The shipping price is calculated by dimensions, route and method of receipt, not by a single total length of the decorative sections.
In the library, it makes sense to compare the three options by cost and visual role, without automatically calling the cheapest one the best. If the thin MLDPU-001 profile is barely visible under the given lighting, it may not solve the design task. If the wider MLDPU-002 competes with the shelves, paying extra will not bring quality. The middle option MLDPU-004 is often worth considering as a compromise, but the final choice depends on the width of the wall sections and the approved visual layout.
The sixth plank: insurance or an unnecessary purchase
In most calculations, people like to add a conventional percentage "just in case." For a small batch of five long-length items, a case-by-case approach is more useful. Where might additional consumption come from? A long vertical turned out shorter due to an incorrect measurement, the craftsman made a mistake with the cutting direction, the end was damaged during transport, or after fitting it was decided to lengthen one short accent. Each risk can be assessed before payment rather than replaced with a universal ten percent formula.
If the base is level, the ends are simple, the dimensions have been double-checked, and installation is performed by an experienced craftsman, the fifth strip remains a sufficient working minimum. If the project is still changing or a reserve is needed to correct a non-standard joint, the sixth strip is justified. But a reserve does not save an incorrect structural scheme: if the molding covers an anchor, no additional quantity makes the solution correct. First resolve the conflict, then choose the purchase volume.
Also consider storing the reserve. A polyurethane plank 2,600 mm long must be protected from mechanical impacts and accidental deformation during storage. In an apartment with furniture and finished finishes, a long item is easy to damage when moving it. Therefore, do not order an extra plank merely out of a psychological desire to have a reserve without understanding where and how it will be stored until installation.
Order list: the SKU matters more than the artistic description
A precise request removes ambiguity. It should include the delivery city, the product code of one selected profile, its size of 2600 mm, a quantity of five or six strips, the material name and contact details. Separately, state whether a ceiling cornice, overlays or related products are needed for the order. Do not write "a few similar mouldings for the library" — the manager will need a specific section designation and quantity.
A buyer planning to buy moldings in Samara, can use the catalog, which presents straight Moldings for walls and products for other purposes. But when choosing, it is important to verify the exact size option, because a beautiful name does not guarantee the required section. For all seven parts, it is better to use one product code from one selected system so that shadows and relief match under different lighting.
Before confirming the order, it is useful to send the contractor a simple cutting table and request written approval of five blanks. This removes the dispute about whether four strips will suffice and shows in advance what offcuts will appear. After approval, the craftsman can number the future elements V1–V3, H1–H2, and A1–A2. On site, such marking helps avoid confusing three seemingly identical verticals if they have small but important differences by installation location.
Delivery of stucco moldings to Samara: they ship planks, not 10.2 meters on paper
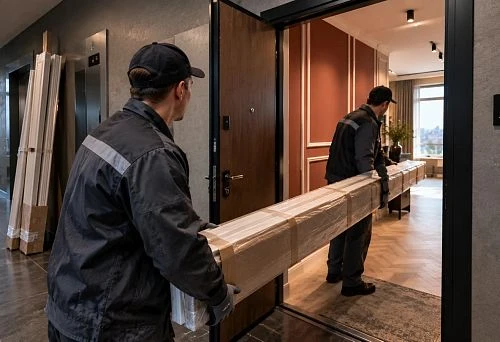
The documented length of the decor is 10,200 mm, but the transport service will receive five items of 2,600 mm each in packaging, not one compact roll. The actual shipping dimensions may be larger than the nominal length of the product due to the protective backing and end packaging. Before paying, you need to check the permitted length of the shipment, the method of delivery, the possibility of access to the address, and the procedure for inspecting the cargo. A cost calculation without the address and the carrier's terms will not be reliable.
Official section Payment and delivery on STAVROS describes the ordering methods and shipping options across Russia. This allows you to arrange a purchase remotely, but does not confirm the existence of a separate warehouse in Samara and does not mean a fixed shipping price. For Tolyatti, Novokuibyshevsk, Zhigulyovsk, Syzran and other settlements in the Samara region, the terms should be clarified for each specific address: it is unreasonable to transfer a tariff or timeframe calculated for the regional center to a different route.
Ask them to clarify how the long edges of the profile are protected and what to do if the packaging is visibly damaged. It is worth opening the shipment and checking the product in the manner provided by the seller and the carrier. Five smooth white planks may seem identical, but upon acceptance you need to verify the article number and cross-section, not just the quantity. If the wrong model is received, do not start cutting: after the material has been processed, a dispute about a mix-up becomes more difficult.
Acceptance: four questions before cutting begins
The first question is "was the right product delivered?". Check the marking, length and cross-section against the order. The second is "are the ends and the relief intact?". Check not only the middle of the plank, but also the edge, which often suffers during handling. The third is "is there enough material for the cutting plan?". Make sure that the quantity of five or six matches the paid specification, and that the installation elements are accounted for separately. The fourth is "where and how will we store it until installation?". This determines the safety of the long items.
Do not confuse minor production surface characteristics with transport damage: the acceptability criteria should be agreed with the seller in advance, and questionable areas should be photographed before installation. If you notice a crack, chip or deformation, record the condition of the product and packaging in accordance with the receipt rules. Do not start trimming a disputed plank just to check: after processing, it may be harder to confirm how it was delivered.
After acceptance, it is useful to make a simple log: date of receipt, article number, quantity of intact items, presence of damage, responsible person and storage location. For a small order this may seem excessive, but it helps avoid confusion between the interior and installation stages. By making such a record, you know that the apartment actually contains the required material, and not just an order confirmation in the correspondence.

Installation: what happens between the drawing and the painted wall
Installation does not begin with applying adhesive. First, the substrate and its condition are checked, access to furniture fasteners is ensured, reference marks are transferred to the wall, and a trial layout is carried out. Then the parts are prepared according to the agreed plan, the ends are treated, and the position of each line is checked with a level. Only after a dry fit is a suitable installation compound used in accordance with the manufacturer's instructions. On a weak, dirty or peeling surface, even high-quality decor will not hold reliably.
Since the elements are independent and straight, they do not need to be joined into closed frames. This reduces the number of corner joints, but it does not eliminate the need for neat line endings. If the ends remain visible, their shape and finish must be identical. A one-millimeter difference on a single short accent can be more noticeable than a slight deviation on a long vertical. Therefore, the point of a simple solution is not to abandon precision, but to make it possible to control precision on each individual element.
Adhesion should be coordinated with the final painting. If the walls are already painted, the installer checks the strength of the finish layer and the compatibility of the adhesive with the coating. If renovation is still ongoing, it is advisable to determine the order of priming, installation, seam treatment, and final painting before work begins. It cannot be promised that any composition is equally suitable for gypsum plaster, painted drywall, decorative skim coat, and a furniture facade. In this article, the base surface is a stationary, prepared wall.
Boundaries of responsibility: the furniture maker, the finisher, and the client
In the library, three participants often assume that the same detail is someone else's responsibility. The furniture maker is responsible for the stability of the section, but not for the decorative line on the adjacent wall pier. The finisher applies the molding, but may not know where a mounting plate is hidden under the paint. The client approves a beautiful sketch, but does not always see the technical constraints. To avoid conflict, one current drawing is needed with both systems: furniture fastening and wall decor.
Before installation begins, it is useful to sign off on a simple sequence: the furniture system has been checked and secured; the layout of utility points has been handed over; areas without decor have been marked; the dimensions of the seven parts have been agreed; one article number has been selected; the bonding method has been confirmed for the substrate. With this approach, there is no dangerous temptation to remove a needed furniture anchor for the sake of molding symmetry. A short pause to verify the project saves more than rushing to install all the strips on delivery day.
If the furniture will later require access to the connections, serviceability must be preserved. This does not mean that every anchor must necessarily be visible: different furniture systems exist. But the decision about where to leave access and which elements may be covered by the finish is made by the specialist for the specific fastening, not by the author of an advertising description. The wall profile serves a decorative, not a structural, function.
Nine questions worth asking before paying
Can moldings be ordered if the shelving units have not yet been assembled?
A preliminary section can be selected and a commercial estimate obtained, but the final lengths and positions of all parts are best approved after the furniture project has been agreed. It is especially important to know where the anchors and upper fastenings of the sections will be located. If the furniture is still in production, it is advisable to request its working drawings: they will help distinguish free wall from installation zones. A decorative line that crosses a future fastening should not be approved just to preserve attractive symmetry.
Why does the query “buy stucco molding” not help you choose the right strip?
Phrase Buy moldings leads to the general catalog but does not answer questions about the cross-section, factory length, and quantity. In this project, seven segments and three possible profiles have already been identified. The buyer must move from a general search to a specific SKU and a complete bill of materials. Only then can they compare the price of whole planks and avoid buying a product with a similar photo but a different relief.
How should the query "buy polyurethane stucco molding" be understood when choosing a material?
Wording polyurethane moldings buy is useful as a path to the category, but the physical properties of materials cannot be reduced to a key phrase. For the library, the profile dimensions, substrate preparation, adhesive compatibility, and the ability not to cover furniture fasteners are important. Gypsum can also be used in interior finishing, but it will require its own assessment of weight, treatment, and installation. The choice is made based on the project detail, not on the promise of a universal advantage of one material.
How many meters of moldings are needed for three wall sections and two upper lines?
In our full example, seven segments have a total length of 10.2 m: three at 2100 mm, two at 1350 mm, and two at 600 mm. However, purchasing is measured in five factory planks of 2600 mm, since long verticals cannot be arbitrarily cut into short pieces without intermediate joints. If you decide to drop two accents or change the length of the upper horizontals, the calculation must be repeated. Do not transfer five planks to another project just because the total length looks comparable.
Which of the three profiles looks best next to bookcase sections?
For narrow margins, check MLDPU-001 and MLDPU-004 first, since they have a smaller width and relief depth. MLDPU-002 may be a good solution for larger wall sections and calm library furniture, but it must be applied to the actual wall or evaluated using an exact cross-section template. Consider the color, evening lighting, and the pattern of the wooden uprights. The final decision cannot be made based only on the room area or the price of a single item.
Can the profile be glued directly onto the side panel of a bookcase?
This is a different installation task. If the decorative element must be on furniture, it is necessary to check the facade material, the coating, the permitted adhesive, the thickness of the side panel, and the possibility of its movement. The scheme in this article is intended for stationary, prepared walls. Do not apply recommendations intended for a plastered substrate to furniture without verification. Be especially careful with movable facades, pull-out elements, and places where the cabinet is attached to the wall.
Should I take a sixth plank as a reserve?
There is no universal answer. With confirmed finished dimensions, straight ends and clean cutting, the working minimum is five strips. A reserve is justified if one element may need to be redone, the project is still being adjusted, or a complex method of finishing the lines has been chosen. The price of the sixth strip varies by item code, so it is more convenient to compare the specific surcharge with the likelihood of a repeat purchase and delivery. You must not replace checking the original geometry with a spare strip: extra material will not fix a placement error.
Can a cornice and decorative overlays be included in this estimate?
The base table shows only the cost of straight wall moldings. A ceiling cornice requires a separate perimeter and a map of corner joints; overlays require a choice of shape, size and installation location. Their price is not included in the 8,700, 15,950 or 27,300 rubles indicated for five strips of the corresponding profiles. If these elements are really needed, add them as new rows in the bill of quantities and agree on the package dimensions with the manager. Otherwise, the final calculation will mislead the buyer.
What should I check upon receipt in Samara or another city in the region?
Check the number of factory strips, the item code, the specified cross-section and the condition of the ends. Inspect the transport packaging, record any visible defects and clarify the procedure for documenting them according to the seller's and carrier's rules. Separately check that any related products are present if they are included in the order. And only after that hand the materials over to the craftsman for cutting. The cost and time of transportation depend on the specific address; any preliminary figures should be confirmed before payment, and should not be assumed to be the same for the entire Samara region.
Bottom line: the wall and the books should remain independent
In a properly designed home library, the decor does not pretend to be furniture. It sets a calm architectural rhythm on the free wall areas, leaves access to fasteners and electrics, and does not restrict the opening of the fronts. The shelving can change, the books can be rearranged, the desk chair can move to the window — and the wall composition does not fall apart into random fragments. For this purpose, in our training version we have chosen seven straight independent pieces without complex frames or unnecessary ornamentation.
The final specification is simple: three verticals of 2,100 mm, two upper horizontals of 1,350 mm, two accents of 600 mm. The total usable length is 10,200 mm; the working purchase is five strips of 2,600 mm, with a sixth possible as a reserve. The chosen profile must be uniform: MLDPU-001 for the finest pattern, MLDPU-004 for moderate relief, or MLDPU-002 for a more noticeable accent. The exact cost will depend on the item code, and the final order total will also depend on packaging, transportation and installation.
Before paying, save the measurement sheet and the layout of the mounting zones, check the final lengths with the craftsman and clarify the delivery terms. Then choose wall molding and the corresponding products in the STAVROS catalog, without mixing the main strips with optional additions. The point of all this work is not to fill every wall section with decor, but to leave a place in the library where books, light and ease of use remain the main things.