Article Contents:
- Resolving the conflict between a beautiful line and a working door
- Measurement sheet: what to record before buying products
- Why a hidden door requires a separate installation solution
- A large mirror: the reflection doubles the decorative rhythm
- Where to buy stucco molding in Ulyanovsk and where to start choosing
- Polyurethane, gypsum and wood — a comparison as applied to this wall
- Three interior strategies — and why they are not equivalent
- The “silence” strategy: preserving the invisibility of a hidden door
- The “contour” strategy: unify surfaces without physically joining them
- The “accent” strategy: one complex element instead of many random ones
- Choosing the profile: three specific STAVROS moldings
- Where the molding should end
- Reflection, artificial light, and visible lines
- Not all “flat walls” are the same: checking the substrate
- Ceiling cornice: should wall lines continue overhead
- Decorative overlays: check the pattern, not just the material
- A design of six independent lines: without adhering to the door or mirror
- Cutting three strips: keep the details intact
- Choosing the fourth strip: where the savings end
- How much it costs to buy stucco molding in Ulyanovsk
- How to place an order without confusion between parts and strips
- Installation stages: first the system, then the decorative contour
- Painting without visible transitions or traces of repair
- Delivery of stucco molding to Ulyanovsk: count not only meters but also dimensions
- Delivery across the Ulyanovsk region: the final address matters
- Acceptance: three quality checks instead of one glance
- Nine mistakes that go unnoticed in a beautiful visualization
- What to check a month after installation
- Frequently Asked Customer Questions
- Can I get a price for full decoration based on three strips?
- When searching for "buy stucco molding," can I choose any white profile?
- Can a single molding be laid over a door gap?
- Can molding be used as a frame around a mirror?
- Which profiles are best for a small and a spacious living room?
- How do I know whether it's worth buying a fourth strip?
- How can I check whether the stucco molding will interfere with opening?
- Can I have an order delivered not to Ulyanovsk but to another city in the region?
- Are special overlays needed to combine with the molding?
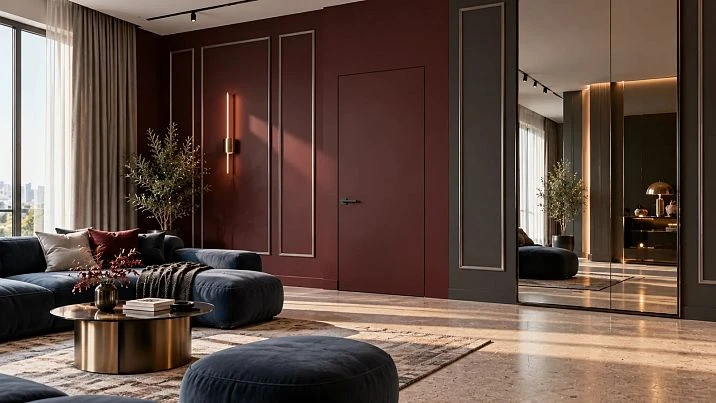
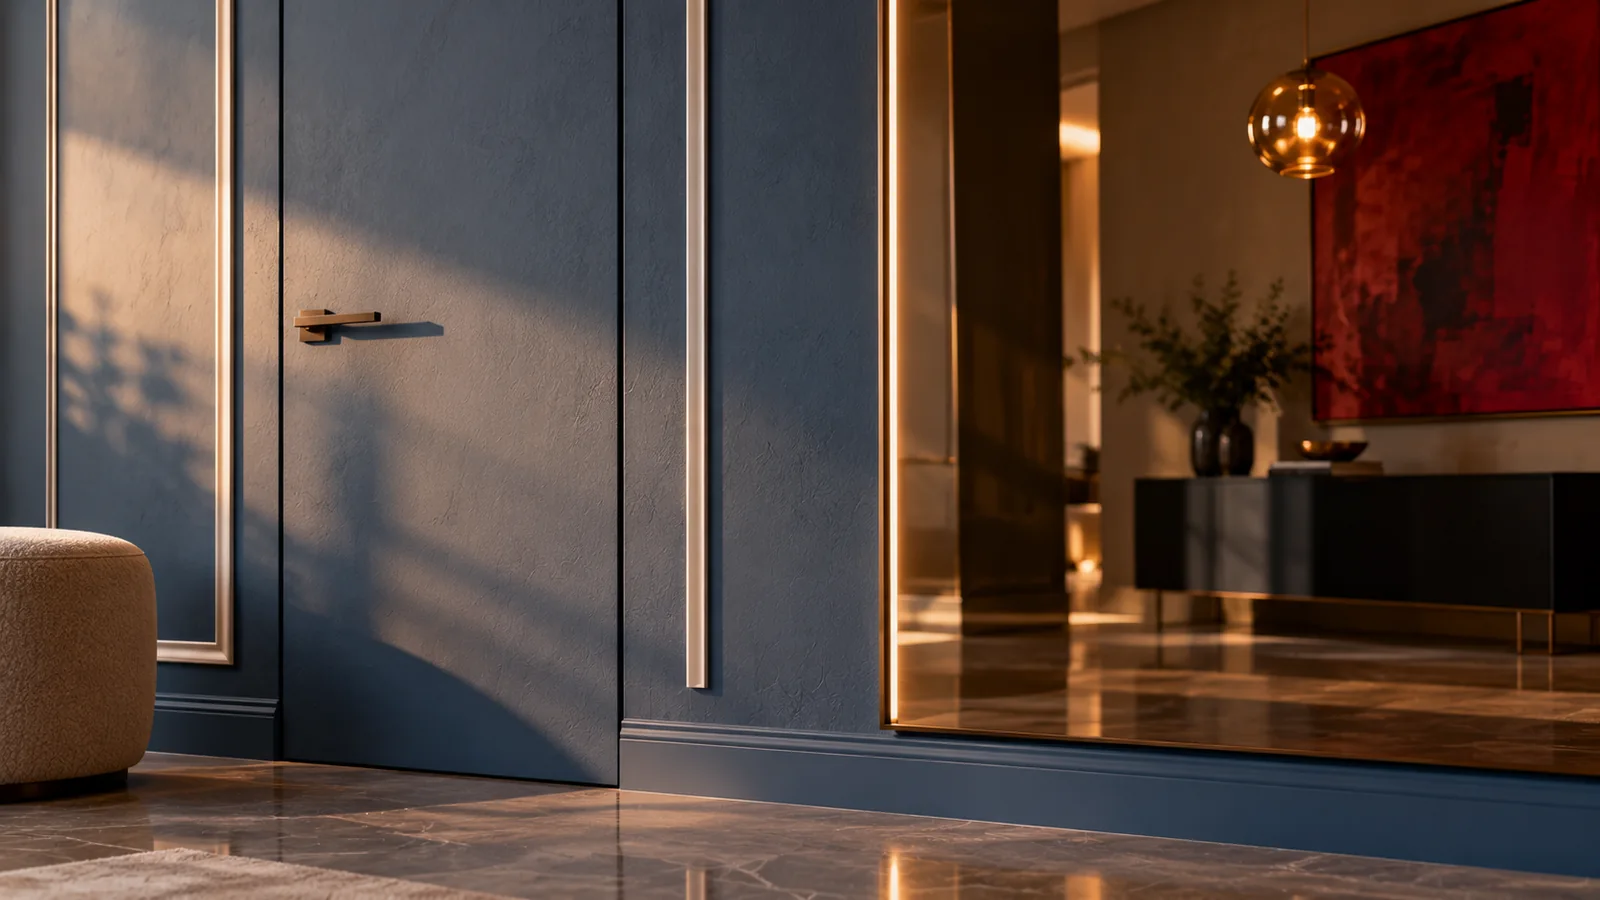
In a spacious living room there are two surfaces that look like part of the same wall but behave completely differently. The first is a large mirror: it reflects the furniture, the light fixtures and every decorative line opposite. The second is a hidden door painted in the color of the wall. When it is closed, it seems to be just another motionless plane; pull the handle and the familiar geometry changes. This is exactly where Moldings requires not only taste but also discipline in design.
Let's imagine an apartment in Ulyanovsk. The owners want to add architectural rhythm without turning a calm modern interior into a museum of classicism. Next to the mirror is a concealed-frame door; its frame is built into the plane of the finish. The room has a sofa, a floor lamp, a low cabinet and a free section of wall that they want to emphasize. It is easy to make a mistake: continue the molding across the door gap, shift the vertical by a few millimeters, or place the overlay where the door leaf travels.
This article is not a review of Ulyanovsk's historical architecture and not a selection of a dozen identical wall frames. We will treat the interior as a technical task with constraints: what stays fixed, what opens, what reflects light, and which details can actually be ordered. We will show three solutions, assemble a specification from six independent segments, calculate whole factory strips and separate the price of the product from the cost of the finished trim.
Resolve the conflict between a beautiful line and a working door
The main rule of the project can be stated in one phrase: the decorative composition must not force a moving element to behave like a fixed one. If a long horizontal line dramatically crosses the door leaf in the rendering, in reality it will have at least two breaks. One is due to the technical gap, the second to the geometry of the rebate and the actual opening trajectory. Even a slightly protruding section can catch the adjacent plane if the door opens toward it.
That is why the design begins with identifying unconditionally fixed zonesOnly areas that are not part of the door leaf, concealed frame, hatch or removable panel are considered fixed. The wall next to the door also requires checking: the frame mounting area, fasteners and adjustable components cannot automatically be considered clear for decorative adhesive and subsequent filling. This is especially important if the door unit has not yet been adjusted or the hardware is planned to be replaced.
When designing, it is more convenient to draw not the moldings first, but the forbidden boundaries. On a paper plan they can be highlighted in color: the path of the leaf, the rebate strip, the access area to the hinges, the edge of the mirror panel, sockets and switches. Decoration appears only within the remaining areas. This way the interior retains its integrity without compromising normal operation. The final beauty is built on a coordinated measurement, not on an attempt to make the product hide a technical problem.




Measurement sheet: what to record before buying products
A single figure of "wall width" is of little help. You need the finished dimensions of each individual plane: from the edge of the mirror to the nearest corner, from the fixed reveal to the start of the door frame, from the floor to the ceiling junction. It is important to specify the height after the finished coating is completed and the location of the floor skirting. If the walls have not yet been painted, measurements are re-checked after leveling, since even a few extra millimeters affect the symmetry of a pair of lines.
For the door, record the opening direction, the leaf width, the actual gap sizes, the thickness of the finish layer, the location of concealed hinges and the handle movement zone. Check the door in the closed, half-open and fully open positions. If the leaf is already installed, it is useful to take a short video and attach it to the working project: on a static drawing it is easy to forget where contact occurs during movement. Tolerances are taken from the manufacturer's instructions for the specific door system, not from a universal figure in an article.
For the mirror, measure not only the visible width but also the mounting scheme. It is necessary to understand whether the panel is glued, hangs on holders, has spacer pads or a frame profile. Record the lighting outlets, service connections and the possible removal area. If the mirror has not yet been installed, it is wiser to finalize the decoration marking after its placement is agreed. No polyurethane molding should become the sole fastening of the mirror.
| Checkpoint | What to record | Why it affects the decor |
|---|---|---|
| Hidden door | Leaf path, hinges, gaps, handle | A moving component must not be covered |
| Mirror zone | Leaf edge, fasteners, lighting | Access and a precise visual boundary are required |
| Fixed wall | Clear width and height | Defines the length of independent lines |
| Ceiling and floor | Junction marks, skirting board | Sets safe terminations for moldings |
| Electrical fixtures | Sockets, switches, cables | Decor must not obstruct maintenance |
Our factory also produces:
Why a concealed door requires a separate installation solution
A concealed door has its own structural outline, often almost invisible after painting. This tempts one to extend an ordinary decorative line along it and make the cut directly above the gap. However, such a technique is only possible as a specially calculated part of the door system, with verification of the manufacturer's tolerance, the relief, the weight and the fastening method. You cannot glue a rigid decorative profile onto the leaf by analogy with a wall and expect the same performance from the assembly.
When opened, the inner side of the door may come closer to the adjacent wall than it seems in the closed position. An additional six, eight or eleven millimetres of protrusion change the contact geometry. Therefore, before ordering products, you should not guess the permissible clearance but check the actual travel of the leaf with a mock-up of the chosen section. A short, safely secured sample used only to check the gap will do; it should not be left where it could jam the mechanism.
It is important not to block access to the adjustment screws of concealed hinges, not to fill the gap with sealant and not to bond the door leaf to the fixed wall with decorative adhesive. When the door opens outwards, there are other potential collisions: the protruding casing of an adjacent door, a cabinet or a wall sconce. The decision on decoration is made after checking the full travel path, including possible changes to furniture. This preserves both the aesthetics of the wall and the serviceability of the door unit.
Get Consultation
Large mirror: the reflection doubles the decorative rhythm
A mirrored surface makes light and lines more noticeable, but it is not an ordinary continuation of a painted wall. A molding placed next to a mirror can be reflected in it at an unexpected angle and appear twice as massive. If two close parallel lines are made on the fixed wall, in the reflection they sometimes turn into a whole grid. It is not enough to evaluate such an effect from a facade drawing: you need to look at the composition from real entry points into the room.
The second feature is mounting. A mirror may have its own installation gap, brackets, concealed fasteners, or an adhesive system with requirements for the substrate. Wall molding must not block access to these components. Moreover, without technical consultation, you must not glue a polyurethane part directly to the glass or amalgam: compatibility of the composition, load, surface cleaning, and removal conditions must be confirmed by the system supplier. In our training example, all decor is located exclusively on the fixed walls nearby.
It is better to check the composition in daylight and evening lighting. A mirror perceives the directional light of a sconce and the diffused glow of a ceiling fixture differently. A place where a thin molding is almost invisible during the day may cast a deep shadow in the evening; from another angle, the reflected strip of the fixture will compete with the relief. Ultimately, the decision on profile thickness cannot be separated from the placement of light and the reflected objects.
Where to buy stucco in Ulyanovsk and how to start choosing
For remote selection, it is convenient to open the STAVROS catalogue and first determine the type of task, not just the shape of the product. If you need Buy molding for a modern wall, the first filter will be material, exact cross-section, length of the factory profile, and installation scheme. Next is compliance with the actual installation location. A beautiful relief by itself does not guarantee that the product will fit between the mirror and the concealed door.
One should not assume there is a local warehouse or showroom in Ulyanovsk unless this is confirmed by the manufacturer. An order can be compiled by item codes and submitted through the available ordering channel; availability and lead times will be confirmed at checkout. For a city apartment and a house in the region alike, a single table with the number of whole strips, dimensions and purpose of the parts is equally useful. It helps the manager verify the items, and the buyer to compare what was delivered with what was intended.
If required buy stucco molding in Ulyanovsk for an individual specification, it is useful to state right in the request that the moldings will be mounted next to a concealed door unit and a large mirror surface, but not on them. Such a note helps avoid incorrect expectations: the supply of decorative profile does not include manufacturing the concealed door, installing the mirror, designing fasteners, or responsibility for someone else's mounting system.
Polyurethane, gypsum and wood — a comparison as applied to this wall
Gypsum and polyurethane have different strengths, and wood has its own finishing logic. Gypsum is valued for its mineral texture and expressive detailing, yet its weight and requirements for the substrate can complicate the installation of local decor. Polyurethane profiles are usually easier to work with on small straight sections, but they too must be cut, glued to a suitable substrate and finished in accordance with the manufacturer's recommendations. No material turns an unprepared wall into a stable structure.
In a room with a concealed door, the advantages or disadvantages of a material are determined not by abstract durability but by the projection of the specific profile and the suitability of the chosen mounting system. Even a lightweight polyurethane molding can interfere with the movement of the leaf. A heavy gypsum element does not automatically become bad if it is located on a properly prepared immovable wall; its fastenings and workflow will simply be different. It is equally wrong to claim that any wood handles moisture worse: the species, coating, operating conditions and fastening all matter.
The search wording polyurethane moldings buy leads to a broad product group, but within it there are moldings, overlays, cornices and ceiling elements. You need to open the card of the specific item, verify the material and size, and only then compare the price. Our calculation uses three verified straight polyurethane profiles; overlays, mirrors and doors are deliberately not added to the price of the moldings without separate selection.
Three interior strategies — and why they are not equivalent
The “silence” strategy. Only thin lines appear on the wall, in places where there are no mechanisms or reflective fastenings. The space remains modern; the pattern does not compete with the mirror. This approach requires precise marking but a minimal number of noticeable elements. It is suitable if the main accent of the room is the reflection of light rather than stucco ornament. The most important result here is not the presence of decor as such, but the ability of the wall to look whole with the door open and closed.
The “contour” strategy. A moderately pronounced wall profile is supported by a small ceiling cornice or a single coordinated horizontal line on the adjacent wall. At the same time, corners, transitions and the axes of the composition are checked especially carefully: excessive continuation of the line into the mirror will create visual noise. The advantage of this method is clear architecture without many small elements. The disadvantage is additional work to coordinate levels and edge terminations.
The “accent” strategy. On one free wall section, a more relief-like line or a local overlay appears. Here, place matters most: the ornament should not end up where a handle is hidden, where the door leaf moves, or where a tall wardrobe will stand. There is no need to add details just because they are in the catalog. Often one expressive element left in a safe zone works better than a large set of heterogeneous overlays.
| Solution | What is visible in the interior | Main risk | When to choose |
|---|---|---|---|
| “Silence” | A thin independent contour | A line that is too weak on a large wall | The mirror is the main accent |
| “Contour” | Moderate relief and coordinated levels | Optical duplication in the reflection | A calm architectural rhythm is needed |
| “Accent” | Local expressive element | Contact with the door or furniture | There is a sufficiently free wall section |
The “silence” strategy: keep the hidden door invisible
In this option, the door is not turned into a decorative panel. On the fixed walls, verticals are installed that do not continue across the opening plane. The mirror remains a separate object, and the molding does not touch its fastening elements. Profiles painted to match the wall work well: their relief is visible thanks to side light, but does not break up the plane with colored borders.
This technique is especially useful when the door really needs to be invisible. If a tall wardrobe or shelving unit is placed nearby, the line is designed not from the edge of the furniture but from the axis of the wall, understanding that the furniture may be rearranged. The end of the molding should look intentional, not like a broken frame. To achieve this, the start and end points are marked in advance, the end treatment is selected, and the line is considered from the doorway and from the sofa.
A thin profile does not eliminate the need to check the substrate. On a painted wall, you need to determine the type of finish coating, the adhesion strength, and a suitable adhesive composition. If the surface is loose, peeling, or has crumbly filler, simply increasing the amount of adhesive does not solve the problem. Areas near heat-generating appliances, wet zones, and places where future access to wiring will be needed should be checked separately.
The “contour” strategy: unite surfaces without physically connecting them
A more prominent molding allows you to set a common level for several fixed sections of the wall. For example, the horizontal line of an adjacent wall may be at the same height as the decorative axis of the mirror zone, but must not cross the opening of a hidden door. Visual connection is achieved through matching height and color, not through a continuous physical strip. This is a fundamental difference: the architectural rhythm is preserved, while the mechanism remains independent.
If a ceiling cornice is added, first determine how it will meet the hidden box area. A standard cornice is designed for a specific wall-to-ceiling angle geometry; it does not have to fit every non-standard junction. In some projects, it is better to stop the line before a complex node and finish the end than to try to conceal a structural gap with it. The expressiveness of the solution is determined by the cleanliness of the joints, not by the length of a continuous contour.
In the evening, evaluate the contour with the work lights on: if the profile casts a shadow on the mirror, it may look like an extra line. This is not a technical defect, but it is better to see the composition before purchasing the full set. A short sample placed against the wall in a safe spot often provides more information than a catalog photo of a room with different lighting.
The "accent" strategy: one complex element instead of many random ones
For an expressive interior, you can keep most of the wall calm and place a more relief-like decorative line on the widest fixed pier. If an ornament is needed, it is selected by size and pattern for the specific profile. You cannot assume that any overlays are compatible just because they are made of polyurethane or painted the same color. Matching material does not yet mean precise alignment of edges and relief height.
The accent should not be placed at a level where it is regularly hit by furniture, a bag, a shoulder or an opening door. A decorative item may have a sufficiently durable surface for normal use, but it is not a protective bumper. If a chair is constantly moved or a cabinet opened nearby, it is wiser to leave that part of the wall without protruding elements. Decor is easy to add later, once the household traffic pattern has been confirmed in practice.
Before moving on to purchasing, make a paper or painter's-tape mockup of one accent. Look at it in the evening, from the hallway, from the sofa, and in the mirror reflection. If the accent constantly draws attention to an awkward joint, it is better to reduce the relief or move it. Such a rejection is not a loss of a design idea, but part of a quality project.
Choosing a section: three specific STAVROS mouldings
Moldings made of polyurethane they differ not only in pattern, but also in how far they protrude from the wall. For an ordinary decorative panel this is a question of proportions; next to a hidden door it is also a question of free space. In our example, three products of the same length, 2600 mm, are compared. This keeps the cutting plan unchanged and shows that the budget is affected by the article itself, not by confusion over the number of strips.
The first option is Molding MLDPU-001. The 10 × 6 mm cross-section forms a small rounded line. This profile is suitable for a restrained relief on a fixed wall section, especially if it is painted in the color of the wall. According to the STAVROS product card as of October 30, 2026, the price of one strip is 1740 ₽. The shallow depth alone does not allow it to be installed on a hidden door leaf: the mechanism and the mounting technology require a separate solution.
The second — Molding MLDPU-004 with a size of 15 × 8 mm. Its relief is already more noticeable under side lighting and expressive enough for a coordinated contour on adjacent walls. The published price is 3190 ₽ per 2600 mm strip. This profile is convenient to use as a reference when fitting: a short sample will show whether unwanted duplication of the line appears in the mirror and whether the protrusion interferes with the free opening of the door.
The third is Molding MLDPU-002, 22 × 11 mm and 5460 ₽ per strip. It produces a richer light-and-shadow effect and can become the main accent of a spacious wall. However, an 11 mm protrusion is not a universally acceptable distance near a hidden door. Actual compatibility is determined on site: we open the leaf, check the trajectory and see whether the structural gap has to be changed for the sake of the decorative effect.
| Profile | Cross-section, mm | Length, mm | Price per 1 strip* | Visual role |
|---|---|---|---|---|
| MLDPU-001 | 10 × 6 | 2600 | 1740 ₽ | A thin, calm line |
| MLDPU-004 | 15 × 8 | 2600 | 3190 ₽ | Medium relief for the contour |
| MLDPU-002 | 22 × 11 | 2600 | 5460 ₽ | Expressive local accent |
Prices are taken from STAVROS product cards as of 30.10.2026. This is the price of one whole item, not a linear meter. Availability, size options, packaging rules and the final price should be checked when placing an order.
Where the molding should end
The most difficult section is not the middle of a straight line, but its end. If the profile breaks off right in front of the mirror, you need to decide how to finish the end: cut it along the design line, carefully finish the coating and leave a technical gap where the mirror mounting requires it. If the wall section is too short, you should abandon the long piece rather than try to "hide" its end under the glass. Beautiful geometry should not prevent the future removal of the mirror panel.
For a hidden door, the end of the decorative line is usually placed on the fixed side, taking into account the space the door leaf actually occupies during movement. This is not necessarily a symmetrical distance from the visual edge of the door: a hidden structure may open differently from a classic hinged door with casing. Therefore, first check the technical line of possible contact, and then set the aesthetic axis. If both tasks conflict, safe operation of the door takes priority.
Another typical situation is ending next to a switch. A polyurethane profile must not be turned into a protective cover for an electrical device, glued over a socket frame, or used as a decorative cable channel. Here it is better to finish the contour earlier, preserving access to the mounting and the ability to replace the mechanisms. A simple model helps avoid crowding: on paper, draw an area around each service zone that must not be crossed. During installation checks, this area remains clear.
Reflection, artificial light and visible lines
A large mirror can increase the visual significance of even a very thin molding. If it reflects another vertical stripe on the opposite wall, the composition may become overly busy. To avoid this, you need to evaluate not a separate fragment of the facade, but the overall frame from the entrance to the living room. It is especially useful to take several photos at the same camera height and compare frames with the decor mockup and without it: this shows which lines begin to compete.
Spotlights with a directional beam reveal wall irregularities and uneven paint coverage. If the molding is located close to the mirror, the shadow on the adjacent surface may look like another decorative stripe. Often it is not a change of article that helps, but moving the line or correcting the light direction. Unlike an expensive profile replacement, such a check does not require ordering several additional strips. But it must be carried out before final gluing and filling.
For light walls and warm lighting, the molding can be painted the same color as the base; it then stands out through its relief. On a rich blue, burgundy, or graphite background, a similar shade can be used to maintain a unified surface. A contrasting white line is also possible, but with a large mirror its reflection is especially noticeable. The choice is made after testing samples under real lighting, not from a small colored rectangle on a screen.
Not all "flat walls" are the same: checking the substrate
Before installation, the surface is assessed for strength, flatness, absence of peeling, and suitability of the chosen adhesive. There is no single universal instruction for working over filler, fresh paint, dense wallpaper, and decorative plaster. Each case requires recommendations from the manufacturer of the finishing materials and the adhesive system. If the substrate does not hold the coating, the molding will come off along with it, regardless of the quality of the polyurethane itself.
Local variations in flatness must be checked precisely where the line will run. On a long vertical, even a slight wave becomes noticeable, especially in the mirror's reflection. Pressing the profile by force against an uneven wall and hoping the adhesive will hold it in the bend is not always acceptable. First, substrate defects are corrected or the design is adjusted. The factory strip remains a straight decorative element; it is not intended to correct the geometry of the load-bearing wall.
Painted surfaces sometimes require removal of contaminants and a control adhesion test. The area of the test patch is chosen so that it can be carefully restored. If a non-standard paint, film, special coating, or mirror backing is used, installation is agreed upon separately. Successful experience with an ordinary mineral wall cannot be transferred to all surfaces in an apartment. This rule is especially relevant for concealed doors: externally identically painted surfaces may have completely different substrates.
Ceiling cornice: whether to continue wall lines at the top
Ceiling molding it can visually connect the living room, but it does not have to repeat every wall profile. In an interior with a large mirror surface, one calm cornice is often enough to emphasize height and not break the ceiling into separate frames. If the ceiling is low or the room already has expressive track lights, additional relief is sometimes better omitted. Empty space is also part of the composition.
A ceiling cornice has its own geometry: it touches two planes at once, and its cross-section is designed for a specific installation angle. It cannot be mechanically substituted for a narrow wall molding, especially at complex junctions. If a concealed door reaches the ceiling, it is necessary to check whether the free movement of the leaf is preserved and whether the cornice ends up in the path of its upper corner. In any case of uncertainty, the decision is agreed upon with the door system manufacturer.
The cornice is not included in the estimate of our training project: the specific article number, perimeter, and type of installation unit are not specified. It will be more useful for the buyer to see an honest separate line "after approval" than a beautiful but incomplete total. When purchasing independently, it is necessary to distinguish between the number of wall molding strips and the number of ceiling decor units: they may have different factory lengths, packaging, and connection methods.
Decorative overlays: check the pattern, not just the material
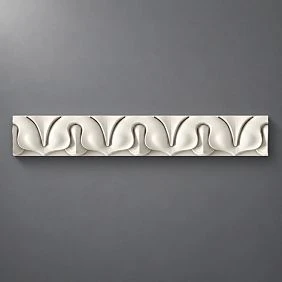
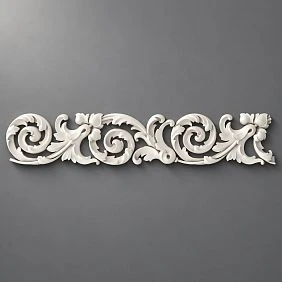
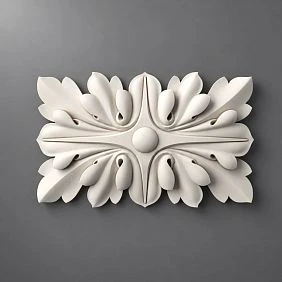
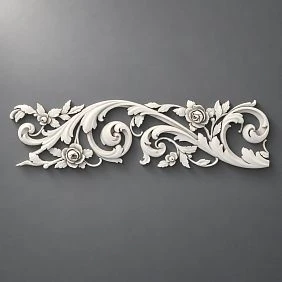
Decorative Inserts can become part of a local accent, but each item should be selected by its specific article number, length and relief. Overlays from different series should not be considered interchangeable. Even if two products are painted white in the catalog, their profiles may differ in height, transition shape and ornament placement. External similarity does not guarantee a neat joint.
On a mirrored wall it is especially important to avoid a decorative element that will be visible twice at once — directly and in the reflection. If an overlay has a complex pattern, after reflection it can visually "densify" the entire wall section. That is why a trial layout is done with a sheet of paper imitating the product's dimensions and checked from several points. This method helps to reject an unnecessary element before ordering and avoid paying for a product that later turns out to be unsuitable.
An overlay also must not be used to cover adjustable parts of a hidden door, the joint of a mirror mounting or an electrical box. It has a decorative purpose, not the function of a service cover. If maintainable access is required, the project provides a separate technical solution. It is reasonable to enter an overlay into the finished schedule only after selecting a specific product and confirming its permissible installation location.
A project of six independent lines: without gluing to the door and mirror
For a clear example, let us take six straight pieces on fixed sections of the wall. Two verticals of 1850 mm each are located in the mirror zone but do not physically touch the glass. On the adjacent wall, two horizontals of 1150 mm each are planned. Two more short accents of 700 mm each complete the composition on free wall sections. This is not an image of a real apartment from the catalog but a training schedule: all dimensions are needed to demonstrate the purchase and must be replaced with the measurement results of a specific site.
The total length of the lines is 7400 mm. At first glance this is almost three 2600 mm strips, but the actual result depends on placing the finished pieces on individual blanks. For the first and second strips, the combination 1850 + 700 mm is suitable: each occupies 2550 mm and leaves a nominal 50 mm. The third strip yields two horizontals of 1150 + 1150 mm, with a remainder of 300 mm before cuts.
With this scheme, three strips are sufficient only with a confirmed cutting plan. Pay particular attention to the first two blanks: 50 mm is a small allowance for the kerf width, end trimming, measurement error and possible chipping. If one of the parts must have an angled cut with the size measured along the long points, the actual length of the blank may differ from the length along the axis. The final cutting plan is approved after selecting the profile section, the method of finishing the ends and the exact position of all elements on the wall.
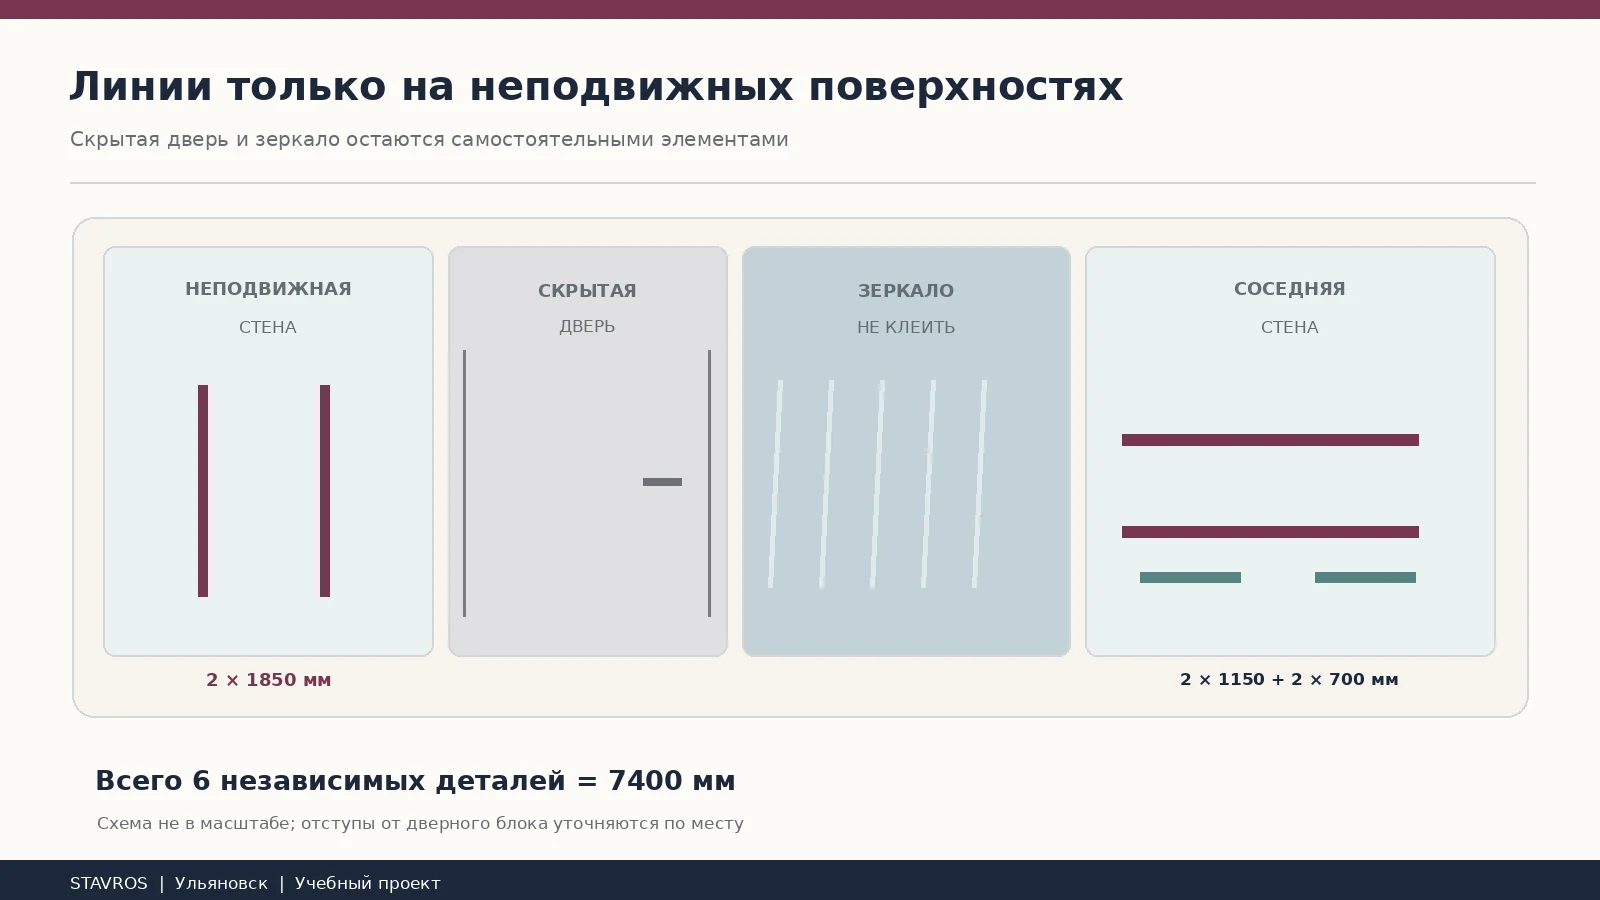
| Detail | Quantity | Length of one, mm | Total length, mm |
|---|---|---|---|
| Vertical on the fixed wall by the mirror | 2 | 1850 | 3700 |
| Horizontal of the adjacent wall | 2 | 1150 | 2300 |
| Short accent | 2 | 700 | 1400 |
| Total | 6 | — | 7400 |
Cutting plan for three strips: keep the parts continuous
The factory length of each of the selected profiles is 2600 mm. The first and second strips are cut identically: 1850 mm for the tall vertical and 700 mm for the short part. The third is divided into two sections of 1150 mm each. Thus, none of the six parts requires an intermediate joint along its straight line. This matters more than a formally minimal amount of waste: an extra joint near the mirror may be more noticeable than on an ordinary matte wall.
The nominal total of the offcuts is 400 mm: 50 mm from each of the first two strips and 300 mm from the last. But these values are not real free offcuts after the work. From them, one must subtract the width of each saw cut, end trimming, possible size adjustment and process waste. One cannot promise that the remaining 50 mm will be enough for any additional piece. For installation with complex angles and uncertain finished dimensions, the fourth factory strip serves as a justified reserve.
The check is carried out in the following order: first, the parts are marked by room and side, then the dimension is transferred along the selected measurement baseline, after which each cut is planned. Cutting must be done with a tool suitable for the material and profile, with reliable fixation of the workpiece. If angled cuts are used, the dimensions are recorded at the agreed points. Only after a trial layout can the bill of materials be considered final and the volume of possible offcuts determined.
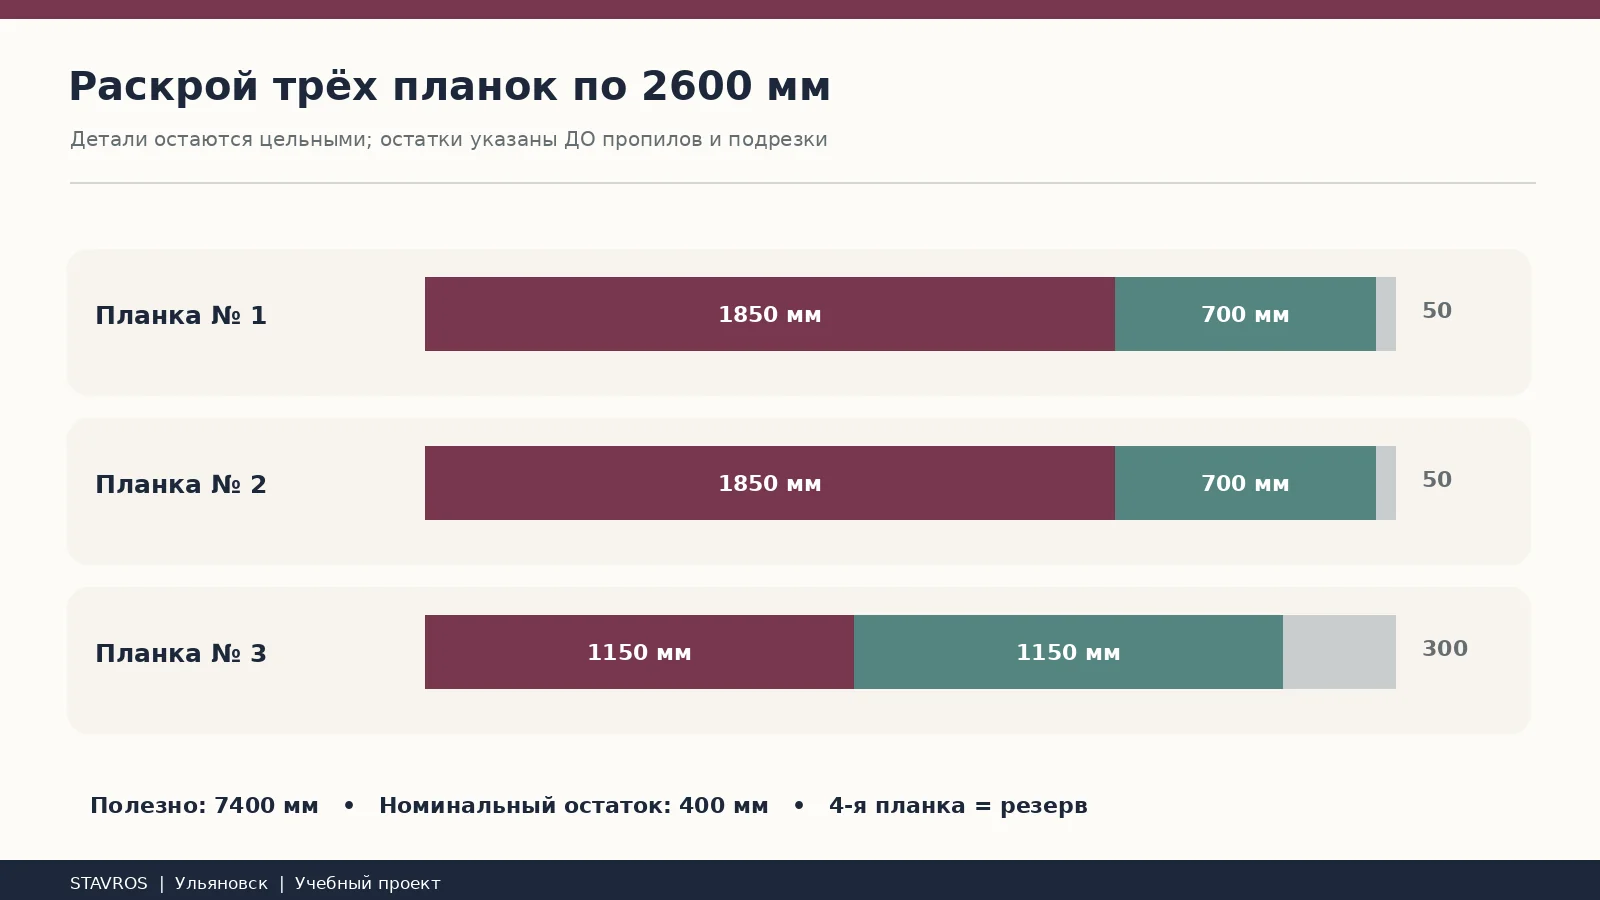
| Factory strip | Parts, mm | Sum of parts, mm | Nominal remainder, mm |
|---|---|---|---|
| № 1 | 1850 + 700 | 2550 | 50 |
| № 2 | 1850 + 700 | 2550 | 50 |
| № 3 | 1150 + 1150 | 2300 | 300 |
| Total | 6 pieces | 7400 | 400 |
Choosing the fourth strip: where the savings end
Buying three strips is a reasonable baseline option when the lengths are confirmed and the end trimming is simple. But the risks of the site itself must be taken into account: the unknown thickness of the future covering, uneven wall sections, complex mitre cuts and the likelihood of damaging the workpiece during cutting. If the measurements were taken before installing the mirror or the final adjustment of a concealed door, it is safer not to present the three-strip calculation as universal. The fourth may turn out to be cheaper than a separate repeat delivery of a single long-length item.
On the other hand, the reserve should not automatically become a rule to buy one extra strip for every small project. It is an additional purchase justified by risk, the availability of a repeat purchase, and the complexity of installation units. With precise geometry, a verified tool, and the ability to calmly make all the cuts, a set of three items remains workable. The difference between the baseline specification and the reserve must always be visible to the customer in the table.
The reserve should not be considered "universal" for all three SKUs. If MLDPU-004 is selected, the spare must be exactly the same strip of the corresponding size; a random substitution with the similar-looking MLDPU-001 can make the continuation of the line noticeably different. Upon completion of the work, it is useful to keep the labeling of the remainder and record the SKU for possible repairs. This is a small thing that makes it easier to restore the finish after rearranging furniture.
How much does it cost to buy stucco molding in Ulyanovsk
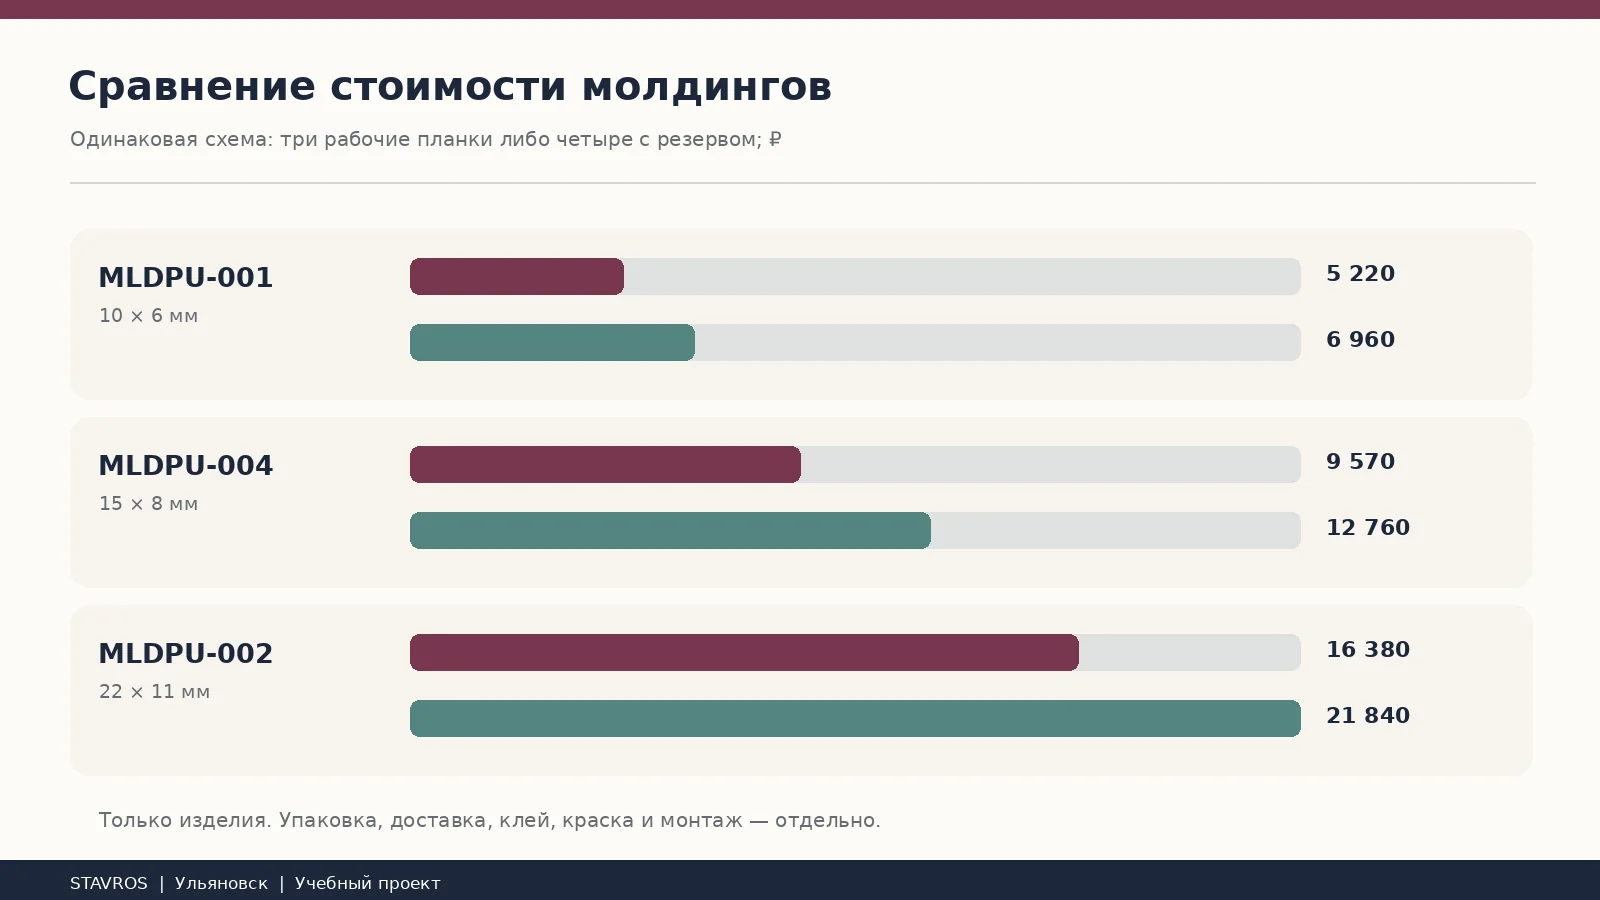
For identical cutting, the final amounts differ significantly. Three MLDPU-001 strips at 1,740 ₽ give 5,220 ₽; four — 6,960 ₽. For MLDPU-004, the base set costs 9,570 ₽, with the reserve — 12,760 ₽. The more expressive MLDPU-002 will cost 16,380 ₽ for three strips or 21,840 ₽ for four. Such a calculation allows comparing specifically the price of a profile of the same length, without substituting the configuration when moving from one SKU to another.
| Molding | Per 1 strip | For 3 strips | For 4 with reserve |
|---|---|---|---|
| MLDPU-001 | 1740 ₽ | 5220 ₽ | 6960 ₽ |
| MLDPU-004 | 3190 ₽ | 9570 ₽ | 12 760 ₽ |
| MLDPU-002 | 5460 ₽ | 16 380 ₽ | 21 840 ₽ |
The name "set cost" in the table means the cost of the direct polyurethane profiles only. It does not include decorative overlays, gypsum items, ceiling cornice, adhesive, consumables, priming, painting, delivery, or the craftsman's labor. On the official product pages for such small batches, a pine transport backing at 390 ₽ is also indicated, but the final charge and packaging rules must be checked in the cart. It should not be mechanically added several times without confirmation of the shipment configuration.
In practice, the most expensive scenario is not always the one where the molding is wider. Additional visits, correcting unsuccessful gaps, and re-gluing onto an unsuitable substrate can cost more than the difference between SKUs. Therefore, reasonable savings begin with correct measurement, a test section, and an agreed fastening scheme, not just with choosing the minimum price per piece. This logic is especially important for renovations with a concealed door and a mirror system, where interference with an adjacent assembly can cause separate costs.
How to place an order without confusion between parts and strips
A convenient order begins with two separate columns: ready-made interior parts and factory product units. The first column lists six segments with reference to their installation location. The second lists three or four whole strips of the selected article. An error occurs when, instead of the second list, the manager is given only the total length of 7.4 m and expects the supplier to guess the requirement to receive two verticals of 1850 mm each without an intermediate joint.
If planning buy moldings in Ulyanovsk, it is useful to add the following information to the request: article, cross-section, factory length, quantity, whether each segment must be solid, what reserve is acceptable, delivery address and desired method of receipt. At the same time, you can request a drawing or technical data sheet for the selected profile. It is not allowed to form a single order from visually similar products without checking that their size and relief actually match.
Accessories for installation and painting are listed on a separate line — not as items automatically included in the set, but as positions to be selected for the substrate. If a hidden door system is nearby, it is advisable to state directly: “decor only on fixed wall sections.” This wording reduces the risk that, during coordination, someone will propose continuing the lines across the door leaf or using a decorative profile to close the installation gap.
If the task is — You can buy ready-made stucco matching the Baroque style. Calculate the quantity: linear meters of cornices and moldings, number of rosettes, pilasters, consoles, corner elements. Add a ten to fifteen percent allowance for trimming. for several rooms at once, it is useful to keep a single schedule and not mix SKUs. After the request is formed, it is checked in two ways. First, by design: whether all six lines are present and whether their axes match. Then, by product: whether one SKU is selected, whether the sizes are identical, whether an additional strip is present, and whether the required transport protection is included. The resulting invoice must correspond to exactly this version of the specification. If the manager proposes a product substitution, the comparison of dimensions and cutting layout is performed again.
Installation stages: first the system, then the decorative contour
The correct sequence on site begins not with applying adhesive, but with checking the concealed door. It must be installed and adjusted in accordance with the manufacturer's documentation. The leaf is opened fully several times, the operation of the handle and hinges is checked, and it is confirmed that movement is not restricted by the future finish. Then the mirror, its fasteners, electrical outlets and service access are inspected. Only after this do they proceed to the final installation line of moldings on the fixed walls.
Marks from the drawing are transferred onto the prepared base and checked with a level. For two vertical pieces, parallelism and a deliberate position relative to the mirror matter most. The horizontals of the adjacent wall are verified against a single height mark. The layout is inspected from the entry point, from the sofa, and from the mirror's reflection: a geometrically correct composition may turn out to be visually overloaded because of lighting or furniture. Adjustments made before gluing are usually cheaper and cleaner than subsequent rework.
A trial layout is done without permanent fastening. Check whether the piece interferes with the door opening and whether it falls within the future mirror servicing area. If there is even one doubt, the offset is clarified against the actual structure. Visual symmetry may be adjusted within the safe zone, but not at the cost of covering the working gap. For assemblies near a concealed door unit, the manufacturer's requirements take priority.
The adhesive system is selected according to the technical documentation for the polyurethane and the wall material. A composition suitable for a mineral substrate must not be applied without testing to any decorative paint, film, or special coating. The profiles are fixed in the agreed order, avoiding displacement during setting. After drying, the joints are assessed, the recommended treatment is performed, and only then does painting begin. It is important to observe drying conditions and product compatibility requirements rather than relying on the generic phrase "can be painted immediately."
Painting without visible transitions or signs of repair
Painting in a single tone with the wall often makes small moldings more convincing than a bright contrast. But this requires a level surface and careful treatment of the joints. Under side lighting, a broad brushstroke or excess material on the profile becomes more noticeable than on a flat surface. It is recommended to make a test on a leftover piece of molding, check adhesion, and assess the nature of the texture. The same color on polyurethane and wall paint may be perceived differently due to different substrates and degrees of gloss.
If the wall is already painted, a locally repainted area can be visible at an angle or in the mirror. Sometimes it is better to cover an entire surface within natural boundaries than to try to mask a small strip next to the new decor. This decision relates to the room's finishing and depends on the type of coating. The cost of additional painting is not included in the price of STAVROS strips and must be accounted for in a separate estimate.
During work, the mirror surface is protected with materials intended for the specific coating, without blocking ventilation and service areas. Aggressive compounds must not come into contact with the glass, door hardware, or seals. At the end, the protection is removed, the absence of adhesive traces is checked, and the door leaf is opened again. Quality installation is confirmed not only by a straight line but also by the continued normal operation of adjacent mechanisms after the finish has fully dried.
Delivery of moldings to Ulyanovsk: count not only meters but also dimensions
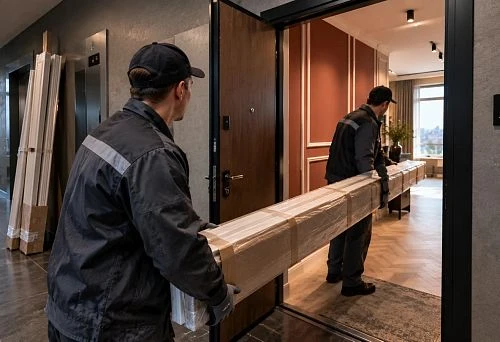
Three strips of 2600 mm each make a relatively small order in terms of the number of items, but a long-length one for transportation. The outer dimensions of the packaging may exceed the length of the profile itself, and the transport company evaluates the shipment according to its own rules for dimensions and volume. Therefore, a fixed rate cannot be promised in advance simply because the total useful footage is 7.4 m. Delivery conditions and the availability of a specific pickup method are agreed based on the address and the actual packaging.
In the STAVROS section Payment and delivery the available methods of placing an order and Contact us to confirm shipping to your destination. are described. When purchasing, you need to check whether the pine transport backing is included and how it is reflected in the invoice. For small orders, the product cards MLDPU-001, MLDPU-004, and MLDPU-002 indicate a guideline of 390 ₽ for such a backing; however, the final cost of the entire logistics portion is determined by the confirmed order. A separate protection line item should not be presented as the price of delivery to the entrance.
Before payment, it is useful to obtain confirmation of the item code, quantity, packaging method, transport company, pickup address, and the procedure for handling damage. Long, thin profiles require end protection and support so that breakage or creasing does not occur during handling. If the customer collects the items themselves, it is necessary to make sure in advance that they can be placed in the vehicle without forced bending. A straight rigid strip cannot be bent into an arc for convenient transport.
Delivery across Ulyanovsk Oblast: the final address matters
For a buyer in Dimitrovgrad, Novoulyanovsk, or another settlement in the region, the route and the format of receipt at the specific address must be confirmed. The general phrase "Contact us to confirm shipping to your destination." does not imply the same timeframe or price for all settlements. It should be clarified in advance whether the handover will be at a transport company's pickup point, by courier, or in another available way. The conditions that apply to central Ulyanovsk cannot be automatically transferred to a remote address.
If the order is needed by the start of finishing work, the schedule is best built taking into account receipt and inspection of the items before installation. Decorative strips should preferably be received, checked, and laid out according to the specification before starting the final painting. Otherwise, a shortage or damage will be discovered at the most inconvenient moment. When speaking with the carrier, it is necessary to separately clarify the requirements for long-length packaging and the procedure for drawing up a report if a defect is found upon receipt.
Acceptance: three quality checks instead of one glance
The first check is quantity and identity. All whole strips are compared against the order, and the item code, size, material, and number of units are verified. MLDPU-004 is not replaced with another profile simply because both items are white and belong to the same product category. If a reserve was agreed, it must be present separately. If the order was placed without a reserve, it cannot be declared a shortfall. That is exactly why a clear itemized list is needed.
The second is physical integrity. The ends, long surfaces, relief, and straightness are inspected. Minor damage on a long strip may be located precisely in the area from which a solid 1850 mm piece needs to be obtained. In that case, the total linear meters of the product do not help much: the defect can disrupt the entire cutting plan. Remarks are recorded before cutting and installation, following the carrier's and seller's rules; the packaging and product are kept for agreeing on further actions.
The third is the installation result. After finishing, the evenness of lines, quality of joints, painting, and absence of glue traces are checked. Then work with the concealed door: full opening, closing, the handle, and access to adjustment are checked. The ability to service the mirror and access to sockets are assessed separately. If, after installation, the decor needs to be opened to access the mechanism, but this requires tearing off the molding, the project cannot be considered properly completed, even if everything looks perfect from two meters away.

Nine mistakes that are invisible in a beautiful visualization
Mistake one: crossing the outline of the concealed door. The image shows a perfect horizontal line, but in reality the glued profile connects two surfaces that should move independently. Solution: move the composition onto fixed sections, or agree on a specialized door construction if its manufacturer permits decorating the panel. A standard wall strip does not replace such an agreement.
Mistake two — gluing the molding onto the mirror without checking the system. This can complicate cleaning, damage the coating, hinder removal, and fail to comply with the permitted fastening technology. Solution: design the lines along the adjacent wall. Any work directly with the glass must be carried out according to the mirror and fastener manufacturer's requirements, not based on an advertising photo.
Mistake three — making all six pieces from three strips without accounting for cuts. In our scheme, the first two offcuts are only 50 mm each. If installation requires complex miters or length adjustments, the actual requirement may change. Solution: approve the cutting plan based on actual dimensions and have a clear reserve option, without substituting an approximate drawing for a final cutting map.
Mistake four — confusing the price per piece with the price per meter. STAVROS quotes the price for one factory strip of 2600 mm. Dividing the cost by the usable length may create the illusion of a cheaper purchase, but the seller ships whole products, not abstract millimeters. Solution: compare the cost of three and four whole strips of the selected article, and account for offcuts separately.
Mistake five — ignoring the reflection. A vertical line on a fixed wall looks understated until it is seen in the mirror opposite. Solution: check the layout under different lighting and from several points of movement. If the rhythm becomes too frequent, reduce the number of lines rather than necessarily buying a thinner profile.
Mistake six — mixing up similar articles. Two white strips do not form a single profile if they differ in width, depth, or pattern. Solution: before ordering, record one exact SKU, do not allow unnoticed substitutions, and compare samples under identical lighting. For paired lines, a profile mismatch is especially noticeable.
Mistake seven — choosing an adhesive without assessing the substrate. Polyurethane alone does not guarantee adhesion to loose filler, special paint or finishing film. Solution: check technical compatibility, substrate strength and the sequence of treatment. Arbitrary installation on a moving door or on a mirror does not become acceptable after buying a "strong" adhesive.
Mistake eight — including delivery in the product price without data. A separate line for the transport backing does not mean payment for the entire shipment. Solution: request the final rate and dimensions of the packed order, separately specify the pickup location, collection time and the procedure for damaged goods. This eliminates unpleasant surprises, especially for addresses outside Ulyanovsk itself.
Mistake nine — evaluating the finished finish without checking the mechanisms. A beautiful profile may block access to adjusting a concealed hinge or impair door operation after an additional coat of paint. Solution: in the acceptance report, separately record a successful check of the full door travel, the openness of technical gaps and the preservation of the ability to service the mirror.
What to check a month after installation
After using the room, it is useful to inspect the main areas once more under the usual lighting. Note whether visible seams, a change in shade or damage from rearranging furniture have appeared. Such an inspection helps distinguish normal signs of use from substrate and installation problems. If a line has ended up too close to the walkway, it is better to move it during the next finishing job rather than try to turn a decorative molding into a protective wall element.
Particular attention is paid to the hidden door: whether the gaps have been preserved, whether the panel moves freely, and whether any friction occurs against the painted surface. If there are signs of contact, operation should be assessed together with a door system specialist, without cutting the mechanism or decorative finish at random. For the mirror, check that there is no stress at the fastening and that access to service parts is maintained. It is important to understand that corrections depend on the specific design, not on universal advice from an article.
Frequently asked customer questions
Can I get the price for full finishing based on three moldings?
No. The stated 5,220, 9,570 and 16,380 ₽ are the cost of three factory moldings of a specific polyurethane profile on the date of checking. The full cost includes substrate preparation, installation compounds, consumables, painting, possible ceiling decor, packaging, delivery and labor. The total depends on the condition of the walls and the complexity of the junctions near the concealed door and mirror. If turnkey installation is required, the estimate is drawn up only after the site has been agreed.
Can I choose any white profile using the query “buy stucco molding”?
Wording Buy moldings too wide for a technical selection. A single category contains products with different materials, sizes and purposes. For a wall with a concealed door, you need to check specifically the straight polyurethane moulding, its cross-section and the possibility of safe mounting on a fixed plane. White colour in the catalogue does not mean identical relief, and matching length does not guarantee identical profiles.
Can one molding be laid over the door gap?
A standard wall molding must not be used to cover the gap between the moving panel and the fixed part of the structure. This can cause friction, jamming and loss of adjustability. If the panel itself needs to be decorated, the solution must be provided for in advance by the door system and confirmed by its manufacturer. In the training project, all six lines are located only on fixed sections of the wall and do not cross the door.
Can molding be used as a frame around a mirror?
A decorative line on the adjacent wall is possible if it does not interfere with fastening, servicing and removal of the mirror. However, gluing directly to the glass cannot be recommended without checking the composition, the condition of the substrate and the instructions of the mirror system manufacturer. It is especially important to preserve service access if lighting and connections are located behind the panel. In our calculation, the mirror surface remains free of glued decor.
Which profiles are best to choose for a small and a spacious living room?
MLDPU-001 has a cross-section of 10 × 6 mm, MLDPU-004 — 15 × 8 mm, MLDPU-002 — 22 × 11 mm. A thin line usually creates a calmer pattern, the medium one gives a noticeable architectural contour, and the wide one interacts more strongly with light. But the choice must be based on the actual distance to the door, the size of the wall piers, the colour of the walls and the reflection in the mirror. The area of the room by itself does not determine the suitable article number.
How do I know whether it's worth buying a fourth strip?
If the dimensions of the six parts are finally confirmed, the angles are simple and there is enough room for the cuts, three strips according to our map may be sufficient. With questionable dimensions or complex end trimming, the fourth serves as insurance against a repeat delivery. First, a real map is drawn up for the selected profile, the cut width is marked, and then the price of the reserve is compared with the cost of a possible additional order. An optional reserve should not be presented as a mandatory kit.
How can you check whether the molding will interfere with opening?
First, the required clearances are determined according to the door manufacturer's instructions, then the full travel of the leaf and hardware is checked repeatedly. On the stationary wall, a mock-up of the selected section is temporarily placed in the intended location without creating a risk of jamming. If the element approaches the door's path, its position is changed or it is abandoned. A simple check of the closed door is not enough: dangerous contact sometimes occurs only in an intermediate position.
Can an order be shipped not to Ulyanovsk but to another city in the region?
The possibility and conditions of transportation must be clarified for the final address. The tariff, timeframe and pickup format for the city of Ulyanovsk should not be applied to Dimitrovgrad, Novoulyanovsk or a remote settlement. When coordinating, it is important to state the length of the product and request the dimensions of the protective packaging. After delivery, check the number of intact strips and the integrity of the profiles before starting to cut.
Are special overlays needed to combine with the molding?
Not necessarily. Our six separate lines can be made with straight moldings only. If an ornament is required, a specific overlay is selected from the product card, its geometry is verified and it is evaluated in the mirror reflection. The material itself does not guarantee compatibility. Overlays are best not installed in areas of door movement, mirror mounting and access to utilities. A separate decorative element is added to the specification only after the location has been checked.
Final specification: safety first, aesthetics second
For a living room with a hidden door and a large mirror, the best result comes not from the maximum number of stucco elements, but from a clear sequence of decisions. First, check the door operation, mirror mounting, technical gaps, and free wall sections. Then choose the scale of the relief, create a trial layout, approve the six independent lines, and perform the cutting. Only after that does it make sense to compare the cost of profiles and place an order with delivery to Ulyanovsk or another city in the region.
In the training example, three strips of the same article are sufficient: two blanks of 1850 + 700 mm and one of 1150 + 1150 mm; the fourth remains as a reserve. If the dimensions and conditions of your site differ, the bill of materials is recalculated without trying to preserve these figures at any cost. Correctly selected wall molding helps set the architectural rhythm, leaving the mirror as an independent surface and the hidden door as a working door.