








































Article Contents:
- Where to buy a ceiling medallion in Moscow if the finishing is already complete
- Can a polyurethane medallion be glued over wallpaper for painting
- Three states of the ceiling surface: what changes for the buyer
- How to inspect the ceiling and gather baseline data before ordering
- Why the outer size of a medallion does not show the mounting area
- How much space five models will take up in a Moscow living room
- How to choose a decorative composition without redoing all the finishing
- CRPU-070: why a smaller size does not eliminate the need to check the wallpaper
- CRPU-069 and RPU.VRS-001: almost the same size, different base handling
- CRPU-068 and CRPU-071: a large composition and the cost of ceiling restoration
- Independent chandelier mounting and access to connections
- How to prepare a papered ceiling for installing stucco decor
- How to preserve the wallpaper texture around a polyurethane rosette
- Local preparation or a full ceiling refresh: how to compare estimates
- How much the rosette itself costs and how to calculate the full purchase budget in Moscow
- How to place an order for a ceiling rosette with delivery across Moscow and the region
- What information to include in the request
- Can I buy a socket if the wallpaper is already glued to the ceiling?
- Do I have to remove all the wallpaper before installation?
- Which model is best for a small living room?
- Is installation included in the product price?
- How do I find out how many covers are included in the set?
- Do I need an installation template if the ceiling is level?
- Can installation be done without removing the chandelier?
- How do the recommendations for painting stucco differ from those for wallpaper?
- Can delivery to the Moscow region be ordered?
- What should I do if, during the process, it turns out that the required socket is not suitable?

The apartment already has paintable wallpaper applied, the ceiling is painted, and the chandelier works. The owners find a composite polyurethane socket in the STAVROS catalog and want to add relief around the light fixture without starting a new renovation. At first glance, all that remains is to choose a pattern and glue. But it is precisely the condition of the old coating that determines whether such work can be started at all: a decorative piece holds no more securely than the layer to which it was attached.
Buying a socket before checking the base is risky. Even smooth wallpaper with no visible bubbles can separate from the ceiling under additional load, and durable paint on the face side says nothing about the adhesion of the glue beneath the sheet. For a composite composition, you have to check not just one area but every place where the decorative elements will be located. If a reliable fastening method has not yet been agreed upon, it is wiser to choose the model in advance, save the product code, and postpone payment until the ceiling has been inspected.
As an example, let's take a Moscow living room with an area of 22 square meters. In the center hangs a chandelier with a metal cup; around it an ornament about one meter in diameter is planned. The wallpaper was applied several years ago, painted twice, and a seam is barely noticeable near the window. We will not judge such a ceiling as either good or bad in advance. First we will establish the structure of the finish layers, then compare the actual STAVROS compositions against it, and only after that calculate the full order budget.





Where to buy a ceiling socket in Moscow if the finishing is already complete
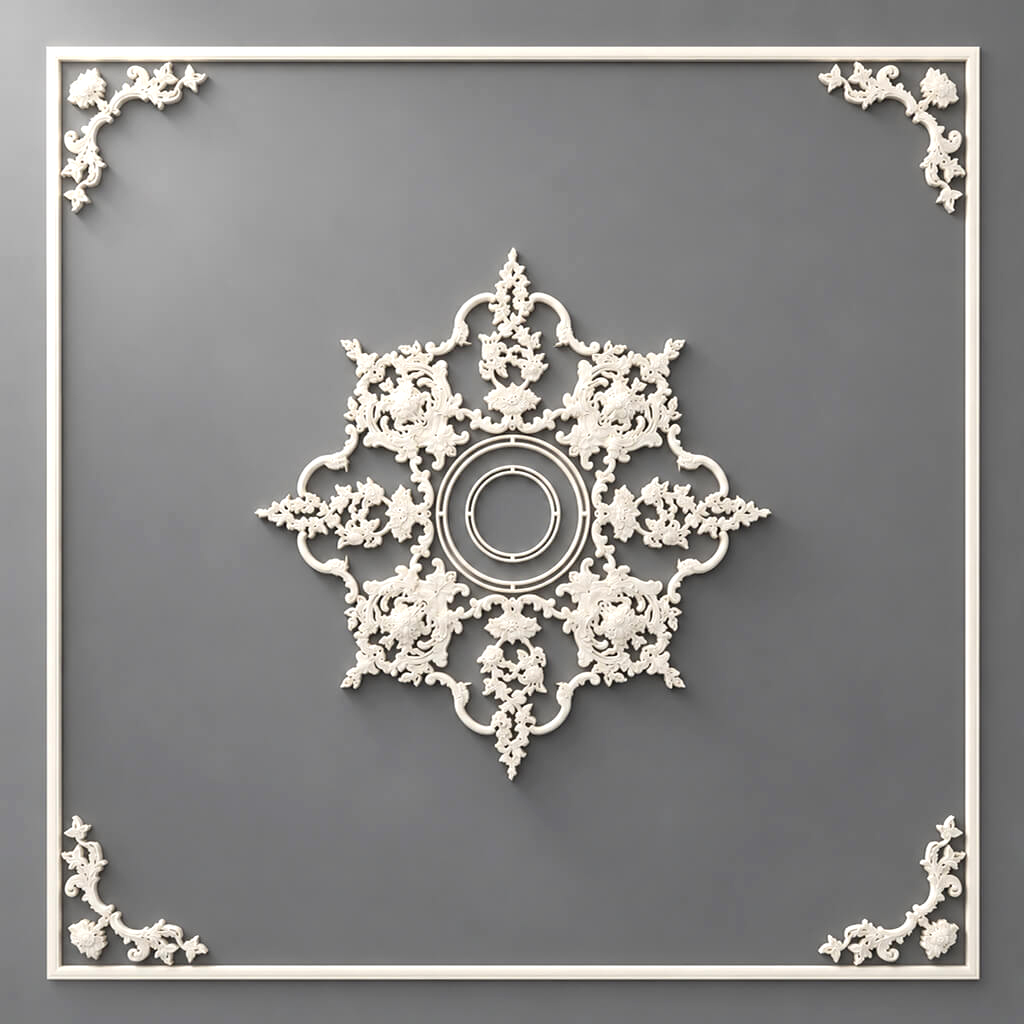
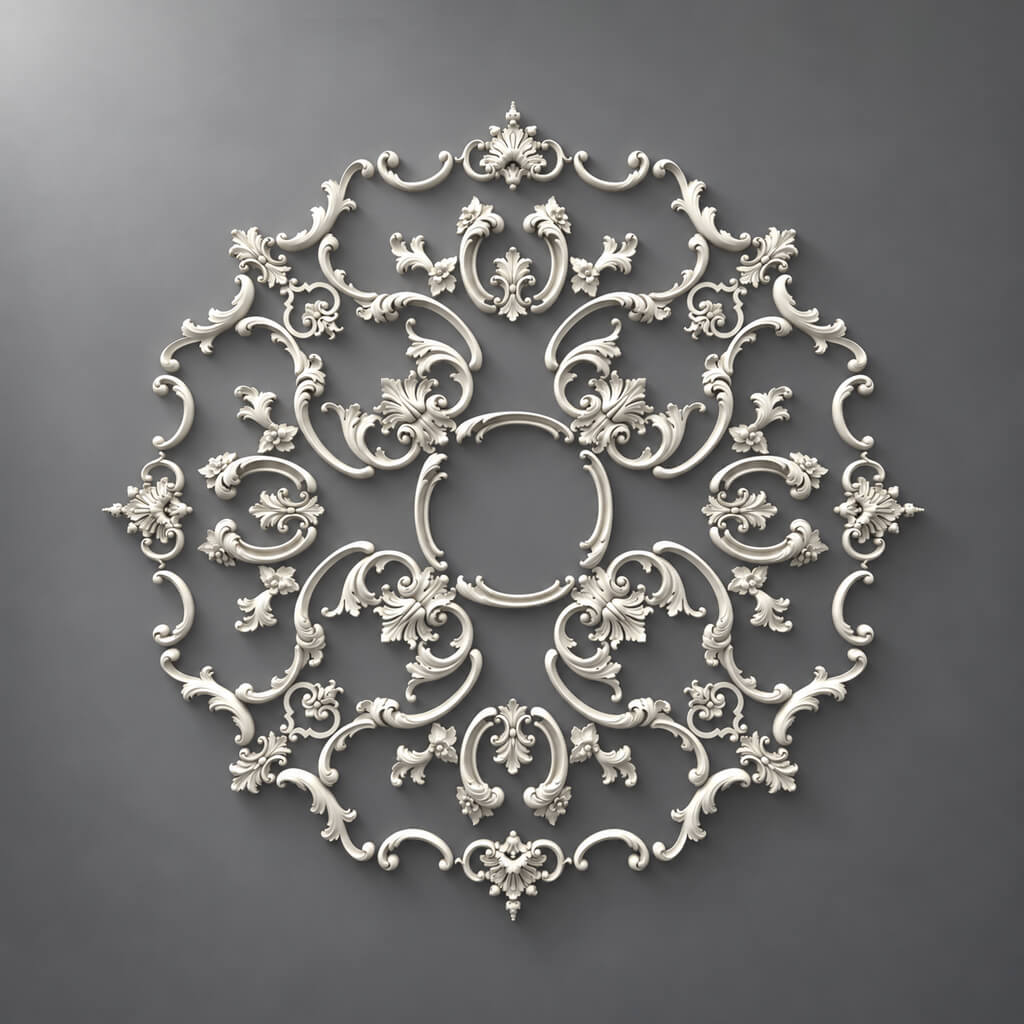
Start with catalog of polyurethane ceiling medallions. It features not only solid decorative circles but also modular models: the pattern is assembled from individual elements placed around the chandelier according to a specific layout. For purchasing, this difference matters. A single factory item code means a complete set, not a separate overlay that matches it in pattern.
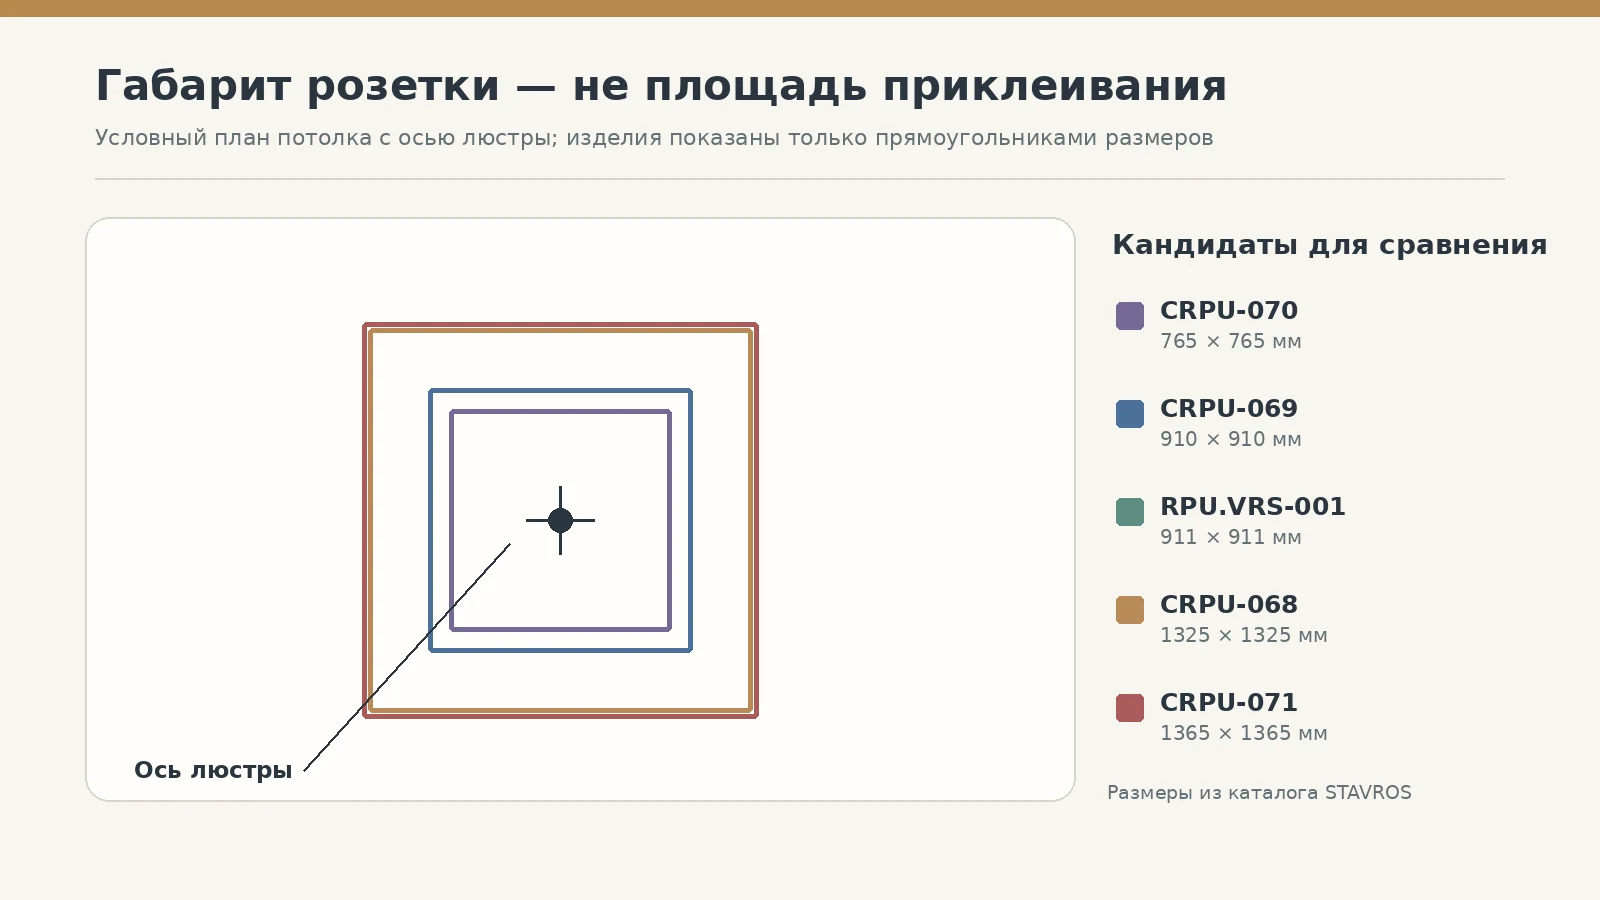
Keep the exact designation of the model you are interested in and its product page. If you choose CRPU-070, this refers to a composition of 765 × 765 mm; CRPU-069 measures 910 × 910 mm, and CRPU-068 occupies a field of 1325 × 1325 mm. These are the dimensions of the finished pattern. They are not equal to the contact area with the ceiling and do not allow you to calculate adhesive consumption. Such area should be confirmed using the drawing with the parts layout and the supplier's instructions.
It is more useful to build your request to the seller not around a single phrase like "recommend a medallion," but around a description of the object. Write that the ceiling has already been wallpapered for painting, specify the type and estimated age of the covering, the chandelier location, the size of the free field, and the desired item code. Ask for the set contents, the installation drawing, and information about the acceptable substrate. An answer about a decorative product does not replace the conclusion of a specialist who inspects the ceiling condition on site.
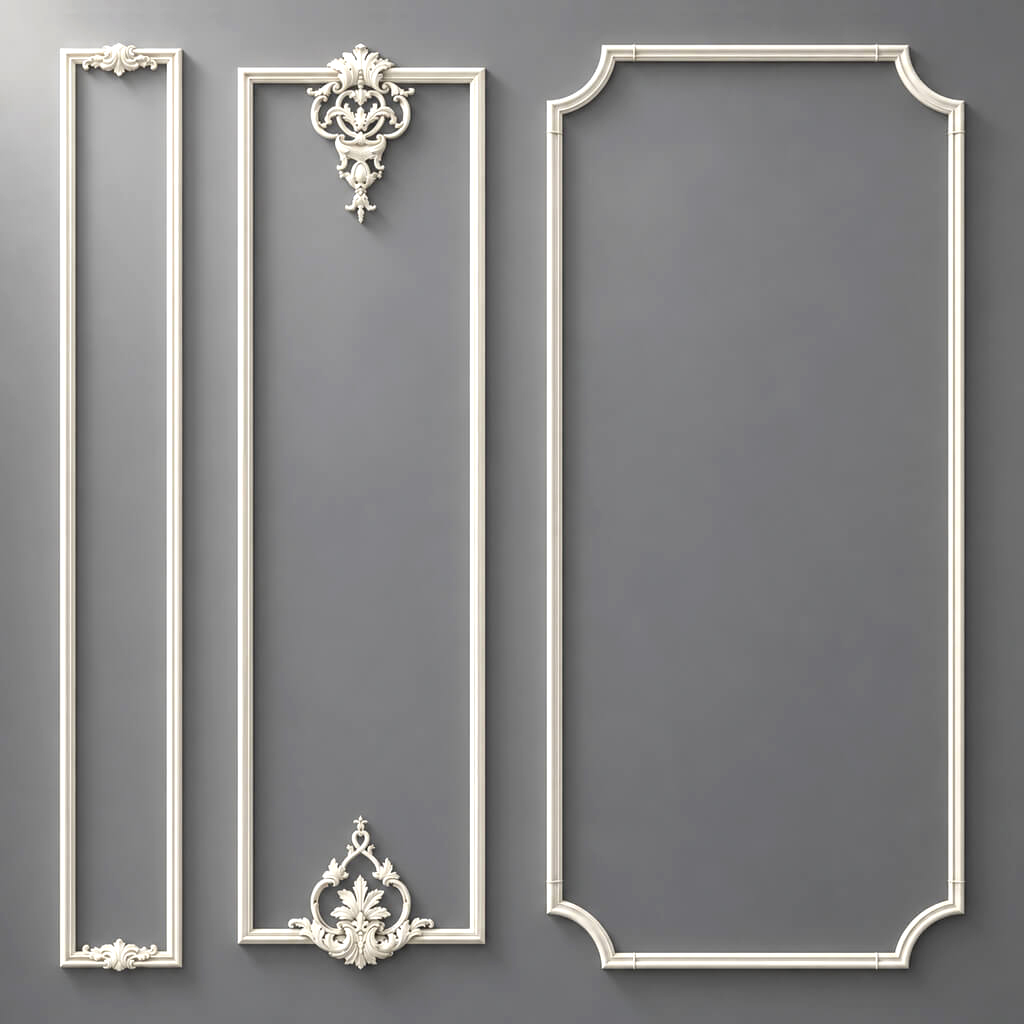
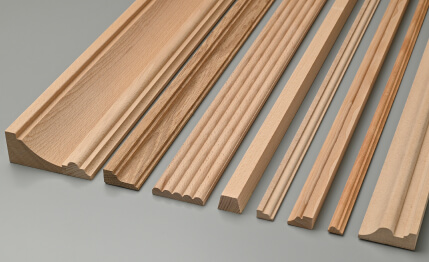
The website also presents Moldings of various types. However, a cornice or a light short molding is not a sufficient comparison for a large ceiling medallion. Products differ in shape, contact points, and the direction of impact on the fixed layer. General recommendations for installing lightweight decor should not be transferred to painted wallpaper without separate verification of the technology.
Before the final order, you need answers to three questions: whether a strong mounting base can be prepared without damaging the entire finish, whether the specific set is suitable in terms of the arrangement of parts, and how much it will cost to restore the ceiling after preparation. The answer "the medallion fits by size" addresses only one of these questions. If the first two remain open, it is better not to rush the purchase.



Can a polyurethane medallion be glued over wallpaper for painting
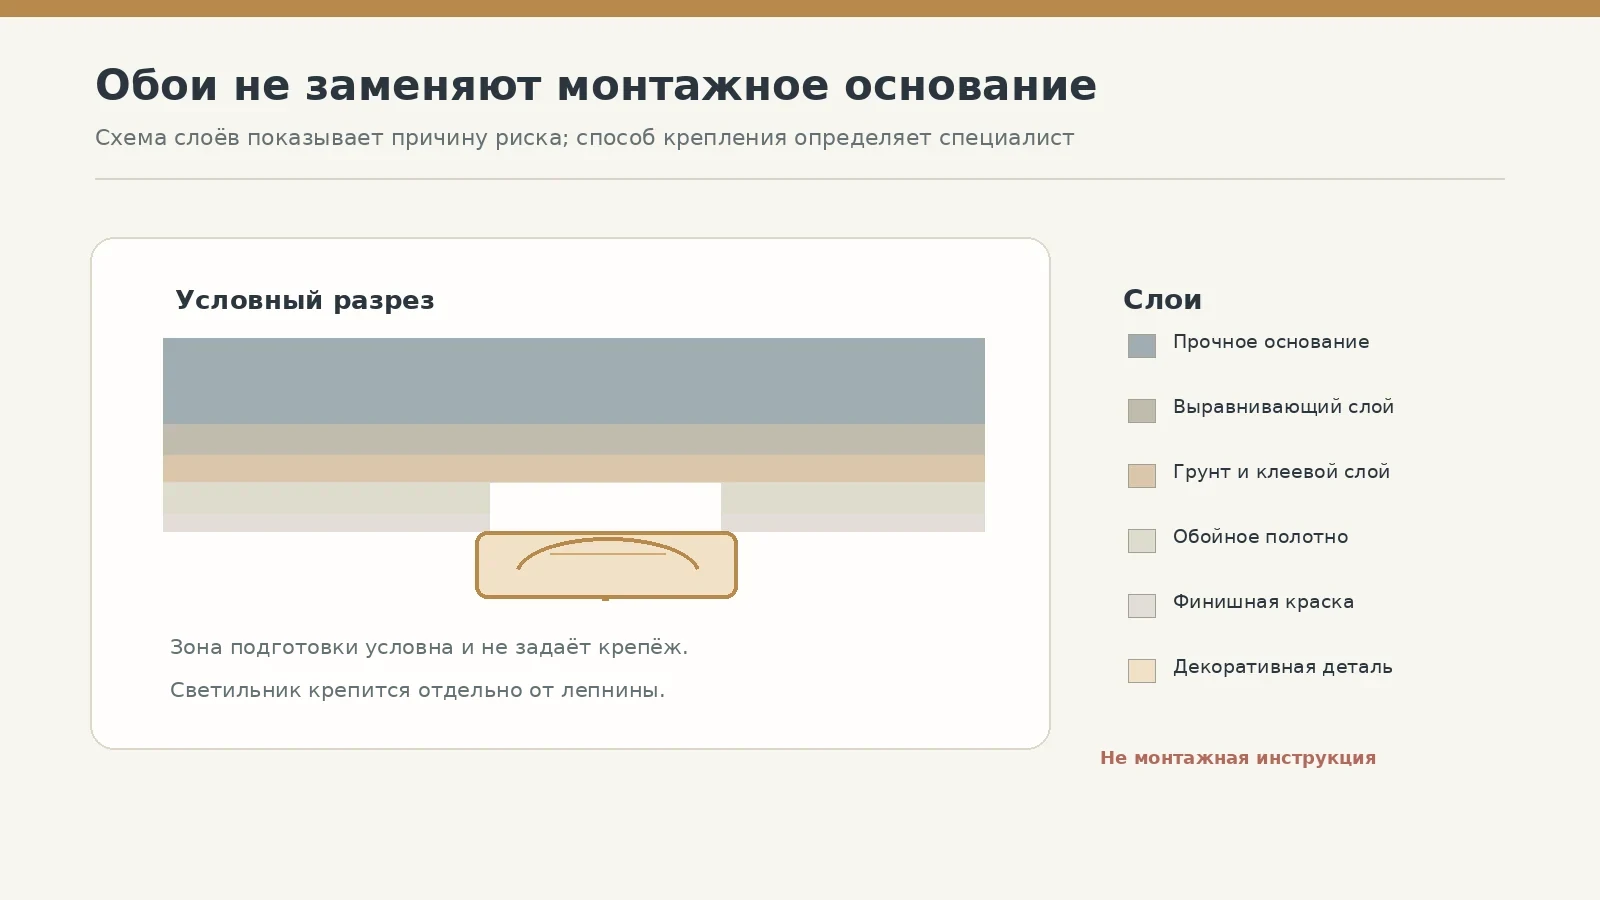
The wallpaper sheet performs a finishing function. Its front side creates texture and receives paint, while the back side is held by wallpaper adhesive. Thus, between the medallion and the load-bearing ceiling there may be paint, wallpaper, wallpaper adhesive, primer, putty, and other old coatings. The strength of the entire system is determined not by the strongest layer but by the weakest point in this sequence.
Imagine two completely identical sections of ceiling. On the first, the wallpaper adheres well, but beneath it there is poorly holding putty. On the second, the putty is strong, but the wallpaper adhesive has lost adhesion near the seam over time. If the decor is attached directly to the painted surface, both defects may appear later — and it is impossible to distinguish one from the other in advance by appearance. Therefore, a visual inspection is necessary, but by itself it is insufficient.
It is especially important to distinguish between two statements. "The adhesive is compatible with painted polyurethane" means one thing. "The entire ceiling finish can support a specific decorative element" means something completely different. The manufacturer of the installation compound must confirm the adhesive's suitability for the selected substrates, and the installer must ensure fastening according to the agreed scheme. If this requires exposing a solid mineral substrate at the contact points, the scope of work must be approved before purchase.
You should not conduct a strength test yourself by randomly gluing a heavy fragment and waiting for it to come off. Such a test can damage an area of the ceiling but will not provide a reliable conclusion for the entire surface. A professional assessment may include inspection of the layer structure, selective openings, and tests permitted specifically for the site; the specific methodology is determined by the specialist responsible for installation.
Sometimes on the manufacturer's website you can find advice on gluing small elements to well-adhering wallpaper. This does not mean that any wallcovering automatically serves as a substrate for multi-component ceiling decor. If the reliability of the existing layers cannot be confirmed or their detachment cannot be ruled out, decorative fastening directly to the wallpaper should not be accepted for this project.
Our factory also produces:






Three states of ceiling covering: what changes for the buyer
The same rosette design can be considered for different ceilings, but the work sequence will differ. Therefore, start not with the color of the stucco, but with the classification of the covering. It allows you to understand whether local preparation is needed, restoration of a larger area, or a complete revision of the decorative solution.
| Ceiling condition | What is visible during inspection | What solution is required before ordering |
|---|---|---|
| The wallcoverings lie flat, the paint is intact | No noticeable bubbles, open seams, or cracks | Determine the layer structure and agree on a fastening method to a suitable substrate |
| There are bubbles, detached edges, or damp spots | Signs of adhesion failure are visible | First determine the cause and fix the defect, then repeat the substrate assessment |
| Several layers of wallpaper and paint of unknown age | The ceiling may look level on the surface | Check the overall layer system; it may need to be removed in the work area |
A level surface is not proof of strength. Often it only means that nothing loaded it before the socket was installed. Joints near the light fixture and areas where traces of a leak were once repaired should be assessed with particular caution. If the cause of the damp spots has not been eliminated, decorative finishing will not fix this problem.
If bubbles are found, you should not simply puncture them, inject a little glue, and consider the substrate suitable. Wallpaper repair may restore their appearance, but it does not confirm that a polyurethane composition may be attached through the restored surface. The condition of the face surface and the permissible installation method are assessed separately.
There is also a fourth, intermediate case: the substrate is known to be reliable, but the surface has a pronounced texture that is difficult to replicate after local removal. From the standpoint of attachment, the task may be solvable, but from the standpoint of finishing, it may be expensive. That is why the estimate should include not only the material and installation work but also the cost of restoring the visible surface.
If the contractor suggests attaching a large socket "to the same wallpaper, like an ordinary skirting board," ask them to specify the exact fastening system, the acceptable substrates, and who is responsible for the result. The absence of this information is grounds to pause the purchase, not a reason to look faster for a stronger adhesive.
Get Consultation
How to inspect the ceiling and gather baseline data before ordering
The buyer does not need to decide on their own whether the ceiling can withstand the load, but they can prepare the information without which the installer will be guessing. Start with the renovation documents, if they have been kept: what serves as the substrate, what primer was used, what the surface was levelled with, which canvas was hung and how many times it was painted. Even an incomplete list helps distinguish a system with a mineral substrate from an unknown set of old coatings.
Then take photos in ordinary daylight and under side lighting. Side light emphasises waves, seams and irregularities that are invisible with the chandelier on. Mark on the plan the areas with suspicious texture, exposed edges and traces of previous repairs. Do not wet the coating or scrape it for testing without agreement with the owner and the finisher: the nature of wallpaper and paint varies, and an attempt to inspect may damage the finished ceiling.
Specification sheet for a preliminary consultation must contain more than the length and width of the room. You will need the size of the free ceiling field, the actual axis of the chandelier, the outer size of its cup, the room height, the substrate type, information about the wallpaper, the location of seams, the position of exposed electrical connections and the chosen stucco pattern. If the chandelier is offset from the centre of the room, indicate both centres. Assuming they automatically coincide is a common mistake.
It is better to give the specialist one simple plan with dimensions than a dozen photos from different angles without scale. The plan marks the four sides of the ceiling, the axis of the light fixture and the estimated overall size of the composition. For a modular socket, however, this is only the first level of checking. The second is the layout of the actual parts, including where they touch the surface and the boundaries of the future wallpaper restoration.
Ask the installation company to specify which areas need to be inspected after local opening of the coating and which works cannot be carried out without shutting off the power supply. It must not be assumed in advance that the wallpaper layer may be left under every element or, conversely, that the coating must always be completely removed from the entire ceiling. The decision is made based on the actual construction, the material instructions and the survey results.
Finally, agree in advance who is responsible for the finishing after installation. One contractor may securely fasten the parts but be unable to reproduce the original texture of the painted wallpaper. Another can restore the coating but does not work with decorative modules. The division of responsibility must be formalised before purchase, otherwise the final price will become unmanageable.
Why the outer size of the socket does not show the fastening area
On the product page, the buyer sees three dimensions: width, height, and relief depth. For CRPU-070, this is 765 × 765 × 18 mm. It seems logical to multiply the first two numbers, get the area, and order the same amount of installation materials. But that gives the area of an imaginary square around the design, not the area of the back surfaces of its elements. Part of the square may remain open ceiling; other areas are crossed only by thin ornamental lines.
The difference is especially noticeable in openwork composite compositions. From a distance of several meters, the design may look solid, but when viewed from the staircase it turns out to be a set of separate relief overlays. Therefore, without a drawing and instructions, it is impossible to accurately predict the number of locally peelable wallpaper areas, the nature of temporary fixation, and the consumption of installation adhesive.
Let us conditionally consider two versions of the same room: a rosette assembled from eight large elements or from several dozen small ones. In the first case, there are fewer placement points, but an individual overlay may cover complex texture and require careful checking of fit. In the second case, numerous joints and axes require more detailed marking. One version cannot be called technologically simpler based only on the number of parts, without their shape and installation conditions.
If the installer needs to preserve most of the wallpaper, the verification logic is as follows. First, they determine the acceptable substrate and fastening method. Then they overlay the actual layout of elements onto the ceiling plan, mark possible preparation zones, and only after that assess restoring the covering between them. This sequence should not be replaced by calculating the outer rectangle.
This distinction also affects communication with the seller. Ask not only for an image of the assembled product, but also for a list of modules with their quantities, a layout diagram, and installation information. Separately clarify whether a paper template is included in the kit or must be obtained another way. Do not buy additional parts by a similar name, expecting to assemble a factory rosette from them without an approved diagram.
How much space will five models take up in a Moscow living room?
Let us take a conventional room of 5.1 × 4.3 m. The chandelier axis is 2.55 m from the short walls and 2.15 m from the long walls. If the composition is positioned symmetrically, half of its outer size is laid off from the axis in four directions. However, the actual ceiling plan should be measured on site: a built-in cornice, a niche, and a deviation of the light fixture can change the picture.
| Model | Outer size, mm | Half of the overall dimension, mm | Distance from the outer boundary to the nearest wall in the conventional room |
|---|---|---|---|
| CRPU-070 | 765 × 765 | 382,5 | 1767.5 mm |
| CRPU-069 | 910 × 910 | 455 | 1695 мм |
| RPU.VRS-001 | 911 × 911 | 455,5 | 1694.5 mm |
| CRPU-068 | 1325 × 1325 | 662,5 | 1487.5 mm |
| CRPU-071 | 1365 × 1365 | 682,5 | 1467.5 mm |
The resulting distances are only geometric offsets within a demonstration rectangular room. They do not indicate the suitability of the wallpaper base, do not confirm the size of the central space for the chandelier, and do not determine the mounting method. Even the largest composition in the table fits within the room by its outer dimensions, but that alone is not a reason to buy.
Suppose the chandelier's suspension point is shifted 180 mm toward the window. All distances from the pattern to the walls change accordingly, with the margin increasing on one side and decreasing on the other. Moving the chandelier for the sake of decorative symmetry is not always sensible: the light's position may be tied to a table or furniture group. In such cases, the composition is coordinated with the actual axis of the fixture rather than adjusting the space solely for a visually pleasing layout.
On a finished, wallpapered ceiling, size matters especially for another reason. The farther the elements spread from the center, the more areas of the finish will need to be inspected. If the wallpaper closer to the wall is in a different condition, the technical assessment becomes more complicated even with perfectly maintained geometry. Mark such transitions separately on the diagram.
How to choose a decorative composition without redoing the entire finish

The purchase begins with two independent decisions. The first concerns the technical feasibility of mounting to the ceiling: an acceptable base, the layout of the elements, materials, and the responsibility of the installation company. The second concerns the artistic result: scale, pattern, color, visibility from the sofa and from the entrance, and compatibility with the chandelier's cup. Trying to solve the second task before the first can result in the model you liked staying in its box.
In a finished interior, it makes sense to check the composition before paying using a full-size paper layout or another precise mock-up. The fixture will partially hide the center of the ornament, and side lighting may make individual relief elements more noticeable than in the product photo. Evaluating the pattern only from above, based on a catalog image, is not enough: in the room, a person sees it from below and at an angle.
A conventional dining room with a low-hanging chandelier and a living room with a higher ceiling may require different solutions even with the same floor area. In the first case, the fixture's cup and the shade itself visually cover part of the pattern. In the second, a larger composition can be considered if the geometry and quality of the base do not contradict it. There is no established universal size here: each conclusion depends on the actual setting.
A polyurethane ceiling rose should not be used as an independent support for a chandelier. The load-bearing fixture mount must be constructed independently, in accordance with the equipment documentation and the floor slab design. If the existing assembly requires servicing, decorative parts must not turn it into an inaccessible cavity.
The most convenient decision-making sequence looks like this: choose two or three visually suitable product codes; confirm the specifications and the exact layout; check the substrate; agree on the preparatory work; assess the finish transitions; obtain a full estimate; and only then place the order. If at any stage it turns out that the old coating will have to be completely removed, this does not mean automatically abandoning the decor. But such a change in the scale of the renovation must be a conscious decision, not a surprise.
CRPU-070: why a smaller footprint does not eliminate the need to check the wallpaper
Ceiling rosette CRPU-070 has an external size of 765 × 765 × 18 mm. According to the public product page, the composition consists of 24 parts of three types. The price of one factory set as of 5 November 2026 is 35,680 rubles. Among the five models under consideration, it requires the smallest square field, but it is not a single solid overlay.
For a wallpapered ceiling, this means that the installer must assess several separate contact zones. An error will occur if a single circle around the chandelier is marked out in advance, the wallpaper is removed from it, and then it turns out that the outer parts are positioned differently. The opposite situation is also possible: a large preparation square is not needed, since individual elements touch the substrate only at certain points. The final scheme is developed based on the product layout, not on the overall silhouette of the pattern.
The complexity is not limited to the number of parts. Each of them has its own relief and a back surface that must be checked for fit. Repeating elements must radiate from the center at an equal pitch; an error in the first sector gradually distorts the entire pattern. Therefore, find out in advance how to obtain the installation template and what reference axes the manufacturer provides.
For a room where the wallpaper has a noticeable seam near the light fixture, you can overlay the CRPU-070 outline on the plan and see whether the decorative modules cross the problem area. If there is an intersection, it must be shown to the installer, rather than assuming that the adhesive alone will reinforce the sheet. If the inspection yields a negative result, a reasonable solution may be not to replace the ceiling rose with an even smaller one, but to prepare the ceiling area down to a solid substrate.
From a budget perspective, CRPU-070 is the lowest-priced alternative in the set under consideration. But if its location specifically requires costly restoration of pronounced texture, the final cost may equal that of a more expensive model on an already prepared substrate. The price of the product itself does not predict the price of the finished ceiling.
CRPU-069 and RPU.VRS-001: almost the same size, different handling of the substrate
Externally, these models occupy practically equal fields: CRPU-069 — 910 × 910 × 15 mm, RPU.VRS-001 — 911 × 911 × 18 mm. A one-millimeter difference has no independent significance when choosing for a wallpapered ceiling. However, the composition design differs: CRPU-069 is stated to have 64 parts of fifteen types, while RPU.VRS-001 has eight large overlays of two types.
CRPU-069 costs 62,560 rubles as of the check date. The numerous modules have their own connection points and orientation, including paired parts with right- and left-hand versions. Marking will require a detailed layout; controlling only the overall symmetry of the outer contour is not enough. It is advisable to divide the base preparation into sections according to the actual layout, rather than doing it "by eye" before the first gluing.
У RPU.VRS-001 eight elements: four NPU-507 and four NPU-508. The open product card describes them as a plant-based openwork ornament. The set costs 67,360 rubles. When marking, individual large modules may require a longer section of base preparation, but there are fewer such sections. The actual labor intensity is determined by the shape of the parts, the condition of the ceiling, and the fastening technology, not just the number of appliqués.
Imagine that a barely noticeable seam between wallpaper panels runs across the ceiling. In one composition it falls between the elements, while in another it crosses the contact area of a large appliqué. The surface preparation decisions will be different, even though the outer dimensions are almost the same. This is an example of why a photo of an assembled rosette is of little help in calculating the scope of finishing work.
| Criterion | CRPU-069 | RPU.VRS-001 |
|---|---|---|
| Outer field | 910 × 910 mm | 911 × 911 mm |
| Thickness per card | 15 мм | 18 мм |
| Composition | 64 elements, 15 types | 8 elements, 2 types |
| Marking feature | Many joints and orientations | Placement control for eight large appliqués |
| Wallpaper check | Each gluing zone according to the diagram | Contact of each large part according to the diagram |
| Price as of 05.11.2026 | 62 560 ₽ | 67 360 ₽ |
If the goal is minimal disruption to the finished finish, do not automatically choose the model with eight parts. First, plot both sets on the ceiling plan and compare the areas actually affected. It is appropriate to ask the installer to evaluate both schemes before payment is transferred to the seller.
CRPU-068 and CRPU-071: large composition and ceiling restoration price
CRPU-068 measures 1325 × 1325 × 18 mm and costs 50,480 rubles at the time of checking. CRPU-071 — 1365 × 1365 × 19 mm at a price of 72,880 rubles. Both models form a much wider decorative zone than CRPU-070, although the price of CRPU-068 is lower than the cost of some smaller compositions. The cost depends not only on the outer size, so comparing these models on the principle of "bigger means more expensive" is incorrect.
For a ceiling with wallpaper, a large overall size increases the likelihood of encountering different coating conditions along the way: closer to the window there may be an open seam, near the wall — areas of old repairs, and on one of the panels — a more pronounced texture. All these zones need to be checked when overlaying the modular layout. Removing wallpaper under the entire outer square in advance cannot be considered a necessity; leaving the panel under all decorative parts also cannot be considered an approved solution.
The published description of CRPU-068 states 72 parts, however the sum of quantities in the previously checked open specification was 68. For a single customer this is already a reason to request an up-to-date item-by-item list, and for the installation crew — not to start marking based on questionable contents. Until written clarification is received, one should not declare that the boxes will definitely contain 72 or 68 items.
CRPU-071 has a noticeably different eight-ray decorative construction. For the buyer this is primarily a visual and installation feature: the locations of the rays and central rings are checked relative to the chandelier cup and future areas of base preparation. The outer thickness of 19 mm does not mean that the entire composition is a solid slab of that thickness. Without a factory drawing, it is impossible to assess the actual geometry of each adjoining area.
Large rosettes should be shown to the finisher together with the ceiling plan before the final color decision. If a large area around them needs to be painted, the boundary of the new coating may become more noticeable under side lighting, especially on textured wallpaper. In such a case, an estimate for a complete renewal of the ceiling plane is sometimes more honest than a promise to repair dozens of small areas without a trace.
Ordering a large composition solely to cover a defective wallpaper seam is not recommended. Decor is not a way to restore a weak substrate. First decide how to eliminate the cause of the peeling, and only then choose a design that will emphasize the central part of the room.
Independent mounting of the chandelier and access to the connections
A decorative ceiling medallion and a chandelier serve different functions. The former creates relief on the ceiling and is mounted according to its own technological scheme. The latter must be reliably held by the standard load-bearing unit designed for the fixture's construction. You cannot substitute the hook, mounting bracket, or other fastening element with polyurethane decor.
Before ordering, compare the outer size of the chandelier's cup with the actual free central space of the model. In promotional images the cup sometimes appears small, but on site it may overlap the inner molded details or obstruct access to the mounting bracket. A difference of a few centimeters here affects not the beauty of the photo, but the ability to service the connections and remove the fixture without damaging the finish.
If cables are connected in a serviceable junction, it must not be hidden under a non-removable polyurethane element, filler, or finishing compound in such a way that access is lost. Inspection and any possible modification of the electrical part should be entrusted to a qualified specialist. Even if the chandelier is currently working properly, this does not confirm the correctness of any future decorative treatment around its outlet.
A separate issue is the sequence of work. If the chandelier is to be temporarily removed, include this operation in the estimate and determine in advance who will de-energize the line, perform the dismantling, and return the fixture to its place. If the fixture is heavy or non-standard, the decor installers must not improvise with its fastening. Data from the product's datasheet and an agreed-upon technology are required.
After the installation of the decorative elements is complete, make sure that the chandelier's cup is installed in its standard position, does not press against unsuitable relief, and does not hinder further servicing. The check relates to the specific fixture and composition, so it cannot be replaced by a universal recommendation on the medallion diameter.
How to prepare a wallpapered ceiling for the installation of molded decor
Work begins not with applying glue to the polyurethane, but with confirming the substrate. A responsible installer determines which solid layer the fastening is permitted to, how to reach it, and how to restore the adjacent finish. The procedure depends on the type of floor structure, plaster, filler, primer, wallpaper, and the chosen mounting system. There is no universal operation of "remove the paint and glue it on" here.
Three options are conditionally possible. The first is local preparation of areas based on the actual back surfaces of the elements, if this technology is confirmed and can be carried out without damaging the surrounding coating. The second is preparation of the general field around the fixture with subsequent agreed finishing of the transition zone. The third is a broader restoration of the ceiling plane, when the original layers do not allow reliable isolation of local areas or when the texture cannot be neatly matched with adjacent wallpaper.
In each option, first ensure the safety of the furniture and walls, then carry out the preparation specified by the specialist, and only after checking the substrate proceed to laying out the modules. The cleaning method, priming, and choice of compound are determined by the material manufacturers' instructions. You must not randomly moisten the wallpaper with solvent or heat it near an electrical outlet in the hope of speeding up removal.
Do not conceal fastening defects with decorative filler. If the overlay does not fit according to the design scheme, filling the resulting gap with a random mixture does not turn a weak substrate into a strong one. If the geometry or surface does not match, work must be stopped until a specialist decides. Temporary fixing must also be carried out according to an agreed technology, not with makeshift props that could damage the wallpaper.
Separately provide protection for the adjacent pattern: on painted wallpaper, any mechanical mark is often visible. When marking out, it is better to agree on a safe way to transfer the axes that does not damage the texture; not every masking tape can be removed without a trace from old paint. Testing the material in an inconspicuous area is possible only with the owner's consent, and not as a mandatory universal technique.
If it turns out that there are several old layers under the wallpaper, you do not necessarily have to remove them yourself the same day. Preparation must end with a technically suitable substrate with clear requirements for drying and further finishing. The timing is determined by the process chart of the system used and the actual conditions, not by the desire to finish before the courier arrives with the decor.
How to preserve the wallpaper texture around a polyurethane rosette
Perhaps the most unpleasant mistake for the owner shows up after a successful installation. The decor holds securely, but a smooth patch remains around it that differs from the wallpaper pattern. In diffused light the patch is almost invisible; in the evening, side lighting reveals the boundary, and the ceiling looks like it has been repaired in fragments. It is not always possible to fix this with one extra can of paint.
The thing is that paint reproduces color but not the relief of the material itself. If the wallpaper has a fine fabric, sand, or repeating stripe texture, a smoothly filled prepared area will reflect light differently. Even with an exact color match, the difference may remain, especially next to protruding molding that casts its own shadow.
One approach is to agree in advance on a decorative field with a defined boundary: for example, a smooth substrate under the composition reads as an independent part of the design rather than a random patch. Another approach is to restore the wallpaper with a suitable material over a wider area. A third is to repaint the entire surface after the work, if the textures are compatible and such a solution actually eliminates the difference. Each approach has costs and limitations.
If a remnant of the previous wallpaper has been preserved, check the batch number and the condition of the roll, but do not count on an absolute match. Old panels and a newly pasted fragment may differ due to the age of the paint, the number of layers, and the direction of the texture. If the original material is unavailable, selecting an analogue without a test area is especially risky.
Before approving the work, ask the finisher to describe where the visible boundary will run. The plan should mark not only the areas where parts adjoin, but also the limits of future painting, possible joints of the new panel, and the transition paths to the cornices and adjacent ceiling zones. Such a scheme helps avoid a dispute when one crew considered its task to be only gluing the rosette, while the other did not know it would have to restore an entire decorative surface.
The result should be checked under the lighting in which the room will be used. For a living room, this means not only sunlight from the window, but also the chandelier, wall lights, and directional accent lighting. One lighting condition shows color, another shows shadows and texture. Choosing a material without such a check can result in a technically sound but visually unsuccessful finish.
Local preparation or full ceiling refresh: how to compare estimates
Suppose the customer chooses CRPU-069 for an already wallpapered living room. The contractor offers two projects: prepare the mounting areas according to the layout, or completely renew the finish of the central ceiling plane. The first solution looks more economical in terms of area. But with many individual modules, the labor intensity of marking and restoration may increase. The second requires more finishing work, but allows obtaining a single texture without many local transitions. The final result cannot be stated without an estimate.
To make the proposals comparable, ask both organizations to estimate the same result: a finished ceiling with an installed rosette, restored paintwork, a properly working chandelier, and access to serviceable connections. If one estimate ends with gluing the parts, while the other includes painting the ceiling, comparing their total amounts is meaningless.
| Estimate item | Local preparation by parts | Broader ceiling refresh |
|---|---|---|
| Layer inspection | Based on the actual condition of each area | Across the entire affected surface |
| Coating removal | Contact areas according to the agreed layout | Finishing area specified by the project |
| Texture restoration | Multiple transitions of different sizes | Uniform finish of the selected field |
| Preparation for adhesive | In accordance with the technology | In accordance with the technology |
| Module installation | According to the outlet drawing | According to the same outlet drawing |
| Painting | Local, with transition checks | According to the updated plane design |
| Likely visual risk | Differences in individual patches | Mismatch between the updated field and adjacent areas |
| Cost | Only based on a detailed estimate | Only based on a detailed estimate |
A full renovation should not automatically be considered the best option. If the ceiling wallpaper is in good condition, an acceptable fastening scheme has been confirmed, and the pattern consists of compact modules, local preparation may be reasonable. If, on the other hand, the panels have old, uneven layers or the texture is difficult to reproduce, the customer is entitled to prefer a seamless finish.
In both cases, include in the price the protection of the premises, removal of the dismantled materials, repair of accidentally affected areas, possible dismantling of the light fixture, and a final inspection. In the contract, it is advisable to specify who is responsible for the finishing boundaries and who is responsible for the fastening and preservation of the decorative parts. Otherwise, unexpected costs appear after the main operation is completed.
How much does the socket itself cost and how to calculate the full purchase budget in Moscow
Most importantly, do not mix the price of the product with the finished work. According to the public STAVROS listings as of November 5, 2026, the cost of one factory decorative set is as follows:
| Model | Size, mm | Set price |
|---|---|---|
| CRPU-070 | 765 × 765 × 18 | 35 680 ₽ |
| CRPU-068 | 1325 × 1325 × 18 | 50 480 ₽ |
| CRPU-069 | 910 × 910 × 15 | 62 560 ₽ |
| RPU.VRS-001 | 911 × 911 × 18 | 67 360 ₽ |
| CRPU-071 | 1365 × 1365 × 19 | 72 880 ₽ |
That is five alternatives, and not the order total for five sockets. For one living room, a buyer usually chooses one main SKU, unless the project provides otherwise. Discounts, availability, and shipping terms are confirmed at checkout and are not derived from this table.
The full estimate has a different structure: the price of the socket plus the cost of inspection, preparation of a suitable substrate, necessary installation materials, labor, finishing, possible electrical work, delivery, and unloading. The amount of installation compound is calculated based on the actual surfaces of the parts and the instructions of the selected system. You cannot take the outer dimension of the composition, square it, and declare the resulting number to be the consumption rate.
It is useful for the buyer to request two documents separately. From STAVROS — the price of the finished set with the current specification and delivery terms. From the contractor — a restoration and installation estimate tied to the specific ceiling and installation drawing. After that, the confirmed amounts are added up, the options are compared, and a clear reserve is kept only for the agreed-upon work, not for an arbitrary percentage.
For example, if CRPU-070 costs 35,680 rubles, that is a specific confirmed line item. But the difference between its price and the price of CRPU-069 does not show savings on repairs: different schemes may require completely different preparation areas. The contractor must show the difference in operations, not promise an unchanged installation cost for any SKU.
It is useful to find out separately whether the offer includes delivery to the building entrance, carrying up to the floor, packaging, and an installation template. The wording "socket with delivery" may mean only handover to the carrier. All terms must be visible in the order. A subsequent dispute about who carries the boxes and when the parts are inspected often costs more than the minutes spent clarifying in advance.
How to place an order for a ceiling medallion with delivery in Moscow and the region
Once the base has been checked and the model agreed, you can buy a ceiling medallion in Moscow through the official STAVROS catalogue. In your request, state the article number of the complete product, the number of full sets, the size and the material. For a single light fixture, do not order separate NPU overlays and the full composition at the same time unless additional parts are required by the agreed project. Otherwise, the components may be ordered twice.
The seller should be given accurate information about the site, especially when installation work is already planned. Specify the city and delivery address, the requirements for accepting the cargo, the availability of a freight elevator, whether the number of packages needs to be checked, and the contact details of the person who can compare the actual delivery with the specification. For an order to the Moscow region, it is important to agree in advance on the exact address to which the chosen shipping method applies.
If the interior calls for different decor, you can Buy molding in the same catalogue, but you should not automatically extend the ceiling composition with cornices or additional medallions. Each new item increases the number of installation areas and changes the wallpaper restoration estimate. Select the set according to the approved project, not by similarity of photographs.
Do not put an arbitrary receipt date in the construction schedule: the production time, transportation and availability of the chosen product must be confirmed for the specific order. Before the crew arrives, it is useful to agree on which document the supplier will hand over with the goods, under what terms a shortage is handled, and whether an up-to-date installation diagram will be available.
What information to include in the request
A good request looks like a small technical specification. It includes the name and quantity of medallions, the single article number of the set, the external dimensions, the material, the list of elements according to the current bill of materials, the layout diagram, the availability or method of obtaining the installation template, the agreed finish and the contact details of the responsible installer. A separate line states the result of the technical check of the base: the confirmed preparation option or the need for an additional survey.
The documentation version also matters. If the estimate was based on one drawing but the product arrived according to an updated specification, the installer must detect the discrepancy before applying adhesive. It is better to keep the documents for the order together with the list of materials than to search for the right file after the ceiling has already been opened up.
How to accept a composite socket and not lose parts before installation
Upon receipt, first verify the number of packages and the marking, then the main item code and the composition against the packing list. For a modular system, not only the total number of parts matters: the names and quantities of each type must match. For CRPU-069, for example, the designations of paired elements are checked especially carefully so that incorrect orientation is not discovered already on the ceiling.
If the packaging is damaged, record its condition before unpacking the contents. Save photos of the marking and the packing list, as well as the carrier's documents. File any remarks in accordance with the delivery terms; do not postpone reporting damage until the installers are about to glue the parts. It is better to agree on claim actions immediately, while the chain of transfer of the goods is still easy to reconstruct.
Do not use a damaged element as a template for cutting the others: even a slight deformation can distort the entire pattern. You should also not mix individual overlays with leftovers from other sets, relying only on a similar ornament. If one part has no marking, its belonging is clarified using the documentation and the original order.
Decorative parts must be stored before installation under the conditions permitted by the manufacturer. At a site with unfinished wet processes, any free corner of the room cannot be assumed suitable in advance. Storage conditions and preparation for installation must be agreed with the supplier and the finishing contractor.
Compare the CRPU-068 list especially carefully. A previously detected discrepancy between the stated total number of parts and the sum of the lines cannot be resolved by simply recounting the boxes. An up-to-date written specification is needed that lists each component and allows the actual delivery to be verified.
Nine mistakes when buying a ceiling socket for wallpaper for painting
The first mistake is ordering the decor before checking the coating. Wallpaper that looks even may hide a weak layer. As a result, the paid-for set has already been delivered, but installation turns out to be impossible without major repairs. This is prevented by inspection, an agreed technology and an estimate before the final order.
The second is mistaking the strength of the paint for the strength of the substrate. A dense matte film on the surface does not automatically reinforce wallpaper adhesive and old filler. During the survey, the entire sequence of layers is assessed, not just how difficult it is to scratch the paint.
The third is choosing by the outer square. Even a perfect match of the size to the ceiling area does not show the contact points of individual modules. Before ordering, a drawing in the actual layout and a check of each planned mounting point are needed.
The fourth is confusing a complete CRPU with NPU sets. The main item number may denote a set of dozens of elements. If you buy the set and the same overlays separately, you will duplicate costs; if you order only some of the modules, you will not be able to assemble the factory pattern.
The fifth is forgetting about painting after installation. On finished wallpaper, a local repair may differ in texture even if the color matches exactly. The estimate before purchase includes restoring the coating and checking the result under side lighting.
The sixth is replacing the instructions for the installation compound with a friend's advice. For the ceiling, a confirmed mounting method is needed based on the actual substrate and the specific product. Unknown adhesive or unapproved preparation creates a risk of detachment and repeat repairs. General information that, what to glue polyurethane molding withare useful for formulating questions for a specialist, but do not replace the object's technical data sheet.
Seventh — blocking access to the chandelier. A decorative canopy must not become part of the load-bearing fastening or turn serviceable electrical connections into an inaccessible assembly. The position of the cup and the disassembly procedure must be verified before any decorative work.
Eighth — failing to agree on the boundaries of responsibility. If one contractor is responsible only for gluing the pieces, while another assumes the ceiling will already be prepared, the wallpaper may be left damaged between stages. Define in writing the scope of preparation, restoration, and handover of the result.
Ninth — starting installation before full acceptance. A shortage of one left trim piece or a detected chip can halt the entire process. Check the products and documents before the crew opens up the ceiling. This is especially important with a complex multi-module composition.
Three practical situations: when the same canopy leads to different solutions
An apartment after a recent renovation. The ceiling was wallpapered for painting six months ago, and the leftover roll and the names of the materials have been kept. The light fixture is installed in the center of the room, and the wallpaper looks even. In such a situation, it is easier to reconstruct the history of the finish, but the substrate check must not be skipped just because the renovation is new. The contractor clarifies the composition of the layers and proposes an acceptable fastening technology. If it requires locally opening up the covering, the owner can check in advance whether there is a suitable stock of wallpaper and whether the pattern can realistically be restored without a visible seam. The decision on the model is made after overlaying its drawing on the ceiling.
Apartment in an old building. The ceiling has been painted several times over the years, some of the wallpaper has been re-pasted, and a line from a previous renovation is visible near the window. In photographs of the room, the surface appears uniform. Under side lighting, it becomes apparent that the density of the pattern differs on either side of the seam. Here, the initial question of buying a decorative medallion turns into a question about the condition of the layer system. The installer and the finisher may recommend first restoring a wider area. The owner receives two proposals: install the medallion after local preparation, or combine its purchase with a full ceiling refresh. The product has not yet been ordered, so the decision can be made without losses on an unnecessary delivery.
Country house with a large living room. The chandelier is located in the center of a rectangular room, but above the dining area there is a different wallpaper texture that differs from the covering in the sofa area. The large medallion CRPU-068 visually connects the two parts of the room, however its outer elements come close to the transition between the coverings. It is necessary to check whether individual modules cross this boundary. Sometimes it is wiser to reduce the composition while keeping both textures intact; in another project, it is appropriate to highlight a single smooth central plane. The specific choice depends on the approved layout, the mounting technique, and the desired appearance of the ceiling.
These three cases show why the same product cannot be sold with one universal answer about installation. The first buyer may have an available history of materials, the second may have unknown strength of the layers, and the third may have a problem with the transition between two finishes. All three have the right to choose CRPU-070, but their list of preliminary work and total cost will be different.
There is also a useful check for the life cycle of the interior. If the ceiling has to be repainted in a few years, will it still be possible to carefully treat the edges of the relief and the joints of the parts? Will painters be able to carry out the work without damaging the mounting? The deeper the ornament and the more modules it has, the more carefully the future finishing should be coordinated. This is not a reason to refuse a large medallion, but a condition for preserving quality after the next renovation.
How to accept a finished ceiling after installation
Acceptance does not end with the phrase “the parts hold.” First, the assembled composition is checked against the installation layout: the central axis, the orientation of the repeating overlays, the uniformity of the pattern, and the absence of unplanned gaps. Then the joints between the modules and the boundaries of the restored covering are inspected. For textured wallpaper, it is important to assess not only the paint line but also the direction of the texture and the possible difference in sheen.
The inspection is carried out under natural light and in the standard evening mode. The light from the chandelier may highlight a joint that is invisible during the day; the window, on the contrary, shows waves at the boundary between the old and new areas. If a defect is visible, its location is recorded and the method of correction is agreed upon, without trying to immediately hide the difference with an additional coat of paint.
Check that the decorative medallion has not changed the standard operation of the light fixture and that the necessary accessible connections remain serviceable. The electrical part is accepted by a qualified specialist; its proper functioning cannot be assessed only by the fact that the lamps turn on. The customer should keep the final diagram, the list of materials, information about the paint color, and the documents for the components.
Finally, ask the contractor to explain the surface care requirements. Aggressive cleaning of the relief or an unsuccessful attempt to repaint a single overlay can damage the finish. The owner should understand which materials are compatible with the coating and which work is best left to a specialist during subsequent repairs. Such a short instruction is more useful than a general guarantee of "installed for the long term" that is not backed by a description of the actual result.
Frequently asked questions about buying sockets for a papered ceiling
Can I buy a socket if wallpaper has already been applied to the ceiling?
Yes, the presence of wallpaper does not prevent you from choosing and submitting a preliminary request. However, the decision on the final purchase is best made after checking whether installation can be performed on an acceptable substrate. The wallpaper covering itself is not sufficient proof of reliable fastening.
Is it mandatory to remove all wallpaper before installation?
There is no universal rule for every site. The possibility of local preparation is determined by the substrate construction, the module layout and the agreed technology. If the old layers are weak or the texture cannot be restored, it may be necessary to renew a larger area of the ceiling.
Which model is best for a small living room?
Compare not only the area, but also the chandelier axis, the composition visible from the room and the condition of the coating. CRPU-070 measures 765 × 765 mm, so among the five models reviewed it has the smallest outer dimension. But technical suitability is determined by the installation scheme, not by the number of millimetres alone.
Is installation included in the product price?
The stated amounts refer to one set of decorative elements. Survey, ceiling preparation, installation materials, labour, finishing and delivery are calculated separately unless otherwise stated in a specific confirmed seller's offer.
How can I find out how many overlays are included in the set?
Request the factory itemized bill of materials by article number. For CRPU-070, 24 parts are listed; for CRPU-069, 64; for RPU.VRS-001, eight. If the description and the total quantities disagree, as previously found with CRPU-068, confirm the composition in writing before payment.
Is a mounting template needed if the ceiling is level?
A level ceiling does not replace the layout plan for the decorative modules. The template is especially useful for complex radial layouts and when preparing wallpaper coverage over individual contact zones. The format and availability of the template should be confirmed for the selected model rather than assumed automatically.
Can installation be done without removing the chandelier?
This depends on the canopy, the mounting assembly, access to the work area, and the safety of the work. If the light fixture obstructs the placement points of the parts, a specialist determines whether temporary removal is necessary. Electrical connections must not be altered independently just to keep the decor in place.
How do the recommendations for painting stucco differ from those for wallpaper?
The materials have different functions and different substrates. A polyurethane part is painted using a compatible finishing system, while the wallpaper must retain its texture and adhesion to the ceiling. Detailed information about paintable stucco helps choose a finish but does not prove that old wallpaper adhesive is suitable for ceiling installation.
Can delivery to the Moscow region be ordered?
The exact locality, address, packaging and shipping terms should be agreed when placing a STAVROS order. Do not infer the rate or lead time from a general statement about Contact us to confirm shipping to your destination.; they depend on the confirmed offer for a specific shipment.
What should be done if, during the process, it turns out that the required socket is not suitable?
Pause the work before additional areas of the finish are damaged. Together with the installation contractor, evaluate an alternative factory model, a change to the decorative design, or abandoning the socket. If an order has already been placed, the terms for modification or return are clarified according to the seller's documents. Do not cut factory parts without an agreed decision.
Summary: how to tell that a ceiling socket is truly ready to order
A purchase can be considered prepared when confirmed model specifications, the installation layout of its elements, a conclusion on the acceptable substrate, a clear method for restoring the wallpaper, a compatible chandelier mounting scheme and a complete estimate have all been obtained at the same time. If even one of these questions remains unanswered, it is better to postpone the final order: a decorative goal does not justify the risk of the ceiling finish peeling or losing access to the light fixture.
For owners of a Moscow living room, a simple checking procedure is useful. First they record the condition of the wallpaper and the chandelier axis, then choose two or three compositions from the catalogue and pass their drawings to the installer. He shows the preparation areas and the boundaries of the finish; the finisher assesses the restoration of the texture; the seller confirms the completeness and price. Only after these answers are consolidated into a single estimate can the options be compared without hidden costs.
If it turns out that a small socket does not allow the wallpaper layer to be preserved, while a larger one requires a complete ceiling refresh, the choice remains with the owner. Sometimes it is reasonable to move the purchase to the next stage of renovation, sometimes to settle for a more restrained decorative treatment. A good outcome does not necessarily mean an immediate purchase: it means that the customer knows in advance what will happen to their finished ceiling and how many different works will be required for the result.