Article Contents:
- Why adhesive is as important as the stucco itself
- What most often ruins installation
- What adhesive is needed for polyurethane stucco
- Installation adhesive for attaching to walls and ceilings
- Joint compound for seams and connections
- Adhesive for stucco installation: what you need to know about consumption
- How to glue polyurethane moldings: breaking down the details
- Surface preparation for molding
- Marking before applying moldings
- How to apply glue to the molding
- Molding joints: how to make them invisible
- Gluing moldings to the ceiling: specifics
- What to glue the ceiling rosette and ceiling stucco with
- Preparing the ceiling
- Marking the center for the rosette
- How to apply glue to the ceiling rosette
- Gaps along the edge of the rosette: how to avoid
- When to paint: before installing the chandelier or after
- What to glue decorative stucco and stucco decor with
- Markup for decorative element
- Applying glue to decorative overlays
- Pressing and holding
- When to paint decorative elements: before or after installation
- Surfaces to which moldings can be glued
- Plastered walls and ceilings
- Drywall
- Colored Surfaces
- Wallpaper
- Tiles and clinker
- How to fix installation errors
- Molding has come away from the wall
- Joint between moldings is visible
- The socket shifted to the side
- Glue came out beyond the edge of the element
- Ready-made scenarios: what to buy together with stucco molding
- Scenario 1: Bought moldings for wall decoration
- Scenario 2: Bought a ceiling rosette
- Scenario 3: Bought a decorative overlay or stucco decor
- Installation of stucco molding in special situations
- Installation in the Bathroom and Kitchen
- Installation on an already painted ceiling
- Installation with a suspended ceiling
- Installation on non-standard surfaces
- Typical mistakes when installing stucco molding: a detailed breakdown
- Mistake one: applying glue to a damp surface
- Mistake two: using too little glue
- Mistake three: installation without marking
- Mistake four: using silicone sealant for joints
- Mistake five: installing the chandelier before painting
- DIY stucco molding installation: step-by-step guide
- What else to add to the order: a complete checklist
- FAQ: answers to the most common questions about stucco molding installation
- About the Company STAVROS
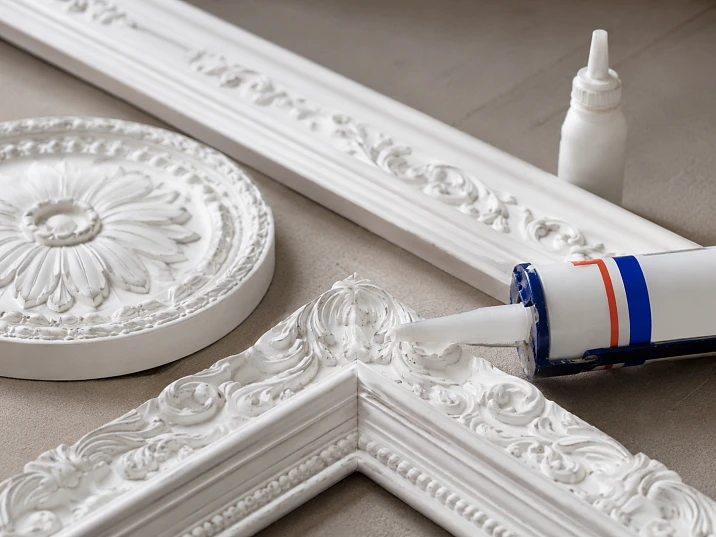
Here's a paradox that every second buyer faces: you've chosen the stucco molding, calculated the dimensions, almost placed the order — and then one question comes up that stalls everything. "What exactly should I use to glue it? So it holds, doesn't fall off, and the seams are neat?" This question seems simple, but behind it lies a whole layer of practical nuances that directly affect the result. The right glue for polyurethane stucco molding is not a trifle or a minor detail. It's half the success of the installation.
You can take magnificent ones Moldings made of polyurethane, perfectly trim the corners, accurately mark the wall — and still get a poor result if the adhesive is chosen incorrectly. A peeled edge, a gap along the socket outline, a shifted decorative overlay — all of this is not a problem with the product itself, but a problem with the compound used to glue it. Let's break this down in detail and honestly.


Why the adhesive is just as important as the molding itself
Polyurethane as a material is lightweight, elastic, with good adhesion to acrylic compounds. This does not mean it will stick to anything. It has its own chemical nature, and the adhesive must be compatible with it. If you grab the first "universal" adhesive from a hardware store, you risk encountering one of several unpleasant effects.
The first is weak initial fixation. You release the element, and it slowly slides down. The second is a reaction of the solvent with the polyurethane. Some organic-based adhesives literally eat away at the polyurethane surface, leaving stains, deformations, and blisters. The third is a brittle joint that cracks at the slightest temperature change or mechanical impact. The fourth is too short an open time: you didn't have time to position the element, and the adhesive has already set.
Before You can buy ready-made stucco matching the Baroque style. Calculate the quantity: linear meters of cornices and moldings, number of rosettes, pilasters, consoles, corner elements. Add a ten to fifteen percent allowance for trimming., you need to understand: the order should include not only the products themselves, but also the correct compound for installation. Molding is a system, not a separate item. The system only works when all its components are chosen correctly.




What ruins installation most often
Practice shows: most problems during molding installation arise not from the complexity of the work, but from three mistakes. The first is unsuitable adhesive. The second is an unprepared surface. The third is haste: not allowing it to set, not holding the fixation time. All three mistakes are solvable if you know what to do in advance.
Our factory also produces:
What adhesive is needed for polyurethane molding
First of all, let's distinguish between two types of tasks that require different compounds. This is the mounting adhesive — for attaching the element to the surface, and the joint compound — for filling seams between elements, for masking joints in corners and at the connection points of planks.
Get Consultation
Mounting adhesive for wall and ceiling installation
Acrylic mounting compounds or special adhesives for decorative polyurethane elements are used to attach polyurethane products to walls and ceilings. The right adhesive for polyurethane molding must meet several requirements.
Compatibility with polyurethane. The composition must not contain aggressive solvents — acetone, white spirit, nitro solvents. They react with polyurethane and irreversibly damage the product surface.
Sufficient open time. The time from application to setting should be at least 3–5 minutes. During this time, you need to apply the element, align it, press it, and adjust its position if necessary. Fast-setting compounds do not allow this.
Good initial grip. Especially important for ceiling elements. If the adhesive remains too fluid for too long, the element will slide under its own weight before the compound gains strength.
Flexibility after curing. A hard, brittle adhesive cracks with micro-movements of the building, vibration, or changes in humidity. An elastic compound compensates for these movements without losing adhesion.
Acrylic mounting compounds are the most versatile and affordable option. They are compatible with polyurethane, work well on most substrates — plaster, drywall, concrete, painted surfaces. They are usually available in cartridges for a gun.
Special adhesives for polyurethane decor are a more professional choice. They are specifically designed for the characteristics of polyurethane: optimal open time, required viscosity, elasticity after curing. Such compounds are more often used when working with heavy profiles and ceiling elements.
Joint compound for seams and connections
After the element is glued, seams remain: between molding strips, in corners, along the contour of the rosette. Filling them with mounting adhesive is not the best solution. For seams, a more plastic, well-spreadable compound is needed that does not shrink and accepts paint well.
The best choice is acrylic sealant for joints or a special acrylic-based finishing putty. They are applied in a thin layer to the joint, leveled with a wet finger or spatula, sanded with fine sandpaper after drying, and painted over. The seam becomes invisible.
Under no circumstances should silicone sealant be used for this — it does not accept paint. After painting, the seam with silicone remains shiny and highly visible. This is one of the most common mistakes when installing stucco molding by inexperienced craftsmen.
Glue for installing stucco molding: what is important to know about consumption
Glue consumption depends on several factors: the width of the molding profile, the area of the decorative element, and the evenness of the surface. On a well-prepared base, the glue is applied in a thin zigzag along the entire length of the product — this method is called a "snake." On uneven surfaces, the application is more generous — in dots or a continuous layer on complex areas.
Approximately: for 1 linear meter of molding 30–40 mm wide, about 50–80 grams of mounting compound is consumed. A 300 ml tube is about 5–7 meters of molding with standard application. Take extra: it's better to have leftovers than to interrupt work halfway.
How to glue polyurethane moldings: analyzing the details
Moldings made of polyurethane — the most common element of stucco decor, and the question "how to glue moldings" arises for everyone who takes on this task for the first time. In practice, installing moldings is not difficult, but requires understanding several important points.
Surface preparation for molding
The base must be clean, dry, free of dust, peeling paint, or loose plaster. This is not just a recommendation — it is a condition, if violated, no glue will save you. If the surface is loose, the glue holds it, not the wall. As a result, a piece of plaster may come off along with the molding.
Before installation, the surface must be dusted — wiped with a dry or slightly damp cloth. If the wall was painted with oil paint or enamel, it needs to be sanded with sandpaper — this will create roughness that improves adhesion. Loose plaster is best reinforced with acrylic deep penetration primer and allowed to dry completely before installation.
Marking before gluing moldings
Before applying glue, you need to make markings. Molding is a linear element, and even a slight deviation from the horizontal becomes noticeable. Use a laser level or a spirit level. Draw a pencil line along which the bottom or top edge of the molding will run.
For frame decor, first mark all four sides of the frame. Check squareness with diagonals: the diagonals of a proper rectangle are equal. Only after marking proceed to cutting and installation.
How to apply glue to molding
Glue is applied to the back side of the molding — the side that will adhere to the wall. The application method depends on the profile width:
-
Narrow molding (up to 20 mm): a thin continuous zigzag along the entire length
-
Medium molding (20–40 mm): two parallel lines — along both edges of the product
-
Wide molding (over 40 mm): two lines along the edges and one in the center, or a zigzag across the entire surface
After applying glue, allow open time according to the instructions — usually 1–3 minutes. Then attach the molding to the wall along the markings and press evenly along the entire length. Do not press hard at one point — this creates uneven contact.
Molding joints: how to make them invisible
A joint is where one piece of molding meets another. On a straight section, joints are made perpendicular to the plane of the product. In corners, they are made at 45 degrees. Both options require precise trimming and proper sealing.
After gluing both elements, a small amount of acrylic sealant or finishing putty is applied to the joint, smoothed with a finger, and allowed to dry. After drying, light sanding with fine-grit sandpaper. If done correctly, the joint becomes completely invisible after painting.
buy polyurethane moldings it is worth ordering with a 10–15% margin precisely to be able to re-cut a failed joint without panic and without waiting for an additional order.
Gluing moldings to the ceiling: features
Ceiling moldings are cornices that cover the joint between the wall and the ceiling. Installation here is more difficult than on a wall: the element is held overhead, and if the glue does not provide sufficient initial fixation, it may shift.
For ceiling moldings, more viscous compounds with high initial adhesion are used. The "double application" method is also convenient: glue is applied to the molding, allowed to dry for 5–7 minutes until tacky, and then pressed against the surface. This dramatically improves initial fixation — the element literally "grabs" immediately upon contact.
After pressing the ceiling molding, it must be held or secured for 10–15 minutes. Masking tape is used: pieces of tape applied from the molding to the ceiling hold it until initial setting. After drying, the tape is removed, leaving no traces.
Buy polyurethane moldings a wide range of profiles — from strict narrow to classic wide — can be found in the catalog, which features both wall cornices and ceiling options of various widths and reliefs.
What to use to glue a ceiling rosette and ceiling stucco
The ceiling area is the most demanding in terms of installation quality. Gravity is at work here, the element is in plain sight, and a chandelier hangs nearby — so the consequences of failure are most noticeable. Let's break down how to glue correctly ceiling rosettes и ceiling molding.
Ceiling preparation
The ceiling must be clean and durable. If it is painted, make sure the paint is not peeling. If the ceiling is a stretch ceiling, direct installation of polyurethane moldings on it is impossible. In this case, the cornice is attached to the wall near the ceiling, not to the film itself.
On concrete and plastered ceilings, a light primer with an acrylic compound is recommended before installation — this significantly improves the adhesive bond with the base. Apply the primer with a brush or roller and allow it to dry for at least 2 hours.
Marking the center for the ceiling rosette
The ceiling rosette is installed strictly centered relative to the chandelier mounting point. Even a shift of 2–3 centimeters will be clearly noticeable because the asymmetry between the rosette and the chandelier is striking.
How to find the center: from the chandelier mounting point, draw a circle with a diameter equal to the diameter of the rosette. This is convenient to do with a homemade compass: take a thin cord with a length equal to the radius of the rosette, secure one end at the chandelier mounting point, and tie a pencil to the other end. Draw a circle. This is the boundary of the rosette.
How to apply glue to the ceiling rosette
Glue is applied to the back of the rosette in a dot or continuous manner depending on its size. For small rosettes (up to 40 cm) — 4–6 dots around the perimeter and one in the center. For large ones (50–80 cm) — a continuous zigzag over the entire area.
Important point: the hole for the chandelier mounting must be clean. If glue gets into it, it will be difficult to pull the wire later. When gluing the rosette, align its center with the chandelier mounting point.
After applying the glue, press the rosette against the ceiling and hold for 3–5 minutes. Then secure it with masking tape in several places until fully set. For large and heavy rosettes, the fixation time can reach 30–60 minutes.
Gaps along the edge of the rosette: how to avoid
The most common problem: a visible gap remains along the edge of the socket. This happens due to unevenness of the ceiling or the socket itself. It is fixed simply: after the glue has fully set, apply acrylic sealant along the entire edge of the socket, smooth it with your finger, let it dry, and paint over it. The seam disappears.
If the gap is large (more than 3–4 mm), it is first filled with acrylic-based putty, allowed to dry, sanded, and then painted. A smooth edge of the socket without visible gaps or joints is a sign of quality installation.
When to paint: before installing the chandelier or after
The correct order of actions: first, all stucco and sockets are glued, then everything is painted in one go, and then the chandelier is installed. This order gives a perfectly even coating without torn edges from masking tape and without paint drips on the light fixture.
If you paint the ceiling with a roller, it will inevitably get on the top part of the walls and on the cornices. This is normal and intended: the cornices should be the same color as the ceiling. Paint the entire ceiling area, including the cornices, with one color and one paint.
Buy ceiling molding It is better to order perimeter and ceiling sockets at the same time to get products from the same batch and the same color tone — this is important for the final painting.
What to use to glue decorative stucco and stucco decor
Decorative overlays are a special category of products. They are usually small in area but complex in shape: relief ornaments, medallions, cartouches, corner and symmetrical elements. It is here that installation errors are most noticeable because the eye is deliberately drawn to these details.
Buy Molded Decoration — this is the first step. Installing it correctly is the second. And the second is no less important.
Marking for the decorative element
Before gluing the decorative overlay, you need to accurately determine its place on the wall. For this, the following technique is used: apply the element to the wall at the intended location, press lightly, and carefully trace its outline with a pencil. Remove the element and you will see the exact outline on the wall.
For paired and symmetrical elements (e.g., a pair of overlays on either side of a mirror), precise symmetry is required. Find the vertical axis — the center of the mirror — and measure distances from it to each element. Check with a level: both elements must be on the same horizontal line. A skewed pair of decor looks worse than its absence.
Applying glue to decorative overlays
Glue is applied to the back side of the product. For small overlays (up to 15 × 15 cm) — 4 dots at the corners and one in the center. For medium ones (15–30 cm) — dots plus a few strips. For large medallions (over 30 cm) — an even zigzag over the entire area, staying 5–7 mm from the edges.
Why can't glue be applied all the way to the edge? Because when pressed, excess glue will seep beyond the outline of the product and stain the wall. It is extremely difficult to clean glue from the textured surface of the decor — especially if it has already started to set. The margin from the edge is insurance against this.
Pressing and holding
After the element is applied to the wall according to the markings, it needs to be pressed evenly. For small overlays, holding by hand for 3–5 minutes is sufficient. For large ones, use painter's tape: make several "holders" of tape going from the wall to the element and back. Leave for 30–60 minutes.
Check the center and axes immediately after pressing, while the glue still allows slight adjustment. If the element has shifted, carefully slide it back. Once it starts to set, it is no longer possible to do this without tearing it off.
When to paint decorative elements: before or after installation
Both options are possible here, each with its own advantages.
Painting after installation is easier and gives a more uniform result. The entire surface (wall, moldings, decor) is painted at the same time, the color matches everywhere, and the joints are painted over organically. Disadvantage: it is inconvenient to paint deep relief in hard-to-reach places.
Painting before installation allows you to thoroughly paint the relief from all sides, including hard-to-reach places. Disadvantage: the attachment point remains unpainted, and after installation, careful touch-up along the contour is needed.
For most situations, the first option is optimal — installation, then painting. The relief is painted with a thin brush after the main roller application.
Buy decorative stucco a wide range — from small corner overlays to large central medallions — is available in the catalog, and for each zone you can choose exactly the element that will be proportionate to the space.
Surfaces on which stucco can be glued
Plastered walls and ceilings
The best base for installing stucco. Plaster holds acrylic glue well, and a smooth surface ensures tight contact. The only condition is that the plaster must be strong, without loose areas. If in doubt, prime before installation.
Drywall
A good base if the sheets are tightly attached to the frame and there are no deflections. Acrylic glue adheres perfectly to drywall. Important: stucco should be glued to a drywall ceiling in places where there is a frame profile under the board — this increases reliability.
Painted Surfaces
It is possible if the paint holds firmly. Oil paint should be lightly sanded before installation to create roughness. Acrylic glue adheres well to water-based paint without additional preparation if the coating does not crumble or chalk.
Wallpaper
Glue polyurethane molding Not recommended over wallpaper. Wallpaper is an intermediate layer between the adhesive and the wall, which may peel off with the product. It is better to remove the wallpaper in the installation area or at least reinforce it with acrylic primer.
Tile and clinker
Installation on tile is possible but requires special compounds — epoxy or hybrid adhesives with high initial adhesion to smooth surfaces. Standard acrylic mounting adhesive holds poorly on tile. If you need to finish an area with tile, it is better to consult a specialist for selecting the compound.
How to fix installation errors
Molding has come off the wall
If the molding or a section has come off — the cause is either poor surface preparation, insufficient adhesive, or failure to hold the fixation time. Repair: carefully press the detached section. If the molding is not yet broken — apply adhesive into the gap using a thin spatula or a spoke, press, and secure with tape for an hour. After setting — fill the gap, paint.
The joint between moldings is visible
The joint was not sealed with sealant or putty. Solution: apply acrylic sealant, smooth with a finger, dry, sand, paint. Takes 20 minutes.
The socket has shifted to the side
If noticed before full setting — carefully shift it. If already set — it will have to be detached. Polyurethane can be removed by cutting the adhesive with a thin blade. After that — clean the surface, reapply adhesive, reinstall.
Glue has overflowed the edge of the element
Excess acrylic glue can be easily removed with a damp cloth or sponge while it is still wet. Dried glue can be removed carefully with a sharp blade to avoid damaging the surface. Then the area is painted over.
Ready-made scenarios: what to buy together with molding
Here are three specific sets for three different tasks — exactly what you need to put in your cart so you don't have to come back for something you missed.
Scenario 1: Bought moldings for wall decoration
What to add to the order:
-
Mounting acrylic glue based on: 1 tube of 300 ml per 5–7 meters of molding
-
Acrylic sealant for joint sealing
-
Painter's tape for fixation while drying
-
Acrylic finishing putty for leveling joints
-
White acrylic paint for final painting
-
Molding stock 15% of the calculated length
Buy polyurethane moldings with this kit means getting everything needed for installation without additional trips to the store.
Scenario 2: Bought a ceiling rosette
What to add to the order:
-
Mounting adhesive with good initial grip
-
Acrylic sealant for sealing the edge of the rosette
-
Painter's tape for holding until set
-
White paint
-
If necessary — Ceiling molding along the ceiling perimeter as a complement to the rosette
ceiling rosettes are presented in the catalog in a wide range of diameters and patterns, and it is almost always possible to choose a cornice from the same series for a unified style.
Scenario 3: Bought a decorative overlay or stucco molding
What to add to the order:
-
Mounting adhesive
-
Acrylic sealant for contour sealing
-
Painter's tape
-
Thin brush for painting the relief
-
Paint matching the wall or contrasting — as intended
buy decorative moldings better with a small margin: sometimes during the process the decision changes and an additional overlay is needed.
Installation of stucco in special situations
Installation in bathroom and kitchen
Polyurethane is moisture resistant, making it suitable for rooms with high humidity. However, the adhesive must also be moisture resistant. Use compounds labeled "waterproof" or "for wet rooms." For the bathroom, it is better to choose a neutral acrylic sealant with antifungal additives.
Before installation, surfaces must be dry. Do not glue stucco immediately after washing floors or cleaning with a lot of water.
Installation on an already painted ceiling
If the ceiling is already painted and you decide to add a rosette or cornice after the main renovation, the preparation is slightly different. At the attachment point, it is advisable to lightly sand the paint with sandpaper grit 80–120 to create roughness. Dust off. Apply glue and install as usual. After installation, paint the entire element with fresh paint so that the color matches.
Installation with a stretch ceiling
A stretch ceiling excludes direct installation of stucco molding on it. But this does not mean that ceiling decor is impossible. Cornices and moldings are glued to the wall near the ceiling — so that they adjoin the stretch fabric from below. This completely imitates the appearance of a ceiling cornice and hides the border strip of the stretch ceiling. A very popular technique in modern apartments.
Installation on non-standard surfaces
Sometimes there is a task to glue stucco molding onto a wooden surface — for example, onto a wooden panel or furniture facade. Acrylic mounting adhesives or special wood adhesives with good adhesion to synthetic materials work well here. The wood must be pre-dusted, and if there is a varnished surface, sanded.
Typical mistakes when installing stucco molding: analyzing in detail
Mistake one: glue on a damp surface
Moisture is the main enemy of adhesion. If the wall or ceiling has not completely dried after plastering or puttying, installing stucco molding will give an unreliable result. Rule: at least 28 days must pass from the end of wet work to the installation of stucco molding — this is how long cement plaster needs to fully gain strength.
Mistake two: too little glue
Out of a desire to save money or fear of 'over-applying', many apply too little compound. As a result, the element holds only at points, not over the entire area. At the first vibration or mechanical impact, it detaches. There is no need to skimp on glue — proper application ensures full contact and maximum strength.
Mistake three: installation without marking
Glue it "by eye" — and get a crooked line that you now either have to tolerate or tear off. Marking takes 15–20 minutes but saves hours of rework. Always mark before installation.
Mistake four: using silicone sealant for joints
Silicone cannot be painted. After painting, the joint with silicone noticeably shines and is visible. Use only acrylic sealant or acrylic putty — they accept paint without issues.
Mistake five: installing the chandelier before painting
If you install the chandelier first and then paint, you will inevitably splatter the fixture or have to go around it with a brush, leaving unpainted areas. Always paint the ceiling, including the socket and cornices, before installing the chandelier.
DIY stucco installation: step-by-step guide
For those tackling installation for the first time — a clear algorithm that ensures everything is done correctly without rework.
Step 1. Preparation. Clean the surface from dust and peeling coatings. If necessary, prime and let dry.
Step 2. Marking. Use a level to mark lines for moldings, the center for the rosette, and outlines for decorative elements.
Step 3. Preparing the items. Cut the moldings to the required lengths, trim the corners at 45°. Check the fit of the cut pieces "dry" — without glue.
Step 4. Installation. Apply glue, press the element, align according to markings, secure with tape. Let it set.
Step 5. Sealing joints. After all elements have set, apply acrylic sealant to the joints, smooth, dry, sand.
Step 6. Painting. Prime all surfaces, then apply finish paint in 2 coats with intermediate drying.
Step 7. Installing lights. Only after the paint has completely dried, mount chandeliers and sconces.
The entire process is detailed in the article installation of polyurethane molding — a step-by-step guide from initial marking to final painting.
If you are specifically interested in working with moldings — the specifics of corners, hidden joints, and painting — a separate article on installing polyurethane molding will help you understand the details.
What else to add to the order: a complete checklist
Before placing the order Buy moldingGo through this list. It is compiled based on practice: these are the things that are usually forgotten to buy and then have to be purchased separately.
Consumables:
-
Assembly adhesive (acrylic, compatible with polyurethane)
-
Acrylic sealant for joints
-
Acrylic finishing putty
-
Acrylic primer
-
White acrylic paint or paint matching the wall tone
Tools:
-
Glue gun for cartridges
-
Painter's tape
-
Level (laser or bubble)
-
Miter box or miter saw for cutting corners
-
Sharp knife or metal hacksaw for cutting polyurethane
-
Spatula for filling joints
-
Sandpaper with grit 120–240 for sanding
-
Thin brush for painting the relief
Stock of items:
-
Moldings: +15% to calculated length
-
Decorative overlays: +1 to paired elements (in case of defects during installation)
-
Ceiling stucco: +10% to perimeter
FAQ: answers to the most common questions about installing stucco
What glue to use for polyurethane stucco on a wall?
Use acrylic construction adhesive compatible with polyurethane. Do not use solvent-based compounds — they destroy polyurethane. For joints: acrylic sealant or finishing putty.
What glue to use for polyurethane moldings on the ceiling?
Same acrylic construction adhesives, but preferably with higher initial tack. Use the "double application" technique: apply glue, let it dry for 5 minutes, then press. Secure with tape for 15–30 minutes.
Can molding be glued onto wallpaper?
Not recommended: wallpaper may peel off along with the molding. It is better to remove the wallpaper in the installation area or prime it with a deep-penetration acrylic primer.
What glue to use for a ceiling rosette to avoid gaps along the edge?
You need a glue with good initial adhesion. After setting, seal the gap along the edge with acrylic sealant — apply a thin layer, smooth with your finger, let dry, and paint over.
Can molding be glued to a painted surface?
Yes, if the paint is firmly adhered. Sand oil-based paint for better adhesion. Acrylic glue adheres well to water-based paint without preparation.
How long does the glue under the molding take to dry?
Initial setting — 15–30 minutes for most acrylic compounds. Full strength — 24–48 hours. During this period, it is better not to mechanically load the elements.
Does molding need to be painted after installation?
It is advisable. Paint evens out the color, hides joints, and improves adhesion of the element to the wall. Without painting, joints and mounting points remain visible.
How to remove an incorrectly glued molding?
If the glue has not yet fully set — pry it off with a thin spatula and carefully tear it off. If it has already hardened — use a thin blade or knife, cutting along the glue seam along the product. After removal, clean the surface of any glue residue.
What is better: liquid nails or special glue for stucco molding?
Specialized glue for polyurethane decor works better: it takes into account the chemistry of the material, provides the necessary open time and correct elasticity. Liquid nails are a more universal but less precise choice.
Is a fitter needed for attaching stucco molding?
No. molding installation made of polyurethane is accessible to anyone who knows how to work with a knife and a level. The only exception is working at great heights or installing very heavy elements.
About the company STAVROS
When it comes to You can buy ready-made stucco matching the Baroque style. Calculate the quantity: linear meters of cornices and moldings, number of rosettes, pilasters, consoles, corner elements. Add a ten to fifteen percent allowance for trimming. with confidence in the quality of the product, the accuracy of dimensions, and the stability of the material, STAVROS is a choice that requires no lengthy explanations. STAVROS is a Russian company specializing in the production and sale of decorative polyurethane products: molding, ceiling moldings, ceiling rose, decorative molding и stucco decoration for walls and facades.
STAVROS offers a wide catalog of products with clear dimensions, good relief detailing, and stable polyurethane quality. The products are suitable for DIY installation, easy to cut, adhere with standard acrylic compounds, and accept paint well. Delivery is available throughout Russia, and the company's specialists are ready to help select a set for a specific project — from a single rosette to a full room design with moldings, cornices, and decorative accents.
Stucco molding is not difficult. It's a matter of the right glue, careful marking, and quality material. You will find all three components at STAVROS.