Article Contents:
- Why the projector wall is a separate design challenge
- Three functions of moldings in the projector area
- Where to use a projector wall with stucco decor
- Living room with a projector instead of a TV
- Dedicated home theater room
- Bedroom with a projector opposite the bed
- Home office and media room
- Children's and teen's room
- Main rule: the projection area is smooth
- Six schemes for designing a wall with a projector
- Scheme 1. Frame around the perimeter of the screen area
- Scheme 2. Side frames on the sides of the screen
- Scheme 3. Dark wall with moldings in the color of the surface
- Scheme 4. Decorative panels below the screen area
- Scheme 5. Moldings, lighting and acoustics in a single system
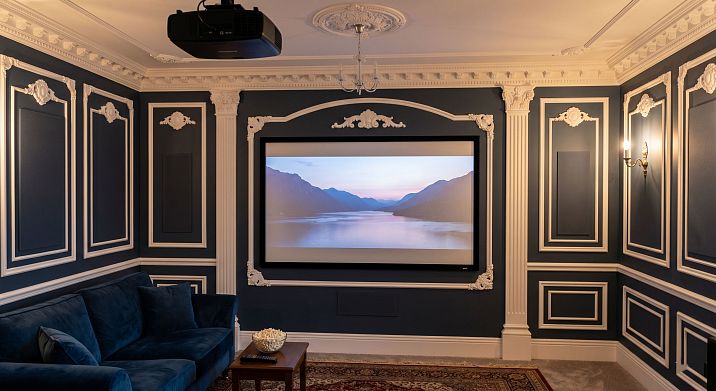
- Scheme 6. Complete molding system for the cinema zone
- How to choose moldings for a projector wall
- By interior style
- By profile width and wall scale
- By the color of the moldings
- Wall color and its impact on projection quality
- Home theater styles with molding decor
- Neoclassicism: cinema in a palace atmosphere
- Modern classic: elegance without pomposity
- Minimalism and Japandi: silence as aesthetics
- Art Deco: Geometry and Gloss
- How to combine moldings with baseboard, cornice, and acoustics
- Baseboard in the theater area
- Cornice as the upper boundary of the theater area
- Acoustics and moldings: visual integration
- Technical nuances: what matters during installation
- Marking considering the projection zone
- Surface in the projection zone
- Molding joints and painting
- Cables and wiring for acoustics
- Mistakes when designing a projector wall
- What to buy for a projector wall
- Answers to popular questions
There is one task in interior design that is rarely solved well and often not solved at all. A person buys a good projector, hangs a screen, sets up acoustics — and gets a technically perfect cinema zone with an absolutely empty, undecorated wall. The screen is retracted — and the wall becomes a bare plane again. The screen is lowered — and all the beauty comes down to a white canvas in a frame against a background of nothing.
Why does this happen? Because the projector wall is an area traditionally perceived as purely technical. A place where there should be a smooth surface. A place where "nothing extra" belongs. A place where design seemingly hasn't reached.
But that's not the case.Stucco decor for a wall with a projector— this is a real task with specific, well-working solutions. The main thing is to understand the principle: moldings do not interfere with the projection if they are positioned correctly. They do not compete with the image. They frame the cinema area, make the wall an architectural statement, and turn a home theater from a technical room into a full-fledged interior space.
The projector wall should be smooth in the image area, but that does not mean it should remain empty.Polyurethane moldingsSTAVROS help frame the screen around the perimeter, highlight side zones, and connect the projector wall with the interior.





Why the projector wall is a separate design task
The projector zone is fundamentally different from the TV zone. This is not a matter of taste — it is a technical reality that affects all design decisions.
A TV is a static object. It is always present on the wall, and moldings can frame it directly: around the perimeter of the screen, on the sides, on top.Polyurethane TV zone decor— this is an established practice with clear solutions.
A projector works differently. The image is projected onto the wall surface or onto a screen. When the projector is on, any protruding relief in the projection area creates a shadow and distorts the image. This means that the classic scheme of "framing directly around the perimeter" does not work here — at least, it does not work in the working area.
But this limitation is not a death sentence. It is a condition of the task. And a good designer knows: a task with conditions is more interesting than a task without them.
A wall with a projector requires a thoughtful approach: moldings are placed where there is no projection — on the sides, above the screen area, at the bottom of the wall, on the side walls of the cinema zone. This creates a rich spatial composition that does not interfere with viewing and turns the cinema zone into an interior event.




Three functions of moldings in the projector zone
Architectural function. Moldings structure the wall as an architectural system: they provide horizontal bands, vertical lines, and a frame structure. The screen becomes part of this system — an integrated element, not a technical object glued to a random surface.
Decorative function.polyurethane wall decor adds character to the cinema zone. Classic neoclassicism, modern minimalism, Japandi, or Art Deco — moldings help make the home theater part of a unified interior concept, rather than an isolated "technical zone."
Integrating function. When the screen is retracted, the wall should not look empty and lost. The molding system works regardless of whether the projector is on: it turns the wall into a decorative surface living its own architectural life.
Our factory also produces:


Where to use a projector wall with stucco decor
Get Consultation
Living room with a projector instead of a TV
This is the most common scenario. A person chooses a projector instead of a TV — and gets a cinematic screen in the living room. The wall behind the screen should look beautiful both in viewing mode and in "standby" mode when the screen is retracted.
polyurethane wall decor behind the sofa — about the principles of designing an accent wall that draws the eye from the sofa area. In a living room with a projector, it's the same story: the wall opposite the sofa is the main decorative surface. And it should work with moldings so that both the screen and the architectural decor exist harmoniously.
Scheme for the living room: dark accent wall (dark gray, anthracite, deep blue, olive), moldings in the color of the wall, cornice at the top, baseboard at the bottom. The central area under the screen is smooth. On the sides of the screen — vertical frames or profile belts.
Separate home theater room
A dedicated theater room is a separate design challenge. There is no compromise between "residential" and "theatrical." Everything is subordinated to viewing: acoustics, chairs or sofas, blackout, lighting, soundproofing.
In such a room, polyurethane decor for a home theater can be more saturated. Side walls — with molding systems and frames. Back wall — with decorative niches or framed panels. Front (screen) wall — moldings only along the perimeter, outside the projection area.
Dark wall tones + moldings in the color of the wall = the correct theater aesthetic that does not distract from the screen but creates atmosphere, quality, and style.
Bedroom with a projector opposite the bed
A bedroom with a projector is a popular solution. The screen lowers onto the wall opposite the bed, the projector is on the ceiling or on a nightstand. Convenient, cozy, cinematic.
But the wall opposite the bed in the bedroom is the same accent wall that needs to be decorated regardless of the presence of a projector.Minimalist stucco decor for wallsIn the bedroom with a projector: thin profiles 14–22 mm matching the wall color, delicate side frames, a horizontal band above the screen area. No protruding elements in the central projection zone.
Study and media room
A study with a projector is both a workspace and a media space. Shelves, a desk, an armchair — and a screen on one of the walls. Moldings in the study with a projector: side frames on the sides of the screen area, horizontal bands, a decorative system on the side walls with bookshelves.Polyurethane wall decor— system solutions for media rooms with projection areas.
Children's and teenager's room
A projector in a children's room means movies, games, educational content. The wall under the screen is smooth and light. Decor: light thinmoldings for the wall with a projectoron the sides of the screen area, without heavy classical stucco. Profile 14–20 mm, white or matching the wall color.
The main rule: the projection area is smooth
Before moving on to the schemes, we need to establish the key rule that determines everything else.
No molding should enter the projection work area.
What is the work area? It is a rectangle on the wall where the image is projected. Its size is determined by the screen size or the calculated image size from a specific projector at a specific distance.
Any protruding relief inside this area creates a shadow that is visible on the image. This ruins the picture quality and makes it uncomfortable to watch.
Therefore, all molding systems for a projector wall are built on one principle: decor — outside the projection area. Above, below, on the sides. It can be flush with the border of the area — but not inside it.
This limitation sets an interesting design logic: the wall is divided into a "technical center" (smooth, for the screen) and an "architectural periphery" (decorated with a molding system).
Six wall decoration schemes with a projector
Scheme 1. Frame around the perimeter of the screen area
Moldings are installed strictly along the perimeter of the screen area — flush with its edges on the outside. This creates a clear "cinematic frame": the image is perceived as a picture in a frame. When the screen is retracted, the frame remains a decorative element that structures the wall.
Profile for this scheme: 25–45 mm. An important nuance — the profile is installed flush with the edge of the projection area, but does not go inside. The indentation from the edge of the area is minimal (2–5 mm) or flush.
Color: matching the wall (for minimalism and Japandi), white (for modern classic), or contrasting dark (for Art Deco and expressive modern interiors).stucco decor in the color of the wall or contrasting— about the principles of choosing molding colors for an accent projector wall.
Scheme 2. Side frames on the sides of the screen
A more delicate scheme: moldings do not frame the screen area around the entire perimeter, but form side vertical frames — to the left and right of the screen area. The center (projection area) remains completely smooth.
Side frames can be narrow (20–30 cm wide) and tall — from the baseboard to the ceiling. Or they can match the height of the screen area. This adds vertical rhythm and architecturality to the wall without touching the working area.
This is exactly where they work wellthin polyurethane moldings: profiles 14–22 mm, vertical frames, or single vertical lines on the sides of the screen area. Delicate, modern, without visual overload.
Accent wall made of polyurethane— about how molding verticals work on an accent wall without competing with the central element.
Scheme 3. Dark wall with moldings in the color of the surface
A dark accent wall is one of the best backgrounds for a home theater. Dark gray, anthracite, deep blue, olive — any rich dark tone creates a cinematic atmosphere and is simultaneously the best background for the projected image (does not glare, does not reflect stray light).
Moldings in the color of this dark wall are absolutely the right choice. The relief is there, it is visible in the play of light and shadow, but there is no color contrast. The wall is perceived as a single surface with an architectural structure. The moldings do not 'whiten' or 'glow' in the dark during viewing.
Scheme: horizontal molding belt above the screen area (by 15–20 cm), horizontal belt below (at the baseboard or at a height of 80–100 cm). Side frames. Everything — in the tone of the dark wall.
Scheme 4. Decorative panels below the screen area
The lower part of the wall under the screen is an area where moldings can be placed completely freely. Projection never works here: the screen does not drop below a certain height (usually 80–120 cm from the floor).
The lower zone can be designed as:
-
a panel system of vertical frames (pseudo-panels);
-
a horizontal molding belt at a height of 90–110 cm, creating the effect of a lower panel;
-
one wide horizontal frame from the baseboard to the level of 100–120 cm.
This divides the wall into a "lower belt" with decor and an "upper zone" with the screen — a visually interesting and functionally sound solution.Ready-made molding frames for the wall — about ready-made solutions for the lower panel zone of the wall.
Scheme 5. Moldings, lighting, and acoustics in a unified system
A home theater is not just a screen. It's speakers, a subwoofer, lighting, chairs or sofas. Moldings help visually unify all these elements into a single architectural system.
How does it work? Side speakers are flanked by vertical molding frames: the speaker is "built into" the niche formed by the moldings. A horizontal band at a height of 80–90 cm separates the acoustic zone below from the screen zone above. Hidden lighting along the perimeter of the molding frame adds ambient light that does not interfere with viewing.
Stucco decor for a wall with lighting — about the principles of integrating hidden LED lighting into a molding system. This is especially relevant for a home theater: lighting around the perimeter of the screen reduces the contrast between the bright image and the dark room, which reduces eye strain.
Scheme 6. Complete molding system for a cinema zone
The most expressive and complex solution. The molding system covers the entire wall with the projector and partially extends to the side walls:
-
cornice along the upper perimeter of the cinema zone;
-
horizontal molding band above the screen zone;
-
horizontal molding band below the screen zone;
-
vertical frames on the sides (left and right of the screen zone);
-
baseboard along the lower perimeter;
-
side walls with a frame system.
The screen area is strictly smooth, without a single molding. Everything else is an architecturally designed system.
These arehome theater decorin the full sense of the word: not just wall decoration, but creating a cinematic space with character, atmosphere, and style.
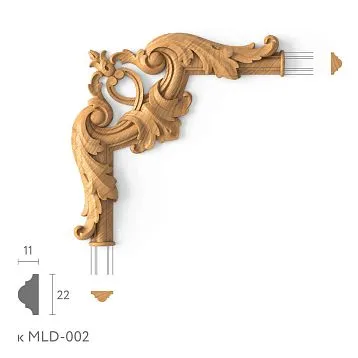
For a home theater, the following are suitableMoldings made of polyurethane, Decor for Moldingand neatPU overlays. It is better to use them on the sides, top, or around the screen area, without entering the projection work area.
How to choose moldings for a projector wall
By interior style
The choice of profile is determined by the style of the entire space — not just the cinema zone. The home theater should be a continuation of the apartment or house design, not exist separately from it.
Modern minimalism. Profile 14–22 mm, smooth cross-section, strictly matching the dark wall color. Moldings are almost invisible but create an architectural rhythm. Suitable for everyone — from studios to spacious apartments.Japandi collection— delicate profiles specifically for this approach.
Modern classic and Neoclassic Light. Profile 25–40 mm with a clear cross-section, without ornament or with minimal decor. Side frames, horizontal belts. Works well on a dark wall in the tone of the molding or with white moldings on a dark background.Light decor for a projector wall— Neoclassic Light collection for modern interiors with a cinema zone.
Neoclassicism. Profile 35–55 mm, corner inserts in side frames, horizontal belts with expressive cross-section. For a separate home theater room with high ceilings.Home theater in neoclassicism— collection for classic interiors.
Versailles Light. Rich profiles, decorative elements, expressive overlays above frames. For a grand home theater in a country house.Classic wall decor with a projector— collection for representative spaces.
By profile width and wall scale
A home theater wall is typically wide: 3.5–5 m or more. For this scale, profiles from 25 mm and above are appropriate. A thin 14 mm profile on a wide dark wall is visually lost.
The exception is a dark wall with tone-on-tone moldings: here a thin 18–22 mm profile works correctly because the relief is read not by width but by shadow.
| Ceiling Height | Wall width | Recommended profile |
|---|---|---|
| up to 2.6 m | Any | 18–28 mm |
| 2.6–2.8 m | Up to 4 m | 25–35 mm |
| 2.8–3 m | 4–5 m | 30–45 mm |
| 3 m and above | More than 5 m | 40–60 mm |
By molding color
This is a key decision for the projector wall.
Tone-on-tone with the dark wall. The best choice for most home theaters. There is relief, but no color contrast — the wall does not glare during viewing. Moldings do not 'glow' in the dark. The only criterion is an exact match of the molding shade and the wall after painting.
White or light moldings on a dark wall. Graphic contrast. Beautiful in daylight, can be irritating during viewing in a dark room — light profiles glare slightly. Suitable for a living room where the cinema scenario is not the only one.
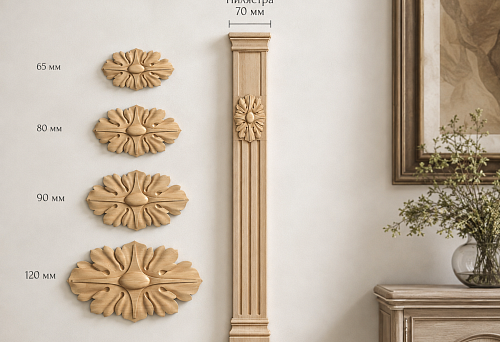
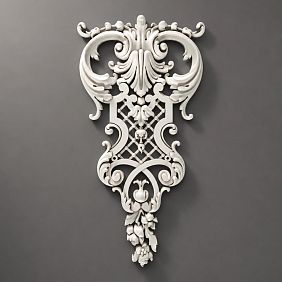
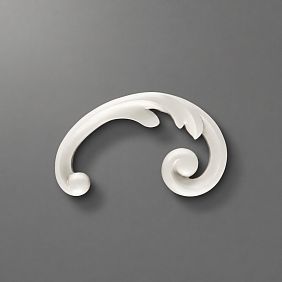
Gold or bronze moldings. For neoclassical and art deco interiors. Metallic shades create a luxurious, premium look. Polyurethane is easily painted in any metallic shade:Polyurethane decorative appliqueswith gold trim are especially striking in the corner nodes of the side zone frames.
Wall color and its impact on projection quality
This is a technical point that directly influences the design decision. Understanding it allows you to make the right choice regarding wall color and moldings.
White wall. Provides a bright image, but in a lit room it 'collects' all the ambient light from the room. Image contrast decreases. Moldings on a white wall: white or matching the tone to avoid creating unnecessary relief.
Light gray wall. The best balance between image brightness and contrast. A popular choice for home theaters in living rooms. Moldings: matching the wall tone or one shade darker.
Dark gray or anthracite wall. Maximum image contrast. Ideal for a dedicated cinema zone with full blackout. Moldings strictly matching the tone — to maintain the atmosphere.
Tinted dark wallpaper or paint (blue, olive, slate). The colored wall tone can slightly affect the image's color balance, but in most cases it's unnoticeable. Moldings in the same tone create a beautiful unity.
Home theater styles with molding decor
Neoclassicism: cinema in a palace atmosphere
This is the most impressive option. A separate room, dark walls, molding frames with cornerdecorative elements for moldings, gold or bronze accents on profiles and PU overlays. Velvet armchairs. Heavy curtains. Chandelier with dimmer.
In such a cinema, you want to watch only classics or great modern cinema. The atmosphere matches.Home theater in neoclassicism — moldings and decorative systems for formal interiors.
Modern classic: elegance without pomposity
A more restrained version of neoclassicism. Dark blue or anthracite walls, smooth moldings 30–40 mm without ornament, white or tone-on-tone profiles. No corner inserts — only clean 45° miters. Modern upholstered furniture, high-quality acoustics.Media zone in modern classic — the Neoclassic Light collection for this style.
Minimalism and Japandi: silence as an aesthetic
A Japandi-style cinema is a maximally calm space. Walls in warm dark tones (dark taupe, smoky gray-brown, graphite with a warm undertone). Moldings 14–20 mm strictly matching the wall color. No ornamentation, no corner inserts. Only line. Only relief. Only shadow.
Projector area in Japandi style — a collection of delicate profiles that do not disrupt the philosophy of minimalism but add architectural depth to the wall.
Art Deco: Geometry and Glamour
Geometric moldings, symmetrical systems, gold accents, contrasting colors — black wall, gold moldings, graphite inserts. This is cinema in the spirit of old Hollywood: Babylon, The Great Gatsby, Pre-Raphaelites on the big screen.
Polyurethane molding for interior provides a complete toolkit for creating an Art Deco cinema: profiles, overlays, corner elements that are easily painted in metallic shades.
How to combine moldings with baseboards, cornices, and acoustics
Baseboard in the cinema area
The baseboard of the cinema area should match the style of the molding system. For a dark wall — a dark baseboard, matching the tone. For contrasting white moldings — a white baseboard.Moldings made of polyurethane — a catalog that includes baseboards and cornices in a unified style with frame profiles.
Baseboard in the cinema: 60–80 mm for modern and neoclassical styles. For minimalist — 45–55 mm. The main thing: the baseboard creates the lower horizontal line from which the entire system is built.
Cornice as the upper boundary of the theater zone
The cornice closes the architectural system from above. In a home theater room, the cornice can be used as a base for hidden LED lighting directed along the wall. This creates soft indirect light that does not interfere with viewing but adds atmosphere.
Technically: a cornice with a 30–40 mm shelf is mounted 8–12 cm from the ceiling. In the space between the cornice and the ceiling — an LED strip. The light falls along the ceiling, creating a soft fill of the space without direct light flow.
Stucco decor for a wall with lighting — on the principles of integrating lighting into cornice and frame molding systems.
Acoustics and moldings: visual integration
Floor-standing speakers or built-in acoustic panels are technical objects that need to be visually integrated into the interior. Moldings help achieve this.
Floor-standing speakers: mounted in "niches" formed by vertical molding frames on the sides of the screen area. The speaker stands inside the vertical frame — and is perceived as a built-in element, not as equipment accidentally placed against the wall.
Acoustic panels on side walls: can be designed as part of the molding system — within frames, in a unified stylistic logic with the entire wall.
Technical nuances: what is important during installation
Marking considering the projection zone
Before starting installation, it is necessary to precisely determine the projection area. To do this, turn on the projector and project a full-format test image. Use a pencil (or painter's tape) to mark the boundaries of the image on the wall — this is the area where the moldings do not extend.
Add a margin of 3–5 cm to the boundaries — this is the "buffer zone" between the edge of the projection and the edge of the molding. If the screen shifts during unrolling (some roll-up screens have a slight offset), the margin will save you.
Surface in the projection area
The surface in the projection area must be perfectly smooth, matte, and of uniform color. Any unevenness, crack, or transition creates a shadow in the image. Therefore, before installing the moldings, the wall in the projection area must be carefully leveled and primed.
installation of polyurethane molding — a complete practical guide to surface preparation and molding installation.
Molding joints and painting
Corner joints of moldings (45°) must be perfectly sealed: puttied, sanded, and painted. Any gap in the joint will be visible under oblique lighting (e.g., from side lighting).installing polyurethane molding — about the technique of clean corner joints and final painting.
Cables and wiring for acoustics
If the speakers require cable routing through the wall, the cables are laid before installing the moldings. The grooves are closed, and the wall is leveled. The moldings are installed on top of the finished prepared surface. Important: cable routes should not pass under the moldings — this will complicate future maintenance.
Errors in designing a wall with a projector
Molding extends into the projection area. The most crude and common mistake. Even a small protrusion of 5–10 mm creates a noticeable shadow on the image. Remember: the projection area is always smooth.
Glossy coating of moldings. Gloss reflects projector light and creates glare. Moldings in the cinema zone should be painted exclusively with matte paint.
Too contrasting color of moldings. White moldings on a dark wall glow in the dark during viewing and distract the eye from the screen. This is especially noticeable in a dark cinema room.
No baseboard and cornice. Molding frames without horizontal lines at the top and bottom hang in the air. The baseboard and cornice are the foundation of the system.
Heavy classic stucco molding in the work area. An attempt to make it "beautiful" in the center of the wall, in the screen area — with overlays, sockets, or ornate profiles. All of this creates shadows and degrades image quality.
Poor acoustics after moldings. Flat molding profiles on walls have a minor effect on acoustics. But if the side walls are completely covered with protruding frames, a slight increase in reverberation is possible. For a serious home theater, this is solved with acoustic panels designed in the same molding system.
Asymmetrical side frames. Frames to the left and right of the screen must be symmetrical: same width, height, and same profile. Asymmetry disrupts architectural order.
What to buy for a projector wall
Practical list of STAVROS elements:
-
Moldings for a home theater— linear profiles 18–55 mm for side frames, horizontal belts, cornice, baseboard
-
Polyurethane wall decor— ready-made systems for cinema zones and media walls
-
Decor for Molding— corner inserts for classic and neoclassical cinemas
-
PU overlays— accent elements for side zone frames
-
Ready-made molded decor kits— system kits for complete cinema zone finishing
-
Polyurethane Items— baseboards, cornices and all elements for a unified system
For a projector wall in a modern interior, it is better to choose calm collections and thin moldings. If a more expressive classic is needed, you can useNeoclassicalorVersailles Light. For modern interiors —Neoclassic LightandJapandi.
Answers to Popular Questions
Can moldings be used on a wall with a projector?
Yes — if they are located outside the projection area. Side frames, horizontal belts above and below the screen area, baseboard, cornice — all of this is compatible with the projector.
Do moldings interfere with image quality?
No, if they do not enter the projection area. Moldings outside the screen area do not affect image quality at all.
What color of moldings should I choose for a dark projector wall?
Strictly matching the wall tone — for a cinema atmosphere without glare and parasitic reflections. White or contrasting is acceptable for a living room with daylight, but not for a dedicated home theater.
What paint should I use for moldings in the cinema zone?
Matte acrylic paint. Gloss and semi-gloss create reflections that are visible during viewing.
How to calculate the projection area before installing moldings?
Turn on the projector, project a full-format test image. Mark the boundaries with painter's tape on the wall. Add a buffer zone of 3–5 cm. This is the boundary beyond which moldings should not go.
What is better: moldings or acoustic panels on the projector wall?
These are different tasks. Moldings are a decorative and architectural element. Acoustic panels are functional. They can be combined: acoustic panels on the side walls, framed with moldings.
I continue the article from where it left off.
Can you make backlighting behind moldings in a home theater?
Yes, and this is one of the best techniques for a home theater. An LED strip behind a crown molding provides soft, indirect light that creates an atmosphere without direct light flow. Backlighting around the screen frame reduces the contrast between the bright image and the dark room — this actually reduces eye strain during long viewing sessions.Stucco decor for a wall with lighting — about the technical principles of integrating LED into molding systems.
Is a cornice needed in a home theater?
A cornice is desirable — it completes the architectural system and creates an upper horizontal line that "closes" the space. In a theater room, a cornice with a 30–40 mm shelf is an ideal base for hidden lighting. Without a cornice, the molding system looks unfinished.Moldings made of polyurethane — a catalog of profiles, including cornices of all sizes.
Are moldings suitable for a bedroom with a projector?
Yes — specifically delicate thin profiles 14–22 mm in the color of the wall. They add architectural structure to the wall without unnecessary relief. In a bedroom, it's important that the decor doesn't feel heavy or distracting —thin polyurethane moldings — exactly for this purpose.
What is better for a projector wall: moldings or MDF panels?
Polyurethane moldings win on several parameters. They are lighter (do not put load on the wall), cheaper to install, and easy to repaint if you want to change the wall color. MDF panels provide a more "closed" surface but are harder to install and practically cannot be repainted without dismantling. For a projector wall, where smoothness in the screen area is important, moldings are a more flexible and technologically advanced choice.
How to design a media zone without a TV and without extra weight?
Minimalist approach: two vertical frames on the sides of the screen area (profile 18–25 mm, matching the wall color), a horizontal molding belt above the projection area, and a baseboard. No overlays, no corner inserts, no ornamentation. The wall gains structure but remains light.Minimalist stucco decor for walls— about the principles of laconic decor for media walls.
How many meters of molding are needed to design a projector wall?
Depends on the scheme. For a simple scheme with two side frames (3 × 1.2 m each) — about 10–12 linear meters of profile plus a cornice and baseboard along the wall width. For a full system (frame around the screen perimeter + side frames + horizontal belts + cornice + baseboard) — 25–40 linear meters depending on the wall width. Add 10–15% for waste and corner trimming.