
























































Article Contents:
- What needs to be marked on the wall before choosing decor
- Where not to place moldings and stucco decor: direct prohibitions
- How to properly position sockets relative to moldings
- Scheme 1: Socket inside the frame
- Scheme 2: Socket outside the frame
- Scheme 3: Socket between frames
- Scheme 4: Socket behind furniture
- Switches on a wall with stucco decor: how to avoid conflict
- TV zone: cables, bracket, outlets and molding decor
- What to consider
- How to properly organize decor in the TV zone
- Sconces and molding decor: how to incorporate a light fixture into the composition
- Sconces inside a molding frame
- Sconce centered in the frame
- Paired sconces symmetrically in a frame or on its sides
- Practical requirements
- Lighting and moldings: what needs to be planned
- What to plan in advance
- What to do if outlets already exist and cannot be moved
- What to do if the switch falls on the molding
- How to choose a ready-made set or individual moldings considering the electrical wiring
- When a ready-made set is suitable
- When it's better to choose individual moldings
- Algorithm for marking the wall before buying decor
- Decor for different rooms: specific scenarios
- Living Room
- Bedroom
- Entry Hall
- Office
- Children's room
- Mistakes when combining stucco decor and electrical wiring
- Choose stucco decor for a real wall with sockets and switches
- About the company
- FAQ: Answers to Key Questions
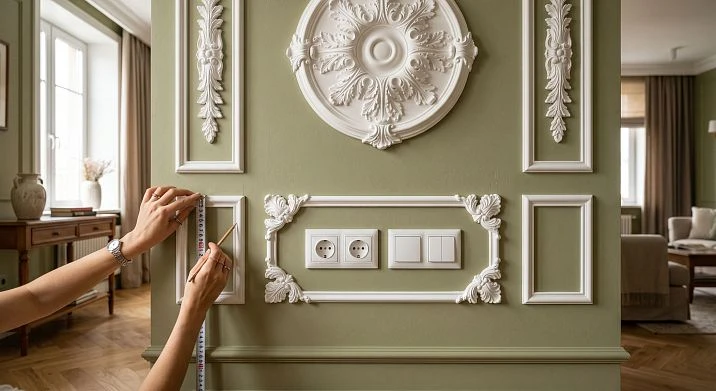
A person choosesSculptural wall decoration. Looks at the catalog for a long time, compares sets, chooses a collection. Buys. Brings it home. And only then notices: the socket is right in the middle of the frame. The switch by the door breaks the molding line. The outlet for the sconce turned out to be exactly where the decorative overlay should be.
This is not a rarity — it's a typical mistake made at the selection stage.Stucco decor and rosettes — not a conflict. It's a planning task. But it needs to be solved before purchase, not after installation.
In this article, we'll look at how to account for electrical work when choosing stucco on a wall with switches and sockets, how to create a diagram before purchase, how to solve the problem of existing outlets — and which Polyurethane wall decor to choose for a complex wall.
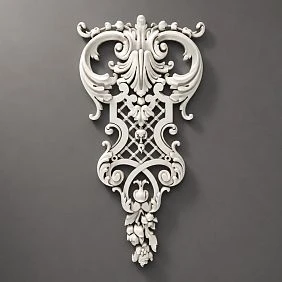
What needs to be marked on the wall before choosing decor
The first and main rule: Relief Decoration is chosen not for an abstract wall from a catalog, but for a specific wall in your apartment. With all its features, obstacles, and engineering points.
Before opening the catalog, take a tape measure and make a diagram of the wall. Mark:
-
The width of the wall — from corner to corner, from corner to opening, from opening to opening. Not one number, but several zones.
-
The height from floor to ceiling — and separately the height of the baseboard.
-
Doors and architraves — the width of the opening, the width of the architrave, the distance from the architrave to the nearest object.
-
Furniture — sofa, bed with headboard, bedside tables, TV stand, chest of drawers, console, desk. All of them affect the working area of the decor.
-
Sockets — their height from the floor and horizontal position on the wall.
-
Switches — their height, distance from the architrave, type (single, double, block).
-
Sconce outlets — exact location, height from the floor.
-
TV outlets — antenna, internet, HDMI, power.
-
Lighting outlets — if LED strip or spotlights are planned.
-
Air conditioner, radiators, pipes — if they are on the same wall.
Only with this diagram can you assess: which area of the wall is truly free, where something can be placedReady-made set of stucco decor, and where it is better to use separateMoldings made of polyurethane with flexible layout.
This step takes 20–30 minutes. But it eliminates the situation where the decor is bought, delivered, and the wall turns out to be unsuitable for the scheme chosen in the catalog.




Where not to place moldings and stucco decor: direct prohibitions
These are not restrictions for the sake of restrictions. This is practical logic that protects you from an ugly wall and inconvenient use of electrical fixtures.
Moldings with sockets on the same wall are compatible — but only with proper placement. The decorative element cannot be placed:
-
Directly over a socket or switch. Sounds obvious, but it happens in practice. Especially when buyingReady-made set of stucco decor"by eye", without precise measurements.
-
So that the molding line crosses the socket frame. A horizontal molding passing through the socket frame looks like a technical error. The wall immediately loses its finished look.
-
Right next to the switch without a gap. There should be free space around any switch — at least 3–5 cm. This provides both visual "breathing room" and the ability to use the switch normally.
-
In place of a future sconce. If a wall-mounted light is planned on the wall, space is needed for it: for the base, for the wire, for heat dissipation. A decorative cover right in that spot is a source of problems when installing the sconce.
-
At the location of a TV bracket. Especially if the bracket is swiveling. Moldings and decorative elements under the bracket will interfere with rotation, and removing them later will damage the finish.
-
In areas with cable outlets. Outlets for set-top boxes, audio equipment, cable channels — all require free access.
-
Behind furniture with regular access to the socket. If you need to periodically unplug a plug between the sofa and the wall, decor should not interfere with moving the furniture.
-
In the door opening zone. A molding that ends up in the path of a moving door risks damage every time it is opened.
-
At the junction with the trim without a proper gap. The minimum gap from the trim is 4–6 cm. Less than that makes the decor look cramped and creates a sense of randomness.
Our factory also produces:

How to properly position sockets relative to moldings
There are four working schemes that allow you to organically combinewall outlets with moldings.
Get Consultation
Scheme 1: Outlet inside the frame
This works if the frame ispolyurethane wall moldingstall enough and the outlet is located in the lower part of the frame — in the area that is hidden by furniture or below the visually active zone. The outlet does not break the molding line, does not fall on the decorative central element, and exists quietly in the lower functional part of the frame.
The main condition: there must be at least 3–4 cm left around the outlet frame to the nearest molding.
Scheme 2: Outlet outside the frame
The best option if you have the opportunity to properly plan the electrical work before finishing. Outlets are brought out to the lower functional zone — under furniture or in the baseboard area. The decorative frame remains clean: without engineering points, without forced indentations, without random details.
This is the result to strive for when renovating from scratch or relocating outlets.
Scheme 3: Outlet between frames
If a wall is divided into several decorative sections — for example, three frames with space between them — the socket can occupy an area in that inter-frame space. When positioned correctly, it looks like a functional point in a neutral field, rather than an obstruction within the decor.
Scheme 4: Socket behind furniture
The most "invisible" method: sockets are planned behind a TV stand, bedside tables, sofa, console, or desk. The decor occupies the entire visible area of the wall — clean, without obstacles. The sockets exist in an area that is normally hidden by furniture.
This option works particularly well in the TV area and the bedside area of the bedroom. For detailed planning of the TV area — see the articlePolyurethane TV zone decor.
Switches on a wall with stucco decor: how to avoid creating a conflict
Moldings and switches on the wall — a classic place for mistakes. Switches are usually placed near doors, that is, on the wall pier. And the wall pier is exactly the place where you often want to install a verticalstucco decor with sockets or a molding frame.
What to consider when planning:
Switch height. The standard height is 80–90 cm from the floor. But in practice, it varies. If the molding frame starts at a height of 40 cm and ends at 190 cm, a switch at a height of 85 cm falls directly inside the frame.
Distance from the trim. The switch is usually 15–20 cm from the trim. If the molding frame is set 8 cm away from the trim, the switch will either be inside the frame or break its vertical line.
Switch type. A single switch takes up 8–10 cm in width. A double or triple block takes up 15 to 25 cm. This fundamentally affects how much space the utility point occupies and what the minimum offset for the molding is.
What to do:
-
Do not run the frame of moldings for a wall with sockets flush against the switch block.
-
Leave a clear space around the block — at least 5 cm.
-
If the switch falls exactly on the molding line, it is better to shift the molding — higher, lower, or to the side.
-
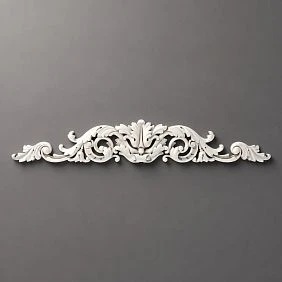
If there is a switch on the wall pier, consider a vertical narrow decor that will fit between the trim and the switch, or between the switch and the corner.Decor for a wall pier with a switchfrom the collection «Ekaterinhof» — a typical example of a correct solution for such a zone.
-
If the renovation is not yet complete and the electrical wiring is not secured — move the switch so that it does not interfere with the decorative scheme.
About different options for working with non-standard walls and limited zones — in the articlestucco decor for niches, ledges, and piers.
TV zone: cables, bracket, sockets, and stucco decor
The TV zone is the most technically saturated section of the wall in a residential interior. A TV on a bracket, a power socket, a TV output, internet, HDMI cable, a socket for a set-top box, possibly audio and backlighting. Plus a TV cabinet below. How to place all thisstucco decor for the TV zoneso that the wall looks like a well-thought-out solution, not like a collection of randomly assembled objects?
What to consider
TV diagonal and installation height. A 65-inch TV is approximately 144 × 81 cm. It occupies a significant part of the wall. The decor around it should be wider than the TV and should not interfere with the installation or maintenance of the bracket.
Bracket mounting location. The bracket is mounted at specific points. If there is a molding at these points, you will either have to drill through the molding or remove it. Both options are bad. Moldings in the bracket area are not allowed.
Sockets behind the TV. There are usually several: TV power, set-top box power, USB. It is desirable that they are located exactly behind the TV — in a hidden zone. But if the bracket is swiveling, you need cable slack, and the decor should not interfere with this slack.
TV output and cables. The best scenario is that all cables go into the wall and come out directly behind the TV panel. Then the decor around the TV area remains clean. If the cables run openly along the wall, the cable channel must be taken into account when marking the moldings.
Lighting. If LED lighting is planned behind the TV, its outlets must be provided before the decor is installed. More about working with decor with lighting in the article.Stucco wall decor with backlighting.
How to properly organize decor in the TV area
Optimal scheme:moldings in the TV areaform a frame around the entire area — with the TV inside. The frame should be:
-
wider than the TV by 15–20 cm on each side;
-
higher than the TV stand by 10–15 cm from below;
-
lower than the ceiling cornice by 10–15 cm from above.
All sockets and outlets are strictly behind the TV, in its shadow. Decorative elements are above and to the sides of the TV, but not where the bracket is attached. The center of the wall, the center of the TV, and the center of the decorative frame must align on the same vertical axis.
For a TV zone, a calm stucco wall decor works wellcalm stucco wall decorfrom the «Petersburg» collection — without excessive relief that would compete with the screen. Heavy formal overlays in the TV zone are usually excessive.
Sconces and stucco decor: how to integrate a light fixture into the composition
A sconce is not just a light fixture. In a proper interior, it is part of the wall's decorative system. That is why the outlet for the sconce should be planned before installing the stucco decor, not after.
moldings and sconces on the wallinteract according to several scenarios.
Sconce inside a molding frame
If the frame is tall enough (from 80 cm), the sconce can be placed in the upper part of the frame — above the visual center but within the molding boundary. This creates the impression that the light fixture is part of an architectural niche, not just attached to the wall.
Conditions: the outlet for the sconce must be provided before installing the moldings. A wire coming out through the molding after installation is a violation of both the finish and the appearance.
Sconce in the center of the frame
One light fixture on the central axis of the frame is a strong and clean technique. It works in the hallway above a console, in the bedroom above the headboard, in the living room above a chest of drawers. The outlet is on the central axis of the frame, and the decorative element is placed below or above the sconce.
Paired sconces symmetrically within the frame or on its sides
Two sconces on either side of a mirror, on either side of a headboard set, on either side of a fireplace — a classic technique. The outlets must be symmetrical to within a centimeter. If the symmetry is off by even 2–3 cm, it will be noticeable.
When placing sconces in pairsmolded decor for a wall with sconces from the «Pavlovsk» collection works especially well: soft forms do not compete with the lamps but create a context for them. More about decor in the bedroom — in the articleStucco molding set for the bedroom.
Practical requirements
-
The outlet for the sconce must be installed on the wall before mounting the molded decor. Making a hole in an already installed molding means risking its integrity.
-
The type of sconce affects the size of the lamp base. For lamps with a large base, ensure a clear area for mounting.
-
The direction of the lampshade and the light dispersion angle affect which parts of the decor will be illuminated. If the lampshade is directed upward, the decor above the sconce will be lit and clearly visible in the evening. If directed downward, the decor above the lamp will remain in shadow.
Lighting and moldings: what needs to be planned
LED lighting behind the TV, under the cornice, behind a molding frame, or above a console is a striking solution that only makes sense with proper planning.
What needs to be planned in advance
Outputs. The wire for the lighting must exit at a specific point. If it runs under or through the molding, it looks unattractive and complicates maintenance.
Placement of the strip. The LED strip can be attached behind the molding (in the groove), on the back side of the cornice, or at the bottom of the frame. Each option requires appropriate surface preparation before installing the decor.
Relief and shadows. Lighting emphasizes any relief. This is an advantage—but also a trap. Uneven markings, misaligned molding, or unsealed joints will all become noticeable with side lighting. Therefore, installing decorative moldings when planning lighting requires special care at every stage.
Color of the lighting and color of the decor. Warm light at 2700K works well with white and cream decor. Cool white (4000K and above) works with light gray or neutral-toned paint.
Maintenance. The LED strip periodically requires replacement or adjustment. If access to it is blocked by decor, this becomes a problem. Plan the placement of the strip so that it can be repaired without removing the moldings if necessary.
All electrical work—cable routing, power point installation, and connecting the lighting—must be performed by a qualified electrician before the decor installation begins.
What to do if outlets already exist and cannot be moved
Real renovation doesn't always allow starting from scratch. Often, outlets are already installed, the electrical work is done, and there's neither time nor budget to change it. What then?
This is not a disaster. It's a different task.
Option 1: Choose a narrower set. If the socket is 40 cm from the corner and you chose a set 900 mm wide, perhaps 610 mm will fit more neatly and the socket will remain outside the frame.
Option 2: Shift the composition horizontally. Do not center the decor on the entire wall, but align it relative to the free zone. For example, if the socket is on the right, shift all decor to the left, and the right margin will be functional.
Option 3: Make several separate frames instead of one large one. If a large frame inevitably captures the socket, break the decor into two or three sections — with the socket in the neutral inter-section space. The article a ready-made set of stucco decor or individual moldings will help you understand when flexible layout is needed.
Option 4: Place the socket in the lower zone of the frame. If the socket is at a height of 30–40 cm from the floor and the frame is tall, the socket will naturally fall into the lower third of the frame — the area that is still covered by furniture. Visually, it disappears.
Option 5: Avoid large decorative overlays near sockets. Simple moldings, clean lines, without bulky central elements — in the area with sockets, this works better. polyurethane wall moldings with a neat, low profile look calm and do not draw attention to engineering points.
Option 6: Use color. Sockets painted the color of the wall become visually less noticeable. If the decor is also painted the color of the wall, the effect is enhanced. The socket fades into the background.
What to do if the switch falls on the molding
This is perhaps the most common local issue.The switch falls on the molding— what to do?
Let's break it down step by step.
Step 1: Determine how critical the overlap is. If the switch is 1–2 cm from the vertical line of the molding, this can be resolved by shifting. If it falls directly on the line, the layout needs to be changed.
Step 2: Shift the vertical line of the molding. The molding frame is not a fixed object. It can be moved 5–10 cm to the right or left. This often solves the problem without a major redesign of the layout.
Step 3: Change the height of the frame. If the frame starts at 20 cm from the floor and the switch is at 85 cm, the lower horizontal line of the molding may end up below the switch. Increase the bottom offset — start the frame at 100 cm. The switch will then be below the frame, in a neutral area.
Step 4: Choose a narrower molding profile. A wide molding conflicts with the switch plate more than a narrow one. Sometimes switching to a thinner profile is enough to keep the desired frame placement.
Step 5: Relocate the switch. If the renovation is still at the rough electrical installation stage, move the switch so that it is outside the planned decor. It's better to spend time and money on this now than to discover the problem after the renovation is complete.
Step 6: Make the switch part of the layout. This is a creative solution: the switch is intentionally integrated into the decorative field, and the empty space around it is organized as a symmetrical neutral zone. It works if there is only one switch and its plate is neat.
The main thing is not to trim a ready-made molding to an already installed switch without understanding the overall layout. Trimming a molding without a plan always looks like a mistake, not a solution.
How to choose a ready-made kit or individual moldings considering the electrical wiring
Ready-made set of stucco decor— a convenient solution when the wall is clean enough. But for walls with electrical wiring, you need to figure out in advance: whether a ready-made format will work or if it's better to assemble from individual moldings.
When a ready-made kit is suitable
-
Sockets and switches do not fall into the central elements of the kit — neither into the molding nor into the overlay.
-
The width of the kit allows maintaining free margins on the left, right, and bottom.
-
TV outputs, sconces, and backlighting do not overlap with the decor area.
-
The decor can be placed above the furniture — in an area free from utility points.
-
The wall is relatively clean: 1–2 sockets at the bottom, 1 switch by the door.
When it's better to choose individual moldings
-
There are several sockets — and they are located in different zones of the wall.
-
There is a TV with a bracket, sockets behind it, and a TV outlet.
-
There is a sconce with outlets at specific points.
-
Lighting with cables is planned.
-
The wall is non-standard: niches, protrusions, atypical openings.
-
You need to go around the switches that are located in several places.
-
The optimal frame width does not match any of the standard ready-made kits.
In these cases, polyurethane wall moldingsprovide freedom: the frame can be assembled exactly to the actual distance between obstacles. How the calculation of moldings works — in the articlehow to calculate moldings and stucco decor for a wall.
Molding frames can be supplemented withdecorative polyurethane overlays— they are inserted into the corners or centers of frames and give the scheme completeness. Corner joints of frames are reinforced withDecor for Molding— corner elements and inserts that make joints neat and expressive.
Wall marking algorithm before buying decor
Here is a specific sequence of steps that allows you to properly prepare the wall for choosing decor.
1. Measure the furniture and mark it on the wall. Apply the outlines of the sofa, bed, nightstands, TV stand — by height and width. You will immediately see which area of the wall is above the furniture and available for decor.
2. Mark all utility points. Sockets, switches, sconce outlets, TV outlets, cable channels. Use painter's tape or a pencil.
3. Find the central axis. In most cases, the decor is built along the central vertical axis of the wall or along the axis of the furniture. Draw a vertical line — this will be the basis of the scheme.
4. Outline frames with painter's tape. Tape allows you to see the real proportions before buying anything. Stick the outlines of the intended decor and evaluate: does the frame overlap with sockets, switches, outlets?
5. Check the indents. There should be at least 4–5 cm from each edge of the molding to the nearest utility point. Make sure this condition is met.
6. Look at the wall from the main viewpoint. Step back 2–3 meters. Look at the markings from the point where you usually view this wall: from the sofa, from the bed, from the entrance. Evaluate the proportions.
7. Compare the markings with the sizes of sets or moldings. Only now look at the catalog — and choose what matches your actual markings, not the other way around.
8. Only after that — buy. This order eliminates the situation "bought and it didn't fit".
More details about the rules for marking and preparing for installation — in the articleHow to choose a set of stucco decor according to wall width.
Decor for different rooms: specific scenarios
Living Room
Typical situation: a large TV, a bracket, sockets behind it, a TV outlet. A sofa with sockets on the sides. Possibly — a sconce above the console. The central wall is overloaded with engineering points.
Solution: divide the decor into zones. The TV wall — a laconic frame made ofmoldings in the TV zone, all sockets behind the TV, no overlays in the bracket area. Side walls — narrow vertical elements without engineering points.
Bedroom
Bedside area: sockets on the sides of the bed at a height of 60–80 cm, switches at the headboard, possibly — sconces. All this must be taken into account before installing the decor.
Rule: sockets near the bed should remain outside the molding frame or in the lower part of the frame below the headboard level. Sconces — above the visual center of the frame, with a pre-planned outlet.Stucco decor for a bedroom with sconcesfrom the Pavlovsk collection works well in this scheme.
Entryway
Many switches, intercom, video doorbell output, mirror, wardrobe. Little space, many engineering points. The best choice is —a narrow or wide set of stucco decor, and for a hallway the correct answer is almost always a narrow vertical format. It takes up less horizontal space and is less likely to intersect with switches.
The key question in the hallway: is there at least one free wall section without engineering points? If yes — this is the place for vertical decor. If no — either move the electrical points, or limit yourself to molding details without large overlays.
More about hallway decor — in the articleWall decor in the entryway and hallway made of polyurethane.
Office
A workspace with outlets on the desk, an internet outlet, possibly a lighting system and sconces. Decor in the study should not interfere with work. It is better to usea frame of moldings on the wallin the area above the workspace — above the equipment level — or on the back wall behind the work chair, which is usually more free.
Children's room
In a children's room, it is better to minimize decor on walls with outlets. Children are active, furniture moves — access to outlets should be convenient. If decor is needed in the children's room, choose simplewall moldingssmall profile in areas without sockets — for example, above the bed or above the desk.
Mistakes when combining stucco decor and electrical wiring
These mistakes occur constantly in real renovations. Knowing them in advance, you are already protected.
Buying decor before the electrical plan. The most costly mistake. A beautifulset of wall moldingshas been purchased and delivered — and then it turns out that the socket is right in the center. Moving the socket is too late, redoing the wall is expensive.
Not accounting for sockets behind the sofa. The sofa covers the lower third of the wall. Sockets behind the sofa are "invisible" during inspection — and they are forgotten. Then the molding runs right through the socket frame.
Placing the molding right next to the switch. 1 cm between the molding and the switch frame is not a gap. It's a conflict. A minimum of 4–5 cm is needed.
Crossing the socket frame with a decorative line. It looks like an installation error, even if done intentionally. The molding line should run either above or below the socket frame — not through it.
They forget about the TV bracket. The bracket is installed after the decor — and it turns out that drilling needs to be done directly through the molding. This destroys the decor and requires repairs.
They install a sconce without reference to the decorative scheme. The light fixture is installed — but the outlet for it ended up right on the overlay. Or the sconce hangs and faces the molding because the distance wasn't calculated.
First they paint the wall, then they move the electrical. After final painting, moving an outlet means opening the wall and repainting. If the decor is already installed, the problem doubles.
They don't mark with painter's tape. This takes 15 minutes. But without it, proportions are estimated "by eye" — and almost always incorrectly.
They choose a set only by photo. The photo in the catalog was taken in a studio interior without outlets, without switches, without cables. The real wall is arranged differently.
They don't think through the color.stucco decor for paintingrequires one coat of primer and one or two coats of paint. If the paint has already been applied, this must be taken into account when installing the decor to avoid redoing the painting afterwards.
Choose stucco decor for a real wall with outlets and switches
In the STAVROS catalog you can selectReady-made molded decor kitsfor clean accent walls, as well asMoldings made of polyurethanefor flexible arrangement on complex walls with electrical. The solution can be supplemented withPU decorative overlays, corner elements for moldingsanddecor for moldings.
Collections by situation:
-
Petersburg Collection — calm stucco decor for TV zones, studies, and living rooms
-
Pavlovsk Collection — for the bedroom with sconces and bedside outlets
-
Ekateringof collection — for wall sections with switches in the hallway
-
Tsarskoye Selo Collection — for an accent wall where electrical elements are hidden in concealed zones
-
Peterhof Collection — for formal walls with a well-planned electrical layout
Useful articles:
About the Company
STAVROS is a manufacturerpolyurethane wall moldingsandpolyurethane interior decor for residential, country, and commercial spaces. STAVROS offers ready-made sets, moldings, overlays, and system solutions for walls of any complexity — taking into account electrical, furniture, and architectural features of the room. Delivery across all of Russia.
FAQ: Answers to Key Questions
Can you do stucco decoration on a wall with sockets?
Yes, you can. The main thing is to plan the location of the sockets relative to the moldings and overlays in advance, so that they do not fall on the decorative lines and do not interfere with electrical maintenance.
What to do if a socket falls on a molding?
It's better to change the frame layout: shift the molding, change the frame height, or choose a smaller set. Cutting the molding around a socket without an overall plan looks like a mistake and ruins the wall's appearance.
Can you place a switch inside a frame made of moldings?
Yes, if there is a free field of at least 4–5 cm around the switch and it does not break the decorative line. But it is often preferable to place switches outside the frame.
What should be done first: electrical work or stucco decoration?
First, plan the electrical work and furniture, make markings, and agree on the decoration scheme. Then, rough electrical work and finishing. Stucco decoration is installed after the electrical work is completed.
How to combine moldings and wall sconces on a wall?
It is better to place sconces in the center of the frame, above it, or symmetrically on the sides. The outlets for the sconces must be provided before installing the moldings — running a wire through already installed decoration damages it.
How to design a TV area with sockets and moldings?
All sockets and cables are behind the TV, in a hidden area. The molding frame is around the TV area, but not at the bracket location. The center of the TV, the center of the frame, and the center of the wall are on the same axis.
Will a ready-made set of stucco decor work for a wall with electrical wiring?
It will work if the sockets and switches do not fall on the elements of the set. If there are many engineering points, it is more convenient to assemble the decor from individual moldings for a specific wall layout.
Do I need to leave a gap from the socket to the molding?
Yes. The minimum gap is 4–5 cm. This ensures both visual 'breathing' around the socket frame and normal access to the electrical system during maintenance.