Article Contents:
- When recessed lights stop being the answer to all questions
- What is a skirting board and cornice for LED backlighting: a thorough breakdown
- Ceiling skirting board with backlighting: in which rooms and why
- Living Room
- Bedroom
- Kitchen-living room
- Hallway and corridor
- Office
- TV area
- Rooms with a stretch ceiling
- How the construction works: ceiling skirting board for LED strip
- Where the strip is placed
- Where the light goes
- Why the gap from the ceiling is important
- Why the tape cannot simply be glued in plain sight
- Why the profile should hide the actual glow point
- Ceiling cornice with lighting: architecture and light in one solution
- How a cornice differs from a baseboard
- Cornice for LED strip: what is important to know
- Ceiling cornice for lighting in different styles
- Cornice with lighting for a stretch ceiling: everything you need to know before installation
- Why you need to think ahead
- How a cornice for a stretch ceiling with lighting works
- What is important to consider
- Molding for lighting: when light is needed not only on the ceiling
- What is molding with lighting
- Where does molding with lighting work
- How to choose molding for LED strip
- Bagette for LED strip
- Curtain lighting and hidden cornice: light by the window
- Why curtain lighting is a powerful technique
- How curtain rod lighting works
- Curtain lighting with stretch ceiling
- Where curtain lighting works especially well
- Where is the best place to use LED backlighting: scenarios and locations
- Along the perimeter of the ceiling
- Behind the cornice
- In niches
- Above the curtains
- In the TV area
- In the bedroom behind the headboard
- In the Hallway
- On the stairs
- In decorative moldings
- In the ceiling level above the kitchen
- How to choose a profile for backlighting: clear criteria
- Ceiling Height
- Room width
- Interior style
- LED strip power
- Light direction
- Niche depth
- Profile material
- Painting possibility
- Tape maintenance convenience
- Coordination with other elements
- Mistakes when choosing baseboard and cornice for LED: how not to ruin the result
- Tape is directly visible
- Light hits the eyes
- Profile is too small
- No space for power supply
- Didn't plan access to the tape
- Chose too cold light
- Did not account for reflection from the glossy ceiling
- Installed backlighting without main lighting
- Forgot about joints and corners
- Did not coordinate the profile with the ceiling height
- Hidden ceiling lighting: DIY niche or ready-made profile?
- Profile materials: polyurethane, solid wood, and other options
- Polyurethane
- Solid wood
- Gypsum
- Aluminum
- How to hide LED strip on the ceiling: practical schemes
- Ceiling cornice: profile and lighting options
- Where to buy baseboard, cornice, and molding for LED: a smart choice
- STAVROS: decor that works
- FAQ: Answers to Popular Questions
- What baseboard is needed for LED strip on the ceiling?
- How does a ceiling cornice with lighting differ from a regular baseboard?
- Can I install lighting with a stretch ceiling?
- Where to hide the LED strip on the ceiling?
- How to choose the color temperature of the strip for the ceiling?
- What is better: spotlights or hidden lighting?
- Can I use molding for lighting on walls?
- How to know if the selected profile is suitable for my stretch ceiling?



When spotlights stop being the answer to all questions
Recessed spotlights were a universal solution for residential interiors for a long time. They were hung everywhere: in bedrooms, living rooms, hallways, kitchens — and it was believed that the lighting task was solved. But the more of them appeared on the ceiling, the more obvious the problem became: many recessed spotlights are not "a lot of light," but a lot of harsh, fragmented, hard light that breaks the ceiling into separate spots and destroys the feeling of a unified space.
A modern interior is built differently. Architects and designers have long been talking about multi-level lighting: main light, local light, and — necessarily — hidden or diffused backlighting. It is this last layer that gives the room depth, softness, and atmosphere. It cannot be achieved with recessed spotlights. It can be achieved with a well-designed LED strip hidden in a ceiling plinth, cornice, or molding.
This is exactly what this article is about. Not about recessed spotlights. About what is at the junction of the ceiling and wall, what directs light where it is not visible, but where it works most effectively.




What is a plinth and cornice for LED backlighting: a substantive breakdown
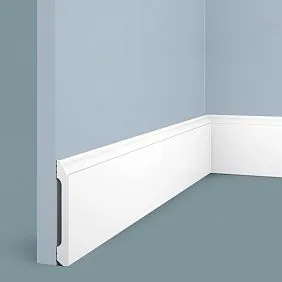
If you are encountering this topic for the first time, it is important to clarify the concepts right away. Ceiling baseboard with lighting — is a decorative profile that is mounted at the junction of the ceiling and wall. Inside it or behind it, an LED strip is placed. The light from the strip is directed upward onto the ceiling or downward onto the wall — depending on the profile design. The strip itself is not visible: it is hidden by a rim, shelf, or internal niche of the profile.
A cornice for backlighting is a more expressive version of the same idea. It is wider, more architectural, creates a noticeable horizontal line under the ceiling, and gives the room a finished, "put-together" look. A molding is an intermediate option: a decorative element that can work on the wall, on the ceiling, in niches, and above the curtain rod.
All these elements share one task: to hide the light source so that only the result remains in the room — a soft, diffused, warm glow around the perimeter. Without visible lamps. Without harsh shadows. Without hard spots on the ceiling.
The principle of operation is simple, but there are nuances. The LED strip is glued inside the profile — where it is not visible from eye level. The profile creates a "visor" that blocks direct visibility of the strip. The light goes in the desired direction: onto the ceiling or into the niche. The ceiling begins to glow — not the strip, not the fixture, but the ceiling itself. This is the effect of hidden backlighting.
Our factory also produces:


Ceiling plinth with backlighting: in which rooms and why
The question "do you need a skirting board with lighting" is easily resolved when you understand what exactly it brings to a specific interior. Ceiling skirting board for LED strip is not just decor, it is a tool for managing light and perception of space.
Get Consultation
Living Room
In the living room, perimeter ceiling lighting is perhaps the most popular use case. In the evening, when you want dim warm light, an LED strip in the ceiling skirting board creates exactly the atmosphere that cannot be achieved with spotlights. The ceiling begins to "glow" from within, the room seems higher, warmer, cozier.
Bedroom
In the bedroom, it is especially important to avoid direct light overhead. Ceiling skirting board for LED strip solves the problem radically: there is light, but it does not hit the eyes, does not interfere with relaxation, does not create tension. A combination works especially well: perimeter lighting as an evening mode and spotlights over functional areas as a working mode.
Kitchen-living room
In open spaces where the kitchen flows into the living room, a ceiling skirting board with lighting helps to visually separate zones not with a partition, but with light. In the kitchen area — bright functional light. In the living room — soft diffused perimeter light. The transition between zones becomes smooth and natural.
Hallway and corridor
A corridor is a room without a window, where lighting is especially critical. Perimeter ceiling lighting turns a narrow dark corridor into a fairly cozy space. Here, ceiling skirting boards with lighting work as the only source — and handle the task.
Office
In a study, the task of perimeter lighting is to reduce fatigue from working under artificial lighting. When light is evenly distributed across the entire ceiling, eyes get less tired than with spot lighting with sharp shadows.
TV Zone
Ceiling perimeter lighting in a ceiling plinth works great in TV areas. When the screen is dark and the surroundings are pitch black, eyes strain from the contrast. Soft background light around the perimeter relieves this strain. Plus, it looks visually beautiful and modern.
Rooms with a stretch ceiling
For a stretch ceiling, a plinth with lighting is one of the most convenient ways to organize perimeter lighting. It allows you not to drill the fabric or embed fixtures into it, but to place the entire structure along the perimeter, hiding both the strip and the wires.
How the construction works: ceiling plinth for LED strip
Understanding the construction means choosing the right profile and avoiding common mistakes. Ceiling plinth for lighting has several important characteristics that directly affect the result.
Where the strip is placed
The strip is mounted inside the profile, in its upper or rear part, where it is completely hidden from direct view from below. This is why the height of the side is important: it must be sufficient to hide the strip from the eye level of a person of normal height. If the side is too small, the strip will be visible, and the entire effect of hidden lighting will be ruined.
Where does the light go
The light from the strip is directed upward — to the ceiling. The ceiling acts as a reflective surface and distributes light throughout the room. The lighter and more matte the ceiling, the better the reflection. Glossy surfaces produce a different effect — brighter and more contrasting, which is not suitable for all interiors.
Why the gap from the ceiling is important
There must be a gap between the top edge of the baseboard and the ceiling surface. It is through this gap that light escapes and reaches the ceiling. If the baseboard is pressed tightly against the ceiling, the light is blocked — there will be no effect. The minimum working gap is 1–2 centimeters, the optimal one depends on the strip power and desired lighting intensity.
Why the strip cannot simply be glued in plain sight
A common mistake is to glue the strip directly to the ceiling near the wall, without a profile. The strip itself does not create soft light. It creates a bright line of individual glowing dots, which looks rough, amateurish, and hurts the eyes. The profile is not an addition to the strip, it is a mandatory part of the system, without which LED strip in the baseboard it does not work as it should.
Why the profile should hide the glowing point itself
This is a fundamentally important point. The task of a good profile is not just to hold the strip, but to completely block its view from any angle. Only in this case does the eye see not the source, but its result: an even, calm, soft halo of light on the ceiling.
Ceiling cornice with lighting: architecture and light in one solution
If the plinth is a laconic solution, then Ceiling cornice with backlight it is an architectural accent. The cornice creates a pronounced horizontal line under the ceiling, which structures the space and gives it depth and scale.
How a cornice differs from a plinth
A ceiling plinth for lighting is usually more delicate: a small cross-section, a restrained profile, an unobtrusive presence. A cornice is different. It is wide, sometimes multi-tiered, forms a noticeable shadow underneath, and makes the ceiling visually more complex and rich.
Ceiling cornices with lighting are suitable where you need not just to cover the joint between the wall and ceiling, but to make this joint a decorative center. In classic interiors, a cornice is a direct continuation of historical tradition: cornices have always been a way to give the ceiling solemnity. In a modern interior, a cornice with LED lighting is a way to combine decorative function with practicality.
Cornice for LED strip: what is important to know
LED strip ceiling trim should have an internal shelf or niche deep enough to accommodate the strip and connecting elements. Good cornices for lighting also consider the need for wire routing and access to the power supply. If all this is thought out in advance, installation goes smoothly and the result looks professional.
One of the important questions is the material of the cornice. Polyurethane cornices from the STAVROS collection are characterized by lightness, precision of shape, and readiness for painting in any color. Solid wood cornices are heavier but create a different feeling: materiality, nature, warmth. The choice depends on the interior style and the task.
Ceiling cornice for lighting in different styles
In a classic interior, a cornice with a rich profile is a must-have element. It 'gathers' the ceiling, making it complete. The LED strip inside enhances the decorative effect and adds a modern technological layer over the classic form.
In a modern interior — minimalism. A narrow, sharp, geometric cornice with a thin strip of lighting. Without stucco, without ornament, but with a clear shadow beneath it and warm light above it.
In neoclassicism and transitional styles — a middle option: a profile with a moderate cross-section, restrained relief, and good integration with the LED strip.
Cornice with lighting for a stretch ceiling: everything you need to know before installation
A separate topic that requires special attention. Valance with backlighting for tensioned ceilings — a query with high commercial frequency, and not by chance: a stretch ceiling creates its own limitations and opportunities.
Why you need to think in advance
The tension fabric is installed last. Once it is stretched, making changes to the perimeter structure is extremely difficult. That is why hidden cornice with lighting for a stretch ceiling needs to be designed before final installation. The space for the profile, niche depth, power supply location, wire length — all of this is planned at the rough ceiling stage.
How a cornice for a stretch ceiling with lighting is arranged
A scheme with a setback is usually used: the cornice or profile is attached to the wall at a certain height, leaving space between the cornice and the fabric where the tape is placed. The fabric is stretched slightly below the cornice, and light emerges through the gap between the fabric and the wall, creating a 'floating' ceiling effect.
This is one of the most striking techniques in modern residential interiors: the stretch ceiling literally hovers in the air above a glowing line, appearing not to touch the walls.
What to consider
-
Ceiling height: the lower the ceiling, the thinner and more delicate the profile should be.
-
Light direction: the tape should shine upward onto the ceiling or fabric, not into the eyes.
-
Material compatibility: a polyurethane cornice is easier to install than a wooden one and does not deform from humidity.
-
Joint with the fabric: there must be a gap between the edge of the fabric and the wall through which light comes out.
-
Profile color: for a suspended ceiling, the cornice is usually painted white or to match the wall color, so that it is almost invisible — and then the lighting effect is perceived as "space magic."
Molding for lighting: when light is needed not only on the ceiling
We are used to thinking of lighting as a ceiling element. But Molding for backlighting — this is a fundamentally different story: light on walls, in niches, around decorative frames, behind the headboard.
What is a molding with lighting
Molding with lighting on the wall — this is a decorative strip or profile that is attached to a vertical surface and hides an LED strip inside. The light comes out from the side or bottom of the molding, creating a soft light line along the wall. This can be a vertical line from floor to ceiling, a horizontal strip at the level of the headboard, a frame around a panel or niche.
Where does molding with lighting work
TV area. Moldings around the TV panel or along the cabinet are a very popular scenario. Soft light around the screen reduces eye strain and at the same time creates a stylish visual design.
Bedroom behind the headboard. Illuminated moldings behind the headboard create a soft night light that does not disturb the partner and does not interrupt sleep. It is both functional and decorative.
Accent wall. Moldings with backlighting are used to frame accent walls: panels made of wood, stone, fabric, wallpaper with a pattern. The light along the contour highlights the texture and makes the surface lively.
Niche. Niche with backlighting — a classic of modern design. The molding around the perimeter of the niche hides the tape and turns the niche into a glowing element of the interior.
Decorative frames. Moldings form geometric frames on the wall, inside which there is light. This is a "panel" design in a modern interpretation, suitable for both classic and neoclassical styles.
How to choose a molding for an LED strip
The main rule is that the molding must have enough internal space for the tape. A too thin molding will not hide the tape and will not give the desired effect. A good option is molding LB32 from the STAVROS catalogclear geometry, sufficient depth for the tape, possibility of painting in any color. Suitable for both ceiling and walls.
Bagette for LED strip
A baguette for an LED strip is a type of molding with a wider and flatter profile. It is especially good in modern and minimalist interiors: it creates a thin light line without unnecessary elements. It is easy to install, cut at an angle in a miter box, and joined without gaps.
Curtain lighting and hidden cornice: light by the window
A topic that is often underestimated. Curtain cornice lighting is not just beautiful. It is one of the most powerful techniques of evening interior design.
Why curtain lighting is a powerful technique
When it gets dark outside, an unfilled window opening with dark curtains turns into a "black hole" in the interior. Curtain lighting completely changes the situation: the fabric begins to glow from within, creating a feeling of soft, warm, cozy evening lighting. The window becomes a decorative element, not a dark void.
How curtain lighting works
Curtain backlight is an LED strip hidden behind the cornice or in a special profile above the curtains. The light is directed downwards onto the fabric and diffuses along the entire length of the curtain. As a result, the curtain glows evenly, without spots or streaks.
For this, a hidden cornice with lighting for a stretch ceilingis suitable: it removes the rod itself from view and leaves only the fabric and light.
Curtain backlight with a stretch ceiling
This is a separate structural case. With a stretch ceiling, the cornice is usually installed before the ceiling is stretched, and the strip is laid into it in advance. The ceiling fabric is attached flush to the cornice or with a small gap through which light can also escape onto the ceiling. The result is a double effect: both the curtains are illuminated and the ceiling glows.
Where curtain backlight works especially well
-
Living room with large windows — creates a theatrical, representative look.
-
Bedroom — soft light that does not disturb sleep but creates an atmosphere.
-
Kitchen-living room — unites zones with a single light perimeter.
-
Office — reduces strain when working in the evening.
Where to best use LED lighting: scenarios and places
Let's look at specific scenarios where Hidden ceiling lighting it delivers maximum effect.
Along the perimeter of the ceiling
A classic of the genre. Ceiling perimeter lighting creates a feeling of a "floating" ceiling and evenly fills the room with soft light. Suitable for any room in the apartment — from the living room to the bathroom.
Behind the cornice
The strip behind the ceiling cornice — light goes to the ceiling through the space between the cornice and the surface. The cornice creates a shadow underneath, which enhances the feeling of volume and depth of the space.
In niches
A niche with LED lighting is one of the most expressive design techniques. A shelf in a niche, a bed in a niche, a TV in a niche — all of these get a completely different look when illuminated from within.
Above the curtains
Already discussed above. Let's add: warm light 2700–3000K above the curtains gives the coziest effect. Cold white (5000K+) will look harsh and out of place in living spaces.
In the TV area
Backlight behind the TV panel or along the TV wall. Moldings or cornices with backlighting here often work horizontally — as light strips at or above screen level.
In the bedroom behind the headboard
Molding or profile with a strip behind the bed headboard. Light goes down or up, creating a soft halo. Especially effective with dense fabric or a wooden headboard.
In the corridor
In narrow windowless corridors, perimeter lighting is the only way to create pleasant light. The ceiling appears higher, the space wider, the atmosphere calmer.
On the stairs
Lighting along steps or railings with moldings — safe, functional, and very beautiful. Used as a night orientation light.
In decorative moldings
Moldings on walls with LED strips are no longer just lighting, but decorative art. Frames, panels, ornaments — all of this begins to 'breathe' and 'glow'.
In the ceiling level above the kitchen
Perimeter lighting above kitchen cabinets is an additional and very practical scenario. Light reflects off the ceiling and goes down onto the work surface without creating shadows.
How to choose a profile for lighting: clear criteria
When it is clear where the lighting will be, all that remains is to choose the right profile. ceiling trim for LED strip are selected based on several parameters.
Ceiling height
The higher the ceiling, the larger the profile can be. In a room with ceilings of 2.5–2.7 m, a wide cornice will overwhelm the space — it is better to choose a laconic baseboard of medium cross-section. With ceilings of 3 m and higher, a cornice with a rich profile will be appropriate and even necessary.
Room width
In narrow rooms — delicate profiles. In spacious ones — you can afford larger cornices and moldings.
Interior style
Classic requires a profile with relief, multi-tiered cross-section, rich stucco. Modern minimalism — clean lines, almost invisible profile, at most a thin light strip. Neoclassicism — a middle path: moderate relief, clear horizontal line, noble material.
LED strip power
A powerful strip (more than 10–12 W/m) requires good ventilation and sufficient space inside the profile. A weak strip in a large profile may produce too little light. Balance is important.
Direction of light
Up — for ceiling lighting. Down — for niche or curtain illumination. Sideways — for wall moldings. The profile must be initially designed for the required direction.
Niche depth
This is a critically important parameter. If the profile does not allow placing the tape so that it is not visible, it is not suitable for hidden lighting.
Profile material
Polyurethane moldings, cornices, and baseboards — lightweight, moisture-resistant, easy to paint, cut without chipping. An excellent choice for most interiors. Ceiling cornices and baseboards made of solid wood — heavier, but give a feeling of real material. Suitable for classic and natural interiors.
Paintability
Polyurethane profiles are easily painted in any color — to match the wall, ceiling, or furniture. Solid wood profiles can be painted, stained, or varnished.
Ease of tape maintenance
The LED strip has a limited lifespan. After a few years, it may need to be replaced. The profile should allow this — at least theoretically. If the tape is permanently sealed behind a non-removable drywall box, replacement turns into a renovation. A profile with at least technical access to the tape is much more practical.
Combining with other elements
Baseboard for stretch ceiling and LED should match the wall baseboard, cornices, and moldings in a unified system. Chaotic mixing of profiles of different styles and sizes gives a messy result even with high-quality installation.
Mistakes when choosing baseboard and cornice for LED: how not to ruin the result
Practice shows: most unsuccessful results in ceiling lighting are not a problem with the tape or installation. It's a problem with the wrong profile. Let's look at typical mistakes.
The tape is directly visible
The most common mistake. The profile is too small, the edge is too low — and the tape is visible from eye level. Instead of a soft halo, there is a bright, uncomfortable strip of dots. Solution: choose a profile considering the edge height and viewing angle.
Light shines into the eyes
This happens when the tape shines not only upward but also sideways — directly onto the wall or into the room. It occurs if the profile is designed incorrectly or the tape is installed at the wrong angle. Solution: the profile should have a "visor" that blocks side illumination.
Profile too small
A small profile cannot accommodate the tape, connecting wires, and power supply. As a result, some elements stick out or installers "hide" them haphazardly. Solution: check the internal dimensions of the profile in advance.
No space for the power supply
The power supply is a 10–20 cm box that needs to be hidden somewhere. If not planned in advance, it ends up in a visible spot or behind drywall without access. Solution: provide a technical niche or cabinet for power supplies.
Didn't plan access to the strip
After 2–5 years, the strip may need replacement. If access is sealed tight, repairs will be extensive. Solution: plan installation with technical access in mind.
Chose too cold light
Cold white light (4000–6500K) in living spaces creates a hospital or office feel. For residential areas, warm tones of 2700–3000K are optimal. Solution: select the strip by color temperature, not just power.
Didn't account for reflection from a glossy ceiling
A glossy stretch ceiling reflects light brighter and more contrastingly than a matte one. A powerful strip under a glossy ceiling can create too harsh an effect. Solution: for glossy ceilings, use a less powerful strip or a dimmer.
Installed backlighting without main light
Hidden backlighting is not an independent light source, but an additional one. If there is no other light in the room, perimeter lighting creates an uncomfortable semi-darkness. Solution: always design multiple lighting scenarios.
Forgot about joints and corners
In corners, the tape needs to be carefully folded or connected via a corner connector. If this is not done, dark areas will appear in the corners. Solution: use flexible tape or corner connectors, calculate the tape length with a margin.
Did not coordinate the profile with the ceiling height
A wide heavy cornice on a low ceiling is a visual mistake that "presses down" the space. A light narrow baseboard on a high ceiling gets lost and looks poor. Solution: choose a profile proportional to the height and area of the room.
Hidden ceiling lighting: DIY niche or ready-made profile?
A question that often arises during renovation: build a niche from drywall or buy a ready-made profile? Each option has its pros and cons.
Drywall niche. Allows for lighting of almost any scale, any shape. But requires significant construction work, reduces ceiling height by 10–15 centimeters, and leaves no access to the tape after finishing.
Ready-made profile. Installs quickly, requires no construction work, preserves room height, and leaves access to the tape. The only limitation is standard sizes and shapes of profiles, which, however, cover most design tasks.
For most standard apartments and houses, a ready-made profile is a more reasonable solution. Especially when it comes to ceiling cornice for lightingA good profile gives the same visual result as a drywall structure, but without dust, dirt, and three weeks of work.
Profile materials: polyurethane, solid wood, and other options
The market offers profiles made from different materials. Let's break down the main ones.
Polyurethane
Lightweight, moisture-resistant, precise in details. Polyurethane profiles hold their shape perfectly even with temperature and humidity changes. They are easy to cut, glue with liquid nails, and paint in any color. Polyurethane products from STAVROS — a wide selection of profiles for any task: from delicate moldings to large-scale cornices.
Solid wood
Heavier, requires more reliable fastening. But it creates the feel of a living natural material that no polyurethane can replicate. Solid wood products from STAVROS — for those who choose natural material and appreciate its warmth and authenticity.
Plaster
Rarely used due to brittleness. Well suited for decorative elements, but poorly suited for functional profiles with backlighting: it chips at the slightest impact.
Aluminum
Technical material. Aluminum profiles are used in technical niches, behind stretch ceilings, in hidden structures. When exposed, they are not decorative.
How to hide an LED strip on the ceiling: practical schemes
Three main ways to hide an LED strip on the ceiling — and none of them require construction work if you use ready-made profiles.
Scheme 1: Strip in a ceiling plinth. The plinth is mounted with a gap from the ceiling. The strip is glued inside, on the top shelf. Light escapes into the gap between the plinth and the ceiling.
Scheme 2: Strip behind a cornice. The cornice is attached to the wall horizontally, the strip behind its back wall. There is a gap between the cornice and the ceiling for light to escape.
Scheme 3: Strip in a molding. The molding is attached to the wall, the strip inside directs light along the surface. Used on walls, in niches, along decorative elements.
In all three cases, the light source is completely hidden. Only the result is visible — soft, even, diffused glow.
Ceiling cornice: profile and lighting options
The choice of a specific profile is a matter that is resolved at the intersection of interior style, technical tasks, and budget. Ceiling cornice: profile options and lighting — a topic that requires a separate discussion. Here we will say the main thing: a good profile is one that simultaneously solves a decorative and a technical task. Beautiful on the outside — and convenient for placing the tape inside.
It is important to understand this when choosing: some cornices are beautiful but not suitable for LED. Others are functional but lack decorative effect. The best profiles combine both — and it is with such profiles that STAVROS works.
Where to buy baseboard, cornice, and molding for LED: a smart choice
When you understand exactly what you need — it remains to find where to buy. And here it is important not just to find cheaper, but to find the right one. A profile for LED lighting is not just decor, it is a functional part of the lighting system. A mistake in choosing a profile means a mistake in the result.
In the STAVROS catalog you can select Polyurethane moldings, cornices, and baseboards, which are suitable for hidden LED lighting — both on the ceiling and on the walls. There also — Ceiling cornices and baseboards made of solid wood for those who prefer natural material.
Special attention deserves molding LB32 — a universal profile with clear geometry, sufficient depth for the tape, and the possibility of use both on the ceiling and on the walls.
STAVROS: decor that works
STAVROS specializes in decorative profiles, moldings, cornices, and baseboards for interiors — from classic to modern. The range includes both polyurethane products (Polyurethane Items) and profiles made from natural solid wood (Solid Wood Items). All profiles are adapted for LED strip installation and can be used in various lighting scenarios: ceilings, walls, niches, curtains, TV zones.
STAVROS is not just a decor store. It is a system of solutions for those who build interiors consciously, understand the role of each element, and want a result that will work for years.
FAQ: Answers to popular questions
What baseboard is needed for an LED strip on the ceiling?
You need a profile with a sufficiently high edge that hides the strip from eye level, and with a gap from the ceiling through which the light comes out. A regular thin decorative baseboard without an internal niche will not handle this task. It is better to choose specialized profiles designed specifically for baseboard for LED strip on the ceiling.
How does a ceiling cornice with lighting differ from a regular baseboard?
A cornice is a larger and more expressive element. It creates a noticeable horizontal line under the ceiling and carries a stronger decorative effect. A baseboard is more delicate and unobtrusive. For hidden lighting, both options work; the difference lies in the visual result and interior style.
Can lighting be done with a stretch ceiling?
Yes, and this is one of the most beautiful results. The main thing is to plan the structure before installing the fabric. The profile or cornice is attached to the wall, the tape is placed inside, the fabric is stretched with a gap — and the light comes out through the gap between the fabric and the wall. This creates a "floating" ceiling effect.
Where to hide the LED strip on the ceiling?
Best options: in a ceiling plinth, in a cornice, in a drywall niche, or in a special molding. It is important that the profile completely blocks direct visibility of the tape — then the light will be soft and comfortable.
How to choose the color temperature of the tape for the ceiling?
For living spaces — 2700–3000K (warm white). For work areas — 3500–4000K (neutral). Cold white (5000K+) is not recommended for residential interiors.
What is better: spotlights or hidden lighting?
The ideal answer is both, in the right combination. Spotlights provide functional, directional light. Hidden lighting creates atmosphere and makes the interior feel alive. Using only one means depriving the interior of one of the most important layers of lighting.
Can molding be used for lighting on walls?
Yes, and this is a very expressive technique. Moldings with lighting on walls create light lines, frames, and accent zones. They work especially well in the TV area, behind the headboard, and on accent walls. More details in the article about moldings for lighting.
How to understand if the selected profile is suitable for my stretch ceiling?
The main criterion is the height of the profile attachment relative to the level of the stretch fabric. The profile must be fixed above or at the level of the fabric so that there is a gap between the fabric and the wall for light to escape. If the profile is lower, the light will be blocked.
A ceiling without spotlights is not a compromise. It is a conscious choice in favor of high-quality, layered lighting that makes the interior lively, deep, and atmospheric. Skirting boards, cornices, and moldings for LED backlighting are the tools of this choice. And the more precisely they are selected, the better the result.