Article Contents:
- Shaped wooden trim, not a wall slatted panel
- How to tell a workshop task from a finishing task
- Trim, moulding, profile and baguette: what actually differs
- How this appears in the STAVROS catalogue
- How to choose a search term
- Where to use shaped trim in furniture
- Furniture front frame
- Horizontal band of a wardrobe or sideboard
- Drawer front framing for a chest of drawers
- Top and bottom furniture lines
- Summary table by locations
- Decorative molding for a wooden door
- What to check
- Strip dimensions and frame length
- Door and trim
- Profile for a mirror or picture frame
- Length calculation
- Limitation
- Catalog baguettes
- Decorative molding in a wooden panel and boiserie
- How to assemble the grid
- What we do not disassemble
- How to read the cross-section of a wooden profile
- Back plane
- Front side
- How to avoid mistakes
- The same width does not yet mean the same result
- How this affects the project
- What to consider when choosing
- Example of proportions
- Beech, oak, or MDF: what a workshop should choose
- Oak
- Oak
- MDF
- Glue grade: what does "for enamel" and "for tinting" mean
- Quality of sanding
- Summary
- How to choose a profile before manufacturing the facade
- Steps for the project
- What is important to know about undercutting
- The "beautiful slat" mistake
- How to calculate the linear meters of a shaped slat
- What eats up the reserve
- An example of math and practice
- Second example: when cutting is more cost-effective
- Cost of the example
- The cutting map matters more than the total number of meters
- How to use leftovers
- What to do with different facades
- Pattern direction
- How to check the profile before purchasing the entire batch
- What to check
- Samples in the catalog
- How to make a test facade
- What to do with the result
- Smooth or shaped slat: when each is needed
- Smooth
- Shaped
- Carved moldings
- Comparison
- How to make a decision
- When to choose molding instead of a slat
- How to tell by the task
- When the strip doesn't fit
- Where to find wooden strips and profiles
- Order terms
- What to clarify with the manager
- Procedure
- Workshop questions
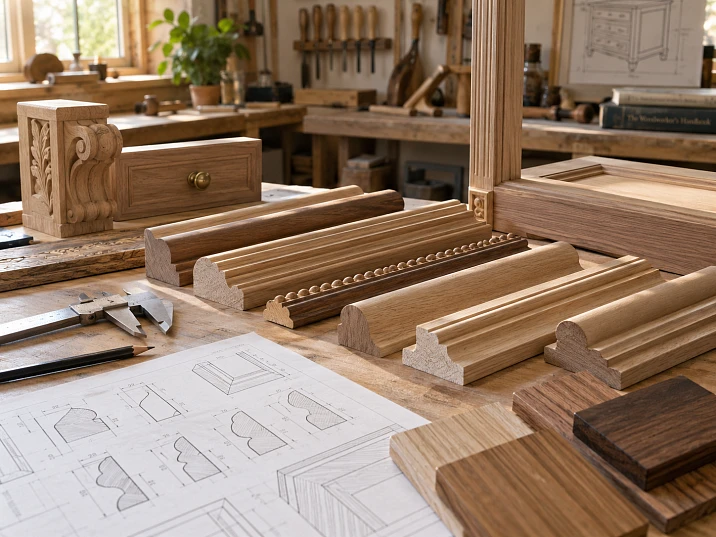
The drawer front is decorated in the drawing with a beautiful frame made of profiled trim, and a week later it turns out that the chosen strip is twice as thick as in the sketch and protrudes above the surface so much that the handle rests against it. It's just that the width in the catalog matched, but the cross-section turned out to be different. For a workshop, such a mistake means redoing the frames on all the fronts in the series. Moreover, it arises not because of bad wood, but because the profile was chosen by the picture, not by the cross-section.
A shaped wooden strip in joinery work is a ready-made long-length profile with a specified cross-section, which the craftsman cuts, joins, assembles into a frame, uses as a band, or places along the edge of a product. This is not a wall slatted panel and not a ready-made frame: here the strip is a semi-finished product from which part of one's own product is made. It should be chosen before manufacturing the front, by the actual cross-section, and purchased according to a cutting plan, not by the total number of meters. Below is an analysis of how to determine the cross-section, select the material, calculate the linear meters and cutting plan, and check the profile before purchasing a batch.
If you need an overview of all types of moulding, not just the shaped strip, start with the article about wooden moulding for furniture fronts. Here only one scenario is considered: a ready-made linear profile as a blank for a joinery workshop.
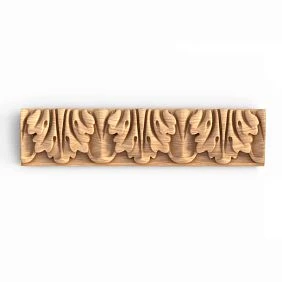
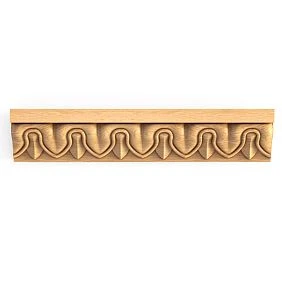
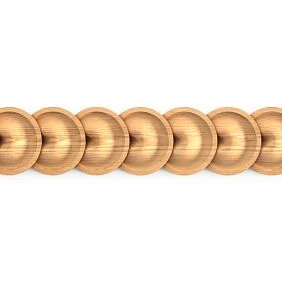
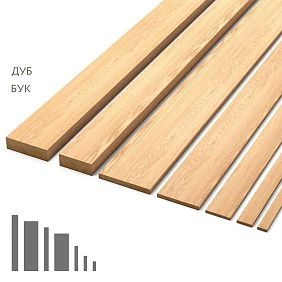

A shaped wooden strip is not a wall slatted panel
The word "strip" brings with it two different products, and confusing them is dangerous. A wall slatted system is a set of vertical planks on a backing, which is mounted on the wall as a decorative panel. This is an interior product with its own spacing, backing, and fastening schemes. A shaped strip in the joinery sense is a separate plank with a profiled cross-section, and work with it begins in the workshop, not on the wall.
What a craftsman does with a shaped strip:
-
cuts into parts according to the drawing;
-
cuts the ends at an angle and joins them;
-
assembles into a frame around a panel or mirror;
-
uses as a band dividing the tiers of a cabinet;
-
places along the edge of the facade as a bounding line;
-
builds into a door leaf, frame, or panel.
The general logic for all scenarios is the same: a joinery product, the place of the profile, the type of section, width and thickness, material, length, cutting, joint, finishing, linear footage, purchase. Each subsequent step depends on the previous one, and skipping steps is costly. For example, you cannot choose the material before the section: a batten of the same width in beech and oak has different prices and different behavior under finishing.
In the STAVROS catalog, such products are found in the mouldings section, and the wooden batten is highlighted as a separate product type. There, for example, batten RK-001 and interior batten RK-002 are presented. The name “interior” should not be misleading: from the workshop’s point of view, it is the same linear profile that can be cut and used in a product. Whether it is suitable is determined by dimensions and the drawing, not by the name.




How to distinguish a workshop task from a finishing task
Ask yourself: who will cut and join the profile? If the strip goes into a facade frame that is assembled by the workshop, this is a carpenter’s task. If the strips are laid in a row on the wall without angled joints, this is a slatted panel. We do not cover the second scenario. The boundary is simple: corner joints, cutting into parts, and fitting to the product dimensions are signs of a blank, not a finishing material.
Our factory also produces:
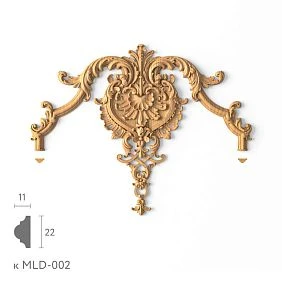
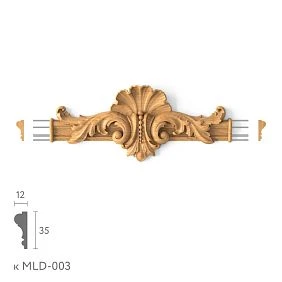
Slat, layout strip, molding, and baguette: what actually differs
In projects, these words are used interchangeably, and there is no strict regulatory boundary between them for furniture. One manufacturer calls a thin strip a layout strip, another a slat, a third a glazing bead. Therefore, it is more useful to understand the practical logic than to search for the "only correct" definition.
| Term | How to perceive it in a project |
|---|---|
| Rail | A relatively simple linear profile, often with a slight relief |
| Layout | A thin profile that divides a field or forms a frame |
| Molding | A more developed decorative section with pronounced relief |
| Molding | A profile for framing, a pronounced frame shape |
| Carved molding | A profile with a repeating ornament |
This table is not a law, but a working dictionary of the workshop. It helps to formulate the task for the supplier: if you ask for a "layout strip," a thin profile for a frame is expected; if you ask for "molding," a noticeable relief is expected.
Get Consultation
How this is visible in the STAVROS catalog
The catalog uses its own terminology. In the "Wooden baguette" section, at the time of checking there were 78 items, and there, for filtering, product types are designated as "molding" and "trim". Ornament types: geometric, floral, acanthus, bindweed, bead, ionic, braid, vegetal, frieze, laurel. Product type: carved or geometric. That is, a baguette in this catalog can be either a simple geometric profile or a carved one. This confirms that names cannot be taken at face value: look at the cross-section and the drawing.
There is also the reverse side. The section description says that wooden baguettes often serve as frames for paintings and mirrors, while carved trim covers a wider assortment. For a workshop this means: if you need a profile for a mirror frame, you will find it both in baguette and in trim. Do not limit your search to one word.
How to choose a word for search
If you need a simple linear element, search for "slat". If you need a thin frame, search for "molding strip" or look at thin slats. If you need a profile with a noticeable shadow and relief, search for "molding". If you need a frame with an ornament, look at "baguette" and "carved trim". Then open the product card and look at the drawing: the word gives direction, the drawing gives the answer.
Where to use shaped slats in furniture
Furniture is the most frequent customer of shaped slats. Here the profile does the work of a graphic line: frame, belt, border. Let's look at four typical places.
Furniture facade frame
A flat facade made of panel or MDF looks empty. A frame made of slats around the perimeter or with an indent from the edge turns it into a paneled one. The craftsman cuts four parts, miters the corners at 45 degrees and glues the finished frame onto the facade. For this task, the thickness of the profile and its relief are especially important: they determine how much the frame will protrude above the plane.
Horizontal belt of a cabinet or sideboard
The profile works as a line dividing the tiers. It does not form a closed contour, but runs along the entire width of the carcass. Length is important here: a belt on a cabinet 900 mm wide requires a strip no shorter than this size without a joint, and a joint in the middle of the belt looks careless. The standard strip in the STAVROS catalog has a length of 2400 mm, which means that for a single belt up to about 2.3 m wide, no joint will be needed.
Drawer front framing
For a small drawer front, the correct profile scale is critical. A 150 mm high drawer with a 40 mm wide frame will leave a 70 mm free field inside, and the frame will dominate. A 15 or 24 mm wide profile is more proportional for such a front. The rule is simple: on each side, the frame should occupy no more than about one-fifth of the front height if you want to leave a free field. This is a guideline, not a norm: heavier frames are acceptable on classic furniture.
Also check the handle. If the handle is centered on the drawer, the frame should not come right up against it: leave a gap for fingers.
Top and bottom lines of the furniture
The profile can be used together with a cornice or plinth, but do not mix their functions. The cornice completes the top of the cabinet and has a projection that conceals the joint. The plinth covers the bottom and the joint with the floor. A rail in these places serves as an additional line, not a replacement. If you are trying to replace a cornice with a shaped rail, check that it can support the required projection and that the cabinet ends are covered.
Summary table by locations
| Place | What to check |
|---|---|
| Front frame | Thickness, projection, free field, gap to handle |
| Cabinet waist band | Length, joint, profile width relative to tier |
| Dresser drawer | Profile scale relative to facade height |
| Top and bottom of the cabinet | Line function: accent, not a replacement for the cornice |
Shaped rail for a wooden door
The door leaf also uses the profile as a ready-made blank. The profile is used for a frame on a flat leaf, for an additional panel grid, for a decorative band, for framing the central part, and for finishing the architrave. This section does not turn into a door-making guide. The task is narrow: how to choose a ready-made profile for an already designed leaf.
What to check
The thickness of the leaf and the allowable protrusion of the profile above it. If the door leaf is 40 mm thick and the profile protrudes by 23 mm, the structure will become bulky and will catch on the jamb or adjacent elements when opening. The width of the field: the profile should not cover more than the project provides for. The number and position of joints: on a door leaf the frames are large, so their joints on the long sides are noticeable.
The next check concerns movement. The door opens and closes, and protruding profiles may catch on the threshold, jamb, or another door. Model the position of the leaf and assess the clearances before ordering.
Dimensions of the strip and length of the frame
The height of the door leaf is about 2,000–2,100 mm. A 2,400 mm long strip covers the height without a joint, which is convenient for the vertical lines of the frame. But for a vertical door part 2,000 mm long, 400 mm remains from a 2,400 mm strip, which is enough for one or two short parts. This is important for cutting, which is discussed below.
Door and finish
The door leaf is usually finished in one go, together with the applied profile. Therefore, the profile species must match the leaf species, and the finish must be applied as a single layer. If the leaf is oak, choose an oak profile of the same glue-up grade, otherwise the difference will show after a clear finish.
Profile for a mirror or picture frame
A frame is the classic use of a profile. Four pieces, four 45-degree joints, and the entire geometry is determined by the mirror size and profile width. Here the profile is called a baguette, and the frame-making process itself is left to the workshop. Ready-made frames are a separate topic, which we do not cover.
Check seven parameters.
-
Frame width: how much the profile overlaps on each edge of the mirror.
-
Profile depth: how far it protrudes from the wall plane.
-
Mirror size: the inner dimension of the frame must be smaller than the mirror by the rebate amount.
-
45° angle: the precision of the cut determines how tight the joint is.
-
Four joints: their quality determines the appearance of the entire frame.
-
Profile pattern: with asymmetric profiles, the placement of the relief matters.
-
Wood grain direction: the longitudinal direction of the fibers on all four parts should read consistently.
Length calculation
For a 600 × 800 mm mirror with a 40 mm wide profile, the outer frame size will be 680 × 880 mm with a 40 mm overlap on each side (if the profile lies entirely over the mirror). Length of parts along the outer edge: two at 880 mm and two at 680 mm, totaling 3,120 mm. A single 2,400 mm strip will not be enough; two are needed. This is an example of the logic, not a construction recommendation: a real frame may have a rabbet, a back panel, and a different overlap scheme.
Limitation
Not every profile is suitable for a frame. If the profile is flat and without a rabbet, the mirror cannot be secured. In this case, an additional part or a different construction will be required. Check the drawing to see whether the profile has a seat.
Catalog baguettes
In the STAVROS baguette section there are samples: at the time of checking, the "Wooden baguette samples" set cost 180 rubles. For framing projects this is a reasonable step: before ordering strips, look at and hold the profile in your hands.
Shaped molding in a wooden panel and boiserie
The molding in a panel works as the framework of the composition. It forms a grid of frames, divides the fields, highlights the central section, and connects the overlays and rosettes into a single pattern. A panel made of frames with applied elements looks cohesive if the profile lines continue one another.
The key question here is how the profile combines with the elements within it. If a rosette is placed inside the frame, a free field should remain between it and the profile. If an overlay extends onto the profile, its thickness adds to the thickness of the frame. A panel composition relies on the general rules for selecting decor, which are described in the article about wooden elements for panels.
How to assemble the grid
Mark the central axis on the wall or on the layout, the offsets from the corners, and the field dimensions. The profile is joined at the intersections with a miter or butt joint. For right-angle intersections, separate corner elements are often used: according to the catalog description, they eliminate the need to cut the molding at 45 degrees and cover the joint. This noticeably speeds up the work and improves repeatability on a large panel, so it makes sense to look at the corner elements in the trim section.
What we do not cover
This does not cover slatted panels with spacing, acoustic solutions, and vertical slats for TV zones. That is a different product. We are interested in the profile that the craftsman cuts and joins into frames.
How to read the cross-section of a wooden profile
The cross-section is what is visible on the end of the plank if you saw it across. It is what determines how the profile behaves in the product. Width is only one of its characteristics, and you cannot choose based on it alone.
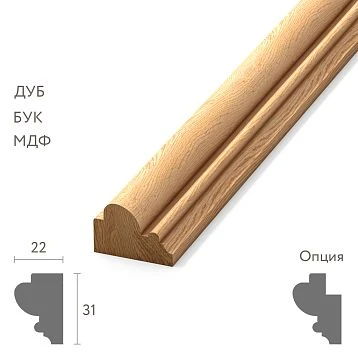
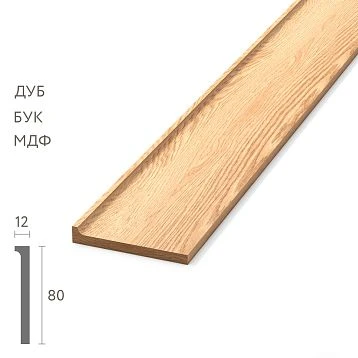
In STAVROS catalog cards, dimensions are indicated by letters. For the RK-001 slat, A, C, and L are specified: A is the width, C is the height or depth of the profile, L is the length of the plank. For example, in the item "15 × 5 × 2400", the width is 15 mm, the depth is 5 mm, and the length is 2400 mm. The cards have a "Product drawings" section where the shape of the cross-section can be seen.
What needs to be understood from the cross-section:
-
how much the profile protrudes above the facade (dimension C);
-
whether a handle can be installed nearby without hitting the profile;
-
does it conflict with the panel;
-
is it possible to make a clean corner joint (the cut plane and the relief pattern);
-
how much flat surface remains for mounting (the back plane).
Back plane
This is the face with which the profile rests on the base. If it is wide and flat, gluing is reliable. If the profile has a rounding or bevel on the back side, the bonding area decreases, and additional fasteners will be needed. For thin slats of 15 × 5 mm, the back plane is almost equal to the width, while for profiles with deep relief it can be noticeably narrower.
Front side
The relief of the front side determines how the part will play with light. A profile with a bead and a cove produces two shadows, while a flat one produces almost none. Assess where the light falls in the room: near a window the relief reads more strongly, while in a shaded corner it almost disappears.
How to avoid mistakes
Always open the drawing and compare it with the scale of the project: place a full-size printout of the section against the facade. A profile that looks thin on the screen may turn out to be more massive than needed at real size.
The same width does not yet mean the same result
Two battens 30 mm wide can be completely different. A flat 30 × 6 mm and a shaped 30 × 18 mm differ threefold in depth. The latter creates a deeper shadow, protrudes further above the surface, requires more space around it, and visually appears more massive. At the same catalog width, these are two different products.
The STAVROS catalog provides an example using real data. The RK-001 batten comes in variants 15 × 5 mm, 24 × 5 mm, 40 × 5 mm, 70 × 7 mm, 90 × 10 mm, as well as 60 × 23 mm and 80 × 23 mm. Note the last two: at widths of 60 and 80 mm, the depth reaches 23 mm, while the 90 × 10 mm variant at a width of 90 has a depth of only 10 mm. That is, 90 mm of width gives a smaller protrusion than 60 mm of width in another variant. Width does not indicate massiveness.
How this affects the project
A 60 × 23 mm profile used as a frame on a facade will give a shadow and protrusion comparable to the thickness of a panel. A 90 × 10 mm profile will give a wide but flat edging. The effects are different, and the cost is different: in beech, the first costs from 4,420 rubles per 2400 mm strip, the second from 3,350 rubles (prices at the time of checking).
What to consider when choosing
The depth of the relief determines the shadow. The cross-section profile determines the character of the line. The protrusion determines how much clearance is needed to adjacent parts. The scale determines the relationship with the dimensions of the product. Before choosing, write down four numbers: width, depth, strip length, and the size of the free field on the product. Compare against them, not against the general impression from a photograph.
Example of proportions
Door facade 396 × 716 mm. A frame made of 24 mm wide profile with a 30 mm indent from the edge gives an inner field of 276 × 596 mm. If you take a 70 mm wide profile, the field shrinks to 216 × 536 mm, and the facade turns into a wide frame with a small window inside. A difference of 46 mm in width changes the proportions of the entire door, so check the free field before ordering.
Beech, oak, or MDF: what a workshop should choose
The choice of material is determined by the finish, not only by price. Before choosing, decide what the batten will be coated with: enamel, lacquer, oil, or tint.
Beech
Beech is dense, non-porous, with a uniform surface. As stated in the manufacturer's notes, it is most often used for products intended for enamel finishing. It is suitable when painting is planned, a calm uniform surface is needed, and the wood grain should not show through.
Oak
Oak is dense, porous, with a pronounced texture. It is chosen when the texture should remain visible: under oil, lacquer, or tinting. It is also suitable when the batten should match oak furniture.
MDF
The STAVROS mouldings section names oak, beech, and MDF in its title, and the filters include the value "Solid wood/MDF". This means some profiles are produced in MDF. But the materials cannot be considered interchangeable: a specific profile may exist only in solid wood. Check the product page for each item. For RK-001, the product page lists only beech and oak.
Glue-up grade: what "for enamel" and "for tinting" mean
For a solid wood profile glued from lamellas, one more characteristic matters. The manufacturer states that "for enamel" means the wood lamellas are glued without color and texture matching: contrasting tonal and textural differences are possible, and such a blank is chosen for opaque finishing. "For tinting" means glue-up with color and texture matching: differences are possible but less noticeable, and this blank is chosen for semi-transparent finishing.
Hence the practical conclusion. If you are going to paint the batten with enamel, choose the "for enamel" option: it is cheaper by logic and hides differences between lamellas. If you are going to tint or apply clear oil, choose "for tinting", otherwise the difference in lamella color will show through the coating. This characteristic must be recorded in the specification along with the wood species.
Sanding quality
The catalog distinguishes between "Standard" and "Prestige". Standard is machine sanding at a more attractive price. Prestige is detailed hand sanding, after which the products require no additional work. For RK-001, the product page states "Prestige". For a workshop, this affects time: a hand-sanded part is ready for finishing, while a machine-sanded one will need additional work.
There is also a practical warehouse feature. According to the manufacturer's responses, most items in the warehouse are stored unsanded, so shipping from the warehouse takes three business days: time is needed for sanding and packing. If the item is not in stock, the average production time is 5–10 business days.
Summary
| Task | Material | Bonding grade |
|---|---|---|
| White or colored enamel | Beech | For enamel |
| Oil, lacquer, visible texture | Oak | For tinting |
| Tinting beech | Beech | For tinting |
| Profile for painting, there is an MDF option | MDF, if such a profile is produced | Check on the product card |
For price comparison, let's take two sizes of RK-001 for a 2400 mm strip. At a size of 24 × 5 mm, beech costs 840 rubles, and oak costs 1,150 rubles: oak is about a third more expensive. At a size of 80 × 23 mm, beech costs 5,720, oak 8,600: the difference is higher, about half. On a large series, this difference becomes significant, so don't take oak "just in case" if the strip will be painted with enamel anyway.
How to choose a profile before manufacturing the facade
The correct sequence is: catalog, article number, actual cross-section, size, facade drawing, frame, cutting, production. The bad sequence is the reverse: the facade is already ready, you found a beautiful strip, and you're trying to fit it in. The first saves time, the second creates rework.
Why does order matter? Because the profile size determines the facade dimensions. If you've decided to make a frame with an inner field of 276 mm, you need to know the profile width in advance. Otherwise, you'll have to adjust the door dimensions to a randomly found profile, and that reshapes the entire construction.
Steps for the project
-
Determine the function of the profile: frame, band, edging.
-
Find candidates in the catalog by dimensions A and C, material, and type.
-
Download the drawings and print the cross-sections at a 1:1 scale.
-
Attach the cross-sections to the facade sketch and evaluate the proportions.
-
Choose one product code and lock in the dimensions in the drawing.
-
Only after that, develop the cutting plan and facade dimensions.
The manufacturer itself recommends preparing a design project before ordering: you can download product drawings from the website or order a project. For a workshop, a profile drawing in its own project is a mandatory element.
What is important to know about cutting to size
According to the manufacturer's responses, the service of cutting or sawing to your size is not provided. This means you will receive the 2400 mm strip in one piece, and the workshop will cut it. This determines the entire subsequent calculation: the strip length cannot be changed, and the leftovers remain yours. Plan the cutting with this in mind.
The "beautiful slat" mistake
The profile was chosen from a photo and you liked it. Then it turns out that at real size it is more massive or thinner than it seemed. Everything you see on the screen is scaled to the same image size, and the scale is lost. So look at the numbers and the drawing.
How to calculate the linear meters of shaped slats
For a single rectangular frame, the formula is short: two height dimensions plus two width dimensions. A 680 × 420 mm frame gives 2 × 680 + 2 × 420 = 2,200 mm. The mathematical linear meterage is 2.2 m. But the purchasing meterage should not equal the perimeter exactly.
What consumes the margin
Corner cutting: when cutting at 45 degrees, the piece along the long edge must be longer than along the short edge, and this must be taken into account in the part dimensions. Defective section: a solid wood strip may have a section that you will reject. Pattern matching: if the profile has a repeating ornament, the corners will have to be aligned by pattern, and losses will increase. Technological remainder: what is left of the strip and does not fit into the next part. Standard strip length: for RK-001 it is 2,400 mm, and this limits the cutting scheme.
There is no universal margin percentage. It depends on the profile, the layout, and the craftsman's experience. Therefore, it is better to calculate the cutting plan than to set aside a percentage.
Example of mathematics and practice
Twelve fronts with a 680 × 420 mm frame. The total perimeter is 12 × 2.2 = 26.4 m, that is, exactly 11 strips of 2.4 m. Mathematically, 11 strips are enough.
In practice, it is different. One strip fits parts of 680 + 680 + 420 + 420 = 2,200 mm, leaving 200 mm, from which saw cuts are subtracted. No next part fits into the remainder, because the shortest is 420 mm. This means one strip yields exactly one frame. Checking by enumerating cutting schemes taking into account a 4 mm saw cut confirms: for 12 frames, 12 strips are needed, not 11. The difference is one strip, but in a series of six frames or twenty it scales.
Second example: when cutting is more efficient
A small 300 × 200 mm frame for a drawer: perimeter 1,000 mm. Two frames per strip give 2,000 mm, remainder 400 mm. Twelve frames mean 12 m, that is, mathematically exactly 5 strips. But 5 strips of 2.4 m are exactly equal to 12 m, and with saw cuts they will not be enough. In practice, 6 strips are needed. Here the remainder on each strip provides margin for saw cuts and defects.
The two examples show different situations: in the first, the cutting plan does not allow packing several frames onto a strip; in the second, it does, but the mathematical minimum is unattainable. Neither is solved by a percentage.
Example cost
Let's take RK-001 measuring 24 × 5 × 2400. For 12 frames you need 12 planks. In beech, one plank costs 840 rubles, totaling 10,080 rubles. In oak, one plank is 1,150 rubles, totaling 13,800 rubles. Prices are as of the time of checking; before ordering, check the product page. A rigid packaging frame for 390 rubles is added to the order cost for safe transport, as stated on the product page.
The cutting map matters more than the total number of meters
For a facade series, it's better not to think in terms of "28 meters needed." A reliable record looks like this: product code, plank length, cut parts, number of frames, number of whole planks. From it you can see how many whole planks you actually need to buy.
Example structure:
| № | Article | Detail | Length, mm | Quantity |
|---|---|---|---|---|
| 1 | PROFILE-01 | facade vertical | 680 | 24 |
| 2 | PROFILE-01 | facade horizontal | 420 | 24 |
Next you create cutting layouts: which parts fit on one plank. For the example above, there is one layout: two verticals and two horizontals per plank, with 200 mm remaining. How many planks: the number of frames, that is, 12. Record the leftovers: 200 mm per plank is 2.4 m in total, and you immediately see that there is almost no real usage.
How to use leftovers
Leftovers 200 mm long are useless for frames, but they will come in handy for samples, finish tests, and adjustments. Don't throw them away: a test finish on a leftover from the same batch gives an accurate picture of the color. If the leftover is longer, it can be used for small parts of another project.
What to do with different facades
If the facades are different sizes, the cutting map becomes more complicated. Gather all the parts into one list, sort them by descending length, and lay them out on planks so that leftovers are minimal. Parts of 680 mm are better combined with 420 and 200 than with other 680s if they don't fit. Allow for a 3–4 mm kerf per cut and an allowance for trimming.
Grain direction
For shaped profiles with ornament or relief, cutting also follows the pattern. If a symmetrical pattern is needed at the corners of the frame, the parts are cut from adjacent sections of the strip. Then waste increases, and the cutting plan must be drawn on paper before ordering.
How to check the profile before purchasing the entire batch
Workshop workflow: one strip, a trial cut, one corner, one facade, finishing, approval, purchase. Skipping steps is expensive.
What to check
-
Corner quality: tightness of the joint after sawing, whether there is chipping on the edge.
-
Relief: clarity of lines, absence of chips and machining marks.
-
Sanding: whether the surface matches the declared level, whether rework is needed.
-
Reaction to finishing: how enamel or tinting lays on the relief.
-
Scale: how the frame looks on a real facade.
-
Color after coating: for oak and beech it differs from what is expected.
-
Combination with overlays and handles: do the elements conflict?
Samples in the catalog
The STAVROS catalog offers sample sets. For example, a set of OMLD-005 molding samples costs 5,400 rubles at the time of checking, while wooden baguette samples cost 180 rubles. To test an individual strip, you can order a single piece: the manufacturer ships from one item.
How to make a test facade
Take one strip, cut it into parts for one frame, assemble it dry, and then with glue. Glue it onto a test facade or a scrap piece of the panel, and finish it according to the series scheme. Evaluate the result on site, under the lighting in which the furniture will stand. If the result is satisfactory, assign APPROVED status and purchase the batch.
If something is wrong, it is better to find out on one frame. Ordering 12 strips without a test means risking 10,000–14,000 rubles.
What to do with the result
Record in the specification the article number, dimensions, species, gluing grade, sanding quality, finishing scheme, and inspection date. Keep the test frame as a reference. A month later, with a new batch, compare the very first part against it.
Smooth or shaped strip: when each is needed
The choice between a smooth and a shaped profile is determined by the purpose of the item, not by fashion.
Smooth
Suitable when geometry matters more, a calm facade is needed, and the product is in a modern style. A smooth rail sets the line and creates almost no shadows. It works well on minimalist facades, where the frame is needed for the pattern rather than for relief.
Curved
Suitable when the profile itself should form the relief: classic, neoclassic, boiserie, door leaves, frames, decorative facades. A curved rail creates shadows, adds volume, and allows you to do without overlays.
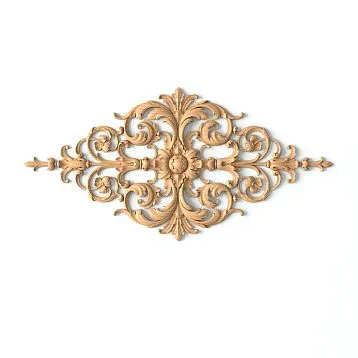
Carved millwork
Needed when what is required is no longer just a profile, but a repeating ornament: braid, laurel, bead-and-reel, acanthus, ionic, frieze. The catalog of carved moldings sections offers such types of ornaments, and the product type can be selected as “carved” or “geometric.” Carved moldings are more expensive and require more careful finishing, because the relief gets clogged with thick paint.
Comparison
| Type | When to choose | Limitation |
|---|---|---|
| Smooth rail | Modern facades, calm geometry | Little relief, precise joint needed |
| Shaped trim | Classic, doors, frames, boiserie | Requires space, deeper shadow |
| Carved molding | Ornament needed along the line | More expensive, more complex finishing |
How to decide
Look at the piece as a whole. If it already has carved overlays and rosettes, it is better to choose a calmer profile so as not to create competition. If the piece is smooth and you need an accent, choose a shaped one. If in doubt, place paper cross-sections of both options against the sketch and compare.
When to choose molding instead of trim
Trim is chosen when a relatively simple linear element is needed and the profile must work structurally within a frame. It is lightweight, inexpensive, cuts and joins well.
Molding is chosen when the cross-section is more pronounced and the decorative line should be more independent. Molding is heavier in pattern, and it is more often placed in prominent places: on cabinet waistbands, on the facades of classic furniture.
Carved baguette is chosen when ornament becomes the main focus. A carved baguette is itself a decoration, and no additional overlays are required alongside it.
How to distinguish by purpose
If you want a line, choose a slat. If you want a line with character, choose a molding. If you want an ornament, choose a carved baguette. Look at the prices in the catalog: slat RK-002 costs from 1,010 rubles, molding MLD-056 from 580 rubles, MLD-013 from 1,150 rubles, baguette K-025 from 890 rubles. Price does not determine the type: it depends on the size and complexity of the profile. The main thing is to focus on the drawing.
Details on choosing molding for furniture are described in the article about solid wood molding for furniture. And if you need a thin frame profile, compare with the material about wooden trim for furniture facades.
When a slat is not suitable
If a large protrusion is required to hide a joint, a slat will not replace a cornice. If a deep relief with shadow is needed, a thin flat slat will not create it. If the profile must bear a load, a decorative strip is not intended for that. In these cases, change the type of product.
Where to find wooden slats and profiles
The purchasing order follows the project: first function and cross-section, then article number, then sample, then batch. Route through the STAVROS catalog:
-
Section Wooden planks for linear profiles;
-
Rail RK-001 with seven sizes in beech and oak;
-
Interior Rail RK-002 for more pronounced profiles;
-
General section Wooden profile for furniture: mouldings, cornices, skirting boards, architraves;
-
Section carved trim and wooden baguette for ornamental profiles.
Order conditions
According to the manufacturer, items are shipped from one piece. In-stock goods are shipped within three business days; made-to-order production takes on average 5–10 business days. Delivery is carried out across Russia and to CIS countries by transport companies. A packaging frame for 390 rubles is added to the order cost. The manufacturer accepts non-standard items according to a drawing, but only batch orders. Painting of items is performed for orders amounting to 150,000 rubles or more. See the prices for items in the product cards; prices are as of the time of checking.
What to clarify with the manager
Availability of the entire required batch: in the RK-001 product card, availability varies by size; for example, 15 × 5 mm in beech had 283 pieces, while 24 × 5 mm in oak had only 10. If the series requires more than is in stock, plan for a lead time of 5–10 days. Gluing grade for your finish. Section drawing. Terms for ordering a non-standard size profile and the minimum batch.
Procedure
-
Determine the function of the profile and its place in the product.
-
Select candidates in the catalog by A and C.
-
Download the drawings and print the 1:1 cross-sections.
-
Select the product code, wood species, and glue grade.
-
Calculate the cutting layout and the number of slats.
-
Order a single slat or a sample and check it.
-
Approve the product code and order the batch.
-
Before placing your order, check the price and availability on the product page.
Workshop questions
What is a shaped wooden slat?
This is a long-length solid wood profile with a specified cross-section that a craftsman cuts into parts, joins at an angle, and integrates into a product: a facade, door, frame, or panel. It is a blank, not a finished frame or a wall panel.
How does a shaped slat differ from a molding?
There is no single regulatory boundary. In practice, a slat is a simpler linear profile, while a molding has a more elaborate decorative cross-section. The decision should be based on the cross-section drawing, not the name.
How does a batten differ from a wooden trim strip?
A trim strip is usually a thin profile for a frame or dividing a field. A batten can be either thin or solid. At STAVROS, thin battens sized 15 × 5 and 24 × 5 mm are close to a trim strip in purpose.
Where to use a shaped batten in furniture?
Within facades, waistlines of cabinets and buffets, framing of dresser drawers, and the top and bottom lines of the carcass. For each spot, check the protrusion and the scale of the profile.
Is a wooden batten suitable for a door leaf?
Yes, as a frame, an additional grid, or a decorative waistline. Check the allowable protrusion above the leaf and the clearances when opening, and coordinate the species and grade of the glue-up with the leaf.
How to choose the width of a batten for a furniture facade?
First determine the required free field inside the frame, then subtract it from the facade size taking the setback into account. Narrow profiles suit small drawers, wider ones suit large doors. Check on a paper mock-up.
How to correctly calculate the linear footage?
Calculate using the cutting map: parts, strip length, layout schemes, number of whole strips. The perimeter footage gives only the minimum. In the example, 12 frames of 680 × 420 mm require 11 strips by footage, but 12 by cutting.
How do you miter a shaped rail in corners?
Usually at 45 degrees with precise end trimming. First practice the angle on an offcut of the same plank. Keep in mind that the manufacturer does not cut to your size, so the cutting is done by the workshop. For intersections, you can use ready-made corner elements that do not require trimming.
What to choose: oak, beech, or MDF?
Beech for enamel, oak for oil, lacquer, and tinting. Check MDF against the card of the specific profile: not every one has such a version. Choose the gluing grade separately: "for enamel" or "for tinting."
Where to buy a decorative solid wood rail?
In the STAVROS catalog in the sections Wooden planks и molding and profiles. Before ordering, check the current price and availability in the product card.
Prices, RK-001 dimensions, gluing grades, lead times, and order terms were verified against STAVROS catalog cards at the time of preparation. Calculations are approximate; prices are for a 2400 mm plank.