











Article Contents:
- Can You Remove Wall Molding Without Damaging the Wall?
- Set a realistic definition of success
- Decide whether to preserve the old trim
- Identify the substrate before selecting a tool
- Special caution for older U.S. homes
- Construction adhesive beneath the profile
- Painter's caulk along the perimeter
- Hidden pins or brads
- Decorative trim is not the same as baseboard
- Make a minimal, practical removal kit
- Protect the wall and neighboring finishes
- Consider outlets, switches, and other obstructions
- Pick the least visible section
- Read the failure pattern
- Decide whether to stop and call a professional
- Step 1: Label and document the existing layout
- Step 2: Score the complete paint boundary
- Step 3: Open the smallest practical starting gap
- Step 4: Work a few inches at a time
- Step 5: Treat corners as separate attachments
- Step 6: Investigate any sudden hard stop
- Step 7: Choose between saving the molding and saving the wall
- Step 8: Remove the strip without twisting it
- Step 9: Assess the wall before scraping adhesive
- Painted drywall: protect the facing paper
- Old plaster: check for hollow or cracked areas
- Wallpaper: plan for a damaged strip
- Wood, MDF, and finished panels
- Tile, stone, and other hard finishes
- Identify whether residue is raised or bonded into the finish
- Do not assume that heat releases cured glue
- Do not apply an unidentified solvent
- Keep dust and debris under control
- First determine whether paper is sound
- Feather a gouge rather than building a ridge
- Repair exposed drywall paper carefully
- Inspect with side light before priming
- Why primer matters
- Four questions to ask before reusing a removed strip
- Replacement profiles: four verified STAVROS options
- Do not choose a new profile by visible width alone
- Replace the composition, not merely the product
- Confirm a clean surface before drawing lines
- Keep margins and clearances consistent
- Calculate the minimum linear footage
- Prepare the backing surface first
- Dry-fit the full frame before opening the adhesive
- Choose an approved adhesive and follow the label
- Finish joints without recreating future removal problems
- Consider a different design to minimize the old repair footprint
- Removing molding beside cabinets and built-ins
- Working around a door casing or window trim
- Walls with chair rails and wainscoting
- Removing trim from a humid or damaged wall
- Separate removal, wall repair, and new trim costs
- Build a materials list from the cut plan
- Avoid unsupported labor and material price claims
- Can I remove polyurethane molding and reuse it?
- Is it possible to remove glued wall trim without tearing drywall?
- How do I remove wall molding from a painted surface?
- Should I use a heat gun to soften molding glue?
- Can I dissolve construction adhesive with acetone or alcohol?
- What should I do if brown drywall paper peels off?
- Can new molding cover adhesive marks from the old frame?
- Do I need to remove the baseboard before changing wall frames?
- Does a removable molding system exist?
- How long must the repaired wall dry before installing new trim?
- Can I change from picture frames to more elaborate wall panels?
- Is painting the entire wall necessary after removing molding?
- Final project checklist
- A better result begins with the wall, not the trim
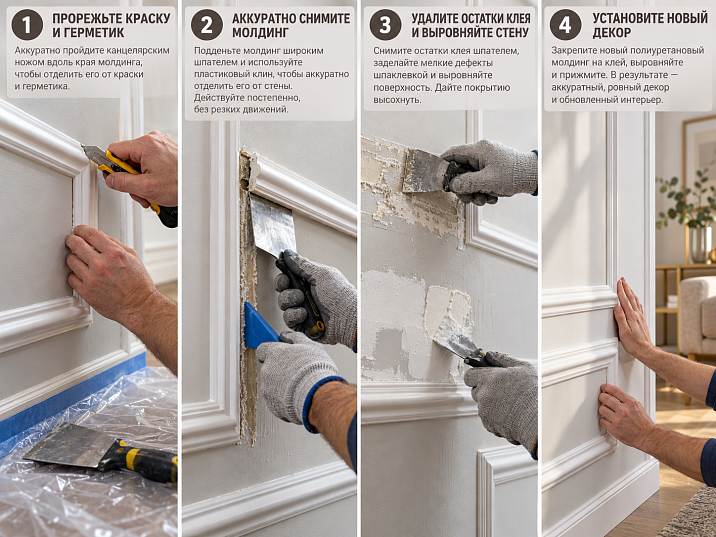
Removing polyurethane wall molding is a renovation job, not simply a matter of pulling a decorative strip off the wall. The safest result depends on what holds the molding in place, whether paint and caulk bridge its edges, and how well the drywall, plaster, wallpaper, or paneling beneath it can resist separation. A strong installation adhesive may hold more tightly than the paper face of drywall. In that case, saving the wall may require sacrificing the molding. This guide explains how to remove wall molding methodically, how to repair the surface you uncover, and when it makes sense to install replacement trim.
For U.S. homes, the biggest distinction is between removing applied picture-frame molding from a painted wall and removing a baseboard or a piece of structural finish carpentry. Both can involve scoring paint and working gradually, but baseboards may be nailed through studs, while polyurethane wall-frame trim is frequently bonded with adhesive. Never assume the same fastening system applies. If you plan to replace the design, begin by exploring the sizes and shapes in the STAVROS polyurethane wall molding collection; new profiles should be selected after the old wall is assessed, not before.


Can You Remove Wall Molding Without Damaging the Wall?


Set a realistic definition of success
A clean removal is possible when the adhesive bond releases before the wall finish fails. It is not guaranteed. A strip fixed over a well-prepared, sound coating may detach with limited patching; another strip bonded to the drywall paper can lift the paper as it comes away. A wall repainted several times may also have one continuous paint film connecting the decorative profile to the field of the wall. Pulling without first cutting that film can peel paint far outside the intended outline.
Think of success in three levels. The best outcome leaves the wall ready for light touch-up. A common outcome needs joint compound, primer, and repainting. The difficult outcome requires repair of torn drywall facing or loose plaster before the new decoration can be mounted. A responsible plan includes all three possibilities and an allowance for surface repair.
Наша фабрика также производит:




Смотреть весь Каталог продукции
Decide whether to preserve the old trim
If the old molded frame will be discarded, its material is less important than the underlying wall. You can cut a long strip into manageable sections where appropriate rather than levering a six-foot piece away all at once. If you hope to reuse the molding, document its dimensions, mark each component's original position on removable labels, and use only the force that the profile can tolerate without bending or cracking. Most standard rigid polyurethane profiles are not intended to flex around a large arc.
Saving all four corners of a picture-frame layout may be unrealistic when the mitered joints have been filled and painted repeatedly. The corner compound can act like a continuous bridge. Separating one side without scoring these joints often transfers the stress into the adjoining pieces.
Получить консультацию
Identify the substrate before selecting a tool
Painted drywall, plaster, plywood, MDF paneling, ceramic tile, and wallpaper all react differently. Drywall paper is vulnerable to peel forces. Plaster may be strong in compression yet crumble along an old crack. Finished wood can be permanently gouged by a thin metal pry bar. Wallpaper may detach from the wall instead of separating from the adhesive. A tool that works on one substrate may be too aggressive for another.
Before doing anything visible, look for an inconspicuous starting edge and determine what is behind the trim. If you are unsure whether the wall contains brittle historic plaster, concealed cables, or vulnerable finishes, stop and get appropriate help instead of trying increasingly forceful tools.
Special caution for older U.S. homes
Painted surfaces in houses built before 1978 may contain lead-based paint. Disturbing them can create hazardous chips or dust. The U.S. EPA recommends lead-safe renovation practices and, for applicable work, a certified renovation contractor. The rules for paid work and owner-occupied DIY projects differ; verify the current EPA and state requirements before cutting, scraping, or sanding old paint. Do not rely on a dust mask or ordinary vacuum as proof that work with suspected lead paint is safe.
Why Moldings Stick: Adhesive, Caulk, Paint, and Fasteners
Construction adhesive beneath the profile
Many decorative polyurethane strips are attached with beads or lines of construction adhesive. Some adhesives remain slightly flexible; others cure to a relatively hard bond. You usually cannot identify a product simply from the color of the material visible at an exposed end. Manufacturer instructions, original invoices, and leftover packaging are more reliable than visual guesses.
A bead of adhesive can create isolated points of strong resistance. A broad layer can bond much of the profile's back surface to the wall. Both situations require careful separation; pulling on one end can create a large peeling force at the next bonded point. Treat the adhesive as an unknown until a small test shows how the joint actually fails.
Painter's caulk along the perimeter
Caulk often fills the narrow gap between molding and wall. It can feel rubbery and may cut more easily than cured construction adhesive, but it can also carry paint that bridges both surfaces. Slice the caulk and paint skin along both exposed edges. Do not push the blade into the drywall or attempt to cut to the substrate through the full thickness of the trim.
A shallow scoring pass repeated with control is preferable to a single aggressive plunge. The objective is to sever the surface film that would otherwise peel as a sheet. Protect nearby door casings and the painted edge of an adjacent frame.
Hidden pins or brads
Some installations combine adhesive with small nails or pins. Metallic points may be almost invisible beneath filler and paint. If a strip releases at most locations but stays anchored in one spot, do not simply increase leverage: inspect for a fastener. If you must remove a nail after the strip is off, work from the accessible back when possible to avoid pulling a nail head through the finished face.
Decorative trim is not the same as baseboard
Someone researching how to remove baseboard molding is often dealing with a different fastening system, wall joint, and risk profile. Tall baseboards may cover expansion spaces at the floor and may be secured with finish nails into framing. Wall-applied picture-frame molding usually outlines a decorative field. Removing a baseboard can also reveal flooring gaps and old caulk. Use the shared principle of controlled scoring, but do not treat wall-frame molding as if it were a nailed baseboard.
Tools, Protection, and Worksite Preparation
Make a minimal, practical removal kit
You do not need an industrial demolition kit. You need a sharp scoring tool, a thin non-marring separator, a putty knife with a controllable edge, a small pry tool for situations where leverage is appropriate, and a wide protective shim to spread any force over the wall. Add a work light, painter's tape suited to the finish, pencil, phone camera, drop cloths, eye protection, and suitable gloves.
Keep a utility knife under deliberate control and change blades instead of compensating for a dull blade with extra pressure. Metal scrapers can cut wood and paint; plastic tools are usually gentler but may not separate a hardened joint. A flexible putty knife can distribute force along more of the surface than a narrow screwdriver.
| Tool or supply | Why it helps | Main precaution |
|---|---|---|
| Sharp utility knife | Separates the paint and caulk film | Make shallow cuts; never cut blindly near wiring |
| Flexible putty knife | Tests a thin gap and separates accessible adhesive | Avoid twisting the tip into drywall paper |
| Plastic trim separator | Protects finished surfaces during light probing | Not strong enough for every cured adhesive |
| Wide wood or plastic shim | Spreads contact pressure under a tool | Keep it flat and free of grit |
| Small pry bar | Optional controlled leverage on robust substrates | Avoid point-loading plaster or drywall |
| Work light | Reveals shadows, movement, and lifted paint | Look along the surface, not only straight at it |
| Drop cloth and dust control | Contains debris and protects furniture | Use appropriate methods if older paint may contain lead |
| Patch compound and primer | Restores the wall after removal | Match products to the substrate and follow drying instructions |
Protect the wall and neighboring finishes
Move furniture away from the work area. Cover hardwood flooring and countertops where fragments may fall. If you are working near a ceiling, make sure ladders or platforms are stable and appropriate for the height. Keep children and pets out of the immediate area. Photograph the entire wall from straight on and under raking light before the first cut; those images are valuable when locating old trim outlines or planning a revised layout.
The paint finish matters. High-gloss enamel highlights scratches and patch edges. Flat wall paint may be easier to touch up, but an older or faded wall can still show a newly painted rectangle. Expect to repaint a whole wall if consistent sheen and color are important.
Consider outlets, switches, and other obstructions
Decorative frames sometimes pass close to receptacles, switches, sconces, HVAC controls, or built-in cabinetry. Do not slide a metal blade behind a molding in an unknown wall cavity. Work from the surface, never cut wiring, and isolate electrical work to qualified professionals when the project would require opening a device box, moving wiring, or altering the outlet installation. A decorative strip should not be used to hide an electrical condition that needs correction.
Plan a Test Removal Before You Commit
Pick the least visible section
Start at a small, accessible part of the composition rather than a long top rail above a sofa or bed. A side piece or short lower run can show how the adhesive and finish behave with less risk. Examine whether the trim is one rigid piece or connected to additional decorative ornaments; those accessories may need individual separation.
Mark a small area for the test. Cut the paint along both edges and, if there is a filled corner, cut its joint as well. Insert a thin tool only far enough to sense the bond. If the first attempt lifts wallpaper or tears drywall paper, treat that as evidence about the entire installation. Continuing the same technique at larger scale will likely increase repairs.
Read the failure pattern
Three common outcomes reveal what is holding the assembly. If adhesive stays on the wall and the molding separates, you will mainly deal with residue. If adhesive stays on the molding but takes painted paper with it, the substrate has failed. If both molding and wall remain intact while the tool cannot progress, there may be a stronger adhesive bead, an unexpected mechanical fastener, or insufficient access to the joint. Stop, investigate, and change strategy rather than escalating force.
Decide whether to stop and call a professional
Professional assistance is sensible when there is suspected lead paint, asbestos-containing adjacent materials, extensive moisture damage, old fragile plaster, major electrical conflicts, high work locations, or a finish that would be expensive to reconstruct. These are not ordinary trim-removal problems. The potential damage can exceed the cost of the decorative element by a wide margin.
How to Remove Wall Molding: A Controlled Step-by-Step Method
Step 1: Label and document the existing layout
Photograph every joint, note the longest runs, and record whether the molding will be reused. Use low-tack labels on the back or on separate bags when you remove short pieces. If the wall contains several equal-sized frames, identify their original positions. Relying on memory can lead to mirrored or rotated corner sections during reinstallation.
Step 2: Score the complete paint boundary
With light pressure, score where molding meets wall. Work along the top and bottom edges of a horizontal strip and along both vertical sides of an upright strip. For a rectangular panel, include the mitered corners. The blade should part the surface coating, not penetrate the gypsum board's paper facing. Repeat a shallow pass if the caulk is thick. If the line begins to peel outside the cut, stop and isolate that section before continuing.
Step 3: Open the smallest practical starting gap
At the test edge, slide a flexible separator against the adhesive joint. Keep the blade almost parallel to the wall. Avoid using the wall itself as a hard fulcrum. When possible, use a broad protective shim under any tool that needs leverage. A narrow gap is enough to identify whether the strip can move; a large opening created with a sudden jerk is not the goal.
Step 4: Work a few inches at a time
Move along the profile in short increments, periodically returning to a previous section. The objective is to distribute separation instead of concentrating all the force at one end. An assistant can support the released portion so its weight does not pry against the final bonded section. Use extra care on long polyurethane strips: a rigid piece can snap or damage adjacent paint when its free end swings away.
Step 5: Treat corners as separate attachments
At each miter, check for filler and paint that connect the two lengths. Separate that material before advancing. If preserving the frame, avoid flexing a corner into a different angle. The safe approach may be to remove two short segments together if their joined corner is stronger than either section alone. Do not let a corner's decorative detail become an unintended lever against the wall.
Step 6: Investigate any sudden hard stop
Resistance at a single point can mean a brad, a thicker adhesive pad, or a hidden screw head. Look closely at the face and along the backside of any released section. Do not drive a tool farther into the substrate to overcome the obstruction. Reposition, expose the joint more carefully, or consult an installer when the fastening method cannot be identified.
Step 7: Choose between saving the molding and saving the wall
There is no universal rule that the trim must survive. If the wall paper begins tearing while a strip remains firmly bonded, splitting the decorative piece into shorter sections may reduce stress, provided the cutting method is safe for the setting. Conversely, when an expensive carved profile is being preserved, controlled local repair of the wall after removal may be preferable to forcing the profile free. Make that decision deliberately rather than after an accidental break.
Step 8: Remove the strip without twisting it
Once the bonded area has separated, support the full length and lift it away in line with the opening. Do not rotate a long section across a neighboring frame, window casing, or light fixture. Set reusable pieces on a flat, protected surface, then label them. Keep fragments and nails in a container rather than leaving them where they can scratch flooring.
Step 9: Assess the wall before scraping adhesive
Examine the exposed surface under bright side light. Mark paper tears, lifted paint, gouges, remaining adhesive, and any signs of moisture. Do not immediately attack the residue with a metal scraper. If the adhesive is bonded more strongly than the finishing compound beneath it, aggressive cleaning can multiply the repair area. The first stage of successful removal is knowing what needs repair, not making every mark disappear at once.
Removing Molding From Different Wall Materials
Painted drywall: protect the facing paper
Drywall is the most common problem surface because its painted paper face can be weaker in peel than a cured adhesive. After cutting the surrounding paint, use the smallest useful separation force. If brown facing paper begins lifting, do not continue the same motion in the hope it will somehow stop. You may need to sacrifice the molding or accept a larger wall-repair patch.
Never use the tip of a screwdriver as a fulcrum directly on drywall. The concentrated load can crush the gypsum core even when the paint looks undamaged. A wide shim reduces localized pressure, but it does not guarantee a flawless result. After removal, loose paper must be stabilized before normal joint-compound finishing; applying wet compound directly to frayed paper can cause bubbling.
Old plaster: check for hollow or cracked areas
A traditional plaster wall may release a molding cleanly in one location and then lose a fragile skim layer elsewhere. Listen for hollow spots and look for hairline cracks before removal. If a section moves or sounds detached, do not use it as a lever point. For decorative historic interiors, preserving original plaster may be more valuable than saving a replaceable polyurethane strip. An experienced plaster repair specialist can advise on stabilization where extensive delamination is present.
Wallpaper: plan for a damaged strip
Wallpaper under glued molding is often a sacrificial layer. Even if the decorative piece comes off intact, the surface paper or printed finish may come with it. When the wallpaper is discontinued, preserving the surrounding field can be difficult or impossible without leaving an obvious patch. Determine whether the room will be repapered, painted, or covered with a new panel layout before starting. This can change both the order of work and the budget.
Wood, MDF, and finished panels
Factory-finished panels require gentle tools and extra protection against scratches. Once the coating or veneer is cut, a repair may remain more visible than on a painted wall. If the molding has been adhered directly to a veneered or laminated surface, the adhesive may have a stronger hold than the face layer. Test in an inconspicuous position, avoid solvents unless the panel and coating manufacturers approve them, and consider professional refinishing for a valuable surface.
Tile, stone, and other hard finishes
Hard surfaces withstand compression better than drywall, but glazed tile, marble, and polished stone are not immune to chips. A levering tool may concentrate stress at an edge or grout joint. A solvent that is harmless to one tile may stain grout or etch adjacent stone. If you cannot identify the adhesive or finish compatibility, do not experiment across a visible wall. The expected repair may be very different from patching paint.
| Wall surface | Most likely failure | Careful approach | Typical follow-up |
|---|---|---|---|
| Painted drywall | Torn face paper, lifted paint | Score coating; separate with minimal leverage | Seal damaged paper, skim, prime, repaint |
| Plaster | Chipped finish coat, existing cracks | Test for loose areas; avoid prying on weak plaster | Stabilize and patch compatible plaster layers |
| Wallpaper | Ripped covering and lost pattern | Plan removal with a wallcovering change | Replace or redesign the wallpaper field |
| Painted wood or MDF | Gouges, veneer lift, finish scratches | Non-marring tools and careful test | Finish repair or panel replacement |
| Tile or stone | Edge chips, grout damage | Protect edges; avoid unapproved solvents | Substrate-specific restoration |
What to Do With Adhesive Left Behind
Identify whether residue is raised or bonded into the finish
Not every residue needs to be scraped down to the same layer. A raised bead can sometimes be carefully pared down without gouging the underlying wall. A thin film permanently bonded into an old painted finish may require controlled surface preparation and a skim coat. The choice depends on adhesion, not simply thickness. Check whether adjacent paint is stable before removing a ridge of adhesive.
When the glue is stronger than the wall's final skim coat, trying to remove all of it can enlarge a small defect into a wide crater. Removing loose material, feathering the stable edge, and building a sound repair surface often gives a better outcome than chasing every last trace of the old bond.
Do not assume that heat releases cured glue
A household hair dryer and a construction heat gun do not have the same temperature range, and neither is a universal adhesive remover. Heat may soften some adhesives, but it can also damage paint, soften or deform polyurethane, or alter wallpaper. Excess heat around electrical devices and unknown finishes adds risk. Never recommend a fixed temperature or dwell time without a specific product's instructions. A dry mechanical test is a better first diagnostic step than heating an unknown wall assembly.
Do not apply an unidentified solvent
Construction adhesives are not one chemistry. Mineral spirits, acetone, alcohol, and specialty removers behave differently and may attack a finish without dissolving a fully cured adhesive. If you have the original adhesive's name, follow that manufacturer's instructions for cured residue, compatibility, ventilation, and protective equipment. When the identity is unknown, a conservative mechanical repair is preferable to a broad solvent experiment. Test any permitted cleaner in a hidden spot first.
Keep dust and debris under control
Use appropriate containment and dust-management practices for normal wall repairs; avoid dispersing fine sanding residue through occupied rooms. When old paint may contain lead, ordinary dry sanding or uncontrolled scraping is not an acceptable shortcut. Identify the age and condition of the coating and apply the relevant lead-safe procedures before disturbing it. If water damage, mold, or an unusual odor becomes apparent, address the underlying issue rather than immediately covering the area with a new decorative frame.
Repairing Drywall After Decorative Molding Removal
First determine whether paper is sound
There is an important difference between a superficial paint peel and exposed, fuzzy drywall paper. For an intact substrate with a shallow recess, the repair may need only cleaning, filling, sanding, priming, and repainting. If the drywall facing has torn, loose fragments must be dealt with and the damaged area sealed using a compatible product before wet compound is applied. Sherwin-Williams' drywall-preparation guidance describes using an appropriate conditioner on torn facing paper before subsequent patching. Follow the specific product directions rather than assuming every primer works the same way.
Feather a gouge rather than building a ridge
Use a suitable patch or joint compound for the size and depth of the defect. Spread beyond the damaged outline so the finished surface blends back into the surrounding plane. Let each layer dry fully according to the label before adding another. Overfilling a small gouge creates a raised strip that becomes especially visible after painting in low-angle light. A long, narrow shadow where the old molding sat is a frequent sign that the surface was not feathered far enough.
Repair exposed drywall paper carefully
Do not aggressively sand the brown or frayed face paper: abrasive action may make the fibers fuzzier. Remove loose material according to the chosen repair system, seal the damaged area, and then apply thin coats of compound. More than one coat may be needed for a smooth transition. If the core is crushed, the repair may call for a larger patch or replacement rather than cosmetic filler. Severe damage, movement, or dampness should be assessed before finishing.
Inspect with side light before priming
Direct overhead lighting can hide ridges. Set a portable light close to the wall, shining across the surface, and inspect the repaired zone from several angles. The slight shadow of an old adhesive line may become obvious once the decorative molding is gone. Correct imperfections before painting, not after furniture is returned. If the old finish has faded, full-wall repainting may be necessary to avoid a visible patch, even when the surface is flat.
Why primer matters
A wall patched with joint compound can absorb paint differently from the surrounding surface. A suitable primer equalizes porosity and improves the consistency of the finish. Torn paper and old adhesive also present distinct compatibility issues. Choose the primer based on the substrate and the finish system; do not simply paint over raw compound and assume the patch will disappear. The companion STAVROS guide on repairing damaged polyurethane molding addresses repairs to the decorative material itself, which are different from repairing the wall beneath it.
Reuse the Original Molding or Install a New Profile?
Four questions to ask before reusing a removed strip
Is the molding straight and undamaged? Has it retained its original cross-section without chips, cracks, or twisting? Can cured adhesive be removed from its back without weakening the piece? And will its dimensions still fit the new design? Reuse is most attractive when all four answers are favorable. A saved profile with a distorted back may not lie flat against the repaired wall, resulting in a weak bond or a wavy painted line.
If the original layout looked too busy, reattaching every piece simply recreates that problem. Decorative wall molding can be redesigned with fewer, larger frames instead of making cosmetic repairs to a layout you no longer like. In that case, use the old material only where it fits the new measurements.
Replacement profiles: four verified STAVROS options
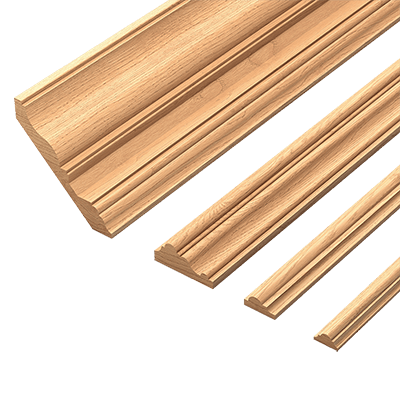
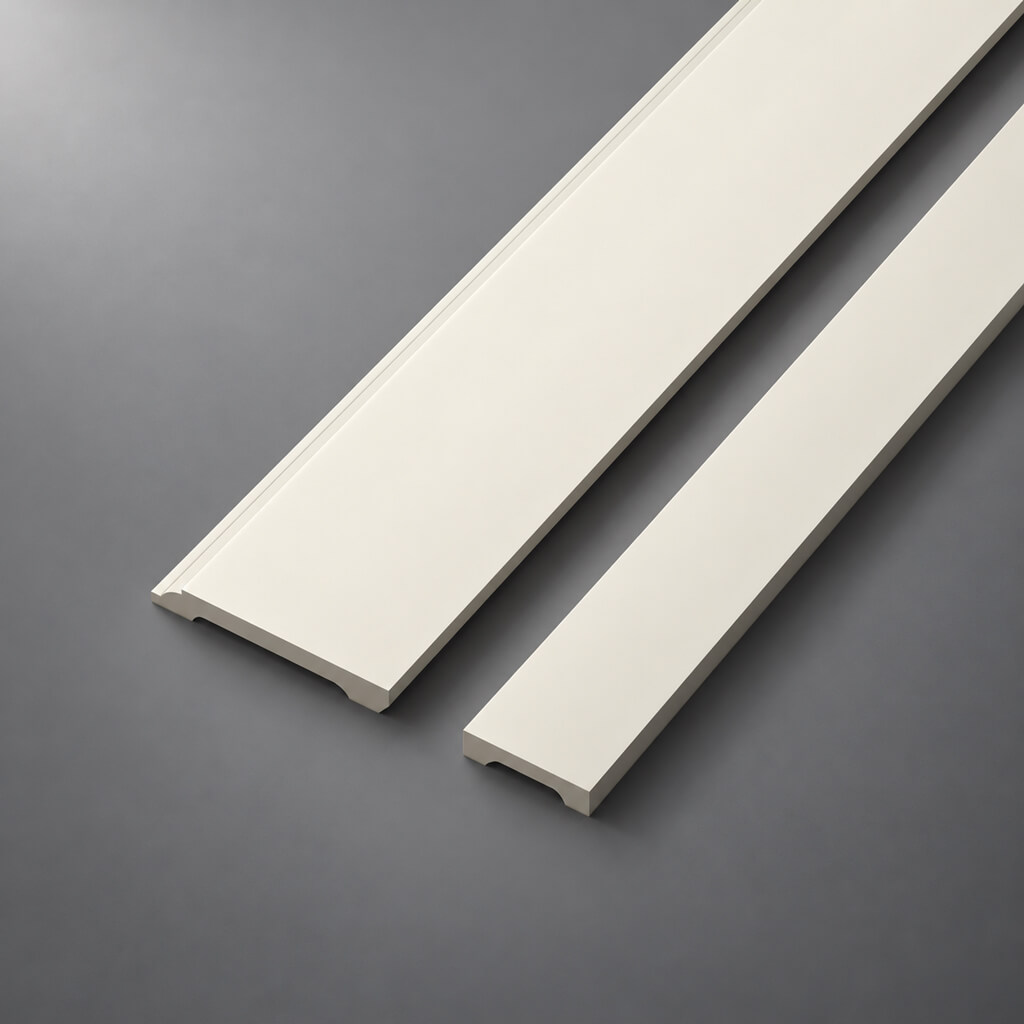
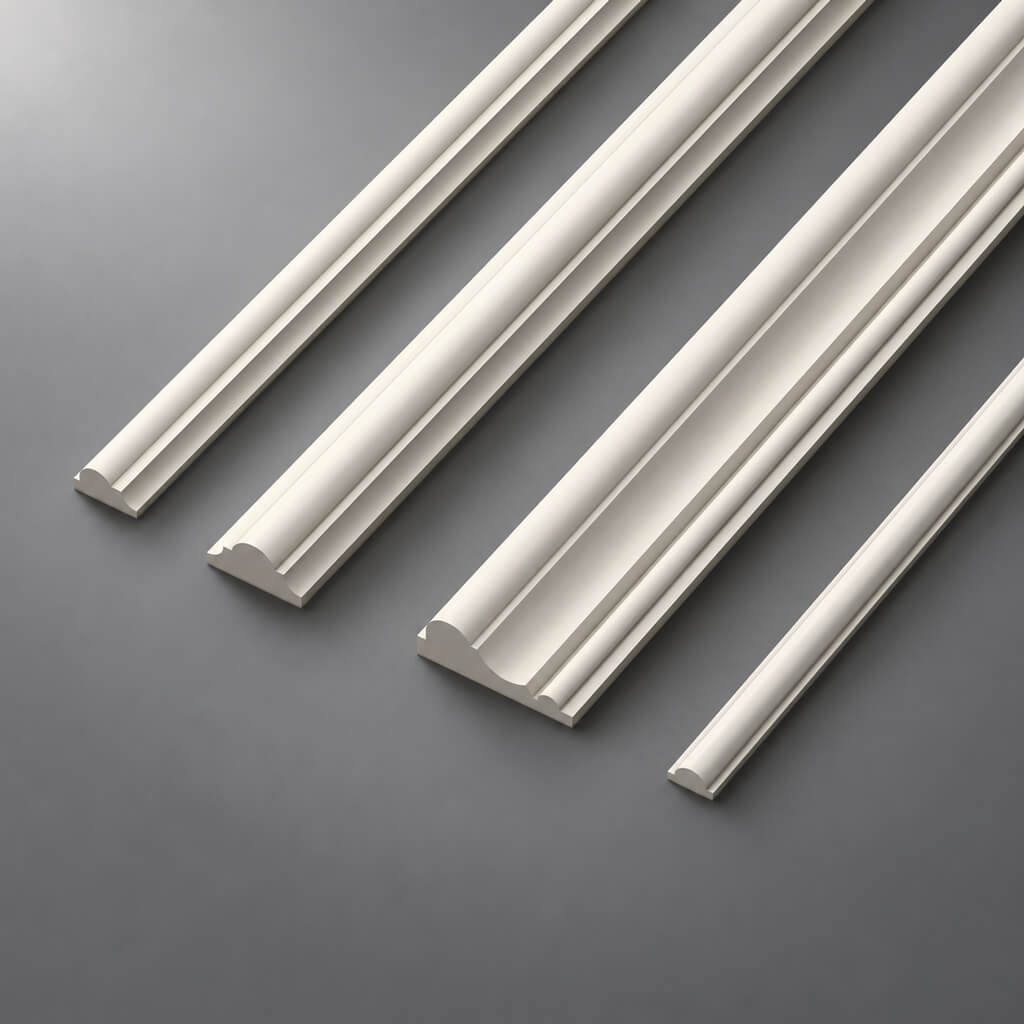
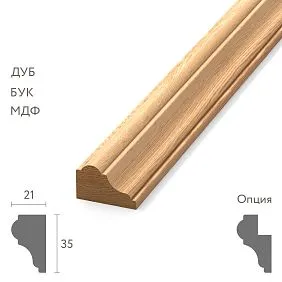
STAVROS offers rigid polyurethane wall moldings in several cross-sections. The four examples below are real catalog items; all are listed at 2600 mm (about 102.36 inches or 8.53 linear feet) per strip. The widths and projections affect the look of the new frames. They are decorative wall profiles, not automatically interchangeable with crown molding or floor baseboards.
| STAVROS item | Published cross-section | Published strip length | Useful design role |
|---|---|---|---|
| MLDPU-001 | 10 × 6 mm (0.39 × 0.24 in) | 2600 mm / 102.36 in | Thin, subtle outlines and inner borders |
| MLDPU-004 | 15 × 8 mm (0.59 × 0.31 in) | 2600 mm / 102.36 in | Compact raised frames |
| MLDPU-002 | 22 × 11 mm (0.87 × 0.43 in) | 2600 mm / 102.36 in | More visible architectural contours |
| MLDPU-003 | 35 × 12 mm (1.38 × 0.47 in) | 2600 mm / 102.36 in | Bold frames on larger wall fields |
For a delicate renewal, compare MLDPU-001 thin polyurethane molding with MLDPU-004 compact wall molding. Where the old frame needs more visual definition, review MLDPU-002 polyurethane panel molding or MLDPU-003 wide decorative molding. Match dimensions to the actual wall geometry and the intended finish. Prices, stock, and shipping details require a current catalog check and are not assumed here.
Do not choose a new profile by visible width alone
Imagine removing a 1.38-inch-wide molding and replacing it with a 0.59-inch one along the same centerline. The difference is 0.79 inch, leaving roughly 0.395 inch of old wall area exposed on each side. If that area has different paint sheen, adhesive shadow, or rough repair compound, the smaller trim will not cover it. Plan to restore the entire old footprint before installing the narrow replacement. The reverse is also true: a wider profile can hide an old outline, but it does not fix weak paint or poor adhesive support below.
Replace the composition, not merely the product
Changing from crowded narrow rectangles to two generous frames can do more visually than switching to a larger molding. The article on three levels of wall-frame complexity provides design context for this decision. If your room also contains chair rails, baseboards, or door casing, ensure the revised frame layout maintains consistent margins and does not collide with existing trim.
Measure a New Wall Molding Layout Correctly
Confirm a clean surface before drawing lines
A replacement frame must be designed on a repaired wall, not mapped over bumps left by the old adhesive. Once compound, sealer, and finish preparations have cured, mark the centerline of the wall and identify immovable elements: doors, windows, receptacles, radiators, cabinet edges, and furniture. Decide whether the molding should align visually with the sofa or with the architectural width of the wall; those axes do not always match.
For broader inspiration, compare the STAVROS article on picture frame molding on walls, but work from the measured usable field rather than copying a photograph. A pleasing grid on a 14-foot wall may look crowded on an 8-foot wall.
Keep margins and clearances consistent
Instead of selecting a random number of rectangles, start with the intended outer margins and gaps. For example, on a usable 120-inch-wide wall with 8-inch margins at each end and 4-inch gaps between three equal frames, the total available frame widths are 120 - 16 - 8 = 96 inches. Each frame is therefore 32 inches wide. If the usable height is 72 inches and you leave 8-inch top and bottom margins, each frame can be 56 inches tall.
Check whether those measurements refer to the outer edge or centerline of the molding. A one-inch face makes a significant difference in the clear opening of a narrow panel. Use one convention consistently in sketches, cut lists, and installation marks.
Calculate the minimum linear footage
Three identical rectangular frames with external dimensions 32 × 56 inches require a nominal perimeter of 2 × (32 + 56) = 176 inches per frame. For three frames, that is 528 inches, or 44 linear feet of finished runs. With stock strips measuring 102.36 inches, the mathematical length-only minimum is 528 ÷ 102.36 = 5.16 strips, meaning at least six strips. But cut layout and miter losses matter: a 56-inch vertical piece and a 32-inch horizontal piece fit within one 102.36-inch strip, yet four 56-inch uprights cannot be efficiently paired with each other.
Before ordering, write out all twelve cuts: six at 56 inches and six at 32 inches. Pairing one 56-inch cut with one 32-inch cut consumes 88 inches before saw kerf and end trimming, so six strips can provide those twelve finished runs under favorable cut geometry. That gives no allowance for mistakes or defective ends. An extra strip may be prudent, but the right purchase quantity depends on the saw setup, exact cut reference, corner details, and whether some offcuts can serve another frame. The article on installing polyurethane molding with clean joints covers finishing considerations after the layout is planned.
Installing Replacement Polyurethane Wall Trim
Prepare the backing surface first
A new polyurethane profile is only as secure as the surface supporting its adhesive. Paint or primer that is peeling, a powdery skim coat, and inadequately sealed drywall paper are all poor foundations. Confirm the wall is dry, clean, flat enough for the chosen profile, and compatible with the adhesive system. Where patch compound has been used, follow that manufacturer's cure and priming instructions. Allow time for the repair to stabilize instead of covering fresh filler with a decorative strip immediately.
For a higher-relief design, check the shadow line with a straightedge. The edges of a rigid molding will reveal an uneven wall even if the frame looks straight on a paper plan. Small adjustments may be practical, but the adhesive should not be expected to bridge major depressions or repair unsound material.
Dry-fit the full frame before opening the adhesive
Cut and lay out each side to confirm the corner orientation, then check how the pieces meet on the actual wall. Mark the outside edge or a consistent centerline, not alternating reference points from one run to the next. For a DIY wall molding installation, a full dry fit is one of the cheapest ways to discover an incorrect miter or a mismatch between the drawing and the room.
Cut orientation matters. A mitered frame can look correct when its pieces lie on a workbench, then reveal reversed angles against the wall. Label top, bottom, left, and right on removable masking tape. If you are changing from plain miters to decorative corner blocks, compare actual corner-element dimensions before cutting the straight lengths. The STAVROS guide to decorative molding corners explains how corner details alter the visual rhythm of a wall frame.
Choose an approved adhesive and follow the label
There is no single glue that is correct for every polyurethane molding, every painted substrate, and every temperature or humidity. Select an installation adhesive specifically identified as compatible with the decorative material and the wall surface. Confirm preparation, bead pattern, open time, initial support, full curing, and paintability. A product that is labeled high-tack is not automatically suitable for every wall coating. Avoid inventing cure times or using solvent-based products that the molding manufacturer does not approve.
Apply the adhesive according to the chosen system, press the molding into the intended location, and support it as required. Clean excess adhesive using only the method allowed by its manufacturer. A dry cloth may spread certain products rather than remove them; a damp sponge is not appropriate for all chemistries. Do not rely on paint, caulk, or a tiny dot of fast-setting glue to compensate for a poorly prepared base.
Finish joints without recreating future removal problems
Finish the corners and straight joints with a suitable paintable material, keeping the decorative profile's detail visible. Excess caulk blurs the shadow line and creates a thick film that must be cut the next time the wall is renovated. Sand only as permitted for the material. Prime where necessary and paint with a coating compatible with polyurethane and the substrate. For a more complex frame arrangement, review wall molding compositions from simple frames to detailed panels.
Consider a different design to minimize the old repair footprint
Replacing an identical rectangular frame is often easiest because the new line follows a familiar position. But it may be a missed opportunity if the existing layout was poorly proportioned. On an 8-foot ceiling, overly tall or tightly spaced frames can make the room feel busier than expected. Changing the spacing or simplifying the number of frames may be more effective than substituting one SKU for another. If the room already features a chair rail, use the guidance on horizontal polyurethane molding and wall division to coordinate the height before installation.
Special Situations That Change the Removal Strategy
Removing molding beside cabinets and built-ins
Molding installed against a cabinet may have been caulked or painted together with the cabinet face. The cabinet's veneer, edge banding, or factory finish can be more difficult to repair than a painted wall. Cut the boundary carefully and use protective shims; do not pry against a thin door or drawer front. If a profile has been deliberately integrated into the cabinetry, it may be worth removing a nearby removable panel or trim cover first to inspect the fastening system.
Working around a door casing or window trim
Door and window casing may have miters, returns, hidden fasteners, and more paint layers than the wall frame. A decorative rail that terminates at a casing can pull the casing paint when removed. Separate all adjoining caulk joints before attempting movement. If the goal is only to replace the wall frame, leave sound door and window trim untouched rather than turning a small renovation into a full casing replacement.
Walls with chair rails and wainscoting
Chair rail molding is not the same thing as a rectangular applied wall frame. It often runs across several wall bays and may intersect door casings or the top edge of a wainscoting system. Work out where the rail can be separated without destroying adjacent panels. When removing only the frames below a sound rail, protect the rail and assess whether the painted field beneath it can be restored consistently. A new wall pattern should coordinate the rail height, baseboard height, and overall room proportions.
Removing trim from a humid or damaged wall
If the removed profile exposes swollen drywall, dark discoloration, a persistent damp patch, or a musty odor, do not immediately patch and conceal it. Determine the moisture source and the condition of the affected materials. A decorative trim piece is not a waterproofing barrier. Reinstalling over an unresolved leak only delays the problem and can make the eventual repair larger. Use appropriate assessment or remediation professionals when the signs indicate a substantial condition.
Budgeting a Removal and Replacement Project
Separate removal, wall repair, and new trim costs
A practical estimate has at least three components: taking down the old molding, restoring the wall, and installing the new design. A fourth component may be whole-wall painting when the old paint cannot be matched convincingly. Do not treat the cost of a new molding strip as the entire project price. Even a narrow decorative border can leave a wide repair zone if the old adhesive takes drywall paper with it.
Build a materials list from the cut plan
Count required lengths by finished cut, not simply by total perimeter. Include appropriate adhesive, joint filler or caulk, primer, paint, surface-repair compound, and protective materials. Record tool rentals or professional services separately. The STAVROS molded trim category is useful for comparing different profile geometries; confirm current specifications and commercial terms on individual product pages when ordering.
Avoid unsupported labor and material price claims
Prices vary widely by location, surface condition, trim complexity, and who performs the work. A U.S. homeowner should request a scope-based quote that distinguishes straightforward removal from patching and repainting. This article deliberately does not convert historical ruble prices from the Russian original into dollars or promise U.S. local warehouse inventory, installation labor, or delivery times. An accurate material list is more valuable than a universal price per linear foot with no identified scope.
Common Mistakes and How to Avoid Them
| Mistake | What can happen | Better decision |
|---|---|---|
| Pulling before scoring paint | Paint peels beyond the molding outline | Cut the full painted perimeter first |
| Levering directly on drywall | Paper tears or gypsum core crushes | Spread force with a shim and use smaller movements |
| Assuming every strip is adhesive-only | Hidden nails hold a stubborn point | Inspect for mechanical fasteners before increasing force |
| Treating a heat gun as a universal release tool | Deformed plastic, scorched paint, ineffective bond removal | Follow known adhesive instructions, otherwise avoid heating |
| Washing or soaking unknown adhesive | Stained finish or weakened wallcovering | Check product compatibility and test inconspicuously |
| Scraping until all trace of glue disappears | Large gouges and unnecessary paper loss | Stop at sound substrate and plan a controlled surface repair |
| Painting directly over torn paper | Bubbling or visible patches | Stabilize damaged facing before skim coating |
| Ordering thinner trim without restoring the old footprint | Exposed paint shadows around the new profile | Repair the whole field and remeasure the layout |
| Buying by nominal length only | Insufficient stock after miter cuts | Prepare a cut list and allow realistic waste |
| Hiding damp or damaged drywall behind new trim | Ongoing moisture damage | Fix the underlying problem before finishing |
The table is a diagnostic checklist, not a substitute for the directions of the particular adhesive, wall repair product, finish coating, or equipment used on a job.
Frequently Asked Questions
Can I remove polyurethane molding and reuse it?
Sometimes. Reuse is most practical when the profile remains straight, its face is undamaged, the adhesive can be cleaned without weakening the material, and the new plan uses the same dimensions. Aggressive prying, old filler at miter joints, and thick construction adhesive can make preservation impractical. Decide whether the saved strip is worth the additional labor before starting.
Is it possible to remove glued wall trim without tearing drywall?
Yes in some installations, but there is no guarantee. The result depends on the relative strength of the adhesive, paint, primer, joint compound, and drywall facing. Scoring paint and separating the bond gradually reduce avoidable damage, but even careful work may expose paper that needs sealing and patching.
How do I remove wall molding from a painted surface?
First identify whether the material is attached with adhesive, nails, or both. Cut the continuous paint and caulk film along the complete perimeter. Open a small gap with a controlled tool, support any released portion, and work in short increments. Inspect paint behavior as you go. If a coating begins peeling beyond the score line, stop and isolate the lifted area rather than pulling harder.
Should I use a heat gun to soften molding glue?
Not as a default technique. Cured adhesives have different responses to heat, and heat may damage polyurethane or the underlying finish. Never substitute an arbitrary temperature for an adhesive manufacturer's removal directions. Avoid heating near unknown electrical components and stop if the substrate shows any sign of softening or discoloration.
Can I dissolve construction adhesive with acetone or alcohol?
Do not assume either will dissolve the adhesive or protect the finish. These liquids can damage certain coatings, plastics, or adjacent materials. If the adhesive is identifiable, consult the manufacturer's cure-state and cleanup instructions, including ventilation and compatibility guidance. When it is unknown, mechanical removal combined with substrate repair may be the safer choice.
What should I do if brown drywall paper peels off?
Stop scraping the paper surface. Remove only genuinely loose material under the chosen repair system and apply a sealer or conditioner formulated for damaged drywall facing before patching as directed. Then skim, dry, smooth, prime, and repaint. If the gypsum core has broken or there is widespread damage, a larger professional repair may be required.
Can new molding cover adhesive marks from the old frame?
Only if the wall below is sound and compatible with the new adhesive. A wider profile might conceal a color difference, but it does not fix loose paint or raised residue. Narrower molding can expose the old footprint on both sides. Measure the old and new face widths, make a full dry fit, and repair the affected surface even when it will later be partly concealed.
Do I need to remove the baseboard before changing wall frames?
Usually not when the decorative frames terminate above a sound baseboard. There is no reason to disturb a properly installed baseboard merely to update applied wall molding. If the redesign includes the bottom trim or a wainscoting assembly, evaluate the baseboard separately because its fastening and flooring interactions can be different.
Does a removable molding system exist?
Some decorative systems use mechanical attachments or reversible details, but removability must be verified in a specific product's instructions. Do not assume that any standard polyurethane wall molding fixed with construction adhesive can be detached without repair later. If frequent redecoration is a priority, discuss a purpose-designed mounting system with the installer before purchasing.
How long must the repaired wall dry before installing new trim?
There is no universal number of hours. It depends on the compound, sealer, film thickness, substrate, room temperature, and humidity. Follow the selected product instructions and confirm the surface is fully dry and stable before gluing and painting. A wall that feels dry on the surface can still be unsuitable for another coat or strong adhesive load.
Can I change from picture frames to more elaborate wall panels?
Yes, after restoring the underlying surface. Elaborate layouts require additional measurements and careful coordination with outlets, casings, furniture, and existing trim. Compare simpler applied frames with the alternatives described in the STAVROS guide to wall panels and architectural framing. More relief is not automatically an improvement in a small room.
Is painting the entire wall necessary after removing molding?
Not always. A fresh patch may blend into a recent, matte finish when the same paint is available. Older walls, strong lighting, dark colors, and higher sheen can make spot repairs visible. Test the result under daylight and raking light before deciding. The paint may need to extend across the complete wall for a consistent finish.
Before You Buy Replacement Wall Molding
Final project checklist
- Identify the original wall surface and any safety concerns before work begins.
- Determine whether the molding is to be preserved, repaired, or discarded.
- Photograph and measure all existing frames, joints, and nearby fixed objects.
- Score the finish and perform a small controlled removal test.
- Work in short sections, inspecting adhesive and substrate behavior continuously.
- Stabilize damaged drywall paper and repair the wall before repainting.
- Choose the new profile by cross-section, not just its product name.
- Calculate complete finished cuts and the number of usable stock lengths.
- Confirm adhesive, primer, finish, and product compatibility against current instructions.
- Dry-fit the full layout and inspect finished lines under side lighting.
A better result begins with the wall, not the trim
Removing decorative wall molding is a sequence of controlled decisions: identify the attachment, score the paint, test the bond, separate gradually, and repair what the old installation reveals. A clean wall gives a new design a reliable foundation. The same care that prevents unnecessary damage during removal also creates straighter frames, cleaner joints, and a more durable finish after replacement.
When you are ready to select new material, compare the actual profile widths, projections, and 2600 mm stock lengths in STAVROS polyurethane moldings. Choose a design that solves the proportions of the room rather than simply covering the lines left by the previous one. A thoughtful update can turn a damaged or outdated picture-frame wall into a quieter, better-balanced architectural feature without repeating the original installation mistakes.