Article Contents:
- Short answer: what to do if KON-012 doesn't fit
- Confirmed specifications for KON-012
- Why the finished opening almost always differs from the design
- How to measure the finished opening
- Three vertical measurements — minimum
- Multiple posts — multiple separate openings
- Measure between actual support surfaces
- Record the date and stage of renovation
- Straight section is not an empty space
- Top and bottom do not have to be the same
- The axis must remain suitable for installation
- When a large module is left mandatory
- When the composition can be reconsidered
- How to distribute the reduction
- Why the center is more important than arithmetic symmetry
- When the scenario is not suitable
- Check on the wall or facade
- First, check the pattern
- All identical posts are replaced identically
- Module exclusion must be included in the specification
- Uniform height and uniform pattern
- Individual height while maintaining the pattern
- Which Option to Choose
- Density
- Hierarchy
- Pauses
- Direction
- Furniture post
- Stand or support
- Interior baluster
- Decorative partition
- Post in furniture portal
- Accent in display case or shelving
- Light enamel
- Dark enamel
- Bright enamel
- Clear finish is more demanding on assembly
- Tinting changes the perception of volume
- The oil highlights the ends and the direction of the grain
- Control stand first
- Photo with a tape measure
- A pair of stands for a symmetrical project
- Not a solid stair baluster
- Not a KON partition kit
- Not a separate KN figure
- Not an ordinary craft blank
- Not a ready-made load-bearing furniture leg
- Why you can't write "figure on top"
- Why a single zero reference point is needed
- How to fix the rotation of an element
- A separate package for each stand
- The statement must go to installation with the goods
- Order before the finished floor
- Measure one point
- Do not subtract installation zones
- Cut KN-013
- Remove KN-005 from only one post
- Reduce only the top end
- Paint the mounting channel
- Mix beech and oak without a project
- Count the decorative post as a stair post
- Order parts at different times
- Do not sign elements
- Do not check the side clearance of 130 mm
- Focus on the total height of modules without the axis
- Reduce all intervals equally
- Do not check the minimum opening
- Do not make a control stand
- Place an order verbally without a drawing
- Specify the minimum, not just the average height
- Add a photo with a tape measure
- Show the adjacent furniture
- Separately write about the transparent finish
- Template for multiple racks
- Side template 130 mm
- Do not discard the packaging until inspection
- Check the elements against the list
- Check the opening before finishing
- Calculation of the MLD-060 axis
- Agreed allowance and meaningless allowance are not the same thing
- Why the end face is included in the calculation
- First cutting, then final marking of modules
- Incomplete seating cannot be compensated by force
- Face-to-face pair check
- Changing one digit requires a new sum check
- Approval by photo does not replace dimensions
- Geometric level
- Compositional level
- Technological level
- What is the standard height of KON-012?
- Can I simply shorten the MLD-060 axis?
- Can I cut off part of KN-013?
- Can KN-005 be removed?
- How to measure the opening?
- What should I do if the openings are of different heights?
- Is KON-012 suitable for a staircase?
- What is the diameter of the axis?
- How does beech differ from oak?
- When should I paint the baluster?
- What Adhesive to Use?
- Can I order one control post?
- Do I need to buy KN-013 separately?
- Can KON-012 be made lower than 900 mm?
- How to keep the same pattern on five balusters?
- What to do if the floor is not laid yet?
- Can a large module be moved higher?
- What is more important: the same height or the same pattern?
- Where can I see other shapes?
- What should I send to the manager?
- Can I reduce only the top straight section?
- Do I need to keep equal distances between all shapes?
- Can elements of a different species be used?
- What to do if KN-005 does not fit on the axis after painting?
- How to check the side clearance?
- Can KON-012 be used as a table leg?
- How to calculate the number of elements for ten posts?
- Is a margin needed along the MLD-060 axis?
- Can the posts be assembled independently?
- Why can't the modules be glued immediately according to the photo?

The design height was exactly one meter. According to the drawing, everything matched: the decorative post was supposed to fit between the lower base and the top rail, maintain the specified rhythm, and complete the furniture or interior composition. Then the finished floor was laid, underlayment was added, baseboard was installed, the upper part of the frame was reinforced — and the clear opening became lower. The KON-012 set with a height of 1000 mm no longer fits.
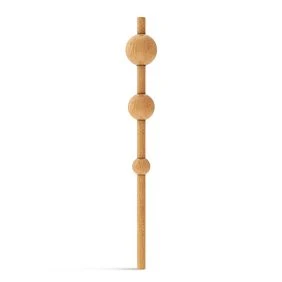
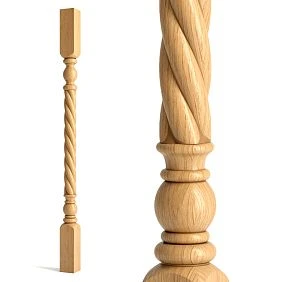
In such a situation, the hand reaches for the simplest solution: saw off the excess. But the decorative baluster KON-012 is not designed as a solid turned part from which you can mindlessly remove a few centimeters from the end. It is a modular composition on a wooden axle MLD-060 with a diameter of 34 mm. Geometric modules form its pattern, and straight sections of the axle set pauses between large shapes. If you cut randomly, you can shift the central accent, ruin the symmetry, leave too short a mounting section, or get two adjacent posts with different patterns.
The right solution begins after finishing work is completed. You need to measure the actual opening, subtract mounting zones, break down the composition into individual modules, and determine what changes are acceptable. Sometimes it is enough to shorten a straight section of the axle. Sometimes you have to rearrange elements. In a tighter opening, a coordinated removal of one shape may be required. The set card directly provides for changing the number and composition of modules, so buy the KON-012 baluster set better not as an unconditionally ready meter-long part, but as an initial composition that needs to be checked against the specific object.
The main question of the article sounds simple: how to preserve the character of KON-012 if the floor, base, or top rail reduced the finished opening? The answer is also specific: do not fix the assembled post with a saw, but recalculate the axis, the order of shapes, straight sections, and mounting zones in advance, then provide the manager with an accurate specification.
Short answer: what to do if KON-012 does not fit
First, stop the installation. Do not trim geometric shapes or remove a random section of the axle until a dimensional diagram is drawn up.
The further procedure is as follows:
-
Measure the finished opening in at least three points.
-
Record the minimum actual height.
-
Determine the upper and lower mounting zones.
-
Calculate the visible height of the decorative composition.
-
Transfer the KON-012 composition to the vertical diagram.
-
Mark the mandatory large accents.
-
Check whether the straight sections of MLD-060 can be reduced.
-
If this is not enough, coordinate the rearrangement or exclusion of the module.
-
Check the symmetry of all project racks.
-
Only after that place the order.
The nominal height of 1000 mm is a characteristic of the standard composition, not a guarantee of fitting into any opening that is also marked as 1000 mm on the drawing. Mounting zones are required for installation, and the actual height may differ at different points.
If a completely different pattern is required, it is useful select STAVROS construction elements and assemble the rack from individual figures, rather than trying at all costs to preserve the standard KON-012 scheme.




Confirmed characteristics of KON-012
Before calculation, separate known data from those that depend on the project.
| Parameter | Confirmed value | How to use in calculation |
|---|---|---|
| Article number | KON-012 | Specify in all schemes, requests, and lists |
| Product type | Decorative baluster kit | Consider as a composite assembly, not a single turned part |
| Nominal height | 1000 мм | Compare not with the design height, but with the finished floor height |
| Maximum transverse dimension | 130 мм | Check side clearances and proximity to furniture |
| Central axis diameter | 34 мм | Align with module mounting holes |
| Base | Wooden axis MLD-060 | Geometric shapes are placed on it |
| Material | Beech or oak | Choose according to future finishing and overall project material |
| Sanding | «Prestige» | Surface is prepared for subsequent finishing according to the card |
| Change of composition | The number and composition of shapes can be changed or partially excluded | Recalculation for an opening is permissible as a design task |
| Purpose | Decorative balusters, supports, stands, interior accents | Cannot be automatically considered a stair load-bearing baluster |
| Assembly | Fixation of shapes on the axis with wood glue | The specific composition and operating mode are checked before installation |
| Finishing | After full assembly | Seating channels are protected from the paint layer |
| Status and cost | Checked in the current product card | Do not transfer old data to the new specification |
The table shows the main feature of the product: KON-012 is valuable precisely for its ability to control the composition. The buyer gets not only a ready silhouette, but also a system that can be recalculated. However, freedom does not mean arbitrariness. Any change must preserve fit, geometry, symmetry, and mounting areas.
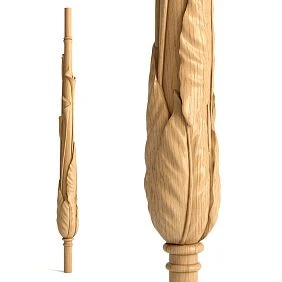
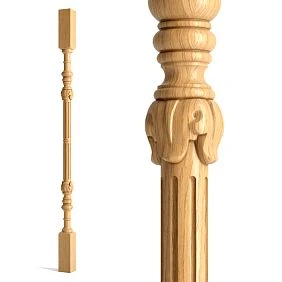
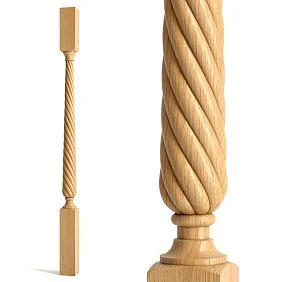
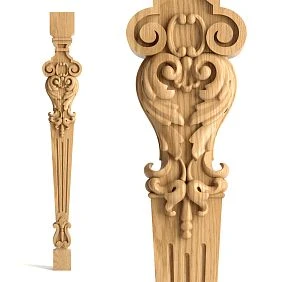
Our factory also produces:
Why the finished opening almost always differs from the design
On the early plan, the height between two lines looks accurate. The real object is assembled in layers, and each layer takes up part of the space.
The following may appear at the bottom:
-
screed;
-
leveling compound;
-
substrate;
-
parquet, engineered wood, laminate, or tile;
-
mounting plate;
-
decorative baseboard;
-
baseboard;
-
lower shelf or furniture base;
-
thrust bearing;
-
compensation gap.
The height is reduced from the top:
-
reinforcing bridge;
-
top rail;
-
cornice;
-
mounting plate;
-
ceiling box;
-
lining;
-
decorative profile;
-
fastening unit;
-
Leveling shim.
Even when each layer seems thin, the total can be noticeable. If the design opening was 1000 mm, but after finishing it became 982 mm, the standard composition cannot simply be "squeezed" in. First, you need to understand which eighteen millimeters can be removed without damaging the pattern and installation logic.
It is especially dangerous to rely on a single measurement. The floor or the top structure may have a slope. On the left edge it might be 986 mm, in the center 983 mm, on the right 980 mm. If you make the post for the average value, it will not fit at the lowest point.
Get Consultation
How to measure the finished opening
The measurement is taken after all work that affects the height is completed. If the floor is not yet laid, use not an abstract thickness of the covering, but the full layer stack: adhesive, underlayment, slab, leveling, and other layers.
Three vertical measurements — minimum
For one location, measure the height:
-
at the left edge;
-
along the central axis of the post;
-
at the right edge.
Even if the post is narrow, three points are still useful: they show the slope of the base and the top line.
Multiple posts — multiple separate openings
For a row of five decorative balusters, you cannot measure only the end positions. Each axis gets its own height. The furniture frame may sag or have local deviations, and the floor may have a slight difference in level.
Create a table:
| Rack number | Height left, mm | Height at axis, mm | Height right, mm | Minimum, mm |
| 1 | ||||
| 2 | ||||
| 3 | ||||
| 4 | ||||
| 5 |
The working value for each position becomes the minimum confirmed size, taking into account agreed installation requirements.
Measure between actual support surfaces
The tape measure is placed not "approximately from floor to cornice," but between the surfaces into which the rack actually fits. If there is a socket at the bottom and a groove at the top, you need to know the depth of each seating area. If the composition is placed between two flat surfaces, measure exactly the distance between them.
Record the date and stage of renovation
Measuring before laying the floor and measuring after laying are different initial data. The diagram indicates the date, type of covering, and readiness of the top assembly. This avoids disputes about which size was provided.
Formula for visible height KON-012
For a preliminary list, it is convenient to use a simple diagram:
Visible height of the composition = finished opening − lower mounting zone − upper mounting zone − technological gaps.
Mounting zone values cannot be invented from a photo. They are determined by the design of the furniture, base, fastening, and the agreed diagram.
Example. The finished opening after laying the floor is 985 mm. The lower mounting zone occupies a conditional 12 mm, the upper one 10 mm, and the project provides an additional technological interval of 3 mm. The visible part should be:
985 − 12 − 10 − 3 = 960 mm.
This does not mean that you need to cut 40 mm from the standard KON-012. First, you need to understand where in its rhythm the straight sections of the axis are, how much space the modules take up, and what changes the agreed composition allows.
KON-012 is not a solid turned baluster
A solid part is turned from a single blank. Its pattern is tied to the wood body, and changing the height often requires reworking the entire profile.
KON-012 is arranged differently. At its base is a round wooden axis, and separate geometric shapes are installed on it. This principle provides several advantages:
-
the composition can be assembled according to a diagram;
-
large and small modules can be arranged in a specified rhythm;
-
Straight sections of the axis can be used as visual pauses;
-
The number of figures may be changed;
-
Individual elements can be partially excluded after approval;
-
multiple posts can be assembled from a single parts list;
-
during design, the overall height can be controlled without accidentally cutting into the decorative pattern.
To see the system more broadly, it is useful to read, how the STAVROS furniture constructor works. The general material explains the principle of modular parts, and here we keep a narrow task: the opening that has shrunk after finishing.
Here is MLD-060: not only the height depends on it
MLD-060 is a round wooden axle with a diameter of 34 mm. For standard KON-012, a length of 1000 mm is used, but the MLD-060 catalog also offers other lengths. The current version is checked in the product card.
The axle solves several tasks at once:
-
connects modules into one vertical line;
-
ensures straightness;
-
forms free intervals between figures;
-
creates upper and lower mounting sections;
-
determines the final height of the stand.
Before ordering, you need to buy a wooden axis MLD-060 with a diameter of 34 mm only after straight zones and assembly method are calculated. It cannot be guaranteed that the seller will automatically produce any required length: non-standard schemes are agreed upon separately.
A straight section is not an empty space
The buyer sometimes considers the visible axis as "unused length" that can be removed without consequences. In reality, the gaps between modules define the pattern. If all shapes are moved close together, the composition becomes heavy. If a too-long section is left at the top, the decorative center shifts downward.
Top and bottom do not have to be the same
A symmetrical composition may require equal straight sections, but another project is built around a central accent and different endings. The decision is made based on the layout, not out of habit.
The axis must remain suitable for installation
The straight end cannot be shortened to the point where the zone required for the chosen mounting or seating disappears. Its length is agreed upon with the furniture manufacturer or installer.
KN-013: a large module cannot be cut for the sake of a few millimeters
The geometric shape KN-013 has a longitudinal size of 104 mm, a transverse dimension of 109 mm, and a mounting hole of 34 mm. It works as a noticeable volumetric accent.
If the finished opening has shrunk, KN-013 cannot be treated as a wooden "reserve" from which a part can be sawed off. Trimming will disrupt the shape, expose the internal channel, change the fit, and make one side of the figure unlike the other.
To recalculate, you need to check the height of the large KN-013 module according to the drawing, determine its place in the composition, and preserve the integrity of the part.
When the large module must be kept
KN-013 is retained if it defines the recognizable center of the pattern, is repeated on adjacent posts, or is linked to the horizontal line of the furniture.
When the composition can be reconsidered
If the standard composition does not fit even after reducing the straight zones, a different order or a different set of figures is discussed. The decision is not reduced to the question "remove KN-013 or not" — the entire silhouette is evaluated.
KN-005: the compact module also cannot be excluded automatically
KN-005 has a height of 66 mm, a cross-sectional dimension of 76 × 76 mm, and a hole of 34 mm. It is smaller than KN-013, so it seems like a convenient candidate for removal.
But a small module can play an important compositional role:
-
separate large figures;
-
support the rhythm;
-
form the transition to the straight axis;
-
balance the top and bottom;
-
repeat in several stances.
Before making a change, you need to check the small module KON-012 and see it not separately, but in the overall layout.
Excluding KN-005 reduces the height not only by its longitudinal size. After removal, adjacent intervals change. You may need to redistribute straight sections so that the composition does not look torn.
Maximum dimension 130 mm and opening width
The issue is more often discussed in terms of height, but KON-012 has a maximum transverse dimension of 130 mm. This means that in the project you need to check not only the vertical.
Ask:
-
does the baluster touch the facade;
-
is there enough distance to the glass;
-
does the shape intersect with the door;
-
whether there is room for a hand to clean;
-
whether the large module protrudes into the passage;
-
whether the axis center coincides with the project line;
-
whether there are enough side clearances with multiple posts.
If the opening is narrow in width, changing only the height will not save the project. A different set or a custom composition of smaller figures may be needed.
Vertical dimensions list
Before ordering, compile all numbers into a single table.
| Parameter | Project value |
| Model | KON-012 |
| Number of posts | ___ pcs. |
| Nominal height | 1000 мм |
| Actual finished opening | ___ mm |
| Minimum height on site | ___ mm |
| Lower mounting zone | ___ mm |
| Upper mounting zone | ___ mm |
| Technological interval | ___ mm |
| Required visible height | ___ mm |
| Shaft diameter | 34 мм |
| Straight section at bottom | ___ mm |
| Straight section at top | ___ mm |
| Position KN-013 | ___ mm from bottom |
| Position KN-005 | ___ mm from bottom |
| Other modules | Per specification |
| Material | Beech / Oak |
| Finishing | ___ |
| Composition approved | Yes / no |
| Mounting diagram approved | Yes / no |
Such a list turns the request "make it a bit lower" into a clear task.
Scenario 1: shorten straight sections of MLD-060
This is the first option that is checked when the opening is slightly reduced.
Suppose the standard layout has free straight zones at the top, bottom, and between shapes. If the total shortfall is small, it can be distributed among these zones without changing the module composition.
How to distribute the reduction
Do not cut the entire difference from one edge. First, set:
-
minimum mounting area at the bottom;
-
minimum mounting area at the top;
-
mandatory pauses near large figures;
-
position of the composition center;
-
symmetry relative to adjacent posts.
The remaining difference is distributed across less noticeable straight sections.
Why the center is more important than arithmetic symmetry
If KON-012 is located next to a handle, shelf, or cross rail, its large module may be tied to that line. With uniform reduction, the center will shift. Therefore, the scheme must account for surrounding furniture.
When the scenario does not fit
If straight sections are already short, further reduction makes the stand visually dense or removes the installation zone. Then they switch to changing the layout or composition.
Scenario 2: change the arrangement of modules
Modules can be shifted along the axis while preserving their quantity. This helps when you need to change the position of the visual center or align shapes with horizontal furniture lines.
For example, the floor has risen by 15 mm, but the top decorative accent must remain at the same level relative to the facade. Then the reduction is done mainly from the bottom, while the position of the top module is preserved.
Another example: the stand is installed between the base and the countertop. After replacing the base, the bottom line rose, and the visual center must align with the handles of the adjacent cabinet. The scheme is rebuilt around this mark.
Check on the wall or facade
Make a full-scale strip mockup:
-
draw an axis;
-
mark the lower and upper boundaries;
-
cut out paper outlines of large modules;
-
mark the dimensions of KN-013 and KN-005;
-
move elements along the axis;
-
photograph the variants;
-
choose the one where the rhythm looks cohesive.
A paper layout does not replace a technical drawing, but helps to see the pattern shift.
Scenario 3: partially exclude the figure
Card KON-012 allows changing the number and composition of shapes. This opens the way to recalculation, but does not mean that any module can be removed without consequences.
First, check the pattern
Removing one element changes:
-
height;
-
number of accents;
-
rhythm;
-
distance between large forms;
-
visual center;
-
similarity to neighboring racks.
All identical racks change identically
If there are four KON-012 in one row, you cannot remove a figure only from the shortest position and leave the rest standard. This will result in noticeable inconsistency. Usually, a single composition is chosen based on the minimum opening and applied to the entire row.
Module exclusion must be included in the specification
A verbal “remove one small detail” is not enough. The application must specify the figure's article number, quantity, and the new position of the remaining elements.
Scenario 4: assemble your own composition
If the opening is noticeably lower than 1000 mm or the standard pattern looks heavy after reduction, it is wiser not to preserve KON-012 at any cost.
In this section you can assemble a decorative post from individual modules, choosing the desired geometric shapes and calculating them to fit the height.
This path is suitable when:
-
a smaller transverse dimension is needed;
-
a different center is required;
-
the project is more modern than the standard composition;
-
several openings differ significantly;
-
need to repeat the motif of other furniture;
-
standard KON-012 elements do not fit without losing rhythm.
Scenario 5: order a composition calculation
An object with dozens of posts, different heights, or complex junctions requires systematic design. In such a situation, you can match a baluster for a non-standard opening and provide specialists with a complete set of initial data.
For the calculation, prepare:
-
measurement plan;
-
table of finished heights;
-
photographs;
-
furniture drawing;
-
number of racks;
-
desired material;
-
finishing;
-
references to horizontal lines;
-
requirements for the same pattern;
-
diagram of the upper and lower mounting.
Why the nominal 1000 mm cannot be reduced "by eye"
Let's imagine that the opening became 27 mm lower. It seems like a small difference. But the set has several sections, and each is connected to the neighboring ones.
If you remove 27 mm from the top:
-
the upper straight section will become shorter;
-
the large module will move closer to the frame;
-
the center of the drawing will rise;
-
adjacent posts may differ;
-
the mounting area may disappear.
If you remove 27 mm from the bottom:
-
the lower figure will drop;
-
the composition will become heavier near the floor;
-
the pattern will no longer match the facade;
-
the baseboard may cover part of the element.
If you distribute the difference across several zones without a drawing, the dimensions are hard to replicate across the entire batch. Therefore, even twenty or thirty millimeters require a full development drawing.
Several identical balusters: calculate by the minimum opening or by each position
There are two working approaches here.
Uniform height and uniform pattern
All posts are made identical to the minimum opening. In higher places, the difference is compensated with a coordinated installation solution. Plus — absolute repeatability of the pattern. Minus — residual gaps need to be carefully addressed.
Individual height while preserving the pattern
For each position, only the straight sections are changed, while the modules remain at the same relative levels. This method is more complex in production and labeling, but helps account for variations.
Which option to choose
The decision depends on how visible the row is, how the fasteners are arranged, and what matters more — uniform height of the figures or a tight fit for each post. The schedule must clearly specify the chosen principle.
What to do if openings differ by a few millimeters
A slight variation is not a reason to make random posts. First, determine the cause:
-
floor slope;
-
unevenness of the top rail;
-
deflection;
-
different thickness of the underlayment;
-
inaccurate furniture assembly;
-
measurement error.
After checking, an acceptable compensation method is determined.
A universal gap cannot be promised. In a visible furniture composition, even a few millimeters can be noticeable, but in a hidden mounting unit, they can be compensated by the design.
Preserving the visual center
KON-012 has not only an overall height, but also a visual center. It is formed by the largest volume or group of shapes.
To check, apply to the drawing:
-
eye height in the main scenario;
-
countertop lines;
-
handles;
-
shelves;
-
middle of the facade;
-
horizontal crosspieces;
-
adjacent decor.
The center of a large module is better connected to one of the significant lines than left at a random mark.
How to preserve the character of KON-012 after reducing the height
The external character of an assembled baluster is not created by a single shape. It is formed by the relationships between volumes. A large element is perceived as large only next to a calmer axis and smaller transitions. If all pauses are removed, the forms will merge. If excessively long empty sections are left, the composition will fall apart.
When recalculating, it is useful to evaluate four characteristics:
Density
How many decorative modules fall within the visible height. After reducing the opening, the density increases even if the composition is unchanged.
Hierarchy
Which element is primary, which is secondary, and which serves as a transition. If you remove the secondary figure, the large accent may be left without visual support.
Pauses
Straight sections of MLD-060 create breathing room. Their length should be intentional, not leftover from arithmetic.
Direction
The composition can visually stretch upward, be centered, or have a heavy base. Redistributing modules changes this direction.
Baluster for furniture, stands, or interior accents
KON-012 can be used in various decorative tasks, but the calculation changes.
Furniture post
You need to know the actual opening between frame parts, the mounting, and possible load. The decorative set itself does not replace the structural calculation of the furniture.
Stand or support
They check stability, the top and bottom nodes, load distribution, and the item's purpose.
Interior baluster
The main priorities become visual rhythm, placement safety, mounting strength, and repeatability of several verticals.
Decorative partition
The spacing of posts, uniform module height, light gaps, and attachment to the top and bottom base are calculated.
Post in a furniture portal
Here, geometric shapes must correspond to panels, cornice, plinth, and handles. Reducing from the bottom can break the connection with the base, reducing from the top—with the cornice.
Accent in a display case or shelving unit
The baluster works next to glass, lighting, and shelves. Need to check glare, shadows, and the side dimension of 130 mm.
KON-012 should not be automatically considered a stair baluster
The search query "buy wooden balusters" often refers to stair railings. However, KON-012 is positioned as a decorative modular composition for interior products, supports, and accents.
For stair railings, confirmed characteristics are needed:
-
structural strength;
-
mounting method;
-
step;
-
railing height;
-
work with handrails;
-
compliance with the project;
-
operational safety.
In the KON-012 card, these parameters are not declared as a universal stair system. Therefore, the article and the order cannot be based on the assumption that the decorative set automatically fits the railing.
Beech under enamel
Beech is chosen when a dense, opaque color is needed. The calm texture does not conflict with the geometry, and the enamel unites the axis and modules into a cohesive silhouette.
In a project with an altered composition, opaque finishing helps visually connect elements. However, enamel does not fix crooked assembly, uneven gaps, or misalignment.
Before ordering, it is useful to clarify, what 'Prestige' sanding meansand agree on the preparation for finishing.
Light enamel
On a white, cream, or pastel surface, shadows between shapes are especially noticeable. Straight sections must be even, and the axis must be exactly centered on the holes.
Dark enamel
Deep color unifies the form but shows dust, damage, and glue marks more clearly. Dry-fit inspection is still mandatory.
Bright enamel
Saturated color turns KON-012 into an active interior accent. Here, any difference between adjacent posts becomes more noticeable, so the patterns must match.
Oak for tinting, oil, or clear lacquer
Oak is chosen when the wood grain needs to be preserved. On rounded and faceted surfaces, the fibers reveal themselves differently, so the batch must be perceived as consistent.
When the composition changes, the direction of the texture is especially noticeable. Two figures of the same article may have natural differences. For a number of stands, it is better to order materials in one batch and agree on the finish in advance.
Clear finish is stricter on assembly
Enamel can hide color differences in the glue seam, but a transparent coating leaves the wood visible. Excess glue, scratches, and marking traces must be removed before the finish.
Tinting changes the perception of volume
Dark stain makes large modules visually heavier. If the reduced KON-012 turned out dense, very dark finishing can enhance this feeling.
Oil emphasizes the ends and the direction of the fibers
When trimming the axis, the end requires careful preparation. Decorative figures are not trimmed, so their factory geometry is preserved.
Why it is better to paint after assembly
The paint layer increases the dimensions of the seating surfaces. If you first coat the axis and the inner channel, the figure may no longer fit freely.
Correct logic:
-
dry layout;
-
height check;
-
marking;
-
trial assembly;
-
alignment;
-
fixation;
-
final processing;
-
finishing of the assembled composition.
The seating channel of the figures is protected so that paint, varnish, or oil do not change the fit.
Dry assembly before glue
No modified KON-012 should be immediately assembled with glue.
During a dry fit, check:
-
whether each figure passes along the axis;
-
whether the diameter matches;
-
is there any skew;
-
are the intervals maintained;
-
does the final height work out;
-
whether several posts align;
-
are the shapes oriented correctly;
-
are there enough mounting sections;
-
whether the large module interferes with adjacent parts.
All elements are marked with a pencil in a hidden area or with separate tags.
Control stand first
For a series, it makes sense to assemble one stand completely without final finishing. It is tried in a minimal opening, the pattern is checked, and only after confirmation is the scheme repeated.
Photo with tape measure
A photo of the assembled rack next to the tape measure helps confirm the dimensions and position of the modules before fixing.
Pair of stands for a symmetrical project
If the composition is built as a pair, it is better to lay out the left and right stands simultaneously. This allows mirror errors to be noticed.
Glue and temporary fixation
The card recommends PVA D3 for fixing figures on a wooden axis. During polymerization, painter's tape is allowed, and in certain scenarios, additional micro-pins.
This does not mean that one method automatically suits any structure. The following are taken into account:
-
material;
-
contact area;
-
load;
-
humidity;
-
finish;
-
orientation;
-
base;
-
requirements of the furniture project.
You can select compatible compounds in the section materials for installation of wooden modules, but final compatibility is checked according to the technical documentation.
How not to confuse KON-012 with similar products
Not a solid stair baluster
KON-012 consists of an axis and modules. A solid baluster has a continuous turned profile.
Not a KON partition kit
Partition kits are designed for different heights, compositions, and rhythms. Matching assembly principles does not make them interchangeable.
Not a separate KN figure
KN-013 or KN-005 — only one module. A stand requires an axis, full composition, calculation, and fastening.
Not an ordinary craft blank
Constructor elements have a mounting hole, precise dimensions, and a connection to the axle.
Not a ready-made load-bearing furniture leg
A decorative stand can be used in furniture only after a structural calculation.
Comparison of options after reducing the opening
| Solution | When it fits | Pros | Limitations |
| Reduce straight sections | The difference is small | The composition is preserved | The rack must not be deprived of mounting zones |
| Rearrange the modules | Need to maintain emphasis at a certain height | Controlled visual center | A new layout is required |
| Exclude module | The difference is significant | Height is reduced without cutting the figure | The rhythm of all stances changes |
| Assemble a composition from individual KNs | Standard KON-012 is not suitable | Complete freedom of the scheme | A thorough calculation is needed |
| Choose a different KON kit | A ready-made different pattern is needed | Selection is simplified | The size is still checked |
| Order a design calculation | Complex object or many racks | Reduces risk of errors | Accurate source data required |
What to buy with KON-012
| Product or section | Why it's needed | What to check | ||||||||||||||||||||||||||||||||||||||||||||||||||||||||||||||||||||||||||||||||||||||||||||||||||||||||||||||||||||||||||||||||||||||||||||||
| View KON-012 contents | Check standard composition | Material, elements, status, current price | ||||||||||||||||||||||||||||||||||||||||||||||||||||||||||||||||||||||||||||||||||||||||||||||||||||||||||||||||||||||||||||||||||||||||||||||
| Axis for KN geometric shapes | Assemble vertical | Diameter 34 mm, length, wood species | ||||||||||||||||||||||||||||||||||||||||||||||||||||||||||||||||||||||||||||||||||||||||||||||||||||||||||||||||||||||||||||||||||||||||||||||
| Buy geometric shape KN-013 | Save large accent | Size, hole, material | ||||||||||||||||||||||||||||||||||||||||||||||||||||||||||||||||||||||||||||||||||||||||||||||||||||||||||||||||||||||||||||||||||||||||||||||
| buy the compact figure KN-005 | Configure small rhythm | Height 66 mm and hole 34 mm | ||||||||||||||||||||||||||||||||||||||||||||||||||||||||||||||||||||||||||||||||||||||||||||||||||||||||||||||||||||||||||||||||||||||||||||||
| View all KN shapes and KON sets | Find replacement or add module | Size compatibility | ||||||||||||||||||||||||||||||||||||||||||||||||||||||||||||||||||||||||||||||||||||||||||||||||||||||||||||||||||||||||||||||||||||||||||||||
| Select glue for assembling a wooden baluster | Prepare assembly and finishing | Compatibility with wood and coating | ||||||||||||||||||||||||||||||||||||||||||||||||||||||||||||||||||||||||||||||||||||||||||||||||||||||||||||||||||||||||||||||||||||||||||||||
| choose beech or oak | Agree on material |
Type of future finishing
How to create a module mapFor each post, create a vertical list from bottom to top. For example:
This table does not claim that the standard KON-012 consists only of the listed rows. The full composition is verified in the card and the order specification. The table shows the calculation method: each element receives an article number, size, and position. Why you cannot write "figure on top"After assembling several racks, a verbal description loses meaning. Specify the number, article, and mark. Why a single zero reference is neededIt is better to take all dimensions from the bottom finished plane. If some marks are given from the top and some from the bottom, the risk of arithmetic error increases. How to fix the rotation of an elementRound shapes may not require orientation, but figures with complex geometry or noticeable texture are better marked with an arrow on the diagram. Marking the kit before assemblyFor a single post, marking seems unnecessary. For a row, it becomes mandatory. Use the system:
Marking is applied to tags or hidden areas that will not be visible after installation. Do not make deep scratches on the front surface. A separate package for each postAfter the test layout, it is convenient to sort the elements into labeled kits. This prevents mixing of parts. The list must travel to the installation site together with the goodsDo not leave the diagram only in electronic correspondence. A printed sheet helps the assembler check the order on site. Mistakes due to which the baluster will not fit againOrder before the finished floorThe opening changes after the flooring is laid. Even an accurate design mark does not replace the final measurement. Measure one pointThe minimum height remains unknown. The post enters from the left and rests against the right. Do not subtract mounting zonesThe composition fits arithmetically, but it cannot be fixed. Cut KN-013The large figure loses its shape, seating channel, and symmetry. Remove KN-005 from only one postThe row gets a different pattern. The difference is more noticeable than a small mounting gap. Reduce only the top end faceThe center of the composition shifts upward, and the top figure approaches the frame. Paint the seating channelModules no longer fit freely onto the axis. Assembly requires sanding of the already painted surface. Mixing beech and oak without a project.Even under similar tinting, the wood reads differently. In one rack, such mixing looks accidental. Consider the decorative rack as stair-relatedPurpose, mounting, and safety requirements are not confirmed. Order parts at different timesBatches may differ in wood, preparation, and shade after clear finishing. Do not sign elementsAfter dry fitting, the order is lost. The installer assembles modules in a different sequence. Do not check the side dimension of 130 mmA large figure collides with the facade, glass, curtain, or a person in the passage. Rely on the total height of modules without the axisThe sum of the shapes does not equal the total height of the composition. There are straight sections and mounting zones between them. Reduce all intervals equallySome pauses are more important than others. Mechanical division of the difference ruins the hierarchy. Not checking the minimum openingThe average value is taken as a basis, and one position ends up lower. Not making a control standThe error repeats throughout the entire batch. Placing an order verbally without a drawingThe phrase "make it lower" allows for different interpretations. Numbers and article numbers are needed. Who KON-012 is suitable forThe kit is worth considering if:
KON-012 is especially convenient for a project where the standard rhythm is liked, but the height needs to be adapted. The modular principle allows working with the composition more carefully than with a solid turned part. When it's better to choose another productAnother set or an independent composition is preferable if:
In such a situation, it is useful to choose modules for your own composition or consider another ready-made KON set. Request to manager: what data to provideA good request contains not only the article number.
Specify the minimum, not just the average heightIf the opening varies from 976 to 983 mm, both values must be included in the request. Add a photo with a tape measureThe photo does not replace the table, but confirms the location and direction of the measurement. Show the adjacent furnitureIt is important for the manager to see which horizontals the large module is attached to. Separately mention the transparent finishFor oak under oil or tinting, it is important to agree on material from the same batch. How to order KON-012 on STAVROSThe commercial path looks like this:
If the project requires changes, formulate the order not as "KON-012 standard", but as "KON-012 for finished height ___ mm according to the attached diagram". Full-scale control layoutBefore payment, print or draw the stand at a 1:1 scale. The layout must include:
The layout is applied to the installation site. This allows you to see whether the large accent is too low and whether it conflicts with the furniture. Layout for multiple standsFor a rhythmic row, it is better to make one full-size layout and copies with individual heights. The centers of the modules on all sheets must coincide according to the accepted rule. Side template 130 mmIn addition to the front layout, make a cardboard gauge of the transverse protrusion. It will show collisions with doors and passage. Kit acceptanceAfter receiving, check:
First, perform a dry assembly of one control position. If it matches the opening and the pattern, proceed to the rest. Do not discard the packaging until inspectionDamage or shortage is easier to document with preserved packaging and marking. Check the elements against the packing listAfter a change in composition, the set must contain exactly the number of figures specified in the confirmed specification. Check the opening before finishingEach figure must pass through the axis in a dry state. Do not try to fix a mismatch with a thick layer of glue. Checklist before payment
How to calculate the quantity of KON-012 and individual modulesThe quantity cannot be determined by a single line "as many as openings." The project may include main posts, mirror pairs, spare positions for trial assembly, and elements that are excluded from the standard composition after recalculation. First, approve one composition. Then, for each article, make a separate calculation: Module quantity = number of modules in one post × number of identical posts. If some openings receive a different scheme, they are counted as a separate group. For example, four posts are assembled according to scheme A, two according to scheme B. They cannot be combined into one line without a breakdown.
Reserve is assigned not automatically, but based on project risks. For expensive oak trim, an extra part may be useful as a tinting sample. But buying random modules without an approved composition is unreasonable: leftovers do not compensate for an error in the total height. Calculation of the MLD-060 axisFor each post, the full axis length is determined and compared with the available lengths in the card. Then a cutting map is compiled. It specifies:
It cannot be assumed that one axis of 1000 mm length will automatically produce one rack for a 980 mm opening. After end processing and preparation of mounting zones, the actual layout may change. Agreed allowance and meaningless allowance are not the same thingUseful allowance has a purpose: trial assembly, finish sample, replacement of a damaged part, or compensation for manufacturing defects. Meaningless allowance is a few random modules without understanding where they can be used. Cutting layout for multiple racksThe cutting layout is especially important when finished heights differ. A separate row is created for each axis:
After cutting, the number is immediately saved on each segment. Otherwise, the axes are easy to confuse: visually they are identical, but the lengths differ by a few millimeters. Why the end is included in the calculationThe trimmed axle must have a neat end face perpendicular to the longitudinal line. If the end face is angled, the post becomes skewed, and the dimension on one side differs from the other. For a clear finish, the quality of the end face is even more noticeable. First cutting, then final marking of modulesIf all marks are applied first and then the axle is shortened from the other end, the position of the shapes will shift. The working sequence must be fixed in the map. Control dimensions after dry assemblyAfter installing all modules without glue, not only the total height is measured. It is useful to check:
Results are recorded next to the design values. If the actual size differs, first determine the cause: cutting error, incomplete seating of the figure, mixed-up module, debris in the channel, or incorrect mark. Incomplete seating cannot be compensated by forceIf the figure did not reach the mark, hitting it with a hammer does not solve the problem. Remove the module, check the channel and axis, remove the obstruction, and repeat the dry fit. Face-to-face pair checkTwo symmetrical posts are placed side by side on a flat surface. The centers of the figures and the ends must align according to the adopted scheme. This check detects errors faster than measuring each part individually. How to record changes so they are not lost during installationThe modified KON-012 must exist not only in the designer's memory. Prepare a set of documents:
Each document is marked with a version number and date. If the floor was raised by a few more millimeters after measuring, the old scheme should not accidentally end up in the work. Changing one digit requires a new sum checkIf the opening height decreased from 982 to 978 mm, it is not enough to correct one cell. The visible height, straight zones, and module positions are recalculated. Approval by photo does not replace dimensionsA photo helps assess the rhythm but does not confirm millimeters. The final version must contain numerical marks. Three levels of verification before final fixationGeometric levelThe stand fits, the axis is straight, the figures are fully seated, and the mounting zones are preserved. Compositional levelLarge and small modules form a readable rhythm, the center is connected to the furniture, and paired stands match. Technological levelMaterial, adhesive, preparation, marking, and finishing sequence are coordinated. Only when all three levels are passed can the dry composition be moved to final assembly. FAQ: questions about KON-012 and the finished openingWhat is the standard height of KON-012?The nominal height of the set is 1000 mm. For ordering, it must be compared with the actual finished opening and the mounting zones subtracted. Can the MLD-060 axis simply be shortened?Straight sections can be reduced if mounting zones and the pattern are preserved. The solution is recorded in the diagram, and the required axis length is agreed upon before ordering. Can part of KN-013 be cut off?No, random trimming will destroy the shape and the mounting channel. The large figure is used as a whole. Can KN-005 be removed?The card allows changes to the composition, but the exclusion must be agreed upon and repeated on all identical racks if the project requires a uniform pattern. How to measure the opening?Measure the height at least at three points after the floor and top assembly are completed. Record the minimum value and separately specify the mounting zones. What to do if the openings have different heights?Create a list for each position. Then choose a single size based on the minimum or individually modify only straight sections, preserving the position of the figures. Is KON-012 suitable for a staircase?The card describes a decorative interior composition. For a stair railing, a separate structural project and confirmation of all safety requirements are needed. What is the axle diameter?The diameter of MLD-060 and the mounting holes of related modules is 34 mm. How does beech differ from oak?Beech is convenient for dense enamel, oak is chosen for finishes with visible texture. Specific preparation is checked in the card and the quality section. When should the baluster be painted?After full assembly and inspection. Mounting channels are protected from the paint layer to avoid changing the diameter. Which glue should I use?The card recommends PVA D3. The specific composition is selected considering the material, load, humidity, and project. Can I order one control post?The possibility and conditions need to be clarified when placing the order. For the series, a control assembly reduces the risk of repeating an error. Do I need to buy KN-013 separately?The standard composition is checked in the card. A separate module is needed if the specification changes or a custom composition is being assembled. Can KON-012 be made below 900 mm?The possibility depends on the selected composition and proportions. With a significant reduction, it is better to develop a new composition rather than compress the standard one. How to keep the same pattern for five balusters?Use one layout, unified module numbering, and control marks on all axes. Changes are repeated systematically. What to do if the floor is not yet laid?First, calculate the full floor build-up, but confirm the final order based on the finished measurement after the covering is completed. Can a large module be moved higher?Yes, as a design change, if the installation zones and the overall rhythm are preserved. The new position is recorded in the drawing. What is more important: the same height or the same pattern?For a visible row, a unified pattern is usually more important. The method of compensating for different heights is agreed upon separately. Where can I see other shapes?You can study the material about which geometric shapes to place on the axis, and then proceed to the module cards. What should I send to the manager?Final dimensions, quantity, module layout, material, finish, photos, purpose, and installation zone data. Can only the upper straight section be reduced?Technically, this option can be considered, but it shifts the pattern. First, check the position of the central accent and the length of the upper mounting zone. Do we need to keep equal distances between all shapes?No. The rhythm can be built on different pauses. The main thing is that the intervals are set by the scheme and repeated in identical stances. Can elements of a different wood species be used?Mixing beech and oak requires a separate artistic solution. For a solid finish, it is safer to choose one species within the composition. What to do if KN-005 does not fit on the axis after painting?Do not use force. The cause may be a paint layer in the channel or on the axis. That is why seating surfaces are protected and checked before finishing. How to check the side dimension?Make a cardboard template with a width of the maximum dimension of 130 mm and run it along the entire height of the future post. Can KON-012 be used as a table leg?Only after a structural calculation of the frame, fastening, and load. The decorative kit itself is not a ready-made universal leg. How to calculate the number of elements for ten posts?First, approve the composition of one post, then multiply the quantity of each item by the number of posts and add only the agreed technological allowance. Is an allowance needed along the MLD-060 axis?The allowance depends on cutting and ordering method. It cannot be assigned arbitrarily: create a cutting map based on available lengths and approve it. Can the posts be assembled independently?Independent assembly can be considered if there is a precise diagram, dry fitting, and understanding of fastening. A complex or loaded project is better entrusted to a specialist. Why can't the modules be glued immediately based on a photo?A photo does not show precise intervals, mounting zones, and actual height. First, a drawing or full-size layout is needed. Summary: the composition needs to be recalculated, not cut off the beauty.KON-012 was not chosen for the round axis. The buyer is attracted by the rhythm: a large form, a small transition, a pause, then volume again. It is this order that makes the assembled baluster expressive. When the floor has been raised and the opening has become smaller, the task is not to remove extra millimeters at any cost. The design intent must be preserved in the new size. Check the finished opening, create a height schedule, subtract installation zones, lay out the shapes on the axes, and choose one of the meaningful scenarios: shorten straight sections, rearrange modules, remove a shape in a coordinated manner, assemble a custom post, or order a calculation. STAVROS offers the KON-012 kit itself, the MLD-060 axis, KN-013 and KN-005 shapes, assembly materials, and the option of project consultation. When all items are linked by a single scheme, the decorative baluster becomes not a random set of wooden forms, but a precisely calculated part of furniture or an interior. |