Article Contents:
- Wooden mini balusters at furniture scale
- Where short posts are used in furniture
- How to calculate the post length between shelves
- Shelf thickness affects the overall height of the shelving unit
- How to choose the diameter of a mini baluster
- How to calculate the spacing and number of posts in a row
- Why the profile must be checked along the entire height
- The number of parts is calculated by openings and sides
- Ready-made turned post or assembly from modules
- Module examples: small size must be checked across all axes
- Top and bottom ends matter more than a single attractive thickening
- Beech or oak for small posts
- Finishing repeating profiles
- One sample and a row mockup before purchasing a batch
- How to list mini balusters in a specification
- Can a mini baluster be replaced with a furniture leg
- Where to buy mini balusters and turned wooden elements
- Questions before ordering
- Can wooden mini balusters be shortened to fit the required shelf?
- Can an asymmetric post be flipped?
- Why check shelf clearance if the spacing between posts is sufficient?
- Can an order be repeated from a photo of a finished shelving unit?
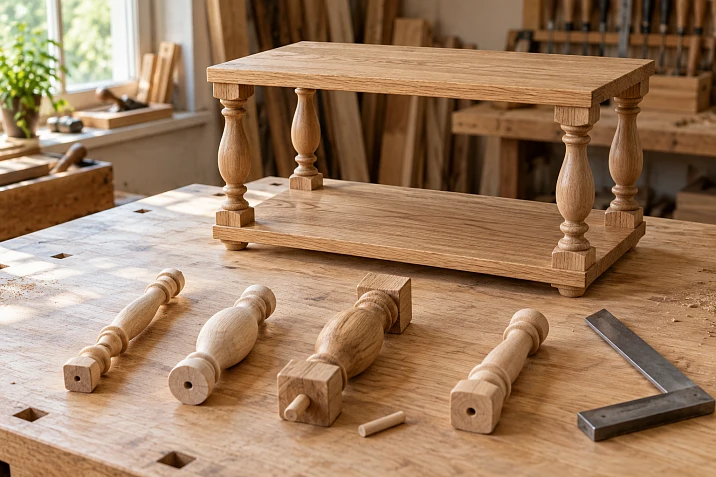
The required spacing was left between the shelves, a beautiful short post was chosen — and during assembly it turned out to be too short to seat in the holes. Another model fits in height, but its wide thickenings almost block the opening. For a small shelving unit these mistakes are especially noticeable: the posts repeat, so an unsuccessful size immediately changes the whole piece.
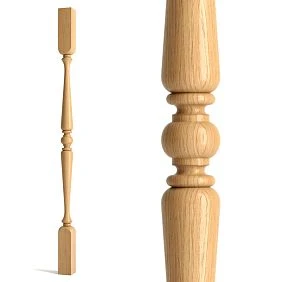
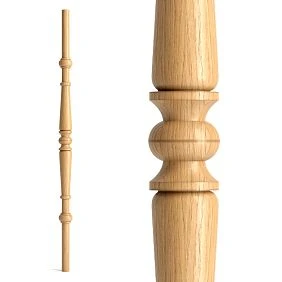
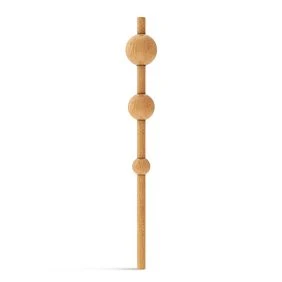
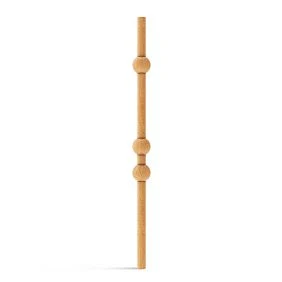
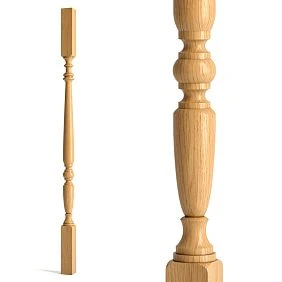
Wooden mini balusters are selected based on their place in the furniture. First, the spacing between shelves and the design of the top and bottom connections are determined, then the diameter, profile and arrangement are checked. After that, the material, finish and quantity of identical parts are chosen. The name "mini" helps describe the scale, but does not replace a drawing and the dimensions of a specific product.
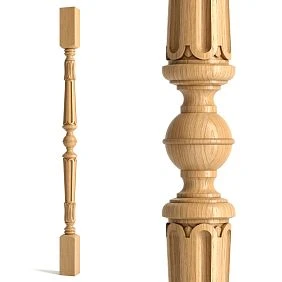
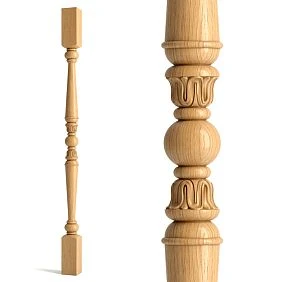
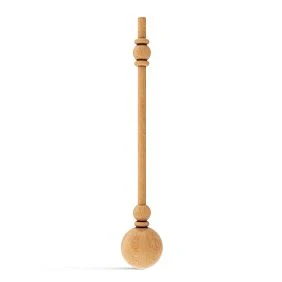
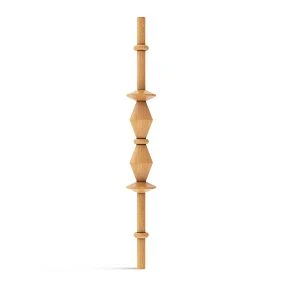
Wooden mini balusters at furniture scale
In a shelf or shelving unit, a mini baluster works as a short vertical post: it connects levels, frames the side panel, or creates a decorative row. The load-bearing and decorative functions may differ. One element participates in transferring the load from the shelf, while another only fills the space between already fixed parts.
Selection depends on this. For a decorative row, the profile, spacing and junctions are important first. For a load-bearing post, the cross-section, connections, rigidity and the behavior of the entire furniture structure are additionally checked. The word "decorative" should not mask a situation where a shelf with items actually rests on the part.
A stair baluster is selected as part of a railing, while a furniture post is selected as part of furniture. A small balustrade on a sideboard or shelving unit is not a stair or balcony railing. This section addresses the furniture assembly specifically, without transferring stair dimensions or layout schemes.
It is also not possible to obtain a suitable mini baluster by simply shortening any large model. Cutting removes the end sections, changes the position of the thickenings, and may eliminate the space for attachment. A profile is needed that fits at its actual size.




Where short posts are used in furniture
| Installation location | What the posts provide | What to check first |
|---|---|---|
| Between the shelves of the etagere | They connect the levels and form open bays | The distance between shelves and both joints |
| On the side panel of an open module | They create repeating verticals | Useful depth and access to the contents |
| In a small wall shelf | They connect the parts of a furniture composition | General diagram for attaching the shelf to the wall |
| In the hutch of a cabinet or sideboard | They separate the open section | Scale relative to the lower cabinet |
| In the decorative row above the shelf | They form a low furniture balustrade | Spacing, end margins and junction with the strips |
First, mark on the sketch which uprights are load-bearing and which are decorative. They may look similar, but the requirements for the joints do not have to match. For a wall shelf, the presence of vertical parts also does not eliminate the need to check its main fastening.
For an open module, the front view is not the only thing that matters. A three-dimensional profile on the side panel can reduce the clearance for a book or box. Measure the most protruding areas along the entire path where the item is placed, including the upper part of the upright under the shelf.
Our factory also produces:
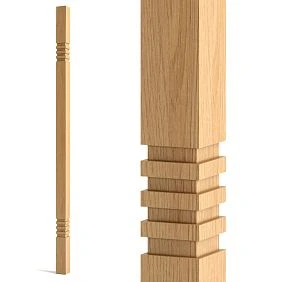
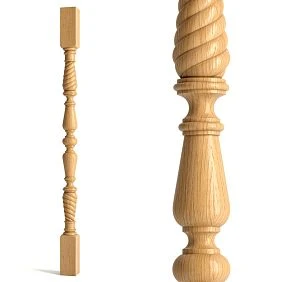
How to calculate the length of the upright between shelves
Distinguish two dimensions: the distance between the shelf surfaces facing each other and the full length of the wooden part. They coincide only with a particular type of joint construction.
If the post stands with its flat ends between the shelves without intermediate elements and does not extend inside, its installed length equals this distance. If the ends go into the shelves, the full part must be longer than the visible section.
Full post length = distance between shelves + top end embedment + bottom end embedment.
This entry refers to a part whose own ends go into the adjacent elements. A separate dowel or pin is a different case: its length is not automatically added to the length of the wooden post body.
Suppose the clear distance between the shelves is 240 mm. The top end of the post goes into the shelf by 12 mm, and the bottom end by 10 mm. Then the full length of the part is 240 + 12 + 10 = 262 mm. The visible section between the surfaces remains 240 mm. All numbers are illustrative: the seating depth is chosen for the actual joint and shelf thickness.
Subtracting both seatings from 240 mm in this example would be a mistake: the result would be a part that is too short. A different matter is separate washers or bases located inside the opening. If a 4 mm washer is placed at the top and bottom, and the post itself abuts them with its ends without embedment, 240 − 4 − 4 = 232 mm remains for it.
On the working drawing, show the shelves, ends, tenon shoulders, washers, and fasteners in section. Each dimension must have a clear reference base. The wording "post height 240" is insufficient if it is unclear whether the tenons and additional parts are included.
When choosing a ready-made model, check which dimension is given in the product card: the overall length of the product or the distance between specific sections of the profile. Also, do not confuse the hole depth with the actual end embedment. If the shelf position is set by the tenon shoulder, the assembly dimension is measured to this bearing surface, and the hole depth is coordinated with the joint construction.
Get Consultation
The thickness of the shelves affects the overall height of the shelving unit
The height of the opening between shelves is not equal to the distance between their top surfaces. The second dimension includes the thickness of the next shelf. Mixing up these values is especially noticeable when there are several levels.
For a conventional shelving unit with three shelves 20 mm thick and two clear openings of 240 mm each, the total height of such a block is 3 × 20 + 2 × 240 = 540 mm. Legs under the bottom shelf, finials and other protruding elements, if any, are accounted for separately.
When the overall height of the module is specified, it is first distributed between the shelves and openings. Then the length of the uprights is calculated taking joints into account. This order prevents discovering at the end that identical purchased parts produce a shelving unit taller than planned.
If the levels have different heights, separate items are needed for the uprights. Even with the same profile pattern, parts for the upper and lower openings must not be mixed. During assembly they must be unambiguously matched to the drawing.
How to choose the diameter of a mini baluster
A short upright with a wide thickening looks different from a tall part of the same diameter. As the height decreases, the profile is perceived as denser. Therefore height and cross-sectional dimensions are considered together, without a universal ratio between them.
For a turned part, compare at least three sections: the narrowest neck, the maximum thickening and the end bases. The maximum diameter determines how much space the profile occupies. The neck cross-section and end zones are needed to assess the structure and fastening.
For a load-bearing application, a beautiful thin transition does not yet mean the chosen part is acceptable. Material, height, load, holes and joints are taken into account. Load-bearing capacity cannot be assigned based on a single maximum diameter or on the fact that the upright is made of oak.
For a small shelf, it is useful to attach to the sketch the silhouettes of two models of the same height. Compare them with the shelf thickness and the size of the whole module. A thickening that looks neat in a separate photograph can turn into an almost solid band in a row of several uprights.
How to calculate the spacing and number of uprights in a row
Spacing is the distance between the axes of adjacent uprights. Clearance is the distance between their nearest surfaces. For two identical circular sections at the chosen height, the clearance equals the spacing minus the diameter at that level.
First determine the field length between the side boundaries of the row. Then choose the number of posts, take their width into account, and distribute the remaining space among the gaps. With equal gaps, including both outer ones, the result is:
Field length = number of posts × post width + (number of posts + 1) × clearance.
Clearance = (field length − number of posts × post width) ÷ (number of posts + 1).
In these formulas, the outer gaps are measured from the field boundary to the surface of the post. If the project provides for different edge offsets, they are subtracted separately and the remainder is distributed only among the posts.
Let's take a conventional field 600 mm long and identical posts 30 mm wide at the level being checked. Let's compare several options:
| Number of posts | Total width of parts | Number of gaps including outer ones | Equal clearance |
|---|---|---|---|
| 5 | 150 мм | 6 | 75 мм |
| 6 | 180 мм | 7 | 60 мм |
| 7 | 210 мм | 8 | 48.75 mm |
For six posts, the spacing is 30 + 60 = 90 mm. The first axis is located 60 + 15 = 75 mm from the start of the field. Subsequent axes: 165, 255, 345, 435 and 525 mm. The last post ends at 540 mm, so 60 mm also remains on the right.
This is a calculation of a furniture composition, not a safety barrier standard. It does not determine the permissible load on the shelf. The number of load-bearing posts and their arrangement must be coordinated with the structure, and the decorative rhythm should be selected within that solution.
Why the profile must be checked over the full height
Equal axis spacing does not produce equal clearance along a shaped post. A narrow neck opens up space, while a bead or vase closes off part of it. That is precisely why a calculation based only on the thin middle section can be misleading.
In the previous conditional example, the spacing is 90 mm. If at another height the profile widens to 40 mm, the clearance there will be 90 − 40 = 50 mm. With unchanged axes, the outer gaps will also become smaller: 55 mm instead of 60 mm. To assess the tightest section, the actual outer contour is used.
Place several repeats on the mockup, not just one post. For a side panel or a low decorative row, you can compare two options for the quantity. A denser arrangement strengthens the vertical division; a sparser one leaves more open space. The choice depends on the entire module and the items that will be on the shelf.
Symmetry is measured from the boundaries of the visible field. If part of the row is covered by a side wall, equal offsets from the invisible edges of the workpiece may not produce visually equal outer gaps.
The number of parts is counted by openings and sides
For a shelving unit with three shelves, there are two gaps between the levels. If in each of them the project provides for four separate corner posts, 2 × 4 = 8 parts will be required. The lower legs and upper finials are not included in these eight.
A different count applies to a decorative row. Six posts on one side panel and the same number on the other make twelve parts per level. If such a row is repeated in two openings, the result is twenty-four. Shared corner posts, if they belong to two visible sides at once, must not be counted twice.
Record the parts of different heights, orientations and versions separately. For a modular post, also count the number of each module per assembly. Reserve items, trial parts and elements for finishing are added deliberately, not mixed with the quantity required for the finished furniture.
A finished turned post or an assembly of modules
A finished post is chosen when a suitable profile with the required height and end sections has been found. The order specifies a single version of the part and the quantity. At the same time, "one finished part" does not necessarily mean it is made from a single solid block: the construction of the wooden blank is specified separately.
A modular composition is considered when the height, the sequence of thickenings or the shape of the transitions need to be defined from several components. In the section wooden construction set elements you can compare the shapes that are included in posts and other furniture components.
The assembly requires its own diagram and a complete list of parts. Check the axis or base, the mounting holes, the end joints and the method of fixing each element. Matching hole diameters do not yet confirm the rigidity of the finished post or its connection to the shelves.
The height of such a structure also cannot always be obtained by adding up the catalogue lengths. If the elements fit into one another or overlap part of an adjacent part, the dimensions after assembly are taken into account. If they are positioned with gaps on a common axis, these gaps are also included in the calculation.
Examples of modules: the small size must be checked along all axes
The STAVROS configurator includes, for example, the following products:
| Model | Size A × B × C × D, mm | Confirmed features |
|---|---|---|
| Geometric figure KN-009 | 22 × 62 × 62 × 34 | Beech or oak; 34 mm through hole |
| Geometric figure KN-005 | 66 × 76 × 76 × 34 | Beech or oak; 34 mm through hole |
The descriptions of both models provide for mounting on an MLD-060 wooden axle or a pipe of the corresponding diameter. These are components to be incorporated into a structure, not automatically ready-made short supports between shelves.
The KN-009 combines a small axial dimension of 22 mm with an outer transverse dimension of 62 mm. So the word "short" does not mean "thin". In a compact shelving unit, the module width may prove a more significant constraint than its height.
Such items cannot be substituted into the above calculation for conventional 30 mm wide posts without recalculation. For each selected profile, the outer contour, pitch and free gaps must be determined anew.
The top and bottom ends matter more than a single attractive thickening
Before purchasing, examine both ends of the post. You need the dimensions of the flat sections, the shape of the end, the position of the axis and the available connection area. A shaped finish may require a separate adapter element, whereas a flat pad requires a different method of joining.
If drilling is planned, check where the hole will fall and how much wood will remain around it. The possibility of modification is agreed on a case-by-case basis for the specific part. Pay especially close attention to the narrow neck, the end after trimming and the area where a mounting hole already exists.
The assembly drawing should show not only the fastener and the insertion depth, but also the shelf thickness. For a blind hole, the material specified by the design must be preserved up to the opposite surface. The joint dimensions are not assigned based on the outer diameter of the post alone.
In a series, it is convenient to mark holes from identical datums and use a proven template. Otherwise, an even row according to the sketch may become uneven after installation: axis position errors will be noticeable on several repeated parts.
STAVROS product drawings and the documentation for the specific model are used before final marking is issued. If the required dimension of the mounting part is not in the available drawing, it is clarified with the supplier or on a sample.
Beech or oak for small posts
Beech is best viewed under a dense enamel, where the silhouette and color remain the main focus. Oak is best suited to tinting, oil, or clear lacquer when the project needs a pronounced wood texture. These are directions for selection, not a restriction on the finishing methods for each species.
In a row, what matters is how the parts look together. The same stain on several blanks does not guarantee a complete match in shade. The coating sample is compared with the posts and the shelf next to which they will be installed.
In the section quality of wooden products STAVROS separately describes surface preparation and regluing options for enamel or tinting. Both parameters must be agreed for an order. More thorough sanding by itself does not mean an identical wood pattern.
The species is chosen after checking the geometry. Replacing beech with oak will not fix a short mounting section, an overly wide profile, or an unsuitable height.
Finishing of repeating profiles
On a turned profile, light is distributed differently: protrusions are lit, recesses cast shadow. Therefore, the color on a flat sample may be perceived differently than on a finished mini-baluster. Before a batch, a test coat is needed on a part with characteristic geometry.
Agree on which surfaces are finished before assembly and which remain prepared for joining. The coating thickness may change the fit in the hole. A lacquered or enameled area also cannot automatically be considered a suitable surface for the chosen adhesive.
Mounting and finishing materials are selected as a compatible system taking into account the wood, the substrate, and the assembly method. For a composite post, the order of operations is especially important: after the modules are fixed, some surfaces may become difficult to access.
In a small series, a single preparation and application technology is maintained. It is convenient to evaluate the parts of one row together before installation in order to notice differences in shade or gloss. The approved sample is signed and kept for comparison with subsequent orders.
One sample and a row mock-up before purchasing a batch
A single test post answers questions about size, surface, and joinery. But it does not show the rhythm of multiple repeats. For this, the fitting is supplemented with a full-size mock-up of the row: paper silhouettes, templates, or a precise model.
It is convenient to carry out the check in the following order:
- Verify the full length, the visible section, and the cross-sectional dimensions of the part.
- Fit the upper and lower assemblies to samples of shelves of the required thickness.
- Place the repeating contours at the selected spacing and check the outer margins.
- Match the openings with the items for which the furniture is intended.
- Perform a test finish and compare it with the shelf.
- Record the item code, finish, joinery, and the accepted quantity.
If the posts are involved in bearing, fitting a single sample does not confirm the performance of the entire product. Rigidity and stability are assessed for the assembled structure according to the approved design. A decorative mock-up solves only its own task.
For the resulting set, check the uniformity of dimensions from the same supporting surfaces. Matching the overall length at the extreme points does not always confirm an equal distance between the shoulders or washers. For four posts of one opening, it is the installation dimensions that determine the position of the upper shelf. Discrepancies are identified before finishing and final assembly.
For a batch of several identical rows, an error in one position will be repeated many times. Therefore, a changed diameter or a new end washer requires returning to the calculation, even if the central profile has remained the same.
How to record mini-balusters in the specification
The entry must link the purchased part to a specific furniture opening. For multiple levels, it is useful to mark them on the drawing and not rely on the visual similarity of the posts.
| Field | What to save |
|---|---|
| Position | Level, side, or corner of the furniture module |
| Part | Item code and exact dimensional version |
| Height | Visible section, full length, and fits |
| Profile | Maximum contour, end sections, orientation |
| Layout | Number of posts, axis coordinates, edge margins |
| Connection | Upper and lower assemblies, additional parts |
| Material | Wood species, blank preparation, and surfaces |
| Finishing | Coating system and control sample |
| Quantity | Per module and per series; samples and reserve separately |
For a modular rack, additionally compile a list of modules per assembly. If, for example, each of the eight posts has two identical bushings, you need sixteen bushings, not eight. Axles, fasteners and end parts are counted separately.
Before ordering, check that the bill of materials matches the latest version of the drawing. A link to the product page is useful but does not replace recording the selected material and dimensions: one page may contain several variants.
Can a mini baluster be replaced with a furniture leg?
External similarity of a turned profile does not confirm the same purpose.
| Parameter | Post between shelves | Leg under the cabinet |
|---|---|---|
| Main joints | With the upper and lower furniture planes | With the cabinet and the floor |
| What determines the position | Opening, axes and repeat row | Cabinet support diagram |
| End sections | Require checking from both sides | Top fastening and lower floor contact |
| Quantity | By levels, sides and joints | By furniture design |
In the section unpainted turned furniture legs you can compare ready-made profiles. Using the selected model as an inter-shelf post is permissible only after checking both junctions and dimensions. The foot pad or shaped leg base may require a solution that was not originally part of the post design.
Where to buy mini balusters and turned wooden elements
Selection begins with the required geometry: a short ready-made post or components for a coordinated assembly. In the catalog wooden furniture components STAVROS compares suitable groups, then moves on to the specific item and its drawing.
General section wooden balusters and selections round turned balusters и carved and turned-carved balusters help compare profiles. These are stair categories: the presence of a model in them does not by itself confirm its small furniture scale and suitability for a shelf.
To buy mini wooden balusters or select ready-made turned elements for an assembled post, provide the supplier with the distance between shelves, the mounting layout, the maximum outer dimension and the number of parts. Add the wood species, preparation and intended finish. If you need a sample, specify it separately from the working set.
Price, availability and lead time are confirmed for the selected version. For a repeatable series, it is useful to study conditions for manufacturers and save the agreed item codes together with the drawing. A ready-made purchase should replicate the project: the required length, suitable ends, the calculated spacing and a sufficient number of parts.
Questions before ordering
Can mini wooden balusters be shortened to fit the required shelf?
Only if trimming is provided for or agreed upon for the specific model. The installation zones and the intended profile must be preserved. Having extra millimeters in the overall length does not mean they can be removed from either end.
Can an asymmetric post be flipped?
The position is changed after checking the ends, joints, and silhouette. With a directional profile, flipping changes not only the pattern but also the location of the wide sections relative to the shelves. The accepted orientation is marked on the drawing for the entire batch.
Why check access to the shelf if the distances between the posts are sufficient?
An item may pass between adjacent posts but not fit under the top shelf or may hit the back row. The entire installation and removal path is checked, not just a single frontal clearance.
Can an order be repeated from a photo of a finished shelving unit?
For an exact repeat, you need item codes, dimensions, material, and finish. A photo preserves the overall appearance but does not show the fit or the composition of the assembled post. Therefore, it is better to include wooden mini-balusters in the specification right away: it will allow both an individual part and the entire furniture range to be repeated.