Article Contents:
- What Makes an Art Deco Wall Look Intentional?
- Geometry is a system, not an assortment of shapes
- Symmetry, repetition, and breathing room
- Contrast creates the final character
- Polyurethane wall molding versus wood, MDF, plaster, and polystyrene
- Face width is not the same as projection
- Verified STAVROS profiles for linear Art Deco details
- What to check in a product drawing
- 1. One tall geometric frame behind a sofa
- 2. Three vertical bays for a living-room accent wall
- 3. A stepped outer frame with a quieter inner contour
- 4. A mirror-centered foyer composition
- 5. Framed panel fields behind a headboard
- 6. A low geometric wall treatment
- Survey the room before drawing the frames
- Choose one measurement convention
- Set margins that suit the wall, not a fixed formula
- A nine-foot wall with three equal bays
- Why linear feet alone can understate the order
- Cut plan A: three narrow frames, 30 by 54 inches
- Cut plan B: three 26-by-50-inch bays on a nine-foot wall
- Cut plan C: two large frames with nested inner borders
- Long horizontal bands and unavoidable joints
- Where an ornament earns its place
- Coordinate an onlay with the frame opening
- Coordinated kits versus individual parts
- Dark blue, warm white, and a restrained metal accent
- Forest green, cream, and dark wood
- Step 1: inspect and prepare the substrate
- Step 2: transfer the drawing accurately
- Step 3: plan and cut the miters
- Step 4: dry-fit each complete frame
- Step 5: attach trim with an approved system
- Step 6: prepare joints, caulk, and paint
- Step 7: check the result in real lighting
- Fireplace walls and other heat sources
- Wall lights, televisions, and electrical access
- Hallways, rentals, and high-contact locations
- Match the selection to the drawing
- Add ornaments only after the linear plan is settled
- Is Art Deco wall molding the same as picture frame molding?
- Which polyurethane molding should I select for a small room?
- Can polyurethane wall molding be painted gold?
- How do I measure the trim for a rectangular panel?
- Can I put wall molding directly on textured paint?
- What is the difference between a molding, an onlay, and a decorative kit?
- How much extra molding should I buy?
- Are standard wall moldings suitable around a fireplace?
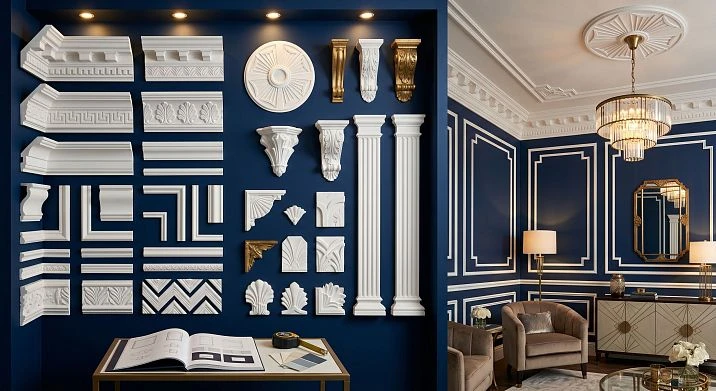
An Art Deco wall does not depend on expensive stone, ornate plasterwork, or a room full of gold accents. Its character comes from deliberate geometry, a clear focal point, controlled contrast, and details that relate to the architecture. A flat painted wall can carry that character when the layout is measured carefully and the trim is chosen for its actual dimensions. For homeowners planning an accent wall, or designers specifying a living room, entryway, bedroom, or small commercial interior, well-proportioned decorative wall molding offers a practical starting point.
The useful question is not simply which molding looks the most luxurious. It is how the profile, frame sizes, furniture, lighting, and paint finish will work together. This guide explains how to translate Art Deco design into an achievable American interior, select verified STAVROS polyurethane profiles, work out cut lengths in inches and linear feet, and avoid common installation mistakes. It also distinguishes individual molding from decorative onlays and coordinated sets, because those products are not interchangeable and may not all be made from the same material.


What Makes an Art Deco Wall Look Intentional?




Geometry is a system, not an assortment of shapes
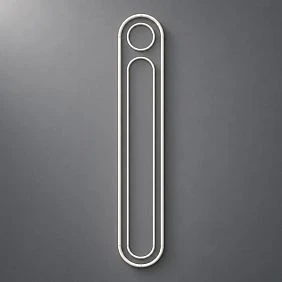
Art Deco is associated with the decorative arts of the 1920s and 1930s, but the principles are useful in newer homes too. Straight verticals, stepped outlines, fan or sunburst motifs, and repeated rectangular fields can give a wall a recognizable rhythm. They do not all need to appear together. Two tall panels with a controlled gap may read as Art Deco more convincingly than twelve unrelated ornaments. A good design establishes one organizing idea and repeats it with discipline.
Start by identifying the architectural center. On a living-room accent wall it may be the sofa, rather than the mathematical midpoint between the side walls. In a bedroom it is typically the bed. A foyer may be organized around a mirror or console. The eye reads the relationship among these fixed objects and the surrounding trim. If the furniture is intentionally off center, the molding can frame a functional zone instead of forcing strict symmetry across the entire room.
Наша фабрика также производит:
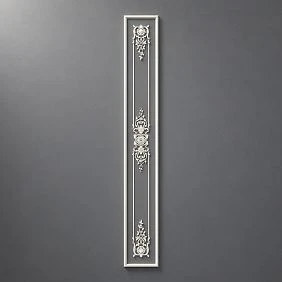
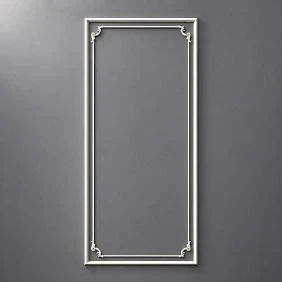
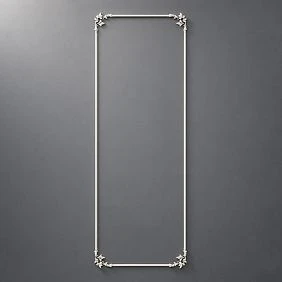
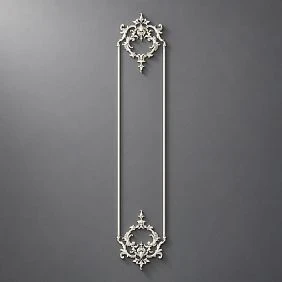
Смотреть весь Каталог продукции
Symmetry, repetition, and breathing room
Symmetry is a familiar Art Deco approach, but it is a tool rather than a rule for every situation. A centered frame with two narrow side panels can suit a formal room. An offset larger panel beside two smaller ones may work better around a doorway. What matters is a recognizable proportion: equal margins where they are meant to match, alignment between corresponding edges, and enough undecorated wall to let the frames remain legible.
Measure the uninterrupted wall surface, not only the overall room width. Door casings, baseboards, ceiling transitions, radiators, light switches, and built-in furniture all consume space. Mark those first. The remaining usable field will determine whether you can fit one dramatic panel, a three-part arrangement, or a repeating series of narrow bays. This preparation prevents a pattern from ending awkwardly against a doorframe or a corner.
Получить консультацию
Contrast creates the final character
A wall covered in deep navy with trim painted the same color can look architectural and quiet. The same wall with ivory trim becomes graphic. A small metallic finish on a selected ornament brings another level of emphasis. This is why color decisions should be made alongside the profile selection, not after everything is attached. Relief depth creates shadows; paint determines whether those shadows feel subtle or theatrical.
For an approachable contemporary interpretation, let one surface carry the strongest contrast. Keep adjoining walls calmer, and coordinate the molding with existing doors and furniture instead of introducing a new color every few feet. The result is more coherent and easier to live with over time.
Choose the Right Material Before Choosing the Pattern
Polyurethane wall molding versus wood, MDF, plaster, and polystyrene
Polyurethane molding is an option for applied decorative wall frames. It provides shaped profiles that can be fitted and painted using a compatible installation and coating system. The decisive details are the individual product's width, projection, stock length, and surface preparation requirements. Do not treat every item described as "molding" as polyurethane: suppliers may also sell polystyrene cornices, wooden trim, MDF panels, or mixed-material decorative kits.
Wood can be appropriate when the design calls for authentic grain or stained architectural millwork. MDF is common for painted boards and broad flat panels, but its performance depends on moisture exposure, edge preparation, and finish. Traditional plaster can belong in heritage restoration or where the specified appearance demands it. Polystyrene is a different polymer with different adhesive and coating restrictions. None of these is an automatic substitute for a verified polyurethane profile just because its photograph looks similar.
In practice, the best material decision begins with the room and substrate. A dry interior drywall surface, an older uneven plaster wall, and a factory-finished cabinet panel may require different preparation even if the planned geometry is similar. Review the product instructions and test the proposed attachment and finish where appropriate. For heavy or overhead pieces, obtain installation guidance suited to their location and support requirements.
Face width is not the same as projection
A molding has at least three relevant dimensions: the face width you see from the front, the distance it projects from the wall, and its stock length. A thin face can still cast a noticeable shadow if its relief is deep. A wider profile with shallow relief may appear quieter. When deciding between two designs, compare their side profiles as well as the catalog photographs.
Face width affects the negative space inside a frame. If you design a rectangle measuring 30 inches across its outside long points and choose a 1.38-inch-wide profile, the interior opening will be approximately 2.76 inches narrower than the outside width, subject to the actual cross-section and layout. This can substantially change the visual balance of a narrow panel. Mark which edge your measurements refer to before making any cuts.
Verified STAVROS profiles for linear Art Deco details
The following are real polyurethane wall-molding products listed on the U.S.-facing STAVROS site. Their dimensions are nominal catalog measurements, not claims of fire rating, flexibility, adhesive suitability, or U.S. stock availability.
| Profile | Catalog face x projection | Stock length | Useful design role |
|---|---|---|---|
| MLDPU-001 | 10 x 6 mm (0.39 x 0.24 in) | 2600 mm (102.36 in) | Delicate inner border or double-line accent |
| MLDPU-002 | 22 x 11 mm (0.87 x 0.43 in) | 2600 mm (102.36 in) | Medium-relief panel outline or repeated vertical |
| MLDPU-003 | 35 x 12 mm (1.38 x 0.47 in) | 2600 mm (102.36 in) | More prominent outer frame or focal outline |
| MLDPU-004 | 15 x 8 mm (0.59 x 0.31 in) | 2600 mm (102.36 in) | Refined secondary contour and smaller compositions |
The small wall trim molding MLDPU-001 is useful when a composition needs a fine inner line instead of another heavy border. For a mid-scale frame, the stepped polyurethane panel molding MLDPU-002 gives a different shadow pattern. A larger feature may benefit from decorative wall molding MLDPU-003, while the slimmer panel molding MLDPU-004 is worth comparing for layered borders. These examples are product options, not a claim that every Art Deco design needs all four.
What to check in a product drawing
Record the face width, relief depth, total length, and the side of the molding intended to contact the wall. Check whether the profile is directional: some molded edges look different when rotated 180 degrees. For a continuous frame the same edge should face inward on all four sides. If a corner embellishment is planned, compare the actual mating cross-sections instead of assuming that two items from similar-looking collections fit together.
Ask whether the product is supplied with a preparation coat, whether the selected paint system is compatible, and what adhesive the manufacturer recommends for the wall surface. Catalog photographs and marketing descriptions are not a substitute for a specification. If you are comparing a coordinated set with separate molding, identify every included component and its material before preparing the cut list.
Six Art Deco Wall Molding Ideas That Work in U.S. Homes
1. One tall geometric frame behind a sofa
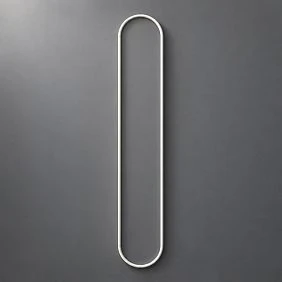
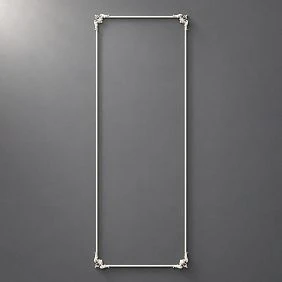
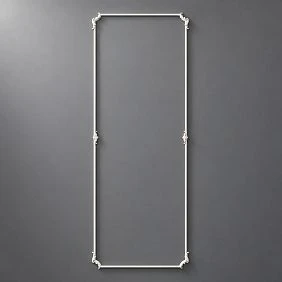
A single tall panel can anchor a relatively narrow living-room wall without filling it with busy ornament. Position its center relative to the sofa or console, maintain a deliberate margin above the furniture, and leave enough plain paint around the outside. The panel may be taller than it is wide, with a slim inner line used only if the wall has sufficient space.
This arrangement is especially useful in a small condominium where surrounding door openings limit the available surface. It can be finished wall-color for quiet relief or with a subtle contrast for a stronger outline. Keep the top edge in a relationship with the ceiling and nearby window heads rather than selecting an arbitrary height.
2. Three vertical bays for a living-room accent wall
A three-bay design creates an obvious central axis. Make the center bay wider for artwork or a mirror, and let the side bays repeat its height. Alternatively, use three equal rectangles when the furniture below is symmetrical. The intervals between the bays should be derived from the actual clear wall width, not copied from a photograph of a different room.
Tall panels often suit eight- or nine-foot ceilings, but their exact proportions depend on the baseboard, crown molding, furniture, and visual scale of the trim. Sketch several options with painter's tape. Stand at the doorway and at the normal seating position before deciding which rhythm looks balanced.
3. A stepped outer frame with a quieter inner contour
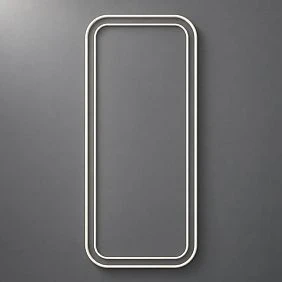
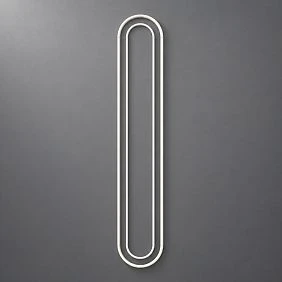
Layering is one way to suggest the stepped geometry associated with Art Deco. Build a main rectangular border and add a narrower inner border, maintaining a consistent inset. The two profiles need not be identical. A prominent outer frame can be paired with a delicate inner bead, provided their reliefs and colors do not fight for attention.
For practical planning, treat the two rectangles as separate material lists. Their outside dimensions are different, their miter cuts are different, and offcuts from one may or may not be long enough for the other. The simplest visual idea can produce an inefficient cutting plan unless stock lengths are considered before ordering.
4. A mirror-centered foyer composition
A vertical mirror can establish the center of an entryway without requiring a separate decorative panel. Two narrow wall frames or vertical accents on either side make the composition feel intentional. Leave clearance for the mirror itself, electrical controls, nearby doors, and any console below.
Do not assume decorative polyurethane trim can support the mirror's weight. Mount the mirror with the appropriate hardware and substrate support independently. If the mirror is within a surrounding frame, measure the outside of the mirror assembly and the clearance it needs for cleaning or removal. A trim border is a visual detail, not a mounting system for heavy glass.
5. Framed panel fields behind a headboard
A bedroom offers a natural central axis at the bed. One large panel across the headboard can be calmer than separate small rectangles over every nightstand. In a larger room, a central field with symmetrical side bays can create a more formal effect. The frame should account for the actual width of the headboard, wall-mounted lamps, outlets, and planned bedside furniture.
In a room where the paint is already dark or the textiles carry a large pattern, use wall-color molding to keep the relief subtle. If the bed and furniture are simple, a narrow metallic accent on one selected detail can make the wall more expressive without treating the whole room as a stage set.
6. A low geometric wall treatment
A lower-wall composition can suggest modern wainscoting without copying traditional raised wood panels. Use a consistent horizontal line and a series of restrained rectangles below it. The horizontal division should be coordinated with existing door trim, furniture heights, and the wall's visual proportions. A chair rail is one possible element, but not every applied rectangle needs a chair rail to be called a wall frame.
This is where picture frame molding on walls becomes useful as a layout method. The same technique can look traditional or Art Deco depending on proportion, finish, and the surrounding materials. Avoid claiming that decorative molding alone creates a structural panel system.
How to Plan the Layout Around an Actual Wall
Survey the room before drawing the frames
Measure the finished wall at several heights. Older American homes can have floors that slope, corners that are not perfectly square, or baseboards with different heights from one side of a room to the other. A new development may be straighter, but doors, outlets, thermostats, and wall lights still affect the workable area. Measure the visible flat surface after taking account of those objects, and use the same reference lines throughout your drawing.
Photograph the wall straight on with furniture in place. Add a rough elevation sketch showing the wall width, ceiling height, baseboard top, furniture outline, and door or window casing. Record the location of switches and outlets. Then mark the proposed frames in pencil or removable tape. The tape mockup is especially useful because a 1-inch profile can look narrow on a product page yet appear conspicuous once multiplied around several large rectangles.
Check the composition from the room's main entrances. A central panel that looks perfect head-on can appear crowded when seen from the side, particularly when a door casing projects into its apparent edge. Also consider wall-mounted televisions and art: frames should provide a clean background and never block controls, wiring access, ventilation, or required equipment clearances.
Choose one measurement convention
An installation drawing can be based on the outside long points of mitered trim, on the centerline of the profile, or on the opening inside the trim. All three systems are valid, but switching between them midproject causes mistakes. The cut examples in this guide use the outside long-point measurements of each straight frame member. They are illustrative layouts, not substitute specifications for a particular miter saw or corner accessory.
Suppose a frame is specified as 30 by 54 inches measured to its outside corners. Two horizontal members have 30-inch outside lengths, and two vertical members have 54-inch outside lengths. If its profile face is 0.87 inch, the visible inner opening is roughly 28.26 by 52.26 inches, assuming a simple symmetrical frame. Verify the actual profile shape before using that approximation in a tight clearance.
A different convention may be necessary when using decorative corner blocks. In that case the straight members meet the blocks rather than each other, so their required cut lengths are determined by the block dimensions and mating details. A decorative corner is not automatically a dimensional replacement for a mitered joint.
Set margins that suit the wall, not a fixed formula
There is no universal number of inches between an Art Deco frame and the ceiling. A useful starting point is to compare the upper margin with the baseboard, the height of existing door headers, and the room's dominant horizontal elements. The top may align with a nearby window or sit somewhat below the ceiling to create a clear painted margin. Below, the frame should have comfortable separation from the furniture and the top of the baseboard.
Keep the visible margins consistent wherever the same design element repeats. A six-inch side gap does not have to equal a six-inch top gap, but corresponding panels should be based on a common rule. If the wall is interrupted by a doorway, it may be better to end one deliberate composition before the door rather than squeeze in a partial panel and hope it looks intentional.
A nine-foot wall with three equal bays
Consider a clear feature wall that measures 108 inches wide. If you reserve 10 inches at each outer edge and 5 inches between adjacent panels, the three available panel widths are: (108 - 20 - 10) / 3 = 26 inches. The result is a clean plan with three 26-inch-wide outer frames. Choose their height separately in relation to the ceiling and furniture; for this example, assume 50 inches. Your elevation should show all three frame centerlines and the identical top and bottom references.
This design uses six horizontal pieces at 26 inches and six vertical pieces at 50 inches. The total outside-cut length is 6 x 26 + 6 x 50 = 456 inches, or 38 linear feet. But the number of sticks cannot be established by dividing that number and rounding up without a cut plan. As the next section shows, this layout can work efficiently because two 50-inch pieces fit within one 102.36-inch stock length, allowing for a typical narrow saw kerf, and three 26-inch pieces fit comfortably in another.
Calculate Polyurethane Wall Molding by Individual Cuts
Why linear feet alone can understate the order
Many buyers estimate panel molding for walls using a total perimeter and a percentage allowance. That is helpful for an early budget, but it can undercount the number of full sticks. A profile supplied in 102.36-inch lengths cannot produce two 54-inch pieces, even though their combined linear footage seems close to one stick. You must account for the longest required pieces, available offcuts, cut orientation, and saw kerf.
Make a list of every finished member. Group the identical lengths, then test how those pieces fit into a stock length. Use the longest pieces first. Keep the kerf allowance separate from the finished length: when a saw removes roughly 1/8 inch of material per cut, the layout has to leave room for that loss as well as any trimming needed to square an end. Actual kerf varies with the tool and blade.
Stock-length optimization is important, but the fewest sticks are not the only objective. A highly visible Art Deco frame may justify moving a joint into a less conspicuous location. Some profiles have a distinct directional pattern that must meet correctly at miters. If you are uncertain, build one full frame from sample lengths before placing the larger order.
Cut plan A: three narrow frames, 30 by 54 inches
For three rectangles measuring 30 by 54 inches at their outside corners, you need six 30-inch horizontal pieces and six 54-inch vertical pieces. Their finished cut length totals 6 x 30 + 6 x 54 = 504 inches, or 42 linear feet. Five stock lengths of 102.36 inches provide 511.8 inches in total, which looks sufficient if you consider length alone.
That five-stick estimate fails because a stick cannot yield two 54-inch pieces. Instead, cut one 54-inch vertical and one 30-inch horizontal from each stick. That pairing consumes 84 inches plus the necessary kerf and leaves a useful but too-short remainder. Repeat six times to obtain all twelve members. The practical count is six full sticks before contingency. This is exactly why a nominal linear-foot calculation is not an order quantity.
| Item | Finished cuts | Total finished length |
|---|---|---|
| Vertical members | 6 x 54 in | 324 in |
| Horizontal members | 6 x 30 in | 180 in |
| Combined frame material | 12 cuts | 504 in / 42 ft |
| Practical 102.36-in stock plan | 6 sticks, each cut 54 + 30 in | Allow kerf and check ends |
The design can use MLDPU-002, MLDPU-003, or another suitable verified wall profile, but the plan must be recalculated if you change the frame's outside dimensions. Larger face widths change the interior openings even when the outer perimeter remains the same.
Cut plan B: three 26-by-50-inch bays on a nine-foot wall
The earlier three-bay example has six 50-inch pieces and six 26-inch pieces. Two 50-inch pieces fit inside one 102.36-inch stick, with a small remaining length after narrow saw cuts. Three 26-inch pieces fit in one stick, leaving more unused material. Therefore three sticks can supply the six long members, and two more sticks supply the six short members. The cutting arrangement uses five full sticks, rather than simply assuming a generic ten-percent allowance.
The calculation assumes the finished long-point cut lengths are exactly 50 and 26 inches and that your tool's kerf fits the remaining capacity. Check the actual blade and test a first batch before cutting the entire order. If the installed design includes a stepped secondary border, create a second independent cut list; do not apply the first frame's material count to a smaller inner rectangle.
Cut plan C: two large frames with nested inner borders
Suppose a broad accent wall will have two outer frames, each 36 inches wide by 70 inches tall. The outer members are four pieces at 70 inches and four at 36 inches, totaling 424 inches or about 35.33 linear feet. The simple length calculation rounds up to five sticks. But a 70-inch piece cannot share a 102.36-inch stick with a 36-inch piece. Each 70-inch vertical requires its own stick, and the four 36-inch horizontal members require two additional sticks when cut two per stick. The outer layer therefore needs six sticks.
Now add one inner rectangle to each frame, measuring 30 by 64 inches at the outside edges of its own molding. Four 64-inch pieces can each be paired with a 30-inch piece within a 102.36-inch stick, producing four sticks for the inner layer. Combined, the two-layer design needs ten sticks before contingency, not an estimate based solely on the total perimeter. Label the outside and inside layer separately so that a 64-inch piece is not accidentally cut to the outer frame's 70-inch length.
These calculations demonstrate planning, not a universal waste percentage. Even a mathematically efficient list can change if the delivered ends are damaged, miters need recutting, or profile patterns must align. Decide whether to include additional material after checking the site's tolerances and your confidence with the cutting method.
Long horizontal bands and unavoidable joints
An uninterrupted 11-foot horizontal line is 132 inches long, so it exceeds the 102.36-inch stock length of the four profiles described above. It must be built from at least two pieces, even if the overall order contains offcuts. Two 66-inch members provide a centered meeting point, but you may prefer a seam aligned with a deliberate vertical division. The best location depends on the relief pattern and how the finished wall is lit.
A scarf joint may be suitable for certain linear trim profiles, subject to manufacturer guidance, but it is not interchangeable with every material or relief. A butt joint or scarf needs a sound backing and appropriate joint preparation. Decide where the seam will be before ordering and verify that the required uninterrupted pieces can be cut from the available stock. For a highly detailed profile, pattern matching may be more important than using a theoretical offcut.
Add Decorative Onlays Without Losing the Geometry
Where an ornament earns its place
A central ornament works best when the surrounding frames have already established a clear hierarchy. In a foyer it might appear above a console. On a bedroom feature wall it might sit above the headboard. In a commercial reception area it may anchor the principal sightline. Choose an ornament that supports the geometry: a stylized fan, a restrained radiating pattern, or another motif with an intelligible silhouette.
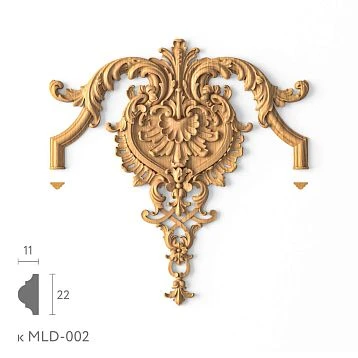
Many polyurethane decorative appliques offered by STAVROS use floral or flowing classical forms. Such pieces may work in a more eclectic interior, but they should not be labeled Art Deco automatically. Examine the silhouette, the dimensions, the projection, and the actual component material before deciding to use an item. A category page is a selection tool, not proof that every product belongs to a particular historical style.
Coordinate an onlay with the frame opening
Measure the free area inside the intended frame after accounting for trim face width. Then make a paper template at the ornament's full listed size. A centered piece needs space around it; a design that nearly touches the frame can look squeezed once painted. If the ornament is intended to sit above a console, view the template from normal standing distance and ensure it relates to the furniture's width rather than floating in an arbitrary position.
Some designs require left-hand and right-hand components. Record their codes separately. Do not assume that rotating one piece makes it equivalent to the opposite orientation. Likewise, verify whether an accent is solid polyurethane or a composite assembly with MDF. Adhesives, fasteners, and surface preparation may differ across components. Confirm any mounting requirements for larger pieces before selecting a wall location.
Coordinated kits versus individual parts
A coordinated kit can reduce the number of stylistic decisions when its layout matches the room. However, a kit is not automatically a complete answer for every wall width, and its components may be made from different materials. Look at the included item codes, the dimensions of the complete arrangement, and the usable height and width. Check whether the kit is intended for wall installation, a ceiling field, a door surround, or another application.
Separate profiles provide more freedom for custom geometry, especially around window heads, wall lights, or a nonstandard furniture arrangement. The tradeoff is a more demanding cut list and greater responsibility for choosing compatible elements. Compare the full assembled kit specification against your drawing before deciding which route is simpler.
Art Deco Color Palettes and Paint Finishes
Dark blue, warm white, and a restrained metal accent
Deep blue walls with warm-white trim are a recognizable graphic combination. The important choice is not the exact shade name but its relationship with the room's daylight, floor, upholstery, and door trim. Blue paint often changes noticeably between natural light and warm lamps. Test large swatches on the actual wall, then hold a sample of the selected molding against them at several times of day.
If a metallic finish is part of the plan, apply it selectively. One narrow line or a central ornamental detail can catch light without turning every frame into a shiny border. Metallic paint behaves differently on broad flats, rounded beads, and deeply recessed edges. Use a test piece to judge how much of the profile's shape remains visible before committing to the full wall.
Forest green, cream, and dark wood
Deep green paired with cream or ivory can work with walnut-toned furniture, brass-colored light fittings, and darker floors. A strongly textured sofa or rug may already provide sufficient visual interest, making modest wall relief the better choice. Keep the molding line quiet when other elements have active patterns. This palette can be applied to an entryway or study as well as a living room.
A green-on-green treatment is an alternative. Paint the wall and trim in one coordinated shade and let daylight reveal the geometry through shadows. It can make several frames feel more architectural and less like separate decorative attachments. For U.S. apartments, where the same room may function as a living area and workspace, this restrained treatment can be more versatile than bright contrast.
How to Install Wall Molding With Clean Art Deco Lines
Step 1: inspect and prepare the substrate
The appearance of an accurately cut frame depends on the surface behind it. Inspect painted drywall for peeling coatings, dampness, loose texture, and significant unevenness. Address underlying moisture and unstable finishes before installing trim. New drywall compound and repaired surfaces may require specified curing and priming. A clean, dry, sound substrate gives the attachment system a better starting point than a dusty or glossy surface.
Do not assume that one adhesive suits every substrate or profile. Check the molding manufacturer's installation guidance and the adhesive manufacturer's compatibility with polyurethane and the existing wall finish. A heavily textured wall or a nonporous coating may require a different preparation method from ordinary painted drywall. Where the project includes old paint of uncertain condition, investigate the appropriate renovation precautions before sanding or disturbing it.
Step 2: transfer the drawing accurately
Use a level or laser reference to establish the main vertical and horizontal lines. Do not blindly follow a sloping floor or ceiling if that would make the frames visibly crooked. Instead, choose a deliberate relationship between level geometry and the room's architectural constraints. Mark the outer corners and centerlines, then check corresponding diagonals on rectangles before cutting.
For DIY wall molding, painter's tape is a useful full-size preview. Place it where the outside edges will be and inspect the spacing with furniture returned to position. This is the last low-cost opportunity to move a panel, increase a gap, or remove an unnecessary decorative element.
Step 3: plan and cut the miters
A standard rectangular frame often uses 45-degree miters at square corners, but real rooms and complex geometric designs can require other angles. Verify the orientation of the molding on the saw, especially for asymmetrical profiles. Mark the outside long point and test with a short offcut before cutting a full-length member. Two pieces that measure correctly but are mitered in the wrong direction are still unusable.
The central lesson in how to cut wall molding is to maintain one measurement convention and one reference edge. Keep pieces labeled by frame and position. A right vertical and a left vertical may have the same finished length but opposite miter orientations. Cut conservatively, dry-fit, and adjust small errors deliberately instead of forcing a joint to close with adhesive or filler.
Step 4: dry-fit each complete frame
Place all four members against the wall or assemble a dry layout on a protected flat surface, depending on the manufacturer's recommended method. Check the corner pattern, outside dimensions, and visible spacing. Look closely at the profile face: a well-matched miter should continue the bead or step naturally around the corner. Large gaps typically indicate an angle, measurement, or substrate problem that is better corrected before bonding.
When several frames repeat, compare the first complete frame with the drawing and use it as a quality reference for the others. This does not mean blindly duplicating its dimensions if the wall is irregular; it means preserving the intended geometry. Verify that all parts are identified before any adhesive is applied.
Step 5: attach trim with an approved system
Apply the specified adhesive to the appropriate contact surfaces in the quantity and pattern required by its instructions. Press the profile into position without twisting it. Temporary support or removable tape may be needed while the bond develops. Follow the stated working, setting, and curing times; do not paint immediately merely because the trim feels stationary.
Long pieces benefit from careful handling so they are not bent beyond their approved limits. Ordinary rigid wall molding should not be treated as a flexible arch profile. Where a wall curves or a corner is substantially out of square, select an installation approach or product specifically approved for that geometry. Verify the product's minimum bending radius if using a genuinely flexible version.
Step 6: prepare joints, caulk, and paint
After the bonding system has cured as specified, inspect corner joints, seams, and the edges against the wall. Use a compatible filler or sealant only where it is appropriate for that gap and material. A large miter error should be recut instead of being hidden beneath a thick bead of caulk. Allow fillers to cure, smooth as permitted by the product, and remove dust before finishing.
Where a primer is required, use one approved for both the molding and chosen topcoat. Finish with thin, even coats that preserve the profile's fine steps and beads. On a high-contrast wall, protect the line between colors carefully; a small paint bleed can be conspicuous beside otherwise precise geometry. Remove masking tape in accordance with the paint and tape instructions.
Step 7: check the result in real lighting
Turn on the room's evening lights and look at the completed wall from several angles. Side lighting can expose poorly finished seams that were invisible in diffuse daylight. Check the repeated margins, the meeting points at corners, and the finish around light switches and adjacent casings. A small spot repair may be easier than a wholesale repaint when the overall geometry is correct.
For more general step-by-step context, consult STAVROS's wall molding installation and painting guide, then follow the product-specific directions that apply to the selected polyurethane profile and wall substrate.
Where an Art Deco Wall Treatment Needs Extra Care
Fireplace walls and other heat sources
A fireplace feature wall can be an attractive Art Deco focal point, but decorative polyurethane must not be assumed safe near an active firebox, appliance opening, vent, or hot surface. Fireplaces differ in design and required clearances. Use the specific appliance and surround instructions, and keep combustible or heat-sensitive decor out of areas where its use is not explicitly permitted. A general rule from a photograph cannot establish the safe location for this material.
The same judgment applies near heaters and high-temperature lighting. If a proposed design requires a profile in a restricted or uncertain zone, revise the geometry rather than improvise a heat-resistant coating or unverified attachment method. A painted finish does not convert a decorative molding into a fire-rated component.
Wall lights, televisions, and electrical access
Mark fixture boxes, switches, receptacles, and inspection points before cutting. Decorative trim should not block a device cover or compromise access to an electrical enclosure. Do not bury cables behind a glued-on border in a way that conflicts with the installation requirements of the electrical system. Coordinate wall sconces with the geometric frame so the fixture appears intentionally placed and its heat and mounting clearances remain appropriate.
For a television wall, verify mount strength independently of decorative trim. Plan ventilation, service access, cord routing, and the viewing position before placing a frame. A narrow border may help visually connect the TV with adjacent panels, but it is not a structural mounting element.
Hallways, rentals, and high-contact locations
In a narrow hallway, choose a profile projection that does not create an inconvenient snag point at shoulder or furniture height. High-contact locations may need additional consideration of impact resistance, cleaning, and the finish's durability. For rented property, obtain any required owner approval before permanently bonding decorative material to the walls.
When planning a commercial space, coordinate trim with the applicable project, fire, accessibility, and maintenance requirements. The beauty of a feature wall is not a reason to obstruct a required route, exit, detector, sign, or service opening. A designer or contractor responsible for the project can confirm how the details fit the intended building use.
Shop STAVROS Polyurethane Molding for an Art Deco Project
Match the selection to the drawing
Begin with the wall elevation and a cut schedule rather than a shopping cart. Identify the main frame profile and decide whether a secondary inner line is necessary. Then compare the verified dimensions of MLDPU-001, MLDPU-002, MLDPU-003, and MLDPU-004. One consistent profile is often enough for a strong Art Deco arrangement. If two profiles are used, give each a distinct purpose rather than switching styles randomly between panels.
Browse the STAVROS wall trim molding collection to compare sections and stock lengths. For a quiet inner detail, consider the slim polyurethane molding MLDPU-001. A more prominent frame may call for the 35 mm decorative panel molding MLDPU-003. Select from current product pages rather than assuming every profile mentioned in a design article has the same availability or finish.
Add ornaments only after the linear plan is settled
If the design needs a central motif, review decorative polyurethane onlays as a separate purchase. A finished room usually benefits from a hierarchy: trim establishes the architecture, and one or two focal details introduce ornament. Look at the exact dimensions and material specification of each onlay. Do not assume a set with an Art Deco-inspired look contains only polyurethane or fits a custom frame without adjustment.
Record the total number of stock lengths, the individual cuts they must produce, any left- and right-handed elements, and the necessary preparation supplies. If you need polyurethane wall molding profiles for a repeatable multi-room project, keep one approved sample and a numbered cut drawing so each room receives the intended proportions.
Frequently Asked Questions
Is Art Deco wall molding the same as picture frame molding?
Picture frame molding is a way to make decorative rectangles or panels on a wall. Art Deco is a broader design language that may use those frames, but also depends on their proportions, rhythm, focal points, and finish. A conventional wainscoting layout can use the same installation technique yet create a different visual character. Think of the frame as a construction method and Art Deco as the design direction.
Which polyurethane molding should I select for a small room?
Start with the available wall width and the size of its uninterrupted areas. A compact room may benefit from the 10 mm, 15 mm, or 22 mm faces in the verified STAVROS range, but the right choice depends on how many lines the design includes and how much relief is wanted. A single 35 mm frame can also work in a small room if it has enough clear wall around it. Test full-size profile samples and taped outlines rather than relying on a universal width rule.
Can polyurethane wall molding be painted gold?
A compatible decorative finish can be part of a painted trim project, but its suitability depends on the specific product surface, preparation, primer, and topcoat. Test the system and avoid thick applications that obscure fine detail. For a modern Art Deco interpretation, gold-colored accents are often more controlled when confined to one line or ornament rather than all of the wall's trim.
How do I measure the trim for a rectangular panel?
Choose whether the drawing uses outside long-point dimensions, inside opening dimensions, or centerline dimensions. The examples here use outside long points. For one 30-by-54-inch rectangle, the four finished members are two at 30 inches and two at 54 inches. Then test how those cuts fit into the selected stock length with allowance for saw kerf, trimming, and potential recuts. Do not order by perimeter alone.
Can I put wall molding directly on textured paint?
It depends on the texture, the stability of the coating, the contact area of the molding, and the approved adhesive system. Pronounced texture can leave gaps behind the profile and prevent a predictable bond. Review the product instructions and consider preparing a suitable flat contact zone. A temporary tape mockup can test the visual design, but it cannot prove long-term adhesive compatibility.
What is the difference between a molding, an onlay, and a decorative kit?
A molding is a linear profile used to define a border or architectural line. An onlay is a localized ornament. A kit is a group of components intended to create a coordinated arrangement. The kit may contain several materials and parts of different sizes. Verify the contents and material for the exact product instead of treating the terms as synonyms.
How much extra molding should I buy?
There is no single percentage that works for every set of frames. The 30-by-54-inch example needs six sticks even though a simple total-length calculation suggests five. Start from the cut list and test each stick's yield, then consider actual site conditions, blade kerf, miter errors, material condition, and any need for future repairs. The cutting pattern is the foundation of an accurate order.
Are standard wall moldings suitable around a fireplace?
Not necessarily. Decorative polyurethane must be placed only where the selected fireplace's instructions and applicable requirements allow that material. Required clearances and permitted surround materials vary by appliance. Avoid relying on a generic setback dimension or assuming that paint changes the material's heat performance.
A Final Checklist Before You Order
A successful Art Deco wall begins with fewer decisions made carefully. Confirm the focal point, draw the full elevation, and establish the same measurement convention for every frame. Compare actual profile face widths and stock lengths, check the substrate and installation guidance, and calculate cuts per stick rather than from total footage alone. Coordinate the wall color, trim finish, existing architectural details, and lighting before purchasing decorative accessories.
For a practical next step, compare STAVROS polyurethane wall moldings against your dimensions and select a sample profile for a test layout. If an ornament is needed, add it only after the primary geometry is resolved. With a measured design, a credible product specification, and careful installation, an Art Deco-inspired accent wall can feel like part of the room's architecture rather than decoration applied as an afterthought.