Article Contents:
- What Is a Wall Molding Kit—and What Does It Actually Include?
- Four questions to answer before choosing a kit
- All-polyurethane components
- Polyurethane ornament with primed MDF molding
- What about wet rooms, exterior walls, or heated locations?
- Japandi: clean shapes and controlled shadows
- Neoclassic Light: restrained detail for a transitional room
- Neoclassic: a stronger architectural rhythm
- Versailles Light: a classic statement without covering everything
- Versailles: higher ornamental density for formal spaces
- Example 1: Two wide Japandi modules on a 12-foot wall
- Example 2: Three narrower Neoclassic Light modules
- A simple layout checklist
- Living room: an accent wall behind the sofa
- Bedroom: architecture behind the headboard
- Dining room: repeated vertical panels
- Entryway and hallway: narrow decorative modules
- Home office: one architectural axis
- Media and television wall: design around the equipment
- Can you substitute ornate or beaded trim?
- Tone-on-tone paint
- White molding on a darker wall
- Accent color inside the panels
- Metallic or antiqued highlights
- 1. Inspect the wall and the contents of the kit
- 2. Mark the actual finished dimensions
- 3. Dry-fit all corner and ornamental pieces
- 4. Cut straight molding only as specified
- 5. Select approved adhesives and supports
- 6. Finish seams and paint carefully
- 7. Check the completed wall against its function
- Important: confirm shipping to a U.S. address
- Can I design a wall molding accent without hiring an interior designer?
- What is the difference between a wall molding kit and a picture frame molding kit?
- Are all STAVROS wall molding kits made entirely of polyurethane?
- Will a 90.55-inch kit fit an 8-foot ceiling?
- What wall molding style suits a modern living room?
- How many wall molding kits do I need behind a sofa?
- Is decorative molding suitable for a small bedroom?
- Can I add decorative onlays to a ready-made kit?
- Are panel molding corners included in every kit?
- Can wall molding kits be painted the same color as the wall?
- Are wall molding kits the same as structural wall panels?
- Does STAVROS deliver wall molding kits to the USA?
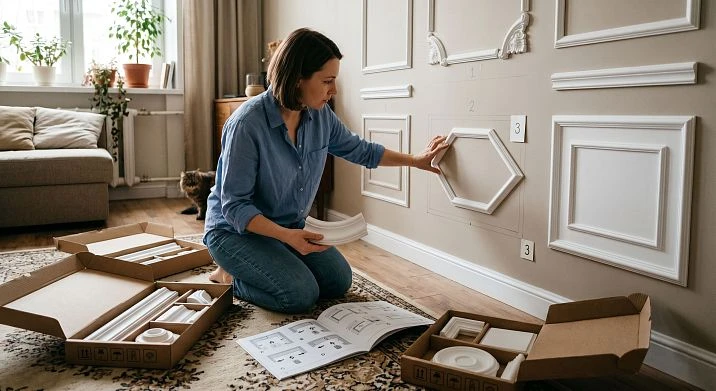
A well-designed accent wall can make an ordinary room feel more architectural without requiring custom cabinetry, major demolition, or an elaborate renovation. The challenge is not deciding whether decorative trim looks attractive. It is selecting the right wall molding kit, checking whether it actually fits the wall, and making sure its profiles, corners, and decorative accents belong together.
For U.S. homeowners working without an interior designer, wall molding kits offer an appealing starting point. A coordinated composition gives you a shape and proportions to evaluate before you buy individual pieces. Yet a kit does not eliminate the need to measure: a 90.55-inch-tall decorative panel may be ideal for a 9-foot room and physically unsuitable for an 8-foot wall with a full-height baseboard and crown molding.
Material matters just as much as appearance. Some ready-made designs use polyurethane molding throughout; others combine sculpted polyurethane accents with primed MDF molding. Both can be appropriate for interior decoration, but they are not interchangeable, and a mixed-material set should never be presented as solid polyurethane. Nor is a decorative molding frame a structural wall panel or a support for shelves, mirrors, and televisions.
This guide shows how to compare real STAVROS wall molding kits, choose an appropriate design for a living room, bedroom, dining room, or hallway, and decide when individual polyurethane wall moldings make more sense. You will find a verified product comparison, dimensions in inches, layout calculations, a stock-length cutting example, installation questions to resolve, and a practical purchasing checklist for buyers in the United States.
What Is a Wall Molding Kit—and What Does It Actually Include?
A wall molding kit is a coordinated group of decorative components intended to create a defined arrangement on a wall. Depending on the product, that may be a narrow vertical panel, a full rectangular outline, a decorative composition with sculpted top and bottom elements, or a wider frame with shaped corners.
A manufacturer's finished-size diagram describes the completed decorative composition. The individual pieces inside the package may still be supplied as separate profiles and ornaments that require cutting, layout, mounting, joint treatment, and painting. A catalog illustration is therefore not proof of a peel-and-stick panel, a preassembled wall slab, or a one-hour installation.
Typical components include straight moldings, decorative corners, a central or terminal onlay, or several matching details. But not every kit contains all of these. Some have no central ornament at all. Others use a single elongated decorative element. Before buying, compare the bill of materials on the actual product page rather than assuming a standard four-corner picture frame.
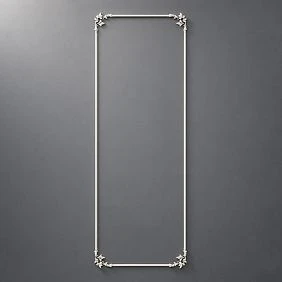
The distinction is important when searching for picture frame molding kits. A homeowner may imagine four straight pieces around a rectangular field. A particular CPU-series STAVROS kit, however, may be a taller ornamental wall composition with several different pieces. These are related design solutions, but they are not necessarily the same product format.




Four questions to answer before choosing a kit
-
What exactly is in the set? Identify the straight profiles, decorative accents, quantities, and material of every component.
-
What is the finished outside size? Compare the published width, height, and depth with the uninterrupted space on your actual wall.
-
Does the design suit the room? Evaluate the ornament level, profile projection, and relationship to your furniture, doors, and other trim.
-
What else must be purchased? Adhesives, approved fasteners, joint materials, paint, extra molding, and tools may not be included.
A ready-made composition can simplify the design choice. It cannot make incompatible dimensions or installation conditions disappear.
Наша фабрика также производит:
Смотреть весь Каталог продукции
Compare Real STAVROS Wall Molding Kits Before You Buy
The STAVROS wall-decor catalog organizes coordinated designs into collections. The CPU-series kits below show how much the format and material can vary even when the finished height is similar.
| STAVROS kit | Collection | Approximate finished width × height × depth | Listed material composition | Best design role |
|---|---|---|---|---|
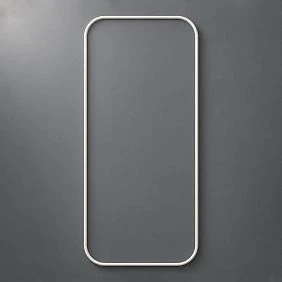
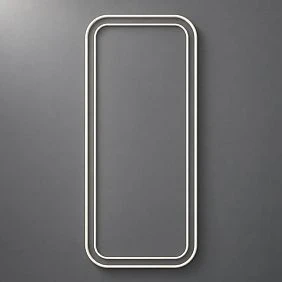
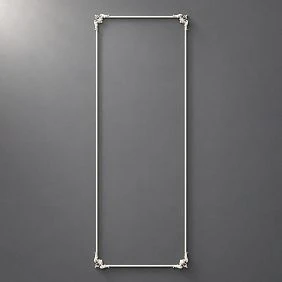
| CPU-3-1 | Japandi | 42.24 × 90.55 × 0.51 in. | Polyurethane MLDPU-027 molding and MLDPU-027U-1 corner pieces | Broad, restrained geometric accent |
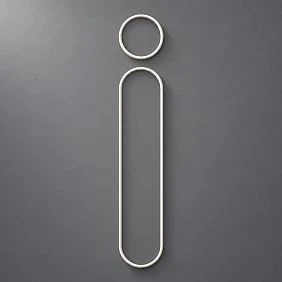
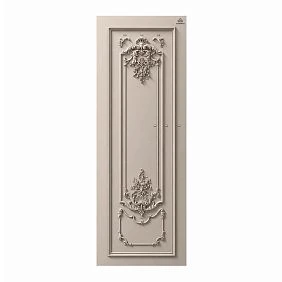
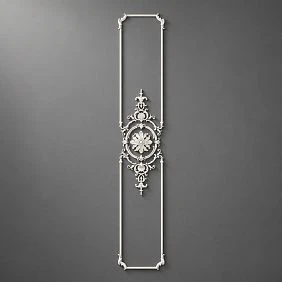
| CPU-1-1 | Neoclassic | 11.81 × 90.55 × 0.83 in. | Polyurethane NPU-399 ornament + primed MDF MLD-003-MG profile | Narrow vertical architectural accent |
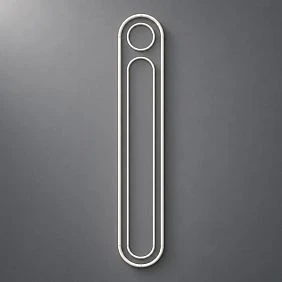
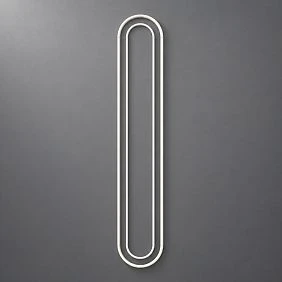
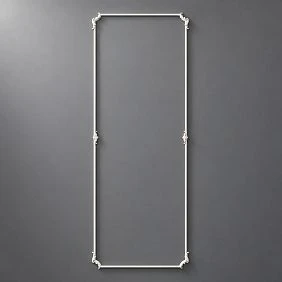
| CPU-2-2 | Neoclassic Light | 23.62 × 90.55 × 0.83 in. | Polyurethane MLDPU-2-1.1/2-2.1 accents + primed MDF MLD-002-MG | Delicate elongated panel |
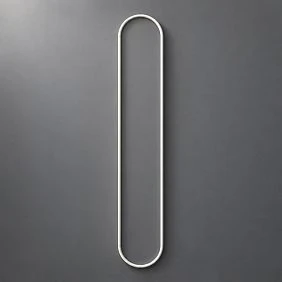
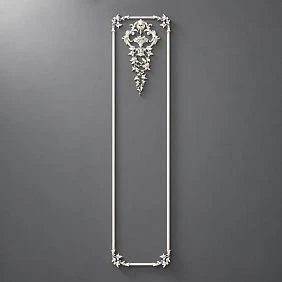
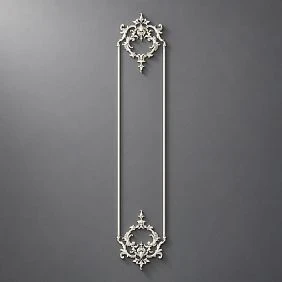
| CPU-4-4 | Versailles Light | 11.81 × 90.55 × 0.63 in. | Polyurethane floral ornaments + two primed MDF molding profiles | Ornamental vertical divider |
| CPU-4-2 | Versailles Light | 17.36 × 90.55 × 0.87 in. | Polyurethane decorative accents + primed MDF molding | Formal panel with a pronounced upper ornament |
The dimensions are the published overall composition dimensions, not necessarily the lengths of the loose profiles supplied inside the set. They are rounded conversions; confirm the current drawing and materials for the exact SKU before ordering.
These examples immediately change the purchasing conversation. Someone looking for an all-polyurethane wall molding kit can investigate CPU-3-1 because its published component list identifies polyurethane profiles and corners. Someone who wants a subtle, narrow traditional accent might prefer CPU-1-1, but must accept that its straight molding is MDF. A buyer who wants a wide three-panel wall should not assume that three narrow 11.81-inch sets cover the wall in the same way as three 42.24-inch designs.
The product pages also distinguish individual component lengths from the finished composition. A molding supplied in a roughly 102.36-inch stock length may be cut to create a 90.55-inch-tall module. Verify the current cut drawing, kit quantities, and whether any cutting or assembly work remains before installation.
Получить консультацию
Polyurethane vs. MDF: Why Material Composition Changes the Decision
The word polyurethane is sometimes used loosely for an entire decorative style, even when only the sculpted appliques are made from polyurethane. That is not a reliable material specification. STAVROS explicitly lists mixed polyurethane-and-MDF construction for several CPU kits.
All-polyurethane components
Rigid polyurethane is used for the straight MLDPU-027 profile and the rounded corner components in CPU-3-1. This may appeal when the design requires a consistent polyurethane material across the decorative pieces. It still requires an approved adhesive or other specified mounting system, properly prepared surfaces, and compatible finishing materials.
Polyurethane ornament with primed MDF molding
In CPU-2-2 Neoclassic Light, the sculpted top and bottom accents are polyurethane while the straight MLD-002-MG profile is primed MDF. In CPU-1-1 Neoclassic, an NPU-399 polyurethane ornament pairs with MLD-003-MG primed MDF.
This is a deliberate decorative combination: the straight MDF profile establishes the linear outline; molded polyurethane produces the sculptural detail. But the surfaces, joints, moisture response, and finish preparation must be considered as a complete assembly. A coating or adhesive suitable for one component is not automatically correct for the other.
What about wet rooms, exterior walls, or heated locations?
Do not assume that the material of one onlay makes an entire decorative kit waterproof, outdoor-rated, or suitable next to a heater. The exact item, substrate, coating, and mounting instructions determine the application. Standard decorative wall moldings are not fire-rated hearth surrounds or load-bearing trim. For a bathroom, unconditioned entry, or other demanding location, obtain specific suitability information before purchase.
If you want to build your own composition from individual components, review STAVROS polyurethane moldings and polyurethane onlays and appliques separately, then verify how the pieces fit together.
Choose the Collection by Architectural Style, Not a Trend Label
Collections are useful shortcuts, but names alone cannot tell you whether a design will work in a particular room. Start with the room's actual architecture: ceiling height, door and window casing, furniture scale, and the amount of existing ornament. Then compare the collection's geometry and component list.
Japandi: clean shapes and controlled shadows
A Japandi-inspired interior combines restraint, clear form, and natural-looking finishes. On a wall, that often means generous negative space and subtle relief rather than numerous floral ornaments. The STAVROS Japandi collection includes coordinated compositions with geometric profiles and softened corners.
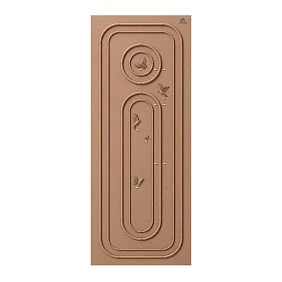
The CPU-3-1 polyurethane kit is a useful example: a broad, elongated arrangement with MLDPU-027 straight molding and MLDPU-027U-1 corners. Its approximately 42.24-inch width gives it a different visual presence from a narrow vertical strip. On a suitably sized wall, one wide module may be more convincing than several unrelated decorative shapes.
For a contemporary living room, consider painting the kit in the wall color and letting the profile cast a soft shadow. With oak furniture, plaster-look walls, or neutral upholstery, this can create architectural interest without adding strong visual noise.
Neoclassic Light: restrained detail for a transitional room
The STAVROS Neoclassic Light collection uses slimmer visual rhythms and more controlled ornament than overtly palatial compositions. It is relevant to American interiors described as transitional, updated traditional, or modern classic.
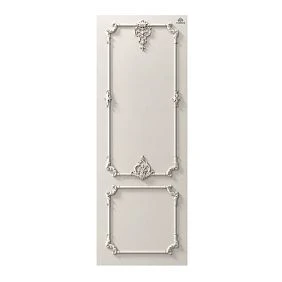
CPU-2-2 has a finished width of about 23.62 inches and a height of 90.55 inches, with polyurethane relief accents and primed MDF molding. Two or three measured vertical modules can create a structured dining-room or entryway wall without requiring a large decorative centerpiece in every bay.
Do not assume this collection is automatically suitable for all 8-foot ceilings. Check the entire installed height against the baseboard, crown molding, and intended margins first.
Neoclassic: a stronger architectural rhythm
The STAVROS Neoclassic collection offers vertical arrangements with more noticeable classical detailing. Some formats work as pilaster-inspired accents between doorways or alongside cabinetry. A wider grouping can establish repeated architectural lines across a formal living or dining wall.
The CPU-1-1 set is relatively narrow at 11.81 inches, so it makes more sense as a vertical separator or localized accent than as a full-width composition behind a large sofa. A design may repeat the narrow element at regular intervals, but the spacing must be calculated from the wall dimensions.
Versailles Light: a classic statement without covering everything
The Versailles Light collection emphasizes floral accents, relief, and formal symmetry. Its different CPU-4 arrangements have distinct footprints and ornamental density. It is better suited to rooms where classical detail is an intentional part of the design rather than an isolated purchase.
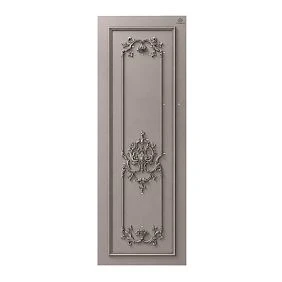
CPU-4-4 combines two primed MDF profile types with polyurethane floral ornaments. CPU-4-2 adds a more pronounced upper decorative accent. They are alternatives for different compositions, not interchangeable labels for the same set.
A useful approach is to concentrate the most ornamental design on one feature wall while keeping adjacent walls quieter. This gives the decorative work a focal role without turning the entire room into a competition between patterns.
Versailles: higher ornamental density for formal spaces
The larger STAVROS Versailles collection includes elaborate CPU-5 compositions. These may be appropriate for an expansive dining room, a double-height hall, or a traditional room with substantial existing millwork. They are not automatically a better choice simply because they contain more ornament.
For someone decorating without a designer, the safest method is to make a full-scale mockup of the proposed panel boundaries before committing to a large number of elaborate pieces. A room can support a rich composition, but it still needs clearly defined margins, uncluttered visual centers, and consistent alignment.
The Most Important Measurement: Will a 90.55-Inch Kit Fit Your Ceiling?
Many of the verified CPU examples above have a finished height of approximately 90.55 inches. That sounds compatible with an American room until you consider the actual working area between baseboard and ceiling trim.
For a wall with a ceiling height of H, baseboard height B, crown molding that drops C inches down the wall, and desired clear gaps G₁ and G₂, the available decorative height is:
Available height = H − B − C − G₁ − G₂.
The finished kit must fit inside that number. If it does not, the correct answer may be a shorter custom molding design or a different kit—not forcing the decoration against the baseboard or crown.
| Ceiling and trim example | Calculation | Room for a 90.55-in. composition? |
|---|---|---|
| 8-ft ceiling; 5-in. baseboard; 3-in. crown; no added gaps | 96 − 5 − 3 = 88 in. | No; the usable area is already too short |
| 9-ft ceiling; 5-in. baseboard; 3-in. crown; 4-in. clear gaps above and below | 108 − 5 − 3 − 4 − 4 = 92 in. | Yes, dimensionally, with 1.45 in. remaining |
| 10-ft ceiling; 6-in. baseboard; 5-in. crown; 6-in. clear gaps above and below | 120 − 6 − 5 − 6 − 6 = 97 in. | Yes, dimensionally, with 6.45 in. remaining |
These are illustrations, not product-specific installation clearances. The wall may also have an outlet, door casing, sconce, radiator, furniture, or uneven surface that changes the decision.
An 8-foot ceiling is not a reason to abandon decorative molding. It may simply favor a shorter DIY picture-frame molding layout using individual profiles or a confirmed shorter kit. Do not trim factory decorative accents arbitrarily; a manufacturer-designed composition may depend on the specific geometry of its top and bottom ornaments.
How to Lay Out Kits Across a Wall Without a Designer
A wall elevation is a straight-on drawing of the finished surface. Draw the wall to scale, record its width and height, then mark doors, windows, switches, baseboards, and any architectural elements that must stay accessible. Next draw the main furniture: sofa, bed, sideboard, dining table, or media unit. Only then start placing decorative modules.
You are not looking for one universal ratio. You are deciding whether the wall needs a single center accent, two balanced frames, three repeated modules, or a narrow vertical divider beside an opening.
Example 1: Two wide Japandi modules on a 12-foot wall
Suppose the accent wall measures 144 inches (12 feet) wide. You want two CPU-3-1 modules, each 42.24 inches wide, separated by a 12-inch center gap.
The total occupied width is:
2 × 42.24 + 12 = 96.48 inches.
The remaining width is 144 − 96.48 = 47.52 inches, or 23.76 inches on each side if the arrangement is centered.
That makes a clear, measurable composition with generous breathing room. But it is still necessary to confirm the height using the previous section's formula. A design that fits horizontally may fail vertically.
Example 2: Three narrower Neoclassic Light modules
Suppose a 120-inch-wide dining-room wall will receive three CPU-2-2 panels, each 23.62 inches wide. You choose 12-inch gaps between modules.
Total panel width is 3 × 23.62 = 70.86 inches. Two gaps use 24 inches. The remaining width is 120 − 70.86 − 24 = 25.14 inches, leaving 12.57 inches at each end.
This produces a balanced layout on paper. Place painter's tape on the actual wall to check whether the composition is visually centered on the dining table, not merely centered between two corners. If the table is offset because of a doorway, the design center may need to move with it.
A simple layout checklist
Before choosing your number of kits, verify the outside width of each composition, the amount of space required between repeated modules, the clear end margins, the furniture centerline, and the finished height. Compare relief depth with switch plates, wall lights, and door swing paths. A projection of less than an inch can still matter when a door or cabinet opens immediately beside the decoration.
For an easy preview, cut paper rectangles to the published overall sizes. Tape them to the wall and view them from the entrance, the primary seating position, and any adjoining hallway. A few minutes with full-scale templates usually reveals spacing problems that a catalog photograph cannot.
Where Wall Molding Kits Work Best: Room-by-Room Selection
The wall's use should determine the decorative arrangement. A kit can add structure behind a sofa, but the same kit may look awkward when squeezed beside a bedroom door. Measure the visible space and plan around the room's focal point rather than forcing every composition into a standard grid.
Living room: an accent wall behind the sofa
A sofa offers a useful visual centerline. If the seating group is centered on the wall, one substantial decorative panel or two balanced modules may be appropriate. If the sofa is offset to accommodate a doorway, aligning the ornament with the furniture can look more intentional than centering it mathematically on the wall.
For a restrained contemporary room, compare Japandi wall molding kits. A larger composition may look cleaner than several small frames. For a transitional living room, repeat Neoclassic Light panels with consistent spacing and finish.
Remember that a kit's published height matters independently of the furniture. The fact that a 90.55-inch composition looks appropriate above a sofa in a product photograph does not mean it will fit between your existing baseboard and crown molding.
Bedroom: architecture behind the headboard
A bedroom usually benefits from a quieter result. A simple picture-frame molding arrangement, painted the same color as the wall, can add depth without competing with bedding and artwork. Choose whether the decorative system will visually frame the headboard or cover the wider wall behind the bed. Those are different proportions.
A narrow vertical module on each side of the bed can create rhythm, especially with symmetrical nightstands. A single wider kit centered behind the headboard may be more suitable when the room already contains wall sconces or framed art. Avoid placing projecting ornaments where people may strike them while sitting up or where they interfere with bed-mounted lighting and outlets.
The CPU-3-1 polyurethane design offers a broad, understated shape to compare, while CPU-2-2 offers a narrower mixed-material alternative. Use exact room measurements to determine whether either composition is viable.
Dining room: repeated vertical panels
A dining room is a natural location for a sequence of repeated architectural bays. Two or three coordinated wall molding kits can establish an orderly background for a sideboard or dining table. Traditional rooms may support a restrained floral detail; contemporary rooms often look better with unornamented frames.
Start with the position of the table and any sideboard. A wall division that is perfectly centered between corners can still feel wrong if its central module does not relate to the dining arrangement. Select the number of panels only after drawing the overall composition.
For a formal scheme, the Neoclassic collection and Versailles Light collection offer different levels of classical detail. Resist the urge to place the richest available ornament on every panel. Repetition often looks more professional when one element has visual priority.
Entryway and hallway: narrow decorative modules
A long hallway has many visual interruptions: doors, switches, narrow piers, and changing sightlines. It often benefits from narrow vertical accents rather than large broad frames. The 11.81-inch width of CPU-1-1 makes it worth considering for a suitable uninterrupted pier, provided its 90.55-inch height fits.
Check door swing and casing first. A decorative panel should not obscure a switch plate or create a projection where people carrying furniture will hit it. A very narrow hall may be better served by a single strip of polyurethane decorative molding rather than a sculptural kit.
Home office: one architectural axis
In a study or home office, a decorative panel can establish the wall behind a desk, a bookcase, or a reading chair. A single vertical composition may be more effective than filling every wall. For a traditional library, an understated Neoclassic set can echo existing cabinetry. For a minimalist office, choose cleaner lines and a matching wall color.
Keep electrical outlets, cable management, shelves, acoustic panels, and working lights separate from the decorative trim. The moldings themselves should not act as supports for monitors, storage, or shelving.
Media and television wall: design around the equipment
A television wall requires access to the actual screen, bracket, outlets, ventilation and cables. Decorative side panels may create a frame-like architectural context, but a molding must not cover the screen or block required ventilation. Wall-mounted televisions need independent rated mounting hardware secured to an appropriate substrate; a polyurethane wall molding kit is not television support.
Before buying, draw the screen's outside dimensions and the desired location of every electrical component. Then position the decorative panels on either side or outside the primary viewing zone. If a symmetrical kit forces the television into an unsuitable position, choose a custom layout instead.
Wall Molding Kit vs. Individual Decorative Molding: A Buying Decision
A ready-made kit is best when you like its proportions, it fits the available wall area, and the component materials suit the room. Individual straight moldings offer more control when the wall is unusually wide, has a lower ceiling, includes niches or irregular openings, or requires a specific number of picture-frame panels.
| Your situation | Better starting point | Why |
|---|---|---|
| The exact kit fits the clear wall area | Ready-made wall molding kit | A coordinated visual design already exists |
| You need pure polyurethane components | Verified all-PU kit or individual PU profiles | Avoids assuming mixed PU/MDF is all polyurethane |
| The room has an 8-ft ceiling with baseboard and crown | Shorter custom frames or a specifically shorter confirmed kit | Common 90.55-in. compositions may not fit |
| There are multiple doors or an offset window | Custom molding cut list | Frame widths and spacing can respond to openings |
| You want a special centerpiece | Kit plus a carefully matched polyurethane onlay | Adds a focal detail without redesigning every panel |
| You need five identical decorative bays | Repeated modules only after an exact layout check | Prevents bad end margins and crowding |
A hybrid approach can work: use one verified kit for the central feature and add simpler independent picture-frame panels around it. However, similar color does not guarantee compatible geometry. Check profile widths, relief projections, corner series and joint transitions before mixing components.
DIY Picture Frame Molding: Calculate the Full Strips Before Ordering
When a stock kit is too tall or too wide, a custom layout from separate polyurethane profiles may be the better answer. The correct calculation starts with a list of individual cut pieces, not merely total linear footage.
Consider three decorative rectangular frames on an accent wall. Each frame is 28 inches wide by 64 inches high, measured at the outside long points of its mitered corners. These are illustrative design dimensions, not a factory STAVROS kit.
One frame requires:
2 × 28 + 2 × 64 = 184 inches of installed molding.
Three frames require:
3 × 184 = 552 inches = 46 linear feet of installed molding.
Now choose a straight STAVROS MLDPU-002 polyurethane molding, listed in lengths of about 102.36 inches. One 64-inch piece and one 28-inch piece fit into a single strip, using 92 inches. There are six long pieces and six short pieces across the three frames, so the project can be planned around six complete molding strips, subject to saw kerf, usable ends, and field conditions.
| Quantity | Cut dimension | Total material |
|---|---|---|
| 6 vertical frame members | 64 in. each | 384 in. |
| 6 horizontal frame members | 28 in. each | 168 in. |
| Total installed molding | — | 552 in. / 46 ft |
| Stock-length plan | 6 strips × 102.36 in. | 614.16 in. purchased |
That means approximately 62.16 inches of nominal offcut in total, before kerf and trimming. The offcuts may have other uses but should not be assumed to fit additional frame members.
The practical lesson is that picture frame molding kits and individually cut moldings should be compared on a complete project basis. A decorative kit may simplify coordination, while individual profiles can solve a height or width mismatch; neither purchasing approach eliminates the need for measured layout.
Can you substitute ornate or beaded trim?
Not automatically. Ornamental profiles are often supplied in shorter lengths than straight wall moldings and may require pattern matching across joints. The STAVROS ornamental trim category includes beaded molding, rope molding, floral designs and more elaborate motifs. The KPU-105 beaded polyurethane molding is listed in approximately 39.37-inch stock lengths, very different from a 102.36-inch MLDPU straight molding.
A 64-inch vertical in the example above cannot be cut from one 39.37-inch strip. It would need an appropriate approved joint and at least two pieces, with the ornament repeat considered. Do not reuse the six-strip estimate after changing the SKU.
Decorative Corners, Onlays, and Ornate Molding: When to Add Them
An accent wall can look incomplete when the proportions are poor, even with expensive decorative pieces. Conversely, a well-proportioned design may need no extra ornament at all. Choose details by visual function.
Panel molding corners are useful when they establish a deliberate transition between straight profiles or introduce a specific ornamental motif. The STAVROS molding corners and accents category contains components associated with particular molding families. Check whether the corner is a matching connector, an applied overlay, a left/right piece, or a standalone ornament. Do not assume it replaces a miter or can be used with every straight profile.
A central polyurethane decorative onlay can turn one plain panel into a focal feature. Floral or acanthus patterns can suit a formal dining room. A single geometric applique might be appropriate in a more restrained setting. Centering and projection matter more than simply increasing the ornament count.
Ornate molding and decorative trim molding are particularly useful as secondary details: a fine beaded border inside one main panel, a short decorative frieze on a feature wall, or a restrained rope pattern that refers to traditional millwork. Repeat the design language consistently, but avoid mixing unrelated bead, rope, floral and leaf patterns purely because they are all available.
If you want a quieter wall, start with the straight polyurethane wall molding collection and leave the panel interiors painted. If you want a classical feature, browse ornamental polyurethane trim and use the pattern in one defined role.
Choose a Paint Finish That Unifies the Wall
One reason decorative molding works in so many American interiors is its ability to create light and shadow without forcing another strong color into the room. The same molding arrangement can look traditional in warm white, contemporary in wall-matched paint, or highly graphic in a dark contrasting color.
Tone-on-tone paint
Paint the molding and wall the same color so the relief provides a subtle architectural texture. This suits minimalist rooms, bedrooms, and transitional interiors. A soft off-white, warm gray, muted taupe or pale green can work well, depending on the furniture and natural light.
White molding on a darker wall
Contrasting light trim can emphasize the exact frame geometry. It is especially effective in a dining room, home office or traditional living room where door casings and baseboards already have a coordinated white finish.
Accent color inside the panels
A paint field within one or more molding frames can add depth. The color may match the room's upholstery or cabinetry, but you need not paint every panel a different shade. Strong repetition often gives a calmer result.
Metallic or antiqued highlights
Selective bronze or gold highlights may suit Versailles Light ornament, especially when concentrated on a central applique or relief. Thick coatings can obscure fine detail; test the finish on an appropriate sample and follow the coating instructions for every substrate in the set.
For mixed PU/MDF compositions, do not assume one generic primer and paint procedure is approved for all components. Check the specific factory finish and coating compatibility, then plan joint treatment and paint application accordingly.
Installation: What a Ready-Made Kit Does Not Do for You
A kit reduces the number of design choices, but physical installation remains a project with substrate, layout, cutting, and finishing requirements. The following workflow is intended as a planning guide; always follow the instructions for the selected SKU and mounting system.
1. Inspect the wall and the contents of the kit
Confirm the finished wall is dry, sound, and suitable for the intended attachment system. Identify loose paint, wallpaper, damp spots, cracks, and significant unevenness. Check the contents against the product's current parts list before beginning. Separate polyurethane ornaments from MDF moldings where the finishes or adhesives differ.
2. Mark the actual finished dimensions
Use a level and a dimensioned elevation. Draw the exact outside edges and any molding centerlines recommended by the installation drawing. Account for baseboard, crown, switch plates, and adjacent door trim. Do not work solely from a photograph of a decorated living room.
3. Dry-fit all corner and ornamental pieces
Position the decorative corners and onlays before permanently attaching anything. Confirm that left and right pieces are oriented correctly, that the corners meet the intended straight profiles, and that the selected shapes do not obstruct outlets or nearby cabinetry. Some decorative parts are overlays rather than structural corner connectors.
4. Cut straight molding only as specified
Check whether the kit profiles are already cut or supplied in stock lengths. Measure from the correct reference points and allow for saw kerf and end condition. Mitered corners may use long-point outside dimensions, while a kit's approved joint design could require a different method. The correct procedure depends on the actual components.
5. Select approved adhesives and supports
Use a mounting system confirmed as compatible with the individual polyurethane or MDF products and the receiving substrate. The STAVROS installation and finishing materials section may help identify related supplies, but a catalog cross-listing alone does not confirm compatibility.
Large or projecting details may require temporary support or a mounting method different from that used for a slim profile. Observe the specified working time and full cure requirements. Cosmetic caulk is not a substitute for the required bond or mechanical attachment.
6. Finish seams and paint carefully
Once the attachment system has cured, treat joints using suitable products, protect adjacent finishes, and apply the approved paint system. Ornamental areas may require controlled brushwork to preserve relief detail; straight profiles should be inspected under side lighting for visible steps or uneven joints.
7. Check the completed wall against its function
A wall molding kit must not obstruct switches, smoke detectors, heating vents, electrical boxes, required clearances, or the operation of doors. Mirrors, shelves, televisions and artwork need independent rated mounting hardware—decorative moldings do not support them.
How to Budget a DIY Accent Wall in the United States
Catalog pricing is only one part of the purchase decision. A useful estimate distinguishes the visible wall-decor product from the additional materials and work needed for a finished installation.
| Budget category | What to verify |
|---|---|
| Ready-made kit | Exact CPU article number, size variant, contents and current price |
| Extra straight trim | Full stock lengths required by the cut plan |
| Decorative corners and appliques | Quantities, orientation and compatibility with the chosen profile |
| Adhesives and joint treatment | Product-specific suitability and coverage |
| Surface preparation | Wallpaper removal, patching, repairs and sanding if required |
| Primer and paint | Coverage and compatibility with PU, MDF, or both |
| Installation | Number of panels, cut complexity, access, height and labor |
| Shipping and import costs | Written destination-specific quote and responsibilities |
A kit is not automatically cheaper than buying individual moldings, and individual strips are not automatically more economical. The comparison depends on how efficiently each option fills the wall, how much cutting is needed, and whether extra ornaments or materials must be purchased.
If you are calculating custom trim, estimate equivalent material cost per linear foot as the current full-stick price divided by the listed stock length in feet. Then convert the cutting plan into the actual number of complete sticks you need to buy. For kits, compare the cost of the entire installed composition, not merely its width or the number of decorative pieces visible in a photograph.
Important: confirm shipping to a U.S. address
STAVROS operates an English-language catalog that displays U.S.-dollar prices and inch dimensions, but its published payment and delivery information primarily describes Russia and CIS destinations. Dollar pricing is not proof of U.S. shipping availability or a delivered price.
Before purchasing for an American renovation, request written confirmation of delivery to the actual ZIP code, product availability, packaging for long profiles, freight, import and customs responsibilities, damaged-item procedures, payment terms, and realistic timing. If the supplier cannot confirm the route, do not schedule an installer based on the catalog alone.
For specification work, the available STAVROS catalogs and drawings can help verify product geometry. Match the drawings to the exact CPU and component SKUs, not only to the collection name.
Common DIY Wall Molding Mistakes—and How to Avoid Them
Choosing a set by style without checking material. A Neoclassic kit containing primed MDF is not an all-polyurethane kit merely because it includes PU relief accents. Use the itemized material list.
Assuming every ready-made kit is a four-sided picture frame. Some CPU products are narrow vertical decorative arrangements with distinctive ornaments. Check the published layout and contents.
Ignoring ceiling trim. A 90.55-inch composition will not fit between a 5-inch baseboard and 3-inch crown on an 8-foot wall, even before adding decorative margins.
Buying all the ornaments first. Determine the full wall geometry before purchasing appliques and corners. A sculpted centerpiece that is too wide may force an awkward panel layout.
Assuming one kit fills an entire wall. The finished width on a product card may describe one decorative module. Repeated installations require deliberate spacing and a clear end-margin plan.
Ordering molding by total feet only. The cut list determines the number of full strips; patterned trim can require extra material for alignment.
Mixing corner components with unrelated moldings. Decorative corners may be series-specific, and some are applied overlays rather than joining profiles.
Installing directly over failing paint or wallpaper. The attachment is only as reliable as the underlying surface. Prepare the substrate according to the approved mounting method.
Believing adhesive means no installation skill is required. Accurate leveling, cutting, curing and careful finishing still determine whether the final wall looks professionally composed.
Treating decorative profiles as load-bearing. Polyurethane or MDF ornament does not support a television, mirror, shelf or other substantial object unless a specific engineered system explicitly provides for that function.
Frequently Asked Questions About Wall Molding Kits
Can I design a wall molding accent without hiring an interior designer?
Yes. Start by measuring the usable wall area, identifying the room's main visual axis, and making a full-scale paper or tape mockup. A coordinated kit can reduce selection work, but you still need to verify dimensions, contents, substrate, and installation requirements.
What is the difference between a wall molding kit and a picture frame molding kit?
Both terms can describe decorative wall compositions. However, picture frame molding kits commonly suggest rectangular outlined panels, while some STAVROS CPU sets are narrow vertical modules or more elaborate decorative arrangements. The actual product drawing—not the search term—defines the shape.
Are all STAVROS wall molding kits made entirely of polyurethane?
No. CPU-3-1 lists polyurethane straight moldings and corners, while CPU-1-1 and CPU-2-2 combine polyurethane accents with primed MDF moldings. Verify the material of every kit component.
Will a 90.55-inch kit fit an 8-foot ceiling?
Not in many typical conditions. An 8-foot ceiling is 96 inches high; a 5-inch baseboard and a 3-inch crown drop leave only 88 inches between them. You may need a shorter confirmed kit or an individually designed molding arrangement. Do not arbitrarily shorten ornamental components without the manufacturer's guidance.
What wall molding style suits a modern living room?
A restrained geometric layout or tone-on-tone painted frame often works well. The STAVROS Japandi designs provide examples of quiet shapes, while Neoclassic Light offers a more traditional but relatively controlled alternative.
How many wall molding kits do I need behind a sofa?
Calculate from the actual finished width of the selected module and your desired gaps. A 144-inch wall with two 42.24-inch-wide CPU-3-1 compositions and a 12-inch gap would leave 23.76-inch side margins if centered. The right number of modules also depends on the sofa location and the usable wall height.
Is decorative molding suitable for a small bedroom?
It can be, particularly as a simple, appropriately sized composition. Avoid a large projecting ornament beside the headboard or an overly tall kit that conflicts with crown molding. A smaller custom picture-frame design may suit a low ceiling better than a full-height CPU module.
Can I add decorative onlays to a ready-made kit?
Potentially, but compatibility is not automatic. Verify dimensions, motif, finish, and how the new piece meets the existing profiles. Explore STAVROS polyurethane appliques only after the basic wall arrangement is settled.
Are panel molding corners included in every kit?
No. Some designs have corner elements, some have terminal ornaments, and others have different types of decorative pieces. The STAVROS molding decor category is a source of separately sold accents; confirm each kit's own component list.
Can wall molding kits be painted the same color as the wall?
Often yes, with a compatible finishing system. Tone-on-tone paint emphasizes shadows rather than color contrast. For mixed polyurethane-and-MDF kits, check surface preparation, primer compatibility, joint treatment, and paint instructions for both materials.
Are wall molding kits the same as structural wall panels?
No. Decorative molding is applied architectural trim. It may define the appearance of a panel, but it is not an independently rated load-bearing wall element, acoustic assembly, fire-resistant barrier, or mounting support for heavy objects.
Does STAVROS deliver wall molding kits to the USA?
The website offers English-language shopping information, but its published shipping details primarily concern Russia and the CIS. Ask STAVROS to confirm fulfillment, a complete delivered quotation, packaging and import terms for your U.S. destination before placing an order.
Choose the Right STAVROS Wall Molding Kit for Your Accent Wall
A coordinated wall molding kit is useful because it turns a vague decorating idea into a specific composition that can be measured. The right result comes from checking the actual width, height, projection, component materials, and installation method—not from assuming the same design fits every room.
Start with the STAVROS wall molding kit catalog and compare Japandi, Neoclassic Light, Neoclassic, and Versailles Light according to your existing architecture. If your wall needs nonstandard dimensions, build a cut list using individual polyurethane wall moldings and add decorative trim or appliques selectively.
Measure first, check the component list second, and buy only after the design fits the wall on paper. That approach gives homeowners working without a designer a clearer path from inspiration to a coordinated architectural accent.