Article Contents:
- The first filter is the element's function in the project
- Catalog map: where to go for the right solution
- The section name does not replace checking the material
- When to open the moldings section
- How to read dimensions A, C, and L for a molding
- Filters narrow the choice, the product card clarifies the result
- When you need the trim catalog
- Why ornament is checked by pattern repeat
- Molding decor is selected for a specific profile
- What to check on a corner piece and a paired ornament
- Onlay: a separate accent with its own dimensions
- Ceiling medallion: location first, then pattern
- When a ready-made ceiling composition is more convenient
- A catalog and a collection answer different questions
- How to make a shortlist of actual products
- Example: three tasks for one wall
- What to check in a 3D model
- When a DWG drawing is needed
- The sample completes the verification of the relief and finish
- From the catalog selection to the specification
- Linear trim and piece decor are calculated differently
- Mistakes that force you to repeat the catalog selection
- How to proceed to purchase and keep the chosen solution
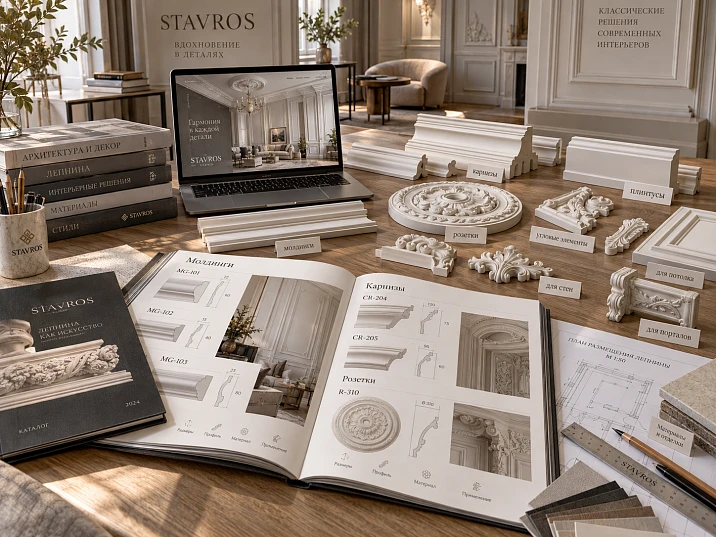
The project folder contains twenty images of stucco, but the specifier has nothing to order yet. One image shows a ready-made ceiling composition, another shows a separate applique, and a third shows a molding without dimensions. All three solutions may appeal to the client, but they will have to be handled differently: clarifying the set composition, checking the dimensions of the part, or calculating the number of strips.
A stucco catalog for designers becomes useful when the search starts from a specific place in the project. A linear profile is needed for a frame, a piece element for an accent above a door, and a rosette or set for a central ceiling composition. Only after that do restrictions on dimensions, pattern, and material appear.
В STAVROS stucco catalog these tasks are distributed across several sections. To turn them into a working list of products, consistently clarify the function, geometry, and finish of each item. A photograph helps start the selection; it is completed by an SKU with verified characteristics.
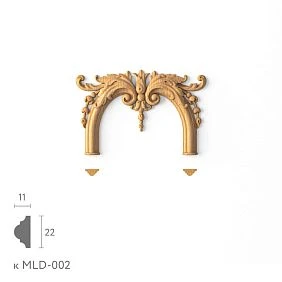
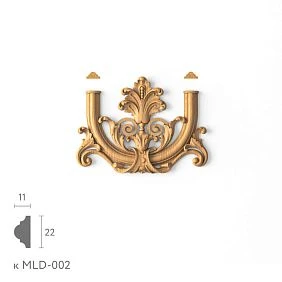
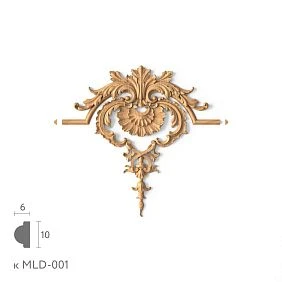
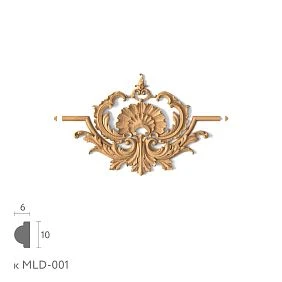
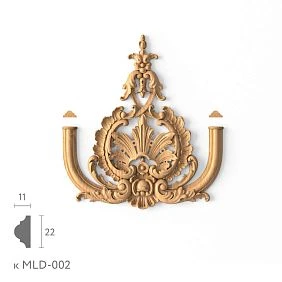
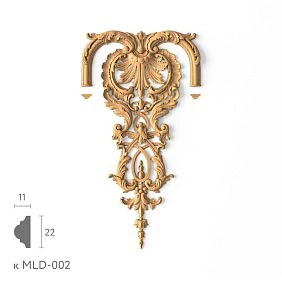
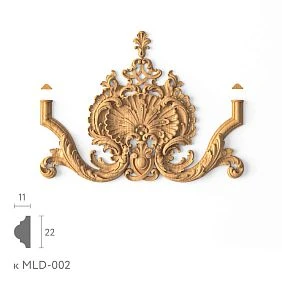
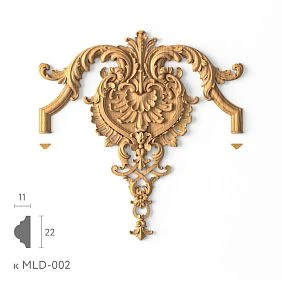
The first filter is the function of the element in the project
Before opening a product group, write down a short task: “close the wall frame,” “design the ceiling perimeter,” “add a vertical ornament,” “highlight the center above the dining table.” This wording immediately narrows the search area.
Then mark the location on the wall elevation or ceiling plan. You need the available field, adjacent elements, and the surfaces the decor will adjoin. For a wall contour, these may be the casing and the cabinet; for a ceiling rosette, the light fixture, ventilation grille, and the boundary of the ceiling zone.
Style is connected to an already defined task. If you start with the general wish “classic stucco molding,” the selection will include cornices, capitals, and large appliqués. Comparing them with one another is pointless: each type is responsible for its own part of the composition.




Catalog map: where to go for the right solution
It is convenient to read the sections as several entry points into the assortment: by place of application, product type, and artistic design. One element may appear in several routes at once.
| Project objective | Desired group | What to get from the product card |
|---|---|---|
| Outline the panel, assemble the frames, draw the wall line | Moldings | Section, strip length, material |
| Choose a ready-made composition for the wall | Decor for Walls | General layout and composition of the selected solution |
| Create a wall-to-ceiling transition | Cornices | Profile, projection, height, mounting surfaces |
| Apply a repeating ornamental band | Molding | Dimensions, motif, direction, and pattern repeat |
| Complement the selected molding | Decor for moldings | Compatibility, dimensions, orientation of parts |
| Place a separate ornamental accent | Overlays | Width, height, thickness, position of the pattern |
| Highlight the ceiling center | Ceiling rosettes | Dimensions and layout of the central zone |
| Assemble a ceiling composition from coordinated elements | Decor for Ceilings | Diagram, complete set, materials of the components |
For example, the section wall decor is useful when searching for an overall composition. If you need only one profile for an already drawn frame, it is faster to go directly to the moldings. These are two different scales of search.
Our factory also produces:
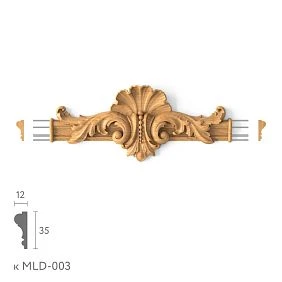
The section name does not replace checking the material
Within the general direction of stucco decor, there are products made from different materials. Therefore, the page path or the white color in the photo does not confirm that a specific profile is made of polyurethane.
The material is taken from the specifications of the selected item. If the project specifically requires polyurethane stucco, this requirement must accompany the selection all the way through to ordering. If a combination of materials is allowed, the substrate, installation, and finishing of each component are checked separately.
Pay especially close attention to ready-made sets: an artistically coordinated composition may include several materials. For the designer, this means the composition must be preserved, and for the order assembler, it must not be replaced with the generic name "polyurethane stucco."
Get Consultation
When to open the moldings section
Moldings made of polyurethane They are sought for frames, panel borders, vertical lines and horizontal bands. Here one chooses an extended contour that will then be cut and assembled according to the project.
Before viewing the profiles, determine the role of the line. The main border, the inner contour of a double frame and a small insert between panels may require different cross-sections even in the same room. It is convenient to separate these positions in the working list right away.
Do not transfer the properties of a cornice to a profile just because both products are long. A cornice works at the transition between planes, while an ordinary wall molding is installed along its own mounting surface. The purpose and permissible position are checked against the specific product.
How to read dimensions A, C and L for a molding
For a preliminary comparison, three parameters are needed: profile width, its thickness or depth, and product length. In molding cards they may be designated as A, C and L.
Width shows how much space the line occupies on a plane. Depth affects the projection relative to the wall and the character of the shadow. Length determines whether the required section can be obtained from a single strip and how cutting can subsequently be organized.
At the same time, the same depth does not mean the same light and shadow: two profiles may have different beads, steps and recesses. After the numerical selection, the cross-section itself is compared.
The letters should be read together with the labels and the drawing. In the overlay catalog, A denotes width and B denotes height; in ceiling rosette filters, the reverse order of labels occurs. For a project, it is more reliable to write “width 55 mm, height 254 mm,” keeping the manufacturer’s original designations next to it.
Filters narrow the choice, the product card clarifies the result
First set the mandatory constraints, then use sorting. For a narrow wall frame, this may be a width range; for a part near a casing, the permissible projection; for a vertical overlay, both width and height at the same time.
Sorting by size A does not replace the other checks. The first product that fits by width may be too deep, while another will not have the required ornament orientation. Parameters that are not available in the filter of a specific section should be checked manually in the product cards.
If no suitable products remain, return to the project constraints. Clarify which of them is truly rigid and which was a preliminary preference. Do not substitute this work by reducing the actual product in the visualization: its catalog size will go into the order.
When you need a moldings catalog
Go to the section polyurethane molding when you need an extended decorative element, including a band with a repeating pattern. For such a search, a separate selection is useful ornamental trim, where filters by ornament types are provided.
Molding also belongs to moldings in the broad sense. However, when working with the catalog, it is useful to distinguish between searching for a smooth contour and searching for a repeating motif. In the second case, the cross-section geometry solves only part of the task.
For a frieze above a door, first set the height of the available strip and the nature of the pattern. A long floral motif and small beadwork organize this strip differently, even if they occupy the same width.
Why the ornament is checked by pattern repeat
A repeat is the recurring section of an ornament. It determines which fragment will be on the axis of the composition, what will remain at the edges, and how adjacent planks will join.
Imagine a band above an opening: on the left the pattern ends with a whole sheet, on the right with half of one. The total length is chosen correctly, but symmetry is not achieved. This needs to be corrected during layout while the pattern can still be shifted and the cut positions changed.
Check the repeat length, the start and end of the strip, the direction of the motif, and the permissible joint areas. If the repeat size is not specified, request a drawing or clarification by article number. Calculating it from a reduced photo is risky.
Do not mistake the commercial length for the repeat length. And do not assume that every offcut is suitable for the next section: the required pattern phase may require additional trimming.
Decor for moldings is selected for a specific profile
В molding decoration catalog corner, center, and intermediate elements are sought. It is more convenient to start with the already selected molding: then the decorative piece is checked for compatibility with a specific cross-section.
For example, in the corner product card MLDPU-003U dimensions 218 × 218 × 15 mm and use with MLDPU-003 and MLD-003-MG are indicated. This is a specific product relationship that can be carried over into the working selection.
The corner itself occupies its own area on the wall. Therefore, after adding it, the lengths of the straight sections and the position of the frame are refined. You cannot simply place a decorative element over a previously calculated joint and keep all dimensions without checking.
What to check on the corner piece and the paired ornament
General stylistic similarity does not confirm that the profiles match at the joint. On the drawing, check the contact contour, the mounting plane, and the relative position of the relief. The maximum thickness of the overlay may exceed the depth of the molding: the ornament can protrude forward while maintaining the intended junction.
Distinguish between a frame corner on a single plane and a turn between two walls. A piece for a flat composition does not become a spatial corner just because of its name.
For directional elements, check the left and right versions separately. Rotating one applique does not always replace a mirrored pair. The letters L and R in product codes are kept in the specification without abbreviations, and the quantity is recorded for each side.
Applique: a separate accent with its own dimensions
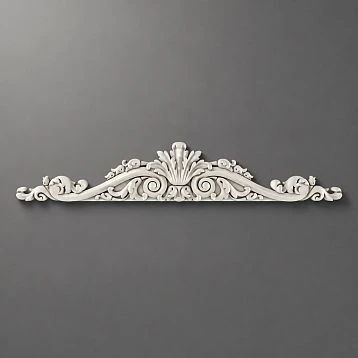
Section decorative inserts It is needed for central accents, ornamental inserts, vertical details, and panel decoration. Here it is no longer enough to select the profile width: the product occupies an area and has a certain compositional orientation.
Check the width, height, and thickness, then the surrounding free field. An applique may formally fit between two moldings, but its extreme scrolls will end up too close to the frame. The visible gap is checked along the outermost contour of the ornament.
The geometric center of the rectangle described around the piece does not always coincide with the visual center of the design. This is especially noticeable with elongated branches and asymmetrical elements. For such products, it is useful to overlay the contour on the layout and mark the design axis, and then evaluate the position in the model or on a trial marking.
Ceiling rose: first the place, then the design
Before searching the ceiling rosette determine the center of the composition. It may correspond to the center of the room, the dining group, or another zone. These points do not necessarily coincide.
Next, you need the dimensions of the light fixture and its ceiling cup, the size of the available field, the location of the cornice and neighboring fixtures. For the ceiling rose, check the overall size, thickness, the structure of the center, and the possibility of the wire outlet provided for by the design.
You cannot assume in advance that the central hole has already been made or is suitable for a specific chandelier. This is verified against the product and the installation solution. A decorative ceiling rose also does not confirm that a light fixture can be hung from it: its mounting is provided for separately.
For a visual comparison, place the selected ceiling rose on the ceiling plan at actual size. A large ornament should be considered together with the chandelier and the entire ceiling field, not just in an enlarged product photo.
When a ready-made ceiling composition is more convenient
Section ceiling decor useful if you need several coordinated contours and ornamental accents at once. A ready-made composition provides a starting scheme that can be compared with the geometry of the room.
For the set CPU-P1 the specifications list dimensions of 2500 × 2500 × 83 mm and the material "Primed polyurethane/MDF". The contents list individual parts, including primed MDF moldings. This example shows why the entire set listing needs to be checked.
Compare the scheme with the ceiling, light fixtures, and engineering devices. Clarify which elements are included in the delivery and what is purchased separately. If the dimensions of the composition change, the straight sections, the placement of the ornament, and the number of parts will need to be checked again. The entire set cannot be scaled as a single image.
The catalog and the collection answer different questions
The catalog shows the assortment by product groups. Decor collections help you choose elements united by a single artistic design. STAVROS offers, for example, "Versailles", "Art Deco", "Modern", and "Classic".
Starting with a collection is convenient when a project involves many ornamental details: a ceiling center, overlays, corner accents. Then it is easier to maintain the overall character of the pattern. But belonging to one collection does not eliminate the need to check dimensions and joints.
If you need a single smooth wall molding or a minimalist frame, it is faster to start with function and geometry. Plaster molding collections for designers help coordinate the look, but they should not make it harder to find a simple, technically suitable element.
How to create a shortlist of real products
For each project position, a few meaningful options are enough. One may fit better in width, another may provide the desired relief, and a third may have a confirmed decorative corner. Be sure to note why the product remained in the selection.
Below is an example of a working table with real product codes. All dimensions are given in millimeters; the purpose in the project is conditional. Two moldings are compared with each other, while the overlay belongs to a separate task.
| Code in the project | SKU STAVROS | Type | Dimensions from the product card | Role in the selection |
|---|---|---|---|---|
| M-01A | MLDPU-002 | Molding, polyurethane | A 22; C 11; L 2600 | Narrower contour option |
| M-01B | MLDPU-003 | Molding, polyurethane | A 35; C 12; L 2600 | A wider option; a compatible corner MLDPU-003U is available |
| D-01A | NPU.VRS-012 | Overlay, polyurethane | A 55; B 254; C 11 | Separate vertical accent |
The table is supplemented with the place of application, a reference to the layout drawing, and an open question. For example: “check the free space around the overlay.” The status “under review” means that the item has been found but has not yet been approved for purchase.
Example: three tasks for one wall
Suppose a project requires a main frame, a vertical ornamental insert, and decorative corners. For the frame, a profile width from 20 to 36 mm and a thickness up to 12 mm are preliminarily acceptable. For the insert, a field 90 mm wide and 320 mm high has been allocated. These are conditional constraints of a specific example, not recommended dimensions for any interior.
By the numbers, both moldings from the table pass the first screening: MLDPU-002 has a cross-section of 22 × 11 mm, MLDPU-003 — 35 × 12 mm. Next, it is necessary to decide which contour matches the composition. If the project selects the corner MLDPU-003U with a confirmed connection to the MLDPU-003 profile, this pair becomes a separate solution option. Compatibility of the same corner with MLDPU-002 does not follow from a match in purpose.
The NPU.VRS-012 overlay, sized 55 × 254 mm, fits within the allocated field by its overall dimensions. With geometric centering, 17.5 mm remains on the sides and 33 mm on the top and bottom. These gaps still need to be evaluated on the layout drawing: mathematical placement does not prove that the ornament has enough free space.
The result of such a review is two frame alternatives, a separate overlay, and one verified "profile — corner" pairing. For now, they do not need to be turned into a single order. First, the compositions are compared, then the selected items are approved.
If there is not enough free space for the overlay, the field size is changed or another part is selected. If the corner shape does not fit, they return to the decor group for the selected profile. This way, each check leads to a specific catalog section, and the search does not start over from the entire assortment.
What to check in the 3D model
The model is needed after the initial selection. It is used to evaluate the scale of the product relative to the door, furniture, ceiling, and neighboring decor. Several selected options are placed under the same conditions: the viewpoint, lighting, and finish are kept the same.
Otherwise, the comparison will be unfair: side light will emphasize the relief of one profile, while diffused light will almost hide another. For a ceiling rosette, a general view of the room is useful; for a complex overlay, a close-up view of its surroundings is also useful.
Check the units of measurement and the actual dimensions of the uploaded model. Arbitrary stretching changes the actual product. If the scale doesn't fit, they return to selecting a different item or reconsider the composition.
When a DWG drawing is needed
The drawing is used to check the cross-section, depth, mounting plane, and junctions. In a complex assembly, it may be needed even before the final visual selection: it's better to detect incompatibility before approving the image with the client.
On the page catalogs, 3D models, and drawings from STAVROS separate materials on polyurethane decor are available. Find the data for the required item and verify it against the selected finish in the product card.
The mere fact that a file has been downloaded does not mean the node has been verified. The working fragment must clearly show the adjacent profile, the base, and the position of the part. If a required dimension is missing or the information is inconsistent, the item is left pending clarification, without guessing the geometry from a photograph.
A drawing is especially useful next to a door casing or built-in furniture. Check the position of the outermost protruding point, taking into account the base and the installation node. The catalog thickness describes the product, but it is not always equal to its final protrusion relative to the adjacent finished surface. In an elevation view, these layers are easy to overlook; in a section view, the cause of a potential conflict becomes visible.
The sample completes the verification of the relief and finish
For the final check, a physical sample of the required product or an approved test fragment is used. It allows you to see the relief under real lighting, evaluate the surface, and perform a test coating.
In the section samples and catalogs different formats for getting acquainted with the products are presented. Clarify the contents of the selected set: the presence of a catalog or a display stand does not mean that it includes every required profile.
For the "molding — corner" assembly, it is useful to consider them together. For a paintable overlay, check the finish on the relief, where light and shadow change the perception of color. After approval, record the item code, the execution, and the approved finish system. A saved photograph of the sample supplements this record.
From the catalog selection — to the specification
Approved items are transferred to the specification with a reference to the room and the drawing. The line must include the project code, the full item code, the type, dimensions, material, finish, quantity, and unit of order. The link to the product card is kept for re-verification and future purchases.
If an article number has different sizes or executions, a single name is not enough. Record the selected variant in full. For a set, keep the composition so that individual elements are not lost when clarifying the order.
Options under consideration are best kept in a separate table. The specifier should see which items are approved for ordering and which serve only as alternatives. For a disputed line, a specific question and the person responsible for resolving it are left.
Mouldings and piece decor are calculated differently
Mouldings and other linear trim are first broken down into design segments. A cutting map is then created from them, taking into account stock lengths, trimming, and pattern. The final number of strips is obtained from this map. The total linear metres alone do not show how many whole items will be required.
Appliques and rosettes are counted individually. Left and right elements are listed as separate lines. For sets, the composition and unit of supply are checked to avoid accidentally ordering its components again.
For example, the note “four corners” does not yet explain whether four identical pieces are needed or two mirrored pairs. The answer must be contained in the layout and carried over from it into the specification.
Mistakes that force you to repeat the catalogue selection
Most often, the connection between three things is lost: the image, the item, and its place in the project. This happens even with well-chosen decor.
Only a screenshot was saved. A month later, it is difficult to recover the size and finish from it. Along with the image, leave the full product code, the link, and the date the product page was checked. If the specifications change later, it will be clear what information the project relied on.
The overall look was approved, but not the specific items. The client approved the ceiling image, while the working list still has three rosettes. Before assembly, link the approved visualisation to a specific selection option and mark the final choice.
Parts that are already included in the set were added to it. Combine the set composition and additional items into a single quantity check. Separately mark the items needed outside the finished composition.
A missing element was replaced with a similar one. The new profile may have a different cross-section, the overlay may occupy a different area, and the ornament may face a different direction. Return the replacement to the check it affects: geometry, junction, or composition. After approval, update both the drawing and the purchase list.
For repeated rooms, it is also useful to specify where each version of the solution is used. Otherwise, an approved detail for the living room may accidentally end up in an order for the study, where a different scale of decor is intended.
How to proceed to purchase and save the selected solution
Before buying polyurethane stucco, compare the order with the specification: item codes, dimensions, materials, sides of paired parts, and quantity. Confirm current prices, availability, and delivery terms specifically for the selected items. A suitable product in the catalog does not yet confirm the ability to receive the entire project volume at once.
If you need to buy polyurethane moldings together with decorative corners, submit them as linked items. If you plan to buy a ceiling medallion, attach the approved dimensions and finish. Any proposed substitution is checked against the original task and adjacent elements.
Information for professional work is collected in the section for designers and architects. For a specific request, prepare a short table of the selected products, a project fragment, and a list of remaining questions. With this set, you can clarify the order without going back to searching through scattered images.