Article Contents:
- Which wooden elements are used for decorating furniture
- When one type of decor is enough
- Facade: the main visible plane
- Side panel: an independent part of the composition
- Top of the cabinet: cornice, frieze, and decorative finishing
- Base: legs, plinth, and bottom line
- Handles: the area of constant contact
- Vertical overlays
- Horizontal elements
- Central overlays
- Paired and corner elements
- When a rosette is better than an overlay
- When a rosette is not needed
- Matching the rosette shape with the frame pattern
- One frame or two
- How to calculate molding length for a rectangular frame
- Molding and central overlay
- How to tie the legs to the facade
- The height of the support changes the entire furniture
- Construction matters more than the pattern
- Knob handle or pull
- Why you shouldn't choose a handle solely by size
- Combining handle wood and facade decor
- First, we determine the usable space
- Then we identify the main element
- We check not only width and height
- A three-dimensional template is better than a single layout
- How to choose a scheme
- When one large element looks better
- When several elements are better
- One main accent
- Pattern alignment
- Relief depth alignment
- Finishing coordination
- Beech for covering enamel
- Oak for transparent finish
- Can beech and oak be combined
- When unfinished elements are more convenient
- When ready-made coating is more convenient
- Finishing and carving depth
- What DIY manufacturing includes
- Why left and right parts are listed separately
- How the amount of moulding is calculated
- Stock for serial furniture
- Option with two overlays
- Option with a moulding frame
- Option with a top cornice
- If the main elements are handles
- If a framed pattern is needed
- If a carved accent is needed
- Decor near the handle
- Decor for upper cabinets
- Care for Carved Elements
- First stage: measuring the furniture
- Second stage: drawing the axes
- Third stage: paper templates
- Fourth stage: checking the volume
- Fifth stage: final list
- Buying decor that is too large
- Inconsistency of different elements
- Ignoring the thickness of the relief
- Incorrect calculation of the molding
- Too complex composition on a small facade
- Finishing parts without a preliminary fitting
- Lack of a single order list
- Can wooden decor be installed on an MDF facade?
- Are wooden overlays suitable for already assembled furniture?
- Can carved overlays and moldings from different collections be combined?
- What to choose for furniture with small drawers?
- Do all elements need to be made of the same wood species?
- Can a decorative overlay be installed over old paint?
- How many decorative elements are needed for a two-door wardrobe?
- Should you buy spare carved overlays?
- Can one decorative leg be replaced without changing the others?
- What is more cost-effective for a small workshop: ready-made decor or making your own?
- Can the same pattern be used on a wardrobe, chest of drawers, and cabinet?
- What should you do if the overlay you like does not fit on the facade?
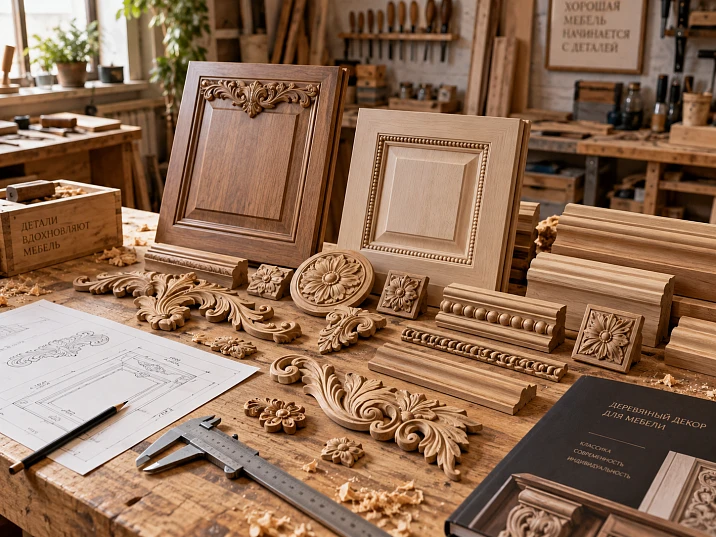
A wardrobe can have smooth facades, good proportions, and high-quality finishing, but after installing carved overlays it suddenly starts to look overloaded. It is enough to choose a pattern that is too large, place it next to a massive handle, or add a few more decorative details to an already expressive frame.
The opposite situation also occurs. A furniture maker buys beautiful wooden overlays, tries them on the doors, and discovers that the composition looks unfinished. There is a lack of framing, a top accent, or a connection between the facade and the supports.
Both problems arise for the same reason: elements for decorating furniture are selected as separate beautiful pieces, although they should work together.
Selection should begin with the furniture construction and the purpose of each part. A carved overlay decorates a flat surface, a molding forms a border, a rosette creates an accent, a leg defines the character of the base, and a handle must remain comfortable for daily use. It is not necessary to use everything at once. A good composition often consists of two types of decor connected by a common shape, size, or pattern.
Ready-made wooden decor allows you to assemble such a composition without making each carved part yourself. But before buying the elements, it is necessary to determine their place, check the dimensions, choose the wood and finish, calculate the quantity, and make sure that the decorations do not interfere with the operation of doors and drawers.
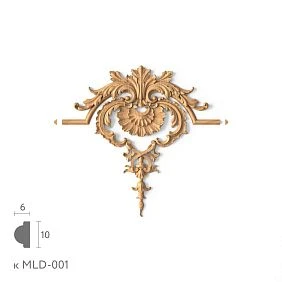
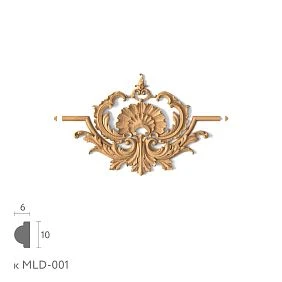
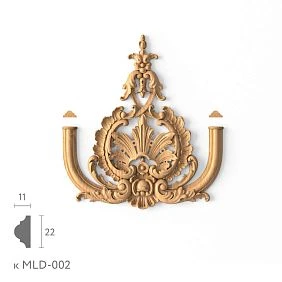
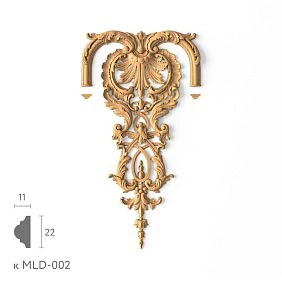

What wooden elements are used for decorating furniture
Ready-made furniture decor differs primarily by purpose. An equally expressive carved pattern can solve completely different tasks depending on whether it is made in the form of an overlay, a round rosette, or a long profile element.
To begin with, it is convenient to divide decorative items by function.
| Type of element | What it changes in the furniture | Main application area | What to Check |
|---|---|---|---|
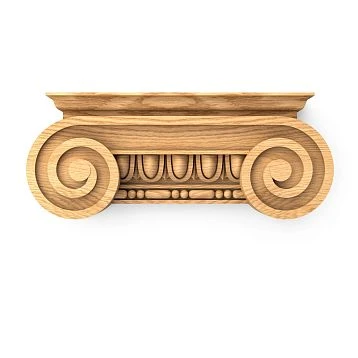
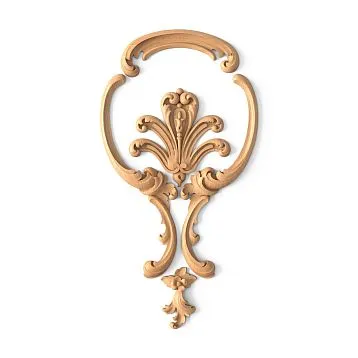
| Carved overlay | Creates a pattern on a flat surface | Facade, door, side panel | Dimensions, relief, pattern direction |
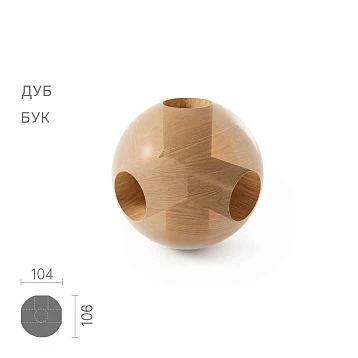
| Wooden rosette | Creates a point accent | Center of the facade, intersection of profiles | Diameter or sides, position relative to the frame |
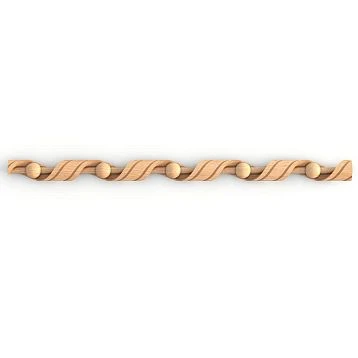
| Molding | Divides the surface into fields, creates a border | Door, drawer front, cabinet body | Profile width, angles, length of blanks |
| Furniture leg | Defines the silhouette of the base | Chest of drawers, nightstand, table, console | Height, mounting, load capacity |
| Wooden handle | Combines decorative and functional purposes | Doors, drawers | Grip, fastening, protrusion, placement |
| Cornice or decorative molding | Completes the upper or lower part of the cabinet | Wardrobe, sideboard, display cabinet | Overhang, joints, connection to the cabinet |
Each type has its own limitation. A socket clearly marks the center, but does not replace a long vertical overlay on a tall door. Molding helps organize a wide surface, but it cannot be used as a load-bearing support. A leg affects the proportions of the entire piece, but will not fix a too-cramped arrangement of decor on the facade.
in the STAVROS catalog carved decorative wooden elements, including overlays, rosettes, carved supports and other products. For a furniture project, it is more useful to first determine the required type of element, and then move on to specific models.




When one type of decor is enough
A small bedside cabinet with smooth fronts can achieve a finished look after installing only wooden handles. Additional overlays are optional here.
On a tall wardrobe with large flat doors, a single central carved element sometimes looks lost. In such a design, it is more logical to use a pair of elongated overlays or form a frame from molding.
A chest of drawers with already expressive legs and a profiled countertop edge may not require any facade carving at all. It is enough to coordinate the shape of the handles with the pattern of the supports.
The selection criterion is simple: each added detail must perform a clear compositional or functional task. If its purpose cannot be explained, it is worth checking whether it is really needed.
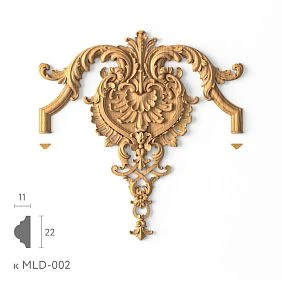
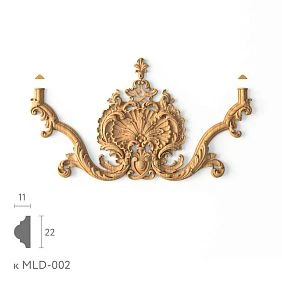
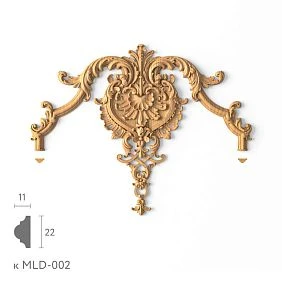
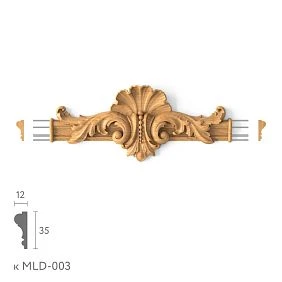
Our factory also produces:
We select decor by furniture zones, not by a photo of the product
The same decorative overlay is perceived differently on a tall cabinet door, the side of a sideboard, and the front of a small drawer.
The reason is not only the difference in sizes. The direction of the lines, neighboring elements, distance to the edge, position of the handle, and the angle at which a person usually sees the furniture all change.
For a tall wardrobe, the main areas are the doors, side posts, top cornice, and base. In a chest of drawers, the horizontal lines of the drawers and the legs become more important. A console table often has almost no front plane, so the supports and aprons carry the decorative load.
Get Consultation
Front: the main visible plane
The front is the first thing to attract attention, but even here not all the space can be used for decoration.
On a hinged door, it is necessary to leave a free area for the handle, take into account the opening direction and the position of adjacent leaves. On a pull-out drawer, provide a grip and prevent protruding decor from coming into contact with neighboring parts.
When choosing decorative overlays, first measure the usable field of the front, not its entire width and height.
For example, a door measures 500 × 800 mm. If a molding frame is provided along the perimeter, the decorative overlay must fit within the remaining field. The dimensions of the door itself are no longer a sufficient basis for ordering here.
Side panel: an independent part of the composition
The side surface of a wardrobe can remain almost unnoticed if the furniture stands between walls. But in a freestanding buffet or chest of drawers, the side panel is clearly visible.
In that case, it is desirable to coordinate the decor of the side panel with the front, without necessarily repeating the pattern completely.
If the front part of the furniture is decorated with rectangular frames, a simpler framing of the same profile can be used on the side panel. This preserves the overall rhythm without an excessive number of carved details.
However, a large central overlay on the side panel is not always justified: it may be hidden by neighboring furniture, and the additional relief sometimes prevents a tight fit against the wall.
Top of the cabinet: cornice, frieze, and decorative finishing
The upper decorative band noticeably changes the silhouette of the wardrobe. Even a relatively small cornice projection creates a shadow and visually separates the upper part from the main surface.
But the cornice requires checking across the entire structure.
It is necessary to take into account the depth of the cabinet, the projection above the facade, the opening of the upper doors, the distance to the ceiling, and the possibility of installing already assembled furniture.
If the wardrobe is installed almost flush with the ceiling, a complex protruding cornice may turn out to be an inconvenient solution. A narrow wooden profile without significant projection sometimes looks better and is easier to install.
Base: legs, plinth, and bottom line
The lower part of the furniture determines its visual stability.
On a massive chest of drawers, tall thin supports create the impression of a lighter cabinet. Low wide legs, on the contrary, emphasize the mass of the piece.
The choice of lower decor should take into account not only appearance but also construction. A decorative overlay on the plinth does not replace the fastening of the load-bearing leg. If the support bears the load, the method of its installation is determined separately.
Handles: an area of constant contact
A person uses a furniture handle every day. That is why sharp protrusions, narrow gaps, and deep carving that makes gripping difficult are especially undesirable near it.
When developing the composition, space is left not only for the handle itself, but also for the fingers.
Such a limitation may change the position of the central overlay or force you to abandon a symmetrical pattern on a narrow drawer.
Decorative overlays for furniture: which shape to choose
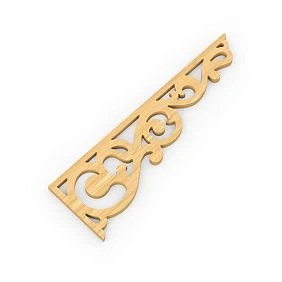
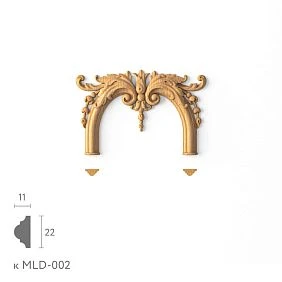
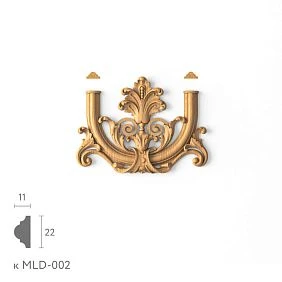
Carved overlays are one of the most versatile types of wooden facade decor. They can work on their own, combine into symmetrical compositions, be placed inside frames, or be repeated on several parts of the cabinet.
In the section decorative overlays for STAVROS furniture you can select items by shape, size, and style of carving. But when choosing a design, it is useful to first determine what task it should perform.
Vertical overlays
Elongated elements are suitable for tall cabinet doors, narrow side panels, furniture posts, and vertical sections of the cabinet.
They emphasize the height of the object and help organize a long surface, on which a round rosette or a small central applique would look too isolated.
For example, on a door 1,800 mm high and 450 mm wide, large wide decor can visually make the facade feel heavier. A narrow vertical applique better matches its elongated geometry.
However, the direction of the pattern should be considered separately. If the ornament clearly has a top and bottom, it cannot be rotated for placement convenience without checking.
Horizontal elements
A horizontal applique is suitable for the upper sections of a cabinet, wide drawers, a decorative frieze, and transverse compositions.
Its connection with other horizontal lines is important — the edge of the countertop, the upper cornice, the lower boundary of the facade.
On a chest of drawers with several drawers, installing a large horizontal applique on each of them can create an excessive number of parallel lines. Sometimes it is better to highlight only the upper wide drawer or use small elements coordinated with the handles.
Center overlays
A central applique is especially useful on facades with a pronounced free field.
It can become an independent decoration or a central element inside a molding frame.
But the geometric center does not always coincide with the visual one.
On a cabinet door with a handle at the side edge, the composition is perceived differently than on a blind decorative panel. On a drawer facade, the center is also occupied by the handle if it is installed in the middle.
Therefore, the position of the overlay should be chosen taking into account the hardware, and not just by the ruler.
Paired and corner elements
Paired decor is used on double-door cabinets, symmetrical doors, furniture portals, and decorative panels.
If the overlays have left and right versions, they must be specified separately in the order. Rotating one piece does not always replace a mirrored pair: the pattern may become inverted.
Corner overlays are convenient for highlighting a frame or the outer corners of a facade. But they require especially precise coordination with the molding: it is important not to cover the joint of the profiles and not to create too thick a node.
Wooden rosettes: a small element with a noticeable role
A rosette differs from an elongated overlay in the character of its composition. Its shape usually concentrates attention at a single point.
That is why a rosette is well suited for the center of a square panel, the intersection of decorative profiles, the upper termination of a furniture post, or a symmetrical section of the cabinet.
In the STAVROS wooden carved rosettes products of various shapes and designs are presented.
When a rosette is better than an overlay
Imagine a facade 440 mm wide and 460 mm high with an almost square free field. An elongated vertical overlay may look random because its direction is not supported by the proportions of the surface.
A round or square rosette solves a different problem: it marks the center without turning the composition into a vertical or horizontal stripe.
A rosette also helps to connect several moldings if its shape is designed for such use. In this case, it becomes part of a frame system rather than a separate decoration.
When a rosette is not needed
On a small drawer with a central handle, a rosette may compete with the hardware.
If the height of the front panel is only 140 mm, the space between the handle, the top and bottom edges is limited. Adding a relief detail may make the drawer inconvenient to use.
A rosette is also not always justified on a facade with a large, pronounced wood grain. If the goal is to emphasize the natural texture, an additional carved center can distract attention from it.
Matching the shape of the rosette with the pattern of the frame
For a calm geometric facade, it is reasonable to choose a rosette with a fairly restrained pattern. A complex floral ornament will require different compositional support.
But this does not mean that all elements must have the same profile.
It is enough to harmonize the character of the lines, the scale of the details, and the degree of relief. A large rosette with deep relief next to a thin flat molding may look too heavy if the other parts of the furniture do not support its expressiveness in any way.
Furniture moldings: how to create a decorative frame
A smooth furniture facade can be divided into geometric fields using wooden molding. At the same time, the facade itself does not become structurally framed: the profile forms a decorative frame on its surface.
This difference matters when choosing the fastening and calculating the free space.
The molding sets the boundary. An overlay or rosette may be located inside this boundary, but it does not necessarily have to be present there.
In the section wooden moldings and linear trim products you can select profiles suitable for furniture and interior tasks.
One frame or two
A single frame is suitable for facades that need a calm geometric relief.
A double frame creates a more complex pattern and requires a larger free field.
On a narrow door, two frames can sit so close together that the gap between them no longer reads as an independent part of the composition. In that case, it is wiser to omit the inner contour.
If a large carved overlay is already provided inside the frame, additional trim should also be evaluated critically.
The number of details does not determine the quality of the design. What matters more is how clearly the primary and secondary elements are distributed.
How to calculate the molding length for a rectangular frame
Suppose a furniture front measures 600 × 800 mm. A rectangular frame is planned so that its centerline runs 60 mm from each edge.
Then the dimensions of the rectangle along the centerlines will be:
-
width: 600 − 60 − 60 = 480 mm;
-
height: 800 − 60 − 60 = 680 mm.
Theoretical total length of the centerlines:
2 × (480 + 680) = 2,320 mm.
However, the figure of 2,320 mm is not yet the finished amount of material to purchase.
The actual lengths of the blanks depend on the profile width, the method of measuring the segments, and the angle cuts. When joining at 45°, the outer and inner sides of each segment have different lengths.
In addition, it is necessary to take into account the limitations of standard product lengths, possible defects in individual sections, and the need to align the decorative pattern.
Before ordering, you should prepare a cutting plan: specify the four segments, their outer and inner dimensions, and the joining method.
If a carved profile with a repeating ornament is used, it is important to check how the pattern will meet the corner. Sometimes an arithmetic allowance alone is not enough: you have to choose a different starting position for the carving or use decorative connecting elements.
Molding and center overlay
The combination of these parts often works better when their functions are separated.
The molding shapes the geometry of the facade, while the overlay sets the main accent.
If the profile has a pronounced relief, the central element does not necessarily have to be made equally deep. A frame that is too active and a large overlay can compete with each other.
A simple test fitting helps to verify compatibility: place both elements against the facade at the same time. Individually they may look good, but in the overall composition they may turn out to be disproportionate.
Furniture legs as part of a decorative composition
Legs are often chosen separately from the facade decor. This leads to a situation where the upper part of the furniture is made in one character, and the base in another.
For example, a chest of drawers has massive carved overlays with rounded leaves, while the supports have sharp geometric edges. Such a combination may be intentional, but without an overall concept it gives the impression of randomly selected details.
A decorative leg has two roles. It influences the perception of the furniture and at the same time can serve as a load-bearing element.
Therefore, choosing it only from a photograph is unacceptable.
in the STAVROS catalog furniture legs and supports made of solid wood.
How to match legs with the facade
It is worth starting with the silhouette of the furniture.
If a chest of drawers is wide and low, tall narrow legs visually lift the body. This can be useful for a piece that looks quite heavy.
On a narrow tall cabinet, the same legs sometimes create a feeling of instability, even when the structure itself is calculated correctly.
Legs with pronounced carving are more logical to use where the facade decor does not overload the overall composition.
Two approaches are possible:
The first — expressive supports and calm facades. The legs become the main decoration of the lower part. A simple molding or small overlays on the doors are sufficient.
The second — a complex facade and restrained supports. The main attention is focused on the carving of the doors. The legs support the shape of the body and do not create a second equal center of attention.
Both solutions can be successful. The choice is determined by the proportions of the piece, not by a rule that carving is necessarily required in all zones.
The height of the support changes the entire piece of furniture
When replacing ordinary legs with decorative ones, it is important to recalculate the total height of the item.
For new furniture:
total height = body height + height of the installed base + other structural additions, if any.
If the body of a chest of drawers has a height of 720 mm, and the support adds 140 mm, then when the body is placed directly on the supports, the total height will be 860 mm. But only provided that the structure does not include additional stands, adjustable elements, or a separate base.
This is a training example, not a characteristic of a specific model.
For a bedside table, increasing the height may affect convenience relative to the mattress. For a console, it may affect the position of the work surface. For a wardrobe, it may affect the distance to the ceiling.
Construction matters more than the pattern
Not every decorative detail that resembles a leg is suitable for bearing load.
Before ordering, it is necessary to check the purpose of the product, the recommended mounting scheme, the location of load-bearing points, and compatibility with the weight of the furniture.
Strength calculations should not be replaced by a visual assessment of wood thickness. For a heavy bedside table, sideboard, or table, real loads, stability, and the connection of the legs to the frame are taken into account.
If only decorative cladding of the base is needed, it is sometimes better to use an overlay element on an already calculated structure rather than change working supports.
Wooden furniture handles: how not to disrupt the composition
A handle may be small, but it is constantly in the field of view and tactile contact.
On the front, it is perceived as part of the decorative scheme. At the same time, its main task is to ensure convenient opening of the door or drawer.
Therefore, handles are selected after determining the main decorative zones, but before the final fixing of overlays and moldings.
Available for selection STAVROS wooden furniture handles.
Knob handle or pull handle
A small knob handle takes up relatively little space on the front and can be combined with central decorative compositions.
But it is important to ensure sufficient grip. If a protruding carved overlay is located next to the knob, fingers may catch on it when opening.
A pull handle forms a more extended line. It can support the horizontal pattern of a drawer or the vertical composition of a cabinet.
However, a pull handle requires checking the center-to-center mounting distance, projection, and position relative to the frame.
When replacing an already installed handle, existing holes must be taken into account separately. The new decorative element should not conceal the problem of poorly positioned fasteners without a reliable structural solution.
Why a handle should not be chosen solely by size
On a small drawer, a long handle can occupy a significant part of the front width. This is not always bad: in a calm modern composition, it can become the main horizontal line.
But if overlays and a frame are already placed around the handle, a conflict arises.
Several parameters need to be checked at the same time: the length and width of the handle, its projection, the available space for the hand, the distance to the carved decor, and the opening direction.
Convenience is best assessed on a sample or an assembled front. A drawing shows the dimensions, but it does not always give a full idea of how natural the grip will feel.
Combination of handle wood and front decor
If the furniture is painted with opaque enamel, wooden handles and overlays can receive the same color.
But the same paint does not make any shapes compatible. A straight-lined handle on a front with very lush floral ornamentation requires a thoughtful combination.
With a transparent finish, another factor is added — the color and pattern of the wood.
Even two items made from the same species can differ in shade. If a particularly close match is required, materials, test paint samples, and the finishing method should be agreed in advance.
How to choose the size of the decor relative to the furniture front
In the photo of a product card, a carved overlay may fill almost the entire frame. This helps to examine the pattern, but says nothing about its scale relative to a specific door.
Therefore, decorative elements are selected based on the working field of the furniture.
First, we determine the usable space
Let's imagine a smooth facade measuring 500 × 700 mm.
The plan is to leave 50 mm of free space from each side edge and 60 mm from the top and bottom.
We get a conditional field:
-
width: 500 − 100 = 400 mm;
-
height: 700 − 120 = 580 mm.
This is not necessarily the allowable size of the overlay itself.
If a molding frame is placed inside the field, its width and position further reduce the available space. If there is a handle nearby, its working area must also remain free.
Therefore, the initial dimensions of 400 × 580 mm serve only as the first constraint, after which the specific composition is checked.
Then we determine the main element
If the front is tall and narrow, a vertical overlay can be considered. If it is almost square, a rosette or a central composition works well.
For a wide horizontal drawer front, more compact elements are suitable, positioned in the center or symmetrically relative to the handle.
The choice of shape is determined by the aspect ratio and the overall composition.
There is no strict universal rule that an overlay must occupy a strictly defined percentage of the front area. Two elements of the same width can be perceived completely differently due to the density of the ornament and the depth of the carving.
We check not only width and height
A relief detail has a third dimension — depth or thickness.
It determines how much the overlay will protrude above the surface.
For a fixed panel, this mainly affects the relief and lighting. On an opening door, the protruding detail moves together with the front and may catch on the adjacent leaf, handle, wall, or side element of the cabinet.
Therefore, for hinged doors, verification is required throughout the entire opening range.
This is especially relevant if the decorative overlay is located near the hinge side, on a narrow door, or next to a side wall.
A three-dimensional template is better than a single layout marking
A full-size paper outline helps determine the position of the item by width and height.
But it does not show the depth of the relief.
If a 15 mm protrusion is specified for the future item, a trial fit can be performed with a spacer of the appropriate thickness attached to the paper or cardboard template.
This method does not replicate every carving line, but it helps to see the overall protruding dimensions.
Check the opening, the distance to the handle, adjacent fronts, and the cabinet. Once the item is received, the trial fit should be repeated with the actual overlay before final attachment.
One large element or several small ones
The choice of the number of decorative details affects the perception of furniture no less than the choice of ornament.
A large carved overlay creates one noticeable accent. Several small elements can create rhythm or support symmetry.
But increasing the number of details complicates layout marking and installation, increases the likelihood of size mismatches, and can make the front too fragmented.
How to choose a scheme
| Construction | What is usually worth considering | When the solution is not suitable |
|---|---|---|
| Narrow tall door | One vertical overlay | The handle or structure occupies the same field |
| Wide door | Horizontal decor or a pair of elements | The front already has an active frame |
| Square panel | Central socket | The center is occupied by a handle |
| Large smooth front | Molding frame with a single accent | Lacks a flat mounting surface |
| Small box | Restrained decor or just a handle | Relief makes gripping difficult |
| Two symmetrical panels | Paired overlays | Actual dimensions or opening conditions differ |
The table does not replace a fitting test, but it helps rule out obviously unsuitable options even before selecting item numbers.
When one large element looks better
If the furniture has simple geometry and a large free surface, a large overlay can become the only decoration needed.
Its size should be coordinated with the facade, and the pattern should be legible enough from a normal viewing distance.
Fine, dense carving on a large cabinet can sometimes look like a dark spot from a distance. Larger forms give a clear silhouette and noticeable light and shadow.
When several elements are better
On two identical doors, a mirrored pair of appliqués can support the symmetry of the cabinet.
On a long furniture frieze, repeating elements can create an even rhythm.
But repetition must have a clear step and boundaries. If identical rosettes are placed on several sections, the distances between them and the offsets from the edges must be determined in advance.
You cannot count on an even layout "by eye" being accurate enough, especially in serial furniture production.
How to combine appliqués, rosettes, moldings, legs, and handles
The most difficult part of furniture decoration begins after choosing the individual pieces.
Each detail on its own may match in material, size, and pattern. But in the finished composition they must be perceived as parts of a single object.
For this, it is useful to assign decorative elements different degrees of expressiveness.
One main accent
Let's imagine a sideboard with two tall doors.
A pair of vertical carved overlays can become the main element. In that case, it's better to choose simpler moldings, and handles that don't compete with the carving.
Another option is an expressive wooden cornice. In this case, the fronts can remain fairly restrained, and small rosettes can be used only to support the overall composition.
If all the elements are equally large and rich, it's hard for the eye to identify the main focal point.
Matching the pattern
A floral ornament pairs well with smooth outlines of profiles and rounded elements.
Geometric carving more often requires a stricter organization of lines.
But stylistic connection doesn't come down to literally repeating the pattern.
For example, the rounded shape of a leg can support the smooth lines of an overlay, even if it doesn't have the same ornament. And a molding with a simple cross-section can create the right frame around fairly complex carving.
Coordinating the depth of the relief
Two carved items of the same width can cast different shadows due to the depth of processing.
If the facade should feel calm, you shouldn't automatically choose the most voluminous details.
Compare the protrusion of the overlay, molding, and handle. This is especially noticeable under side lighting.
A deep central overlay next to an almost flat frame can look appropriate. But if you also add voluminous corner rosettes, the facade may lose its clear structure.
Finishing coordination
A unified finish often ties details together more strongly than an identical shape.
If the body and decor are painted with the same enamel, the differences between individual elements become less noticeable, and the composition is perceived as more cohesive.
When preserving natural wood, on the contrary, it is necessary to take shades and texture into account. Combining different species is possible, but requires a thoughtful decision.
You shouldn't purchase several items made of different woods assuming that any clear lacquer will make them the same color.
Beech or oak: what to choose for decorative furniture elements
Beech and oak are used in the production of wooden decorative items, but they differ in appearance and behavior during finishing.
The choice depends on whether the wood grain will be preserved, how the main furniture is painted, and what types of parts are required.
Beech under covering enamel
Beech has a relatively even texture, so it is often chosen for parts that are planned to be painted with opaque finishes.
On a furniture facade, this allows different decorative elements to be unified by a common color.
However, surface preparation remains mandatory. It is necessary to take into account the direction of the grain, the quality of sanding, priming, possible grain raising, and the requirements of the chosen coating system.
If the overlay is glued to a facade made of another material, the compatibility of the substrate, adhesive, and finish should be checked.
Oak for transparent finish
Oak has a more pronounced texture.
It is suitable for items in which the wood pattern should remain visible after applying oil, lacquer, or a tinting coating.
But the same species does not guarantee an absolutely identical shade of the finished parts.
When assembling a single piece of furniture, it is advisable to coordinate finish samples. Especially if the legs, handles, and carved overlays will be located next to each other and clearly visible.
Can beech and oak be combined
Technically, combining different species is possible if the project allows for their appearance and a finishing method has been selected.
However, two scenarios should be distinguished.
With opaque enamel, the visual differences in the wood can be almost completely hidden. With a transparent finish, on the contrary, they become part of the composition.
If the goal is a uniform natural shade for all parts, it is preferable to agree on the material and test finishes in advance rather than trying to eliminate differences after installation.
Unfinished decor or ready-made items with a coating
The finishing method affects the sequence of furniture production.
Unfinished overlays, rosettes, and handles make it possible to include the decor in the overall finishing system of the furniture. Ready-made items with a coating can reduce part of the work but require more precise coordination of color and mounting method.
When unfinished elements are more convenient
If the furniture is made in a workshop with its own finishing, unfinished parts often provide more options.
You can choose a single primer, enamel color, gloss level, and patination method for the entire piece.
However, it is not always necessary to glue the decor first and then paint the entire piece of furniture.
Deep carving creates hard-to-reach areas. Sometimes it is more convenient to perform some operations separately, then install the elements and finish the joints.
The sequence depends on the design and the selected materials.
Available for supports unpainted wooden furniture legs, and for facade hardware — uncoated wooden handles.
When a ready finish is more convenient
A ready-made finish can be useful when replacing a single part, doing a small furniture update, or assembling without your own painting workshop.
But you need to check whether the shade matches the existing coating.
Even identical color names do not guarantee a perfect match if different compositions, bases, or application techniques are used.
When installing ready-made parts, avoid accidental damage to the coating from fasteners or glue. The installation method must be suitable for the specific piece.
Finishing and carving depth
On deep ornamentation, oil, stain, patina, and lacquer can reveal different areas of the relief.
The difference between frontal and side lighting is especially noticeable.
If a decorative element has thin protruding areas, a multi-layer coating can change the clarity of the pattern. Therefore, it is advisable to perform a test finish on a sample or an inconspicuous area, following the material instructions.
Ready-made wooden decor or making it yourself
For a joinery workshop, the choice between buying ready-made elements and producing them in-house depends on the complexity of the pattern, the number of identical parts, and the available equipment.
It cannot be stated in advance that one option is always cheaper.
What making it yourself involves
If a carved overlay is required, the workshop must prepare a model or drawing, select the wood, make the blank, perform the processing, remove tool marks, sand the product, and check the dimensions.
For repeat production, it will additionally be necessary to control the consistency of the parts.
If production is carried out on a CNC machine, program preparation, workpiece clamping, tool selection, and machining time are taken into account.
Complex carving may require additional manual operations.
The cost of a single part is made up not only of expenses
Finished decor: product price + delivery + acceptance + rework if necessary + finishing + installation.
In both cases, the same number of finished parts of the required quality is taken into account.
How to assemble a set of decorative elements for one piece of furniture
Selecting decor becomes much easier when the workshop prepares a bill of materials before purchase.
It records not only the product name, but also its place in the furniture, dimensions, material, and quantity.
Let's consider a hypothetical project of a two-door wardrobe with two lower drawers and four supports.
It may require the following components.
| Element | Installation location | Quantity | What data to enter |
|---|---|---|---|
| Left vertical overlay | Left door | 1 | SKU, size, material |
| Right vertical overlay | Right door | 1 | SKU, size, material |
| Molding | Frames of two doors | By cutting | Profile, section lengths, joints |
| Wooden handle | Each door and each drawer | 4 | Model, size, mounting |
| Furniture leg | Cabinet base | 4 | Model, height, permissible load |
| Rosette | If necessary, in the composition | As per project | Size, pattern, installation location |
This is an example of calculating the quantity for a given design, not a ready-made STAVROS set. Specific article numbers are selected after determining the dimensions.
Why the left and right parts are listed separately
If the carved overlays form a mirrored pair, an orientation error may become noticeable only during assembly.
Therefore, the specification must have separate lines for the left and right parts if the manufacturer produces such versions.
The phrase "two overlays" does not provide enough information to the purchaser or assembler.
How the amount of molding is calculated
A list of segments is compiled for each facade.
If two doors have identical rectangular frames, first calculate the cutting plan for one, then repeat it for the second.
However, the purchase is not planned based on total length alone.
It is necessary to take into account the actual length of the supplied profiles and the possibility of obtaining the required cut pieces without unnecessary joints.
For example, if a single continuous piece of 1,100 mm is needed for one section, a remaining profile length of 900 mm cannot be used instead without changing the design.
This is especially important for long vertical frames of cabinets.
Allowance for series-produced furniture
If a workshop produces several identical items, it is advisable to provide an allowance of individual parts taking into account possible defects, damage during processing, or the need for replacement.
But the size of the allowance should be determined by the design, the cost of the items, delivery times, and production statistics, if available.
A universal percentage for all types of decorative elements is not suitable here.
For an inexpensive straight profile and a large carved overlay with custom manufacturing, the conditions will be different.
Practical example: decorative set for a two-door wardrobe
Let's imagine a wardrobe 1,000 mm wide with two identical hinged doors. The carcass has a restrained geometry, and the client wants to add wooden carved decor without completely reworking the fronts.
The first solution is to use paired vertical overlays.
Before choosing the products, it is necessary to determine the usable width of each door. It will depend on the actual gaps between the fronts, the side panels, and the carcass structure.
The overlays should not be placed flush against the central joint without checking that the doors can open. If handles are installed nearby, a separate fitting check will be required.
Option with two overlays
One elongated element is placed on each door.
The composition forms one mirrored pair. If the fronts are fairly simple, an additional rosette may not be needed.
This method helps emphasize the verticality of the wardrobe and keep the number of parts relatively small.
Option with a moulding frame
If the fronts are wide and require more pronounced detailing, rectangular frames can be provided.
In this case, the overlays become part of the inner field.
But the free space is reduced, so the overlay dimensions are checked again.
Moldings of the same size cannot be mechanically added to the original version.
Option with a top cornice
If the wardrobe has sufficient distance to the ceiling, a top cornice can complete the composition.
At the same time, it is necessary to check installation accessibility, the cornice projection, and door opening.
If the distance to the ceiling is small, a more compact profile can be considered instead of a complex cornice.
As a result, there are several reasonable options for a single structure. The choice is determined not by the number of items, but by the proportions of the wardrobe and the operating conditions.
Practical example: decor for a chest of drawers with several drawers
The main feature of the chest of drawers is the repeating horizontal fronts.
For example, the piece has three identical drawers. Each is fitted with a wooden handle.
If a large rosette is placed next to each handle, the composition may end up looking cluttered.
It is better to first decide what will be the main element: the handle, the moulded frame, or a separate decorative overlay.
If the main elements are the handles
Choose three identical handles, check their position relative to the centre of the fronts and the ease of grip.
Additional carving may remain only on the side panels or legs.
This option is suitable if the chest of drawers has a sufficiently expressive base.
If a framed pattern is needed
Each drawer receives an identical decorative frame.
It is important to maintain identical spacing and profile. If the drawers have different heights, you cannot copy the frame dimensions without recalculating.
You should determine the general layout principle, then mark out each front panel separately.
If a carved accent is needed
On a wide top drawer, you can use a horizontal overlay, while keeping the others more restrained.
But vertical asymmetry must be intentional and supported by the overall design of the dresser.
For example, the top drawer may differ in height or function. Then an accent on it feels more natural.
If all three drawers are identical, choosing one decorative tier requires especially careful fitting.
Practical example: wooden decor for kitchen fronts
In the kitchen, decorative elements face harsher operating conditions.
Here, fronts are often located close to each other, used daily, subjected to wet cleaning, and in some areas exposed to steam, splashes, and temperature changes.
Therefore, wooden decor for kitchen furniture should be selected taking into account not only its appearance.
Decor near the handle
On a kitchen door, people often grab the handle with wet hands. A textured overlay directly next to the grip area can make cleaning and everyday use more difficult.
If facade decor is needed, it is better to provide convenient access to all frequently used areas.
Decor for upper cabinets
Tall decorative details may be appropriate on display cabinets, buffet sections, and individual upper cabinets.
But in a small kitchen, many carved overlays can visually fragment the row of facades.
Sometimes it is enough to highlight one display cabinet or the central section of the kitchen unit, keeping the neighboring facades more restrained.
Care for carved elements
The deeper and more complex the relief, the more hard-to-reach areas there are when cleaning.
For the kitchen, it is especially advisable to choose a suitable protective coating system and to check the recommendations of the finishing materials manufacturer.
If a carved element is located directly next to the sink or cooking area, its operating conditions should be assessed separately.
One should not assume that any wooden product with a decorative coating is equally well suited for all kitchen areas.
How to prepare the layout before purchasing the decor
One of the most useful operations is to make a full-size layout.
It does not require complex equipment and helps to avoid ordering unsuitable parts.
First stage: measuring the furniture
Measure the actual fronts and carcass.
For ready-made furniture, one should not rely solely on the dimensions from the original project. After installing the hardware and adjusting, the gaps may differ from the calculated ones.
Record the width, height, free margins, and locations of the handles.
For a framed facade, measure the flat surface inside the existing frame separately.
Second stage: marking the axes
Mark the center lines of the doors and drawers.
If the facades have different widths, each axis is determined separately.
For a paired composition, check the symmetry relative to the overall center of the furniture and at the same time relative to each door.
This is not always the same thing.
Third stage: paper templates
Using the dimensions of the selected items, cut out the outlines from paper or thin cardboard.
Place them on the facades without permanently attaching them.
It is better to look at the furniture from several distances: up close, from a normal viewing point, and from another part of the room.
A pattern that is too small may get lost from a distance, while an excessively large one may take up almost the entire facade space.
Fourth stage: volume check
If the relief protrudes above the surface, make a temporary three-dimensional template.
Check the movement of the doors, adjacent handles, cabinet protrusions, and the ability to grip them properly.
For pull-out drawers, separately assess the distance to adjacent fronts and the countertop.
Fifth stage: final specification
After the layout is approved, record the item codes, dimensions, materials, quantity, orientation of parts, and required finish.
This will help avoid a situation where the installer uses the correct items but installs them in the wrong sequence or location.
What to check before ordering wooden decorative elements
Buying ready-made decor simplifies furniture making, but it does not eliminate the need for a preliminary technical check.
Pay especially close attention to the following points.
-
Purpose of the item. Is the selected part suitable for the facade, carcass, support, or decorative trim?
-
Dimensions. Are the actual width, height, length, and depth of the item specified? Does the overall size differ from any of the dimensions shown in the diagram?
-
Mounting surface. Can the base of the decorative element be placed on a surface that is sufficiently flat and suitable for fastening?
-
Pattern direction. Does the overlay have a top and bottom? Is a separate right or left version needed?
-
Material. Is the required wood species available in the selected finish?
-
Finish. Is the item supplied unfinished or with a ready-made finish? Is the intended coating compatible with the material?
-
Fastening. How should the part be installed? Is adhesive bonding sufficient, or is a different method required according to the design and the manufacturer's recommendations?
-
Furniture operation. Does the element interfere with opening, closing, pulling out, or grasping the handle?
-
Quantity. Are the items counted correctly for each side, each door, and all repeating elements?
-
Repeatability. Can the same item code and finish be purchased to continue the series or for future repairs?
-
Production time. Are the required elements in stock, or do they need to be made to order?
-
Total cost. Are the material, possible finishing, delivery, installation, and necessary additional elements included?
If information is missing on at least one critically important parameter, it is wiser to clarify it before payment.
This especially applies to dimensions, the orientation of paired overlays, and load-bearing furniture supports.
Mistakes when selecting decorative furniture elements
Most unsuccessful decisions are discovered before installation if the project is evaluated as a whole.
Buying decor that is too large
On the product card, the carved overlay looks striking. But after fitting, it turns out that it takes up almost the entire height of the drawer or blocks the space for the handle.
The reason is choosing by appearance without checking the actual dimensions.
A full-size template helps prevent this mistake.
Inconsistency between different elements
The legs are chosen in one style, the moldings in another, and the overlays have an even more complex pattern.
All the parts are high-quality, but the furniture looks like a combination of several projects.
The solution is to designate one leading type of decor and select the rest as supporting elements.
Ignoring the thickness of the relief
The overlay is placed on the door, but when opening it touches the adjacent part.
The problem arises because only the plane of the closed facade was checked.
Before installation, it is necessary to assess the protruding volume along the entire path of the door's movement.
Incorrect calculation of the molding
The workshop adds up the lengths of the four sides of the frame and buys exactly that much profile.
During cutting, it turns out that the lengths of individual workpieces, the cuts, and pattern matching were not taken into account.
A separate cutting map for each frame helps prevent the mistake.
Too complex a composition on a small facade
On a small door, molding, a rosette, a large overlay, and a protruding handle are placed at the same time.
Almost no free space remains.
In such a situation, it is better to exclude some elements. Reducing the amount of decor can improve both the appearance and the usability of the furniture.
Finishing parts without a preliminary fitting
The carved overlays are painted and ready for installation, but one of them requires adjusting the base.
Any subsequent processing may damage the coating.
Therefore, products are first test-fitted and their geometry is agreed upon, and then final finishing is performed in the selected technological sequence.
Lack of a single order list
The project uses two types of overlays, several molding lengths, and different handles. But purchasing is done from photographs without exact item codes.
This increases the likelihood of error when reordering.
For a workshop, it is useful to keep a complete list of parts together with the drawing and their layout diagram.
When decorative elements should not be added
Decor does not have to be present on every piece of furniture.
If the furniture has a pronounced solid wood texture, complex body geometry, or is already rich in structural profiles, additional carved details may be unnecessary.
It is also worth avoiding protruding overlays in places where they hinder gripping, cleaning, moving the furniture, or the operation of mechanisms.
For a very narrow front, it is sometimes better to use one suitable handle than to try to place several carved decorations around it.
When updating old furniture, do not cover up damage that requires repair of the base with decorative details. An overlay will not restore the strength of a cracked joint or a warped door.
If a project requires a custom design that is not among the ready-made items, it is wiser to consider custom manufacturing instead of a random combination of unsuitable elements.
A good furniture composition is not necessarily complex. Sometimes the most successful solution is to leave part of the surface free.
Where to buy wooden elements for decorating furniture
To complete a single piece of furniture, it is more convenient to select decor from related sections of the catalog rather than purchasing each part randomly from different suppliers.
At STAVROS, you can select several groups of products for a furniture project:
-
Carved wooden decoration — for facades, cabinets, and decorative compositions.
-
decorative inlays for furniture — for doors, drawers, side panels, and frame elements.
-
Solid wood furniture legs — for the bases of tables, nightstands, chests of drawers, and other furniture.
-
Wooden furniture handles — for doors and drawers.
-
Wooden moldings and trim — for frames, borders, and decorative bands.
When selecting items for a single project, it is useful to first determine the main composition and only then place an order by individual categories.
If the front is decorated with carved overlays, check whether molding is needed and the compatibility of the future handle. If decorative legs are being purchased, compare their height and shape with the cabinet and the front design.
For furniture workshops, it is especially important to keep the item codes and exact dimensions of all elements so that the original configuration can be reproduced if the item is manufactured again.
It is wiser to buy wooden decor for furniture after approving the layout, dimensions, and finish. Then the finished items become part of a well-thought-out furniture project, rather than a set of decorations that have to be found a place for during assembly.
Frequently asked questions about decorative elements for furniture
Can wooden decor be installed on an MDF facade?
Yes, in many cases wooden decorative elements can be installed on prepared MDF fronts. But the mounting method depends on the surface, coating, dimensions, and weight of the part.
Before installation, you should check the compatibility of the adhesive or other fastening with the specific materials. If the front is already painted or film-faced, the adhesion strength to the coating must be taken into account.
Are wooden overlays suitable for already assembled furniture?
They are suitable if there is sufficient mounting surface and the decor does not interfere with the furniture's operation.
First, measurements and a trial fitting are performed. Pay especially close attention to doors next to the wall, adjacent fronts, and the space for handles.
Can carved overlays and moldings from different collections be combined?
Yes, if they match in pattern, scale, relief depth, and finish.
The collection name helps guide you, but it is better to make the final decision based on the actual composition. A full-size trial fitting allows you to see the combination more accurately than individual product photos.
What should you choose for furniture with small drawers?
For a compact drawer, a small accent or just a suitable handle is often more convenient.
If you want to add a carved overlay, it is necessary to preserve a free grip area and check whether the protruding relief causes any inconvenience during use.
Do all elements need to be chosen from the same wood species?
Not necessarily. But with a transparent finish, different species can differ noticeably in texture and shade.
If a visually matching set is required, agree on the material and a sample finish in advance.
Can a decorative overlay be installed over old paint?
The feasibility of such installation depends on the condition of the surface and the chosen fastening.
If the old paint is peeling, the new element will not hold reliably regardless of the adhesive quality. The base must be inspected and prepared according to the requirements of the installation system used.
How many decorative elements are needed for a two-door wardrobe?
There is no universal number.
For a simple symmetrical composition, two paired overlays may be sufficient. If frames, a top cornice, or decorative posts are included, the quantity is determined by the project and the cutting plan.
Should spare carved overlays be purchased?
For one-off furniture, the spare depends on the cost, availability of the model, and the risk of damage.
In serial production, an additional quantity may be justified, especially if consistency of the design is required. But buying a spare without calculation is not necessary.
Can one decorative leg be replaced without changing the others?
This is possible if the new support fully matches the required structural parameters, height, mounting method, and appearance.
But if the old supports differ in wear, size, or load-bearing capacity, replacing a single element may not be enough.
Which is more cost-effective for a small workshop: ready-made decor or making it yourself?
If the catalog has a suitable part, buying a ready-made item allows you to avoid developing and manufacturing the thread from scratch.
In-house production may be justified for non-standard items or a sufficiently large repeatable series. You need to compare the full cost of the work, not just the wood consumption.
Can the same design be used on a wardrobe, chest of drawers, and cabinet?
Yes, this approach helps unite the furniture into a set.
But the size and number of decorative elements should be adapted to each item. The same large overlay that suits a wardrobe may be too big for a cabinet.
What should you do if the overlay you like does not fit on the facade?
First, check whether it can be placed differently and whether a smaller version of the item is available.
If the right size is not available, it is better to choose another element than to violate working clearances or place the thread close to the handle.
In some cases, it is more reasonable to use a compact rosette or a thin decorative molding instead of an overlay.