Article Contents:
- Which ready-made parts are convenient for a first project
- Inspect the furniture before marking
- Work area and relief depth: what to measure
- Make a full-size template
- How to transfer the axis and preserve the position of the part
- Paired overlays and a dry layout of the entire facade
- The molding frame is marked before cutting
- What to prepare at the workplace
- Surface preparation depends on its material and finish
- Paint before or after installation
- Beech, oak, and a test stain
- How to choose glue for decor
- Check the fit and prepare the clamp
- Installing the overlay: step-by-step sequence
- How to remove excess and avoid damaging the finish
- When you can remove the clamp and put the front back in place
- DIY dresser decor: three drawers without mistakes in repetition
- DIY wardrobe decor: check both doors together
- DIY cabinet decor: keep space for your hand
- What to check if the result turned out uneven
- Where to buy decor for DIY furniture makeovers
- Additional questions
- Can old handle holes be covered with an overlay?
- Are nails or pins needed in addition to glue?
- Can a flat wooden overlay be glued onto a rounded cabinet front?
- What should I do if I later want to remove the decor?
- Can I start with valuable old furniture?
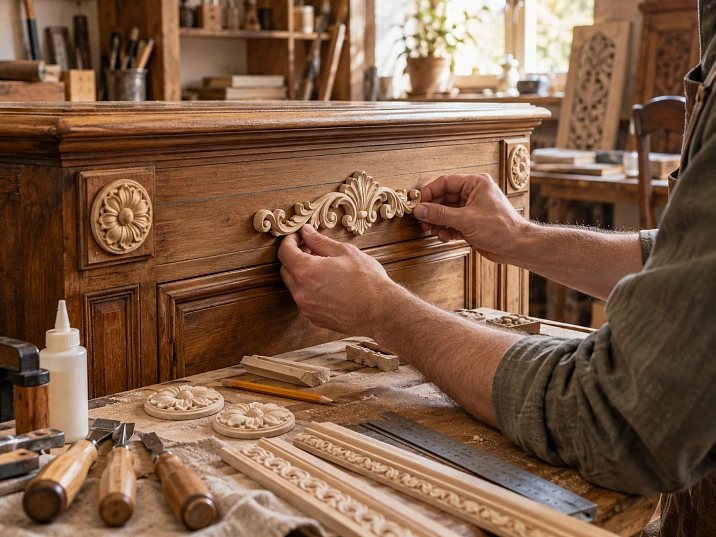
The overlay fits on the door, but after installing the handle, fingers catch on its edge. The molding frame looks even on the table, but on the closed cabinet it ends up higher than the adjacent one. Both mistakes can be detected before glue and paint — during a full-size dry fit.
For DIY furniture decorating, you don't necessarily have to carve an ornament. Ready-made wooden overlays, rosettes, and profiles let you focus on other work: finding a place on the cabinet front, checking the fit, preparing the surface, and carefully attaching the parts. These are the operations that determine whether the furniture will be usable after the makeover.
Start with one fully tested unit. If a dresser has several identical drawers, first dry-fit the decor on one cabinet front, test the finish and the fastening method. Then transfer the successful solution to the rest. This way, a marking mistake or coating incompatibility won't be repeated across the entire set at once.

Which ready-made parts are convenient for a first project
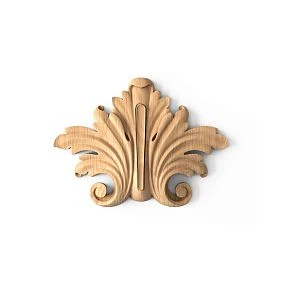
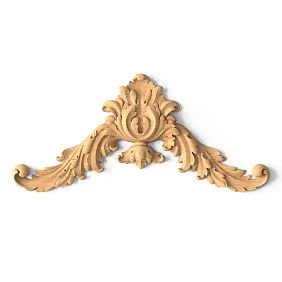
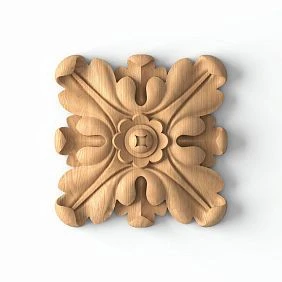
For a first experience, a small element with a clear back side and an accessible installation spot will work. U wooden overlays for furniture you can choose a separate accent for the door, drawer, or side panel. Before ordering, check how complex the contour is: thin branches are harder to hold in place during pressing than a compact piece with wide mounting areas.
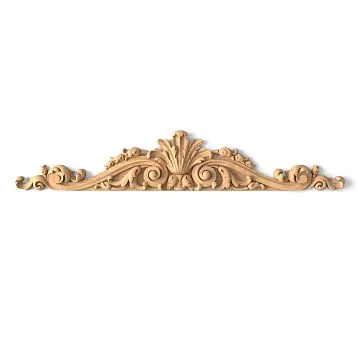
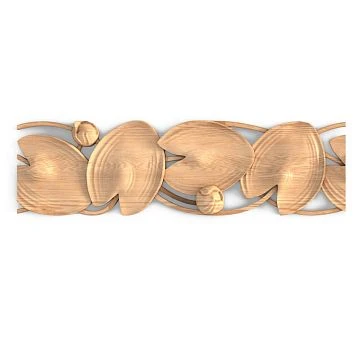
Match the elongated design to the location. For a narrow post, consider Vertical wooden overlays, for a wide drawer front — Horizontal appliqués. You can rotate the chosen ornament only when its design and mounting shape allow such a position.
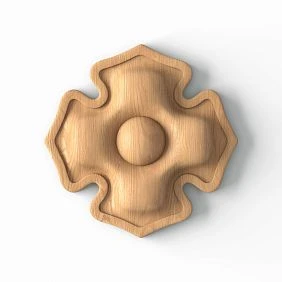
For a small central accent, convenient options are Wooden sockets. Their compact contour is easier to place on a small cabinet. With a round piece, still check the top and bottom of the design: a round shape on the outside does not always mean that the ornament looks the same at any rotation.
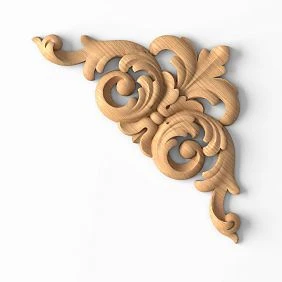
Molding will require precise cutting and checking the angles. Corner wooden trim add another task — matching the profile. To start, one overlay or one frame is enough. Handles and decorative legs should be changed as a separate step: their attachment and performance under load require their own checks.




Inspect the furniture before marking
First, open all doors and pull out the drawers. Check that they do not stick, that the gaps do not disappear during movement, and that the fronts are not skewed. If hinges need adjustment or slides need repair, do this before placing the decor. Otherwise, the marking will be tied to the temporary position of the parts.
Inspect the installation site in side light. Peeling veneer, a swollen film, a crack in the base, and flaking paint require fixing the cause. An overlay can cover the trace of an old fastening after repair, but it will not make a weak surface strong.
On a frame facade, find the boundary between the frame and the inner insert — the panel. If the panel is designed to be movable within the frame, do not rigidly connect it to the frame with a single glued part. For such a facade, choose a location within one part, or work out the fastening separately taking the construction into account.
For the work, it is convenient to remove the door or pull out the drawer if the construction allows it. Before disassembly, photograph the position of the hardware and label the parts on the back: "top", "left facade", "drawer 2". Sort the fasteners into groups. A cabinet with two similar doors is easy to reassemble with the doors swapped and get a different gap pattern.
Our factory also produces:
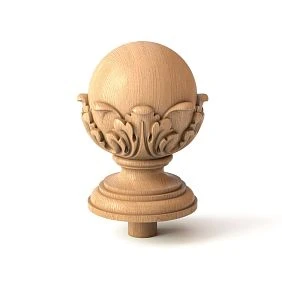
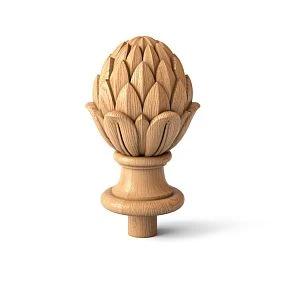
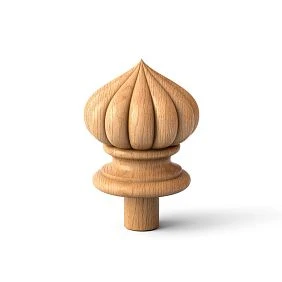
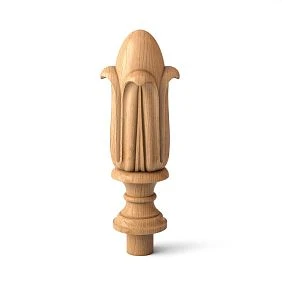
Working area and relief depth: what to measure
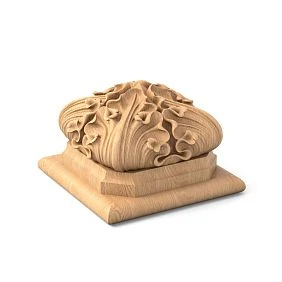
The working area is the section free for the chosen part. It does not include the handle, the edge of the profiled frame, the lock, and the places needed for opening. Measure the width and height of this section, then mark the constraints directly on the sketch.
For a flat overlay, three dimensions are usually important: width, height, and thickness. In product cards they may be designated A, B, and C. Match the letters with the diagram of the specific product: the parameter value is checked against the drawing, especially when moving between different product groups.
The first two dimensions show whether the outline will fit. The third helps check how far the relief will protrude forward. In an assembled unit, the intended backing or mounting layer may be added to it. The result must be compared with the handle, the adjacent door, and the wall near the cabinet.
Do not rely only on the height of the handle above the facade. Fingers go under it along a certain trajectory, and the decor can occupy exactly that place. Grasp a real handle with the template attached, and then with a three-dimensional mockup. If the hand has to go around a sharp curl, it is better to change the position now.
A drawing of the back side is also more useful than a beautiful general view. It shows where the contact areas are. If the necessary information is not in the product card, check drawings and models or clarify the mounting dimensions before purchase.
Get Consultation
Make a full-size template
A paper template is needed to transfer the real scale of the part onto the furniture. A rectangle based on the outer dimensions helps you quickly check the boundaries; a cut-out contour shows more precisely how the ornament sits next to the handle and frame.
- Take the dimensions of the selected version from the product card or drawing.
- Transfer them onto thick paper. If you use an image of the product, keep its proportions and check both sides after scaling.
- Mark the axis, the top, and the points relative to which you will position the part.
- Place the template against the front, compare the offsets and the position of the hardware.
When printing, disable automatic scaling to "fit to page". Add a reference segment, for example 100 mm, and measure it with a ruler on the printout. The image may look convincing even though the printer has scaled it down along with the page margins.
To check the protrusion, use a lightweight mock-up of the required thickness. Hold it securely so it does not fall when the door is opened; it is more convenient to test-fit real wooden decor on a horizontally positioned front. Paper alone will not reveal a collision of three-dimensional parts.
First test painter's tape on an inconspicuous area of the surface. Even temporary fixing can leave a mark or remove a weak layer of paint. On fresh finishes, observe the manufacturer's permitted time before applying tape.
How to transfer the axis and preserve the position of the part
For a symmetrical overlay, find the middle of the selected working area. If it is bounded by a frame, measure between its inner edges. The center of the entire front and the center of the available area may not coincide.
A conditional example: on a flat front 600 mm wide, the central axis runs 300 mm from the side edge. An overlay 240 mm wide, when positioned symmetrically, will occupy the area from 180 to 420 mm. This calculation sets the horizontal position. The height is still chosen separately, taking into account the handle and other lines.
Apply reference marks outside the future adhesive area: the axis, the top or bottom level, and two side points. They must remain visible when the overlay is in place. Fully hidden markings are inconvenient: after applying the adhesive, you will no longer be able to use them to check for displacement.
On a sensitive surface, use proven painter's tape and place marks on it. The tape must not end up under the part being glued. Pencil marks on unfinished wood are also removed before clear finishing, so do not outline the entire ornament with heavy pressure.
If the position was changed during test-fitting, erase the previous marks. Two adjacent marks are easy to confuse at the moment of installation. Keep a photo of the final layout and the dimensions from the selected reference edges — they will help restore the scheme after surface preparation.
Paired overlays and dry layout of the entire front
The left and right overlays are laid out simultaneously. Directional elements may have different article numbers or L and R designations. Two identical parts rotated in different directions do not always form a mirrored pair.
For a cabinet, first close the adjusted doors and evaluate the entire composition. Mark the overall horizontal line and the required distance from the central gap. Then transfer the dimensions to each door leaf. Checking the two fronts separately does not show whether the lines will align after assembly.
Dry fitting means assembly without glue. It should include all parts of the unit: overlays, frame profile, corner elements, handles. If a handle is removed, mark its outline and mounting points, and temporarily put it back in place to check the grip.
Try removing one of the secondary elements. Sometimes after that it becomes easier to read the main pattern and use the front. For a DIY rework, a reasonable starting point is one main accent and, if necessary, one supporting type of decor. This is a working way to simplify installation, not a mandatory scheme for any furniture.
The moulding frame is marked out before cutting
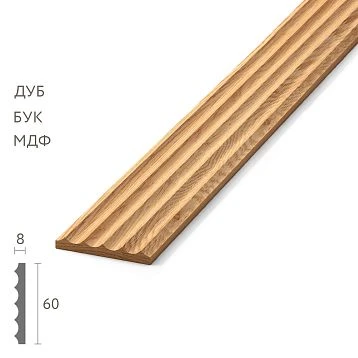
When working with wooden mouldings for furniture first select the profile cross-section and draw the frame on the front. Specify which line the dimensions refer to: the outer edge, the inner opening, or the profile axis. Mixing these options leads to an error even with accurate sawing.
Let's consider a conditional front of 600 × 400 mm. Suppose the outer edges of the rectangular frame should be 35 mm from the edges of the front, and the visible width of the moulding is 18 mm. Then we get:
| Dimension in the example | Calculation | Result |
|---|---|---|
| External frame width | 600 − 35 − 35 | 530 мм |
| Outer height of the frame | 400 − 35 − 35 | 330 мм |
| Width of the inner field | 530 − 18 − 18 | 494 мм |
| Inner field height | 330 − 18 − 18 | 294 мм |
If an insert is planned inside, test-fit it within the 494 × 294 mm field and leave the chosen gaps to the profile. The available area also decreases where the handle runs. The dimensions given serve as a calculation example and do not set mandatory frame proportions.
For a 45° miter joint in this scheme, you need two pieces 530 mm long and two 330 mm long, measured at the long outer points. Their sum is 1720 mm. When ordering, add allowance for cuts, end trimming, and test joints, then check the placement of the segments on the stock strips.
Before final cutting, make a test angle from short offcuts of the same profile. Check the face side direction and the molding position when sawing. With an asymmetrical cross-section, flipping the strip changes the joint even if the tool angle remains the same.
Assemble all four sides without glue. Verify the outer dimensions, diagonals, and fit against the facade. If one corner is off, find the cause in the length, cut angle, or profile position. Clamping cannot fix an incorrectly cut frame without risking shifting the other corners.
After fitting, label the segments on the back side: top, bottom, left, right. For multiple frames, add the facade number. Keep the parts of each set together: even segments of similar length should not be swapped after individual fitting. If the profile has a pattern, also mark its direction before you remove the dry layout from the table.
Decorative ends and connecting parts are selected in the section decoration for moldings. If they are part of the composition, the frame dimensions are calculated based on the actual method of joining with them. The formula for four profiles joined at 45° does not automatically apply to such a frame.
What to prepare at the workplace
You will need a ruler or tape measure, a square, a pencil, paper templates, suitable abrasive, and dust removal products. For moldings, you need a tool that allows you to maintain the cutting angle reproducibly and a way to hold the workpiece securely. First test it on offcuts.
Plan the clamping in advance: clamps with protective pads, suitable stops, or another fixing method permitted by the chosen adhesive's technology. Lay everything out so that you can place the part and secure it without leaving to search for tools. It is useful to run through this sequence once without glue.
Place the removed front on a clean, stable support. The pads must not scratch the back side or come into contact with protruding hardware. For a large door, provide support across the area so that it does not sag during clamping.
The product for removing excess adhesive should also be within reach. Choose it according to the adhesive instructions and compatibility with the furniture finish. A solvent that cleans the tool may damage the front. When sawing and sanding, protect your eyes and breathing from dust; take the working conditions for the adhesive and finishing compounds from their labels.
Preparation of the base depends on its material and coating
First determine what the back side of the decor will bond to. Under a visually similar painted surface there may be solid wood, veneer, or MDF. And the actual contact will be with lacquer, enamel, film, or exposed material, depending on the chosen preparation.
| Base | What to check before installation | What solution is required |
|---|---|---|
| Untreated wood | Cleanliness, dryness, and fit | Preparation and adhesive for exposed wood |
| Durably painted wood | Paint condition and adhesive compatibility | Fastening over the coating or preparing an exposed area using the selected technology |
| Lacquered furniture | Peeling, polish residue, and lacquer sensitivity to the cleaner | Test cleaning and adhesion check on a similar surface |
| MDF under enamel | Coating strength and board condition | Work without damaging the substrate, taking both surfaces into account |
| Laminate board or film-faced facade | Reliability of the cladding and its type | A composition that allows such a surface, and a preliminary test |
| Old loose or peeling finish | Extent of damage and condition of the material underneath | First, repair the substrate and the coating |
Start by cleaning off dirt with a suitable product. Pay especially close attention to the areas around handles: grease, polish, and traces of household products may remain on them. Do not try to sand the dirt into the surface right away. After cleaning, carry out the subsequent operations in the order specified for the chosen system, and let the base dry.
If sanding is required, choose the abrasive according to the material and the task. Light preparation of durable enamel and removal of damaged coating are different jobs. On veneer and thin cladding, you cannot work the same way as on a solid board: you can sand through the decorative layer.
Remove dust from recesses and from the back side of the overlay. Before gluing, check the surface with a clean hand or a lint-free cloth: there should be no noticeable dust trace left on it. This is a household cleanliness check, not a replacement for the moisture and preparation requirements in the adhesive instructions.
Paint before or after installation
The finishing order is chosen before applying primer. Otherwise, by the time of installation, the surface on which you planned to glue the wood will already be covered with varnish or oil.
Separate finishing is convenient for contrasting decor and transparent coatings. A removed overlay is easier to process from the sides, remove accumulations of product in the carving, and compare the shade with the facade. But the installation areas must be prepared in accordance with the chosen adhesive. If it is intended for bare wood, do not coat these areas with finishing product; think through the method of protecting the boundaries in advance.
Joint painting is convenient for a single opaque color. The decor is installed according to an agreed technology, the joint is allowed to cure, the transitions are prepared, and the facade is painted together with the overlay. With this sequence, you need to reach the side edges and recesses with a brush without flooding the fine pattern.
A mixed order is also possible: some of the preparatory work is done before installation, and the final coats after. It is suitable only when the adhesive, primer, and coating are compatible. Specifying a single order for all materials would be incorrect.
Do not automatically fill all visible joints. A narrow shadow line is sometimes intended by the shape of the part, and the gap between independently moving furniture components must remain functional. Filler and paint must not join a drawer to an adjacent strip or cover a structural gap.
On the STAVROS website there are installation and finishing tips, including different approaches for painted and unpainted surfaces. Use them together with the current instructions for the specific products you will be working with: the sequence of steps and waiting times depend on the product.
Beech, oak, and a test patch
Beech is often chosen for opaque painting, oak when you want to preserve visible texture. These are common scenarios, not a prohibition on other combinations. For DIY work, it is more important to determine in advance what kind of surface is required: a uniform covering color, a readable wood pattern, or emphasized carving recesses.
Check the finish of the purchased part. In the description quality of wooden products STAVROS distinguishes blanks for enamel and for tinting. They have different requirements for selecting wood by color and texture. The enamel variant cannot be regarded as a promise of identical lamella pattern under clear lacquer.
Perform a test patch before final installation, especially if the new overlay must match already finished furniture. The same shade name on the can does not guarantee the same result on different substrates. You need to compare finished samples after the specified drying times.
To check color and texture, you can use Product samples. To see how the composition settles into the recesses and changes the carving pattern, a small part with a similar relief is useful. A flat board does not show all the features of such a finish.
Write down the sequence: preparation, primer if present, colored and protective layers. Note the materials used and the number of coats. If a successful result was achieved after several attempts, this record will allow you to repeat it on the remaining overlays.
How to choose glue for decor
Choose the composition based on the two contact surfaces. The entry "wooden overlay + bare wood" describes one task. "Wooden overlay + old enamel on MDF" is already a different one. The name of the decor material does not determine the properties of the second side of the joint.
Wood glue for bare wood cannot be automatically transferred to a lacquered facade. This distinction, in particular, is explained in the recommendations of the manufacturer of Titebond wood glues. If the fastening is done over an old coating, its reliability is limited also by how firmly the coating itself adheres to the substrate. A stronger adhesive does not fix peeling paint.
In the section materials for installation and finishing look for a solution after you have determined the substrate. For the chosen product, read the purpose, material restrictions, application conditions, clamping method, and cleaning requirements. Solvent-based compositions are additionally checked for compatibility with sensitive coatings.
Before installation, write down four parameters:
- the allowable time between applying the composition and joining the parts;
- the possibility and time window for adjusting the position;
- required fixation duration;
- the time after which the joint allows further processing and use.
Fast initial setting does not mean full strength development. Also, do not transfer the "press, separate, and hold" technique from one assembly adhesive to another: it is used only where the instructions provide for it.
For an unknown combination of coating and adhesive, test on offcuts with similar finish. Let the bond cure according to the instructions and evaluate the result. A test on a bare board does not confirm that the same adhesive will hold the overlay on furniture film.
Check the fit and prepare the clamp
Place the decor in position without adhesive. It should not rock on a random protrusion, rest against the edge of the frame, or touch the base only with thin ends. Look at the gap under side lighting and determine which areas of the back side actually make contact in the joint.
If the front has a relief, choose a position on a suitable flat surface or modify the assembly. A thick adhesive layer is permissible only within the limits provided by the specific compound. It does not serve as a universal shim for a part that does not fit in shape.
Check the overlay separately on a flat surface. If it is noticeably warped or damaged, do not try to straighten it immediately with a strong clamp on the front. With thin carving, such force may concentrate on a single area. First determine the cause and whether the part can be used correctly.
The clamp is placed through a suitable pad onto a strong area that has support underneath. Do not press directly on a thin scroll or the top of the relief. The clamp should hold the part in the desired position without skewing or leaving marks on the front side.
Masking tape is suitable only for cases where its holding force is sufficient and this method does not contradict the technology. It does not replace the required pressure for bonding and is not reliable insurance for a heavy overlay. Check whether it can be fixed during a dry assembly.
Installing the overlay: sequence of actions
Proceed to bonding when the location, fixation method, and finishing order are already known. Prepare materials for cleaning, and verify the temperature and other conditions against the adhesive's instructions. Do not start working with an unfamiliar adhesive directly on a finished facade.
- Restore the reference marks. Compare them with the saved layout after cleaning, sanding, or pre-painting. Place the part in position once more and remove it.
- Apply the adhesive to the designated contact areas. Follow the application method and layer thickness from the instructions. Do not fill decorative slots with adhesive and do not expect that any excess squeezed out can be invisibly removed from any texture.
- Allow the required holding time, if specified. For some compounds, parts are joined immediately; for others, the procedure differs. Working time is counted according to the rules for the specific product.
- Install the overlay according to the reference marks. Check the position of the axis and both edges while adjustment is still possible. A single top mark is not enough: the part can rotate around it.
- Secure without shifting. Install the prepared spacers and clamp. After tightening, check the position again: the part sometimes shifts on the mounting layer at precisely this moment.
- Remove the excess that has come out using the specified method. Do not substitute the cleaner with a random solvent. Make sure that cleaning does not shift the overlay or damage the coating.
- Allow the joint to cure. Do not remove the fixation or proceed to the next step before the time permitted by the instructions and working conditions.
If you cannot place the part accurately within the allowed time, do not try to compensate with additional pressure. Further actions — removal, cleaning, and reapplication — are determined by the condition of the adhesive and its instructions. Reinstalling over an already set layer is not equivalent to a new quality bond.
It is better to install multiple overlays sequentially if the glue's working time does not allow you to calmly align the entire set. For a frame, decide in advance whether you will mount the assembled unit or individual profiles. In either case, prepare a way to hold all corners until fixation; starting from one randomly chosen side is inconvenient.
How to remove excess and not damage the finish
A glue mark on bare wood can become visible after staining: the area will absorb the finish differently. On a finished enamel, the problem is different — the cleaner or mechanical removal can alter the sheen and leave damage. Therefore, test the cleaning method together with the glue on a trial joint.
For some water-based woodworking adhesives, the manufacturer allows removal of fresh excess with a damp cloth. This recommendation cannot be applied to any adhesive, and the wood and panel edges should not be heavily wetted. Spreading the glue over a large area also increases the area that will then have to be checked before finishing.
For a relief overlay, identify in advance the places where it will be difficult to reach with a cloth or tool after installation. Plan the application so that you can control the adhesive squeeze-out precisely there. Work out the dosage on a test piece: too little glue also does not provide the necessary contact.
Place the protective tape next to the installation area and remove it at a time suitable for the coating and the adhesive used. It must not get into the seam. Do not cover still-soft paint with tape in the hope that a slight effort when removing it will necessarily go unnoticed.
When the clamp can be removed and the front returned to place
Installation has several time limits. Confusing them is dangerous for the result: the part no longer slips, but the joint may not yet be ready for processing or normal furniture use.
| Stage | What it means for the work |
|---|---|
| Allowable assembly and adjustment time | The part can be joined and aligned within the instructions |
| Holding time under clamping | The clamp holds the position for as long as the chosen adhesive requires |
| Permitted further processing | The subsequent operations specified by the manufacturer may be performed |
| Full strength set or full cure | The relevant process is complete; operating conditions must still match the intended use of the compound |
The difference can be significant. For example, in the Tytan Classic Fix technical data sheet for the 290 ml package the working time of 10–15 minutes and full curing of 72–120 hours are specified. These values relate to a specific product and do not set a regime for another adhesive or packaging version. The manufacturer also links the result to application conditions.
A similar distinction applies to coatings: a surface that is dry to the touch may not yet allow pressing, tape application, and assembly. Reattach handles and hardware taking into account the time until assembly and the load specified by the finish manufacturer.
After the permitted holding time, install the fronts back in their original places. Slowly check the full travel of each door and drawer without forcing past any obstacle that has appeared. Inspect the gaps, access to handles, and areas where the relief passes close. Only after this check should you proceed to normal use of the furniture.
DIY chest of drawers decor: three drawers without mistakes in repetition
First, make a map of the fronts: top, middle, bottom. Record their dimensions and the position of the handles. If the drawer heights differ, an identical overlay does not have to sit at the same distance from the top edge. Each front needs a clear reference principle.
Suppose center appliques are planned for all three drawers. Make three templates and place them simultaneously on the closed dresser. Check the overall vertical axis, the space around the handles, and whether the decor looks too cramped on the lowest front.
For identical drawers, make one marking template with a stop against the chosen edge. Label its orientation and working side. When placing the template, check that it rests on the same base: the edge of the flat part and the protrusion of the profile frame give different reference points.
Install and finish the first applique according to the chosen scheme, then evaluate it on the assembled drawer. If everything works, repeat the operations on the rest. The number of identical parts does not eliminate the need to check their position: the fronts of old furniture may differ slightly.
DIY wardrobe decor: check both doors together
On a two-door cabinet, the central gap becomes the main reference point. If mirrored appliques are used, determine in advance which way their branches or scrolls face. Lay out both pieces and label the corresponding doors on the back side.
Mark up on closed, adjusted doors, then transfer to the removed fronts for installation. With moulded frames, compare the top and bottom lines of both leaves at once. A small difference in height is more noticeable in a pair than on each door separately.
Make the frame on one door self-contained. The decor must not overlap the central gap or prevent the doors from moving independently. Even if the ornament appears as a single whole in the cabinet design, physically it must still be divided according to the construction.
Check the opening across the full range of use. On the outermost leaf, the relief may come close to the wall, and on the inner one, to the adjacent front. A light three-dimensional mock-up helps you see this before installing the wooden parts.
DIY cabinet decor: leave room for your hand
On a small front, first mark the grip area. This is especially important if there is a recess instead of an external handle or the door is opened by the edge. Decor installed too close can make a familiar movement inconvenient.
For a small cabinet, try a single socket or a compact applique. Look at the design from a normal distance — for example, while sitting next to a bedside table. High relief is more noticeable in that position than in a frontal catalog image.
If a frame is planned, check whether there is still enough space inside for the second element. Reducing all the parts one after another is not always useful: a thin pattern may get lost, and installation will become more difficult. Sometimes a single frame completes the task without an additional applique.
For a cabinet on which items are regularly placed and which is often wiped down, choose a suitable furniture finish and take its care requirements into account. A decorative element by itself does not make the base or finish resistant to moisture.
What to check if the result turned out uneven
| What was found | Possible cause | What to check before fixing |
|---|---|---|
| The overlay shifted after pressing | There were no side guides, and pressing shifted the piece | Is it still acceptable to adjust the position according to the adhesive instructions |
| A gap remains under the edge | Base unevenness, obstruction, unsuitable back side | Where the actual contact is located and whether a gap is provided by the product shape |
| One corner of the frame came apart | Incorrect length, angle, or profile position | Dry assembly, frame geometry, and orientation of all segments |
| The decor peels off together with the paint | Poor adhesion of the old coating to the substrate | Condition of the entire area; replacing the adhesive without repair does not solve the problem |
| A light spot appeared under the tint | Residual adhesive, uneven preparation, or a characteristic of the wood | Determine the cause on a test area before applying additional coats |
| The door leaf began to catch on the adjacent part | The relief protrusion was not taken into account, or the position of the front changed | Adjustment and movement path; do not open with force |
If the cause is unknown, stop repeating the operation on the remaining fronts. Fixing one test piece is easier than restoring an already painted set. Do not mask a structural defect with an extra coat of paint or random filler.
Where to buy decor for DIY furniture makeovers
Once the templates are checked, you can buy furniture decor using the prepared list. It should include item codes, dimensions, material, finish for the chosen coating, and quantity. For paired overlays, specify the sides separately; for moulding, specify the number of product strips according to the cutting plan.
In the carved wooden decor STAVROS select parts for the already defined locations. For small accents and additional units, you can also look at wooden decorative elements. Check the availability of a suitable pattern together with the available size and type of treatment.
If you need decorative elements for furniture for the first time, start with a small test kit. Include material for a trial frame corner and a color sample in the consumption, if required. Such a reserve has a specific purpose; an arbitrary additional overlay will not replace a cut piece of the required profile or a sample of the same wood.
Before placing the order, check payment and delivery, the availability of the selected finish, and the lead time for the entire set. It is better to set the day of final assembly after the delivery times, test finishing, and technological waiting periods are known.
Before installation, you should have ready not only the wooden parts but also a verified installation plan. Then DIY furniture decor is assembled in a clear order: fitting, marking, preparation, agreed finishing, fastening, and checking the furniture's operation.
Additional questions
Can old handle holes be covered with an overlay?
Yes, if this is coordinated with the new marking and the base has been prepared beforehand. Assess whether the holes reduce the contact area and whether they fall under thin sections of the decor. If filling is needed, choose a material compatible with the base, adhesive and future coating. Before installation, it must undergo the required drying and processing.
Are nails or pins needed in addition to glue?
Not for every decorative unit. Additional fastening is chosen according to the structure, facade thickness and part. Thin carving can split, and fasteners that are too long can go through the facade. If mechanical fixation is intended, determine its locations and permissible dimensions in advance. A random pin will not compensate for poor fit.
Can a flat wooden overlay be glued onto a rounded facade?
Only after checking that the mating surfaces and the permissible fastening point match. A flat rigid part usually does not follow noticeable curvature of the base. Do not try to force it into place or fill the entire gap with glue. For such a location, look for a suitable shape or design a separate transition piece.
What should I do if I later want to remove the decor?
Plan for this before installation. A strong adhesive bond may come off along with the paint, veneer, or part of the base. If the modification needs to be reversible, consider a replaceable facade, a separate decorative panel, or a specially designed detachable fastening. It is impossible to promise that an overlay can be removed without a trace from any surface.
Can I start with valuable antique furniture?
For an item of historical or collectible value, first determine whether it is acceptable to alter the original finish and construction. Test-gluing on such a facade also leaves consequences. It is more convenient to practice marking, cutting, and installation on a separate workpiece or on ordinary furniture whose modification is already planned.