Article Contents:
- What you should know before choosing carved elements
- Four groups of parts — four roles in the railing
- The starting post sets the scale of the composition
- Left and right versions cannot be substituted by rotating the photo
- A baluster works as a repeating module
- Carved and turned-carved baluster: what to compare
- Round and square shapes display carving differently
- How to preserve the main ornament and avoid overloading the row
- Compare the full geometry, not just the height
- A single baluster may require different solutions on the flight and the landing
- The unfolded view shows what is not visible in the product card
- The number of balusters is determined by the railing project
- Choose the handrail before finalizing the order of vertical components
- The sub-rail strip and the handrail are different items in the set
- Calculate the handrail length along its line and cutting map
- The finial must complete the selected post
- How to use ready-made recommendations for combining models
- Choose beech or oak for the entire visible system
- A test color sample is applied to the carved and turned relief
- What a sample piece provides before ordering a batch
- A single specification links the design, geometry, and order
- Before paying, check the set by sections
- Frequently asked questions when selecting a set
- Can different series of carved elements be combined?
- Must the handrail repeat the ornament of the post?
- Can one baluster model be replaced with a similar one after approval?
- Can I buy balusters now and choose the handrail later?
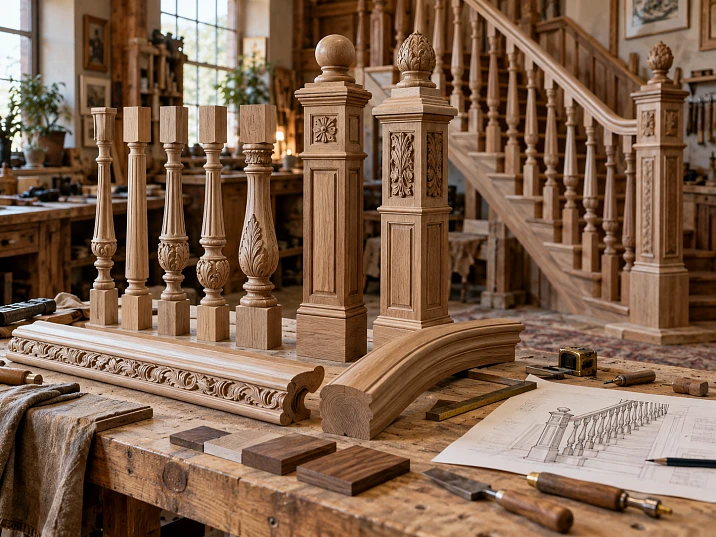
A baluster may look good in a photograph and turn out to be too ornate in a long row. A post with a suitable ornament may not align with the handrail at the junction point. And the same wood tone on individual samples may show noticeable differences after the entire railing is stained. That is why carved elements for staircases are selected based on both appearance and the geometry of the future joint.
Work begins with a railing layout: posts, baluster repeat sections, turns and the handrail line are marked. Then the main decorative motif is chosen, part dimensions are verified and a general schedule is compiled. You move on to purchasing the set when not only the item codes are clear, but also the position of each element, its material, finish and method of joining with adjacent parts.
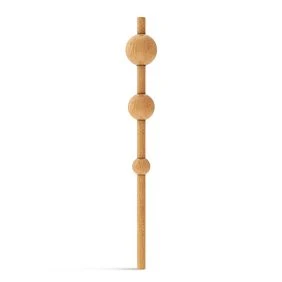
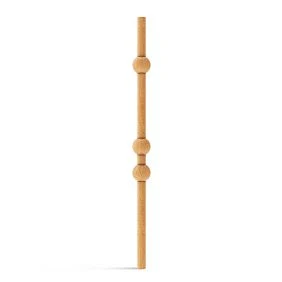
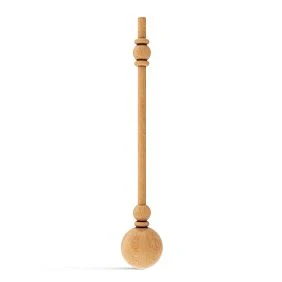
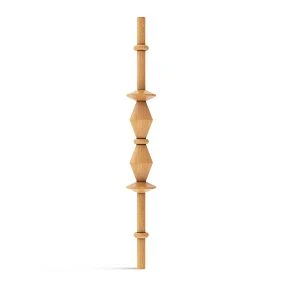
What must be known before choosing carved elements
Selection requires a staircase plan and side views of the railing. These must define the start and end of each section, the location of posts, the handrail line, mounting bases and design dimensions. Sloped flights and horizontal landing sections are considered separately: the same parts create a different pattern on each.
The railing height, infill, permissible gaps and mounting structure are determined in the design with account for the staircase's purpose and applicable requirements. Decorative selection is carried out within these limits. The approved baluster layout must not be changed merely for a more attractive repeat without checking the design.
If the staircase already exists, its actual dimensions become the initial data. You need to know where the handrail arrives, which mounting surfaces are available and what is preserved during renovation. Selection from a single photograph does not show these constraints: perspective distortion hides dimensions, and some joints remain out of frame.




Four groups of parts — four tasks in the railing
The appearance of a staircase railing is formed by balusters, posts, the handrail and, if provided, separate finials. Each group is evaluated relative to the others.
| Element | Role in composition | What to coordinate with adjacent parts |
|---|---|---|
| Starting or support post | Marks the start, end, or turn of a section | Scale, thread position, handrail attachment point |
| Baluster | Creates a repeating pattern | Silhouette, width, ornament position, mounting parts |
| Handrail | Connects vertical elements with a continuous line | Profile, grip, cross-section, and joint construction |
| Finial | Completes the silhouette of the post | Fit, size, pattern direction, and proximity to the handrail |
These roles do not imply the same structural function. A baluster, post, and decorative finial cannot be considered interchangeable supports. The purpose and fastening of a specific part are verified separately from the similarity of the ornament.
A practical selection order is to determine the character of the accent post, find a baluster for the repeating row, and immediately check handrail options. The finial is chosen together with the post. Before the final order, the entire group must be present on a single drawing.
Our factory also produces:
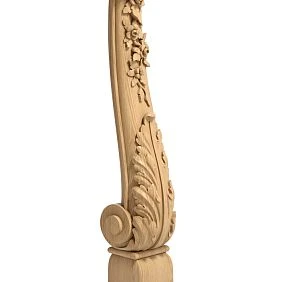
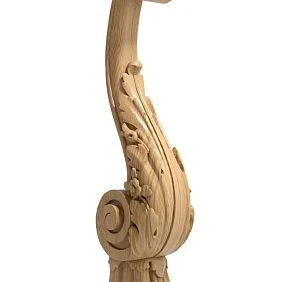
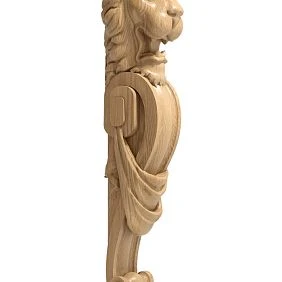
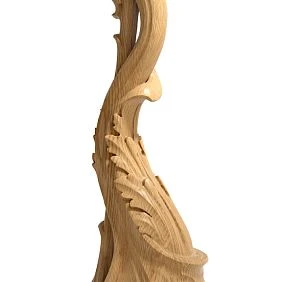
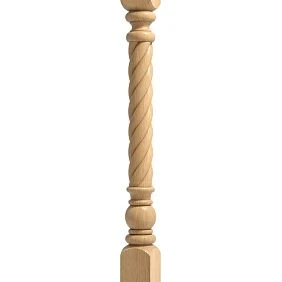
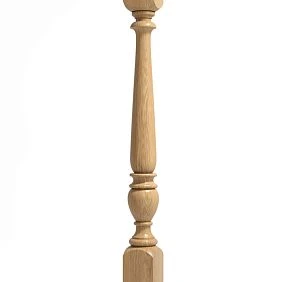
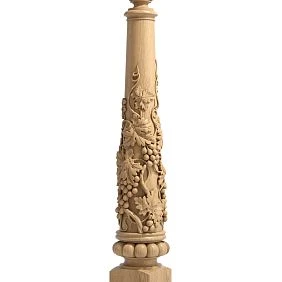
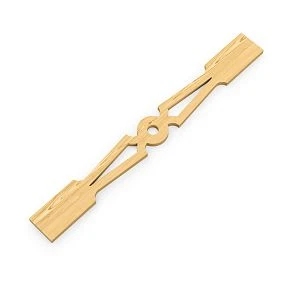
The starting post sets the scale of the composition
Starting and support posts for staircases are considered with regard to the installation location. The post at the entrance to a flight is usually clearly visible from the room; the corner post is in a different environment and is perceived together with two directions of the railing. Equally active carving at all points is not needed for every project.
A post can be visually more massive than the balusters, since it occupies a separate accent position. However, there is no universal ratio of cross-sections here. A large element can successfully emphasize the start of a wide staircase and at the same time look excessive on a small section of the landing.
Not only the face width is checked. Volutes, leaves and other protruding parts increase the actual overall dimensions. They may end up close to a wall, a doorway or the path of a hand. Therefore the post is shown on the plan together with the surrounding structures, and on the side view together with the handrail.
It is not necessary to literally enlarge the baluster pattern for a post. Unity can be maintained by a common plant motif, the character of the flutes or similar profile transitions. It is important that the ornaments are consistent in scale and do not compete for attention.
Get Consultation
Left and right versions cannot be substituted by rotating the photo
For a directional carved element, the orientation is part of the product code. For example, the catalog presents posts L-003L and L-003R. The manufacturer draws attention to two turning options and suggests checking them against the top view in the drawing.
The side designation must be tied to a specific position on the plan. The entry "left post" without indicating the viewpoint is ambiguous: a person at the start of the staircase and a person on the upper landing look in different directions. It is more reliable to mark the position, the direction of ascent and the product code directly on the diagram.
Rotating a three-dimensional part can simultaneously change the position of the ornament, the protrusions, and the point where the handrail meets it. Therefore, a mirrored model is not replaced with another one solely on the basis of a similar frontal view. When data is insufficient, the drawing of the required version is requested and the orientation is agreed upon before ordering.
A baluster works as a repeating module
A single baluster shows the craftsmanship of the carving. A row of balusters shows whether that carving suits the staircase. When repeated many times, not only the beautiful details are amplified, but also the visual density, the large thickenings, and the contrast between narrow and wide sections.
When selecting Wooden balusters for stairs, it is useful to look at the silhouette first. Then the ornament is assessed: where its center is located, how far it protrudes, and whether it reads the same from both sides of the railing. On an open staircase, the back side may be no less noticeable than the front.
A long row is sometimes better supported by a calmer model, while expressive carving is left to the posts. The reverse option is also possible: the balusters become the main decorative motif, and the posts and handrail organize their repetition. The choice depends on the entire composition, not on which individual part looks more expensive or more complex.
Carved and turned-carved baluster: what to compare
Carved and turned-carved balusters differ in the way the pattern is formed. In the turned part, the shape is set by the profile of rotation: narrowings, beads, widenings. The carved sections add relief and can create a directional ornament.
The conclusion that "carved is always more ornate, and turned is always calmer" is too crude. A complex turning profile can also be active, and shallow carving can be restrained. Specific models should be compared at the same scale.
When selecting, pay attention to the transition from the decorative middle to the upper and lower mounting parts. If the post is built on smooth forms, while the baluster ends with sharp geometric steps, such a contrast must be intentional. A similar style name does not yet guarantee consistency of these transitions.
Round and square shapes display carving differently
Round carved and turned balusters it is convenient to assess via the profile and the distribution of volume around the axis. But a round base does not mean that the pattern is the same from all sides: the carving applied to it may have a specific orientation.
У square turned and carved balusters the facets and their rotation relative to the railing line are more noticeable. A model shown in the catalog strictly from the front is perceived differently when viewed diagonally. It is necessary to understand which sides are decoratively finished and how they will be visible on the flight and the landing.
Shape does not set the style automatically. A square baluster can have complex classical carving, while a round one can have a laconic profile. For selection, the combination with a specific newel post and handrail is more important. The mounting cross-section is checked separately: the geometry of the decorative middle does not describe the dimensions of the ends of the part.
How to preserve the main ornament and not overload the row
A useful compositional technique is to choose one leading motif and determine where it sounds strongest. If it is a large acanthus on the starting newel post, the balusters can support the plasticity of the leaf or the character of the profile while keeping a calmer pattern. If a dense carved row becomes the main feature, the finial and handrail can be more restrained.
The same motif does not require the same intensity. Repeating a large volute in every detail is sometimes excessive: on the newel post it reads as an accent, but in every gap of the row it turns into a dense pattern. The result must be checked along the entire length of the railing.
The assessment is also carried out against the background of the interior. Carved solid wood decor in front of a smooth light wall is perceived differently than against active wallpaper, bookshelves, or a second stair flight. Views from the entry area and from the landing are useful for checking: it is precisely from these points that a person often sees several rows at once.
If the railing looks heavy, first try a less active profile or pattern within the project scheme. Thinning the row for visual lightness without checking the permissible gaps is an unsuitable way to correct the composition.
Compare the full geometry, not just the height
A carved element has overall dimensions and surfaces through which it connects to the staircase. The project needs both sets of dimensions. The maximum widening of the baluster may look convincing, but says nothing about the feasibility of the planned upper joint.
| Parameter | What it is for |
|---|---|
| Overall height | Check the placement of the part between the project elevations |
| Maximum width or diameter | Assess the silhouette and the space it occupies |
| Lower mounting part | Match the part with the base and the fastening method |
| Upper mounting part | Check the connection with the handrail or intermediate bar |
| Position of the decorative center | Align the ornament in the repeating row |
| Depth and direction of the relief | Check the side protrusions and the view from different sides |
| Allowable trimming zone | Determine whether the part can be adapted without damaging the pattern and the joint |
For example, in the product page balusters L-018 a size of 1000 × 50 mm is specified. This is a characteristic of the product. It does not mean that the assembled railing will automatically be 1000 mm high: the result depends on the base, the treatment of the ends, and the design of the top connection.
Dimensions are taken from the documentation for the selected version. In the section drawings and product models they look for available materials and request the missing installation information before purchasing a batch. A photograph helps to choose the shape; it cannot be used to determine the seating depth or the permissible amount of trimming.
On the flight and on the landing, the same baluster may require different solutions
On the inclined section, the handrail line rises, while on the landing it runs horizontally. Therefore, the same overall height of the parts does not yet confirm that they can be processed in the same way and installed everywhere. The upper ends, attachment points and visible length of the straight sections are checked for each type of joint.
Particular attention is paid to where the thread ends. If, after trimming, the ornament comes right up to the handrail, the usual proportion of the baluster will change. If the cut goes into the decorative part, both the pattern and the necessary installation surface may be lost.
The entire smooth section cannot be assumed in advance to be free allowance. Part of it may be needed for the joint. The possibility of shortening is clarified against the product and the project, and the amount of processing is recorded on the working drawing.
On the landing, the alignment of the horizontal levels of the ornament is additionally checked. On the flight, the line formed by the repeating decorative centres is assessed. You should not try to align them by moving the balusters without taking the fastening into account: first the processing method and the position of the parts in the project are agreed.
The elevation drawing shows what is not visible in the product card
An elevation drawing is a scaled image of a section of railing on which all posts and balusters are visible. A drawing with accurate silhouettes is suitable for an initial check. If product models are available, the volume and turns of the carving can additionally be assessed.
The procedure is as follows:
- Mark the boundaries of the section, the bases and the handrail line according to the project.
- Place the posts in the designated positions, taking into account their actual dimensions.
- Place the selected balusters according to the approved layout.
- Show the decorative centers, profile extensions, and cut zones.
- Add the finials and check the transitions to adjacent sections.
After that, review the entire row, and then the individual nodes. Twenty identical balusters can create an almost continuous band of relief, even though a single model on a white background seems light. Conversely, a profile that is too thin can get lost between large posts.
Alternating two models is also first checked on the elevation. The start and end of the repeat matter: on a short section, the ornament may break off randomly, and near a corner post an undesirable adjacency of two identical accents may occur. The alternation must have a clear scheme and separate quantities by SKU.
If two flights, or a flight and a landing, are visible from the room at the same time, a general view is added to the individual elevations. The rows may visually overlap, making the pattern denser than on each drawing separately. Here it is useful to compare two baluster options with the design placement unchanged: this shows the influence of the profile itself rather than an accidental change in spacing.
The number of balusters is determined by the railing design
The calculation requires an approved layout for each section: its boundaries, the axes of the elements, the end offsets, and the position of the posts. Simply dividing the total length of the staircase by a preferred spacing is not enough. The posts take up space, adjacent sections may share an end element, and at turns the placement conditions change.
It is important to distinguish between the distance between baluster axes and the clear gap between their surfaces. With a shaped model, the gap varies with height: a narrow neck and a wide carved section produce different geometry. The infill check is performed against the specific profile, not just the maximum width from the product card.
A conditional example of calculation after project approval: the first section provides for 12 balusters, the landing — 8, the second section — 10. If the same design is used everywhere, 12 + 8 + 10 = 30 balusters are needed for installation. This example demonstrates the addition of finished design quantities and does not set a recommended spacing.
Posts are counted by unique positions on the plan. If one corner post belongs to two adjacent sections, it is not included in the order twice. The trial part and the agreed reserve are recorded separately from the installation quantity.
The handrail is selected before the final order of vertical parts
Wooden handrails for stairs they define the upper line of the railing and the surface a person holds onto. They must be assessed simultaneously by profile, grip comfort and joint construction. Decorative expressiveness must not interfere with the use of the handrail.
On the general view, check whether the handrail looks excessively heavy above thin balusters and whether it gets lost next to a massive post. On the sample — how convenient the shape and surface transitions are. On the drawing — whether the lower part of the profile fits the adopted baluster fastening.
At the point of adjacency to the post, an accessible installation zone is important. The width of the handrail alone does not prove compatibility: its end face may land on protruding thread or a profile ledge. At a turn, each adjoining section is checked, not only the attractive frontal view of the post.
The continuity of the line and the transition between the inclined and horizontal parts are agreed separately. A straight handrail that matches in cross-section does not yet resolve the entire turn assembly. Connecting parts and the method of joining must be present in the project and the bill of materials.
The under-handrail strip and the handrail are different items in the set
Some connections provide for an intermediate strip between the upper ends of the balusters and the handrail. It must not be forgotten in the order or automatically replaced with a part of similar width.
For example, in the description handrail PR-002 additional equipment with a handrail strip PR-003 is specified. In the product card PR-003 its purpose is explained: fixing the upper ends of the balusters, on top of which the handrail is placed.
This example helps to verify the composition of a specific assembly, but it does not mean that PR-003 is needed for every handrail in the catalog. Compatibility with the selected balusters, the length of the strip and the fasteners are clarified according to the working solution. The wording "supplied additionally" is also taken into account when agreeing on the scope of delivery: a separate item must not be lost between the request and payment.
For control, it is convenient to put one assembly mark on the drawing and list all its parts under it. Then it is clear what exactly needs to be purchased, what the workshop will manufacture and what operations are ahead during assembly.
The length of the handrail is calculated along its line and the cutting map
The length of an inclined handrail is not equal to the length of the flight in plan. The order includes the dimension along the part line, taking into account the joints and end treatment provided for by the project. For several sections, a cutting map is drawn up, which shows which blanks each item is made from.
Total meters do not replace such a map. Two short offcuts do not become one long part without an additional joint. If a joint is needed, its location and design are agreed in advance; it cannot be introduced only because it is more convenient to use up the offcuts that way.
In the PR-002 product card, the manufacturer distinguishes solid-lamella blanks for lengths of 1500, 2000 and 2500 mm and lengthwise finger-jointed blanks for options over 2500 mm. With a transparent finish, the version should be taken into account when agreeing on the appearance. The name "solid wood" does not mean the absence of gluing or a constant grain pattern along the entire length.
Before purchasing long parts, check the delivery conditions and the ability to bring them into the site. The possibility of ordering the required length does not yet confirm that it can be carried through existing doors and turns without changing the agreed cutting plan.
The finial must complete the selected post
Wooden Caps they are selected based on the base, overall dimensions and character of the pattern. A large decorative finial can change the scale of the entire post, so it is assessed together with the lower part and the adjacent handrail.
First, find out whether a separate finial is provided for at all. On some models the top is already finished as a complete part. Adding another element may be unnecessary and may require rework not envisaged by the design.
If the finial is installed separately, check the mounting surface and the fastening, then the visible transition between the parts. It is necessary to understand whether an overhang forms, whether the directions of the faces align, and whether the ornament intersects with the handrail line. The diameter of the ball or the maximum width of the carved top do not replace the dimensions of the base.
On several posts, an identical finial creates additional repetition. But if the starting post is already a strong accent, the remaining finials can be more subdued. Such a difference is recorded by position so that, when purchasing, the entire set is not replaced with one favourite article.
How to use ready-made recommendations for combining models
The manufacturer's hints reduce the search for a common pattern. For the L-018 baluster, STAVROS suggests considering the L-070 post and the L-023 or L-081 finials. This is a useful starting group for comparing ornament and scale.
However, a decorative recommendation does not replace checking dimensions for a specific staircase. It is necessary to compare heights, mounting parts, the selected handrail and the position of all elements on the layout drawing. The possibility of ordering each position in the required material is also checked separately.
If a ready-made combination suits the pattern but fails at one of the joints, there are several directions of work: another model from a similar group, another provided finish, or a revision of the joint by the designer. Fitting complex carving on site should not become an unaccounted-for part of the purchase in advance.
Beech or oak is chosen for the entire visible system
For a unified natural surface, it is advisable to agree in advance on the species of the balusters, posts, handrail and finials. A mix of different species can be a deliberate technique, but the accidental replacement of one of them makes it difficult to obtain a consistent texture and shade.
Carved beech elements are considered for enamel and other opaque systems. However, the species does not remove the requirements for sanding and preparing the recesses. Carved oak elements are often chosen for finishes with visible texture: stains, oils or clear lacquer. The specific coating is selected taking into account the purpose of the part and the operating conditions.
Under enamel, the material is also recorded in the specification. An opaque color does not make beech and oak a single product item and does not guarantee identical surface preparation. It is not permissible to approve a sample in one species and then, without verification, substitute another for part of the order.
Even within a single species, differences in pattern and shade are possible. For a clear finish, the execution of the blank and the selection of visible areas are important. General information on preparation and manufacturing options is available in the section "Quality of solid wood products"; the selected parameters must be confirmed for each item code.
A test color application is performed on carved and turned relief
A flat wood sample helps to pre-select the color, but does not show the whole picture. Shadows appear on a baluster, gloss changes on the convexities, and the tone reads differently in the recesses. After patination, the difference between a smooth handrail and a richly carved post can become especially noticeable.
For a new set, it is useful to compare a real fragment of the handrail and the selected carved element after the full cycle of the agreed finish. If the pattern of the post and the baluster differ significantly, both types of surface are checked. Color, gloss, legibility of the relief and neatness of the transitions are assessed.
The handrail is additionally assessed as a surface in constant contact with the hand. The coating must be suitable for such use; the technology of preparation, application and curing is determined by the selected system. There is no universal number of coats for all railing elements.
The approved color application is retained together with a record of materials and the sequence of operations. This is especially useful when balusters are painted in one batch and long handrails are finished separately. A single color code without agreed gloss and texture does not ensure consistent perception of the entire set.
What a sample part provides before ordering a batch
If the model has not been used in the workshop before, a single piece helps clarify what is hard to assess on screen: carving depth, surface quality, actual scale and the specifics of the mounting parts. It can be compared with the drawing and the approved fragment of the future railing.
At the same time, one baluster does not replace a layout of a long row, and a wood sample does not confirm that a post is compatible with a handrail. Each check answers its own question. The junction detail requires data on both parts being joined; to assess the finish, samples of the actual surfaces are needed.
In the section "Product samples" they clarify the available sample options. If a trial fit of a baluster or post is specifically required, the purchase of a specific product is agreed in advance: a universal material sample does not reproduce its shape.
After the check, the item code, finish and trial-fit results are recorded. If the part remains a reference piece, it is not included in the quantity for installation. If a different length or material is ordered, it is determined which previously verified parameters will need to be confirmed again.
A single schedule links the design, geometry and order
The specification is compiled by positions on the plan. The same item code may recur in several sections, while visually similar posts may have a different orientation or size. That is why the name “carved baluster” is too generic for purchasing and reordering.
Below is the composition of the schedule for a hypothetical project. The designations С-01, Б-01 and П-01 refer to the project, while the item code column must contain the actual product items after the selection is approved.
| Position | Detail | What to record | Quantity |
|---|---|---|---|
| C-01 | Starting column | Item code, side, dimensions, material, finish | By individual positions on the plan |
| C-02 | Swivel or end post | Item code and handrail junction points | Without double-counting shared posts |
| B-01 | Main row baluster | Item code, size, pattern orientation, end treatment | In our example — 30 for installation |
| P-01 | Handrail | Profile, material, blank finish, cutting plan | By lengths and number of blanks |
| P-02 | Sub-rail strip, if provided | Compatible finish and cutting | Per design detail |
| H-01 | Separate finial, if provided | Item number, base, material, finish | By the number of corresponding posts |
Each item is supplemented with a link to the product card, a drawing of the required version, and an approval note. Fasteners, connecting parts, samples, and reserve are listed on separate lines. The decorative elements schedule by itself is not a complete list of materials for building the staircase.
It is convenient to designate the finish with an internal code that stores a clear process record and a control sample. Then a repeat order several months later reproduces the specific set, rather than an approximately similar shade and pattern.
Before payment, check the set by sections
It is more convenient to check the order not only by product groups but also by the future assembly. For each section, the posts at the edges, balusters, handrail, required intermediate elements, and connections must be defined. This view allows you to notice a missing strip or an incorrect handrail end before delivery.
Then the total quantities are verified. Balusters of different versions are not combined into one line without a breakdown. The left and right posts remain separate items. Handrails are counted by the required blanks, not only by the total number of meters.
When approving the delivery, it is clarified which parts are ready for further finishing, which processing of the installation areas has already been performed, and what remains for the workshop. The availability of a finished shape does not mean that all connections are made for your project.
At receiving, the marking, quantity, material, dimensions and integrity of the relief are checked. Long profiles and protruding carved parts are inspected before processing begins. The parts are distributed among the sections while preserving their designations, so that a directional post or a baluster prepared for a specific joint does not end up in another position.
Frequently asked questions when selecting a set
Can different series of carved elements be combined?
Such a combination can be considered if it passes verification by scale, pattern and dimensions. Belonging to the same series makes it easier to find a common motif, but the final decision is made based on the layout drawing and joints. For different series, comparison at the same scale is especially useful.
Must the handrail repeat the ornament of the post?
No. The handrail can remain smooth and support the composition through the shape of its profile, material and finish. Ease of use and coordinated transitions to the vertical elements are important. Adding carving solely for formal matching is not necessary.
Can one baluster model be replaced with a similar one after approval?
Only after re-checking the affected parameters. Another model may have a different width, mounting parts and relief position. This affects the gaps, end treatment and appearance of the row, even if the height matches.
Can I buy the balusters now and choose the handrail later?
Splitting the purchase into stages is possible when the entire set has already been selected and the joints have been checked. If the handrail profile is not yet known, there remains a risk of mismatch at the upper joint. Before the first order, both components must be fixed and the terms of subsequent delivery clarified. This will allow the purchase to be planned in parts while maintaining a coordinated railing design.
Where to buy carved elements for staircases
In the STAVROS catalog carved elements for staircases are presented in groups from which you can assemble the future railing composition. It is convenient to start the selection with the newel post and baluster, while simultaneously checking a suitable handrail and whether separate finials are needed.
To buy wooden balusters for the entire project, provide the supplier with the exact item code, size, material and quantity according to the specification. For newel posts, additionally indicate the orientation and positions on the plan. If you need to buy a wooden handrail for a staircase, the request must include the profile, blank lengths and the associated elements provided for.
It is better to coordinate wooden staircase components in a single request, even if delivery is planned in several stages. This way all selected materials and finishes are visible. Current prices and lead times are confirmed for specific items, and the terms payment and delivery — taking into account dimensions and the work schedule.
The basis for the order is the approved elevation drawing, verified joints and the item code specification. Once the approved material and finish are added to them, the set can be released for production: each carved part has its own place, and the railing pattern is clear even before installation.