Article Contents:
- A beautiful render is not enough: production needs unambiguous geometry
- What a furniture decor DWG block should contain
- SKU first — then DWG and the furniture facade
- Why serial decor cannot be scaled to fit the facade
- Which base to set Y from
- First the free field of the facade, then the decor size
- The decorative overlay and the furniture handle must be checked together
- Decor and furniture hinge: the conflict is often hidden on the reverse side
- Outer dimension, axis, or inner dimension
- How to build a molding frame on a furniture facade
- Corner elements must match the profile and orientation
- Facade symmetry does not always mean the same ornament orientation
- Kitchen, wardrobe, chest of drawers: the same decor works differently
- Kitchen fronts
- Wardrobe and dressing room
- Chest of drawers and cabinet
- Decorative Panels and Headboards
- Wooden decor: DWG geometry alone is not enough
- If the decor is going under enamel
- Polyurethane furniture decor: the same real SKU logic
- When a separate enlarged detail is needed
- How to name a DWG block so it is still clear six months later
- A factory block cannot be edited without changing its status
- Furniture decor specification
- The stock depends on the type of furniture decor
- Piece carved decor
- L/R
- Moldings
- Custom decor

In a render, an overlay can sit perfectly: centered on the facade, symmetrical relative to the handle, with a beautiful shadow. But that is not enough for furniture production. The designer needs not impressions of the composition, but precise answers: which SKU this is, what size it is, where its anchor base is, at what height the center sits, whether the handle fastener falls into the relief, whether the part conflicts with the hinge cup, and how many identical elements need to be manufactured or ordered.
This is exactly where a decorative element stops being part of the visualization and becomes part of the furniture.
The working chain must be continuous:
real SKU → DWG → furniture facade → coordinates → handles and hinges → L/R → section → specification → quantity → handoff to the designer → production → order.
Furniture decor DWG is not meant to add a nice CAD block to the project. Its purpose is to transfer the selected real decor to production without losing geometry and without wording like "approximately in the center" or "overlay as in the visualization."
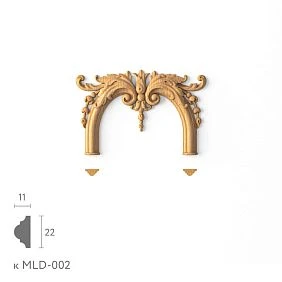
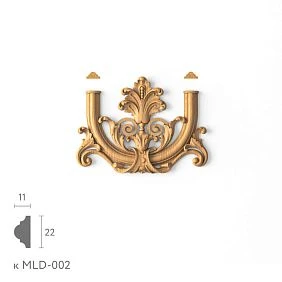
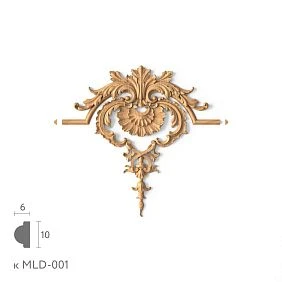
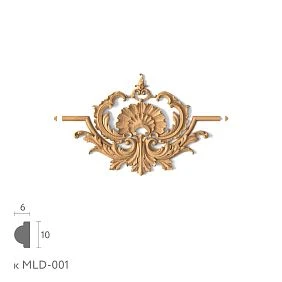
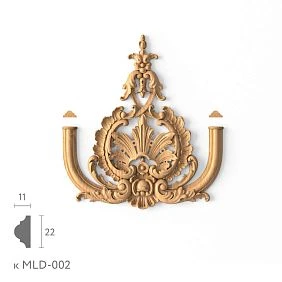
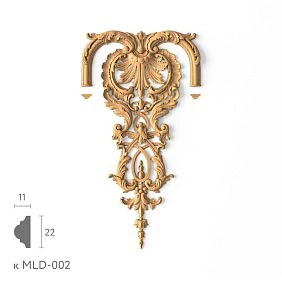
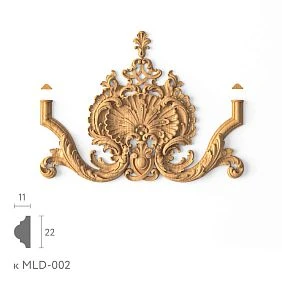
A beautiful render is not enough: production needs unambiguous geometry
A visualization answers the question:
how the furniture should look.
A working drawing answers a different question:
what exactly to install and where.
Therefore, production documentation needs:
- actual dimensions;
- coordinates;
- project codes;
- SKU;
- orientation;
- quantity;
- technological zones;
- references to the facade and hardware.
If the render shows a decorative overlay, but the drawing only says “decor centered,” the solution cannot yet be considered ready for production.
The designer is forced to reinterpret the intent. It is at this stage that slight offsets, substitutions with similar parts, and conflicts with hardware arise.
A strong project leaves no room for redesign in production.




What a DWG block for furniture decor should contain
A working block should describe a real physical element.
Minimum set:
- outer contour;
- actual dimensions;
- thickness or depth;
- the axes;
- insertion point;
- SKU;
- orientation;
- design code.
For a complex carved part, the following are additionally useful:
- cross-section;
- maximum relief depth;
- mounting surface;
- direction;
- designation of the front side.
The more complex the geometry, the more dangerous it is to replace it with a simple rectangle.
A rectangular bounding box shows whether the product fits on the facade, but it does not show where the actual protrusion is, how the relief runs, and what happens near the handle.
For design work, you can use DWG and STAVROS 3D models.
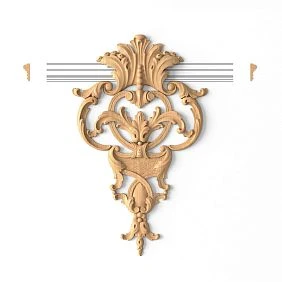
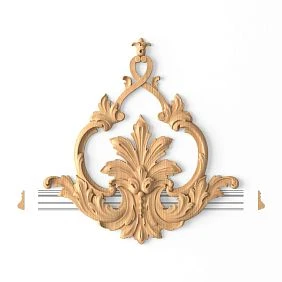
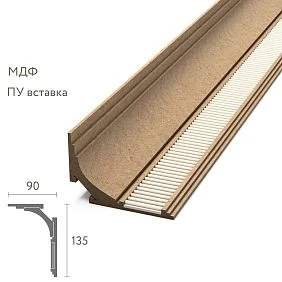
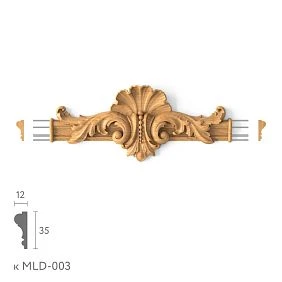
Our factory also produces:
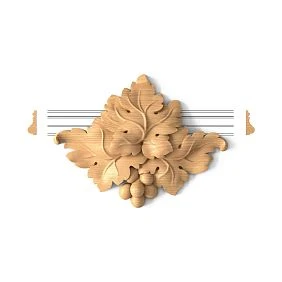
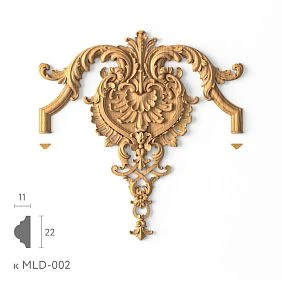
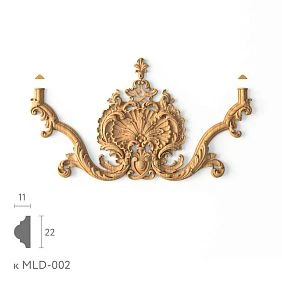
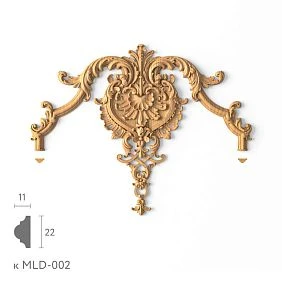
First the SKU — then the DWG and the furniture facade
Bad sequence:
drew a beautiful overlay → scaled it to the facade → started looking for a similar product.
Correct:
catalog → specific SKU → actual size → DWG → facade.
This is a fundamental difference.
In the first case, the furniture is designed around an invented geometry.
In the second, it is designed around a real product that can be ordered.
For wooden furniture decor, it is convenient to start with decorative overlays made from solid wood и wooden decorative elements.
For polyurethane decor — from the section moldings from polyurethane.
After selecting a real product, its geometry becomes the source.
Not the other way around.
Get Consultation
Why serial decor cannot be scaled to fit the facade
Let's imagine a conventional overlay 180 mm wide.
On a 650 mm wide facade, it looks too small, and the designer stretches the DWG to 230 mm.
Visually, the composition improves.
Technically, a new product has appeared that is not in the catalog.
If the original SKU remains in the specification, production faces a contradiction:
- the article number says 180 mm;
- the drawing shows 230 mm;
- the visualization confirms 230 mm.
Which version should be considered correct?
Therefore, for a serial product, the following rule applies:
the scale of the actual SKU = 1:1.
If the element is small, a different SKU is selected.
If there is no suitable one, custom manufacturing is considered separately.
But scaling a finished article number cannot be disguised as a design solution.
Central overlay: the position is set by coordinates, not by words
Wording:
"install the overlay approximately in the center"
is not suitable for production.
A coordinate system needs to be defined.
For the central element, it is convenient to fix:
- the width of the facade;
- façade height;
- X axis;
- Y axis;
- the coordinate of the overlay center;
- distance to the frame;
- the position of the handle;
- the boundaries of the panel.
For a symmetrical facade, often:
X = center of the facade.
But the Y coordinate may depend on the composition.
For example, the overlay may be raised above the mathematical center if the lower part is occupied by a handle, drawer, or another decorative band.
From which base to set Y
There are several workable options:
- from the top edge of the front;
- from the bottom edge;
- from the center of the front;
- from the axis of the panel;
- from the furniture molding line.
The main thing is that the base must be unambiguous and repeatable.
If six identical fronts are assembled according to one project, all six must receive the same coordinate system.
First the free field of the front, then the size of the decor
The overlay cannot be selected based only on the overall width of the door.
Let's imagine a framed facade.
Its overall size is 600 × 900 mm.
But part of the area is taken up by the frame, and the central panel is significantly smaller.
This is exactly where the decor needs to fit.
Work sequence:
facade dimensions → frame → panel → free field → actual overlay size → margins.
If you go by 600 × 900 mm alone, you might choose an element that formally fits on the door but no longer fits within the actual decorative field.
This is especially critical for large carved decor.
The decorative overlay and the furniture handle should be checked together
The handle and the decor often compete for the same compositional spot.
Check simultaneously:
- position of the overlay;
- the position of the handle;
- holes for the handle;
- the trajectory of the user's hand;
- maximum protrusion of the relief;
- symmetry of the facade.
The overlay may not geometrically intersect the handle, but it can still interfere with using it.
For example, a deep relief is located too close to the grip area.
In the render, this is almost unnoticeable.
On a real facade, the hand regularly touches the decor.
Therefore, a front view is not enough: a disputed junction requires a section or profile.
Decor and furniture hinge: the conflict is often hidden from the back side
The hinge is on the inside, the decor is on the outside. Because of this, a designer may perceive them as independent elements.
But both parts use the same facade thickness and the same mounting zone.
Check:
- position of the hinge cup;
- holes;
- fasteners;
- facade thickness;
- installation of the decorative element;
- depth of the relief;
- location of the outer overlay.
Particular attention should be paid to elements that require their own fasteners or additional processing of the facade.
If there is any doubt, the assembly should be shown separately.
Furniture molding in DWG is a profile, not a line
Furniture molding must have:
- actual cross-section;
- width;
- the depth;
- length;
- direction;
- SKU.
If only four lines of a rectangular frame are drawn on the facade, that is not enough.
You need to know which profile is behind these lines and on which basis the frame size is set.
For wooden trim, you can use wooden moldings, cornices, and baseboards и Pogonazh iz massiva.
Outer dimension, centerline, or inner dimension
For a moulding frame, you need to choose one dimension reference principle:
- by the outer contour;
- by the profile centerline;
- by the inner contour.
These principles must not be mixed on one sheet.
If the project specifies a frame by outer dimension of 500 × 700 mm, the inner field depends on the actual width of the moulding.
Therefore, the profile is involved in the geometry from the very beginning.
How to build a molding frame on a furniture facade
Work sequence:
facade dimensions → technological clearances → actual profile → outer frame size → inner size → corners → decorative elements.
First, the zones where the decor must not fall are defined.
For example:
- the edge of the facade;
- handle area;
- hinge zone;
- glass;
- technological groove;
- connecting joint.
After that, the frame is built.
This way, the decorative composition is designed within the actual furniture structure, not on top of it.
Corner elements must match the profile and orientation
A ready-made corner decoration cannot be considered a universal “beautiful detail.”
It must match:
- the width of the molding;
- the geometry of the frame;
- the direction of the ornament;
- the position in the corner;
- the scale of adjacent elements.
If the corner is created as a separate SKU, it gets its own specification line.
If the corners are made by miter-cutting the molding, there is no separate product.
These scenarios must not be mixed.
L/R are production positions, not a mirror effect in CAD
If the manufacturer releases left and right elements as separate SKUs, they must remain separate in the project.
For example:
DEC-01-L
DEC-01-R
The exact position of each is shown on the facade.
In the specification:
DEC-01-L — 1 pc.
DEC-01-R — 1 pc.
Bad practice:
draw one block, mirror it, and write “overlay — 2 pcs.”
If the manufacturer separates the left and right item codes, such a line loses product identification.
Facade symmetry does not always mean the same orientation of the ornament
For a cabinet with two doors, check:
- central joint;
- mirroring;
- identical fields;
- direction of the floral motif;
- position of handles;
- L/R.
Sometimes geometrically identical elements must be mirrored.
Sometimes an ornament has one specified direction.
Therefore, symmetry must be checked not only by the outer contour, but also by the pattern.
Especially for floral and asymmetrical decor.
Master facade: first approve one facade, then replicate
If a piece of furniture has six identical doors, there is no need to design all six independently.
A more effective approach is:
one master facade → verification → APPROVED → repetition.
Master facade contains:
- exact dimensions;
- SKU;
- coordinates;
- Moldings;
- Plates;
- handles;
- hinges;
- panel;
- glass;
- the material;
- finish;
- revision.
After approval, the other identical facades reference it.
This reduces the risk of a serial error.
If the overlay on the master facade is shifted by 15 mm, the error will repeat six times. That is why the standard facade must undergo the strictest verification.
Kitchen, wardrobe, chest of drawers: one decor works differently
Furniture decor cannot be evaluated outside a specific construction.
Kitchen facades
Additionally, the following are checked:
- adjacent doors;
- drawers;
- built-in appliances;
- vertical lines;
- handles;
- sameness of repeats.
The ornament should not accidentally break off at the refrigerator or oven simply because the composition was drawn separately from the kitchen grid.
Wardrobe and dressing room
Here, what matters is:
- large scale;
- long fronts;
- composite doors;
- repeatability;
- central axes.
A single small decorative element that works well on a chest of drawers may get lost on the front of a wardrobe over two meters high.
Chest of drawers and bedside table
On a small front, the opposite problem arises: a large overlay takes up too much of the available space.
Therefore, not only the style of the item is evaluated, but also its proportion relative to the front.
Decorative panels and headboards
If the element is mounted on a fixed panel, the hinge requirements no longer apply.
But the following remain:
- mounting;
- scale;
- joint;
- repetition;
- the material;
- finish.
The material and finish must be part of the production documentation
Geometrically identical decorative elements can be different product and production items due to material and finish. Therefore, after checking the dimensions, it is necessary to separately record what the element is made of and what the final surface appearance should be.
Wooden decor: DWG geometry alone is not enough
For wood, it is not only the shape that needs to be conveyed.
In the specification and notes, it is useful to record:
- breed;
- grain direction;
- front side;
- tinting;
- coating;
- finish;
- the approved sample.
Oak and beech cannot be combined into a single line just because the geometry is the same.
These are different product variants.
For selection, you can use Carved wooden decoration, Decorative Inserts и wooden decorative elements.
If the decor is intended for enamel
Divide:
Product SKU
и
project finish.
Do not rename the product to "white overlay" if the actual product item is determined by the SKU and the white color appears only after the project painting.
This makes it easier to reorder the same geometry.
Polyurethane furniture decor: the same logic of a real SKU
A polyurethane element must also go through the entire project as a real product.
The following are recorded:
- dimensions;
- relief;
- mounting surface;
- SKU;
- the specified finish;
- installation location.
For such solutions, you can use polyurethane molding и molded decoration made of polyurethane.
The material changes.
The documentation principle — no:
real product → real geometry → coordinates → specification.
Front view and section cannot replace each other
The facade shows the composition.
It clearly shows:
- the axes;
- symmetry;
- indents;
- frame;
- handle;
- Decorative elements.
The section answers other questions:
- how much the decor protrudes;
- what the thickness is;
- how the junction is constructed;
- where the mounting plane is located;
- what happens near the frame;
- whether the relief conflicts with the adjacent part.
A single sheet may look completely clear in front view and leave critical uncertainty in depth.
Therefore, for pronounced relief, a section is mandatory at least on a typical detail.
When a separate enlarged detail is needed
An enlarged fragment is needed not for the beauty of the documentation, but when the normal scale hides important geometry.
Typical cases:
- the joint of two moldings;
- a ready-made corner element;
- an overlay next to the handle;
- wood / MDF transition;
- decor near the glass;
- part next to the groove;
- outer end face;
- intersection with the furniture cornice.
If the issue cannot be unambiguously resolved on the main facade, it must be moved to a detail drawing.
How to name a DWG block so it is still clear six months later
Bad:
decor_final_3
nakladka_new
wood_ornament_ok
Such names say nothing about the product.
Better:
STAVROS_[SKU]
or a corporate scheme:
DEC-01_STAVROS_[SKU]
For L/R:
DEC-02-L_STAVROS_[SKU-L]
DEC-02-R_STAVROS_[SKU-R]
The main thing is to keep the SKU and the project code.
Then the block can be linked to:
- 3D;
- PDF;
- specification;
- purchase;
- repeat order.
A factory block cannot be edited without changing its status
If the designer changes:
- width;
- height;
- the depth;
- proportions;
- ornamental geometry,
the DWG no longer describes a serial product.
After such an edit, you cannot save the original SKU as if nothing happened.
There are only two correct scenarios:
- restore the geometry of the actual product;
- move the item to custom and document the new part separately.
This is especially important for carved decor, where the proportion of the pattern is part of the product.
3D, DWG, and the specification must contain a single SKU
Working formula:
3D → DWG → facade → specification → order.
The same project code must lead to a single product.
For example:
DEC-01
In 3D — the specific overlay.
In DWG — the same overlay.
In the specification — the same SKU.
In the order — the same item code.
If the designer changes a product, it creates REVISION.
You can't just replace a row in Excel while keeping the old model and drawing.
What to hand over to the furniture designer
The final package must be self-contained.
Minimum:
- PDF of the facade;
- DWG;
- project code;
- SKU;
- table of decorative elements;
- the material;
- finish;
- quantity;
- L/R;
- images or 3D;
- installation notes;
- current revision.
For complex furniture, it is useful to add a reference table.
For example:
| Code | Facade | X | Y | Orientation | Qty |
|---|---|---|---|---|---|
| DEC-01 | F-01 | Center | 210 mm from the top | — | 1 |
| DEC-02-L | F-02 | 95 mm from the left edge | Center | L | 1 |
| DEC-02-R | F-02 | 95 mm from the right edge | Center | R | 1 |
The numbers in a specific project are taken from the actual drawing. The table shows the principle of coordinate transfer.
Furniture decor specification
Example structure:
| Code | SKU | Type | Material | Facade | Quantity |
|---|---|---|---|---|---|
| DEC-01 | specific | Overlay | Oak | F-01 | 2 |
| DEC-02-L | specific L | Left overlay | Beech | F-02 | 1 |
| DEC-02-R | specific R | Right overlay | Beech | F-02 | 1 |
| MLD-01 | specific | Molding | Wood | F-01–06 | By calculation |
For production, it is useful to add:
- dimensions;
- finish;
- URL;
- revision;
- status;
- comment;
- DWG file.
This is how the specification links the project and procurement.
It is better to count quantities by facade types
For furniture, it is convenient to use the formula:
facade type × number of facades × elements per facade.
For example:
F-01 × 6 facades × 2 overlays = 12 pcs.
For L/R:
F-02 × 4 facades × 1 L = 4 L
F-02 × 4 facades × 1 R = 4 R
For molding, the logic is different: first, the geometric linear footage of the frames is calculated, then the cutting and the quantity of actual linear stock.
Therefore, piece decor and molding should not be counted using the same method.
Stock depends on the type of furniture decor
Automatic “+10%” does not apply to everything.
Piece-by-piece carved decor
If the project requires 8 specific overlays, the result 8.8 pcs. is meaningless.
A decision must be made: 8 or 9.
L/R
Stock is calculated separately for the left and right position.
Moldings
The reserve depends on the product length and the cutting map.
Individual decor
It may require a separate production reserve, but it cannot be assigned without understanding the technology and the order.
The main principle — a reserve must have a reason.
When the project is ready to order
A strong final sequence:
DWG APPROVED → SKU APPROVED → facades APPROVED → final quantity → order.
Before that, the commercial stage is premature.
After approval, you can move on to categories:
- to buy, which will allow you to transform your furniture using carved wooden elements. You can use the C-003-3 decor set to decorate furniture, walls, doors, or any other surface. The C-003-3 decor set is made of oak or beech, known for their strength, durability, and beauty. You can buy the C-003-3 decor set at the Stavros decor store, which specializes in producing and selling decorative elements and hardware for furniture and interiors. At the Stavros decor store, you will find a wide selection of decor sets of various shapes, sizes, and styles. You can choose;
- wooden decorative elements;
- Carved wooden decoration;
- Solid Wood Items;
- Wooden trim;
- Polyurethane furniture decor;
- polyurethane panels.
Useful for designers, architects, and furniture planners the STAVROS professional section.
At this stage, queries like "buy wooden decor for furniture," "buy decorative elements for wooden furniture," "buy polyurethane furniture decor," and "buy furniture overlays" already match the real task: a specific product has been selected, the location has been determined, conflicts have been checked, and the quantity has been calculated.
Final checklist before handing furniture over to production
Check each decorative item:
- a real SKU is selected;
- size is confirmed;
- DWG is used at a scale of 1:1;
- the block was not stretched arbitrarily;
- the insertion point is clear;
- X and Y are defined;
- handle checked;
- hinge checked;
- panel checked;
- glass and grooves have been checked;
- L/R are separated;
- the ornament orientation has been checked;
- the profile section is known for the molding;
- the section is drawn where it is needed;
- master facade approved;
- material specified;
- finish specified;
- quantity is calculated;
- the specification matches the DWG;
- the 3D matches the DWG;
- revision is current;
- status —
APPROVED.
If even part of this data remains "at the discretion of production," the project is not yet finished.
Furniture decor DWG becomes truly useful when the selected decorative element goes through the entire path without substitution:
SKU → DWG → furniture facade → coordinates → handles and hinges → L/R → section → specification → quantity → production → order.
It is this chain that turns beautiful furniture decor into reproducible production documentation.