









Article Contents:
- Which wooden mouldings are suitable for four wardrobe fronts
- MLD-004 15 × 8 mm: the basis of the calculated set
- MLD-001, MLD-002 and MLD-018: three other framing scales
- Oak and beech: which material to choose for furniture mouldings
- Four fronts 520 × 1880 mm: verifying the initial dimensions
- Edge setback and frame geometry: what exactly to measure
- Sixteen parts: the correct bill of materials for four frames
- Cutting plan for eight 2400 mm strips
- 45° miter cut: why the length from the outer point matters more than the total linear meters
- The frames on four doors should look like a single composition
- Why handles, hinges and gaps should be checked before purchase
- How much wooden mouldings cost for four fronts
- How to determine whether the ninth strip is needed
- Fitting, fastening and finishing: a sequence without unnecessary rework
- Customer mistakes that are easier to prevent at the ordering stage
- How to order wooden mouldings with delivery to Ulyanovsk
- When it is better to avoid wooden mouldings or change the project
- What will change if the fronts turn out to be different in size
- Questions before buying wooden moldings
- Can the same strip be used for both vertical and horizontal sides?
- Should I buy four ready-made frames or eight strips?
- Is it acceptable to make corners without a 45° miter cut?
- Which to choose for a cabinet under white enamel — oak or beech?
- Can molding be glued over an old furniture finish?
- Why are eight strips better than seven, even though the total length is 16.8 m?
- Can MLD-004 be replaced with the wider MLD-018 without changing the parts?
- How many days will delivery to Ulyanovsk take?
- Read also

The four cabinet doors sit perfectly level, the handles are mounted at the same height, yet the fronts still look empty. Adding decorative framing seems simple: choose a wooden moulding, step back from the edges and assemble four rectangular frames. The mistake is discovered later, when one vertical piece turns out to be longer than the usable section of the strip, or the frame prevents the neighbouring door from opening. That is why ordering should begin not with the number of linear metres, but with the dimensions of the parts and the placement of the framing on each door leaf.
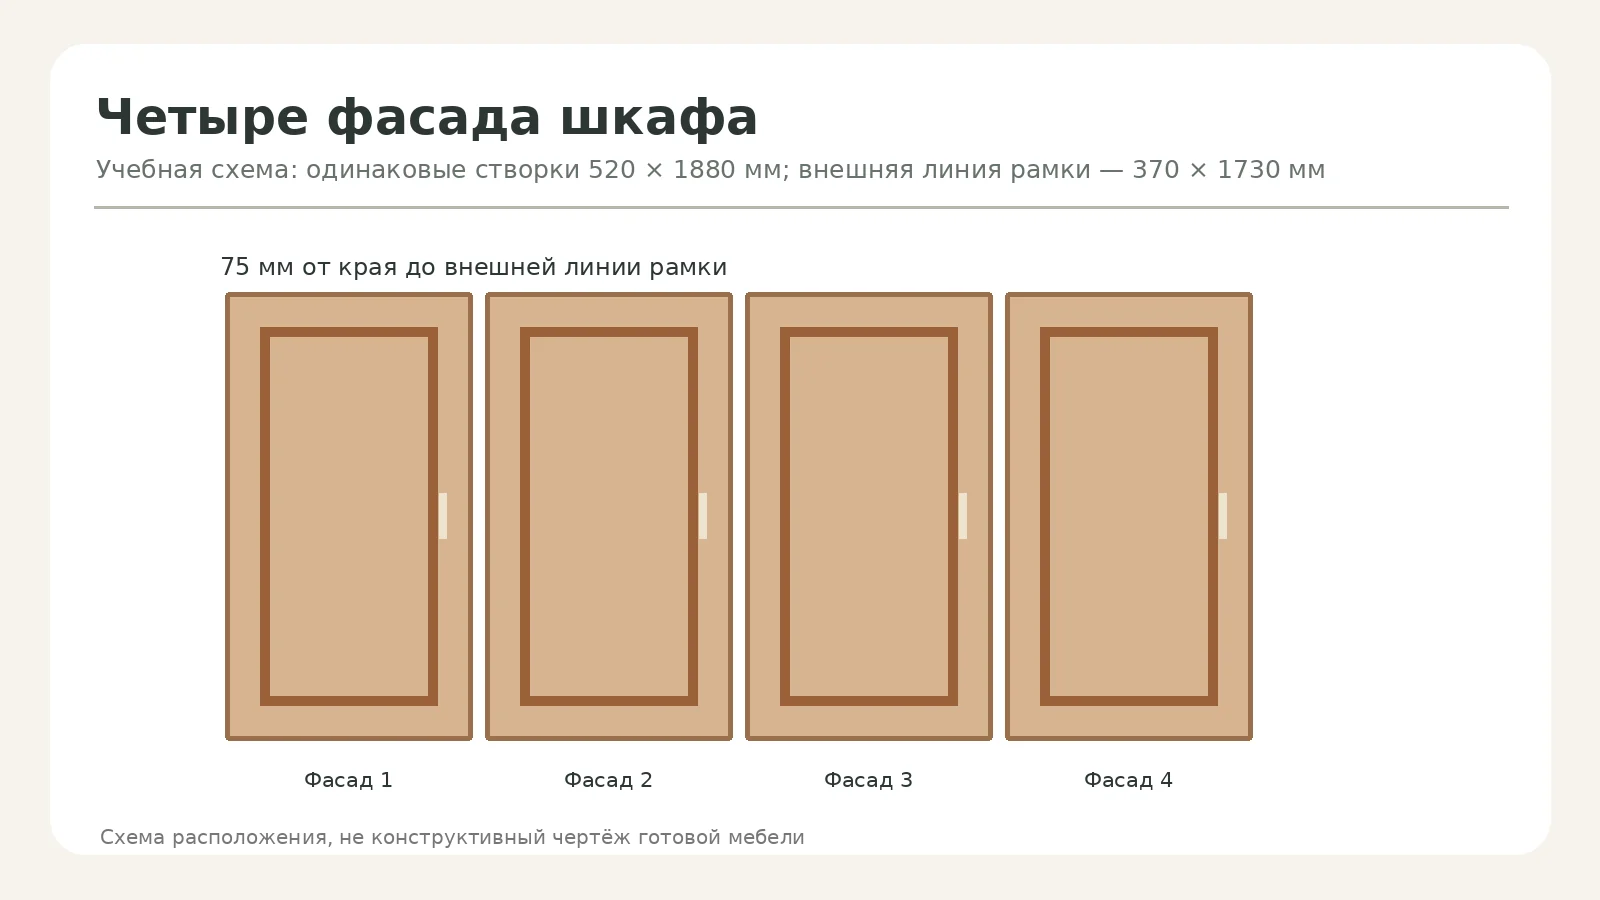
For a cabinet with four 520 × 1880 mm fronts and a 75 mm inset, the calculated outer line of each decorative frame is 370 × 1730 mm. Four doors will require sixteen parts with a total finished length of 16.8 m. If all joints are made at 45° and the dimensions are given along the outer long edges, they can first be laid out across eight 2400 mm wooden strips: each yields one 1730 mm vertical and one 370 mm horizontal. Before sawing, it is necessary to allow for the kerf width, end checking and the actual profile configuration.
For those planning buy wooden mouldings in Ulyanovsk, it is more convenient to prepare the request straight away with the article number, wood species, retail strip length and quantity. The STAVROS catalogue offers compact and wider profiles in beech and oak. The choice depends on the line the moulding should create on the front, how the handles are positioned and whether the material suits the existing furniture finish.


Which wooden mouldings are suitable for four cabinet fronts
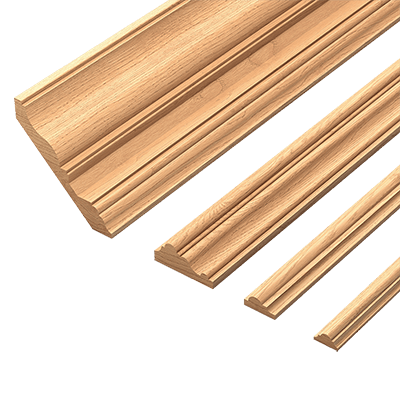
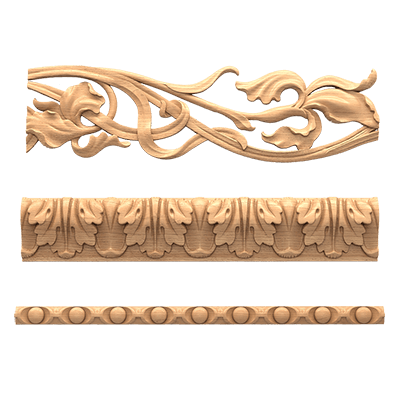
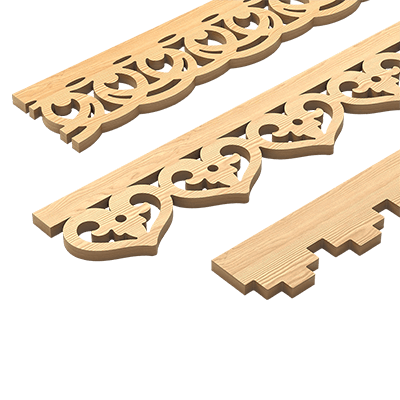
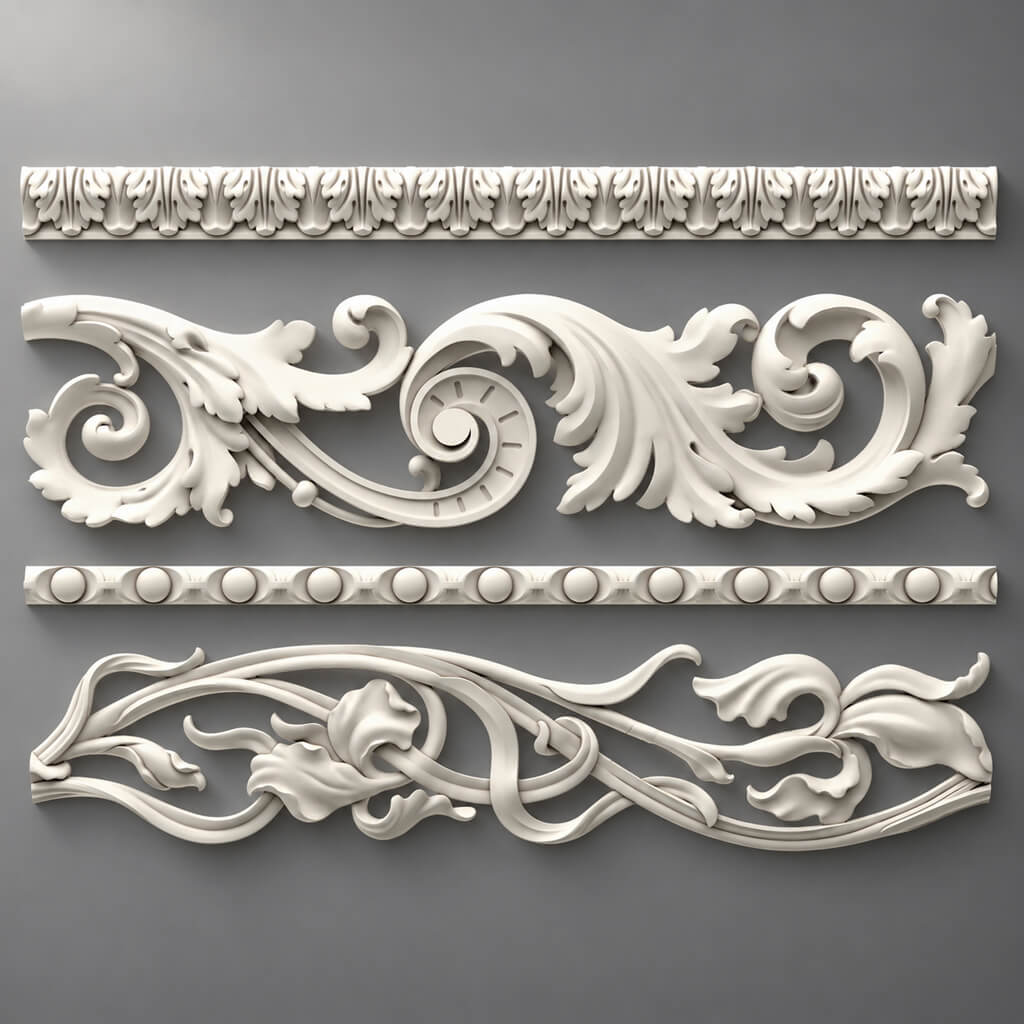
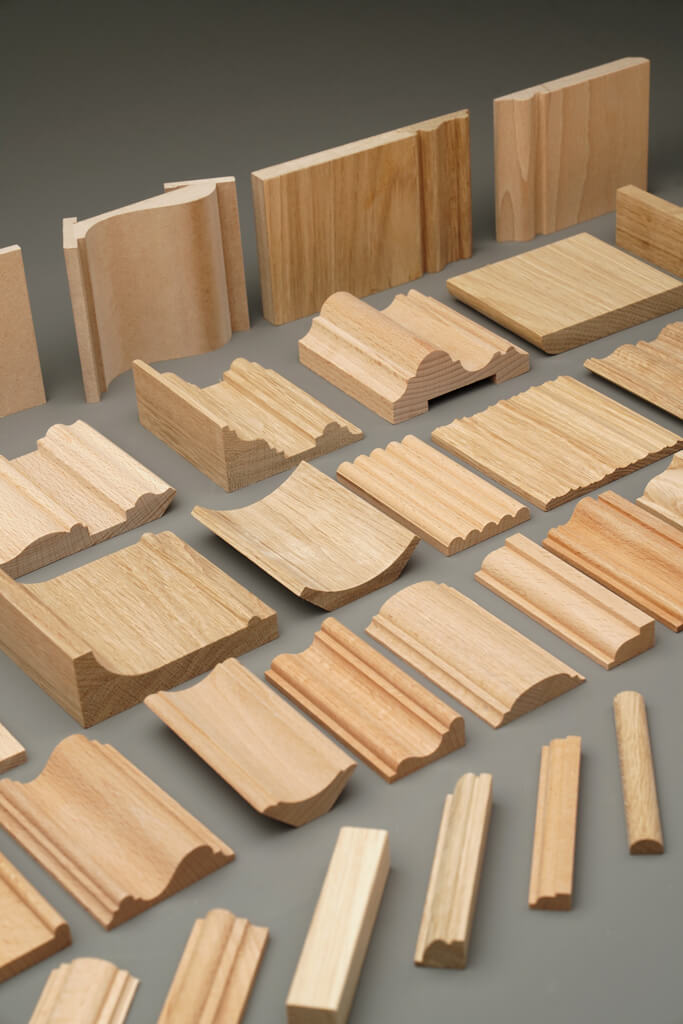
We are considering specifically profiled solid wood products, not ready-made framed fronts. A moulding is a narrow decorative strip with a defined cross-section. It is applied to the plane of the door, forming a rectangle with four joined corners. Even strips of identical length can differ in surface pattern, relief and grain direction; for four adjacent doors this is more noticeable than for a single freestanding chest of drawers.
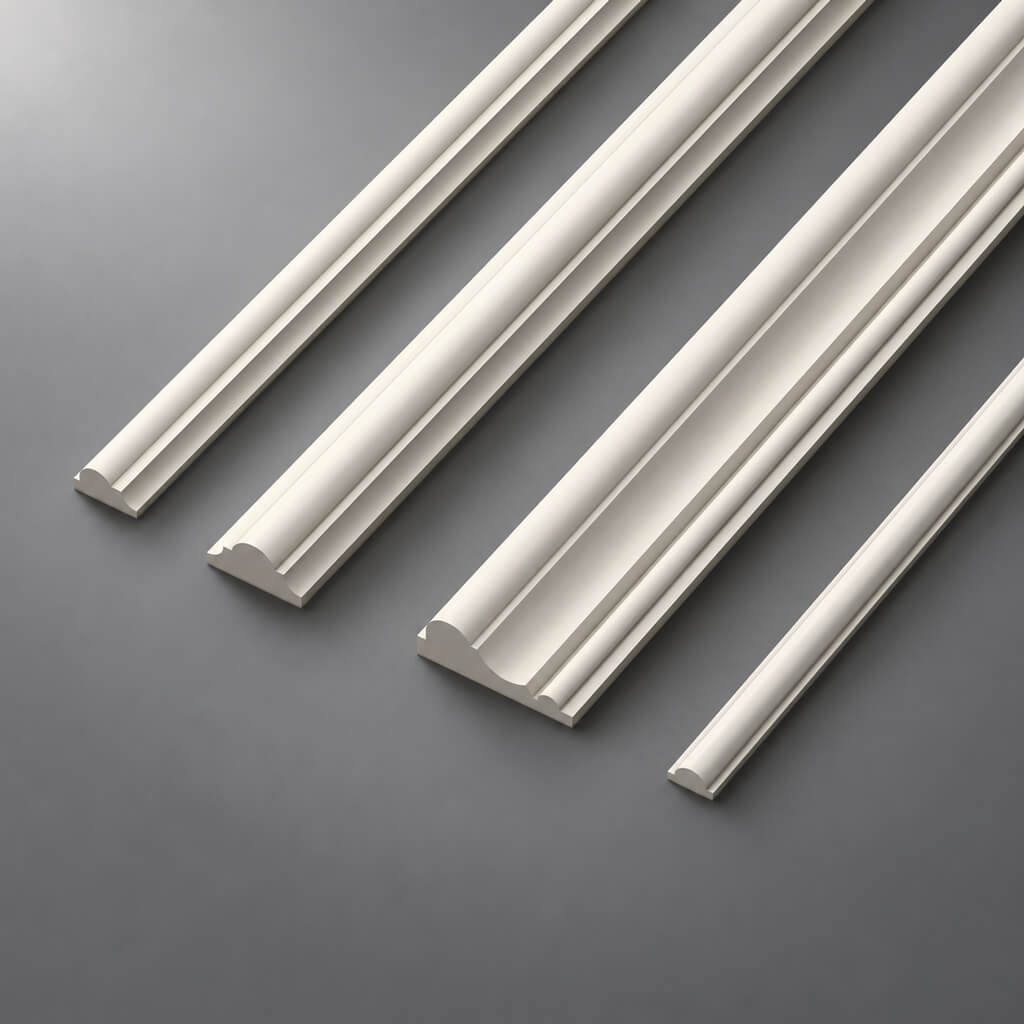
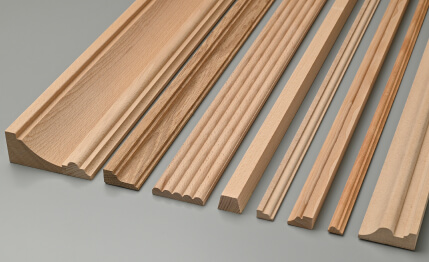
Four current models from the catalogue have been selected for the project solid wood moldings. All of them are available in oak or beech versions with a length of 2400 mm. At the same time, the catalogue also includes MDF versions of a different length. They must not slip unnoticed into the calculation if the order has been agreed specifically for solid wood products.
| Model | Cross-section, mm | Wooden length, mm | How it reads on a furniture front |
|---|---|---|---|
| MLD-001 | 10 × 6 | 2400 | A fine line that preserves a large, calm field inside the frame |
| MLD-004 | 15 × 8 | 2400 | Moderate relief for repeating rectangles |
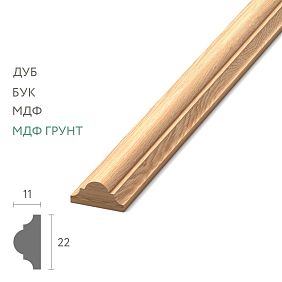
| MLD-002 | 22 × 11 | 2400 | More noticeable border between the central panel and the rest of the door |
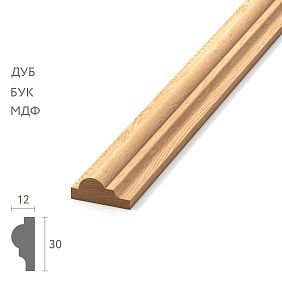
| MLD-018 | 30 × 12 | 2400 | The largest of the four comparison profiles |
This is not a quality scale. A wider profile does not automatically become stronger or more suitable just because its visible line is more massive. A thin strip has less visual weight, but also less area for neat fitting. A large one shows the relief better, but on a 520 mm wide door leaf it may compete with the handle and narrow the impression of the central plane.
The outer dimensions of the frame are the same for all four models. Only the framing pattern and the usable inner field change. This comparison is more correct than changing the profile, the frame size itself, and the edge offset at the same time: then it would be unclear why one option looks more successful.

MLD-004 15 × 8 mm: the basis of the calculated set
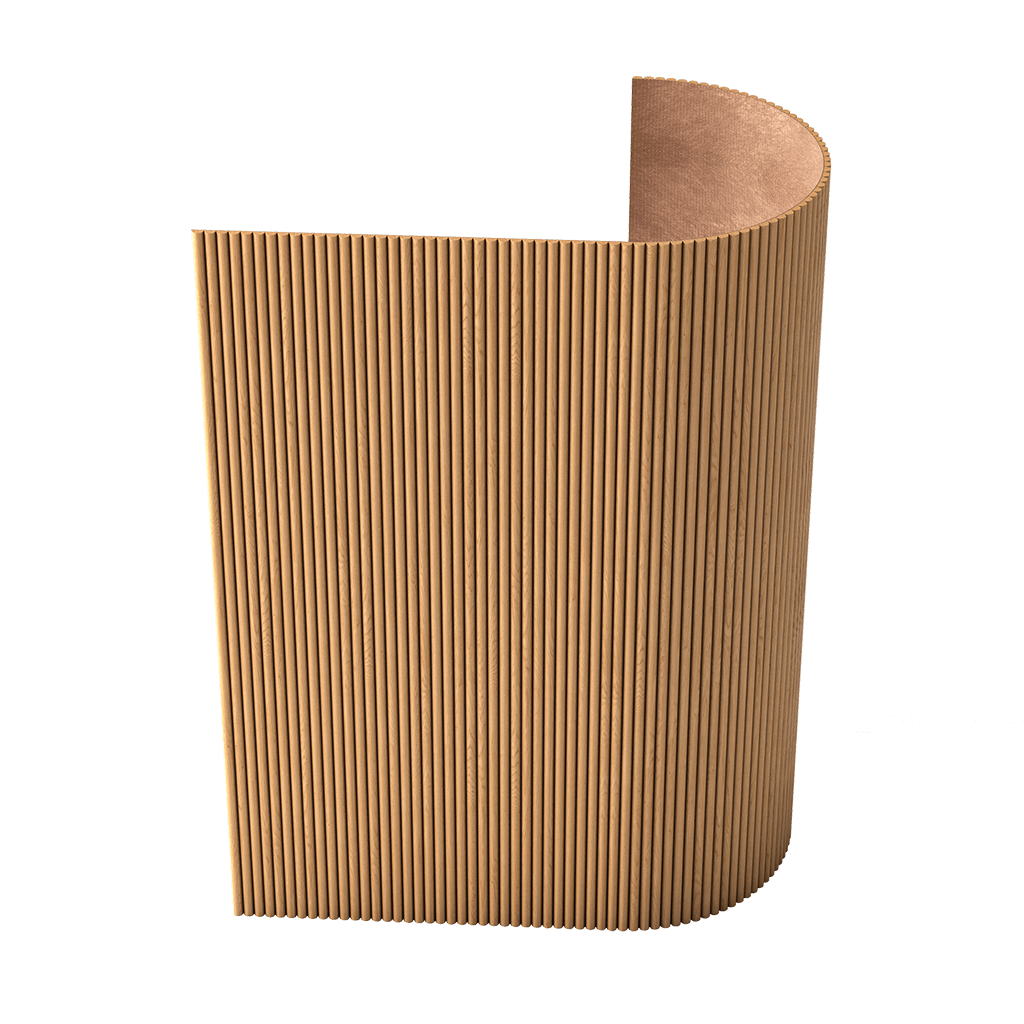
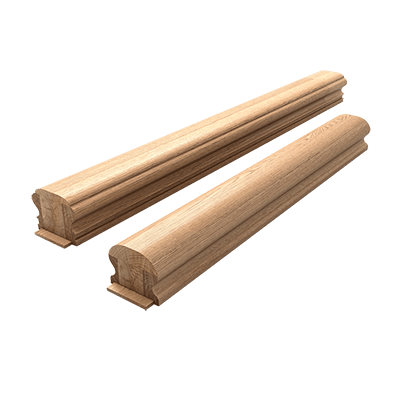
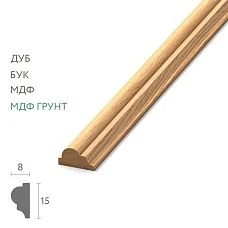
Selected for the main estimate Wooden Moulding MLD-004. Its 15 × 8 mm cross-section allows for a noticeable but not excessively wide line. On a facade almost two meters high, such trim should not get lost in a normal view of the entire wardrobe. At the same time, the door retains enough flat surface on both sides of the frame — provided that the overlay is positioned correctly relative to the edges and hardware.
It is important to understand here that the designation “15 × 8 mm” refers to the cross-section of the product, not to the width of the frame's protrusion in any position. To accurately assess the visible strip, you need to look at the drawing of the specific profile and determine which side it sits against the base. The dimensions on the product diagram cannot be mechanically swapped. Separately, you need to check whether the flat support surface is sufficient for the chosen mounting method.
At the time of checking, the wooden version of MLD-004, 2400 mm long, was available in two species: beech and oak. For a small run of four facades, it is reasonable to order all strips in one species and one coordinated finish. If the wardrobe is already painted, first of all you should test the compatibility of the chosen coating and the prepared wood on a sample. The color name on the screen does not guarantee an exact match with the actual door.
Acceptable geometry for this project does not mean that MLD-004 will suit any cabinet. If the doors are made of thin board, have a pronounced radius on the outer edges, a concealed opening system, or a surface with insufficient adhesion, the fastening must be considered separately. It is especially risky to start by gluing a single frame without a trial fitting: its outer line will set all subsequent offsets, and correcting mistakes on an already finished door is significantly more difficult.
Our factory also produces:


MLD-001, MLD-002 and MLD-018: three other framing scales
Slim moulding MLD-001 has a cross-section of 10 × 6 mm. It is useful when furniture needs to gain additional geometry without the feel of a heavy applied frame. On a door 1880 mm high, such a treatment can look restrained: the eye first reads the proportion of the door, then notices the decorative rectangle. For white or solid-colour painted furniture, this adds depth without turning the doors into large architectural panels.
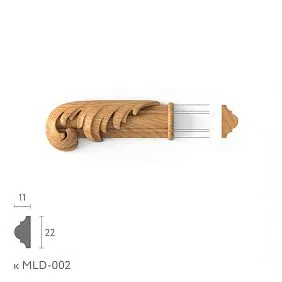
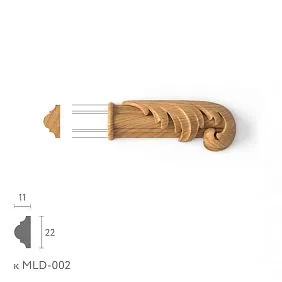
Wider moulding MLD-002 22 × 11 mm is perceived differently. The line has more visible mass, and the transition of light and shadow on the profiled surface is more pronounced. With the same 75 mm offset, it is more noticeable against the wood grain. But if the handle is located within this field, a conflict of two accents may arise: the protruding hardware and the relief will be too close to each other.
Wooden moulding MLD-018 30 × 12 mm should be considered for a more expressive treatment. On a wide door, it can emphasise verticality and complement the cabinet cornice. On a narrow door, it is important to first place the sample against the face surface. What looks moderate in a large photograph can become a dominant frame when viewed from a distance of one metre.
It is useful to make four paper or cardboard mock-ups of strips of different widths and temporarily place them on one door. This technique does not imitate the complex geometry of the real cross-section, but it immediately shows how much the calm field inside the rectangle will shrink. For the final choice, it is better to use real product samples: cardboard does not convey the relief and highlights of the wood.
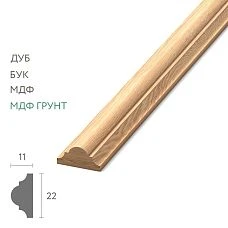
For a wider line, first check on the mock-up MLD-018 solid oak moulding: its 30 × 12 mm profile is noticeably different from the slim MLD-001, and that difference should be a deliberate choice.
A separate mistake is mixing different models on adjacent doors just to "bring the composition to life." If a wardrobe consists of four equal fronts, it is better to first achieve a single rhythm. Profiles can be combined in a more complex project, but that requires a full-scale sketch with coordinated axes and repeatable nodes, not a random alternating order.
Get Consultation
Oak and beech: which material to choose for furniture mouldings
Oak is easy to recognize by its more pronounced grain and pores. On a light finish, its texture often becomes a full part of the decorative composition. If the fronts are made of oak veneer or solid oak, it makes sense to choose mouldings of the same species. However, the word "oak" alone does not guarantee a matching shade: the result is influenced by the cut, batch selection, tinting, and the transparency of the final finish. Sometimes oak overlays on an oak door look like products from two different sets.
Beech usually has a calmer visible wood grain. It is convenient in a project where the moulding's relief should read more strongly than the natural pores and veins. Beech can also be a reasonable choice under opaque paint, but the quality of the result is determined by surface preparation, primer, and material compatibility. One cannot promise that all blanks will react identically to stain: even within a single species, there can be areas with different absorbency.
If the central plane of the front is painted with enamel, first decide whether the frame will be the same color or contrasting. A frame in the same tone works primarily through the shadow on the profile. A contrasting one divides the door more clearly and can visually reduce its width. For a wardrobe with four doors, a slight color difference is repeated across sixteen horizontal and vertical lines, so the effect becomes noticeable across the entire wall.
A small sample is best coated with the same composition and the same number of layers planned for the main batch. Compare it under daylight and artificial lighting. If the wardrobe is near a window, check specifically with side light: in this position the relief often looks deeper. If the surface is regularly wiped, make sure the chosen coating allows for the intended care. Oil, lacquer, and paint create different operating conditions; they cannot be chosen based on a photograph alone.
To order to Ulyanovsk, it is enough to specify the wood species separately from the finish. Do not call a product "ready for painting" if it is sold without the necessary preparation according to its product page. The sanding grade and presence of primer should also be clarified for the selected version, rather than carried over from a neighboring catalog line.
Four fronts 520 × 1880 mm: checking the initial dimensions
Let's imagine a built-in wardrobe with four hinged doors of equal width. The dimensions of each front on the face plane are 520 mm from the left to the right edge and 1880 mm from the bottom to the top. This is a training project: these dimensions are not declared as a STAVROS standard or as a characteristic of a finished wardrobe. They are needed to show the customer the entire path from measurement to the number of strips.
Before drawing any lines, measure the fronts individually. Doors that look identical may differ by a few millimeters due to manufacturing, finishing, or wardrobe assembly. Pay especially close attention to those located next to a side wall: sometimes one opens only to a limited angle, and additional relief on the outer edge will interfere with movement. Measurements are taken on the finished product if the task involves modifying existing furniture.
For the calculation, a uniform offset of 75 mm was chosen from each outer edge of the front to the outer long edge of the decorative rectangle. This gives a width of 520 − 75 − 75 = 370 mm; a height of 1880 − 75 − 75 = 1730 mm. These dimensions refer to the outer boundaries of the frame, not to the central free field inside the profile. To determine the inner side, you will need to add the actual geometry of the specific molding.
The placement of the handles also needs to be checked. On an elongated vertical handle, the fastening point may be close to the frame, but the handle itself and the hand when opening take up more space. Measure not only the fastening holes but also the overall dimensions of the protruding part. The edge of the overlay must not be placed where a hand or the edge of the adjacent door will constantly catch on it.
If the doors are mirrored, glass, or covered with a material, the overall calculation of the part lengths does not yet mean that they can be attached. The fastening method and permissible load depend on the substrate. This example applies to flat furniture fronts on which decorative wooden overlays are structurally permitted to be installed.
Edge offset and frame geometry: what exactly to measure
The difficulty usually arises not in subtracting two offsets, but in choosing the line relative to which the measurement is taken. A molding has an outer and an inner edge, and the relief can make them visually unequal. If you give one craftsman dimensions based on the outer long cut points and another based on the inner straight section, you will get parts of different lengths. On one door this might be noticed late; on four doors the error will be repeated immediately.
Establish the rule: 370 × 1730 mm is the outer dimension of each frame, measured to the most distant points of the part after cutting at 45°. For the horizontal, this is the distance between its extreme outer sharp points; for the vertical, similarly along the length. Then the rectangle has four sides equal in pairs and can be checked by its diagonals before final fixing.
The inner field will be smaller. Exactly how much depends on the visible width of the profile in the chosen orientation. You cannot simply subtract the value "8" or "15" from the 370 mm width without determining which of these numbers refer to the face of the product. When working with a relief quarter-round molding, it is useful to lay the sample out on the front drawing and mark the line of contact with the door surface. This avoids the error where the outer dimension of the frame is correct but the inner pattern is unexpectedly tight.
The third parameter is the distance to obstacles. In projects where the 75 mm offset is specified only on paper, the vertical light gap between the doors, the overlay seal, and the protruding end of the adjacent front are sometimes forgotten. Check not only each frame separately but also the entire wardrobe with the doors open: for the central doors, it is especially important what happens in the area where two adjacent reliefs meet.
Do not replace the final installation drawing with a pretty interior visualization. An image conveys mood, but it does not fix the door thickness, hinge offset, or gap size. A simple diagram with linear dimensions is sufficient for placing an order, provided all measurement datums are clearly labeled.
Sixteen parts: the correct bill of materials for four frames
One frame consists of two vertical and two horizontal parts. Since the doors are identical, a separate calculation for each is unnecessary unless deviations are found after measuring. There are eight verticals in total; each has an external dimension of 1730 mm. There are also eight horizontals; each is 370 mm along the longest side after cutting. The joints are planned at 45°, so the bill of materials must specify not simply "length 1730 mm" but "external length of the finished part with two miter joints."
| Detail | Per front | For four fronts | Length of one, mm | Total finished length, mm |
|---|---|---|---|---|
| Vertical | 2 | 8 | 1730 | 13 840 |
| Horizontal | 2 | 8 | 370 | 2960 |
| TOTAL | 4 | 16 | — | 16 800 |
The line "16,800 mm" is easily converted to 16.8 m and then mistakenly divided by 2.4 m, yielding seven strips. This approach is incorrect: seven pieces would mathematically suffice only by total length, without accounting for how the parts are laid out. Seven long verticals of 1730 mm cannot be placed in fewer strips without lengthwise joints, because one 2400 mm strip cannot yield two verticals. And eight are needed. Therefore, the lower purchasing limit for continuous verticals is exactly eight stock items.
Why is it important to keep each vertical continuous? A door 1880 mm high is inspected along its entire length. An extra joint in the middle of the overlay will be noticeable under side lighting and will require additional grain matching. For a frame on a cabinet, it is far more sensible to obtain the entire vertical from a single factory strip. The horizontals, by contrast, are relatively short and fit well alongside the long parts.
With a different facade height, the principle may change. If the external vertical exceeds the length of the stock molding, either a different profile of suitable length, a design solution with a joint, or a change in the frame geometry will be required. Reducing the margins solely to save one strip should be done cautiously: the visual proportion of all four doors will change.
It is useful to attach the bill of materials itself to the order even when the customer does not plan to cut the material themselves. The supplier sees why the items are needed, and the carpenter sees how many finished parts should result. This does not replace a production sheet, but it eliminates the typical confusion between "four frames," "sixteen parts," and "sixteen strips."
Cutting plan for eight strips of 2400 mm
On each stock strip, we will place one vertical part of 1730 mm and one horizontal part of 370 mm. The sum is 2100 mm. Nominally, 300 mm remains, intended for kerfs, end trimming, end-quality checks, and process reserve. The plan does not claim that exactly 300 mm will remain after actual work: this is a mathematical difference, not a promised usable offcut.
| Plank | Vertical part, mm | Horizontal, mm | Nominal occupied, mm | Nominal remainder, mm |
|---|---|---|---|---|
| № 1 | 1730 | 370 | 2100 | 300 |
| № 2 | 1730 | 370 | 2100 | 300 |
| № 3 | 1730 | 370 | 2100 | 300 |
| № 4 | 1730 | 370 | 2100 | 300 |
| № 5 | 1730 | 370 | 2100 | 300 |
| № 6 | 1730 | 370 | 2100 | 300 |
| № 7 | 1730 | 370 | 2100 | 300 |
| № 8 | 1730 | 370 | 2100 | 300 |
| TOTAL | 13 840 | 2960 | 16 800 | 2400 |
The total initial linear length is 8 × 2400 = 19,200 mm. The difference between it and the finished parts is 2400 mm, i.e. 12.5% of the purchased linear length. This is not a "production waste percentage", since a real portion of the material will go into saw kerfs, some may remain suitable for samples or test joints, and some will have to be excluded if a defect is found in the required zone. The point of the calculation is different: eight strips provide sufficient nominal margin to place two parts on each.
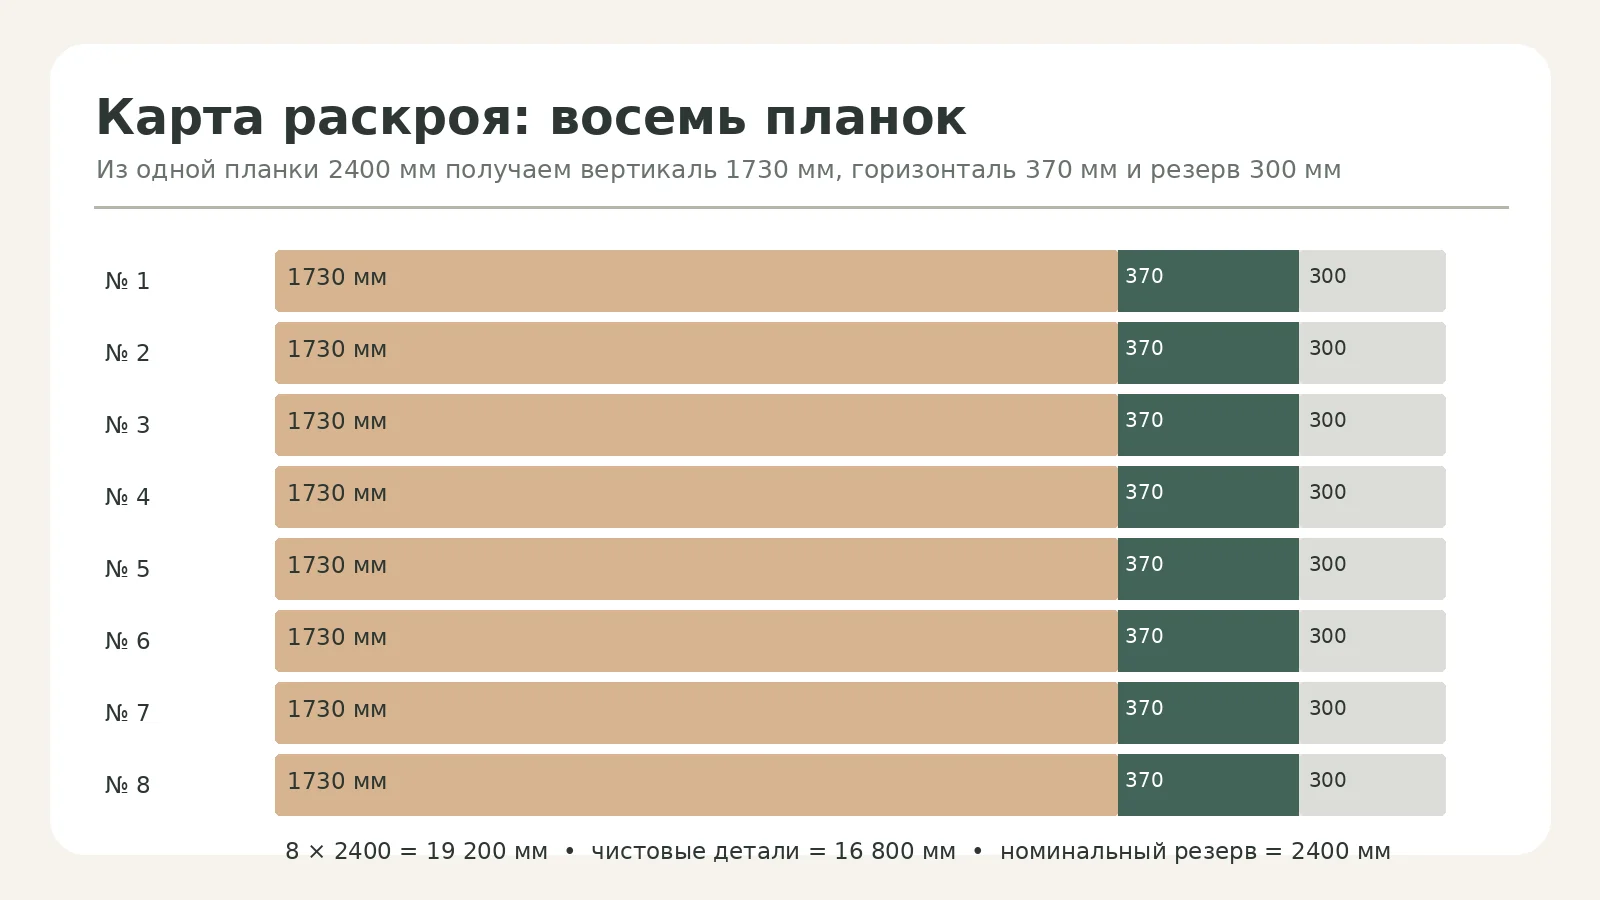
The advantage of the scheme is repeatability. Marking according to a single verified map reduces the number of random decisions. But do not cut all eight initial strips at once: first make a test set of four parts, assemble it without glue and make sure that the external dimension really corresponds to 370 × 1730 mm. Only then transfer the lengths to the remaining parts. For furniture, repeating a mistake is worse than a one-off miscalculation: the spoiled length will turn out to be the same across the entire batch.
In the case of a profile with asymmetric face geometry, it is important for the short parts to maintain a consistent orientation of the pattern. It is not always possible to flip the remainder "however is convenient". The four corners of one frame must look uniform, and the relief on adjacent sides must meet without a random reversal. Marking the back side with a pencil and preserving the sequence of parts before sanding help avoid confusing the side and the top.
After cutting, it makes sense to record the actual consumption: how many millimeters went into cleaning the factory ends, how many into test cuts, and how much remained after the finished parts. This information will be useful when making a second cabinet or replacing a damaged overlay several months later, when the original map has already been forgotten.
45° cut: why the length from the outer point matters more than the total linear length
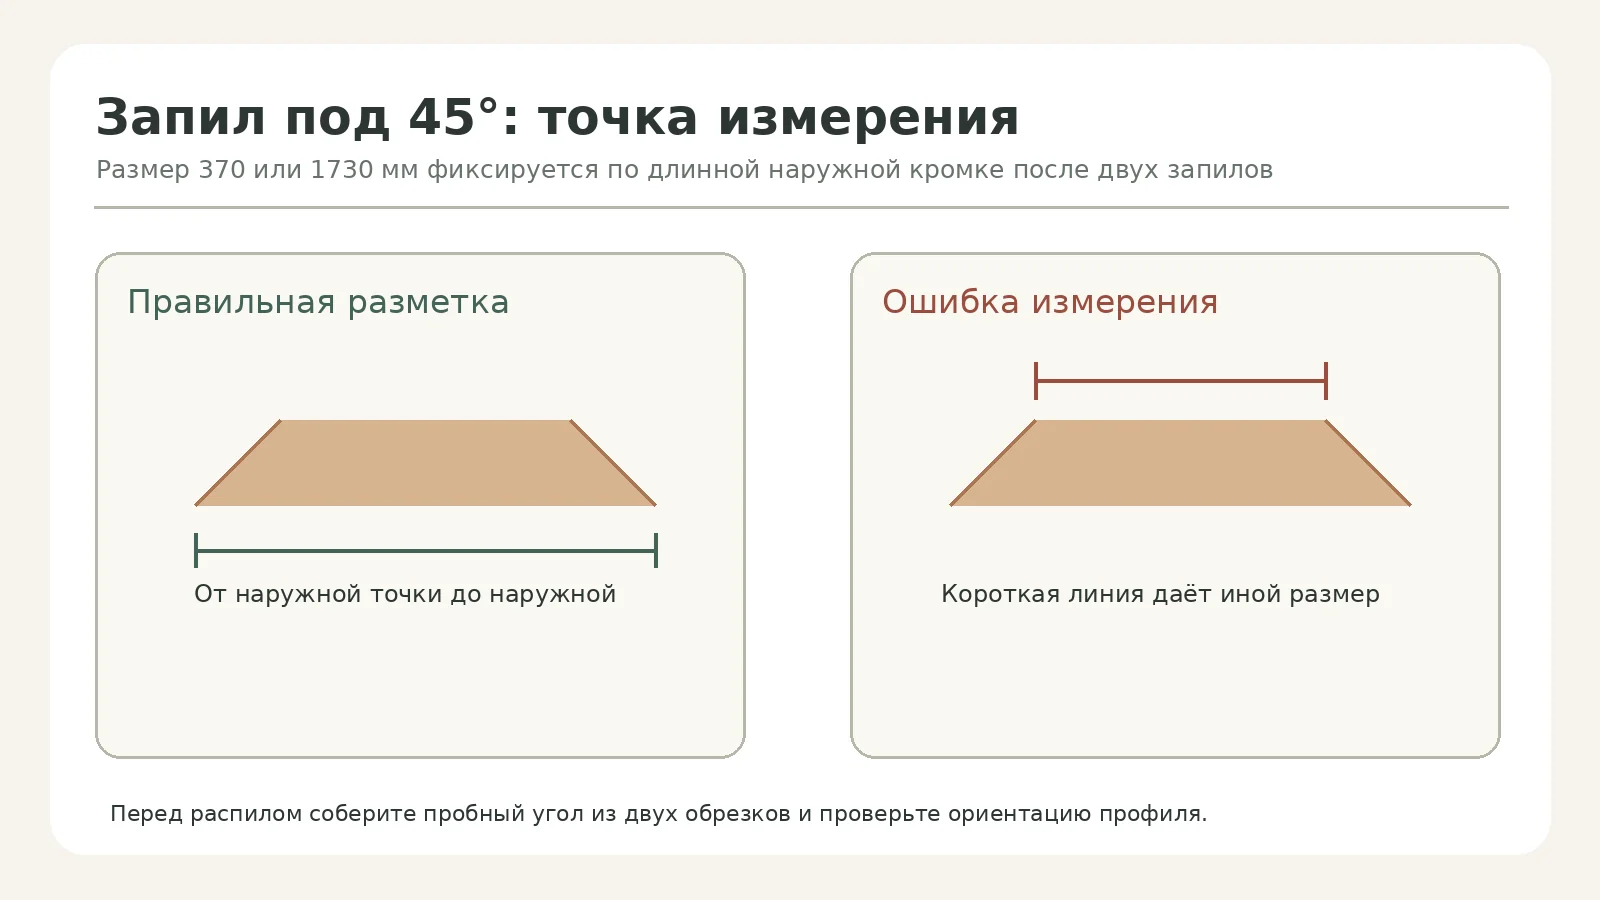
For a square decorative frame, a 45° joint looks familiar, but it requires a precise understanding of measurements. Two identical verticals can be cut to a length of 1730 mm, but if one was measured along the outer long edge and the other along the inner short edge, they will not form a proper rectangle. The difference depends on the profile width, and it cannot be corrected merely by clamping the corners more tightly during gluing.
First determine the face side and the outer edge. Then make the first corner, check its direction on the actual facade, and only after that mark the second cut from the outer point of the finished part. The second end must have the opposite orientation of the cut so that both ends can connect with the horizontal strips. Two parallel cut lines on one part can turn the blank not into a side of the frame, but into a trapezoidal element unsuitable for it.
Before cutting a batch, the tool angle needs to be checked. A nominal 45° on the saw scale does not guarantee that the parts will actually meet without a gap. Take two offcuts of the chosen moulding, assemble a test angle and hold it against the layout. If the joint opens at the outer edge or a gap appears near the inner edge, look for the cause in the saw setting, the support of the part or the orientation of the profile. Filling a wide defect with glue and dust is a bad start for the face surface of furniture.
The kerf width is especially important on repeat operations. In a training example, you can provisionally assume a 3 mm kerf and calculate the number of cuts separately. But in a working calculation you must use the actual blade width and the chosen order of processing the ends. You cannot automatically subtract exactly 3 mm from each side of the frame: which line will be lost depends on which side of the layout the cut is made from. That is why the technical sheet records not only the dimension but also the measuring method.
The 300 mm allowance on the initial strip is relatively convenient in this project. Still, one hidden knot, a local chip on the face side or an incorrect first cut may require the part to be remade. This is where the ninth spare strip makes sense: it is not included in the finish calculation, but it increases the project's resilience to production errors. It should not be considered mandatory for every buyer; the decision is made after checking the condition of the material, the capabilities of the equipment and the cost of re-delivery.
Frames on four doors should look like a single composition
Identical geometry on each leaf does not yet guarantee overall order. Imagine a cabinet with two central doors and two side doors. If on one front the frame is shifted by a few millimetres relative to its neighbour, the upper horizontal lines stop forming an even row. The eye notices the step instantly, even when the deviation itself is small. In photographs with strong perspective it may go unnoticed, but in a real room it will constantly fall into the field of view.
It is more convenient to start from a single horizontal baseline marked with account for the actual position of the doors after adjusting the hinges. If the cabinet is not yet installed, align the fronts themselves in the closed position before starting the decorative work. The overlay should not serve as a means of visually hiding an initially crooked hanging: with subsequent adjustment, the correct relative position of the frames will change again.
Assemble the first frame and check it in a conditional "zero" position, most often on one of the central doors. Then transfer the upper and lower marks to the other leaves, each time re-checking the offsets from their own edges. You cannot thoughtlessly use the floor as the base for all fronts if the cabinet stands on an uneven base and individual doors have already been adjusted. The position of the decorative elements must correspond to the finished furniture plane.
With four identical fronts, the repetition of the internal empty fields reads especially well. If a horizontal crossbar is placed on one and the others are left with a single rectangle, it is precisely this pattern that will be broken. Such a solution is possible if it is provided for by the author's design, but then the material calculation will no longer be the same. In our case, four simple identical frames are needed without additional strips inside.
To check the result, take a general view of the cabinet from human eye level without wide-angle distortion. Then run your eye along the four upper lines and the four lower ones. Do not evaluate only one beautifully assembled frame in close-up; the task here is the single composition of the whole piece of furniture, not the quality of one joint.
Why handles, hinges and gaps are checked before purchase
On a drawing, a handle often looks like a dot. In use, it occupies space, a palm reaches for it, and the neighboring door leaf moves nearby. If the overlay molding is installed too close to the grip area, using the cabinet will become inconvenient. Even a perfectly finished wooden strip should not become an obstacle on the hand's everyday path.
Check the hardware dimensions in three positions: when the door is closed, when it begins to open, and when it has reached its usual working angle. Pay special attention to the central pair of fronts, where the handles are located close to each other. The additional protrusion of the wooden profile may end up next to the edge of the other door if the furniture has non-standard hinges or minimal gaps.
On a built-in wardrobe, the outermost door leaf sometimes passes close to the wall or a decorative side panel. An outer frame with a 75 mm offset usually leaves space at the edge, but without an actual measurement a safe swing cannot be guaranteed. You need to measure the protrusion of the profile above the door face and the path it describes. This is especially important for corner systems and wardrobes installed in narrow niches.
If the handles are already mounted, it is easier to adapt the frame to their positions than to drill additional holes through the new finish. In an unfinished project, you can instead choose the shape and length of the handles to match the selected molding. In both cases, after the preliminary drawing, make a full-size layout with painter's tape. It will quickly reveal a conflict that was invisible on a reduced sketch.
There are also technical limitations of the substrate. If the front is covered with film, an unknown lacquer, or has damage to the top layer, the strength of the adhesive bond cannot be guaranteed. Surface preparation must comply with the recommendations of the adhesive and coating manufacturer, and any tests are best carried out on an inconspicuous area or a separate sample. The mere fact that the molding is wooden does not make it suitable for every type of facing.
How much do wooden moldings cost for four fronts?
Once the cutting plan is known, comparing costs becomes easier. For four frames we use the same outer size of 370 × 1730 mm and eight strips of 2400 mm. Therefore, the difference in price is primarily due to the selected profile and wood species, not to an artificially increased volume of one of the options. This is an important condition for a fair comparison: if the frames for MLD-002 were simultaneously reduced, its final estimate would seem more favorable only because of a change in the project.
As of the verification date, November 13, 2026, the official product pages for the 2400 mm version list the following prices. They apply to commercial solid wood strips and do not include the manufacture of finished fronts or the installation of decorative frames.
| Model and size | Beech, one strip 2400 mm | Oak, one strip 2400 mm |
|---|---|---|
| MLD-001, 10 × 6 mm | 430 ₽ | 500 ₽ |
| MLD-004, 15 × 8 mm | 700 ₽ | 890 ₽ |
| MLD-002, 22 × 11 mm | 920 ₽ | 1260 ₽ |
| MLD-018, 30 × 12 mm | 1660 ₽ | 2160 ₽ |
For an economical comparison, let's take eight strips, which are provided by the cutting map. After multiplying by the price of one product unit, we get the approximate cost of just the wooden profile:
| Model | Eight beech strips | Eight oak strips | Nine beech strips | Nine oak strips |
|---|---|---|---|---|
| MLD-001 | 3440 ₽ | 4000 ₽ | 3870 ₽ | 4500 ₽ |
| MLD-004 | 5600 ₽ | 7120 ₽ | 6300 ₽ | 8010 ₽ |
| MLD-002 | 7360 ₽ | 10 080 ₽ | 8280 ₽ | 11 340 ₽ |
| MLD-018 | 13 280 ₽ | 17 280 ₽ | 14 940 ₽ | 19 440 ₽ |
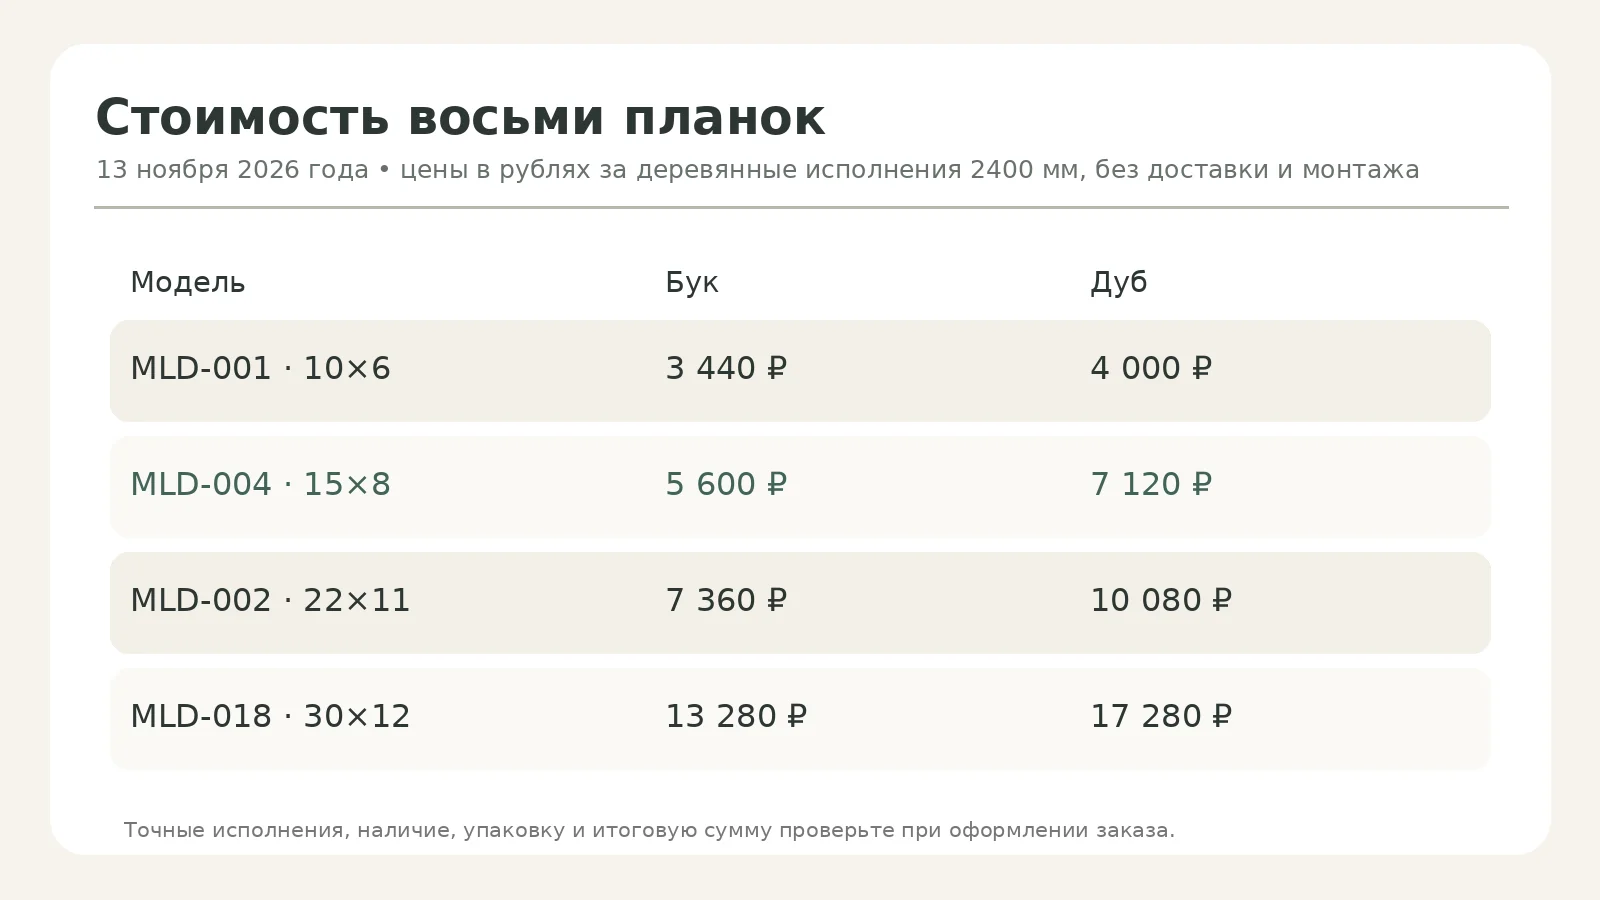
If we compare the options closest in purpose, MLD-004 and MLD-002, then eight beech MLD-002 strips cost 1760 ₽ more. When choosing oak, the difference is 2960 ₽. However, this saving by itself does not answer the question of which frame should be ordered. For a wardrobe with large brass handles, a wide line may be appropriate; with small door handles, MLD-004 often gives a calmer composition. The decision should take the entire furniture facade into account.
For the thinnest frame, you can buy beech molding MLD-001 and keep the same outer frame size; in this case the savings come from the different price of the strip, not from reducing the number of parts.
The estimate does not include packaging, finishing materials, cutting, end treatment, the carpenter's working time, or delivery to Ulyanovsk. Some STAVROS product cards list a charge for rigid packaging. The final order price must be confirmed against the selected configuration: material availability, shipping method, and packaging rules may change. When ordering several models or different batches, the combined cost is not always equal to the simple sum of the old prices.
A reserve ninth strip increases costs by exactly the price of one item in the selected finish. A small saving from forgoing the spare makes sense with reliable equipment and verified geometry. If the order is delivered to another region and obtaining a single strip again would involve additional transport, the spare sometimes pays for itself even with a small volume. But nine strips cannot be declared a mandatory technical standard without assessing the specific risks.
How to determine whether the ninth strip is needed
The most useful check is to assess not the reserve percentage in general, but the places where real material loss is possible. For four frames there are eight long parts of 1730 mm each. Replacing one damaged vertical is not always possible from the remaining offcuts: each nominal remainder after the planned cutting is only 300 mm. If one long element turns out to have a crack, is cut incorrectly, or has a noticeable defect on the face side, spare short pieces will not replace it.
Eight strips are suitable under the following conditions: the actual length of each source blank is not less than the specified one, the face areas are suitable for all parts, the craftsman can accurately make repeatable cuts, and the facade dimensions have been checked after installation. Then each blank has a substantial nominal reserve for process losses. In such a project, you should not automatically add ten percent and then round up "just in case" without discussing the reasons.
The ninth strip is worth serious consideration if the surface requires careful pattern selection, individual blanks will be rejected for appearance, or measurements were taken before the final assembly of the cabinet. A reserve is also appropriate where access to equipment is limited and a mistake cannot be corrected immediately. Unlike horizontals that are too short, damaged verticals more often become the reason for a complete revision of the cutting plan.
A useful compromise is to first make and test-fit one frame from two strips, and then decide how much material to order for the remaining three. This approach works if it is possible to buy the same finish again. But if matching the color and texture of the batch is critical, separate orders carry a different risk. Before splitting the purchase, check whether items from an agreed batch can be obtained and how much the second delivery stage will cost.
Finally, a reserve cannot be replaced by the hope that all mistakes can be hidden with filler. A filled chip on solid wood after a clear finish may differ from the neighboring wood. With opaque enamel, repairing some areas is easier, but you still need to assess the strength and appearance of the joint. An extra strip here is not a formality, but a clearly understood safeguard against a specific defect.
Test-fitting, mounting, and finishing: a sequence without unnecessary rework
First, prepare the facade surface, not the adhesive itself. Remove the handles if this is required for convenience and the design allows it. Clean the doors of dust and dirt, check the condition of the coating and make sure there are no peeling areas. Then lay out the parts of each frame on a separate flat surface. It is convenient to mark moldings of the same color on the back side so that after sanding you do not mix up the direction of the joints.
Dry-fit the parts. The top and bottom, left and right edges must match at the outer dimensions of the frame. Check the diagonals of the rectangle; equal diagonals for such a structure help identify skew if the sides are set without deformation. Do not rely only on a square applied to one corner: locally the angle may be correct while the long sides are offset relative to each other.
Next, transfer the position of the frame to the door. Removable guide marks that do not damage the finish are convenient. At this stage, place the removed handle or its mock-up nearby and check whether it falls on the profile relief. Open the door fully; sometimes it is the movement that reveals a conflict with the adjacent frame that is not visible when the cabinet is closed.
The fastening method depends on the base, the coating, the size of the strips and the operating conditions. For certain combinations of materials, adhesive mounting is suitable; for others, coordinated mechanical fastening is needed. The choice of adhesive should not be made on the principle of "whatever is left over from the renovation": the composition must be compatible with both the wood and the specific facade surface. The setting time, pressing force and permissible load are taken from the instructions for the chosen composition. Here it is impossible to promise universal figures for all bases.
After fastening, do not rush to apply the final coating. Let the joints complete the necessary curing stages, then inspect the corners under side lighting. If local sanding is required, protect the adjacent surface. On a clear coating, it is important not only to remove roughness but also not to create a light spot that differs from the overall texture. When painting with enamel, control the thickness of the layers on the relief: excess paint can visually soften the sharp lines of the profile.
In a cabinet that is used daily, the result should be checked not only visually. Take hold of the handles, open and close the doors several times, wipe the surface with a soft cloth along the usual care path. If the cloth catches on a burr on any part, eliminate the defect before use. The decorative finish should comfortably withstand typical movements near the doors rather than require careful avoidance of every corner.
Customer mistakes that are easier to prevent at the ordering stage
Order seven strips based on dividing 16.8 by 2.4. The finished linear footage is indeed equal to seven lengths of 2400 mm, but each of the eight verticals requires a separate initial strip. The difference between the metric minimum and the actual cutting plan in this project is fundamental. Prevention is simple: first the parts list, then placing the parts onto the commercial blanks, and only after that the quantity in the cart.
Confusing the sizes of MLD-004 and MLD-002. The products belong to the same group but have different cross-sections. Changing the item code after the sketch is approved can make the frames noticeably more prominent and require additional handle checks. Profiles cannot be considered interchangeable just because both models are sold in strips of the same length. Before purchasing, request samples or compare the actual drawings against the facade dimensions.
Take strips of different materials from the same catalog line. A product page may list MDF, beech, and oak at the same time. For our calculation, solid wood with a length of 2400 mm is fixed. The MDF version at 2600 mm uses a different material and may require different finishing conditions. Verify the selected commercial offer by three attributes: species, cross-section, and length.
Measure the finished part from the short side of the miter joint. In that case, the outer frame will end up smaller than intended. It is especially risky to transfer numbers from the sketch to the saw when the measuring edge is not indicated anywhere. On the drawing, next to the 1730 and 370 mm dimensions, be sure to state that these refer to the long outer points after cutting.
Assume that the entire cabinet is perfectly symmetrical. Even if the designed facades are identical, their actual position may differ after the hinges are adjusted. Marking one door and automatically copying it to the adjacent ones without overall control sometimes results in unequal horizontal lines. Therefore, the closed cabinet must be checked as a whole, with control marking on each door leaf.
Buy the trim before choosing the final coating. An oak strip on light enamel and an oak strip under clear lacquer present different challenges. In the first case, the main concern is the compatibility of primer and paint; in the second, it is matching the texture and shade. The coating can reveal chips that were almost invisible before treatment. Make one test corner and one finish sample, and only then approve the entire batch.
Forget about delivery of the long-length item. A 2400 mm strip requires suitable packaging and an agreed shipping method. Delivering a small box of fasteners is not comparable to shipping eight long profile pieces. The buyer must check the pickup point's restrictions, packaging conditions and any need for courier delivery in advance. Otherwise, the final cost and convenience of receipt will come as a surprise.
How to order wooden mouldings with delivery to Ulyanovsk
For a regional order, it is better to prepare one short but complete specification. Instead of the message "need a moulding for a cabinet", write down the item code, cross-section dimensions, wood species, length of the original strip and the number of whole pieces. Example for our project: MLD-004, solid beech, cross-section 15 × 8 mm, length 2400 mm, eight pieces. If a reserve is needed for checking the finish and possibly replacing one long piece, the quantity changes to nine. Additionally, you can attach a diagram of the four frames with external dimensions and a plan for using the wood.
The instruction "finished pieces of 1730 and 370 mm" should not be confused with buying eight original strips. The standard calculation refers to the supply of whole linear stock. Making pieces according to the provided map, processing the ends and assembling the frames are separate operations that must be agreed separately if a ready-to-install kit is required. It is not assumed that the seller will by default cut according to the tutorial table from the article.
You can place a STAVROS order through the product page, and check the receipt conditions in the section payment and delivery. The official website lists the transport services and order placement methods. The specific available delivery method to Ulyanovsk, the shipping cost and the possibility of issuing long-length cargo must be confirmed when placing the order. No separate local warehouse or showroom in the city is assumed in this material.
For long profiles, packaging is part of the practical task. A narrow wooden strip does not handle an impact on the end or bending stress well during unsuccessful transportation. Before paying, find out whether rigid protection will be used, whether it is included in the quoted price and how the carrier accepts cargo 2400 mm long. If self-pickup from a pickup point is planned, check the permissible parcel size with the specific pickup point, not just the general possibility of delivery within the city.
Upon receipt, inspect the packaging and the products themselves. Make sure the quantity matches the invoice, the length and cross-section correspond to the selected item, and there is no noticeable damage on the front edges. If the packaging shows signs of impact, record them before starting installation and act according to the seller's and carrier's rules. This is especially important with a transparent finish, when it can be difficult to repair mechanical damage so that it becomes unnoticeable.
Until work begins, long strips should be stored in conditions suitable for wood and its coating. Do not stand them on one end for a long time near a radiator and do not leave them in direct sunlight by a window. The conditioning and storage conditions should be taken from the manufacturer's recommendations and the requirements of the finishing system. If the material has arrived from a different climate, do not rush to do the final trimming right away: first make sure of its condition and geometry.
When it is better to avoid wooden mouldings or change the project
Not every wardrobe needs decorative frame overlays. If the fronts already have pronounced deep milling, additional relief can make the surface look visually overloaded. With four identical doors this is especially noticeable: a large pattern is repeated many times, and the calm overall rhythm gives way to a clutter of lines. Sometimes keeping clean fronts is better than buying even a beautiful profile on its own.
Another reason to abandon the original scheme is a lack of free space near the hardware. If the handle is already installed flush against the intended frame and cannot be moved, reducing the profile does not always solve the problem. All working clearances must be checked, including hand movement. In some cases it is easier to choose a different placement for the decorative elements, and sometimes not to install them at all.
Particular care is taken with overlays on fronts with unknown or unstable cladding. If the film is peeling in places, the surface is damaged by moisture, or the door manufacturer prohibits additional load and interference with the finish, decorative moulding will not fix the problem of the base. First, the condition of the fronts themselves must be addressed. When replacing doors with new ones, it makes sense to provide the required geometry in the construction rather than imitate it with an overlay on an unsuitable surface.
Separately, compare the labor intensity. If a perfectly smooth finish with no visible joints whatsoever is required, making four frames with sixteen mitre cuts and subsequent finishing may prove more difficult than expected. Sometimes a factory-made front with milled relief meets the task more precisely. In that case, you need to compare not only the cost of eight strips, but also the price of the entire chain of work, the risk of damaging the finished furniture, and the requirements for subsequent care.
What changes if the fronts turn out to be different in size
Let us consider a check that should be done before final order approval. Suppose that after installation, the two central doors are 520 mm wide and the two outer ones are 510 mm. With the same 75 mm offset, the outer width of the central frame will be 370 mm, and of the outer frames 360 mm. The verticals will remain the same if the height and vertical offsets are equal. The horizontal parts will need to be divided into two groups rather than ordering all eight at 370 mm.
For the two central leaves, four horizontals of 370 mm will be needed; for the two outer ones, four of 360 mm. The total length of the horizontals will decrease by 40 mm compared with the original project. This is a small saving in linear meters, but a noticeable change in the marking scheme: if the parts are mixed up, one frame may turn out wider than the other. Now the elements must be labeled by specific fronts and the differences checked at the cutting stage.
Another example is the height of the outer door being 1870 instead of 1880 mm. With the same offsets, its outer vertical part will become 1720 mm. Converting such a difference into total linear meters is easy, but the old cutting map cannot be left without clarification. It must contain different groups of verticals; otherwise the craftsman will get a frame that is too long for a specific door and will be correcting already finished joints.
That is why the final specification for production must be born from measuring each front, even if the commercial calculation starts with conditionally identical doors. You can save on repeat operations when the dimensions really match. It is dangerous to save on the check itself: an error of a few millimeters sometimes determines whether the frame will be perceived as straight when looking at the whole wardrobe.
Questions before buying wooden mouldings
Can the same strip be used for both the vertical and horizontal pieces?
Yes, if we are talking about the same profile, the same wood species, and an acceptable grain orientation. In the cutting plan, each original 2400 mm strip yields a 1730 mm vertical part and a 370 mm horizontal part. However, the actual feasibility of such a cut is confirmed after marking the miters and checking the face side. If the profile has a directional pattern or the grain needs to be matched especially carefully, the cutting map may need to be changed. Not all offcuts are equally suitable for visible horizontal elements.
Should I buy four ready-made frames or eight strips?
Our calculation covers the purchase of eight whole profile pieces, from which sixteen parts for four frames are then produced. Ready-assembled frames are a different order item. If you need exactly that kind of set, agree in advance on the outside dimensions, the joining method, the finish, and delivery of the assembled elements. The price of the original linear stock cannot be applied to a finished product: it does not include the operations for making the frames.
Is it acceptable to make the corners without a 45° miter cut?
Other joints are technically possible if they suit the shape of the chosen profile and the overall pattern. But in that case, the method for determining lengths changes. A simple butt joint will require different calculation bases and different finishing of the visible ends. For a relief molding, an open end may look unfinished. The current bill of materials contains parts for a miter joint, so it cannot be used for another method without recalculation.
What should I choose for a cabinet under white enamel — oak or beech?
For opaque painting, the first criterion will be the compatibility of the specific primer, wood species, and paint system. Beech is often considered because of its calmer wood pattern; oak is chosen if its properties matter or if a partially open texture is intended. But without a sample, it is impossible to promise identical coverage. Agree on the wood preparation with the manufacturer or finisher, and test a small painted sample before treating the entire batch.
Can molding be glued over an old furniture finish?
Sometimes it can, but the decision depends not on the name of the molding but on the condition of the finish and the compatibility of the adhesive with the substrate. Old lacquer, paint, film, and untreated wood behave differently. It is important to check whether the facing itself is peeling: even a very strong adhesive will not hold the overlay if the underlying layer is separating from the front. First, run a compatibility test in a safe spot and review the recommendations of the materials manufacturer.
Why are eight strips better than seven, even though the total length is the same at 16.8 m?
Eight verticals of 1730 mm must be continuous, and a single 2400 mm strip cannot yield two such pieces at once. Therefore, at least eight source pieces are required if longitudinal joints on visible verticals are to be avoided. The short horizontals of 370 mm fit into the remaining parts of the same strips. Here the purchase is determined by the geometry of the parts, not by rounding the quotient of the total length divided by the strip length.
Can MLD-004 be replaced with the wider MLD-018 without changing the parts?
If the outer dimensions of the frame are preserved, the finished lengths along the outer long edge will remain 1730 and 370 mm. However, the visual proportions, the support area and the internal free field will change. Before replacing, check the actual profile cross-section, the proximity of the handles, the joints and the conformity with the overall composition. In a comparison photo, the two mouldings may look similar, but at the scale of a 520 mm wide facade the difference will be more pronounced.
How many days will delivery to Ulyanovsk take?
It is impossible to state a universal timeframe without an address, the selected transport company, the availability of a specific version and the packaging conditions. The STAVROS website describes the ordering and shipping methods, but the timeframe for a specific long-length shipment must be confirmed at checkout. Specify where the cargo should arrive — at a pickup point or at an address — and clarify the restrictions on package length. Do not rely on the timeframes for ordinary small parcels.
Buy solid wood mouldings for furniture facades
For a wardrobe with four facades of 520 × 1880 mm, you can prepare a clear preliminary order: choose one profile, fix the wood species, compile sixteen finished parts and purchase eight strips of 2400 mm length. MLD-004 will give a calmer framing in terms of scale than MLD-002 and MLD-018; MLD-001 will give the thinnest line among the options considered. The final decision depends on the actual profile pattern, the position of the handles, the finish and the condition of the base.
If you need a natural wooden moulding MLD-004 in oak or beech, when placing your order select the wooden version 2400 mm and check the price in the product card. For a more expressive frame, you can compare buy MLD-002 moulding for a wardrobe with the main option on the full-size diagram. Before paying for your order, confirm the quantity, packaging and collection of long planks in Ulyanovsk.