


Article Contents:
- Where to buy a wooden ceiling cornice in Nizhny Tagil
- What to check before choosing a model
- Что отправить вместе с заявкой
- Где купить деревянный потолочный карниз в Нижнем Тагиле?
- Чем KZ-006 отличается от KZ-016 на кухне с коробом?
- Can a wooden cornice be mounted directly along the ventilation duct?
- How many planks are needed for a kitchen of 4200×3200 mm?
- Which is more cost-effective: an oak or a beech cornice?
- Why can't you simply divide 15.6 meters by 2.4 meters?
- What should the cut angle be near the duct?
- Can the profile be glued to a stretch ceiling?
- Do you need a reserve for one additional cornice?
- How to choose the finish of a wooden cornice to match kitchen fronts?
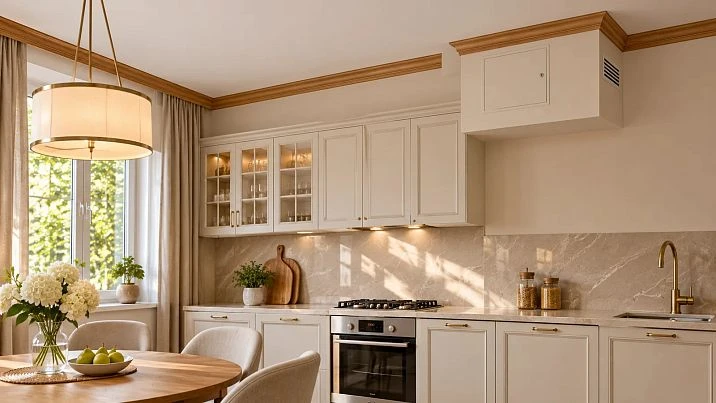
A kitchen measuring 4200×3200 mm seems like a simple room for finishing the ceiling perimeter, until a ventilation duct is discovered along one wall. It takes up 650 mm along the wall and protrudes 400 mm into the room. If you buy wooden cornices only for the length of the four walls, there won't be enough parts to go around the protrusion or, conversely, there will be paid-for planks left over where the decorative line has to be interrupted for servicing utilities. It is especially important to see in advance the inspection hatch, the ventilation grille, and the proximity of wall cabinets.
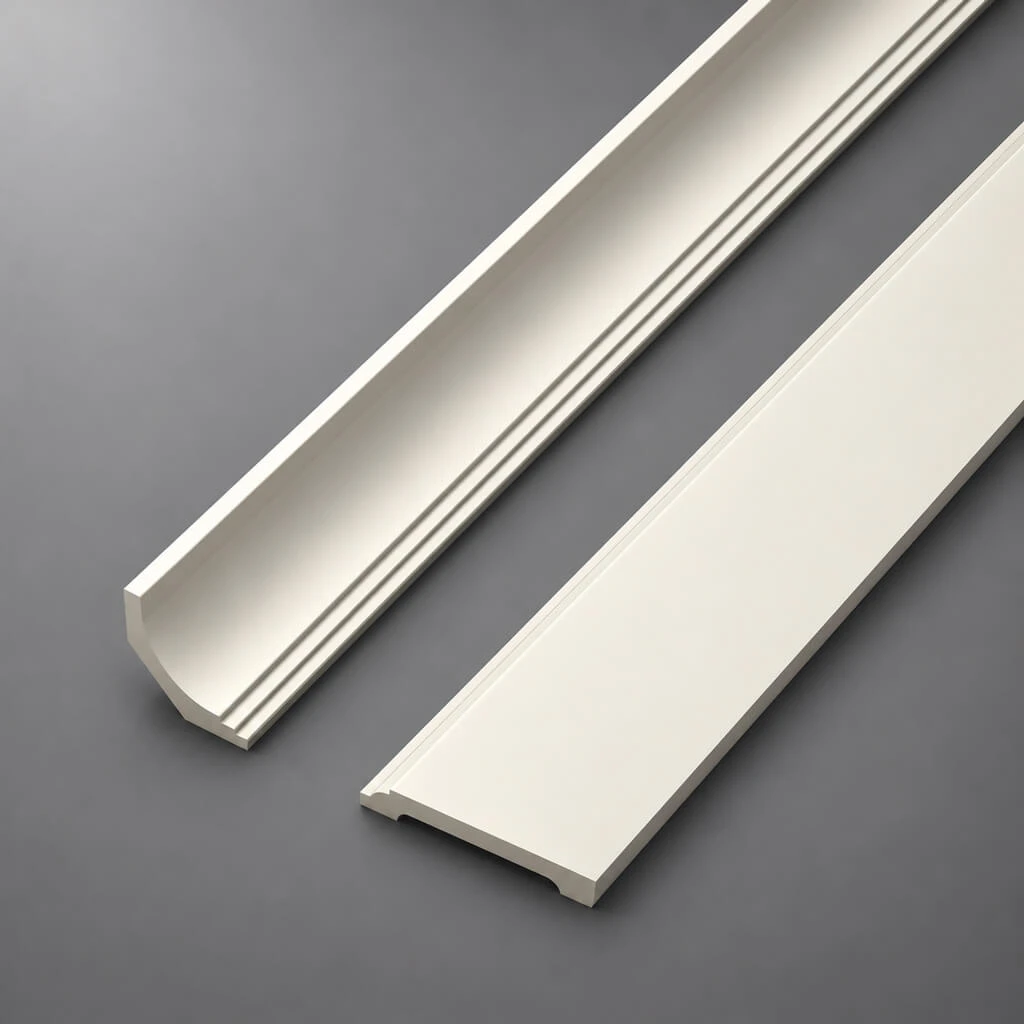
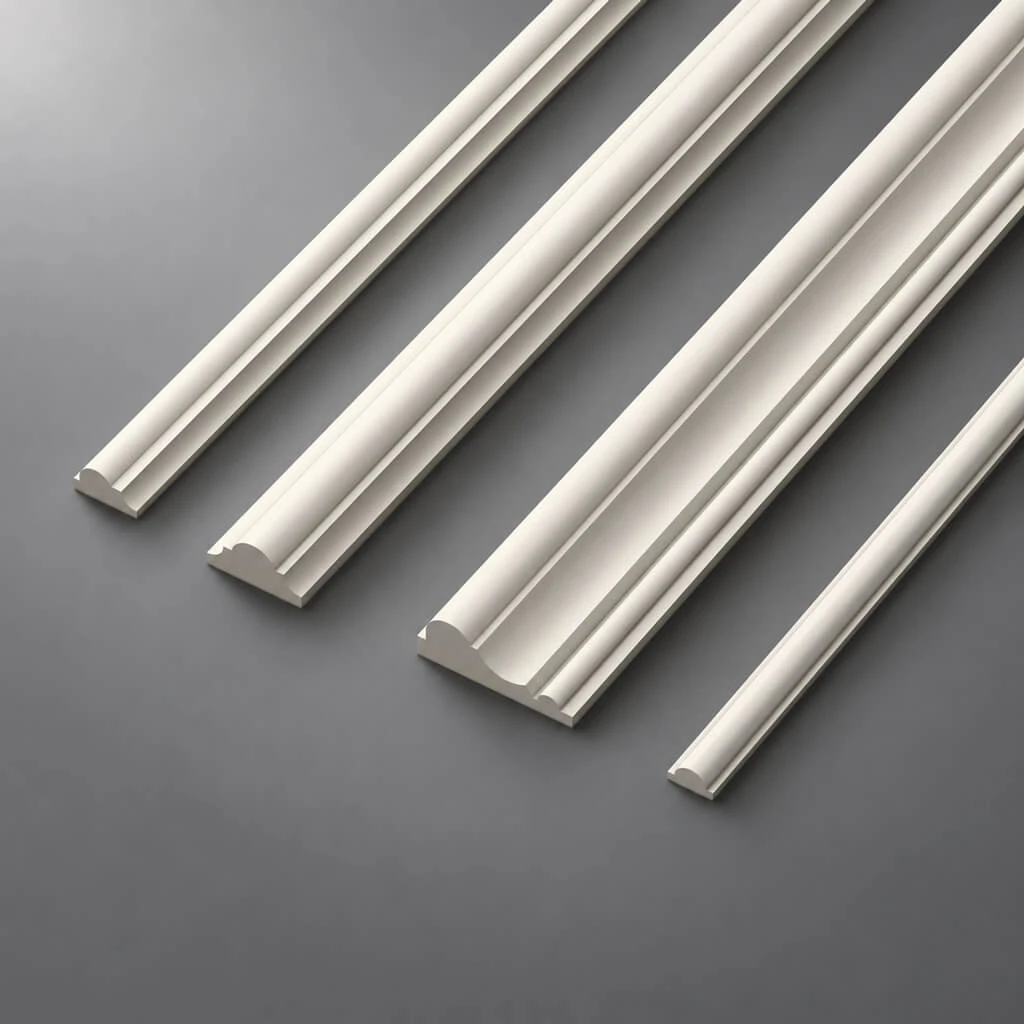
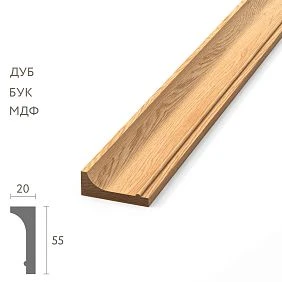
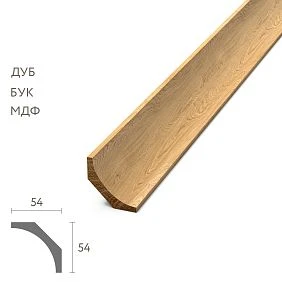
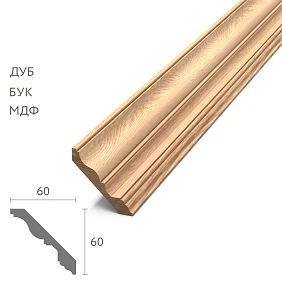
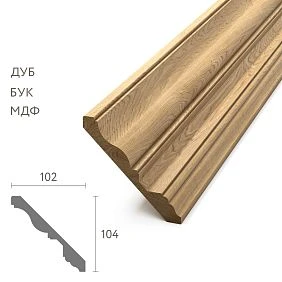
Let's examine this task using two real STAVROS wooden profiles — KZ-006 in solid oak or beech with a 55×20 mm cross-section, and KZ-016 with a 54×54 mm cross-section. For each option we'll show not only the linear footage but also the individual segments, angles, a preliminary cutting map for whole 2400 mm strips, and the cost of the products at prices verified on 18 November 2026. This is a training project: final dimensions and the feasibility of mounting are determined after inspecting the kitchen.
Where to buy a wooden ceiling cornice in Nizhny Tagil
For those who are going to buy a wooden ceiling cornice in Nizhny Tagilit is more convenient to start by choosing a specific profile and material rather than by the conditional cost of one linear meter. The STAVROS catalog features decorative cornices made of solid wood, including KZ-006 and KZ-016, with various proportions. Both wooden versions under consideration have a factory length of 2400 mm, but differ in depth and in the character of the line under the ceiling. For two kitchens with the same perimeter, the final order may differ due to protrusions, openings, and the way the cornice is finished.
So that the manager can check the set, it is useful to state straight away the delivery city, wood species, article number, cross-section, length of each blank being purchased and the number of strips. Instead of a short phrase like “kitchen cornice”, it is better to attach a plan with the dimensions of the box, a photo of the ceiling area and a note of the inspection access. Then the discussion starts from the real installation task rather than from subsequently correcting parts that have already been ordered.
This article is about an architectural decorative ceiling cornicethat frames the junction of the walls and the ceiling. It is not a rod, rail or load-bearing system for curtains. When they hear the word “cornice”, buyers sometimes confuse these products. To avoid such confusion in an order, it is best to do so in the very first line of the specification. A decorative wooden profile must not bear any load from fabric, an electric drive or curtain system fixings.
What to clarify before choosing a model
Take two photos: a general view of the kitchen and a close-up of the box together with the ceiling. State whether the box is made of plasterboard, wood-based panels, plaster or another construction, but do not judge its strength from the outer cladding alone. Separately note the position of the inspection hatch, removable panels, opening doors, light fittings and air diffusers. This information affects both the choice of profile and the permissible method of fixing it.
If the renovation is not yet complete, it is a good idea to agree on the finishing in advance with the furniture makers and the ventilation specialist. The height of the upper kitchen cabinets, the working clearance for their installation, door opening and the routing of exhaust ducts can sometimes determine the possibility of decorative framing more strongly than the ceiling height itself.
Our factory also produces:
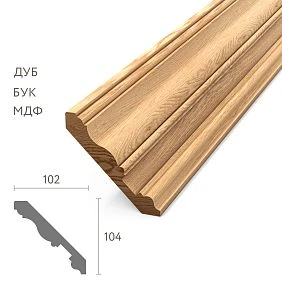
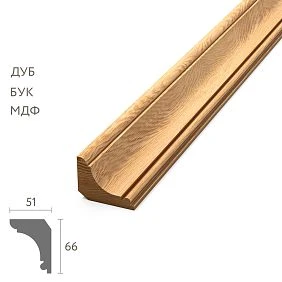
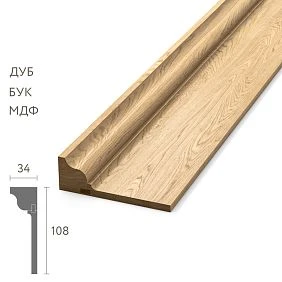
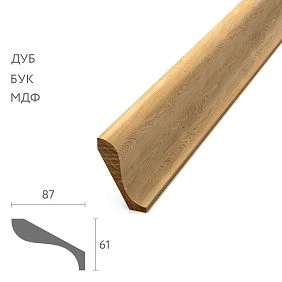
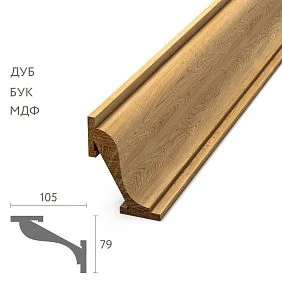
Decorative cornice and curtain cornice: different products
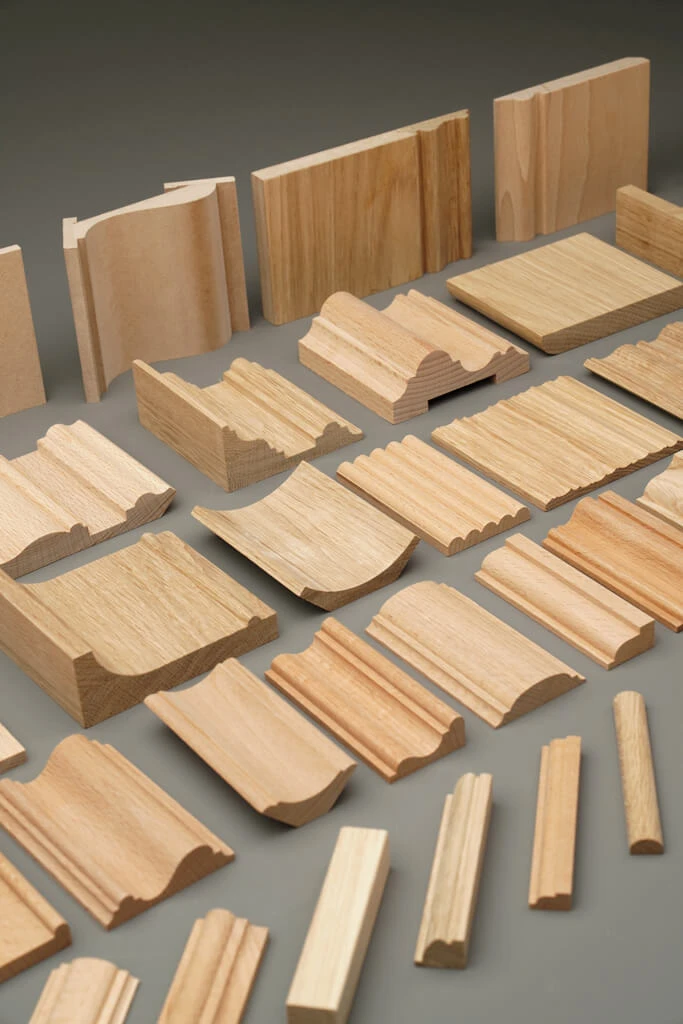
A wooden ceiling moulding, an architectural crowning profile and a functional curtain cornice serve different purposes. The first creates a visual boundary between two surfaces. The second bears the load from the fabric and mechanisms. They cannot be substituted for each other because of a similar name or material. In our kitchen, the framing runs at the ceiling and is not intended for attaching textiles.
The decorative line has its own structural limitations. The part must fit tightly against the designated supporting surfaces, and the joints must not disrupt the profile pattern. On the box, a separate check of the base and removable elements is required. In addition, there may not be enough space between the ceiling and the top of the cabinet for the selected profile depth, even though it looks appropriate in an empty room.
It is better to form an understanding of the product from a technical section and a sample, and to use an interior photograph to assess scale. A shot may be taken at an angle that makes a deep step appear shallow. And vice versa: a close angle increases the visual volume of a narrow cornice. Therefore, photographs and dimensions work together but do not replace each other.
Get Consultation
Which KZ wooden cornices to choose for the kitchen
For a kitchen with a protruding box, we compare only two products from the same product group. Their dimensions are confirmed by the official cards of specific oak and beech variants. The MDF versions found nearby are not included in this calculation: for KZ-006, the MDF version has a section of 55×22 mm and a length of 2600 mm, not the solid wood parameters.
| Parameter | KZ-006 in solid wood | KZ-016 in solid wood |
|---|---|---|
| Cross-section | 55×20 mm | 54×54 mm |
| Factory length | 2400 мм | 2400 мм |
| Wood species | Beech, oak | Beech, oak |
| Beech, price per plank | 3 530 ₽ | 4 450 ₽ |
| Oak, price per single plank | 5 040 ₽ | 6 640 ₽ |
| Main difference | Compact depth | More pronounced volume |
| Practical check | Does not shade adjacent components | Is there enough space at the box and cabinets |
Prices refer to the catalog state as of November 18, 2026, and are not an offer for all future orders. On the website, the price may change when selecting a material or another modification. The table lists only wooden blanks of the required length; the cost of transportation, fasteners, finishing, installation, and packaging is not included.
A compact cross-section can be a good choice when the ceiling area is filled with wall cabinets and appliances. A deeper profile helps emphasize the room's geometry if there is enough space nearby and no risk of covering hatches. There is no universal rule that one option will necessarily be more attractive: the choice depends on the project and the angle from which the cornice is visible from the main points of the kitchen.
KZ-006: compact wooden cornice 55×20 mm
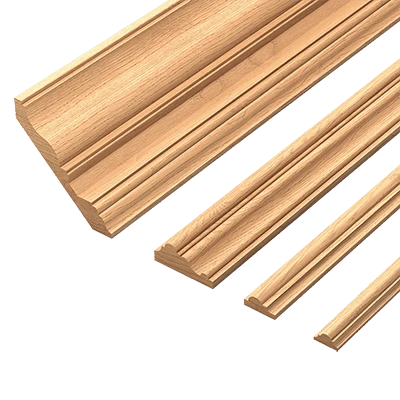
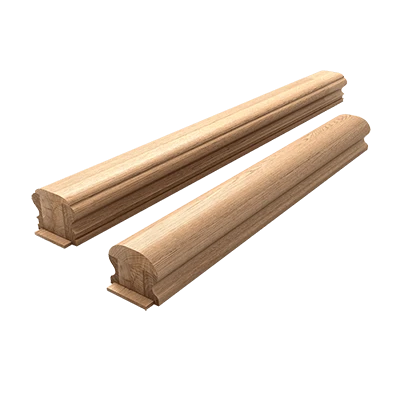
buy a wooden cornice KZ-006 makes sense when a neat top line with a small projection relative to the wall is needed. In solid wood, its cross-section is 55×20 mm, and the length of one retail strip is 2400 mm. Beech and oak options allow you to choose between a calmer, finer texture and an often more pronounced pattern of annual rings. The specific shade and prominence of the grain should be compared using a sample.
In a kitchen with a box, this model offers a useful advantage: during planning, it is easier to find a place for the end of a shallow-depth component. For example, if the decorative line ends before the service area, its end can be finished without an excessively massive projection. This does not eliminate the need to carefully finish the end of the profile: an open cut with visible grain and unprotected coating will spoil even a simple interior.
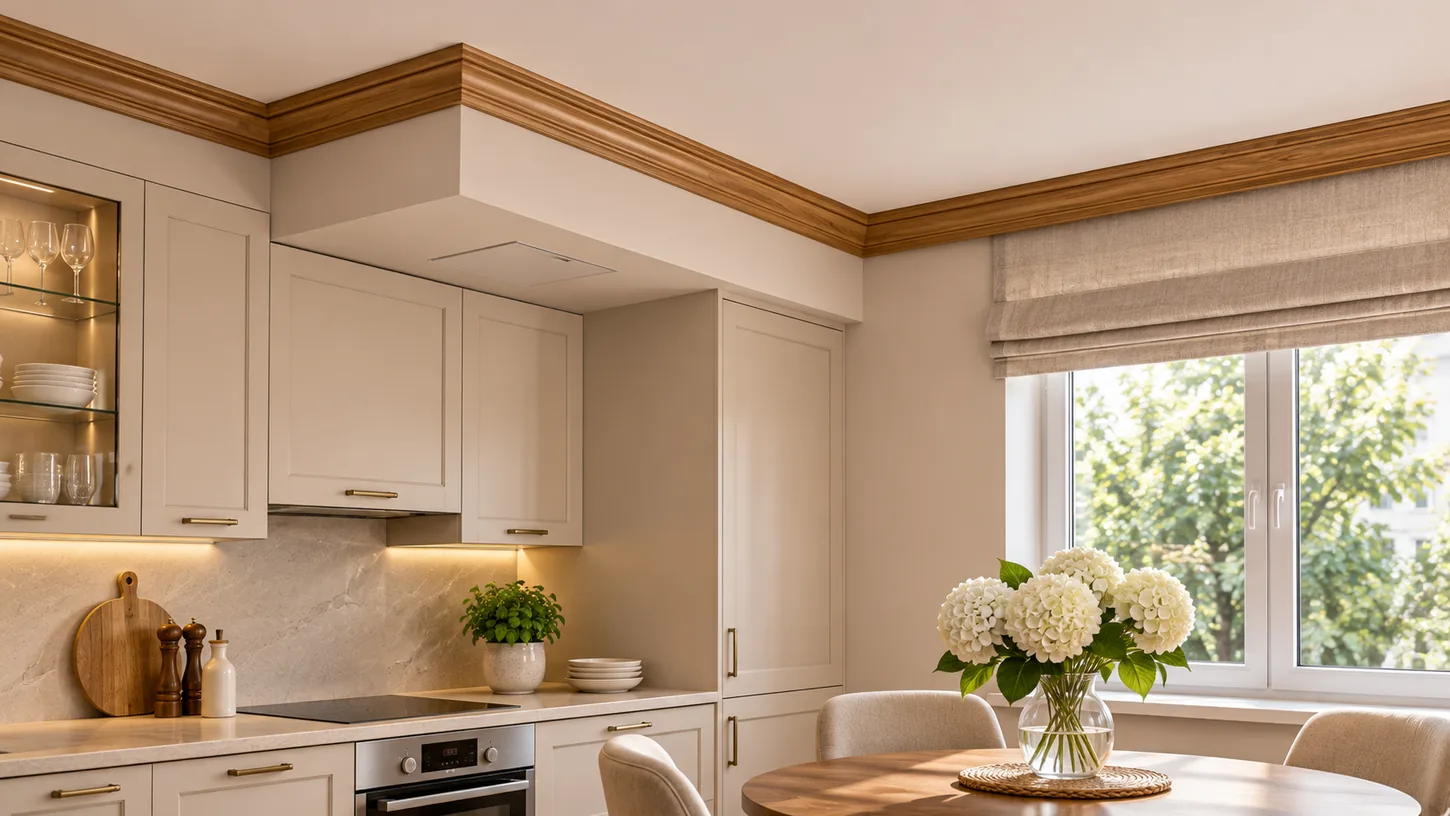
The cross-sectional size of the cornice itself cannot be reduced on site without approval. After arbitrary trimming along the cross-section, the profile may lose its shape, bearing surfaces, and expected pattern. Choose the position and length more precisely rather than trying to modify the product during installation. If the problem is access to the hatch, a well-thought-out termination before the service area is preferable to cladding that cannot be removed.
At the price of one strip, beech KZ-006 is cheaper than oak. However, the result for a specific kitchen will be determined by the number of whole strips, taking cutting into account, rather than simply multiplying 14.8 meters by the price per meter. Therefore, we will prepare the estimate for this profile below for two separate routes.
KZ-016: pronounced cornice with a square cross-section 54×54 mm
Compared with KZ-006, the KZ-016 model forms a more voluminous transition between the ceiling and the wall. Its wooden version has a cross-section of 54×54 mm, a length of 2400 mm, and options in beech and oak. If you need to buy a KZ-016 cornice made of solid wood, before placing an order you should check not only the article number but also the material: the same product page includes MDF with a length of 2600 mm, which is not included in our calculations.
From an interior perspective, a profile with square overall dimensions has a greater presence in the upper zone. On flat walls this may look cohesive, but near a ventilation duct the material begins to compete with the vertical and horizontal edges of its cladding. Differences are especially noticeable if the duct is located close to a light fixture or ends above a tall cabinet. Therefore, first draw the junction in section, attach a sample, and check the free space when opening furniture fronts.
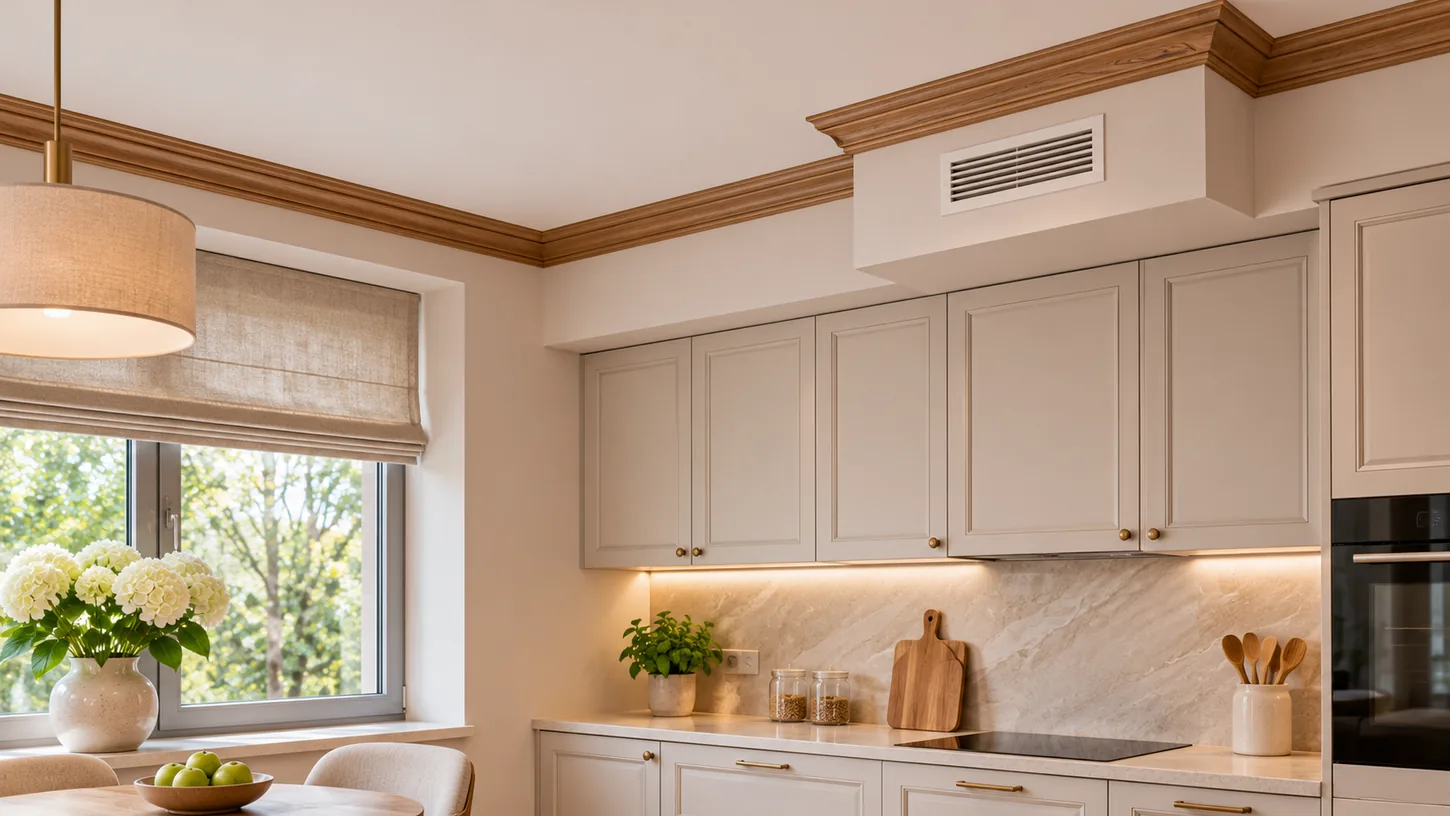
With KZ-016, it is important to distinguish between the overall cross-section rectangle and the actual contact surfaces. The designation “54×54” does not indicate which parts of the profile fit tightly against the ceiling or wall. Without a product drawing, you should not specify drilling locations, fastener diameter, or joint angles. Even with a visually flat duct, its cladding is not always a load-bearing base for a wooden component.
For this profile, it is especially useful to determine in advance whether the cornice will go all the way around the duct. With a continuous line around it, more corner joints will be required and fitting will need more attention. With a break, there will be two open ends that must be finished identically and neatly; otherwise, the larger profile will accentuate the asymmetry.
Oak or beech: how to choose the material for a wooden ceiling cornice
Oak and beech are both solid woods, but they differ in their natural texture, shade, and character of the grain pattern. Oak often has more noticeable large pores and rays that play in the light. Beech surfaces are usually perceived as smoother and calmer. However, wood is not produced with a perfectly identical pattern: even within the same species, adjacent strips may differ. For a continuous line, this must be taken into account when selecting the batch and the final finish.
A clear finish preserves the visibility of the natural material. Tinting changes the color but does not have to remove the contrast of the grain. An opaque enamel brings the visual composition closer to painted walls, but it requires suitable substrate preparation and adherence to the technology of the chosen coating. Do not assume that any oil, lacquer, or paint are compatible with each other. Ask for finish recommendations specifically for the chosen product and first test the result on a sample.
A kitchen differs from a dry living room by temperature and humidity fluctuations during cooking. This does not mean that solid wood is prohibited here, but it requires sensible placement of the profile, ventilation, and a proper protective coating. A decorative element must not be installed where it will be constantly wet, overheated, or interfere with equipment maintenance. Promising that the geometry will remain unchanged under any conditions would be wrong.
When comparing estimates, it is important to remember: buy wooden ceiling cornices it can be made in several versions, but for an accurate total you should choose one species and one model. Mixing oak and beech parts for the sake of economy without a finish design is undesirable: the joints may be more noticeable, and the difference in perception will become stronger after the coating is applied.
How to inspect a ventilation duct before ordering a cornice
A ventilation duct in a kitchen is not just a geometric protrusion. It may contain channels, utilities, and elements that require access. In one apartment the outer shell is a stationary structure, while in another part of the panel must be removable. Therefore, a decorative cornice is planned only after understanding which areas can be faced and where it is permissible to fasten.
The first step is to determine the purpose of the duct and the presence of inspection openings. The ventilation grille should not be moved or reduced because of a beautiful ceiling line. If the working panel opens or is removed upward, the profile above it may block the path of movement. In that case, a break in the decorative line is not a design defect but part of normal maintenance. Possible access to connections and filters within the volume provided for by the design must also be taken into account.
The second step is to check the geometry. Measure the width of the duct along the wall at several points, its projection, and its position relative to the ceiling. Clarify how straight the side faces are, where the outer and inner corners begin, and whether the lines diverge toward the ceiling. A "650×400" scheme is useful for a preliminary order, but the actual wall may require individual cuts instead of standard 45 degrees.
The third step is to assess the substrate. Decorative cladding made of drywall or a thin panel is not the same as a load-bearing structure. For the chosen fastening method, the fastener manufacturer and the installer must confirm the suitability of the substrate, its thickness, and the load conditions. A heavy cornice must not be mechanically fastened to a random section of ductwork, grille, hatch, or stretch ceiling. When in doubt, it is more acceptable to abandon the area near the duct than to hide the problem with cladding.
Going around the duct or interrupting the cornice: two independent solutions
Option A — wrapping around the box The decorative profile runs from the corner of the room along the wall to the side face, then wraps around the 400 mm projection, continues along the front face of the box for 650 mm, returns along the second side face and continues along the wall. Visually, the line remains continuous. This is only suitable where it is technically possible to fasten and service it. If the access panel is located in the cornice area, continuity cannot be considered a sufficient reason to cover it.
Option B — break at the box The cornice ends before the first side face and starts again after the second. The projection remains without decorative trim in the ceiling area. This makes it easier to preserve access to the removable cover or to avoid creating false supports. However, the two visible ends require identical finishing, and a deliberate pause appears on the wall. It can look neat if the offsets are coordinated with the furniture fronts and the boundary of the box.
The decision is often made not only by taste but also by installation conditions. If the box is located directly above a cabinet, sometimes only one part of the cornice is visible. Continuing it behind the furniture, where access cannot be verified and no one will see the finish, may be impractical. Conversely, on an open wall it is more sensible to maintain continuity if it is safe and structurally achievable.
One cannot automatically assume that the option with a break is cheaper based solely on the finished length. It is indeed shorter, but it requires two neat terminations, and the usable offcuts from cutting are not always suitable for adjacent sections. The cutting map below shows under which assumptions both schemes fit within whole planks and how their estimates differ.
Kitchen training plan: from four walls to the actual route
The example is based on a rectangular kitchen 4200 mm long and 3200 mm wide. On one of the long walls there is a box 650 mm wide that projects 400 mm into the room. To obtain an itemized list, we additionally assume the training position of the box: from the left corner of the same wall to the start of the projection — 950 mm; after the box, 2600 mm remains to the right corner. The sum 950 + 650 + 2600 equals the wall length of 4200 mm. These additional distances are introduced to demonstrate cutting: in a real apartment they must be measured.
| Original area | Accepted value | What requires measurement |
|---|---|---|
| Long wall with a box | 4200 мм | Length at the curtain rod installation height |
| Opposite wall | 4200 мм | Position of external and internal corners |
| Two transverse walls | 3200 mm each | Actual length of each line |
| From the left corner to the box | 950 мм | Free section up to the protrusion |
| Width of the box front face | 650 мм | Overall dimension along the installation line |
| From the right edge of the box to the corner | 2600 мм | Line end before the corner |
| Offset of each side face | 400 мм | Protrusion depth relative to the wall |
| Factory-made KZ solid wood strip | 2400 мм | Selected version in the order |
If the box is not located at the ceiling but lower, or the profile runs at a different elevation, the layout changes. Our example considers a cornice that follows the geometry of the box at ceiling level. It is also assumed that there are no sections above doorways excluded from the run, and that wall cabinets do not obstruct it. No electrical, ventilation, or building codes can be derived from this table: it provides only an example of laying out the finishing trim.
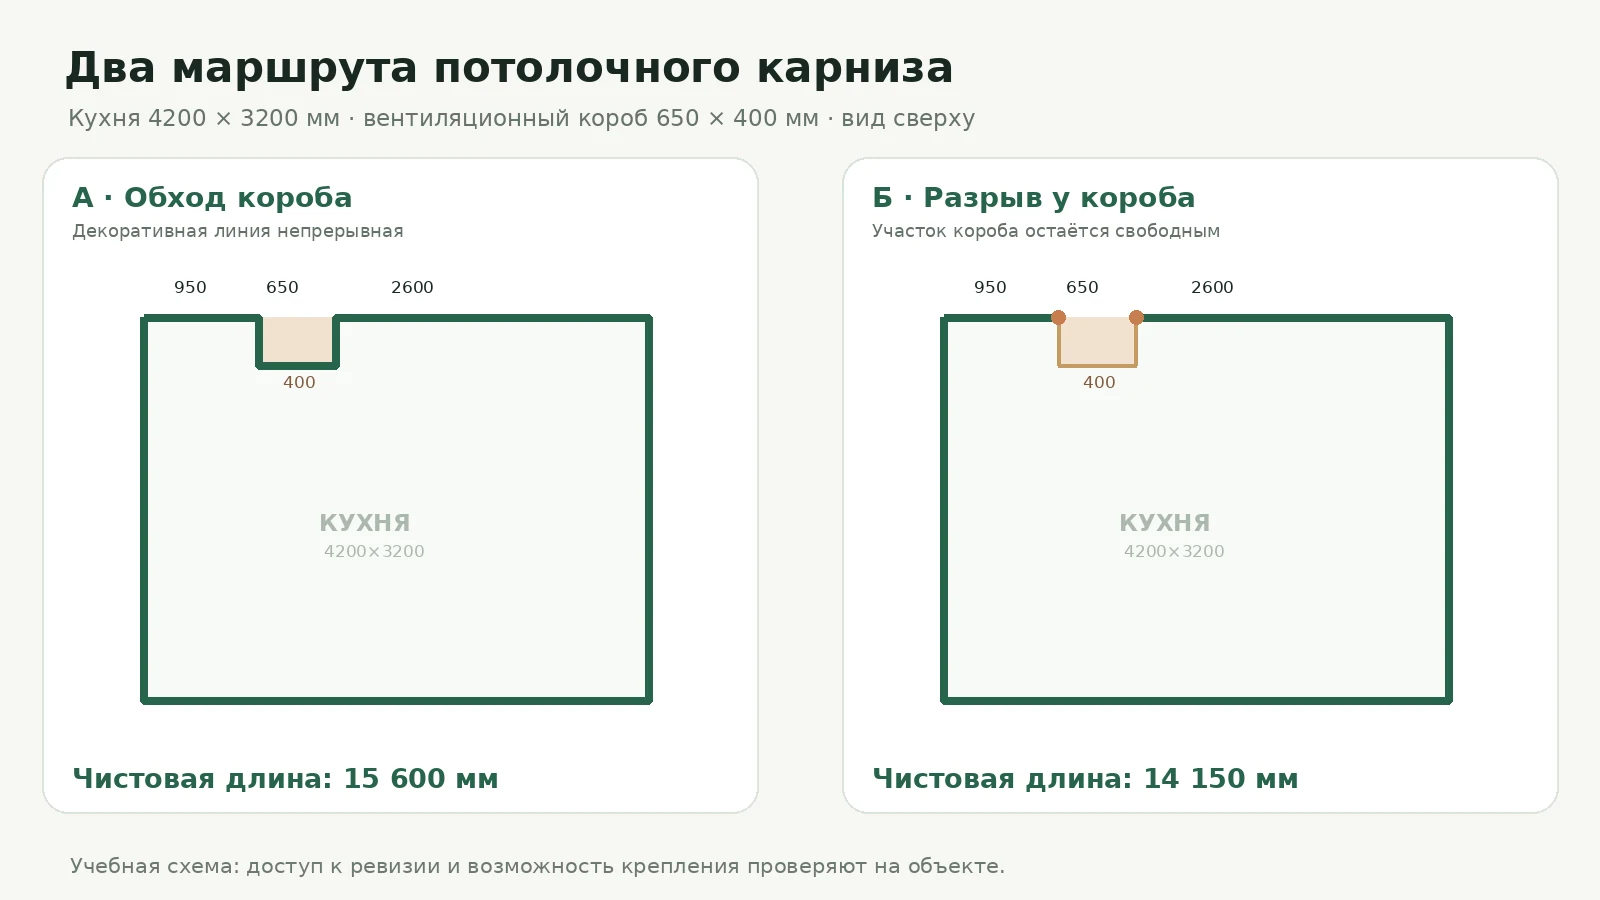
First, mark all direction-change points as separate vertices. In the wrap-around option, the box adds extra turns: at the wall, on the front section, and when returning to the main plane. In the break option, these sections are not clad, but two open ends appear. It is the list of straight segments, not the overall perimeter, that then becomes the basis for the cutting map.
Option A: the cornice wraps around the ventilation box
The nominal perimeter of an empty rectangle is 2×(4200 + 3200) = 14,800 mm. On the long wall, subtract the 650 mm width covered by the box, then add the wrap along two side faces of 400 mm each and the front face 650 mm long. We get 14,800 − 650 + 400 + 650 + 400 = 15,600 mm.
This result is 800 mm more than the usual perimeter: the width of the front face replaces the same section of wall, and the extra 800 mm comes from the two side faces. This is simple but important logic. You cannot add the entire length of the three faces to the perimeter at once without subtracting the already counted 650 mm: otherwise the order will contain an artificial surplus.
For verification, it is convenient to compile a separate list of uncut straight sections:
| Perimeter segment | Finished line, mm |
|---|---|
| To the box along the wall | 950 |
| First side face of the box | 400 |
| Front face of the box | 650 |
| Second side face of the box | 400 |
| After the box up to the corner | 2600 |
| First side wall of the kitchen | 3200 |
| Wall opposite the box | 4200 |
| Second side wall of the kitchen | 3200 |
| Total | 15 600 |
Laying out across these eight sections helps you understand the number of turns and potential joints. But it does not yet show how many strips to buy: a 4200 mm segment cannot be obtained as a single piece from a 2400 mm product. It will have to be assembled from at least two parts, and the joint location is best determined in advance.
For each corner, the orientation of the cut, the side of the profile, the direction of the grain, and the installation order must be coordinated. External and internal junctions at the box differ visually: on the front side the protruding relief is more noticeable, while on the inner side there is a gap deep within the profile. A professional trial fit before final fastening helps avoid a situation where the same numerical length does not produce a tight joint.
Option B: the cornice ends before the box
If the specialists have confirmed that the area near the box should remain free, the decorative line can be broken. On the long wall, two straight segments of 950 and 2600 mm will remain. The side faces of the protrusion, 400 mm long, and the front face of 650 mm are not included in the finishing. The calculated finished length is then 14,800 − 650 = 14,150 mm.
The reduction relative to the perimeter is 15,600 − 14,150 = 1450 мм. This is the sum of three faces of the box that were decorated in option A and remain open in option B. The difference in linear meters does not mean the savings will equal exactly the cost of 1.45 linear meters: the product is sold in whole planks, and the usefulness of the remainder depends on the cutting plan.
| Line section with a gap | Finished length, mm |
|---|---|
| From the left corner to the box | 950 |
| From the box to the right corner | 2600 |
| First cross wall | 3200 |
| Opposite long wall | 4200 |
| Second cross wall | 3200 |
| Total | 14 150 |
The main difference in this option is not only the number of millimeters but also the nature of the termination. The box retains two visible ends that must match in the form of processing. If one profile ends with a flat cut and the second with a decorative return, unwanted asymmetry will arise. It is advisable to decide in advance whether a slight offset from the protrusion is needed and whether this offset can be repeated on both sides.
If an offset is needed for opening the hatch, the actual length will become even shorter. In such a case, the number 14,150 mm should not be left in the article as an absolute standard; the new value must be recorded in the schedule and the cutting plan re-executed. The additional installation clearance is a technical parameter determined by the specific door or removable panel, not arbitrarily assigned for aesthetic reasons.
Why linear meters do not yet mean the number of planks to buy
Two kitchens may share the same total perimeter but differ in the number of straight sections. This is critical for wooden profiles: some long parts will require joints, while short ones can be obtained from offcuts. If you thoughtlessly divide 15,600 by 2,400, you get 6.5 and a conditional seven planks. Such a number shows only theoretical minimum based on total length. It does not account for which segments will actually fit side by side in a single factory blank.
When splitting, the same rough operation gives 14,150/2,400 ≈ 5.90, that is, six strips. But the 3,200 and 4,200 mm sections cannot be continuous. If each of them is cut unsuccessfully, the short offcuts will be unsuitable for the specified lengths, and the number of purchased items will increase. This is not an arithmetic error, but the difference between a cutting problem and a perimeter measurement problem.
For a meaningful comparison, we choose the same principle: divide the long walls into parts so as to minimize visible inserts that are too short, and then distribute the short pieces across whole blanks. At the same time, we try to keep joints in calm areas, not directly at an outer corner and not where sharp light from a fixture falls.
Important limitation: with miter cuts the finished visible length is not always equal to the length of the rectangular original blank. On protruding parts of the profile, the material may need to be longer. Therefore, the map below deliberately includes an allowance for the ends intended for a corner joint. This allowance is for training purposes, not a factory standard. After fitting the actual section and checking the angles, the craftsman adjusts it.
How to prepare a parts list before sawing
The same division scheme for long sections was chosen for both variants. We split the 2,600 mm line into 2,000 and 600 mm. Each 3,200 mm wall into 2,250 and 950 mm. The opposite 4,200 mm wall into 2,150 and 2,050 mm. Thus the installation scheme contains clear long elements and short fillers that can be combined in a single original item.
Why not cut 3,200 mm into 2,400 and 800 mm? Because a 2,400 mm segment with a mitered corner end may not fit into a factory strip of the same length: an allowance for processing is needed. A 2,250 mm segment leaves room for fitting and sawing. Similarly, 2,150 + 2,050 mm instead of 2,400 + 1,800 mm make it possible to prepare both ends without trying to obtain a finished part from a blank equal to it in nominal size.
For the training map we assume: to each end with an angled cut is added 60 мм; to the end of a straight joint or an open end — 10 мм. For each prepared part we reserve 4 мм for the cut when distributing within the original strip. These are the calculated allowances of a specific example, not manufacturer-recommended values. On a real 54×54 mm profile, a different allowance may be required depending on the type of corner and the chosen measurement line. Therefore, the craftsman must verify the dimensions on a sample before mass cutting.
In the tables, the finished length means the nominal size of the finished visible line, and the blank length is its preliminary reserve before the final cut. If, after a test cut, it turns out that more material is needed for the corner, the map should be revised. It is forbidden to shorten the actual part in order to preserve the pre-drawn number of strips.
Cutting map No. 1: going around the box, 8 whole strips
When going around the box, eight straight lines are divided into twelve installation parts. Below is a preliminary cutting map from whole wooden strips 2400 mm long. All dimensions in the "blank" column include training allowances for two ends. The last column helps avoid confusing the finished length of the part with the amount of material for the cut.
| Label | Section | Finished length | Preliminary blank |
|---|---|---|---|
| A1 | To the box | 950 | 1070 |
| A2 | Side face 1 | 400 | 520 |
| A3 | Front face of the box | 650 | 770 |
| A4 | Side face 2 | 400 | 520 |
| A5 | After the box, part 1 | 2000 | 2070 |
| A6 | After the box, part 2 | 600 | 670 |
| A7 | Wall 3200, part 1 | 2250 | 2320 |
| A8 | Wall 3200, part 2 | 950 | 1020 |
| A9 | Wall 4200, part 1 | 2150 | 2220 |
| A10 | Wall 4200, part 2 | 2050 | 2120 |
| A11 | Second wall 3200, part 1 | 2250 | 2320 |
| A12 | Second wall 3200, part 2 | 950 | 1020 |
Total finished lengths — 15,600 mm. Total preliminary blanks with allowances — 16,640 mm. In the distribution map below, we reserve an additional 4 mm of kerf for each of the twelve parts, that is, 48 mm. Thus, to work within these assumptions, it is required to place 16,688 mm within whole planks. Eight planks provide 8×2400 = 19,200 mm, which leaves 2,512 mm of distributed remnants.
| Plank 2400 mm | Parts, blank dimensions | Occupied with kerfs | Free remainder |
|---|---|---|---|
| №1 | A7 — 2320 | 2324 | 76 |
| №2 | A11 — 2320 | 2324 | 76 |
| №3 | A9 — 2220 | 2224 | 176 |
| №4 | A10 — 2120 | 2124 | 276 |
| №5 | A5 — 2070 | 2074 | 326 |
| №6 | A1 — 1070; A8 — 1020 | 2098 | 302 |
| №7 | A12 — 1020; A3 — 770; A2 — 520 | 2322 | 78 |
| №8 | A6 — 670; A4 — 520 | 1198 | 1202 |
| Total | 12 pieces | 16 688 | 2512 |
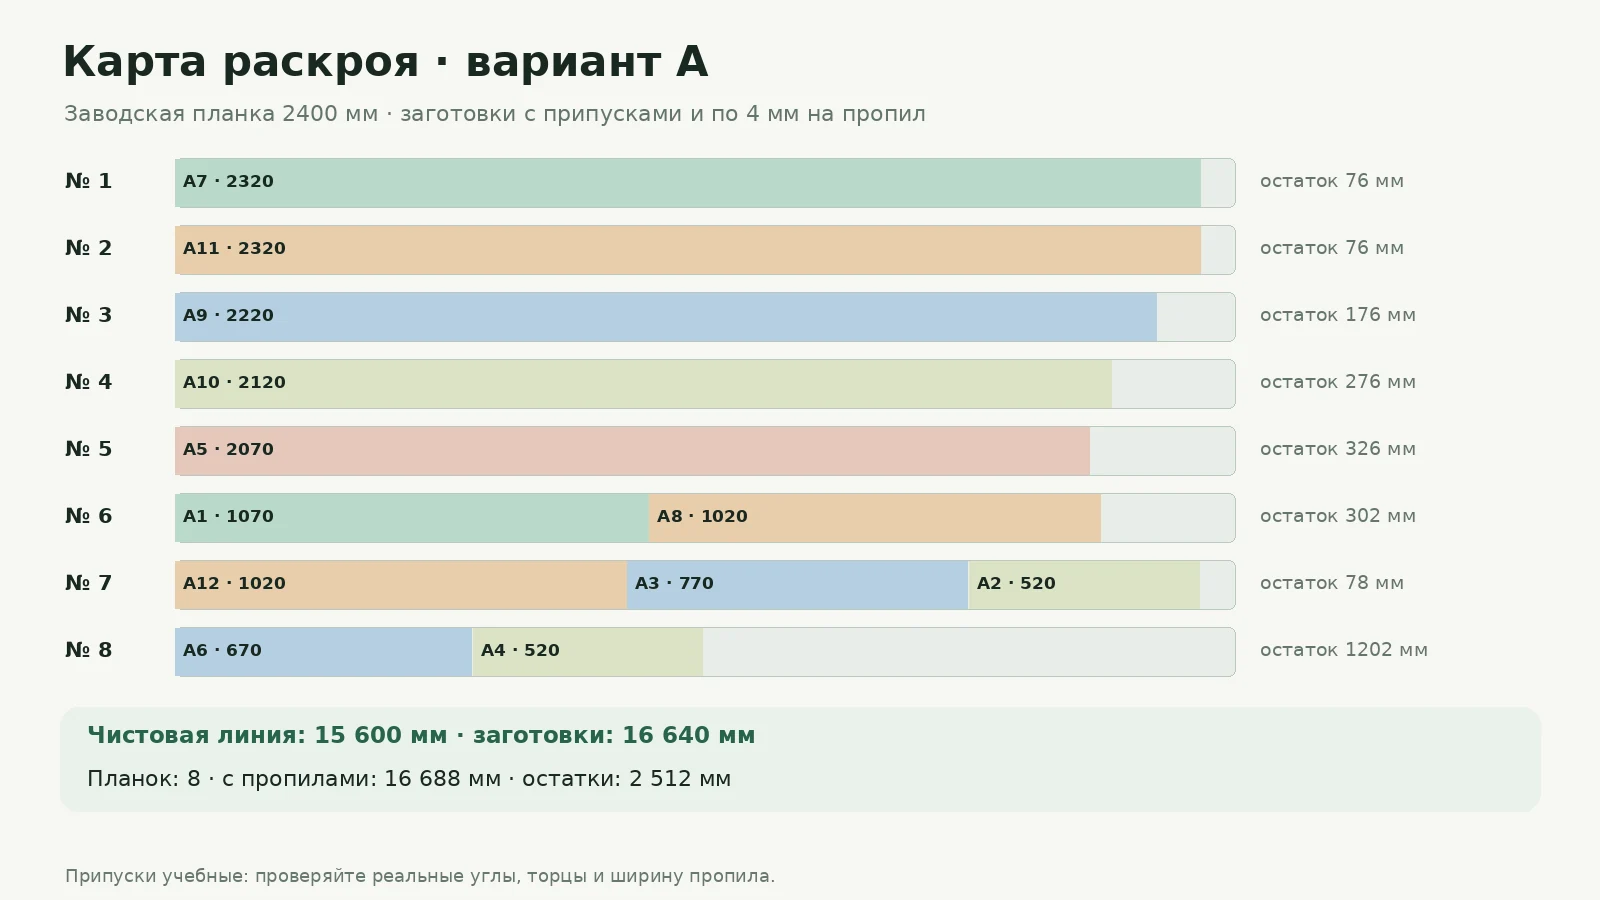
The 1,202 mm remainder from the eighth plank seems large, but this does not mean that the entire project can automatically fit into seven pieces. Five long blanks do not fit in pairs with other long ones, and the remaining short parts combine only under specific combinations and allowances. The distribution shows one reproducible variant of eight planks, not a proof of mathematical optimality for any joining methods.
At the corners of the box, the assembly order matters. First, you can place the short part against the front face and both side sides without final fixing, check the direction of the relief, then fit the long walls. You cannot count on the ability to correct a noticeable error in the outer corner with a thick layer of glue or sealant: the joint must be geometrically prepared.
Cutting map No. 2: line break, 7 whole planks
For option B, we exclude A2, A3, and A4 — the cladding of two side faces and one front face of the box. The open ends of the box receive their own allowances. In our example, the first short section of 950 mm requires a blank of 1020 mm, and the first part of the second section of 2000 mm requires a blank of 2020 mm: instead of one corner miter, processing of the free end is provided here.
| Label | Section | Finished length | Preliminary blank |
|---|---|---|---|
| B1 | To the box, free end | 950 | 1020 |
| B2 | After the box, part 1 | 2000 | 2020 |
| B3 | After the box, part 2 | 600 | 670 |
| B4 | First wall 3200, part 1 | 2250 | 2320 |
| B5 | First wall 3200, part 2 | 950 | 1020 |
| B6 | Wall 4200, part 1 | 2150 | 2220 |
| B7 | Wall 4200, part 2 | 2050 | 2120 |
| B8 | Second wall 3200, part 1 | 2250 | 2320 |
| B9 | Second wall 3200, part 2 | 950 | 1020 |
The sum of the finished sections equals 14,150 mm. The preparatory blanks give 14,730 mm, nine conventional cuts of 4 mm each — another 36 mm. The total layout 14,766 mm fits into seven whole products providing 16,800 mm. Theoretically, the unused material after such a distribution is 2,034 mm.
| Plank 2400 mm | Parts, blank dimensions | Occupied with kerfs | Free remainder |
|---|---|---|---|
| №1 | B4 — 2320 | 2324 | 76 |
| №2 | B8 — 2320 | 2324 | 76 |
| №3 | B6 — 2220 | 2224 | 176 |
| №4 | B7 — 2120 | 2124 | 276 |
| №5 | B2 — 2020 | 2024 | 376 |
| №6 | B1 — 1020; B5 — 1020 | 2048 | 352 |
| №7 | B9 — 1020; B3 — 670 | 1698 | 702 |
| Total | 9 pieces | 14 766 | 2034 |
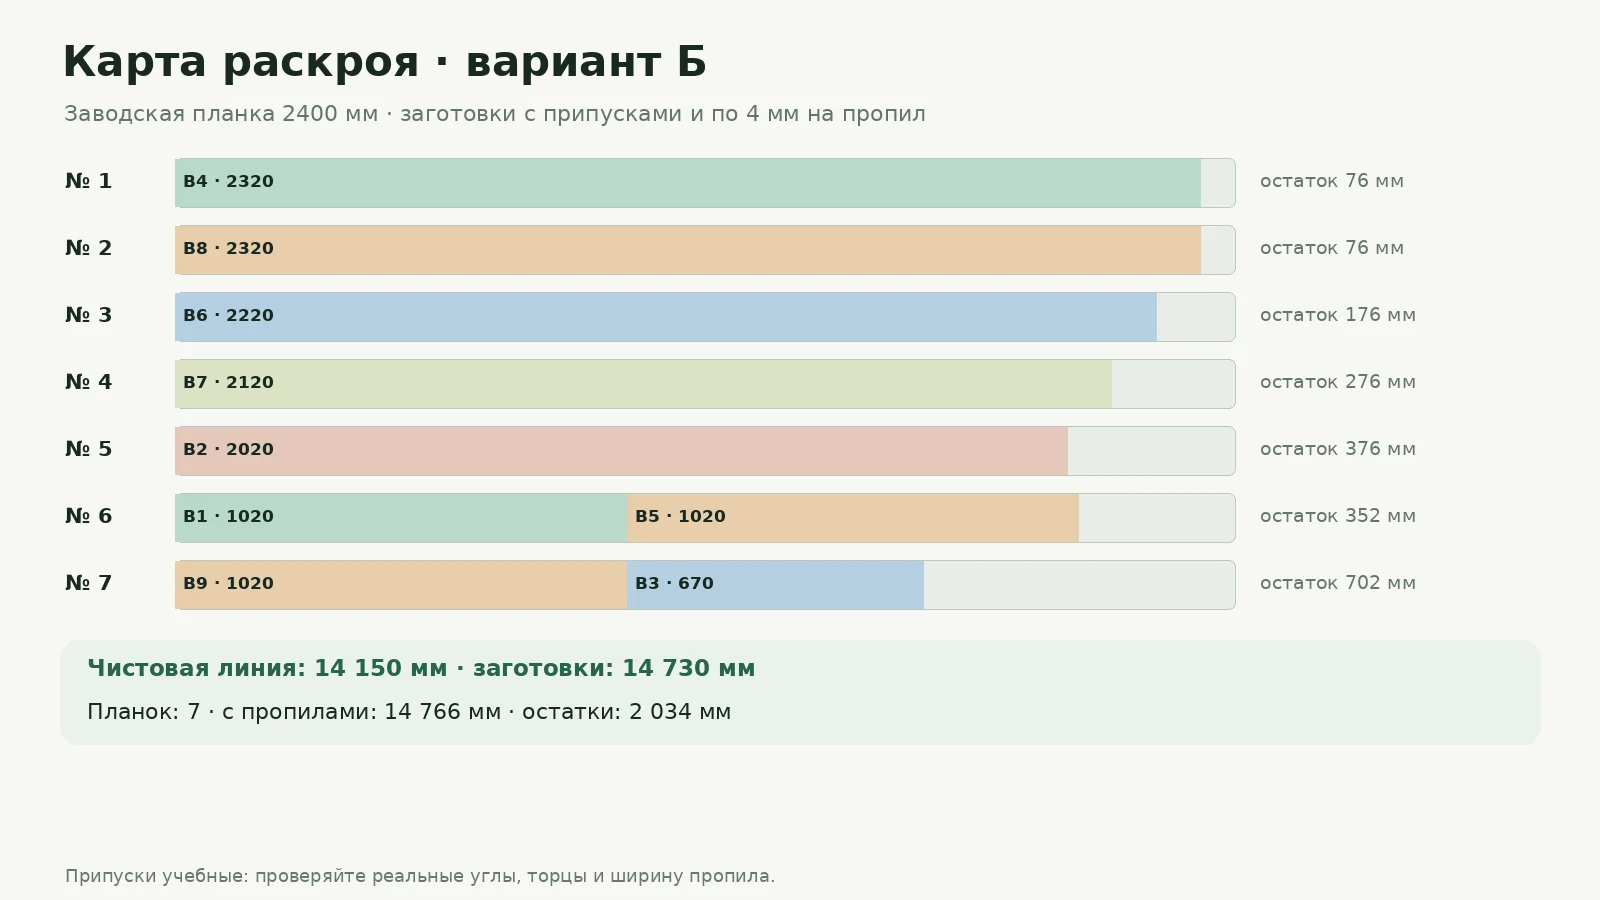
Option B has fewer decorative turns, but two additional end faces that need a clean exterior appearance. Since the inner surfaces of the ends may differ in texture from the face side of the solid wood, it is advisable to plan the finishing of the end in advance: a straight trim, a selected return shape, or another agreed solution. If the shape of the end changes, the blank size must be rechecked.
One of the map's conclusions: you should not evaluate a purchase by linear meterage alone. For option A, seven planks are not a confirmed configuration in the proposed cutting layout, even though 15,600 is formally less than 16,800. For option B, seven planks are sufficient only with the accepted joints and allowances. In both cases, a separate spare plank is treated as protection against measurement errors or defects, not as a part already used in the calculation.
How many wooden cornices to buy: two scenarios
For this kitchen, the main result was not the fractional part of the perimeter but the number of whole products. In option A, the map with the box bypass places twelve parts in eight planks. In option B, nine parts with a break near the box are distributed across seven planks. The difference in finished length is 1,450 mm, but the purchased quantity differs by a whole plank. This is exactly how a technical solution affects the estimate.
| Indicator | Option A: bypass | Option B: break |
|---|---|---|
| Finish length | 15,600 mm | 14,150 mm |
| Number of straight installation parts | 12 | 9 |
| Preliminary blanks with allowances | 16,640 mm | 14,730 mm |
| Training reserve for cuts | 48 мм | 36 мм |
| Total allocated across whole products | 16,688 mm | 14,766 mm |
| Factory products for the described map | 8 pcs. | 7 pcs. |
| Unused remnants per the map | 2512 мм | 2034 мм |
| Additional optional reserve | +1 pc. | +1 pc. |
Remnants cannot be mentally combined into one new plank. Eight pieces 100–300 mm long do not replace a solid section of 1200 mm. In addition, some remnants may have an unfavorable cut direction or an already finished end. Their suitability is assessed using a separate specification, not the overall figure. If additional short parts are needed, first check the actual shape and length of each suitable remnant.
Please note: the calculation was performed for one selected model along the entire route. Mixing KZ-006 with KZ-016 on adjacent parts of the wall will result in different depths and a mismatch of the decorative line. For independent interior zones, combining is possible, but then separate transition units and new cutting maps must be developed.
How much do KZ-006 and KZ-016 cost in oak and beech
Let's compare four "SKU × wood" combinations by the prices on the official STAVROS product pages as of November 18, 2026. For each option we take the quantity of whole pieces, not the finished linear footage. The estimate shows the price of the blanks themselves before delivery, packaging, finishing, labor, and consumables.
| Model and wood | Price per plank | Bypass, 8 pcs. | Break, 7 pcs. | Bypass with 1 spare | Break with 1 spare |
|---|---|---|---|---|---|
| KZ-006, beech | 3 530 ₽ | 28 240 ₽ | 24 710 ₽ | 31 770 ₽ | 28 240 ₽ |
| KZ-006, oak | 5 040 ₽ | 40 320 ₽ | 35 280 ₽ | 45 360 ₽ | 40 320 ₽ |
| KZ-016, beech | 4 450 ₽ | 35 600 ₽ | 31 150 ₽ | 40 050 ₽ | 35 600 ₽ |
| KZ-016, oak | 6 640 ₽ | 53 120 ₽ | 46 480 ₽ | 59 760 ₽ | 53 120 ₽ |
The calculation is easy to verify using the beech KZ-006 as an example: 8×3530 = 28,240 rubles for the bypass and 7×3530 = 24,710 rubles for the break. The difference of 3,530 rubles is the cost of one wooden plank for this particular cutting option. For the beech KZ-016, the same difference is 4,450 rubles. When choosing oak, the difference is 5,040 and 6,640 rubles respectively. This is not guaranteed savings after installation: each scheme may have different costs for processing corners and ends.
If you need to consider oak cornice KZ-006 55×20 mm, do not transfer the minimum card price into the estimate: it may refer to MDF. Similarly, the request buy wooden cornice 54×54 mm requires selecting beech or oak rather than calculating by the first displayed price. The material, length, cross-section and selected finish must match in all order lines.
A significant cost item is rigid packaging for long profiles. Product cards may contain information about the packaging frame, but the order total and the cost of delivery to Nizhny Tagil must be verified in the cart or when agreeing the invoice. Even if packaging is mentioned next to the product, do not assume it is automatically included in the amounts stated here. Fasteners, decorative finishing, any substrate preparation and installer services are calculated separately.
How to reduce material consumption without compromising the finish
Optimization should begin not with replacing oak with beech and not with trying to eliminate the spare blank, but with clarifying the actual run. First check whether the cornices above the cabinets will be visible. If a fully hidden section is not needed by the design, do not include it in the schedule. But you cannot remove a part arbitrarily if it provides a joint, covers a finished edge or is necessary for the geometry of the whole composition.
The second tool is sensible joint placement. A 3200 mm section can be assembled from 2250 and 950 mm, but it does not have to be divided exactly that way. After marking the mitre cuts, the craftsman may find another combination that uses the offcut from the adjacent wall. Before changing the cutting plan, check whether the seam would end up at an external corner or directly above a bright light fixture. Sometimes a slight increase in waste improves the appearance and reliability of installation.
The third tool is choosing the profile to suit the scale of the room. In our example, the thinner KZ-006 costs less than KZ-016 for the same number of strips, but this does not mean that a larger profile is not justified. If the kitchen has high ceilings, pronounced architraves and enough space below the upper line, KZ-016 may better match the interior concept. The savings from an unsuitable product often disappear when trying to redo the finish.
The fourth tool is a preliminary finish sample. If enamel is planned, you should not order an unapproved finish just because of the minimum blank price. The protective coating, quality of preparation and compatibility with kitchen conditions determine the durability of the appearance. Selecting a color on a small sample can prevent the need to repaint all corner pieces.
Finally, record the cutting plan in a convenient form: part label, finished length, end type, allowance, source strip and installation zone. Even a simple schedule from our article will help you avoid sending a long, intact cornice to a short side edge when it is intended for a large wall. It is especially useful to mark the direction of the wood grain and the face side of the profile.
Installing a wooden ceiling cornice near ventilation
Work begins with checking the base and marking the line, not with applying adhesive. The installer must know where the load-bearing part of the structure runs, how level the ceiling is and whether there are any serviceable elements. If the box covers ventilation ducts, it cannot be used as a universal mounting support without assessing the structure. The fastening method is determined by the weight of the selected product, the actual base and the fastening instructions.
Before cutting, it is advisable to hold a sample of KZ-006 or KZ-016 against the wall. This will show how the profile contacts the surfaces and how far it projects into the room. Then check the angle pattern: an internal right angle, an external box projection and a slanted section require different solutions. The corner joint should be dry-fitted before final fixing, especially if the walls do not form exact 90 degrees.
For a wooden profile, the condition of the material and the room conditions are important. It is not recommended to start installation immediately after moving cold blanks into a warm, humid kitchen without agreed preparation. There is no single universal acclimatisation period for all species, finishes and conditions. Follow the manufacturer's and installer's instructions, and check the compatibility of the adhesive or fastening system with the base.
Joints along the wall should preferably be placed where there are no opposing loads from moving panels. In corners, large inaccuracies should not be filled with random filler: after seasonal changes in the material, such a repair can become noticeable. A more reliable approach is precise marking, trial fitting, a suitable joining material and careful treatment of the ends.
Above the work area, additionally check for sources of intense heat, wet steam and contamination. Wooden decor does not replace the requirements for distances from gas or electrical appliances, air ducts and other equipment. If the appliance manufacturer's instructions restrict the installation of combustible materials near a certain area, the decorative finish is adapted to these restrictions, not the other way round.
Inspection hatch and ventilation grille: what must not be blocked
The main technical limitation of this article is the need for ventilation servicing. Access for inspection must remain functional after the renovation is complete. A beautifully installed cornice does not compensate for a situation where the panel cannot be opened, removed or put back. Before ordering, ask the specialist to show how the inspection unit opens and which area needs clear space.
If the inspection panel is located on the front face of the box, its opening may not intersect with the ceiling cornice. But this needs to be checked, not assumed. Hatches have different opening directions, concealed fastenings and removal methods. Sometimes the cover is first pushed up, then towards you; sometimes it slides out along guides. In these cases, the profile at the top may get in the way even when there is a visible gap between the hatch and the ceiling.
Ventilation openings must not be covered or have their free area reduced with decorative wood, adhesive, filler or protective film. If the grille is close to the cornice line, first agree on the technical placement of the device, and only then choose the decorative composition. Trying to hide it behind wood creates not only an operational problem but also a risk of damaging the finished trim during maintenance.
The option with a gap next to the box often becomes a successful compromise: it emphasises that the functional part of the kitchen has its own independent volume. However, even with a gap, you need to make sure that the free ends do not overhang the serviced panel. The distance from the box to the end of the cornice is determined by the actual access path, not by an average decorative offset.
Stretch ceiling, light fixtures and upper cabinets: compatibility check
A decorative wooden profile can be combined with different types of ceilings, but the fastening methods are not the same. A stretch ceiling membrane has no supporting surface designed for arbitrary loads. If the decorative element must be located next to it, the installation solution is provided on a suitable structural base or a project anchor agreed upon before the finishing is completed. A wooden profile must not be glued to the stretched membrane itself.
Drywall ceilings also require clarification. The mere presence of sheet cladding does not mean that it will support any profile. The fastening method depends on the frame design, the number of layers, the distance to solid elements and the weight of the part. On a box, these questions are especially important because its walls may be thin and serve solely as cladding for utilities.
Light fixtures affect how joints are perceived. Point lighting along a wall makes surface irregularities and mismatched patterns on adjacent elements noticeable. Before the final cut, check the room with the working and decorative lighting on. Sometimes moving a joint by a few dozen centimetres gives more visual effect than choosing more expensive wood.
Wall cabinets, in turn, may require space for adjusting fasteners and opening doors. If the upper facade lifts up, measure its actual path. For KZ-016 with a depth of 54 mm, the risk of a spatial conflict may be higher than for KZ-006 with a depth of 20 mm, but the final answer depends on the orientation and shape of the profile. This assembly cannot be assessed by the name “kitchen cornice” alone.
How to combine a cornice with mouldings and wooden trim
A wooden ceiling cornice is usually perceived better when the other decorative elements support its scale and shade. In a kitchen, this could be a wall moulding frame on a free wall, a wooden door casing or a neat transition to a furniture column. At the same time, there is no need to fill every available corner with wood: if the ventilation box already creates a strong geometric step, additional decor can make the upper part of the room too fragmented.
Before buying related products, it is convenient to study Buy wooden trim as a category, and then return to a specific cornice model. Different products, even from the same wood species, may have different profiles and visual proportions. Matching wood does not guarantee a perfect joint; the connections are designed according to the actual shape.
Additional context on the purpose of slats, corners, architraves, and cornices can be found in the materials “Types of wooden materials” и “Wooden materials for finishing”. These publications help distinguish product groups, but they do not replace our calculation of the ventilation duct. For a room with an engineered protrusion, what matters is precisely the preliminary decision on the bypass, the finish, and maintenance.
If in Nizhny Tagil the finishing of a vertical protrusion with decorative corners is already being planned, it is useful to compare approaches with the article about the wooden corner UG-001 for a stepped screen. However, a corner does not replace a ceiling cornice, and the material from that article addresses a different product task.
Seven mistakes when ordering wooden ceiling cornices
The first mistake is to count only the rectangular perimeter. The customer records 14.8 meters and does not account for going around the box. The consequence: there is not enough material for two side faces and the front part. The correct approach is to build a separate list of straight sections and decide whether the box is part of the decorative run.
The second mistake is treating the length of MDF as the length of solid wood. The product card nearby shows options made of different materials; the customer takes 2600 mm from MDF and plans to cut oak to that size. The consequence: unexpected joints and the wrong number of whole products. The solution is to record the SKU, species, cross-section, and factory length in a single line.
The third mistake is ordering based on total linear meters alone. Seven strips may seem sufficient in total for going around, but they do not fit into the proposed cutting map with allowances. A real parts list and allocation per each source product will help avoid the mistake.
The fourth mistake is covering the inspection hatch. The cornice looks continuous, but the service cover cannot be opened. Before finishing, you need to check service access, and if necessary choose a break in the line, change the position of the end, or revise the architectural solution with the involvement of a specialist.
The fifth mistake is cutting all corners using a 45-degree template. Real walls may deviate from a right angle, and the outer turns of the box differ from the inner ones. As a result, open seams appear. The correct approach is to first measure the actual angle, make test cuts, and only then proceed to the final parts.
The sixth mistake is not checking the upper kitchen fronts. A large cornice interferes with the cabinet door, its adjustment or removal. It is necessary to conduct a trial fitting with the doors opened to the full angle and agree on the installation height before ordering the wood.
Mistake seven — comparing estimates without identical scope. In one option, only the price of eight planks is indicated; in the other, painting, delivery and installation are added. The comparison turns out to be false. Separate the cost of products, packaging, labor and additional services; record the date of catalog prices.
How to place an order and arrange delivery of wooden cornices to Nizhny Tagil
Prepare a short specification for the purchase. For example: “KZ-006, solid beech, section 55×20 mm, length 2400 mm, 8 whole planks, box bypass option; agree on the finish and delivery separately.” Attach a diagram with the kitchen dimensions 4200×3200 mm, the position of the 650×400 mm box and a parts map. If the final dimensions have not yet been taken, clearly mark the project as preliminary.
An alternative line for more voluminous decor: “KZ-016, solid oak, 54×54×2400 mm, 7 planks for the option with a broken line; check the ends and access to the inspection hatch.” It is important not to transfer the MDF dimensions or another price from the general product card into it. When ordering one model for all sections, it should not be mixed with another without agreeing on the visual transition.
Conditions delivery of wooden cornices across Russia are clarified on the official STAVROS page. For long products, protective packaging, the integrity of the ends and the size of the cargo unit are important. The pickup address in Nizhny Tagil, carrier availability and the final logistics cost must be confirmed at checkout. It is not permissible to promise a local warehouse or a fixed transportation time solely because the goods are available in another region.
Upon receipt, check the integrity of the frame and packaging, and that the article, wood species, quantity and length match the specification. Before cutting, it is useful to inspect the surface in daylight, lay out the planks along the intended walls and make sure there is no damage. Any discrepancies found should be recorded according to the seller's and carrier's rules before the product is cut or processed.
What to send with the request
Please provide the delivery address, a list of intact products, the material, the cross-section, the intended finish, and a contact for approval. The attachment must include a photo of the duct box with the inspection unit open, a dimensioned sketch, a list of straight sections, and a description of the chosen route A or B. The more accurate this information is, the easier it is to verify the order before payment and avoid shifting all the responsibility onto guesswork from a single photo.
Frequently asked customer questions
Where can I buy a wooden ceiling cornice in Nizhny Tagil?
You can choose oak and beech solid wood cornices from the official STAVROS catalog, with order placement and delivery coordination. Two of the profiles reviewed, KZ-006 and KZ-016, are suitable for our kitchen. Be sure to specify the material and the 2400 mm length in your request: similar MDF options on the same product cards have different specifications. Delivery availability and the final amount are confirmed at checkout.
How does KZ-006 differ from KZ-016 in a kitchen with a duct box?
KZ-006 has a wooden cross-section of 55×20 mm and looks more compact in depth. KZ-016 is 54×54 mm, so it takes up more noticeable space at the ceiling boundary. On a duct box, this affects the appearance of the corners, the need for free space, and the choice of mounting base. You cannot switch from one model to the other without recalculating and test-fitting, even if their first digit seems close.
Can a wooden cornice run directly along a ventilation duct box?
Only if the structure allows mounting and full access to the necessary inspection points and ventilation elements is ensured. The cladding panel alone does not guarantee load-bearing capacity. Sometimes it is safer to end the profile before the duct box and continue after it, carefully finishing the exposed ends. The decision is made after checking the actual structure and maintenance requirements.
How many planks are needed for a 4200×3200 mm kitchen?
In our training example, with a 650×400 mm duct box located on the long wall, the wrap-around option has 15.6 m of finished line and fits into eight planks with the specified allowances. The break option has 14.15 m and fits into seven. This is not a universal answer for all kitchens of this size: the position of the protrusion, additional openings, corners, and cutting requirements can change the number of products.
Which is more cost-effective: an oak or beech cornice?
Beech is cheaper in proven wooden versions of both models: for example, KZ-006 in beech costs 3530 ₽ per strip, in oak — 5040 ₽. But the choice is not determined by price alone. With a clear finish, the difference in texture and shades matters; with an opaque paint finish, the preparation technology matters. When comparing sets, count the same number of whole items, and list services and delivery separately.
Why can't you simply divide 15.6 meters by 2.4 meters?
Because long installation lines will have to be assembled from several pieces, and short segments cannot always be combined within the original strip without waste. In addition, corner joints require length for the miter cut, and sawing consumes part of the material. The article presents one verifiable cutting plan with piece-by-piece distribution, which is better than a simple estimate by linear meters.
What should the cut angle be near the box?
It is determined by the actual joint and profile, not just by the word “rectangular.” For a perfect right angle, the half-cut is often 45 degrees, but real walls and the box shell may have deviations. The outer and inner sides require the correct orientation of the cut. Before mass trimming, it is advisable to do a trial fit and adjust the allowances to the actual cross-section.
Can the profile be glued to a stretch ceiling?
No, a stretch ceiling membrane cannot be considered a suitable support for a wooden cornice. The part is fixed to designated strong bases or pre-designed embedded structures in accordance with the agreed technology. If the ceiling is already installed and there is no suitable base, a safe mounting option must be developed or this unit abandoned, rather than reinforcing the adhesive on the membrane itself.
Is an allowance needed for one additional cornice?
A reserve may be reasonable for complex angles and expensive finishes, especially if the actual dimensions are not final. But the ninth strip for the perimeter and the eighth for the break are a separate reserve, not part of the completed cutting plan. First agree on the possibility of adjustment and return of unused items. Sometimes one additional element prevents an installation delay, and sometimes a properly made map allows you to do without it.
How to choose the finish of a wooden cornice next to kitchen facades?
First determine whether the ceiling line should repeat the wood grain of the furniture or support the wall color. For natural oak and beech, different finishing options are suitable, but they should be tested on a sample. Agree on acceptable shade variations, coating compatibility with kitchen conditions, end-grain technology, and subsequent maintenance. It is better to create a small trial composition before staining the entire set.
Buy STAVROS wooden ceiling cornices with delivery to Nizhny Tagil
For a kitchen with a ventilation duct, first determine a safe route and preserve access to utilities, then choose the profile and material. In the training calculation, going around requires eight whole wooden planks, and with a break — seven; both figures are supported by separate cutting maps. KZ-006 is suitable for a more compact upper line, KZ-016 creates a more noticeable architectural volume. It is better to confirm the final choice with a sample, the type of duct, and a check of the space above the cabinets.
Once the dimensions are clarified, you can buy wooden cornice in a suitable version made of oak or beech, agree on the set and delivery terms. In the order, specify the article number, length 2400 mm, wood species, number of planks, and intended finish. A prepared specification helps avoid mixing MDF with solid wood and makes the order predictable even before installation begins.