













Article Contents:
- Where to buy wooden slats in Lipetsk and what to decide before ordering
- RK-001 slat: what solid wood sizes are available and what the designation means
- Which decorative slats to choose: narrow 24×5 or wide 40×5 mm
- Oak or beech: which solid wood to order for a single wall
- Hidden door: where the decorative wall ends and the moving structure begins
- Training project in Lipetsk: a 5400 mm wall with an off-center door
- Why equal spacing matters more than an equal number of slats on each side
- Calculating RK-001 at 24 mm width: 60 mm spacing and 74 verticals
- Calculating RK-001 at 40 mm width: 80 mm spacing and 55 verticals
- If both margins are centered separately, there will be 56 wide slats instead of 55
- Four reference dimensions that determine the final layout
- Cutting map: why one vertical requires one full slat
- Finished linear footage, purchase length and short offcuts
- How much RK-001 oak and beech wooden slats cost
- When to order two extra planks and when no spare is needed
- Wall preparation: the background between the slats will remain visible
- Installing slats near a door: a sequence that protects the door leaf
- Lighting, texture and color: why two identical spacings look different
- Sockets, switches, cabinet and the lower line of the slatted field
- How to combine RK-001 slats with wooden skirting and moldings
- How to order RK-001 with delivery to Lipetsk without mix-ups
- Mistakes when buying wooden slats for a hidden door
- When slatted finishing is better changed or postponed
- Customer questions about wooden wall slats
- Can RK-001 be installed directly on a concealed door?
- Why does a 24 mm width give more detail than 40 mm?
- Do you need to order exactly 74 planks for a real apartment?
- Can you get two verticals from one 2400 mm slat?
- Why is the wide beech layout in the example almost no more expensive than the narrow one?
- What should I do if the 80 mm gap to the right of the door seems too large?
- Which is better next to a light-colored door — oak or beech?
- Can I first fix some of the slats and then decide where the switches will be?
- Will the slats be supplied in matching shades?
- How can I find out the delivery cost to Lipetsk?
Where to buy wooden slats in Lipetsk and what to decide before ordering
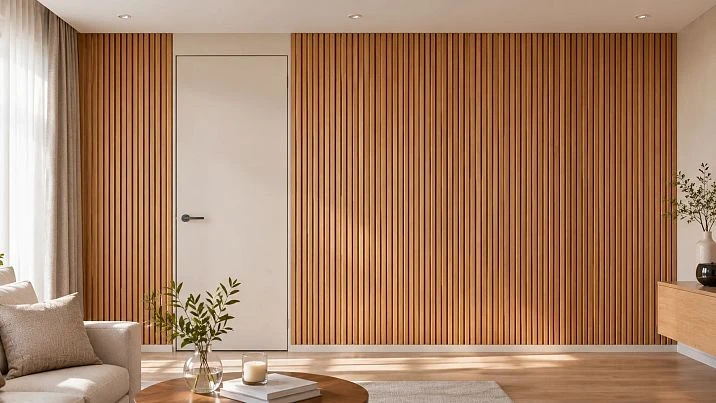
A wall 5.4 meters wide is planned to have vertical wooden slats. But in the middle there is not an ordinary partition, but a concealed-mount door, and it is offset to the left. On one side there will be 1.6 meters of trim, on the other — 2.9 meters. If you start marking the slats from each edge separately, two different rhythms may meet at the door: on the left the gaps look even, while on the right the last element ends up almost flush against the door leaf. This is especially noticeable under side lighting.
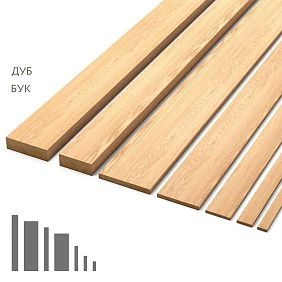
For such a project you can buy wooden slats in Lipetsk with placing an order on the STAVROS website and agreeing on delivery to the city. The calculation below uses one specific item — RK-001 in solid oak or beech. This model is available in sections 24×5 and 40×5 mm, and the length of the wooden blank is 2400 mm. The slats are installed vertically, and the finished height of each in the training diagram is 2300 mm.
The main decision is made before purchase: should the decorative lines continue the overall spacing across the doorway, or should each section have its own symmetrical margins? Both approaches are possible, but the number of elements, edge offsets and appearance will differ. The door opening method and actual installation clearances take priority over a nice diagram on paper. In this project, the wooden elements are placed on the fixed sections of the wall, and not on the door leaf.
The delivery region should not be confused with the place of production or the warehouse. Placing an order with delivery to Lipetsk is possible after confirming the batch composition, packaging and transportation conditions. No local warehouse or specific lead time is implied here. If the interior is still being designed, it is best to attach a drawing to the order: it will allow the selected wood species, section, quantity and required treatment to be verified in a single document.


RK-001 slat: what solid wood sizes are available and what the designation means
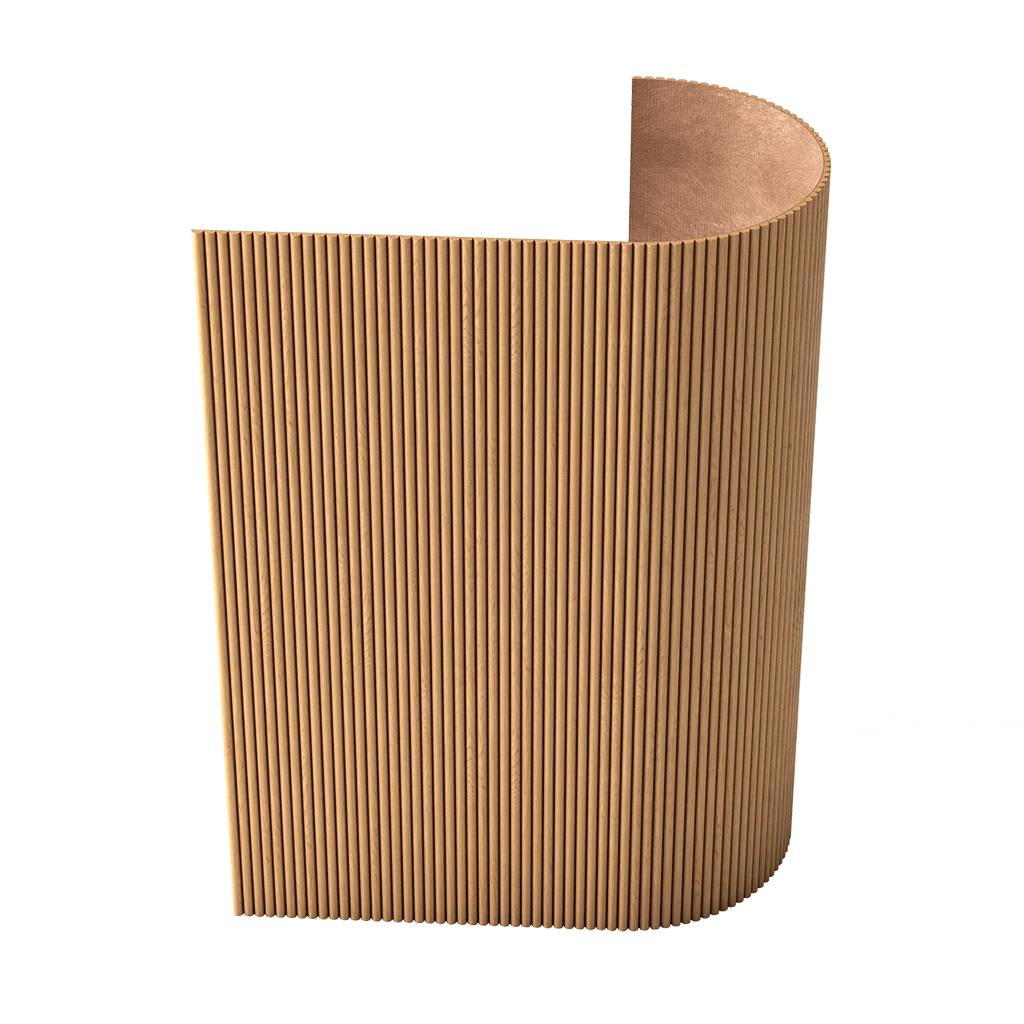
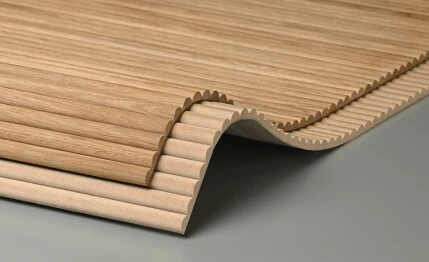
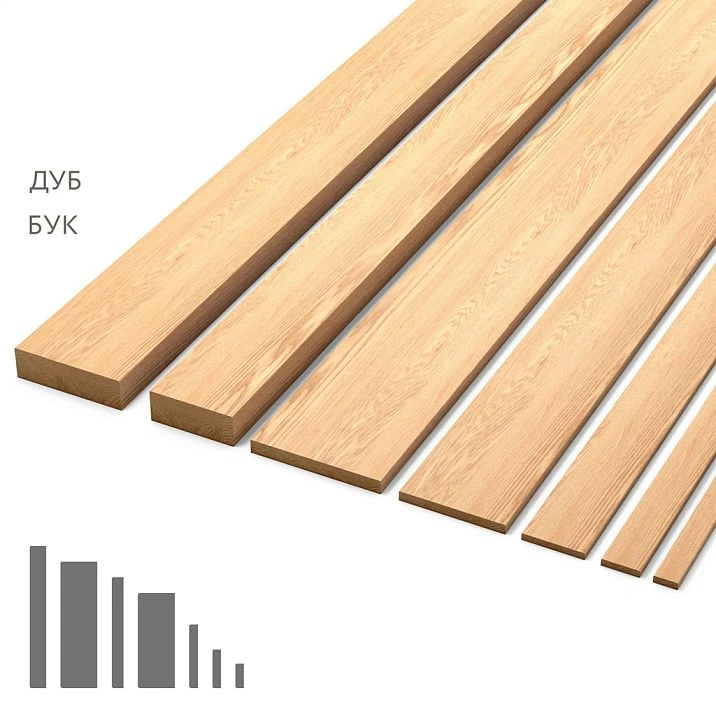
RK-001 has several sections, but for a wall with a hidden door we will consider two thin options. 24×5 mm means a face width of 24 mm and a thickness of 5 mm; 40×5 mm — a width of 40 mm at the same thickness. The length of both considered versions in oak and beech is 2400 mm. These data are published in the product page for the RK-001 wooden slatThere is a fundamental difference here between width and thickness: both battens protrude from the prepared surface by approximately their own thickness, but one covers an almost twice as wide strip of wall.
| RK-001 version | Face width | Thickness | Workpiece length | Species in the calculation |
|---|---|---|---|---|
| narrow | 24 мм | 5 мм | 2400 мм | Beech, oak |
| Wide | 40 мм | 5 мм | 2400 мм | Beech, oak |
Do not confuse this item with a ready-made slatted panel. Individual wooden planks let you choose your own spacing, start the pattern at a given distance from the door, leave a gap at the ceiling and match the tone of the base. A ready-made panel may already have a fixed pitch, its own backing and a different mounting thickness; using its area and price to calculate individual RK-001 would be wrong. Likewise, RK-002 should not automatically be considered another version of the RK-001 solid wood range: it is a different product with a different structural composition.
On the face of the finished composition, the nominal millimetres are not the only thing that matters. A slight unevenness in the wall plane becomes more noticeable when each batten forms a straight vertical line. A 5 mm thick profile does not have much margin for masking defects in the base. Before purchasing, it is worth checking whether the surface will first need levelling, old fixing holes filling or the position of the concealed door frame changing. Otherwise, precise marking will not fix a bad plane.
Our factory also produces:


Which decorative battens to choose: narrow 24×5 or wide 40×5 mm
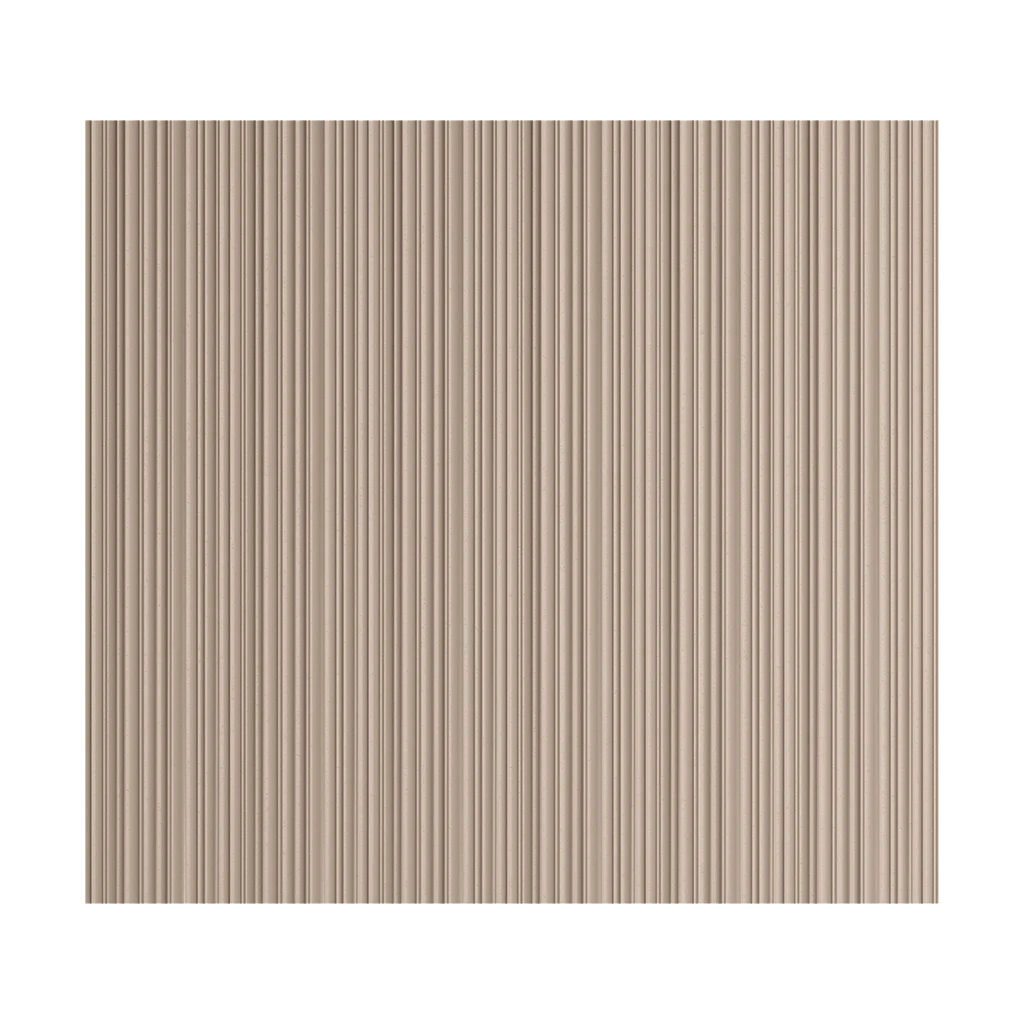
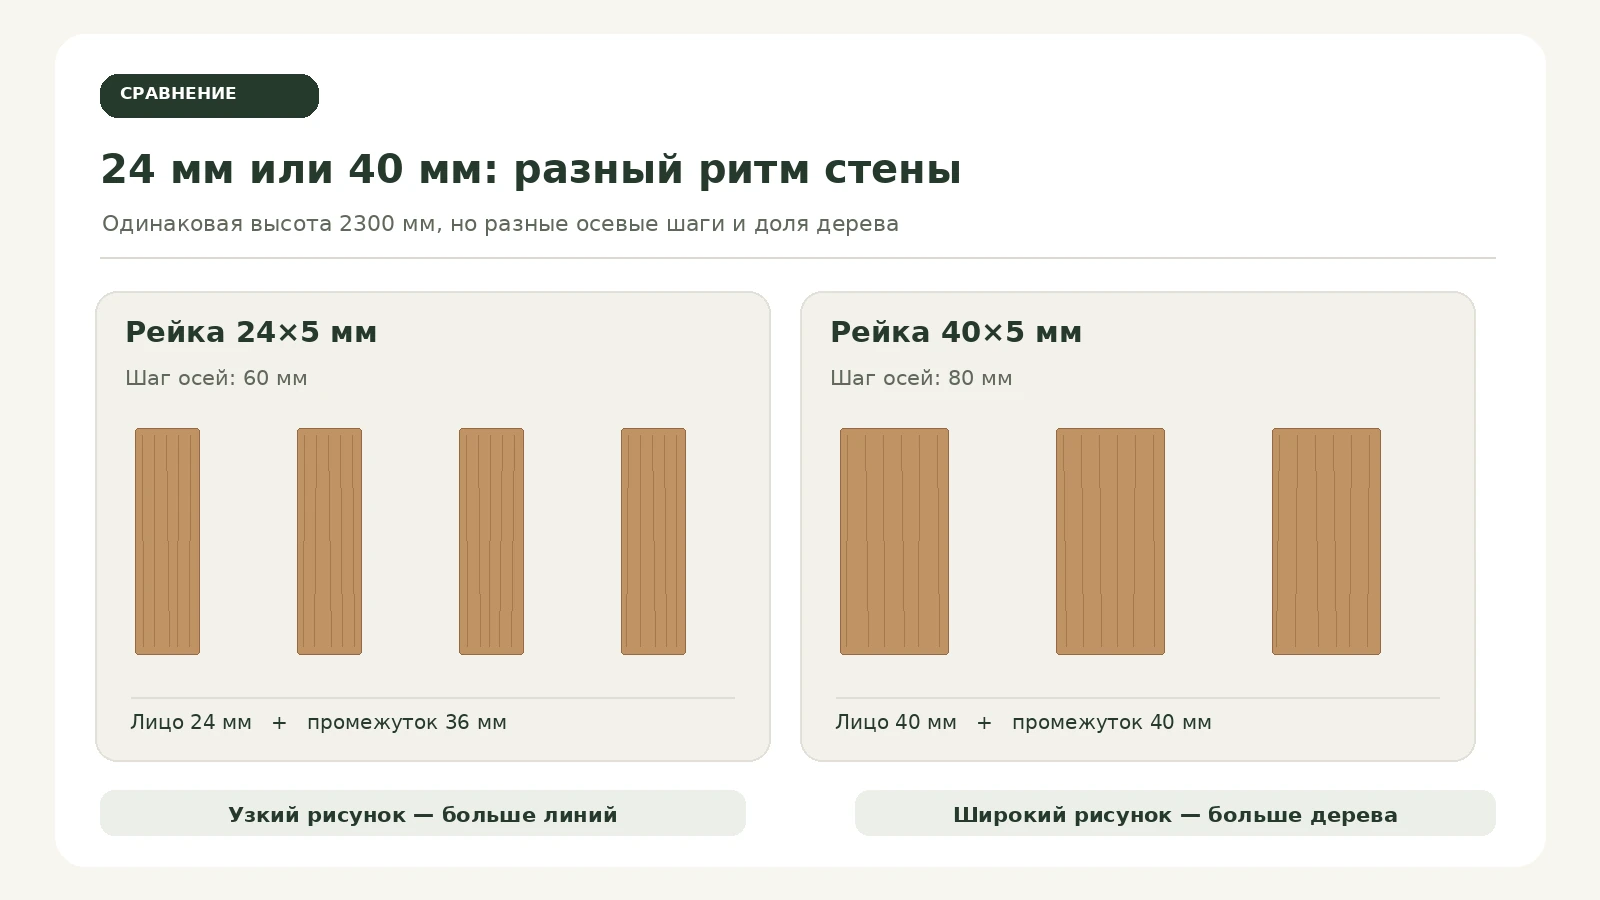
A narrow profile gives a more finely divided pattern. If you leave 36 mm between the front edges, the centre-to-centre pitch will be 60 mm: 24 mm of wood plus 36 mm of exposed wall. This rhythm reads well as a series of separate thin verticals. From a distance of several metres the surface looks fairly light, since the painted base occupies most of the field. Up close, a person sees not only the repeating shadows but also the seams along the sides of each plank — so the quality of the wall preparation is just as noticeable as the quality of the wood.
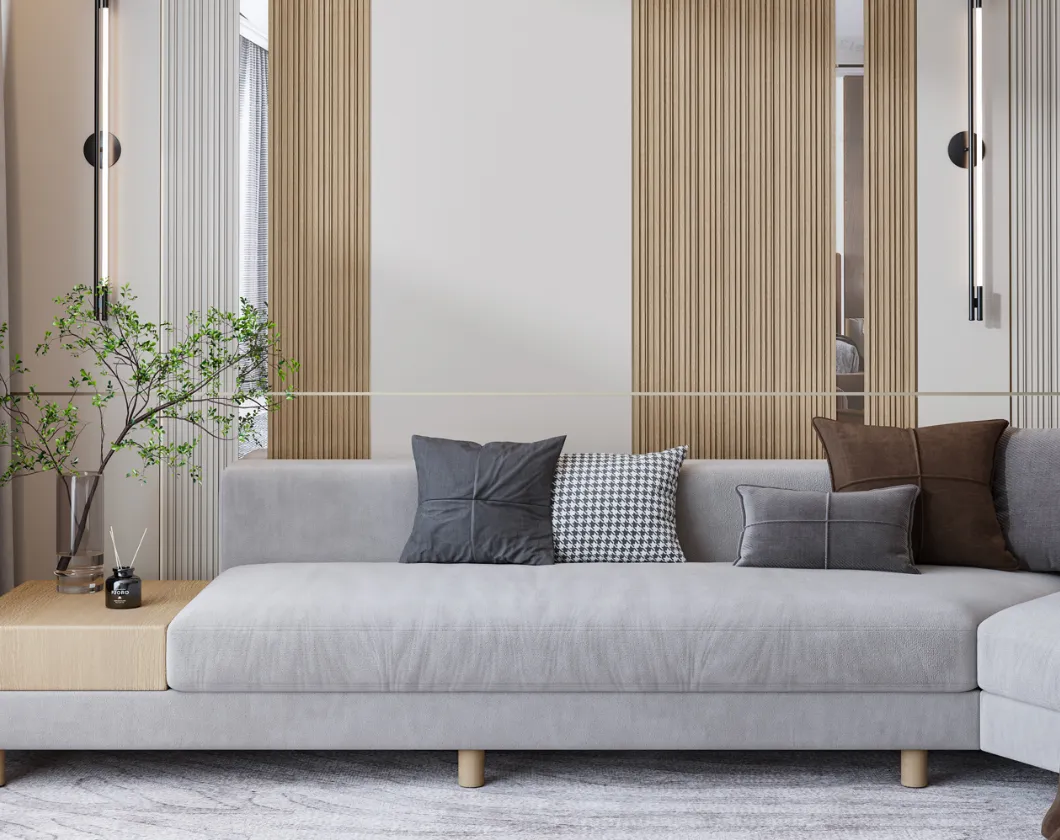
For a width of 40 mm, let us take a different centre-to-centre pitch — 80 mm. Between adjacent battens there will be 40 mm of exposed wall. This is not an attempt to replace one model with another while keeping the same number of parts. Wide planks will make the surface denser and increase the proportion of wood in the composition. If you paint them the colour of the wall, the relief will remain the main feature. With a clear oak finish, the pattern will be felt much more strongly: wide strips provide more continuous wood grain.
| Parameter of the selected layout | RK-001 24×5 | RK-001 40×5 |
|---|---|---|
| Front strip width | 24 мм | 40 мм |
| Centre-to-centre pitch | 60 мм | 80 мм |
| Open gap | 36 мм | 40 мм |
| Protruding element thickness | 5 мм | 5 мм |
| Pattern type | More closely spaced | Calmer, wider |
The seemingly identical free distance between the strips does not mean an identical composition. With gaps of 36 and 40 mm, the viewer may barely notice the difference in open space, but will notice that the wooden parts have become wider. That is why choosing a cross-section from a single photo in the catalog is inconvenient. It is enough to make a test fragment about 600–800 mm wide and look at it from the doorway, from the center of the room, and in evening light.
Before payment wooden slats for walls it is the pair "width — pitch" that should be approved. The entry "decorative slats every 40 mm" is ambiguous: it could mean 40 mm between centers or 40 mm of free distance. In the order, it is better to specify both values. For a 40×5 profile with an 80 mm pitch, there will be no error: the wood width is 40 mm, and the light gap is also 40 mm.
Get Consultation
Oak or beech: which solid wood to order for one wall
Oak is usually chosen when the wood texture itself is an important part of the composition. On long vertical strips, the direction of the grain creates a noticeable pattern even without additional decoration. However, two oak planks are not required to have the same shade or the same pattern placement. If a particularly color-even wall is required, the selection of products and a common sample of the finish coating should be agreed upon, rather than expecting natural material to be identical.
Beech is also considered, among other things, for finishing with opaque enamel. With such a finish, the contrast of the wood grain becomes less noticeable, but the evenness of the lines and the quality of the end faces come to the fore. This does not make beech an "obligatory material for painting": oak can also be painted, and beech can be finished with transparent products. The decision depends on the character of the interior, the shade sample, the chosen technology and the budget for a specific section.
If the slats are adjacent to a wooden door leaf, you cannot automatically select them based only on the word "oak". The color depends on the species, grading, treatment, oil or lacquer, the age of the surface and the lighting. In daylight, a small difference may seem acceptable, but under warm light fixtures it may start to stand out. It is better to compare finished samples next to the door and the floor covering. Two parts of the same wall must have a single finishing solution, otherwise even the same spacing will not visually unite them.
Quantity is also important for our training project. With the chosen scheme of 24-mm slats, there will be more planks than with 40-mm ones, although each narrow one costs less. Therefore, the statement "a narrow slat is more economical" is not always true. Prices and the full estimate will be given below. Before moving on to them, we need to sort out the geometry: with a hidden door, it is precisely this that determines the number of whole blanks.
Hidden door: where the decorative wall ends and the movable structure begins
A concealed-mount door can be almost in the same plane as the wall, but this does not turn the door leaf into its immovable continuation. The leaf moves relative to the frame, has working gaps and limitations on the load on the hinges and cladding. If a wooden slat is glued so that it crosses the opening line, the end face may catch the adjacent plank or the edge of the opening during movement. A similar mistake occurs when the finish is attempted to be carried continuously from the fixed wall onto the door without agreement with the door system manufacturer.
In the composition under consideration, the slats are located to the left and right of the opening, while the door plane remains smooth. This is an independent architectural solution: the door reads as a calm pause between two decorative fields. For another task, where the customer wants to completely hide the door behind slatted cladding, a separate check is needed for the permissible mass on the leaf, the thickness of the cladding, the opening angle, the position of the hinges and the latch. A standard table of wall molding consumption does not replace such a check.
Measurements are taken not from a conventional line in the visualization, but from the actual boundary of the fixed base. The frame of the hidden door, the plastering and the finish coating can shift the start of the decorative field by several millimeters. First, determine to what point the finish is allowed to be brought from the point of view of the door mechanism. Then check how much the resulting clear dimension differs from the design 1600 and 2900 mm.
A simple test is especially useful: fully open the door along the permitted trajectory and mark the extreme positions of the leaf, the handle and protruding parts. Separately check whether the handle could touch the slat during accidental sharp opening. If a risk of impact is detected, change the offset or install an agreed stop. You cannot arbitrarily assign "safe 10 mm" for any door: the required dimension is determined by the actual hardware and the opening method.
The slat thickness of 5 mm itself also matters here. It is added to the actual wall plane and does not disappear due to its small size. For a door system designed for a flat painted surface, even such a protrusion sometimes requires adjusting the installation position of the last plank. Therefore, the installer must receive not only the wall drawing but also information about the door frame.
Training project in Lipetsk: a 5400 mm wall with an off-center door
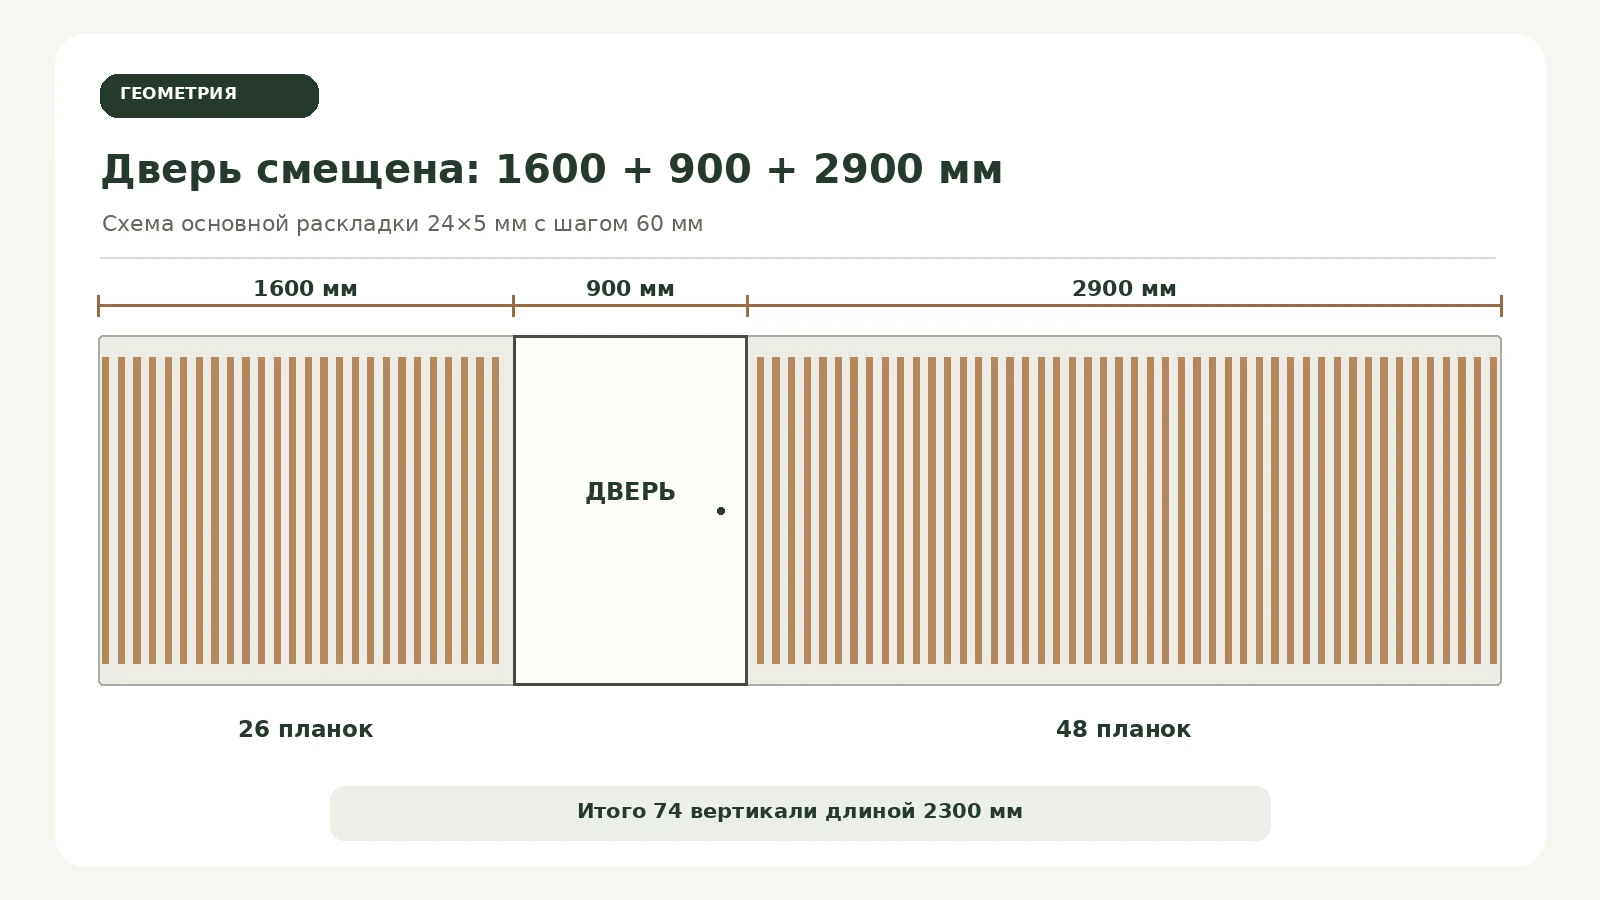
Let's take a straight wall 5400 mm wide. From the left corner to the start of the opening — 1600 mm; then comes a door opening 900 mm wide; from it to the second corner on the right — 2900 mm. The check closes the dimension chain: 1600 + 900 + 2900 = 5400 mm. The finished length of the vertical wooden elements is 2300 mm, the factory length is 2400 mm. All values are conditional, intended for calculation, and are not measurements of an existing apartment.
| Section | Coordinates along the wall | Width |
|---|---|---|
| Left decorative panel | 0–1600 mm | 1600 мм |
| Door without slats | 1600–2500 mm | 900 мм |
| Right decorative panel | 2500–5400 mm | 2900 мм |
| Usable width of two panels | 1600 + 2900 mm | 4500 мм |
| Length of one finished vertical | from the bottom to the top line | 2300 мм |
The area of the two fields without the doorway is 4.5 × 2.3 = 10.35 m². This is the base area, but not the area of the wooden cladding: the wall will remain visible between the slats. For estimating labor for painting the base, this value is useful, but for purchasing RK-001 it is almost irrelevant. Slats are counted in pieces of a specific length, taking into account the width, spacing, edge offset, and all zones where installation is prohibited.
Note the position of the door: the left wall section is noticeably narrower than the right one. If each field is simply "filled with slats to the edge," there will be two random strips of different widths at the doorway. Therefore, it is better to run the marking line across the entire wall at once and mark the door in advance as a prohibited area. Below we will show two methods — maintaining a common grid and independent centering — and compare their consequences.
Why equal spacing matters more than an equal number of slats on each side
A well-organized slatted wall has a pattern that the eye reads before the exact number of planks. It is the distance between repeating vertical lines. If the spacing on the left is 60 mm and on the right 63 mm, over a short span the difference seems unnoticeable. But as you move along the wall, the pattern gradually "drifts," and near the door the mismatch can become the main impression of the entire finish.
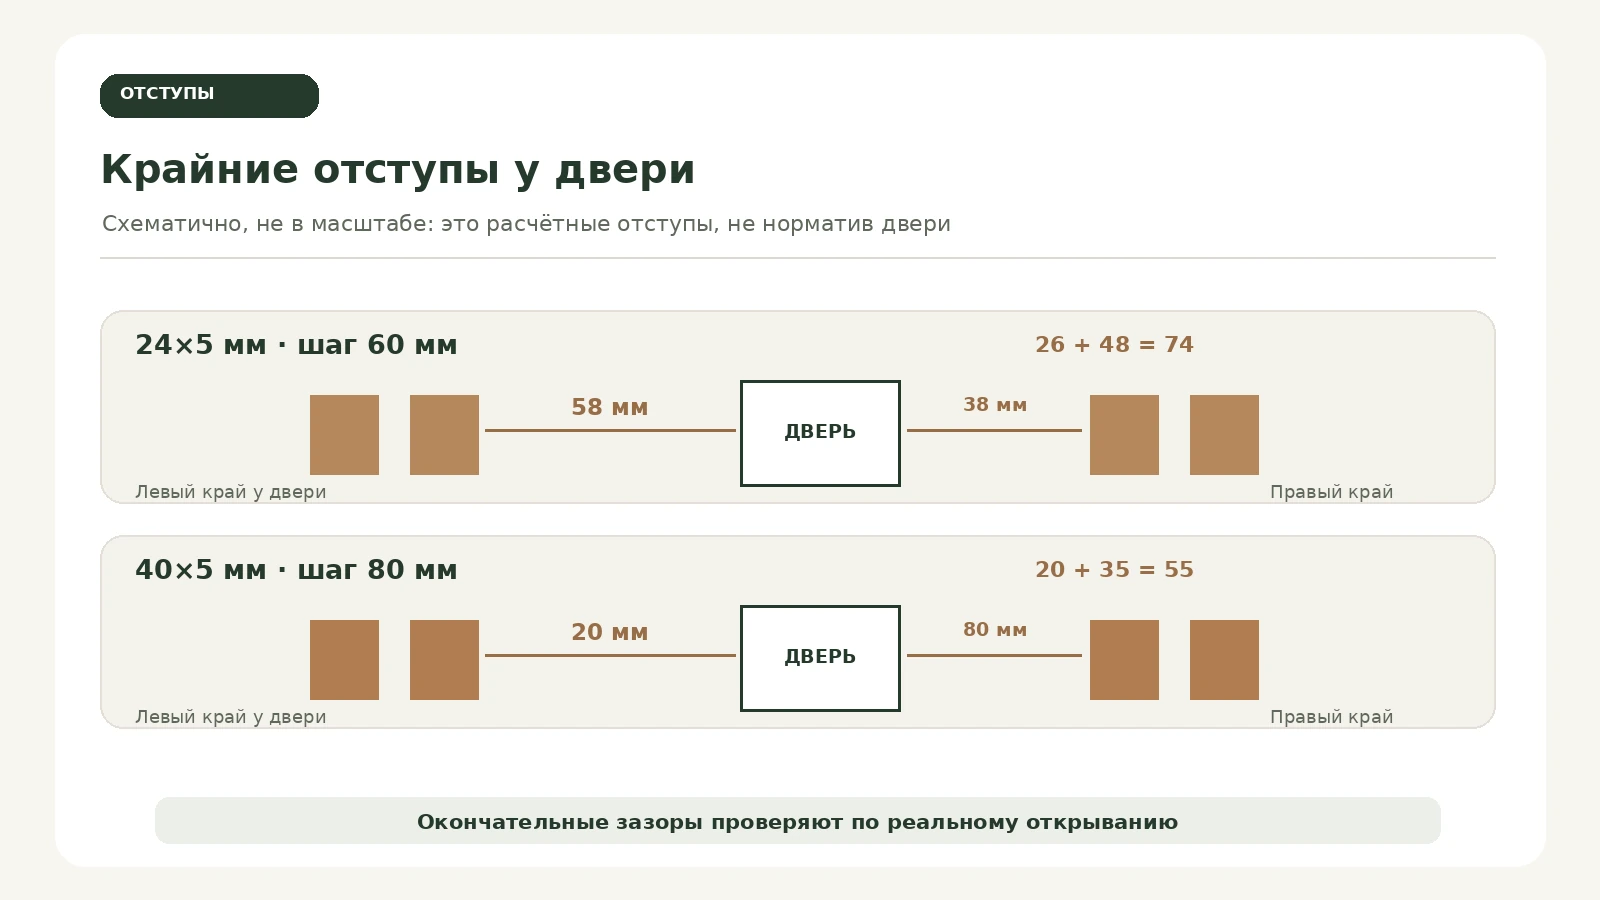
A common spacing means that the centers of the slats are located on a single conditional grid, even where some lines would fall on the door and therefore are not installed. The doorway does not disrupt the rhythm: on the right, the grid continues at the same coordinates. However, symmetry of the side offsets is not guaranteed. On the left there may be 18 mm to the corner and 58 mm to the door; on the right, 38 mm to the door and 18 mm to the corner. Such asymmetry is not an arithmetic error; it is the result of a single axis and an opening that is offset relative to the center of the entire wall.
The second method is to center the left and right fields independently. Then the edge offsets on each field will be equal, but the absolute centers of the slats on different sides of the door may not align with a single continuous grid. This method is especially appropriate when the door has a wide smooth surface and the two fields are perceived as independent inserts. Its drawback will show if you later want to continue the layout across the door or the adjacent niche: new coordination of lines will be required.
The practical rule is this: first determine what matters more for the specific interior — continuous spacing or equal edge margins. There is no need to declare one method correct for all rooms. Our main calculation will use a common grid with door opening protection. We will show independent centering separately to compare counts.
Calculation for RK-001, 24 mm wide: 60 mm spacing and 74 verticals
For narrow slats, let us set an axis spacing of 60 mm. A face width of 24 mm leaves 36 mm of exposed base between neighbors. First, let us find a layout that does not create accidental narrow gaps at the far corners. Let us place the center of the first slat 30 mm from the left edge of the entire wall; the following centers will be at coordinates 90, 150, 210 mm, and then every 60 mm.
On the left field, the last centers that fully fit before the door end at the 1530 mm mark. A 24 mm wide slat occupies from 1518 to 1542 mm; 58 mm remains to the opening boundary. The first slat begins at the 18 mm mark from the left corner. This means the left field accommodates 26 verticals, whose edge distances are 18 and 58 mm. They are not symmetrical, but they are consistent with the common grid.
On the right, the door ends at 2500 mm. The first permissible slat of the common grid has its center at 2550 mm and occupies the 2538–2562 mm section. 38 mm remains to the opening. The last center is at the 5370 mm mark; the right edge of the last slat is 5382 mm. 18 mm remains to the right corner. On the right field, this gives 48 verticals. Total: 26 + 48 = 74 slats.
| Check for slat 24×5 | Left margin | Right margin |
|---|---|---|
| Number of verticals | 26 | 48 |
| First center, from the left corner of the entire wall | 30 мм | 2550 мм |
| Last center | 1530 мм | 5370 мм |
| Offset at the door, from the slat edge | 58 мм | 38 мм |
| Offset at the outer corner, from the slat edge | 18 мм | 18 мм |
The sequence can be verified without special software. For the left field, the centers form the series 30 + 60 × n with n from 0 to 25. For the right field, the same series with n from 42 to 89. Not all intermediate points are used: lines that fall on the door or too close to its boundaries are excluded. Checking such boundary points is better than dividing the section width by 60 because it accounts for the actual width of the slat itself.
The specification must record two separate quantities — 26 and 48. Even if all the material is of the same cross-section and can be supplied in one batch, this record helps distribute the planks between installation zones. If it later turns out that the area near the concealed box cannot be used on the left, a specific line will change rather than an unclear total figure.
Calculation for RK-001 with a width of 40 mm: 80 mm pitch and 55 verticals
With a wooden strip width of 40 mm, it makes sense to first try an axial pitch of 80 mm: one half of the rhythm will be covered by wood, the other will remain open. The thickness is still 5 mm, so the surface does not become noticeably deeper, but its light-and-shadow pattern changes. To maintain a continuous grid, we will place the center of the first batten at a distance of 40 mm from the left corner, and lay out subsequent centers every 80 mm.
In the left section, the centers are located from 40 to 1560 mm inclusive. The first batten occupies the band 20–60 mm, the last — 1540–1580 mm. There is 20 mm remaining from the outer corner and from the door. This gives 20 battens; this is a good example of how an entire section can turn out symmetrical within the overall grid, even though the neighboring field will look different.
The right field begins after the door at the coordinate 2500 mm. A theoretical center of 2520 mm would put the face edge exactly at the opening boundary: there is no allowable technological offset here. Therefore we skip this grid point. The next center is 2600 mm, its left edge is 2580 mm; 80 mm remains to the door. The last batten in the right field has a center of 5320 mm and ends at 5340 mm, leaving 60 mm at the outer corner. Between centers, an 80 mm pitch is maintained across the entire wall, but a noticeable pause occurs near the door.
| Check for a 40×5 batten | Left margin | Right margin |
|---|---|---|
| Number of verticals | 20 | 35 |
| First center from the left corner of the entire wall | 40 мм | 2600 мм |
| Last center | 1560 мм | 5320 мм |
| Offset at the door, from the slat edge | 20 мм | 80 мм |
| Offset at the outer corner, from the slat edge | 20 мм | 60 мм |
Total 20 + 35 = 55 battens 2300 mm long. This result cannot be obtained by dividing 4500 mm by 80 mm and rounding: there are breaks in the pattern at the door, and each plank has a face width. Simple division would give the number 56.25 and would not say exactly where the wooden strips will end. Our scheme clearly shows why one nearest position was skipped.
The 80 mm offset on the right side of the door is a deliberate compromise, not a stated standard for concealed installation. On close inspection it may seem excessive. In that case, consider centering the two fields independently or changing the starting phase of the grid. Before approving either option, the actual trajectory of the door leaf must be checked: even 80 mm is not a universal guarantee of safe opening if a protruding handle or a non-standard door stop is located nearby.
If both fields are centered separately, there will be 56 wide slats instead of 55
For a finish that reads as two independent rectangles, you can abandon the continuous axial grid while keeping the same pitch within each field. In the left section, 1600 mm wide, we place 20 slats 40 mm wide with an 80 mm pitch. From the first to the last outer edge there will be 19 × 80 + 40 = 1560 mm. The remaining 1600 − 1560 = 40 mm is divided in half: of 20 mm each at both edges.
In the right section, 2900 mm wide, we now fit 36 planks. The total width of the group will be 35 × 80 + 40 = 2840 mm. That leaves 60 mm, i.e. 30 mm each from the edge of the group to the opening boundary and to the right corner. The count across the two fields becomes 20 + 36 = 56 planks. On the long part of the wall the pattern will be shifted slightly closer to the door than in the continuous-grid option.
What do you pay for with the extra slat? Not just for another 2300 mm of wood. You get symmetrical offsets for each individual field and reduce the empty zone on the right by the door from 80 to 30 mm. With this solution, the centers of the slats in the two fields are no longer a continuation of a single grid, but both rectangles look complete. If the door is solid-colored and wide enough, the break in the pattern may make this difference unnoticeable.
We will treat as the base estimate 55 slats on the overall grid, while the option 56 slats should be kept as a separate alternative. You must not quietly substitute one figure for another during procurement: these are different layout schemes. Recalculation is also required for any change to the door opening, shortening of the decorative field, addition of a wall switch, or shifting of furniture that covers the outermost slats.
Four control dimensions that determine the final layout
The first dimension is not the overall width of 5400 mm, but the actual width of the fixed section to the left of the installed and finished door frame. The second is the same on the right. The third is the finished height of each vertical: it must be measured from the approved bottom line to the top, not automatically from floor to ceiling. The fourth is the actual position of the outermost point of the open door, taking into account the handle and trim, since this is what determines the safe installation offset.
A standard tape measure gives the wall length along a single horizontal line. But with uneven corners, the width of the same field may differ at the floor, in the middle, and at the top. Take at least three measurements along the height, check that the reveals are vertical, and check the position of the ceiling. If the right field is 12 mm narrower at the top edge, the position of the outermost slat should be chosen based on the smaller clear dimension. Otherwise, one end will end up inside the wall or will start pressing against a protruding part of the trim.
It is convenient to mark out with a laser level. First fix the base vertical and horizontal lines of the finished edges, then mark the centers according to the approved spacing. Do not start gluing the first five slats just for a visual assessment: if it turns out that the pattern needs to be shifted by 20 mm, everything already installed will be wrong. It is better to lay out several whole planks on the floor, check the width of the bundle, and transfer the control lines to masking tape.
Check the actual width of the face strip, not just the nominal figure in the product listing. The drawing calculates based on 24 and 40 mm, but the actual installation dimensions, permissible tolerances, and characteristics of the factory edges must be agreed with the supplier. When inspecting a batch, you do not need to measure every slat for promotional reporting; it is enough to make sure that the items are of the same size and do not show noticeable variation during a dry layout.
Cutting plan: why one vertical requires one whole slat
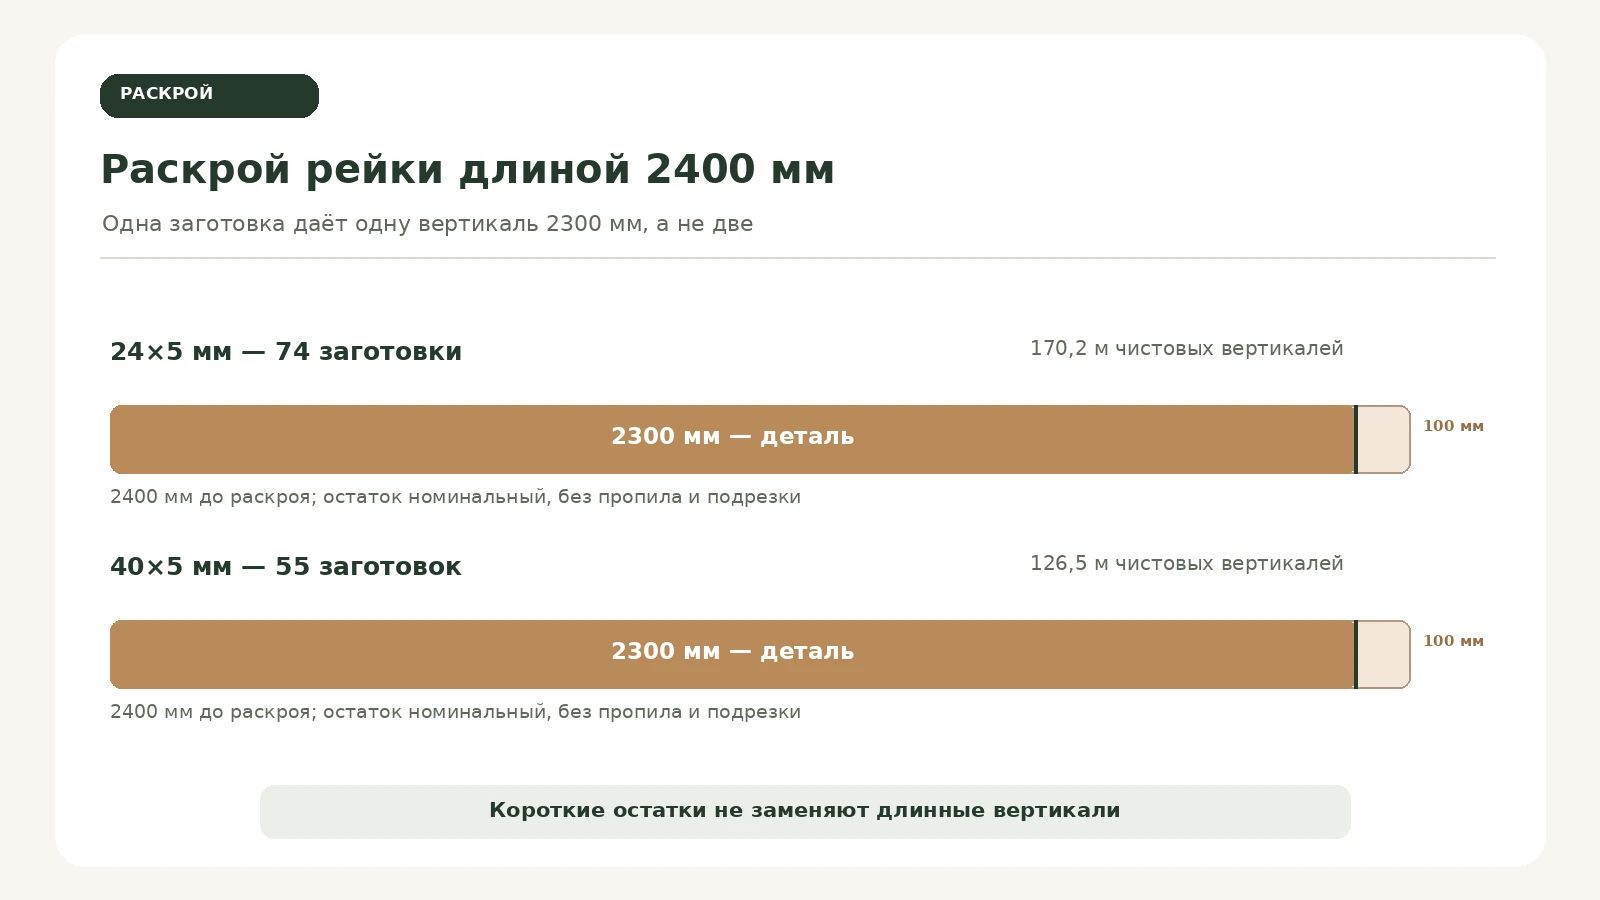
The standard wooden blank RK-001 for the selected finishes has a length of 2400 mm. The finished vertical on the wall is 2300 mm. From one blank you can get one one such part; two parts of 2300 mm will not fit into a 2400 mm strip regardless of the cutting technology. Therefore, the length calculation is especially simple if all verticals are the same: the number of whole purchased slats equals the number of long installed elements.
For the narrow 24×5 option, you will need 26 blanks for the left part and 48 for the right, totaling 74 blanks. For the wide 40×5 option on the common grid — 20 on the left and 35 on the right, totaling 55 blanks. With independent centering of the wide option — 56. In each case, the nominal factory length of the purchased set noticeably exceeds the finished linear meters, but this is not an error: the short offcuts after trimming cannot be assembled into a new 2300 mm vertical.
| Plank | Finished part | Nominal remainder before cuts | Purpose |
|---|---|---|---|
| RK-001 24×5×2400 | 2300 мм | 100 мм | One vertical of the narrow layout |
| RK-001 40×5×2400 | 2300 мм | 100 мм | One vertical of the wide layout |
The table shows nominal a remainder of 100 mm. In practice, a cut, end trimming, and possibly removal of a small damaged section will be required. Therefore, do not promise that after each strip a ready-to-use piece exactly 100 mm long will remain. If the strips arrive with factory ends, their suitability for visible ends must be assessed before cutting. Additional processing of one or two ends will reduce the actual remainder.
It is convenient to mark the strip from which the 2300 mm part is to come on the face side, along the grain direction and by section number. Some slats may need to be turned around due to grain pattern characteristics; this decision is made before sawing. With opaque paint, the grain direction is less noticeable, but it does not eliminate the technical check of the face side, defects, and geometry.
Finished meterage, purchase length, and short offcuts
For the 24×5 mm option, there will be 74 installed uprights. Their total finished length is 74 × 2.3 = 170.2 meters. Purchase length: 74 × 2.4 = 177.6 meters. The nominal difference is 7.4 meters, but it is distributed across 74 separate short segments. Calling such a difference "seven meters of useful reserve" is not acceptable. It is not suitable as a replacement for one damaged long batten.
For the wide layout on the common grid we get 55 × 2.3 = 126.5 meters of finished verticals and 55 × 2.4 = 132 meters of purchased length. The difference is 5.5 meters, again broken into small segments. If you choose the option with 56 wide battens, the numbers change to 128.8 and 134.4 meters respectively. Such a comparison is useful for checking the contractor's bill of quantities, but it does not replace counting whole products.
There is also the area of the face wooden strips. For the 24-millimeter solution this is 74 × 0.024 × 2.3 = 4.0848 m²For the 40-millimeter one — 55 × 0.040 × 2.3 = 5.06 m². Given that the total area of the decorative fields is 10.35 m², the wood covers approximately 39.5% and 48.9% of the area respectively. The rest remains background. This is why one option looks more openwork, although both groups are located within the same 4.5 meters of width.
These areas are calculated only from the frontal face strips and do not take into account the side surfaces and ends. For the consumption of finishing compound, they are an incomplete estimate, and for calculating the purchase of blanks, they are not the main unit at all. The amount of lacquer or enamel also depends on the treatment of the reverse side, the application scheme, and the characteristics of the compound itself. First, the products and the coating scheme are determined, then the consumption rate is obtained.
How much do RK-001 wooden slats made of oak and beech cost?
In the official product card on November 18, 2026 for RK-001 24×5×2400 mm, the price is indicated 840 rubles for the beech plank and 1150 rubles for the oak one. For 40×5×2400 mm — 1130 rubles for beech and 1620 rubles for oak. We calculate at these prices only the purchase of whole products for the main continuous grid: 74 narrow or 55 wide. Neither installation, nor finishing, nor delivery are included in the amounts.
| Wall kit 5400 mm | Price per slat | Without reserve | With two spare |
|---|---|---|---|
| RK-001 24×5, beech: 74 / 76 pcs. | 840 ₽ | 62 160 ₽ | 63 840 ₽ |
| RK-001 24×5, oak: 74 / 76 pcs. | 1150 ₽ | 85 100 ₽ | 87 400 ₽ |
| RK-001 40×5, beech: 55 / 57 pcs. | 1130 ₽ | 62 150 ₽ | 64 410 ₽ |
| RK-001 40×5, oak: 55 / 57 pcs. | 1620 ₽ | 89 100 ₽ | 92 340 ₽ |
The most interesting result relates to beech. Despite the fact that each wide slat is more expensive than a narrow one, 55 wide ones cost 10 rubles less than 74 narrow ones: 62,150 versus 62,160 rubles. This is practically the same budget for two visually distinct walls. The reason is not a discount, but fewer wide components. For oak the picture is different: a wide composition will cost 4,000 rubles more than a narrow one. Choosing based on the price of a single slat alone makes no sense in this situation.
If both fields with wide planks are centered independently, 56 items will be required. Then the estimate without reserve will be 63,280 rubles for beech or 90,720 rubles for oak. This is the cost of an additional slat that removes an overly large empty area near the door but does not preserve a single grid phase. Before approving the budget, it is useful to show the customer two drawings overlaid on a real photograph of the wall.
The price of the batch may change by the time the order is placed. In addition, according to the public product page, the availability of individual versions in stock on the date of checking is not always sufficient for a complete set for our training project. This is not an obstacle to drawing up the specification, but a reason to confirm, before payment, the possibility of supplying the entire batch, the lead time for assembly, finishing options, and the delivery price. You should not add up for a commercial proposal prices from another wood species or a cheaper article just because it is called a "slat".
When it is worth ordering two additional planks, and when no reserve is needed
The option with two spare items means one conventional reserve plank for each field. It is convenient because you can replace one damaged piece on the left and one on the right without immediately reordering. But this is not a mandatory rule of 2 pieces for any wall. If the actual installation is carried out by an experienced team, the dimensions are confirmed, the wood arrives with the agreed quality, and all verticals are identical, the reserve can be determined differently. The decision depends on the risk of damage and the cost of re-delivery.
Short offcuts of 100 mm are not equivalent to spare battens. Such a remainder can be used to make a small finish sample or to check the composition on the end face, but it cannot restore a 2300 mm vertical. If the customer intends to extend the pattern onto the adjacent wall later, the reserve is better calculated for the new area rather than treating two additional long battens as a universal continuation.
Equally important is the completeness of a single batch. Solid wood may vary in shade from delivery to delivery. When painting with enamel, the risk of visual mismatch is lower, but the sanding and surface preparation conditions must also be identical. Therefore, it is sometimes wiser to buy a couple of spare items from the same batch right away than to order one a month later. At the same time, the agreed specification remains decisive: RK-001 24×5 or 40×5, the specific species, length 2400 mm and finishing requirements.
Wall preparation: the background between the battens will remain visible
The narrower the batten, the more area between the wooden strips remains exposed. For our 24×5 mm option, this is more than 60% of the area of the two decorative fields. Therefore, the wall must be fully finished before the wood is installed. If the filler has not been brought to the required levelness or traces of repair are visible on the paint, the verticals will not hide them: rather, they will direct the eye along every unevenness.
First, check the substrate over the entire 2300 mm height. Place a long straightedge against it and assess the deviations along the line of several future battens. If the surface has waves, the thin profile will in places start to pull away or follow the unevenness. Do not press the batten down by using an excessive amount of adhesive: this can result in unpredictable thickness beneath it. What is needed is a prepared flat surface and a fastening method compatible with the wall material and the wood finish.
After levelling, paint the wall in the chosen colour if the coating is specified in the project. Make sure it has reached the required strength and allows the use of the selected installation material. This is more important than simply waiting for the state of "not sticky to the finger". Some coatings are sensitive to adhesive compounds, and a batten fixed to a weak layer may come away together with it. Installation should be carried out according to the instructions for the specific compound and taking into account the substrate — plaster, painted layer, cladding or prepared board. Before starting work, it is useful to check STAVROS tips on finishing and installing decor with the instructions for the selected adhesive and the specifics of your wall.
It is useful to keep access to the control lines until marking is complete. On a painted wall, it is more convenient to mark them temporarily with removable masking tape without scratching the coating. Label the centre marks rather than turning the entire surface into a grid of random pencil strokes. On a dark background, such marks sometimes remain visible between the thin wooden strips.
Installing battens near a door: a sequence without risk to the leaf
Work begins with checking the door, not with fixing the first vertical. Close the leaf, measure the actual visible plane and the edge of the fixed opening. Then open the door fully and see where its edge, handle and hinge zone pass. If a batten falls into the path of the moving part, its position must be changed already on the drawing. When the door is partially open, also assess whether the strips create an obstacle for the hand at the handle.
Next, transfer the approved horizontal bottom line and vertical axes onto the prepared base. Lay out at least three battens on each side of the door without fixing them. Such a small test fragment will help you see the difference between 24 mm lines at a 60 mm pitch and 40 mm at an 80 mm pitch. At this stage it is also convenient to check the distances at the opening: this is where a visually awkward remainder is most often discovered.
Fasteners are determined by the base material, the condition of the coatings and the requirements of the manufacturer of the installation compounds. The batten manufacturer confirms the dimensions and the wood, but one cannot automatically assume that any universal adhesive is suitable for all painted walls. For thin solid wood, the change in wood dimensions under humidity fluctuations and possible restrictions on rigid continuous gluing must be taken into account. If concealed mechanical fasteners are provided, their position must not damage the door frame, cable or other concealed system.
After installing the first few elements, check not only the verticality of individual planks but also the overall pitch. If the first batten deviates by 2 mm and the next is set "according to the previous one" without an independent axis, the error will begin to accumulate. For a long wall, the best control is the specified coordinates of each axis, not eyeballing a repeated gap. It is more convenient to use a spacer template together with a laser line and regularly check the distance from the base edge of the wall.
Do not press furniture, painter's tape or installation supports against the door leaf as if it were a fixed stop. It may shift, and marks from the fixing will remain on the finished coating. All auxiliary devices must rest on permitted surfaces. Until the installation joint has fully gained strength, impacts on thin face edges and accidental loads when opening the door must be avoided.
Lighting, texture and color: why two identical pitches look different
During the day, a wall with thin strips may appear almost flat. Side light from a window changes the impression: a narrow shadow appears along each batten, and the actual thickness of 5 mm becomes more noticeable. With frontal diffused lighting, the relief is weaker. Therefore, the pitch should be chosen not only on a brightly lit sample in a store, but also under the light that will be in the room after renovation.
If there is a window to the left of the door, different shadow contrast may occur on the two parts of the wall. This does not mean that the pitch on the right has gone off. It is simply that the angle of light incidence relative to the surfaces differs. It is better to apply the test fragment to both parts of the wall. This is especially useful when a tall cabinet or a curtain creating a local shadow is located on one side.
A clear oak coating emphasizes the alternation of wood strips. Beech under paint may make the wall look calmer, because its rhythm is formed by geometry and shadows rather than by color differences between individual blanks. But the beech surface must also be properly prepared: opaque paint does not hide poorly sanded ends, steps between planks or uneven width.
It is better to agree on the wood coating on a sample that includes the face side, two side edges and an open end. On a wall, a person often sees the side surfaces from several meters at an angle; if they are left unfinished or differ in tone, the whole composition will look uneven. When ordering a large set, it is worth clarifying who performs the finishing and how the uniformity of the batch is checked.
Sockets, switches, cabinet and the lower line of the slat field
A wall 5.4 metres long rarely has only a door and smooth surfaces. It may accommodate a switch, sockets, sensors, wall lights or furniture. If installers learn about this after cutting 74 long verticals, some parts will have to be shortened or excluded. That is why electrical points, their frames and service zones are marked before the final slat count. Electrical connections must not be covered with decorative strips, depriving them of the necessary access.
Suppose a switch is located to the right of the door. It is convenient to allocate a clear area for it in advance, with no slats. The width and height of this field are determined by the specific electrical installation and access to it, not by an arbitrary aesthetic line. After the zone is allocated, the grid is recalculated: some verticals may end above the switch, continue below it or be absent. This will already be a different project, for which the numbers 74 and 55 are no longer final.
If a cabinet will stand against the wall, it is sometimes advantageous not to install slats behind its fully closed body. But such a choice affects future furniture rearrangement. Open edges must remain neatly finished and coordinated with the cabinet's position. Saving a few planks at the expense of a closed section is permissible only after the furniture and its exact dimensions are approved. Otherwise, a year after moving the cabinet, unfinished finishing will be discovered on the wall.
The lower line of the slats also requires a separate decision. With a floor skirting board, long verticals can start above it with a small specified gap or meet an agreed transition piece. This decision must be chosen in section: it is especially important to take into account the protrusion of the skirting board from the wall and the slat thickness of 5 mm. If the vertical plank visually 'enters' a massive floor profile, such a junction should be shown on the drawing rather than left to the installer as free improvisation.
How to combine RK-001 slats with wooden skirting and mouldings
A slat wall rarely exists separately from the rest of the finishes. It has a top and bottom termination, doors stand nearby, and sometimes a decorative moulding runs along it. For all elements to be perceived as part of one interior, it is not necessary to choose identical article numbers or a completely identical colour. It is far more important to coordinate the thickness of protruding parts, the direction of the wood grain and the visible joints.
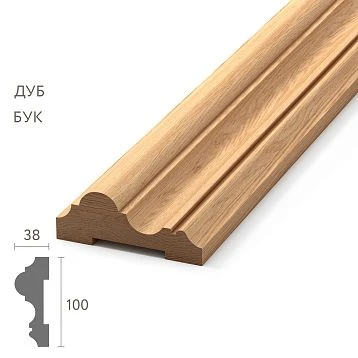
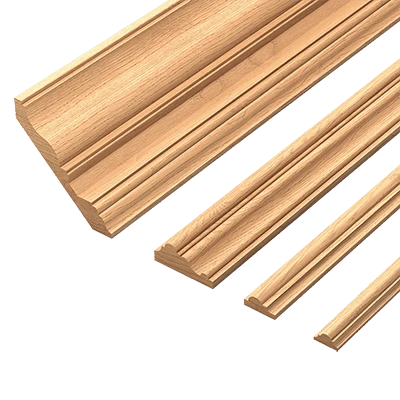
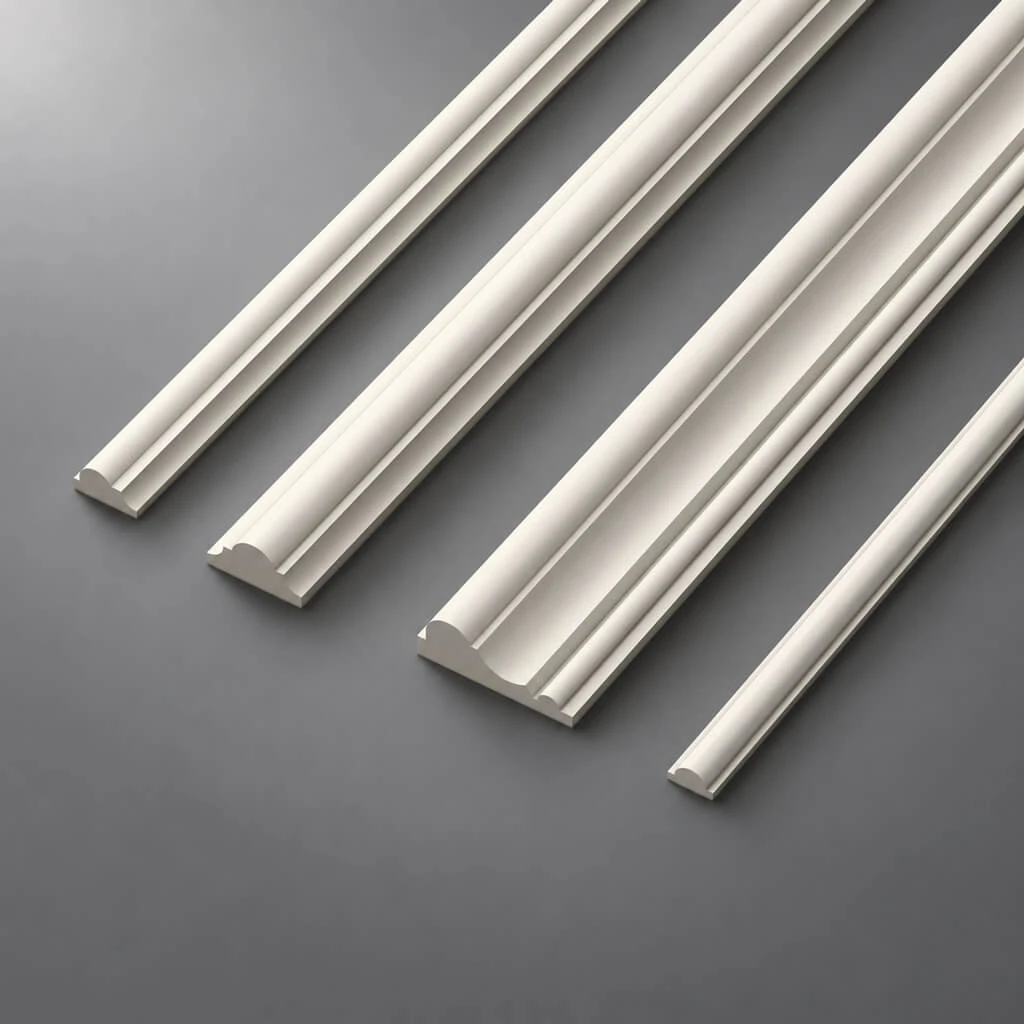
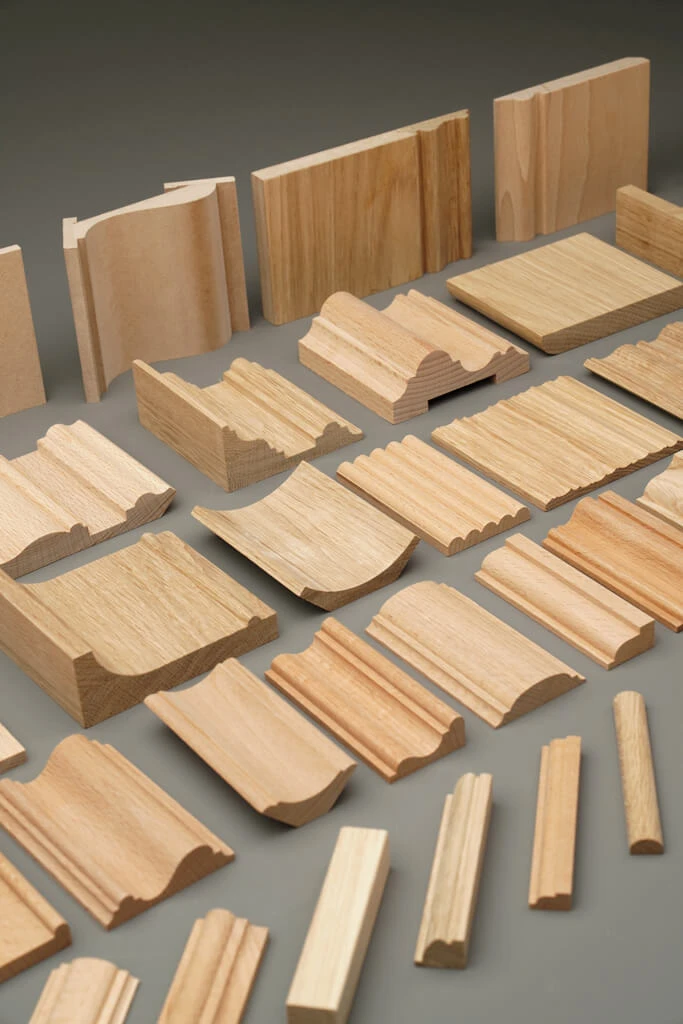
The floor skirting board is close to a person when they walk past the wall. If thin 24×5 mm slats are installed nearby, a massive 160 mm high skirting board can become the main architectural element, while the slats become a secondary background. This is an acceptable solution, but it is worth planning for. For a calmer composition, you can match the thin pattern of the wall with a simple wooden profile at the floor; it is convenient to start the selection with solid wood moldings, rather than choosing disparate products from an image.
Think separately about the termination of the slats at the door. If the concealed frame has no protruding architrave, the last vertical remains fully open on the side and requires a neat edge and coating. Trying to hide it behind a decorative architrave that is not part of the construction is pointless. It is better to leave a pre-agreed clear field — for example, the distance of 38 mm or 80 mm adopted in our model — and ensure the door opens correctly.
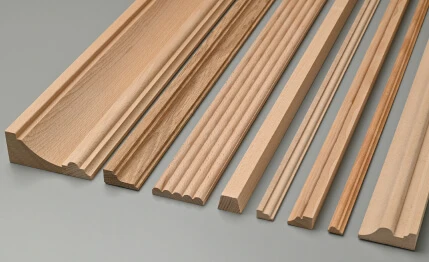
For Lipetsk interiors, the website already has another thematic publication — wooden moldings for a ceiling grid. It examines a horizontal decorative pattern rather than our break in the vertical lines at a hidden door. The cutting charts for these products must not be mixed, but it is useful to compare methods of matching wood and color. Similarly, the material on wooden skirting boards in Lipetsk describes a separate calculation of the floor finish if the lower band of the room is changed together with the slatted wall.
How to order RK-001 with delivery to Lipetsk without mix-ups
A good request allows the supplier to assemble exactly the set that has been calculated. A single line, "wooden slat, 74 pieces," is not enough. For the narrow scheme, the following are required: item code RK-001, size 24×5×2400 mm, species — beech or oak, quantity 74 pieces, and a separately agreed reserve if needed. For the wide scheme, specify 40×5×2400 mm and a quantity of 55 or 56 depending on the approved layout. If the slats are to be painted or prepared for a specific finish, these conditions should be recorded separately.
Before sending the order, check whether the current stock is sufficient for the specific version selected. A product page may list several sizes and species at the same time. A general indication of "in stock" does not automatically mean that 74 oak slats 24 mm wide or 55 beech slats 40 mm wide are available in the warehouse in a single batch. If the quantity is insufficient, the configuration and possible production must be agreed, without promising yourself a specific deadline based on someone else's preliminary calculation.
Long, thin products are especially sensitive to poor handling during transport. In the request, it is useful to clarify how the ends, face edges, and surface of each slat will be protected, whether rigid transport packaging is planned, and how acceptance is carried out. The official RK-001 product page mentions a protective packaging frame; its current cost and whether it is needed for a specific batch should be confirmed when placing the order. Delivery to Lipetsk is agreed based on the address, volume, and selected transport company, not on a single phrase such as "Contact us to confirm shipping to your destination."
The procedure for payment, handover of the cargo, and receipt is set out in the section delivery of wooden moulding across RussiaBefore payment, save the specification, the approved layout plan and the price confirmation. Upon receipt, check the number of packages, the integrity of the packaging, the length, the cross-section and the wood species. If a damaged end or a group that differs noticeably in colour is found, it is better to record this before cutting and installation.
Example order line: “RK-001, solid beech, 24×5×2400 mm, 74 pieces for a wall with a 900 mm doorway; agree 2 spare pieces separately; colour and finish — according to the approved sample; delivery — Lipetsk, address after confirmation”. Such an entry removes ambiguity when selecting a product and does not substitute a real delivery estimate for the calculation.
Mistakes when buying wooden slats for a hidden door
One common mistake is calculating only the area. A wall may have 10.35 m² of decorative fields, but the number of slats cannot be derived from this area without knowing the face width and the pitch. Two layouts yield 74 and 55 blanks, and both occupy the same area. The correct order is the reverse: approve the pattern, count the individual verticals, and only then calculate the cost.
The second mistake is confusing the interval between edges with the pitch between centrelines. The wording “slats every 60 mm” sometimes leads to the installer setting out 60 mm between the edges, while the customer meant centres. For a width of 24 mm, these schemes differ by 24 mm in each repetition and will give a completely different quantity. The drawing needs two values: the width of the strip and the distance between centrelines or edges.
The third is mechanically transferring the same number of verticals to two fields of different widths. On the left 1600 mm, on the right 2900 mm; trying to place 30 slats on each side means creating different gaps and disrupting the design intent. An equal pattern does not require an equal number of elements. In the main variant, it is precisely 26 on the left and 48 on the right that maintain a uniform pitch of 60 mm.
The fourth mistake is ignoring the door's operating zone. If the outermost slat comes so close to the hidden frame that it interferes with opening, neat symmetry does not justify the installation. Check that the leaf operates before installation. The decorative element must give way to the structural requirement, not the other way round.
The fifth is going by the lowest price for RK-001 in the product card. A product family has several cross-sections. The cost of a small 15×5 mm slat is not the same as the price of the 24×5 or 40×5 mm ones we have chosen. In addition, beech and oak cost differently. For the estimate, you need to select the exact specification and then multiply its price by the number of whole blanks.
The sixth is to postpone cutting until the cargo is received, without agreeing on the finished height. With a length of 2400 mm and a vertical of 2300 mm, only 100 mm of nominal reserve remains. If, after installing ceiling lighting or a new skirting board, a vertical of 2380 mm is needed, the possibilities for additional end trimming will already be much smaller. First the geometry of the ends is approved, then the purchase is confirmed.
The seventh is trying to correct an uneven wall with thin solid wood. If the base is wavy, the slats will visually "float" relative to the vertical, and unreliable fastening may lead to detachment. Preparing the wall sometimes costs more than the decorative work itself, but it cannot be replaced by neatly trimming the planks.
When slatted cladding is better changed or postponed
Not every room needs vertical wooden strips. If a concealed door is located right next to a side wall, the free field near the opening may not be enough even for a few safely placed slats. In that case, it is better to consider a smooth paint finish next to the door, move the decorative panel to a separate area, or change the pattern so that it does not conflict with the structure of the opening.
Another limitation is a damp or unstable base. Wood and finishing coatings must be used under suitable conditions. While wet work is still ongoing in the room, the walls have not finished drying, or there is no stable temperature and humidity regime, final installation may be premature. Even a carefully selected spacing does not compensate for changes in the material's dimensions and failure of the adhesive bond. Before starting work, compare the room conditions with STAVROS recommendations for storage and use of wooden decor.
Cladding should also be reconsidered when regular access to utility connections is planned behind the wall. Inspection zones covered with slats will complicate maintenance. It is better to provide a removable section, another method of decorative finishing, or move the panel to a place where frequent access will not be required. The scheme must work not only on the day the renovation is handed over.
Finally, if the budget is limited and wall cladding is not the main element of the interior, it is reasonable to compare it with ordinary smooth painting or a local decorative field of small width. For such a comparison, it is important to recalculate the actual purchase. You cannot promise savings based on an abstract reduction in area: the number of long blanks will depend on the new width and the actual location of the door.
Customer questions about wooden wall slats
Can RK-001 be installed directly on a concealed door?
For the selected project — no: the calculation was performed for fixed wall sections, and the door was left smooth. Cladding the door leaf itself requires separate confirmation from the door system manufacturer regarding weight, thickness, hinges, clearances, and opening. The very name “hidden door” does not mean that any decorative finish is permissible.
Why does a width of 24 mm yield more details than 40 mm?
The quantity is determined not only by the width but also by the selected axial spacing. With a 60 mm spacing and a 24 mm width, you get 74 verticals, while with an 80 mm spacing and a 40 mm width — 55 in the main layout. This is the result of the specific wall geometry with an off-center door, not a general standard for slat consumption per square meter.
Do I need to order exactly 74 slats for a real apartment?
Only if the actual wall matches the training model, the same width and spacing are selected, the height of the finished piece is 2300 mm, and no additional restricted zones have arisen. Real dimensions, switches, furniture, finishing clearances, and the door's swing path may change the quantity. The reserve is agreed upon separately.
Can two verticals be obtained from one 2400 mm slat?
No, if each finished piece must be 2300 mm long. Two such pieces would require a minimum of 4600 mm, not counting the saw kerf. The approximately 100 mm remaining from one blank may be useful for testing the finish, but it will not replace a second long vertical.
Why is the wide beech layout in the example almost no more expensive than the narrow one?
The price of one RK-001 40×5 is higher, but fewer of them are needed. According to the product card as of November 18, 2026, 55 wide beech slats cost 62,150 rubles, while 74 narrow ones cost 62,160 rubles. The ten-ruble difference relates only to the cost of wood for the selected pattern options and does not include finishing and installation.
What should I do if the 80 mm offset to the right of the door seems too large?
You can center the right panel independently while keeping the 80 mm spacing. Then it will hold 36 slats instead of 35, with 30 mm margins at both edges. The entire wall will require 56 wide slats. However, the pattern phase across the opening will no longer be continuous; you need to compare both images and make sure the door opens without obstruction.
Which is better next to a light-colored door — oak or beech?
The choice depends on the approved finish. If an open texture is planned, compare an oak sample with the color of the door and floor. Beech may be suitable for enamel painting, but high-quality surface preparation and edge treatment are essential. The word “light” does not define either the species or the final shade after the coating is applied.
Can I first fix some of the slats and then decide where the switches will be?
This order is undesirable. Electrical points and clear zones may disrupt the chosen spacing or require shortening individual verticals. It is better to first approve the layout with switches, light fixtures, and furniture, and only then perform the final cutting. Access to serviceable electrical installations must be maintained.
Will the slats be supplied in matching shades?
Natural wood can vary in grain and tone. For a prominent visible wall, it is worth agreeing on requirements for batch selection, a finish sample, and acceptable visual heterogeneity. You cannot assume all parts are identical just because the article number and species match.
How can I find out the delivery cost to Lipetsk?
Provide the supplier with the exact order composition, delivery address, packaging requirements, and pickup method. The shipping price will depend on the actual conditions of the batch and the transport company. The slat prices in the article do not include delivery costs; the specific timeframe must also be confirmed separately.
Buy RK-001 decorative wooden slats with delivery to Lipetsk
For a 5400 mm wall with a 900 mm door opening, you can choose one of two clear options. The denser pattern is RK-001 24×5 mm, 74 verticals on a common centerline grid. The wider one is RK-001 40×5 mm, 55 verticals with an enlarged free margin near the right side of the door, or 56 verticals with separate centering of the two sections. All calculations refer to a finished height of 2300 mm and wooden blanks of 2400 mm.
If planning order solid wood slats, first approve the pattern and working clearances at the door. Then choose oak or beech, check a finish sample, confirm availability of the full batch, and prepare a specification with the size and quantity of whole planks. For Lipetsk, separately agree on packaging, transportation terms, and the actual order cost.
As a result, the buyer will have not only a list of products but also a verifiable layout: where each slat begins, why exactly this clearance is acceptable at the door, how many pieces fit in each section, and how many factory blanks are required. Such preparation is especially useful for concealed doors: after installation, correcting a disrupted spacing is much more difficult and expensive than agreeing on it before purchase.