






Article Contents:
- Where to buy a wooden ceiling cornice in Novokuznetsk
- A decorative cornice is not the same as a curtain cornice
- Three STAVROS models: exact solid wood dimensions
- Oak or beech: choosing the material to match the finish
- KZ-004: a calm line for a bedroom with a 2650 mm ceiling
- KZ-008 and KZ-005 in a living room with a 3150 mm ceiling
- One model for the whole apartment or different profiles
- What to measure before calculating a wooden cornice
- From perimeter to bill of materials: two rooms
- Cutting eight KZ-004 strips for the bedroom
- How to fit a 5200×4000 mm living room with eight strips
- How much KZ-004, KZ-005 and KZ-008 cornices cost
- How to avoid overpaying without compromising the result
- Installation at the wall-ceiling junction: order of checks
- Stretch ceiling, concealed lighting and complex corners
- Lengthwise joint: where it is acceptable and what is visible after painting
- How to combine a top cornice with doors, skirting boards and mouldings
- Order with delivery to Novokuznetsk: what specification is required
- Frequently asked questions about choosing and buying
- Are KZ-004 and KZ-005 suitable for the same apartment?
- Why does the price of a wooden cornice differ from the "from" amount in the catalog?
- Can the remainder of KZ-005 be used in the bedroom instead of KZ-004?
- Should oak be chosen for a clear finish?
- When won't eight planks be enough for the living room?
- Can a cornice be glued to an already installed stretch ceiling?
- How to care for an oak or beech ceiling profile?
- What should I do if the inside corner is not exactly 90°?
- Can the entire order be calculated based on ceiling area alone?
- How much will delivery to Novokuznetsk cost?
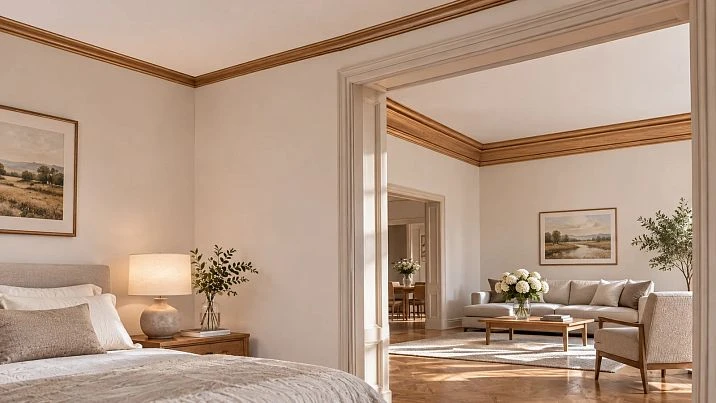
The ceiling in the bedroom is 2.65 m, while in the living room it is 3.15 m. On the apartment plan these two rooms look like part of a single interior, but the same wooden cornice can look completely different in each. In the bedroom, a large relief will bring the upper boundary of the wall closer to the person. In the living room, a too-thin profile, on the contrary, may get lost against the backdrop of tall doors and wide wall sections. That is why choosing products based only on a photo of one room is risky.
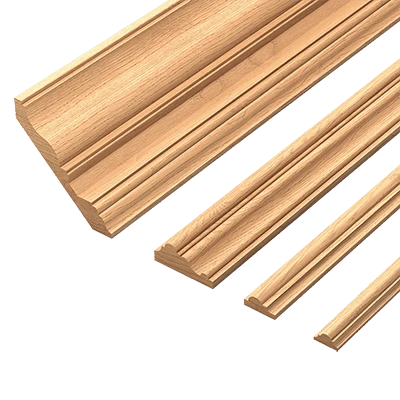
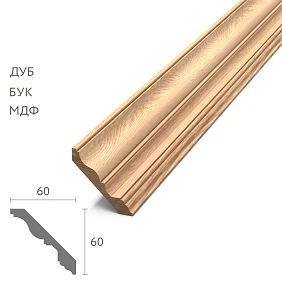
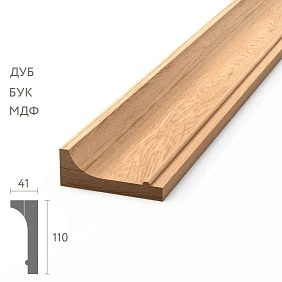
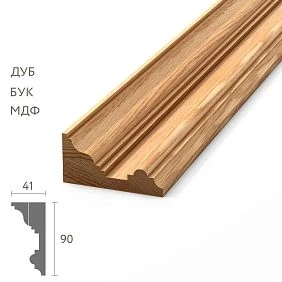
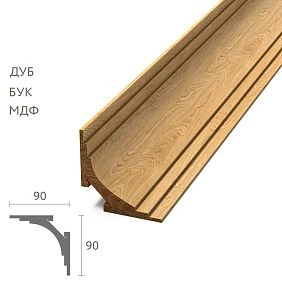
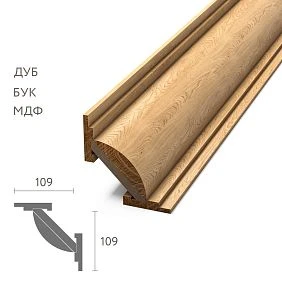
For such a project, STAVROS has three specific solid wood models: KZ-004 with a 60×60 mm cross-section, KZ-008 measuring 90×41 mm, and KZ-005 measuring 110×41 mm. For all the versions under consideration, the strip length is 2400 mm; the wood species can be chosen between beech and oak. Not only the price per piece matters: the profile pattern, the number of corners, the location of longitudinal joints, and the wall fastening conditions must be determined in advance.
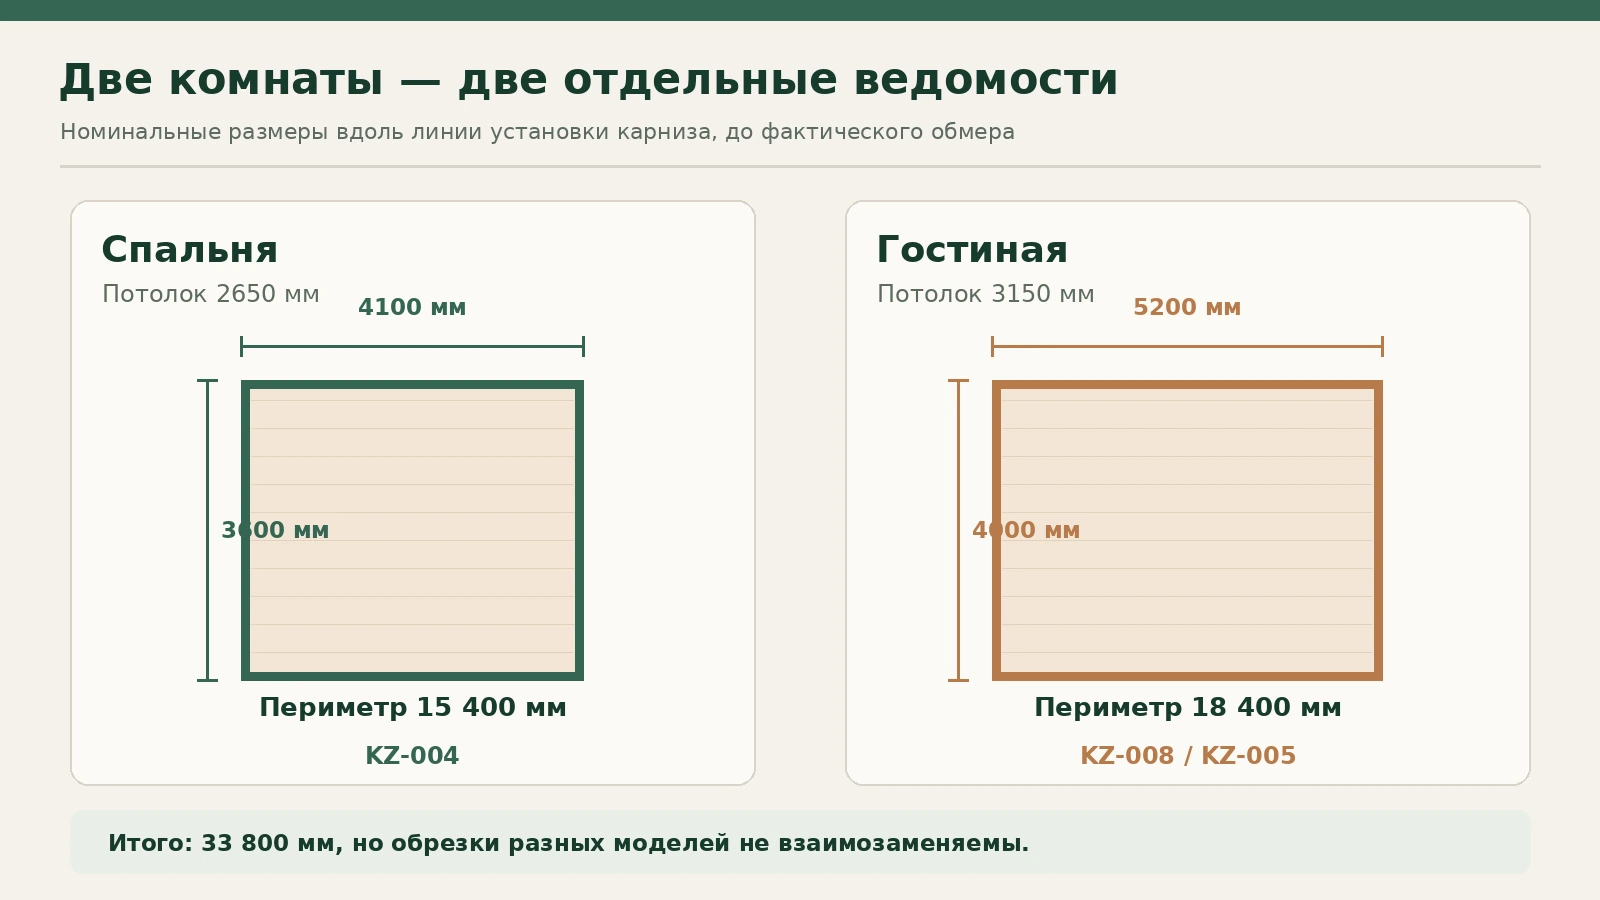
In our calculation example, the bedroom occupies 4.1×3.6 m, and the living room 5.2×4 m. Assuming straight walls and continuous finishing around the perimeter, the bedroom will require eight factory strips according to the proposed cutting scheme; the living room will require another eight. This is a preliminary bill of materials, not an instruction to saw expensive material without measuring: the final lengths are determined along the working line of the profile, taking into account the actual angles, the cutting method, and the allowance for fitting.
Where to buy a wooden ceiling cornice in Novokuznetsk
In Novokuznetsk, wooden decorative cornices KZ-004, KZ-005, and KZ-008 can be ordered through the STAVROS catalog with confirmation of the version, quantity, and delivery. The manufacturer's section presents both wooden and fiberboard options, so when placing an order it is important to choose specifically solid beech or oak with a length of 2400 mm. A direct link to the assortment — buy a wooden ceiling cornice in Novokuznetsk.
Clarifying the material is not a formality. In some product cards, the first option selected is MDF, and its price and length differ from those of wood. If you take the card's starting price and divide it by the room's perimeter, the budget will turn out noticeably lower than the real one. A similar mistake is possible when selecting transport: a longer blank made of a different material does not automatically replace the wooden strip specified in the cutting plan.
Before ordering, it is useful to send the seller a short specification: model, wood species, cross-section, length of one strip, number of whole pieces, method of future finishing, and destination city. The buyer gains the ability to compare offers on equal terms, while the seller can check whether the required versions exist and which shipping conditions apply to long-length mouldings. The presence of a STAVROS warehouse directly in Novokuznetsk does not follow from public data; therefore, local pickup or an arrival time cannot be promised.
What needs to be determined first: will the cornice be only a decorative frame between the wall and the ceiling, or must it also conceal the transition between finishing materials? In the second case, what matters is not only the visible relief lines but also the actual size of the covered strip, the quality of the base, and the ability to securely fasten the wood. If a strong fastening cannot be achieved, it is too early to buy a beautiful profile: the technical problem must be solved first.


A decorative cornice is not the same as a curtain cornice
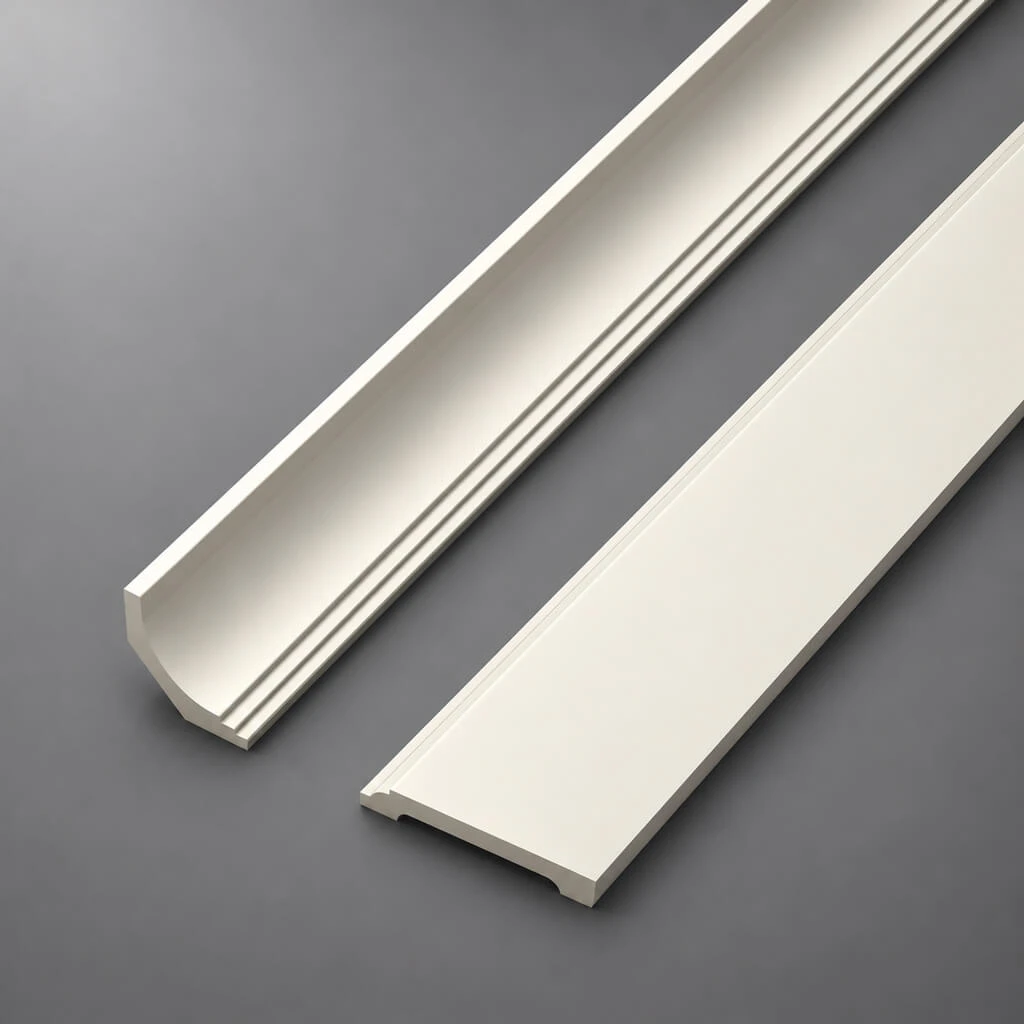
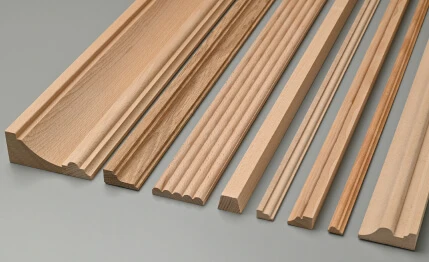
The ceiling wooden cornice in this article is an architectural detail installed at the boundary between the wall and the ceiling. It completes the plane, covers the prepared junction, sets a horizontal rhythm, and casts its own shadow under side lighting. It is not intended for moving curtains and does not replace a curtain fastening system. If a curtain recess is needed, it is designed as a separate unit, taking into account space for tracks, fabric movement, and access to fasteners.
This difference is especially noticeable after renovation. For example, a 160 mm wide recess has already been made in the ceiling, and a wooden profile with a protruding part is planned to be placed near the wall. From a photograph, it may seem that the elements do not interfere with each other. On site, it turns out that the curtain panel passes close to the decor or that the inner corner of the recess is not wide enough for the cut. Therefore, before purchasing, a cross-section is drawn: wall, ceiling level, cornice, recess, and fabric trajectory. If the dimensions are not coordinated, the wooden overlay should not be used as a way to hide the mistake.
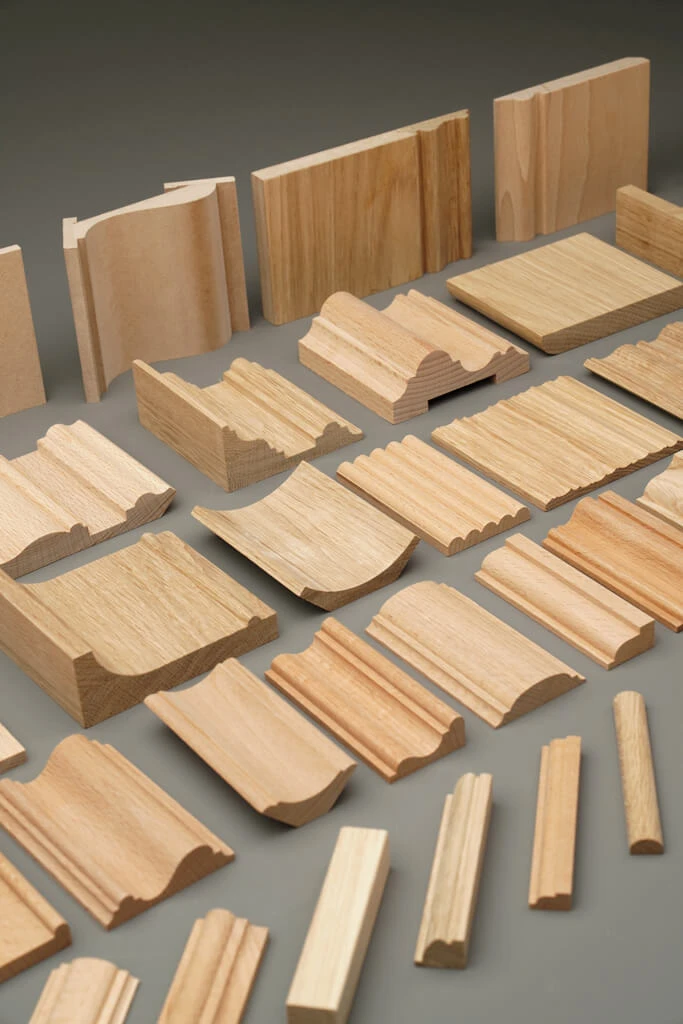
Solid wood differs from gypsum and polymer profiles in weight, grain direction, and reaction to humidity changes. Long wooden parts must be stored horizontally, protected from getting wet, and fastened with a method suited to the specific wall. The profile geometry is preserved at joints: the same pattern on adjacent strips should continue across the seam without a noticeable step. For this, a quality cut is no less important than the choice of wood species.
The main practical sign of a suitable solution is simple: the cornice should look appropriate at normal eye level, not only in a close-up in an online catalog. Before final ordering, it is useful to transfer the outline of the selected cross-section onto a sheet of heavy paper, hold it against the wall under the ceiling, and assess it from the doorway and from the center of the room.
Our factory also produces:
Three STAVROS models: exact solid wood dimensions
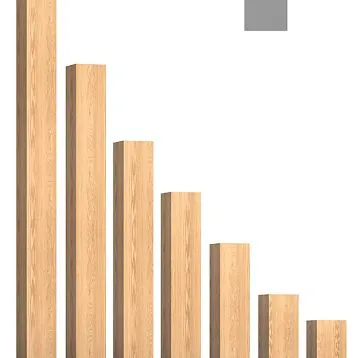
The table shows the confirmed dimensions of the wooden versions. The order of the models reflects the increase in the visible profile height, not a conventional quality rating. All dimensions are given in millimetres.
| Model | Solid wood cross-section A×C | Length of beech and oak | Height of the decorative band | The main objective in our project |
|---|---|---|---|---|
| KZ-004 | 60×60 | 2400 | 60 | Bedroom with a 2650 mm ceiling |
| KZ-008 | 90×41 | 2400 | 90 | A more moderate relief for a 3150 mm living room |
| KZ-005 | 110×41 | 2400 | 110 | A prominent upper band for a high living room |
For KZ-005, the MDF version is offered with parameters of 110×40×2600 mm; the wooden version is 110×41×2400 mm. For KZ-008, the MDF measures 90×44×2600 mm, and the wooden version is 90×41×2400 mm. For KZ-004, the wood measures 60×60×2400 mm, whereas the MDF is designed for 2600 mm. These values must not be mixed within a single estimate or cutting plan. The prices in the following tables apply only to beech and oak.
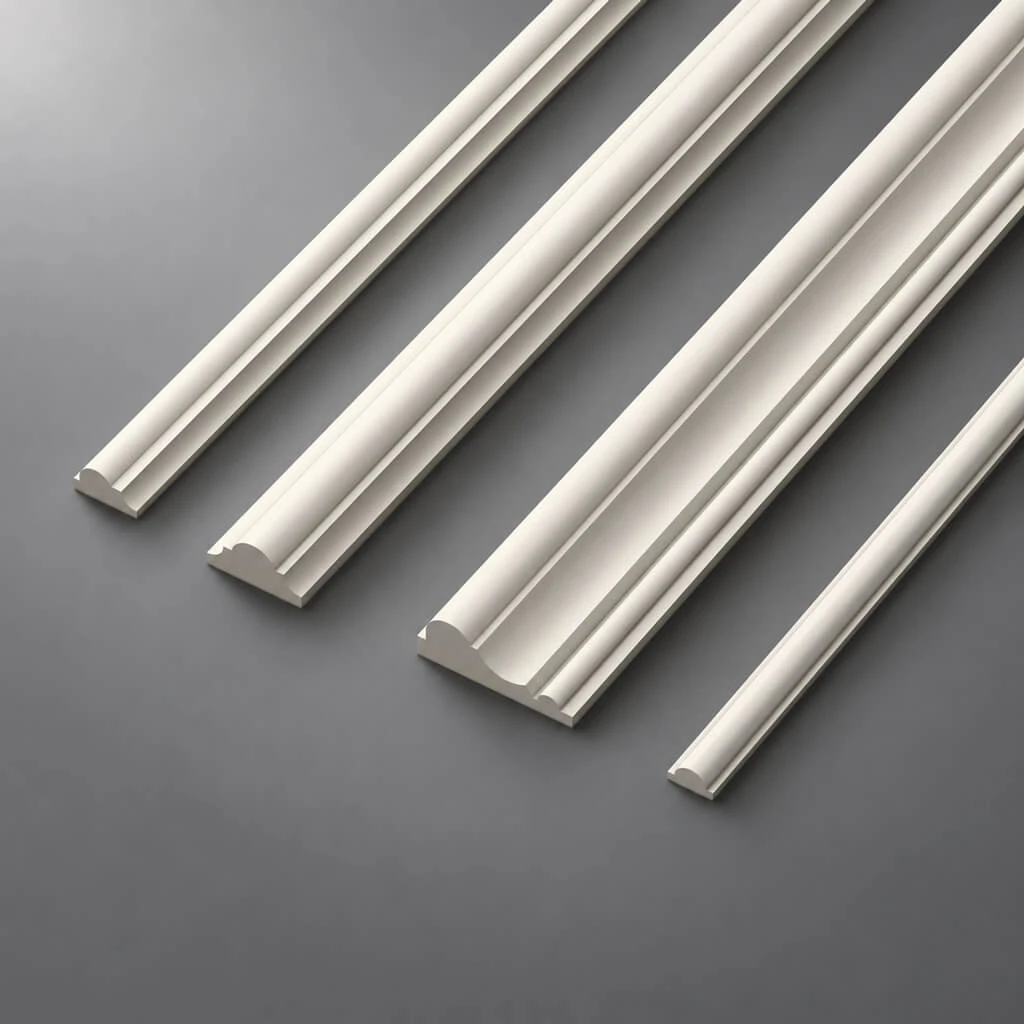
The designations A and C are taken from the manufacturer's data sheets. They should be matched against the drawing of the specific model, especially if the ceiling is sloped or the finish forms a step. The 110×41 mm rectangle does not show the exact curved contour of KZ-005: a factory drawing or sample is required to calculate the visible projection, the number of shims and the mitre cuts. The values in the table are intended for preliminary selection but do not replace checking the junction detail on site.
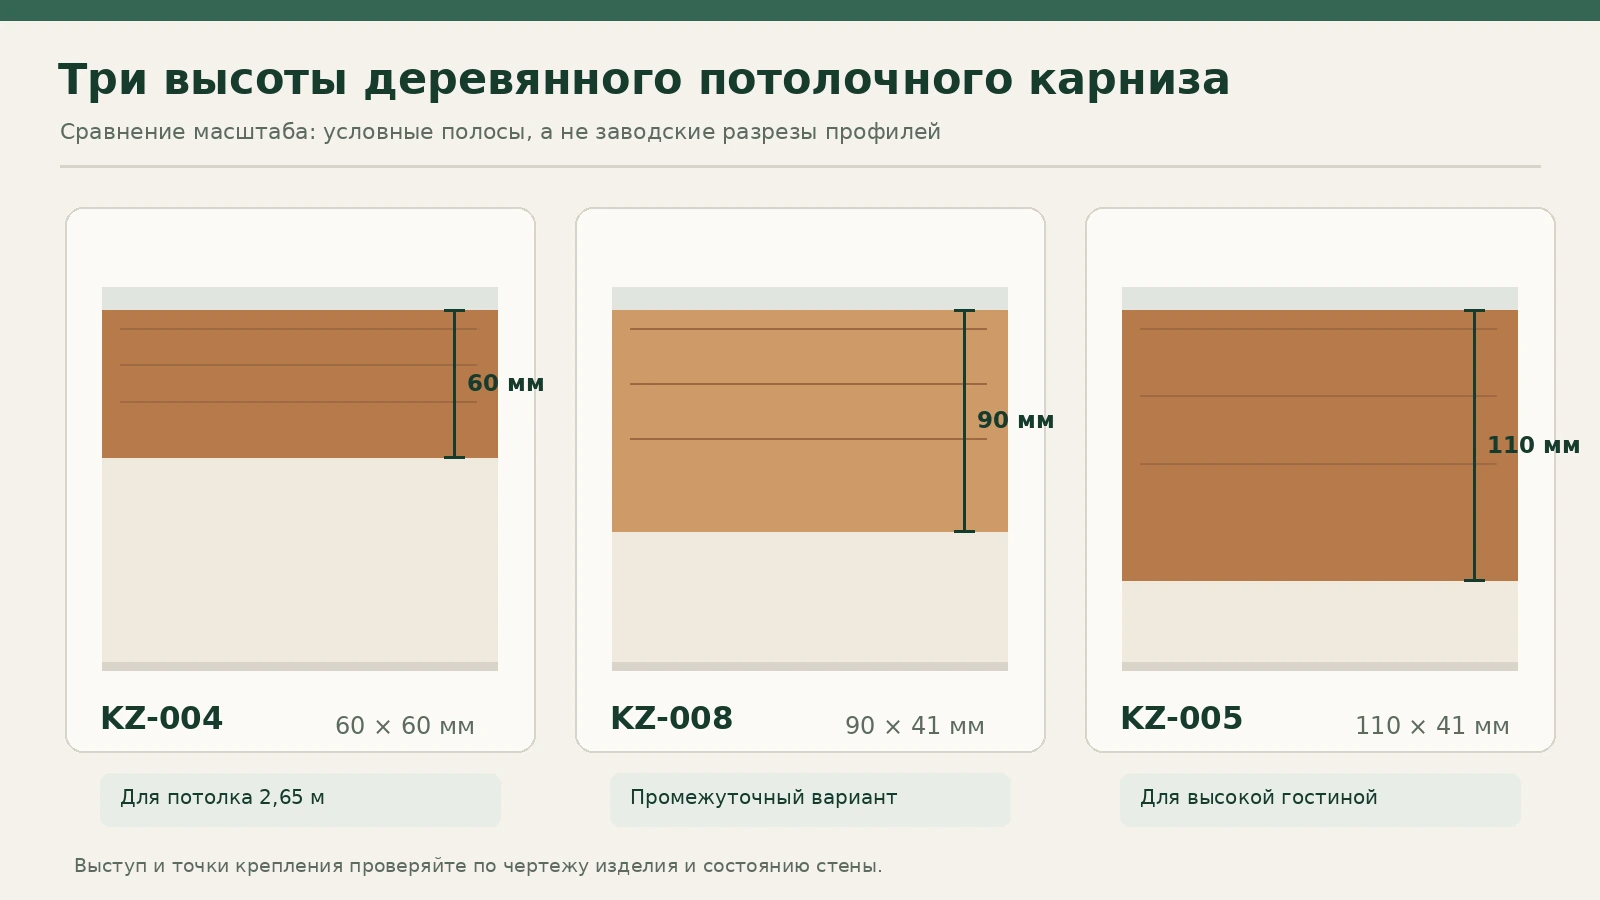
In a room with a lower ceiling, the difference between 60 and 110 mm is noticeable even without an elaborate pattern. This is determined not by fashion but by the share of space occupied by the upper decorative band. At a height of 2650 mm, a 60 mm contour corresponds to roughly 2.3% of the wall height, while a 110 mm contour is about 4.2%. For a living room 3150 mm high, the same 110 mm amounts to approximately 3.5%. Such ratios are not a universal selection rule, but they explain why one profile is perceived differently in two rooms.
Get Consultation
Oak or beech: choosing the material for the finish
If visible wood is intended, oak is usually chosen for its pronounced texture and the ability to show the natural grain under a clear coating. But "oak" does not mean one unchanging shade: adjacent planks may differ in pattern and color. For a long line under the ceiling, this can be more noticeable than on a small sample. Before ordering, you can agree on sorting by appearance and prepare a test finish on an offcut of the same material.
Beech is more often considered for a calmer, finely expressed texture and opaque painting. Under enamel, differences between species are less visible, but not all differences in material behavior and price disappear. Beech also requires a normal humidity regime and a properly selected coating system. One should not assume that any plank only needs to be painted once without primer and then the changes in the wood can be forgotten forever.
The finish coating determines the future work with joints. With clear lacquer, it is inappropriate to arbitrarily cover the joints with colored putty: the transition will remain noticeable. With enamel, after preliminary fitting, a thin preparation of the joint and coating can be performed, but the geometric error itself will not disappear. A wide gap or a "step" due to mismatched relief does not become a quality joint after a thick layer of paint.
There is also the practical question of mixing species. If the ceiling cornice is made of oak and the doors are made of tinted beech, it is not necessary to make all details from the same species. Sometimes it is enough to match the overall color temperature and degree of gloss. In another interior, where natural oak doors with open grain occupy a large area, a close oak cornice will give a more continuous material line. Finished coatings should be compared under the lighting that will be present in the room.
You should not buy oak just because it is more expensive. For white opaque enamel, beech may better fit the budget if the required substrate and surface quality requirements are met. For a clear finish, saving on the species may turn out to be less important than appearance: matching the same wood tone for a tall living room and a bedroom can be harder than simply calculating meters. In both cases, the final cost should be calculated by whole planks, not by imaginary linear meters without waste.
KZ-004: a calm line for a bedroom 2650 mm high
A bedroom measuring 4100×3600 mm has a relatively moderate ceiling height — 2650 mm. Here the ceiling cornice is visible from a short distance: from the bed, at the entrance, and near the wardrobe. The 60×60 mm profile leaves enough space for the light fixture, the upper part of the wardrobe, and the doorway, without turning the ceiling junction into the main detail of the room. It does not require a specially created large decorative ensemble of wall panels.
In the catalog you can buy wooden cornice KZ-004 in beech or oak. It is precisely for the bedroom that we are considering solid wood 60×60×2400 mm. A longer MDF plank exists for this model, but it is not part of our project. The 60 mm height makes it possible to support the ceiling line where the walls are painted in one color and the decorative surfaces are not overloaded with additional frames.
Imagine a wall 4.1 m long with a door at one edge and a cabinet at the opposite edge. If you choose an expressive multi-step profile, a complex fitting zone will appear near the tall cabinet, and several reliefs of similar scale may meet near the upper architrave. With a more compact cornice, the intersection of parts is easier to perceive. But before choosing, you need to check not only the visual impression but also the actual height of the cabinet: whether a mounting gap has been left and whether the decorative line will interfere with opening the doors.
The material requires careful fastening along its entire length. Too few fixing points on an insufficiently level wall can produce a wavy edge, which is especially noticeable in side light. First, check the straightness of the base and ceiling, then mark the working line of the cornice. If the ceiling line deviates by a few millimetres, it is unacceptable to automatically "straighten" it with a thick layer of adhesive without calculating the load-bearing capacity and the permissible gap.

The bedroom has another feature: the upper cornice is often close to concealed lighting. If the light sources are located a short distance from the wall, they will highlight every unevenness of the joint. Before final installation, it is useful to turn on the light that is planned for use in the evening and look at a trial dry assembly of several parts.
KZ-008 and KZ-005 in a living room with a 3150 mm ceiling
In a living room of 5200×4000 mm, the distance to the ceiling is half a metre greater than in the bedroom. A person sees the upper line from different points: from the sofa, by the window, from the passage to the adjacent room. Therefore, the relief of the ceiling cornice can be larger without taking up an excessive share of the wall height. But here another risk appears: a long wall of 5.2 m reveals even a slight mismatch between individual planks. The relief section must continue through the joint without turning or a sudden change in shadow.
KZ-008 — 90×41 mm. This model has a greater band height than KZ-004, but it does not reach the 110 mm of KZ-005. For a living room with painted walls and fairly simple doors, this is an intermediate solution: the pattern is noticeable, but there is still space for wall lights, paintings and tall cabinets. You can buy the KZ-008 ceiling cornice in the wooden version 90×41×2400 mm; when comparing by cost, do not substitute the 90×44×2600 mm MDF option.
KZ-005 — 110×41 mm. It forms a taller architectural band near the ceiling. With side daylight, such a relief becomes an independent part of the composition. It will be especially noticeable on a long wall without furniture, where a continuous line can emphasize the scale of the room. The catalog presents cornice made of solid oak KZ-005; the wooden versions of this model have a cross-section of 110×41 mm and a length of 2400 mm.
The 20 mm height difference between KZ-008 and KZ-005 looks small in the table. In a finished room, it is felt more strongly where a contrasting finish makes the cornice stand out against the wall. If the walls and ceiling are light and the cornice is left dark-stained, the tall band is perceived as significantly more active. If all the finishes are in the same light palette, its shape is read primarily through shadow. Therefore, the question "what is better for a 3.15 m ceiling" cannot be resolved by wall height alone: the chosen wood species, color, lighting, and the composition of the rest of the finishes change the result.
The two models share the same nominal parameter C — 41 mm for solid wood. However, this does not mean that their relief shapes, support points, and mounting techniques are identical. Before installation, the factory drawings are compared, the contact surfaces are identified, and it is checked which edge will adjoin the wall and which will adjoin the ceiling. The installation scheme of one model cannot be transferred to another merely because one dimension matches in the table.

With a stretch ceiling, the issue becomes fundamental: the relief must not rest on the membrane. A load-bearing base must be provided for it in advance, and a safe sequence of work must be chosen. If the ceiling finish has already been completed, the installer must assess the possibility of mounting to the wall without damaging the membrane and without hidden contact with it. When this is not possible, a lighter and more compact solution or a change to the assembly is better than installing heavy wood on an unreliable support.
One model for the whole apartment or different profiles
From a finishing standpoint, the desire to use the same cornice is understandable. One pattern throughout the apartment simplifies color coordination, looks consistent in doorways, and potentially allows some offcuts to be used in different rooms. But the same pattern does not necessarily mean equally successful proportions. In our pair of rooms, the ceilings differ by 500 mm, and the sizes and placement of furniture may also differ.
Option one — KZ-004 in the bedroom and living room. This is the most restrained solution. In the bedroom, the compact cornice supports a clean ceiling line; in the living room, it does not interfere with large pieces and visually preserves the wall at its maximum height. The advantage is a unified scale of finish and the same article number for both rooms. The disadvantage is that on the large open wall of the living room, 60 mm may be perceived as too small if the interior is designed with a noticeable architectural upper band.
Option two — KZ-004 in the bedroom, KZ-008 in the living room. This is a compromise between a unified finish language and the difference in scale. In both rooms you can use the same wood species and a coordinated finish, but the profile height will be 60 and 90 mm respectively. Visually, the two spaces are united by the material, not by a literal repetition of the contour. In the shared area of the hallway and living room, you need to determine in advance whether both cornices are visible at the same time and how the transition from one profile to the other runs.
Option three — KZ-004 in the bedroom, KZ-005 in the living room. It suits when the living room is conceived as a more formal space: a tall door, wide casings, large window openings, the rhythm of wall frames. But a tall profile raises the requirements for substrate preparation and makes colour mismatches at the joints more noticeable. You should not automatically choose this option just because the ceiling is above three metres.
There is also an important economic difference. With the same wooden article, purchasing can be planned with a shared cutting map, redistributing usable offcuts between rooms. If the models are different, an offcut of KZ-004 cannot be used instead of KZ-005 or KZ-008: the joint geometry and pattern will not match. Even the same wood species does not make the profiles interchangeable. In the example below we deliberately calculate the rooms separately so that the cost of a mixed configuration is transparent.
In practice, a simple test helps. Close the bedroom door and see whether its cornice is sufficient as a standalone element. Then open the door and assess the combined perspective from the hallway. If the transition between different shapes looks accidental, you can keep both models but build a common finish system and carefully resolve where one pattern ends. There is no need to turn the whole apartment into one continuous strip of decor where the architecture of the rooms is objectively different.
What to measure before calculating a wooden cornice
The nominal room dimensions are a starting point, not a ready-made order sheet. First, each wall is measured at the place where the calculated profile line will run. If a corner deviates from 90°, the length at the floor and the length at the ceiling may differ. In an old house, unevenness is especially common near plaster transitions and cornice niches. Therefore the tape measure is applied directly in the installation zone, rather than transferring to the drawing a dimension measured near the skirting board.
For the bedroom, record four sides: 4100, 3600, 4100 and 3600 mm. For the living room — 5200, 4000, 5200 and 4000 mm. These figures are valid only for the training rectangular plan. If there is a bay window, a niche for a curtain cornice, a concealed box, a column or a projecting pier, there are more separate sections. One additional short segment can change the cutting plan: with the same total perimeter length, the number of strips purchased may increase.
Each corner is assigned a number and marked as internal or external. Then the actual angle between the walls is recorded, for example with a protractor or a good bevel gauge with the position transferred to a template. When two parts meet at an ordinary right angle, the initial mitre geometry corresponds to half the angle. But you cannot set the saw to “45 degrees for all corners” without checking the walls. A small deviation can sometimes be corrected on a test piece, but on already painted oak a correction costs more.
The next point is the condition of the substrate. They check whether there is crumbling plaster, hidden pipes, electrical wiring or a movable ceiling assembly. The layout of the fastening points must take the wall material into account. Reliable fixing to concrete, solid brick, drywall cladding and aerated concrete requires different solutions. A single universal type of dowel cannot be recommended without understanding the substrate and the weight of the selected profile.
Measuring the ceiling is also not limited to a height of "2.65 m" or "3.15 m". Along long walls, plane deviations are noted; near corners, the depth of the junction; next to niches, the distance to light fixtures and curtain tracks. Where the cornice must cover the trace of the previous finish, the height of that strip is also measured. If the damaged surface is above the selected relief, the wall is repaired first, rather than trying to stretch the cornice covering.
Finally, they choose where longitudinal joints are permissible. In the bedroom, it is better not to leave a joint directly above the bed with directed light if there is an opportunity to rearrange the segments. In the living room, all joints should not be placed on the most illuminated section of the wall. These preferences affect the cutting map and may require an additional factory-made strip — therefore they are noted before paying for the order.
From perimeter to bill of quantities: two rooms
For the bedroom of 4.1×3.6 m, the nominal perimeter is 2×(4.1+3.6)=15.4 m. For the living room of 5.2×4.0 m — 2×(5.2+4.0)=18.4 m. That is 33.8 linear meters of decorative line in total. But these values are correct only with continuous finishing along four walls and no deductions. If the cornice stops at a built-in box or the window is finished differently, the route must be clarified on the plan.
| Room | Ceiling Height | Long walls | Short walls | Nominal perimeter | Model for calculation |
|---|---|---|---|---|---|
| Bedroom | 2650 мм | 2×4100 mm | 2×3600 mm | 15,400 mm | KZ-004 |
| Living room | 3150 мм | 2×5200 mm | 2×4000 mm | 18,400 mm | KZ-008 or KZ-005 |
| TOTAL | Different heights | Four walls | Four walls | 33,800 mm | Two product groups |
If you simply divide 15,400 by the factory plank length of 2400, you get 6.42, that is, formally seven pieces. For the living room, 18,400/2400 = 7.67, formally eight. However, dividing the total linear meters says nothing about whether the required segments can be fitted into whole blanks. For the bedroom, according to the cutting map below, the result is eight rather than seven planks; for the living room, eight can be achieved thanks to a combination of long and short segments.
Why can't both rooms be counted as one line, "33.8 m, therefore fifteen planks"? Because if the bedroom uses KZ-004 and the living room uses KZ-005, we are purchasing two different products and cannot transfer the remainder between them. Even with the same profile, the number fifteen remains only a lower arithmetic bound: it is necessary to build a general layout of the actual pieces and check the joint locations. This is a separate task that is best handled after the final model selection.
For an honest calculation, we assume right angles, four solid walls in each room, the same profile pattern on each wall, and wooden factory planks 2400 mm long. The cutting diagrams below show educational finished lengths of straight sections; they cannot be transferred to production without adjustment for the dimensions of the face and back side of the corner cuts. This approach allows the purchasing principle to be explained without passing off a simple drawing as a professional installation map.
Cutting plan for eight KZ-004 strips for the bedroom
On the four walls of the bedroom, we deliberately do not place joints flush against every corner. For the long side of 4100 mm, we will choose two straight segments of 2300 and 1800 mm; for the short side of 3600 mm — 2300 and 1300 mm. The scheme is repeated on the opposite walls. Each segment is shorter than the factory length of the wooden strip, 2400 mm, and a certain allowance for trimming remains next to it. This is merely a calculated layout by lengths, without transferring the geometry of the corner cut to the front edge.
| KZ-004 strip | Purpose of the segment | Trial finished length | Remainder pending cut clarification |
|---|---|---|---|
| 1 | Wall 4100 mm, first section | 2300 мм | 100 мм |
| 2 | Wall 4100 mm, second section | 1800 мм | 600 мм |
| 3 | Opposite wall 4100 mm, first | 2300 мм | 100 мм |
| 4 | Opposite wall 4100 mm, second | 1800 мм | 600 мм |
| 5 | Wall 3600 mm, first section | 2300 мм | 100 мм |
| 6 | Wall 3600 mm, second section | 1300 мм | 1100 мм |
| 7 | Opposite wall 3600 mm, first | 2300 мм | 100 мм |
| 8 | Opposite wall 3600 mm, second | 1300 мм | 1100 мм |
Check: 4×2300 + 2×1800 + 2×1300 = 9200 + 3600 + 2600 = 15,400 mm. Eight factory strips give 8×2400 = 19,200 mm. The difference is 3800 мм, but this value is not yet a usable offcut: sawing loses the kerf width, and some of the material will go toward end trimming and forming corners. In the table, 100, 600, and 1100 mm are arithmetic limits, not guaranteed usable offcuts.
Why can't seven planks be declared sufficient? Their total length is 16,800 mm, which is 1,400 mm more than the perimeter. It seems that this should be enough. But the chosen layout requires four segments of 2,300 mm, two of 1,800 mm, and two of 1,300 mm. No two pieces from this list fit into a single 2,400 mm plank; each occupies its own blank. To use seven, the joint locations, segment lengths, and cutting methods would have to be revised. Such a problem may be solvable after separate optimization, but this cannot be asserted without an actual cutting map.
Eight planks are a convenient starting layout, not a proven absolute minimum for any permissible joint arrangement. With a clear oak finish, it is sometimes even advantageous to buy a ninth: the craftsman can reject a blank with an undesirable grain pattern, change the joint location, or replace a piece damaged during sawing. If all walls are painted with opaque enamel and the substrate is prepared, the need for such a reserve may differ. The decision is made based on the project, not on a mandatory percentage allowance.
How to fit a 5,200×4,000 mm living room into eight planks
In the living room, the task is more difficult because of the 5,200 mm walls. Each long side does not fit into two 2,400 mm blanks, so without changing the design, at least three straight segments will be required. For it, we choose the sequence 2300 + 2300 + 600 mm. For each 4,000 mm wall — 2300 + 1700 mm. This allows a short 600 mm segment to be used together with a 1,700 mm piece in one factory plank.
| Plank for the living room | Segments in the blank | Where used | Arithmetic remainder |
|---|---|---|---|
| 1 | 2300 мм | Long wall No. 1 | 100 мм |
| 2 | 2300 мм | Long wall No. 1 | 100 мм |
| 3 | 2300 мм | Long wall No. 2 | 100 мм |
| 4 | 2300 мм | Long wall No. 2 | 100 мм |
| 5 | 2300 мм | Short wall No. 1 | 100 мм |
| 6 | 2300 мм | Short wall No. 2 | 100 мм |
| 7 | 1700 + 600 mm | Short No. 1 and long No. 1 | 100 mm to the cut |
| 8 | 1700 + 600 mm | Short No. 2 and long No. 2 | 100 mm to the cut |
Checking long walls: 2×(2300+2300+600)=10,400 mm. Short walls: 2×(2300+1700)=8000 мм. Together — 18,400 mm. Eight full planks KZ-005 or KZ-008 give 19,200 mm, that is 800 mm of nominal remainder. In the last two blanks, a kerf will be required between the parts; if its conventional width is 3 mm, on each such plank after two cuts there will remain not 100 but about 97 mm, not counting further end processing.
Particular attention must be paid to the combination of 1700 and 600 mm: in one board they fit only with careful marking, and the allowance for specific corner cuts cannot be derived from a single sum. KZ-005 has a higher profile than KZ-008. Depending on the orientation of the front edge and the chosen measurement point, the finished beveled end may require a larger initial section than a person calculating a straight cut expects. Therefore, before confirming eight planks, the craftsman must make a drawing of the cuts and make sure they fit within the specified 2400 mm taking into account technological allowances. If not, the position of the joints is changed or a blank is added.
For the living room, seven planks within the given rectangular plan are not enough even arithmetically: 7×2400=16,800 mm, while the perimeter is 18,400 mm. Eight is the lower bound by the sum of lengths. The possibility of actually performing such a cutting plan is determined by the installation conditions and the real geometry of the walls. For some profiles it is more reasonable to use nine so as not to place a short piece in a well-lit corner.

This map is good not because it supposedly eliminates any remainder, but because it shows each purchased plank and where it is used. After measuring, it is permissible to shift the joint along the wall, lengthen one segment and shorten another. Then the schedule is recalculated in full: one cannot simply transfer the conventional allowance from one line to another and consider the cutting problem solved.
How much do KZ-004, KZ-005 and KZ-008 cornices cost
In the public STAVROS product cards at November 18, 2026 prices are indicated for wooden planks 2400 mm long. This is the cost of the products themselves, excluding labor, finishing, delivery and packaging. The starting prices on the cards may refer to MDF, so beech and oak are listed separately in the table. Before placing an order, prices are rechecked against the selected finish.
| Solid wood product 2400 mm | Beech, ₽ per slat | Oak, ₽ per slat | 8 beech slats, ₽ | 8 oak slats, ₽ |
|---|---|---|---|---|
| KZ-004, 60×60 mm | 4 580 | 6 630 | 36 640 | 53 040 |
| KZ-005, 110×41 mm | 9 970 | 15 440 | 79 760 | 123 520 |
| KZ-008, 90×41 mm | 10 290 | 14 570 | 82 320 | 116 560 |
This table explains an interesting peculiarity: among the listed options, beech KZ-005 is cheaper than beech KZ-008 per piece, even though the KZ-005 profile is taller. For oak, the situation is the opposite: KZ-008 costs less than KZ-005. Therefore, price cannot be calculated from height alone or from a conventional “amount of wood.” The cost depends on the specific item code, the manufacturing shape, and the manufacturer's commercial terms.
For a bedroom with KZ-004, eight beech slats cost 36 640 ₽, oak ones — 53 040 ₽. For a living room with KZ-008, eight beech ones cost 82 320 ₽, oak ones — 116 560 ₽. If you choose KZ-005 for the living room, eight beech ones will cost 79 760 ₽, oak ones — 123 520 ₽These values are obtained by directly multiplying the verified price of one strip by eight pieces.
| Two-room set | Beech, ₽ | Oak, ₽ | What changes |
|---|---|---|---|
| Bedroom KZ-004 + living room KZ-008, 8 pcs. each | 118 960 | 169 600 | The living room cornice is 90 mm high |
| Bedroom KZ-004 + living room KZ-005, 8 pcs. each | 116 400 | 176 560 | The living room cornice is 110 mm high |
| Both rooms KZ-004, 8 pcs. each | 73 280 | 106 080 | One SKU and a thinner top line |
The last row intentionally keeps eight separate strips per room. If the buyer decides to use KZ-004 in both rooms, a combined cutting plan can be prepared to check whether the lengths can be used more economically. We do not claim such savings in advance, since we are only considering the original layout with a specific arrangement of joints.
For comparison with a reserve of one additional strip for each selected item the KZ-004 + KZ-008 set will cost 133,830 ₽ in beech or 190,800 ₽ in oak. The KZ-004 + KZ-005 set — 130,950 ₽ or 198,630 ₽ respectively. The ninth strip in each room is a deliberate risk scenario, not an automatically mandatory norm. The buyer can approve the final cutting plan and reserve requirements before an invoice is issued.
Costs not yet included are finishing, fasteners, installation, possibly wall preparation, protective packaging for long items, and transportation to Novokuznetsk. Product pages sometimes mention rigid packaging at an additional charge, but the final packaging scheme and its cost must be confirmed for the specific quantity and route. You cannot simply add the price of one package to eighteen items without finding out exactly how the strips will be packed for transport.
How to avoid overpaying without compromising the result
The first sensible saving is to choose the profile shape based on the project rather than buying the largest option out of habit. If KZ-004 looks expressive enough in the bedroom, switching to the more expensive KZ-005 will not automatically make the room better. A tall decorative band may conflict with door casing, a wardrobe, or planned lighting. The cost of a mistake here includes not only the price difference but also redoing the junctions.
The second is to map out the actual cutting plan. On two walls of equal length, it is sometimes possible to shift a joint so that short offcuts really do fit into another workpiece. But the joint should be moved with regard to the wood grain pattern and lighting. Saving one strip is not always justified if extra joints appear in the most visible place. With a clear finish, even a well-made joint can be visible through the change in grain.
The third is not to buy products before complex construction elements are completed. If the ceiling is still going to be lowered, the walls leveled, or the boxes changed, the current perimeter and mounting method will become outdated. In such a situation, it is useful to choose the model in advance and get a preliminary price, then confirm the final quantity after the actual measurement. Ordering long wooden parts "with a small eyeballed reserve" is weak protection against a geometry error.
The fourth is to separate the cost of the wood from the cost of the finishes. If white enamel is planned, choose the species with regard to substrate quality, price, and finishing requirements. If you need clear-finished oak with an approved pattern, allow for strip sorting and possible additional stock. It is not necessary to use the same color scheme on all floors or rooms, but the material and sheen of the finish must be agreed before purchase.
Finally, compare not the advertising "from" price on the product page, but the final specification: KZ-004 or KZ-005, oak or beech, 2400 mm, how many whole units, what work is performed, how it will be packed and delivered. Only then can you see which part of the costs really relates to the cornices and which relates to executing the project.
Installation at the wall-ceiling junction: sequence of checks
A wooden ceiling cornice has no right to be held solely by a handsome adhesive seam. The choice of fixing method begins with the substrate, the weight of the specific profile and the quality of the contact surfaces. Before work, loose paint and finish are removed at the support points, the plaster is checked for crumbling, and the location of utilities is determined. Never drill blindly near concealed wiring and pipes. If the substrate is uneven, the fixing scheme is developed separately for each section.
Marking begins with a continuous working line. It is checked with a level, then compared with the actual ceiling geometry. With a slight height difference, it is sometimes necessary to choose which edge will become the main visual reference and which gap must be prepared. But a large ceiling dip must not be masked by randomly rotating the decorative profile: after installation the relief will become wavy, even if the material itself is straight. If the ceiling differs greatly in level, first determine how to correct the building base.
During a dry fit, several straight sections are joined on the floor or a mounting table, and the matching of the relief and the orientation of all planks are checked. This is where errors such as a profile turned to the opposite side are discovered. In a picture, a single item may look symmetrical, but the actual cut shows the difference between the front edges. First make sure that the complex surface continues the pattern, then mark the corners.
For fixing, a combination of products compatible with the substrate and the wood is used, as determined by the installer: a suitable mounting compound and, where necessary, mechanical fastening. It is impossible to assign a universal screw spacing for KZ-004 and KZ-005 without knowing the wall material and the actual support scheme. Through weak drywall finish, the fastener must not transfer the load solely to the thin sheet if the calculation requires a load-bearing element behind it.
At the final stage, check straightness, tightness of the corners, absence of stress and the possibility of safely applying the coating. A wooden cornice must not be forcibly bent on an uneven wall to the point of internal stress: after humidity changes, the joint may open. If the test fit shows a large gap, first correct the substrate or change the joint design, rather than tightening the fasteners harder.
Stretch ceiling, concealed light and complex corners
With a stretch ceiling, wood must not be fixed directly to the membrane. The film or fabric performs its own function and is not a load-bearing support for wooden trim. If the cornice is planned before the ceiling is installed, the designer can provide a suitable base for fixing to the wall or to a pre-calculated structure. If the ceiling is already finished, an inspection is required to assess whether installation is possible without access to concealed assemblies and without damaging the existing finish.
A separate issue is the shadow line. Some modern ceilings are deliberately separated from the wall by a gap that creates the impression of a floating surface. A tall wooden cornice can cover this line and deprive the ceiling of its intended effect. In that case, it is sometimes better to abandon a large profile, even if it suits the room height. Preserving the architectural concept is more important than necessarily installing the chosen product.
The situation with concealed lighting is similar. An LED strip or linear luminaire highlights the boundary of the relief. If the cornice is not designed for the specific recess, uneven shadow or a place inaccessible for maintenance may result. Mark on the drawing the distance from the light source to the outermost point of the wood, and check the space for wires, ventilation and servicing of the fixture. A wooden profile does not by itself become a certified lighting enclosure: the relevant requirements for wiring and thermal conditions are addressed separately.
In corners, the wall and ceiling rarely form perfect mathematical geometry. Even at a nominal 90°, a measured line can deviate by several millimeters, and the upper plane of the relief may not align with the lower one. For such a joint, it is useful to make short test pieces from the same profile type and assess how they fit. A proper dry fit reveals the actual state of the joint before any adhesive or finish is applied.
If arches, complex curves, or polygonal niches are required, straight factory-made KZ-004, KZ-005, and KZ-008 profiles cannot automatically be considered ready for bending. It must be determined whether a segmented assembly with acceptable joints is possible or whether a different product type will be needed. Inventing a minimum bending radius for solid wood without manufacturer data is not acceptable.
Lengthwise joint: where it is acceptable and what is visible after painting
A straight joint on a cornice is not just a connection between two wooden ends. The profile must continue through it: the top line, the central projection, the bottom edge, and the transitions between the grooves. A small misalignment on a smooth section may be almost invisible, but on a stepped relief it creates a shadow that will be noticeable from the far end of the room.
If the finish is transparent, the direction of the grain also matters. Two oak blanks of the same article number can differ noticeably in their growth rings. It is useful to lay them out side by side before cutting and to mark the installation order. The customer should agree on which tone variations are acceptable and which areas require matching. A single clear lacquer will not completely hide the mismatch in expensive wood.
Under enamel, the requirements are somewhat different: the surface must be flat, stable, and prepared for a compatible coating system. The joint is made so that no noticeable step forms after normal seasonal changes in the wood. An opaque coating hides color differences better, but it does not correct profile misalignment and does not cancel the behavior of the wooden material. Joints that had to be "sculpted" with a thick layer of filler instead of being precisely fitted look especially poor.
The location of the joint is not chosen solely based on cutting efficiency. In a bedroom, directional lighting can make a joint above the headboard the most noticeable spot in the room. In a living room, a long line opposite the window is under oblique daylight — randomly placed short pieces should be avoided there. If the proposed economical cutting plan places a joint in exactly such an area, it is reasonable to check another layout, even at the cost of an extra strip.
There is a rule that helps evaluate the result even before the final finish: inspect the dry joint from several distances, under general and side lighting. If the pattern mismatch is visible to the naked eye, painting or tinting will rarely eliminate it completely. The position and ends of the parts should be corrected while this is still technically possible.
How to combine an upper cornice with doors, baseboards, and moldings
In a bedroom with a 2650 mm ceiling, the upper KZ-004 may be almost the only relief accent. In that case, the lower floor baseboard does not have to be equally tall: it serves its own function of covering the floor junction. In a living room 3150 mm high, a tall KZ-005 is sometimes supported by sufficiently wide door casings or wall frames. But if all these elements are equally massive, the interior may look overloaded: the eye cannot tell which line is the main one.
The distribution of roles helps. For example, the upper cornice sets a continuous horizontal line, door casings highlight the verticals, and the floor skirting remains a calm lower boundary. If the cornice is oak with a visible grain, the other wooden elements can be matched by shade, but their profile does not have to be repeated. If white enamel is used, the difference in materials is concealed more strongly, but proportions and the depth of shadows become more important.
To select matching profiles, you can open the section Buy wooden trim, which presents skirting boards, mouldings, casings and cornices. However, the main order in this article still consists of KZ-004, KZ-005 and KZ-008. Random items from neighbouring groups cannot be included in the product set simply because they are made of solid wood.
Not every ceiling profile should be called a skirting board in a technical specification. In conversation, the words “fillet”, “ceiling skirting” and “cornice” are used, but for an order the exact article number and its drawing are important. For a comparison of the terms, there is manufacturer material on how a wooden ceiling skirting board, cornice and fillet differ. Another overview — wooden ceiling skirting in the interior — is useful for those refining the overall composition, but does not replace our itemised estimate for two rooms.
Installation methods for lightweight polyurethane stucco should not be automatically transferred to wooden cornices. Weight, preparation methods, material behaviour and fixing requirements differ. If the interior already has a polyurethane rosette or moulding, colour and shape compatibility are checked separately. This allows the elements to be linked visually without presenting them as one structural system.
Order with delivery to Novokuznetsk: what specification is needed
It is enough for the buyer to provide a clear schedule. For an example set with KZ-004 in the bedroom and KZ-008 in the living room, it would be as follows: KZ-004, solid beech or oak, 60×60×2400 mm — eight strips; KZ-008, the same selected species, 90×41×2400 mm — eight strips. If a reserve is decided upon, one additional strip of each item is added separately. If the living room receives KZ-005, the second line is replaced with 110×41×2400 mm, without automatically changing the quantity until the cuts are re-checked.
The request also includes finish requirements: the product is to be painted with enamel, tinted, or given an agreed coating. The description "light wood" does not replace the species designation and a verified color sample. If the customer wants the same shade for the doors and the cornice, it is useful to attach a photo of the existing interior in daylight and a physical coating sample, if available.
Packaging is especially important for long-length parts. It is clarified how the ends are protected, whether horizontal stacking is possible, how many strips fit in one rigid transport pack, and whether packaging is included in the price. On products with pronounced relief, a strong impact on a protruding part can cause a chip, and a long strip without proper support can be damaged during transport. Saving on cargo protection without understanding the delivery conditions is unwise.
For shipment to Kemerovo Oblast, the transport cost and actual timelines must be requested for the current route. On the STAVROS website there is a page delivery of wooden cornices across Russia with the payment and receipt terms; the final cost is agreed with the seller and the carrier. We do not claim that the goods are in stock in Novokuznetsk, and we do not set arbitrary delivery times. Even if the product page contains information about availability in another city, it does not guarantee availability at the time of payment.
Upon receipt, check the number of packages, the integrity of the rigid packaging, and visible damage before the parts are finally handed over for installation. Then compare the markings with the schedule: KZ-004 must not be replaced by KZ-008, and an MDF product must not be wooden only by the name of the product card. If a transparent finish is required, it is useful to lay out the strips by tone and pattern while the installation order can still be changed.
Frequently asked questions about choosing and buying
Are KZ-004 and KZ-005 suitable for the same apartment?
Yes, if the difference in their sizes is justified by the architecture of the rooms. In our example, KZ-004 is placed in a bedroom with a height of 2650 mm, and KZ-005 in a living room with a height of 3150 mm. The two rooms can be unified by species and coating. But at the point of visual transition between them, it is necessary to check how the cornices end and whether an accidental break in the relief is created.
Why does the price of a wooden cornice differ from the "from" amount in the catalog?
Because the product cards include MDF options that may be selected by default. For example, for KZ-005 the price of the wooden beech product 110×41×2400 mm differs from the price of the MDF 110×40×2600 mm. Compare within a single row the item code, wood species, cross-section and length, not just the general model name.
Can the leftover of KZ-005 be used in the bedroom instead of KZ-004?
No, if the continuous relief of a single model must be preserved. KZ-005 has a different height and pattern, so joining it with KZ-004 will not be equivalent. The leftover may be useful for another separate task, but that is not a reason to reduce the KZ-004 specification in the bedroom. When purchasing different models, leftovers are counted separately.
Should oak be chosen for a clear finish?
Oak is often considered for its pronounced wood grain, but the decision depends on the desired color and finish sample. Beech can also be used with clear finishes when the result is agreed upon. Do not buy material based on a verbal description such as "natural": request photos of the selected species and, where possible, a trial finish.
When will eight planks not be enough for the living room?
If the actual wall has additional corners and niches, if the cuts require larger allowances, if the position of the joints cannot be changed, or if some of the material is rejected during preparation. Our eight planks are calculated for a flat training rectangle with specific segments. Before purchase, the craftsman confirms every cut and the position of the joints.
Can a cornice be glued to a finished stretch ceiling?
Not to the membrane itself. A wooden cornice must rest on a prepared load-bearing structure and be fixed in a way suitable for the base. If the ceiling is already installed, the possibility of installation without damaging it is checked on site; sometimes the chosen solution will have to be replaced.
How should oak or beech ceiling profiles be cared for?
Remove dust with a soft dry cloth or an attachment that does not scratch the finish. Care for lacquer, oil and enamel differs, so follow the instructions for the specific finishing product. Do not leave the wood exposed to water or persistent condensation, and maintain normal indoor humidity levels.
What should I do if the inside corner is not exactly 90°?
Measure the actual angle and make a test cut on a suitable offcut. Do not try to fill a large gap with filler. On a textured piece, a pattern mismatch will be noticeable even after painting. For a complex angle, discuss the cutting plan with the installer before placing the full order.
Can the entire order be calculated based on ceiling area alone?
No. The cornice runs along the walls, so the starting value is the length of the installation line. For a rectangular room this is the perimeter, but it is adjusted according to the actual sections. Then a list of parts is compiled from this schedule, a cutting map for the factory strips is built, and only after that is the number of pieces determined.
How much will delivery to Novokuznetsk cost?
There is no fixed amount in this article: it depends on the weight and volume of the package, the number of items, the chosen carrier and the order terms. Request a quote for the final specification. The price of wooden strips in the tables does not include transportation or installation.
Buy STAVROS wooden ceiling cornices in Novokuznetsk
If the bedroom should stay calm in its finishes, start with KZ-004, 60×60 mm. For a living room with a height of 3150 mm, compare two actual profiles: KZ-008, 90 mm high, and KZ-005, 110 mm high. Do not automatically choose the larger one — hold the contour against the wall and compare it with the doors, lighting and ceiling junction. Only after that decision is it convenient to calculate the cost of the set.
According to our working map, two rooms require sixteen wooden planks: eight KZ-004 for the bedroom and eight KZ-008 or KZ-005 for the living room. With a reserve of one plank of each model, that makes eighteen. These numbers should be confirmed after actual measurement and cut planning. If the result does not fit within eight planks per room, it is better to recalculate the purchase rather than try to reduce the technological allowances.
The catalog features wooden cornices made of oak and beech with verifiable dimensions and prices. When placing an order, specify the exact article number, wood species, length 2400 mm, quantity, selected finish, and delivery city. To understand the differences between types of ceiling decor, you can also read the material on how it is used wooden coving in interior design, without substituting it with recommendations for mounting the selected solid profiles.
A good result is visible not only in a photograph of the finished living room. After installation, all profile lines must align at corners and on long joints, the ceiling must not bear load from the cornice where it is not designed for it, and the wood must retain the agreed pattern and finish. This is precisely why preliminary measurements, separate cutting maps, and an exact specification are needed: they turn a beautiful image into an order that can actually be manufactured, delivered, and installed.