










Article Contents:
- Where to buy wooden skirting boards in Bryansk and what to choose before ordering
- What you find on the wall after removing plastic skirting boards
- Five measurements worth taking before buying
- How to choose a height of 97, 100, 120 or 160 mm
- Why height cannot be chosen separately from doors and furniture
- Skirting board on an uneven wall: when height does not help
- Five STAVROS solid wood models: dimensions without confusing them with MDF
- PLT-006 and PLT-007: similar height, but different thickness
- PLT-005 or PLT-001-1: two solutions with a height of 120 mm
- When PLT-003 with a height of 160 mm is justified
- Oak or beech: choosing the wood species for an old interior
- Clear finish, enamel and color matching
- Practical example: living room, bedroom and hallway after dismantling
- Installation area schedule: don't lose short walls
- Cutting plan: how to get a set of 17 planks 2400 mm long
- Do you need to order an eighteenth plank?
- How much does a set of oak and beech skirting boards cost?
- How to create an estimate without hidden lines
- What to do with cables after removing the old skirting board
- Preparing the base for installing solid wood
- Fixing a wooden skirting board and preserving the floor's performance
- How to finish internal and external corners without visible gaps
- In what order to carry out the replacement in an occupied apartment
- Mistakes that force you to buy extra skirting board
- How to order wooden skirting boards with delivery to Bryansk
- Frequently asked questions about wooden skirting boards in Bryansk
- Can a plastic skirting board be fully replaced with a wooden one without touching the floor?
- Is it worth choosing 120 mm if the wall damage extends to 114 mm?
- How does PLT-007 differ from PLT-006 if they are almost the same height?
- Can I order oak skirting boards and then paint them with white enamel?
- What should I do if the walls in the hallway are uneven?
- How many planks are needed for two rooms and a hallway?
- Can leftover pieces be used in another room?
- Is skirting board installed behind a built-in wardrobe?
- How can I find out the delivery cost to Bryansk?
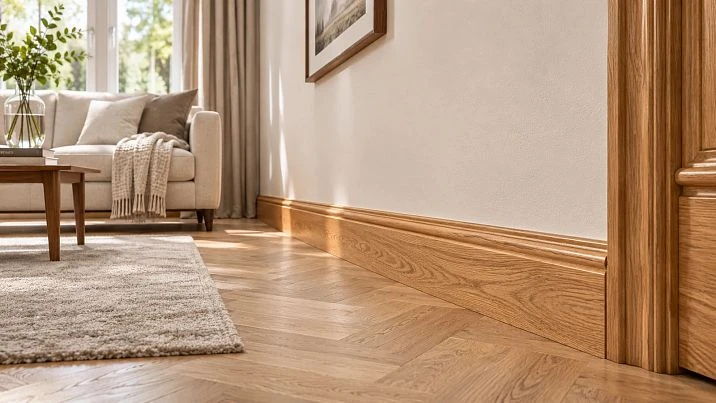
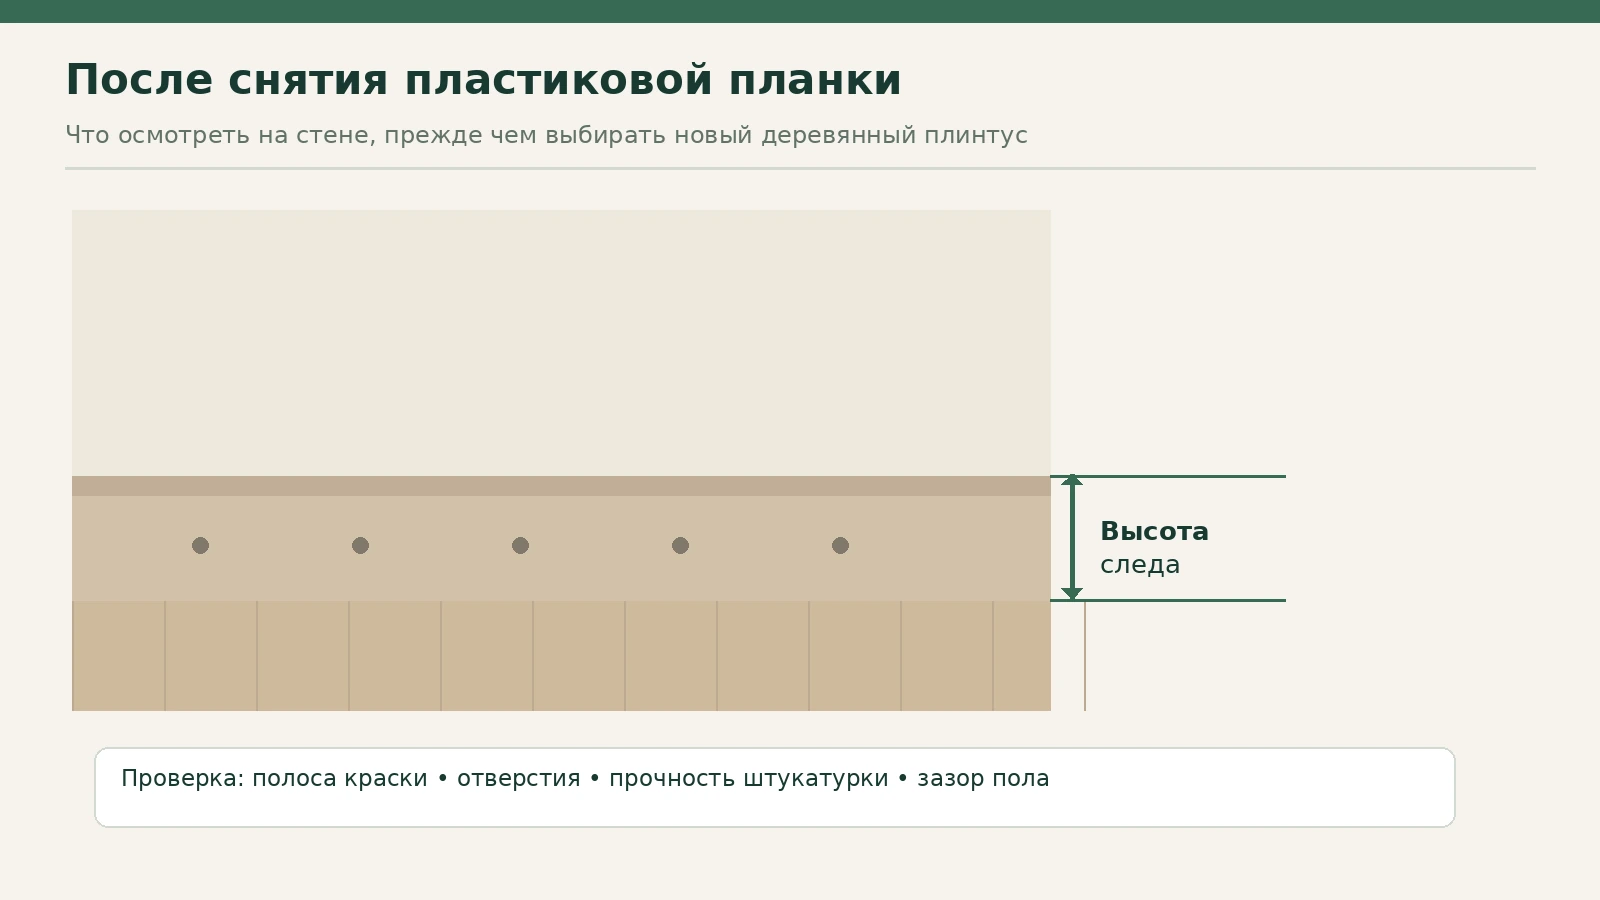
After removing a plastic skirting board, the lower part of the wall rarely looks the way it did before renovation. A light stripe remains on the wallpaper, a dark dust mark on the paint, and holes from fasteners are visible in the plaster. Sometimes the new floor has already been laid, and the old skirting board was covering an uneven edge of the covering. This is exactly the moment when you have to decide whether it can be replaced with a wooden profile without re-finishing the entire room.
For an apartment in Bryansk, it makes sense to first measure the height of the traces of the old finish, the width of the gap at the floor and the free space near the door casingsThen choose the cross-section and wood species, rather than starting with the price per linear metre. If the traces rise to 112 mm, a 100 mm high wooden skirting board will not hide them completely. If the wall is clean and only 17 mm of depth remains to the casing, a beautiful 22 mm thick profile may prove inconvenient at the junction.
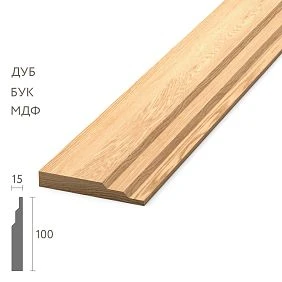
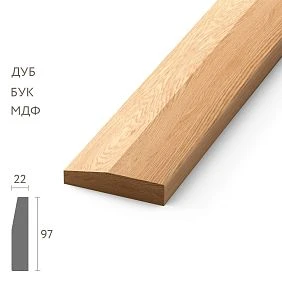
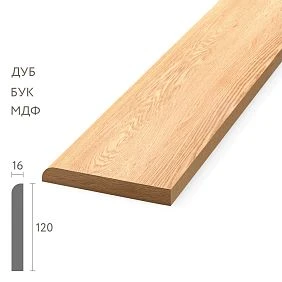
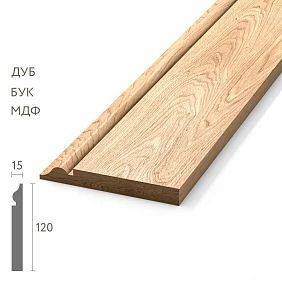
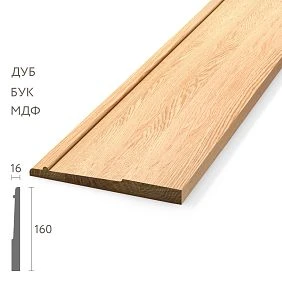
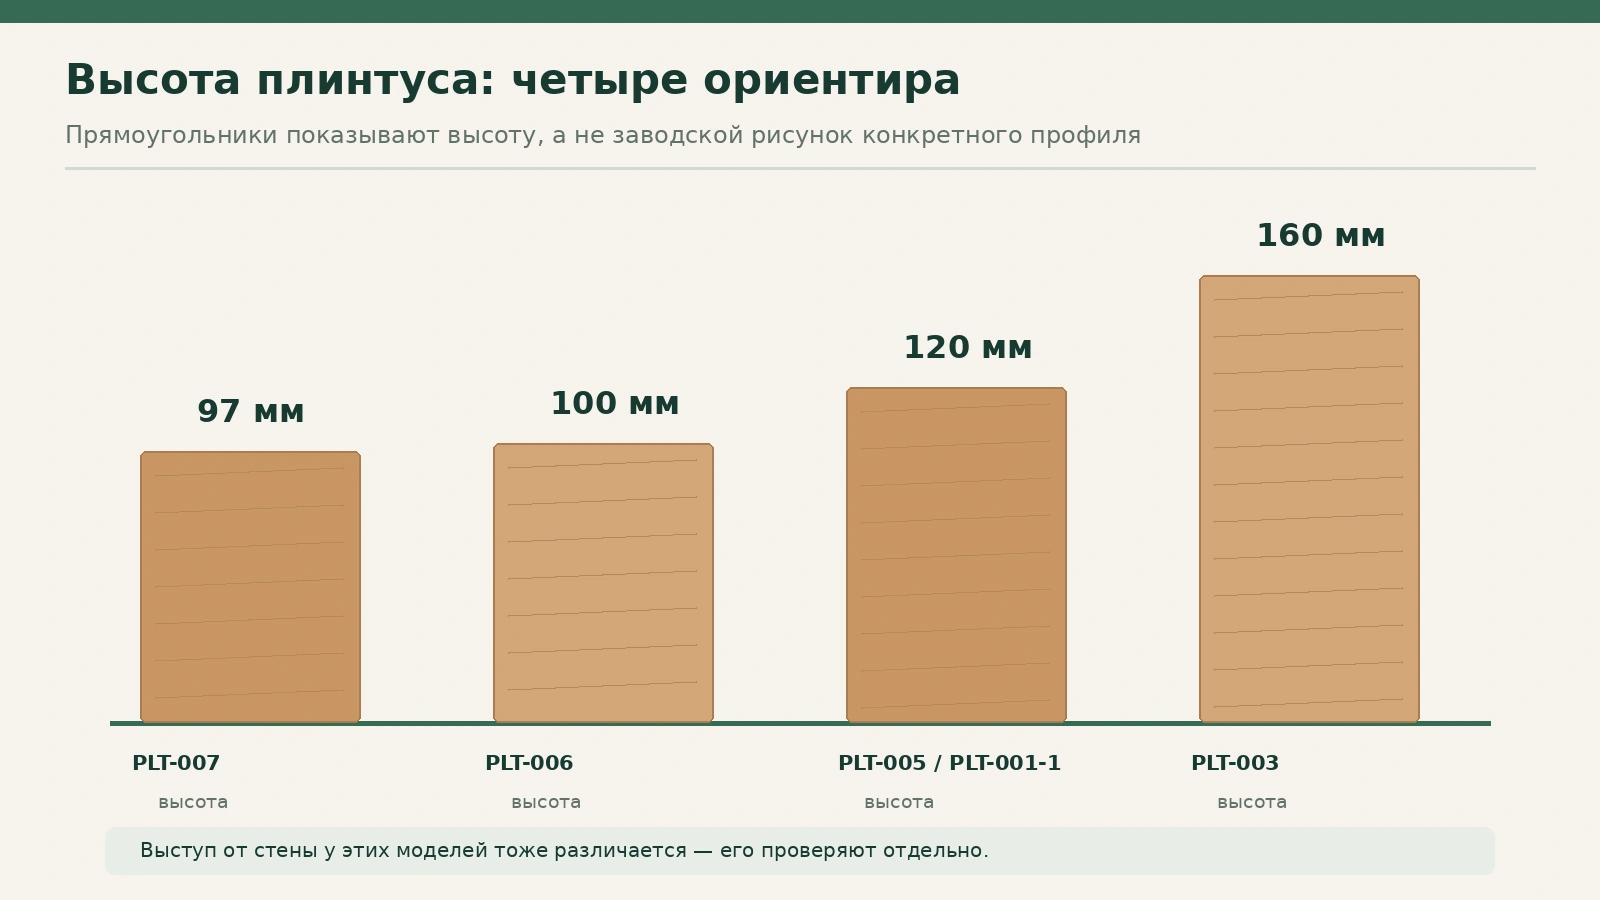
The STAVROS catalogue has five oak and beech profiles suitable for comparison: PLT-007 at 97 mm high, PLT-006 at 100 mm high, two 120 mm models — PLT-005 and PLT-001-1 — and PLT-003 at 160 mm high. For the solid wood versions under consideration, each factory strip is 2400 mm long. Below is not an abstract story about skirting boards, but a procedure for replacement: from inspecting the wall to the bill of quantities, cutting plan, estimate and order with delivery.
Where to buy a wooden skirting board in Bryansk and what to choose before ordering
A resident of Bryansk does not necessarily have to look for a local warehouse with the required wooden profile. On the STAVROS website you can buy a wooden skirting board in Bryansk, choosing a specific product, material and quantity. Delivery is agreed separately: the amount depends on the composition and dimensions of the order, the transport company and the delivery address. A STAVROS store or production facility directly in Bryansk is not assumed here.
When buying a skirting board for an already finished apartment, the task differs from an ordinary purchase during a new renovation. In a new room, the profile height can be included in the design in advance, and doors, wall colour and furniture can be selected to match it. When replacing an old product, the choice is limited by what is already around it: the lower edge of the paintwork, the height of the existing casing, the legs of the wardrobe, the radiator and the floor covering gap.
Therefore, it is better to start an enquiry to the store not with the words “I need a beautiful tall skirting board”, but with a short specification: “oak or beech, height not less than 120 mm, projection from the wall not more than 16 mm, strip length 2400 mm, 34 metres of sections need to be covered, there are three external corners”. That way the seller and the installer will be discussing the same task.
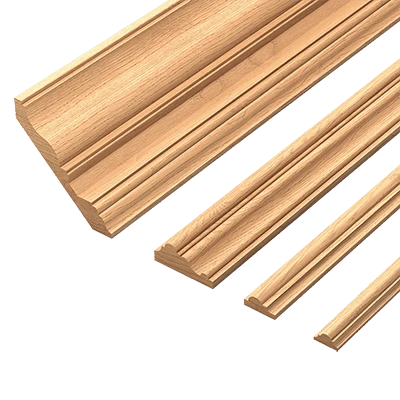
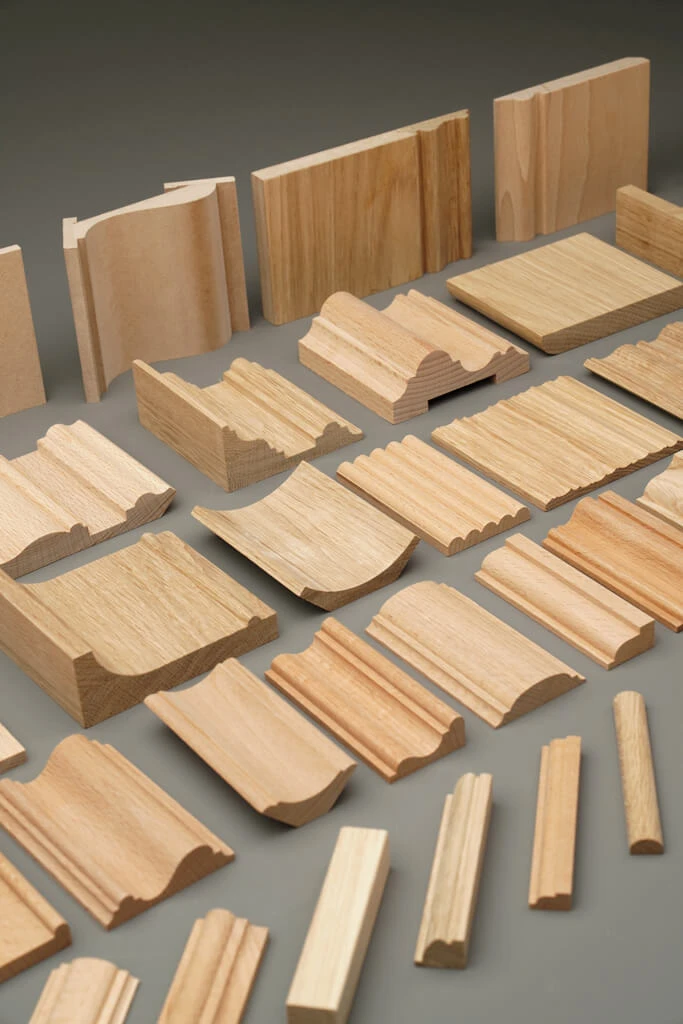
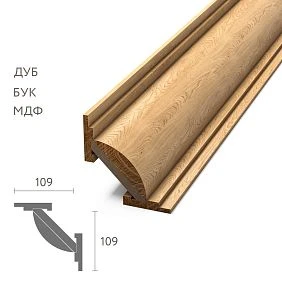
It is useful to open right away wooden trim catalog and compare profiles using drawings. A photograph shows the appearance but does not explain how much space the product will take up near the door frame or how much its top edge will cover the old paint stripe.
What is revealed on the wall after removing a plastic skirting board
A plastic strip is usually flexible enough: it can follow a slight wave in the wall and conceal local unevenness without a noticeable gap along the top edge. A solid wood product behaves differently. It has a fixed geometry, and trying to force it against a heavily curved wall often results in stressed fastening, gaps or damaged finish.
Begin the inspection not with a tape measure, but with a removed section at least 50–70 cm long. While the rest of the finish is still in place, you can see how the old assembly was constructed. A cable may run behind the plastic profile; its fastening sometimes goes only into the plaster, and sometimes into a solid wall. Note such places separately so that when installing the wooden strip you do not drive fasteners into hidden wiring.
Four traces left after removal require different solutions. A stripe of changed colour is primarily a question of the new skirting board's height. Protruding bits of adhesive are a question of preparing the base. Open fastening holes need to be assessed: can they be left covered by the new finish, or must they be filled for reliable fastening? Wallpaper that has come away from the floor, crumbling filler and loose plaster are not fixed by a tall skirting board: they are restored before installation.
Another feature shows up under oblique light. The old skirting board may have concealed not only stains but also a small step between the wall and the floor covering. In daylight it is almost invisible; in the evening, with a side lamp switched on, the joint casts a long shadow. When choosing a wooden profile, this is noticed in advance, not after gluing the first section.
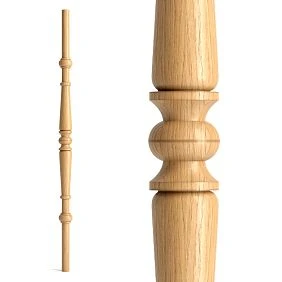
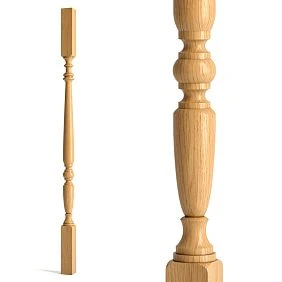
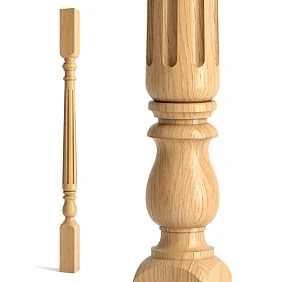
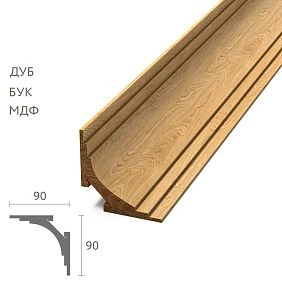
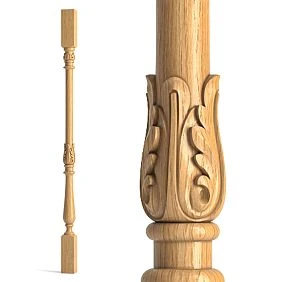
Our factory also produces:

Five measurements worth taking before buying
The first measurement is the height of the upper trace on the wall. Do not measure it in just one corner. Walk along each wall and record the maximum distance from the finished floor to the damaged or discolored strip. If the value by the window is 78 mm and behind the sofa it is 114 mm, you cannot choose a single profile based on the smaller number: after rearranging the furniture, the defect will be in plain sight.
Second — the gap between the flooring and the wall. For a floating floor, it may be provided for by the design; covering it with a decorative strip is acceptable, but rigidly tying the floor to the baseboard is not. Make sure that the actual depth of the selected cross-section will cover the edge, taking into account the position of the profile on the wall. The sufficiency of the overlap is checked not by a single number for the baseboard thickness, but by the actual geometry of its lower supporting part on the drawing.
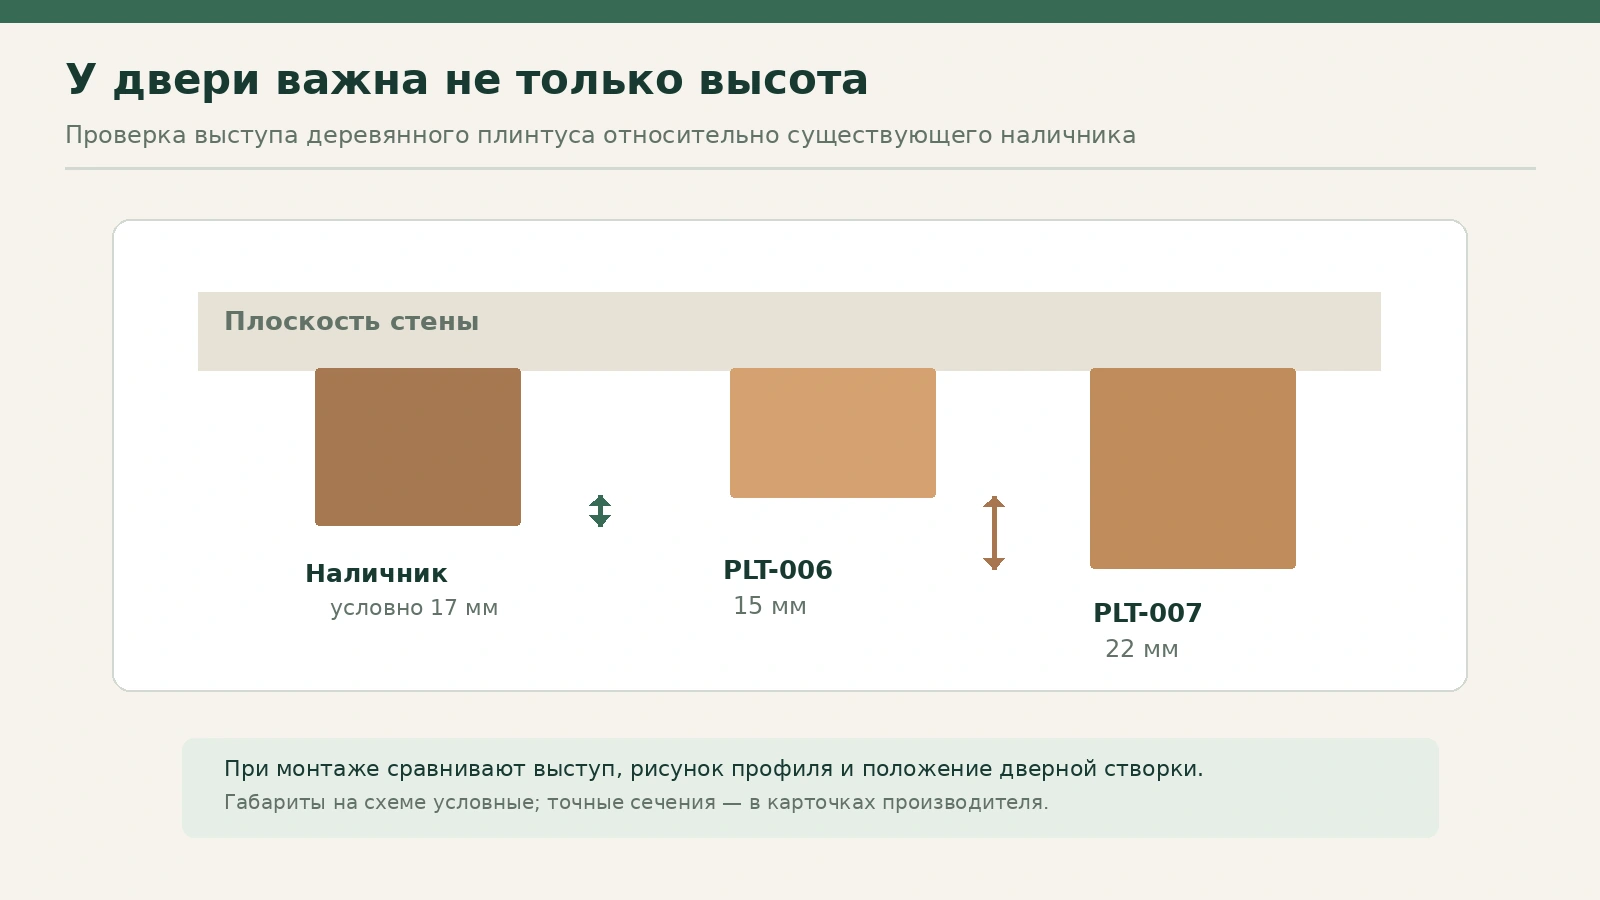
The third measurement is — the protrusion of the door casing and the free space at the frame. Place a ruler against the face plane of the wall and determine how far the casing protrudes. A 22 mm thick profile next to a casing with a 15 mm protrusion can create an awkward step. Sometimes it can be finished with a neat end piece; sometimes a thinner baseboard is needed. You cannot promise in advance that all options will join without additional work.
Fourth — the straightness of the base. Place a long straightedge along the lower part of the wall, mark the gaps and their locations. The fifth dimension is — the length of each independent installation section, including the gaps between doors, corner projections and the ends at furniture. The total perimeter is not sufficient here: two corridors of 8 metres each require a different number of full planks if one has only four long walls and the other has many short sections.
Record the results by room and wall: “living room, wall A, trace 86 mm, section 4800 mm, two internal mitres”; “corridor, section 3, trace 117 mm, 18 mm to the architrave”. Such a schedule does not depend on which model you subsequently choose.
Get Consultation
How to choose the height: 97, 100, 120 or 160 mm
The height of the new wooden skirting board must relate to the highest defect, which the customer intends to cover. However, height can be used as a masking tool only where a level, sound and dry base remains behind the new product. If the old paint is coming away in layers, it is removed down to a stable surface. A weak layer hidden under wood will not become stronger.
For a trace of up to 75–80 mm, it is worth considering PLT-007 with a height of 97 mm or PLT-006 with a height of 100 mm. These figures are not equal to the permitted height of the damage: a margin is needed at the top edge, and the profile geometry may include a chamfer or relief. The working overlap is confirmed with a supplied sample, especially if the floor is uneven or has level differences.
When the strip rises to the 105–110 mm mark, 120 mm models offer a better chance of covering it without repainting the lower part of the wall. PLT-005 and PLT-001-1 are the same in height but differ in the thickness of the wooden version and the pattern. The choice here does not come down to an extra millimetre. You need to look at the shape of the visible top line and the transition to the door architrave.
If the traces reach 125–140 mm, you can check PLT-003 with a height of 160 mm. But first make sure that such a plank does not cover furniture ventilation grilles, does not cross the bottom of a radiator and does not require unrealistic cuts at door frames. A skirting board 160 mm high is already perceived as a noticeable lower part of the wall. There is no need to deal with a small 60 mm stain using such a large profile.
| Maximum height of the old finish trace | What to consider | What to check |
|---|---|---|
| Up to 75–80 mm | 97 or 100 mm | Top edge relief and wall evenness |
| Approximately 80–105 mm | 100 or 120 mm | Actual overlap with the sample on the floor |
| Approximately 105–115 mm | 120 мм | Margin at the upper limit, casing position |
| Approximately 115–145 mm | Wall repair or 160 mm | Furniture, radiators, door height and scale |
| More than 145 mm | Finish restoration first | Even 160 mm may not provide safe coverage |
These are guidelines for preliminary selection, not factory tolerances. A 116 mm defect does not mean a 120 mm strip will necessarily cover it: in a real assembly, several millimeters will go toward geometry and fitting.
Why height cannot be chosen separately from doors and furniture
Near a door, the skirting board is assessed in two planes at once. In height, it covers the lower part of the wall; in thickness, it projects forward relative to the door casing. Imagine a door casing 17 mm thick that ends at the floor with a straight vertical edge. When installing a 120×16 mm skirting board, the transition is usually easier to think through than with a 22 mm thick product. However, even a two-millimeter difference in depth can be noticeable at an angled joint if the surfaces differ greatly in color.
You need to check more than just one doorway. A hallway usually has several doors, and they may have different casings: one door was installed long ago, two were replaced recently, and somewhere the trim was cut down for laminate flooring. A transition that works well at the living room door may look bad at the bathroom door. Before purchasing, take photos of all junctions with a ruler placed next to them.
Built-in furniture poses a different problem: a wardrobe can stand flush against the wall while its front opens almost from the floor. A tall profile can catch the plinth or block service access. Confirm whether the skirting should run behind the furniture or stop at its side panel. Under a wardrobe it may not be needed at all up to the wall, but this decision must be recorded in the specification before cutting.
If there are concealed door frames, the check becomes even stricter. On such doors, the lower part of the leaf is sometimes positioned very close to the wall plane. The protrusion of the wooden profile is checked along the opening path, not just on the drawing in the closed position. When trimming the skirting damages its upper pattern, it is safer to choose a different profile or change the junction solution.
Skirting on an uneven wall: when height doesn't help
One common mistake is assuming that a wide wooden skirting will hide any problem near the floor. A tall profile does cover a larger area of the finish, but a long piece of solid wood will not follow a sharp wave in the wall the way a flexible plastic strip does. If it is fixed only at the two end points, a gap may remain in the middle, and the adhesive seam will be uneven.
First, hold a straightedge and a separate short sample of the profile against the lower part of the wall. This makes it easier to distinguish a long, gentle curve from a local bump of plaster. A small bump can sometimes be carefully removed by preparing the substrate. A deep hollow, on the other hand, has to be leveled: building up a layer of mounting adhesive should not serve as a universal substitute for plastering work.
Pay especially close attention to a corner where two walls do not form a strict 90 degrees. Two strips cut automatically at 45 degrees can leave an open joint there. For solid wood this is unpleasant not only visually: dust will get into the gap, and subsequent painting may highlight the error. Measure the actual angle, make a test cut on an offcut, and only then use the long workpiece.
Five STAVROS solid wood models: dimensions without mixing them up with MDF
Product cards sometimes list different materials under the same item code. For this task we compare exclusively wooden versions in beech and oak. The length of all five wooden options under consideration is 2400 mm, but the height and thickness differ. If you open the card and look at the first visible price, MDF is often selected there. Its cost, length and thickness cannot be carried over to the calculation of solid wood products.
| Profile | Height × solid wood thickness, mm | Length, mm | Beech, rubles per strip | Oak, rubles per strip |
|---|---|---|---|---|
| PLT-007 | 97 × 22 | 2400 | 4 890 | 7 000 |
| PLT-006 | 100 × 15 | 2400 | 3 220 | 4 780 |
| PLT-005 | 120 × 16 | 2400 | 5 140 | 7 030 |
| PLT-001-1 | 120 × 15 | 2400 | 5 140 | 7 730 |
| PLT-003 | 160 × 16 | 2400 | 7 790 | 11 120 |
Prices refer to the solid wood versions shown in the STAVROS product cards at the time of checking November 18, 2026. They do not include installation, finishing, or delivery. Before paying, it is worth selecting the material again and verifying the price: the catalog may be updated. For PLT-006 and PLT-001-1, additional thickness designations appear in the description blocks, but the product lines for wooden versions show 15 mm; the final specification should be verified against the selected product item.
The difference between the profiles becomes clearer when two numbers are placed side by side. Height determines how far the skirting board rises up the wall. Thickness shows its protrusion, which affects joints with the door, furniture, and the overall massiveness of the lower contour. The height difference between 97 and 100 mm is only 3 mm, but in thickness PLT-007 protrudes 7 mm more than PLT-006. In a finished hallway, this difference is sometimes more important than the more noticeable price.
PLT-006 and PLT-007: similar height, but different thickness
If you need to cover a strip of old finishing about 80 mm high, comparing two nearly one-hundred-millimeter models is fully justified. buy wooden skirting board PLT-006 makes sense when a relatively small section depth of 15 mm is needed. This is convenient to check at doors where the casing does not protrude too much from the wall. With the same number of strips, the beech PLT-006 is noticeably more affordable than the thicker PLT-007.
У solid wood skirting board PLT-007 the height of the wooden version is 97 mm, and the thickness is 22 mm. On a wide wall, such a profile can produce a more pronounced lower line. But where there is a narrow architrave, a built-in cabinet or a wardrobe nearby, the 22 mm projection needs to be checked especially carefully. The profile may not so much hide the problem as create a new step next to the vertical element.
Let's imagine two corridors. In the first, the doors were recently replaced, the architraves are wide, and the furniture is moved away from the walls. Here you can compare both designs using samples. In the second, thin old architraves remain, along with a wardrobe whose door opens close to the wall. There, choosing based only on the attractive appearance of PLT-007 in the photo is risky. Even if its height is suitable, the thickness may require a more complex end finish.
PLT-007 should not automatically be considered "better" because of its more massive cross-section. The extra thickness does not help cover paint marks above 100 mm; the height of this model is even slightly less. If the main goal is to cover an old stripe on the wall, you should compare the vertical dimension first, not the weight and expressiveness of the relief.
PLT-005 or PLT-001-1: two solutions with a height of 120 mm
When there are traces of an old skirting board around 100–110 mm, the question of a wooden profile 120 mm high comes up more often. The range includes two options at once. Buy oak skirting board PLT-005 is available in the 120×16×2400 mm version; for beech, the same size is listed in this same product card. wooden skirting board PLT-001-1 in the solid wood table has a cross-section of 120×15 mm with a length of 2400 mm.
A one-millimeter difference does not make them interchangeable. Each product has its own face pattern. If the walls are already painted and the strip is meant to complete a modern composition, compare the samples against the specific finish: the relief and horizontal shadow may be perceived differently. For a room with wooden architraves, select not only the species but also the consistency of lines: two oak pieces can have profiles that are completely different in character.
There is also a budgeting consideration. The beech strip of both models costs 5,140 rubles in the verified product listings. But the price of the oak version differs: 7,030 rubles for PLT-005 and 7,730 rubles for PLT-001-1. If 17 pieces are needed for the whole apartment, the difference between the two oak sets will be 11,900 rubles. It is reasonable to pay it only when the PLT-001-1 design is genuinely preferable or better solves the junction task.
With tall profiles, floor-level errors are more noticeable. If the covering boards or tiles create slight unevenness, the long top line of the skirting can visually emphasize it. Before ordering, you need to see how the chosen profile sits at the two or three most difficult points. It is easier to do a short trial fit than to explain to the installer later why identical twelve-centimeter products in different rooms seem to be installed at different heights.
When PLT-003 with a height of 160 mm is justified
Buy tall wooden skirting board PLT-003 it should be considered where it is really needed. The wooden version has a height of 160 mm, a thickness of 16 mm and a length of 2400 mm. The profile can cover a tall old finishing strip left after removing a previous wide skirting. But if the surface is damaged only by 50 mm, choosing a height of 160 mm just for masking is usually excessive.
On a wall 2.5 m high, a 160 mm strip occupies a noticeable share of the lower zone. In a narrow hallway it will be seen from close up and may make the lower contour look heavier than expected from the picture. This is not a fault of the product itself: that is how scale works. To assess the effect, stick a paper strip 160 mm high in the required color to the wall or hold up a real sample. Look from the entrance door and from the adjacent room.
Pay special attention to radiators and utility hatches. A tall skirting must not block access to removable panels, inspection elements, caps or the lower fastenings of furniture. You cannot simply cut it at a difficult spot and expect the large relief to join invisibly after a short bypass. The taller the profile, the harder it is to hide height jumps and breaks in the pattern.
Another reason to reject PLT-003 is the condition of the base. If the lower part of the wall is so damaged that the solid wood cannot be securely fixed, repair is needed first. Greater height does not turn crumbly plaster into a suitable load-bearing surface. In such an apartment, it is better to restore the wall and choose a skirting according to the proportions of the interior, not only according to the size of the damage.
Oak or beech: choosing the wood species for an old interior
Oak has a pronounced texture: under a clear or semi-transparent finish, the fibers and pores are distinguishable. In an apartment with a wooden floor, this can be appropriate if the buyer wants to show the material and tie the lower line to the joinery details. But choosing oak “to match the parquet” without a sample is risky. Even two oak surfaces can differ in shade, cut, degree of processing and how the finish has settled on them.
Beech, as a rule, has a calmer and more uniform pattern. For a skirting under opaque paint, this is a practical option: after preparation and application of a compatible coating, the texture has less influence on the appearance. However, the same word “for painting” does not mean that the technology can be ignored: the ends, joints and fastening points require separate preparation, and the primer and enamel composition are selected for the solid wood and the conditions of the room.
It is better to compare species on the same article number, otherwise the price of the material gets mixed up with the difference in geometry. For example, on PLT-006 the beech version costs 3,220 rubles, the oak version — 4,780 rubles per plank. For 17 planks the difference is already 26,520 rubles. On the other hand, if the oak texture is part of the interior, switching to painted beech just to save money may contradict the original task. The decision is made by the owner based on the sample and the budget.
Solid wood has limitations common to both species. Wood reacts to changes in humidity and temperature, requires suitable finishing, correct storage and installation. You should not install unprotected planks directly against a damp base or assume that any wood is suitable for a permanently damp room. A finished skirting board will be as reliable as the base, the coating and the operating conditions are reliable.
Transparent finish, enamel and color matching
If you are replacing a plastic skirting board after the renovation is complete, the color of the new product should be checked next to the existing wall and floor. White paint on a separate sample may look different next to a warm cream coating; transparent oak next to reddish parquet may visually clash with it. It is better to compare in daylight and under the artificial light that is usually used in the room in the evening.
On the STAVROS website, wooden products come with various surface preparation options and differences between blanks "for enamel" and "for tinting". The point of the difference is that opaque paint hides variations in the color of the wood lamellas, while a transparent finish shows these differences. When ordering, you need to agree on the specific finish rather than assume that any beech or oak profile from the catalog already has the desired lacquer.
When painting an installed skirting board, it is important to protect the floor covering and not to fill the seam between it and the wall with a compound that will glue the floating floor to a fixed element. If a factory finish is planned, determine in advance how the cut ends and corners will be finished: after installation, their color may require touch-up or local coating. It is better to agree on the coating sample together with the profile geometry.
A separate case is several rooms with different floors. A single skirting board painted in the color of the wall can tie them together; transparent wood usually requires more careful matching with each covering. There is no need to promise that oak will equally replicate the shade of parquet, laminate and a wooden door. If the materials differ noticeably, it is better to accept it as a deliberate combination rather than try to hide it with one random tint.
Practical example: living room, bedroom and hallway after removal
Let us consider a conventional apartment in which the skirting board is being replaced after the final finishing. In the living room, the wall dimensions are 4.8×3.6 m. On one wall there is a doorway 900 mm wide and a 1,200 mm section occupied by a built-in wardrobe with no skirting board behind the cabinet. The geometric perimeter is 16.8 m, but after exclusions 14.7 m of the actually covered contour remains.
The bedroom measures 3.9×3.2 m. The 800 mm doorway and the 2100 mm built-in wardrobe section are excluded from the 14.2 m perimeter. This leaves 11.3 m for installation. These figures do not guarantee that the wardrobe can always be installed without a skirting board: the project assumes that the carcass abuts the wall and the decorative trim ends at its side panel. If the furniture is planned to be rearranged, the solution must be changed before ordering.
The hallway has many doors, so simply adding up the perimeter of a rectangle would be incorrect. After measuring the open sections, we obtained seven segments with lengths of 2100, 1550, 960, 1230, 850, 760 and 1900 mm. Their sum is 9350 mm. There are no invented dimensions for the entire hallway here: for the calculation we need precisely the lengths from corner to door, from door to wardrobe and between openings.
| Room | Original outline | Excluded areas | Finished length |
|---|---|---|---|
| Living room 4.8 × 3.6 m | 16,800 mm | 900 + 1200 mm | 14,700 mm |
| Bedroom 3.9 × 3.2 m | 14,200 mm | 800 + 2100 mm | 11,300 mm |
| Hallway, seven sections | According to actual measurement | Openings already excluded | 9,350 mm |
| Total | 35,350 mm |
A naive calculation would give 35.35 / 2.4 = 14.73, that is, 15 whole planks. But buying 15 items without preliminary cutting would be risky: some long walls cannot be obtained from a single stock length, and small offcuts from large pieces are not suitable for other sections. Now the task is to place all required segments on real stock pieces.
Important: this example is for training purposes; the dimensions do not relate to a specific site in Bryansk. Its value lies in the verifiable logic. The buyer substitutes their own lengths, separately marks the locations of corner cuts, and receives their own specification. It is pointless to copy the number of planks if the apartment differs even by the number of doors.
Installation section schedule: we do not lose short walls
We will assign a conditional code to each section. The letter “L” means living room, “B” means bedroom, and “H” means hallway. Long lines that do not fit into one factory plank of 2400 mm will be divided into several installation pieces. For example, 4800 mm in the living room will consist of three elements: 2200, 1800, and 800 mm. The joints are placed not randomly, but taking into account the visible part of the room and the fastening points.
In the living room we get nine pieces: 2200, 1800, and 800 mm for the first wall; 2200 and 1400 mm for the second; 1800 and 900 mm for the third; 2200 and 1400 mm for the fourth. Their sum is exactly 14,700 mm. In the bedroom there are seven pieces: 2200 and 1700; 1900 and 1300; 1900 and 1200; separately 1100 mm. We get 11,300 mm. The seven hallway elements are already specified as separately measured sections.
Such a list preserves not only the linear footage but also the origin of each part. If the craftsman determines that a door needs a different length, the specific line changes, not the entire abstract "consumption rate." This is also convenient for reordering: it is clear which strip did not fit and why.
Immediately divide the parts into two types. The first — visible continuous lines, where it is desirable to use long segments and choose the joint location according to the wood grain. The second — short sections near doors and furniture, where offcuts from other walls can sometimes be used. An 850 mm segment is useful only when it corresponds to a specific line item in the schedule; a single random 850 mm offcut does not become a universal spare part.
Before cutting, the craftsman verifies lengths against the specific external and internal corners. For a 45-degree joint, the size may be checked along the long edge of the profile, whereas for a straight end — along the end plane. A schedule drawn up without this caveat may end up shorter than the required product after the miter cut. Our example assumes that all the dimensions given are already the control lengths of the parts taking into account the assigned joining method.
Cutting map: how to obtain a set of 17 strips 2400 mm long
For the training map, let us assume a conventional process allowance of 10 mm for each resulting part — for the saw kerf and cleanup. This is not a general factory standard for any saw and any angle. If the craftsman uses a different blade, adds long mitered cuts, matches the wood grain pattern, or trims a damaged end, the cutting plan must be recalculated based on his actual allowances. In the calculation scheme, we do not allow the sum of lengths and allowances on a single factory strip to exceed 2400 mm.
| Plank | Parts per the specification sheet, mm | Conditional remainder after allowances, mm |
|---|---|---|
| 1 | G-1a — 2200 | 190 |
| 2 | G-2a — 2200 | 190 |
| 3 | G-4a — 2200 | 190 |
| 4 | S-1a — 2200 | 190 |
| 5 | K-1 — 2100 | 290 |
| 6 | S-2a — 1900 | 490 |
| 7 | S-3a — 1900 | 490 |
| 8 | K-7 — 1900 | 490 |
| 9 | G-1b — 1800 | 590 |
| 10 | G-3a — 1800 | 590 |
| 11 | S-1b — 1700 | 690 |
| 12 | K-2 — 1550; G-1v — 800 | 30 |
| 13 | G-2b — 1400; K-3 — 960 | 20 |
| 14 | G-4b — 1400; G-3b — 900 | 80 |
| 15 | S-2b — 1300; K-5 — 850 | 230 |
| 16 | K-4 — 1230; S-4 — 1100 | 50 |
| 17 | S-3b — 1200; K-6 — 760 | 420 |
In this layout, all 23 mounting parts are distributed across 17 factory planks. The total usable length is 35,350 mm, and the purchased length is 40,800 mm. Of the 5,450 mm difference, 230 mm is allocated to nominal allowances, and the sum of the calculated offcuts equals 5,220 mm. However, the offcuts do not form a single piece 5.22 m long — they are split into separate pieces. They cannot replace a missing long plank.

Rows 12 and 13 require especially careful checking, where the free space after the nominal allowance is only 30 and 20 mm. For such combinations, a control sample of the actual cut is needed before starting work. If even one cut requires a larger margin, move the short part to another plank or add an item to the order. The table does not authorize cutting "to zero."
Why can't you simply add ten percent to 35.35 m and consider the task solved? Ten percent would give 38.885 m, which rounds up to 17 planks. In this example, the number happens to coincide with the prepared map, but this coincidence does not prove the method is suitable. For another apartment, the same percentage may not provide the required lengths. The only reliable check is placing each part on a specific workpiece with real allowances.
Should an eighteenth plank be ordered?
Seventeen items is the calculated set for the selected cutting plan under the stated conditions. Buying exactly that many without a reserve is possible only after checking dimensions, end quality, the joint layout, the fastening method, and coordinating with the installer. If uncertain angles, long exposed walls, or the risk of damage during transport remain, a separate eighteenth plank may be economically justified.
The advantage of such an additional plank is not the abstract "five percent." The buyer gets , from which a replacement for a long part or a pair of short ones can be obtained. Compare this with the total offcut of 5,220 mm: despite the larger figure, most of the scraps are unsuitable for a section of 1,800–2,200 mm. The purpose of the reserve is to preserve the ability to replace a specific critical element., from which you can get a replacement for a long part or a pair of short ones. Compare with the total remainder of 5220 mm: despite the large figure, most of the offcuts are not suitable for the 1800–2200 mm section. The purpose of the reserve is to preserve the ability to replace a specific critical element.
The reserve should be recorded separately: "17 planks for cutting, 1 whole plank in reserve." Do not hand out the entire purchase to the craftsmen without labeling. If the spare plank is accidentally cut into small parts, it will cease to perform its function. After the work is completed, it can be kept for future repairs, but a long wooden workpiece should be stored under suitable conditions, without dampness or warping.
The reverse situation also occurs. If the measurements are precise, all angles have been checked, the profile has been processed and transportation has been arranged, an additional item may not be needed. In that case, the buyer pays for 17 planks, understanding that in the event of an error or a hidden defect, a separate additional order will be required. This is a conscious choice of risk, not a violation of a universal construction standard.
How much does a set of oak and beech skirting boards cost?
The price of a single factory plank is only the beginning of the calculation. For the apartment under consideration, you can compare the cost 17 items for cutting and the option 18 items, including one whole spare. It is important for the buyer to understand both amounts: it is impossible to honestly state the cost of the required skirting board by indicating only the price of one meter if the product is sold in whole planks and short offcuts cannot be combined into a long piece.
| Model | 17 beech planks, ₽ | 17 oak planks, ₽ | 18 beech planks, ₽ | 18 oak planks, ₽ |
|---|---|---|---|---|
| PLT-006 | 54 740 | 81 260 | 57 960 | 86 040 |
| PLT-007 | 83 130 | 119 000 | 88 020 | 126 000 |
| PLT-005 | 87 380 | 119 510 | 92 520 | 126 540 |
| PLT-001-1 | 87 380 | 131 410 | 92 520 | 139 140 |
| PLT-003 | 132 430 | 189 040 | 140 220 | 200 160 |
All amounts are obtained by simply multiplying the quantity by the price of the corresponding wooden plank shown in the STAVROS product cards during the check on November 18, 2026. This is the cost of material, not a turnkey work estimate. The table does not include priming, enamel or lacquer, carpenter's labor, wall preparation, delivery within Bryansk, or possible packaging. These must be counted as separate line items after choosing the finish and order conditions.
The calculation immediately explains why it is sometimes worth restoring the wall rather than choosing a 160 mm high profile. If the trace of an old 112 mm high skirting can be covered by PLT-005 120 mm, choosing PLT-003 solely for the extra height will increase the price of a set of 17 beech planks from 87,380 to 132,430 rubles. The difference is 45,050 rubles before finishing and installation. This is a serious amount that must be weighed against the actual task, not against a beautiful photograph.
For another pair, the difference may be small. An oak set of 17 PLT-007 costs 119,000 rubles, while PLT-005 costs 119,510 rubles. But a matching budget does not make the profiles identical: PLT-007 is lower and noticeably thicker, PLT-005 is taller and thinner. The first may suit the design but fail to cover a 108 mm high trace; the second will solve the height problem but will require a different scheme for joining to the architrave. Cost is discussed only after checking the geometry.
If a contractor offers a price "per meter," ask them to break down how many whole lengths they included, what length they assumed, and where they allocated the offcuts. The nominal footage of 35.35 m cannot simply be multiplied by a conditional cost per meter without verifying that 40.8 m of material will actually be purchased. You pay for the finished products, not for the abstract length of an already installed perimeter.
How to create an estimate without hidden line items
A convenient estimate consists of several independent parts. The first contains the item code and finish: for example, PLT-005, oak, 120×16×2400 mm, 17 pieces for cutting and one spare. The second contains the selected treatment: for enamel or for tinting, the quality of sanding, the need for primer, lacquer, or another coating. The third line relates to work: dismantling, repairing the lower strip of the wall, installation, finishing the joints, and cleanup.
Enter delivery and packaging separately. A long 2400 mm plank requires careful handling; even if the price of each item is confirmed, the shipping cost depends on the dimensions of the shipment, the address, and the chosen transport company. Do not plug in delivery "within Bryansk for 500 rubles" without confirmation from the carrier. If the seller offers a protective rigid frame, clarify whether it is included in the total amount and for what order volume it is calculated.
In the estimate, it is useful to show two totals: "goods without services" and "total estimated costs". The first can be calculated from the selected product items alone. The second appears only after inspecting the wall and agreeing on the transportation terms. This protects against a situation where the owner chose an oak set from the catalog and then unexpectedly discovered that restoring the lower strip of the wall and finishing the end faces were not included in the installation price.
When comparing several offers, send the same list each time. The phrase "oak skirting 120 mm, 35 meters" is incomplete: you may get different profiles, different blank lengths, and a different number of joints. The precise line "PLT-005, oak, 120×16×2400 mm, 18 whole pieces, finish agreed separately" is already comparable and verifiable.
What to do with cables after removing the old skirting board
A plastic skirting board sometimes performs two tasks at once: it covers the joint between the floor and the wall and serves as a conduit for wires. After it is removed, you have to decide what to do with the cable before purchasing a wooden profile. The decorative wooden skirting board PLT should not automatically be considered a replacement for a cable channel. The presence of a void behind a particular shape does not mean that it is intended for wiring or complies with the requirements for safe installation.
If the wire did indeed run inside the old strip, first record its purpose and route. Do not leave hidden cable under a wooden product just because it physically fits there. For a new run, use systems intended for this purpose and an approved electrical installation method. If necessary, it is better to discuss the matter separately with an electrician than to try to fit the wire and fasteners into a thin decorative profile.
This detailed topic has already been covered in the STAVROS article "Wooden skirting board PLT-006: what to do with cables before buying". Here it is enough to make one practical decision: the wiring must be safely arranged to choosing the skirting board thickness and before drilling new fasteners.
Preparing the substrate for solid wood installation
The reliability of a wooden skirting board begins not with the solid wood itself, but with the surface to which it is attached. After removal, take off any loose adhesive residue, remove dust and check the strength of the lower plaster layer. If peeling filler is found under the old strip, patching over it will not help: the area must be restored down to a sound substrate.
Check that the wall is dry, especially near the entrance door, in the kitchen and in areas of previous leaks. Wood should not be installed directly against a permanently damp surface. If damp patches, salt marks or an unpleasant odour appear at the bottom of the wall, first find the source of the moisture. Installing a beautiful skirting board is not a way to eliminate that cause.
Before work, the wooden products themselves must be kept in conditions that comply with the manufacturer's recommendations and the chosen finish. Do not move cold strips straight from the delivery vehicle to the mitre saw if the temperature and humidity in the room are noticeably different. The acclimatisation period is agreed with the documentation and the actual condition of the material; there is no universal promise that "exactly 24 hours is enough for everything".
One of the most useful techniques is to lay out the strips by purpose before the first cut. Select the straighter and visually better-matching pieces for long exposed walls, and leave parts with acceptable pattern variations for less visible areas, if this does not conflict with the order quality. This distribution helps avoid a situation where sharply different-coloured pieces are joined on the most visible wall, even though better-matching pairs were in the pack.
Fixing the wooden skirting board and preserving the floor's performance
The fixing method is chosen according to the substrate, weight and geometry of the specific profile. On a prepared, sound wall, installation is possible with a suitable adhesive, mechanical fasteners or a combination of methods — following the material manufacturer's recommendations and taking into account the wall construction. Any construction adhesive should not be considered universal for solid wood, a painted wall and damp plaster all at once.
When installed over a floating floor, the skirting board is usually fixed to the wall so that the covering can move within the gap provided by the manufacturer. A decorative strip must not be rigidly glued to both the wall and such a floor without checking the construction: this may restrict its natural movement. For glued parquet the conditions may differ, so the decision is checked against the specific floor covering's design.
If fasteners pass through the face of the profile, decide in advance how their heads will be concealed. On a painted product, the spot can be filled and prepared for the coating. On clear oak, concealing such a point is more difficult: the filler may differ in grain and tone. Therefore, coordinating the fasteners and the finish is one decision, not two independent tasks.
After a dry fit, do not try to force a long workpiece "straight" with fasteners on a wavy wall. It is better to check the base first, then choose a compatible fastening method. In corners and near doors, excessively short pieces held by only one fastener or a small spot of adhesive are especially undesirable. The joint must not only look neat but also be securely fixed.
How to finish inside and outside corners without visible gaps
In an old apartment, a wall corner may not be 90 degrees. If you cut both skirting boards at 45 degrees without checking, an open joint will remain on the outer surface. For tall, profiled products this mistake is more noticeable because the gap runs through several profile projections at once. Measure the actual angle, mark a test piece and compare the fit before cutting the face pieces.
On an outside corner, protecting the end face is especially important. A protruding wooden profile will be hit by shoes, a suitcase or a vacuum cleaner more often than a concealed inside corner. Do not leave untreated wood exposed where a finish coat is intended. When tinting, end grain may absorb the product differently, so the result is first checked on an offcut of the same species.
A longitudinal joint on a long wall should be positioned so that it does not fall on the most noticeable point of the interior unless necessary. It is better to mark the joint line on the wall in advance and assess it under the lighting. If the wood grain is pronounced, select adjacent fragments by tone. The joint option and the processing method are determined by the craftsman for the chosen cross-section and finish; there is no equally good solution for clear oak and opaque enamel.
In what order to carry out replacement in an occupied apartment
Work in a lived-in space requires a careful sequence. First, photograph the old junction, check for hidden utilities and note which areas will be dismantled. Then remove the plastic strips without tearing out the fasteners together with the finish. After cleaning the wall, measure the marks, gaps and angles. Only based on these measurements is the new profile finally chosen. The reverse order — ordering all products first and only then finding out the height of the damaged strip — often leads to unnecessary costs.
After choosing the article, a schedule and a cutting plan are drawn up. The craftsman receives it before installation begins, checks the values on site and designates the joint locations. Before final installation, it is useful to place at least one sample against the door casing, outside corner, uneven wall and an open area near the window. This way you can spot a problem that no general footage calculation will reveal.
The next stage is preparing the base and coordinating the finish. On a painted wall next to the skirting board, it is advisable to protect the surface from adhesive and mechanical damage. On parquet, use suitable protective coverings; when cutting, it is important to prevent sawdust and abrasive dust from getting onto the coating. Finished parts are laid out by room with the codes from the schedule so that elements of similar length are not mixed up.
Installation begins with the most critical geometric junctions specified in the particular project. It is not always necessary to install the longest wall first: sometimes it is more correct to check an external corner or a complex abutment, and only then distribute the remaining joints. At the end, inspect the top line, corners, connection points, door terminations and gaps near the floor. Any defects found are corrected before final cleaning and final acceptance of the work.
Mistakes that force you to buy extra skirting
The most common reason for a reorder is calculating by perimeter only. It does not account for the lengths of individual pieces and actual offcuts. The second is selecting by the height of the old plastic strip without measuring the band of damage above it. The new skirting may be taller than the previous one but shorter than the stain from the old paint. The third is choosing a pattern from an image without checking the projection at the architrave: thicker sections are especially sensitive to this.
The fourth mistake is mixing commercial variants. For example, one PLT-006 card presents both solid wood and MDF options. The length of the wooden strip in our table is 2400 mm, while MDF variants may be 2600 mm. A cutting plan for one length cannot be automatically transferred to another. The fifth is ignoring the substrate: adhesive does not compensate for weak plaster, and a tall wooden strip will not cure a damp wall.
The sixth mistake is having no cable plan. The old plastic skirting was removed together with the cable channel, but the new wooden profile was ordered without determining the wiring route. The seventh is cutting the entire batch before test-fitting at the actual corners. The eighth is buying materials from different batches without first assessing the shade, if a transparent finish with visible grain is intended.
To avoid these problems, before paying, check one short chain: wall defect → selected height → projection at the architrave → substrate → parts list → cutting plan → finish → delivery. Each subsequent item depends on the previous one. If the measurement has not yet been taken, an exact order will be premature.
How to order wooden skirting boards with delivery to Bryansk
For a request, specify not only the city but also the full contents of the set. For example: “Bryansk, PLT-005, oak, section 120×16 mm, factory length 2400 mm, 17 items according to the cutting plan and one spare strip; surface preparation, packaging and transport need to be agreed.” Such wording eliminates half of the clarifying questions before the cost is even calculated.
On the STAVROS page «Payment and delivery of wooden mouldings across Russia» describes the ways to place and receive an order. The company states Contact us to confirm shipping to your destination. by transport companies and the option to arrange delivery to a pickup point or by courier. For Bryansk, the cost and timeframe are determined by the specific order; they should not be considered fixed based on the city name alone. Before payment, ask to confirm the packaging of long items and the procedure for handling transport damage.
If not only skirting boards but also wall decor are being replaced in an apartment, combining orders can sometimes reduce organisational steps. However, the purpose of the items must not be mixed: a wall moulding does not become a floor skirting board just because of a similar shape. For independent wall finishing there is a separate example — «Wooden mouldings in Bryansk: a set for three mirror zones». It helps coordinate the wall decor with the bottom line, but does not replace the schedule of floor components.
Upon receipt, unpack the items carefully and check the quantity, markings and condition of the long edges. A damaged corner on a 160 mm high profile may require extensive trimming, even if the defect appears minor at first glance. If the packaging shows clear signs of impact or moisture, record its condition according to the carrier's rules before deciding on installation. Do not start cutting disputed items until the claim resolution procedure has been clarified.
Frequently asked questions about wooden skirting boards in Bryansk
Can a plastic skirting board be fully replaced with a wooden one without touching the floor?
Yes, if the base and floor covering are in suitable condition, the new board covers the required gap and does not interfere with the floor's movement. But the word “fully” does not apply to the cable channel: if wires ran through the old profile, their routing must be handled separately.
Should I choose 120 mm if the wall damage reaches 114 mm?
This is a borderline case. Nominally there is only 6 mm of clearance, but the profile of the top edge, floor unevenness and installation deviations can reduce it. First place a sample and check the highest mark. Sometimes it is easier to touch up the paint locally than to try to hide everything behind the trim.
What is the difference between PLT-007 and PLT-006 if they are almost the same height?
The wooden PLT-007 measures 97×22 mm, while PLT-006 measures 100×15 mm. The height difference is small, but PLT-007 protrudes noticeably further from the wall. This affects the junction with the architrave, furniture and the character of the bottom line.
Can I order oak skirting boards and then paint them with white enamel?
Technically, solid wood can be finished with an opaque coating given suitable preparation and a compatible material system. But first compare the cost with the beech version of the same model. If the natural wood grain will be hidden anyway, the extra cost for oak is not always justified.
What should I do if the walls in the hallway are uneven?
First determine exactly where the deviation is. Local protrusions are removed by preparing the substrate, and hollows are levelled if necessary. Installing a long wooden trim over random thick blobs of adhesive is no substitute for proper wall preparation.
How many planks are needed for two rooms and a hallway?
In the example given, the finished length is 35.35 m, but the cutting plan of 23 pieces required 17 factory planks of 2400 mm. An eighteenth can be provided as a full spare. For a different layout, the calculation is done anew; the number from the example is not a universal norm.
Can leftover pieces be used in another room?
Yes, if the length, cross-section, material, color and end finishing method match the specific area. But the sum of all short offcuts does not show how many useful long pieces can be obtained. A list of leftovers with actual dimensions is needed.
Is skirting board installed behind a built-in wardrobe?
This depends on the furniture design and future plans. In our example, the areas behind wardrobes are excluded from the calculation. If the wardrobe will be moved or its carcass requires a technical gap, the installation plan must be changed in advance.
How can I find out the delivery cost to Bryansk?
After choosing the model, wood species, number of planks and package dimensions, request a calculation from the seller and the carrier. Without these data, the amount and timeframe cannot be reliably stated. Record the delivery method, packaging requirements and the procedure for inspecting the cargo upon receipt.
Buy STAVROS wooden skirting boards to replace old trim
If the old plastic has been removed and the walls and floor are already finished, you should not start your purchase with just a photo of the new skirting board. For a reliable replacement, you need the height of the actual marks, the free space at the door casings, the condition of the wall and the exact lengths of the installation sections. After these measurements, the choice between PLT-006, PLT-007, PLT-005, PLT-001-1 and PLT-003 becomes clear and verifiable.
When placing an order to Bryansk, choose a wooden version in oak or beech, confirm the finish and the price of the selected item, give the seller the number of whole planks according to the cutting map and separately specify the reserve. This way the buyer gets not a random number of linear meters, but a set that can actually be installed in a specific apartment.