

















Article Contents:
- What Is Wood Crown Molding?
- Crown Molding vs. Cornice vs. Cove Molding
- Crown molding
- Cornice
- Cove molding
- Stain-grade wood crown
- Paint-grade crown
- Matte
- Satin
- Gloss
- Shop-finished crown
- Site-finished crown
- What is wood crown molding?
- What is the difference between crown molding and cornice?
- What is wood cove molding?
- Is oak good for crown molding?
- Is beech good for crown molding?
- Can wood crown molding be painted?
- Can wood crown molding be stained?
- How large should crown molding be?
- What is crown molding projection?
- What is crown molding drop?
- What is crown molding spring angle?
- Should inside crown corners be mitered or coped?
- How do you join crown molding on a long wall?
- Can wood crown molding be used on vaulted ceilings?
- Can wood crown molding go above kitchen cabinets?
- Should cabinet crown match room crown?
- Can crown molding hide an uneven ceiling?
- Can crown molding hide cracks?
- Can wood crown molding include LED lighting?
- How much extra crown molding should I order?
- What makes wood crown molding look high-end?
- 1. Is the crown supposed to look like wood?
- 2. How large should the crown feel, not just measure?
- 3. How will it meet cabinets, beams, and openings?
- 4. How will corners be cut?
- 5. How will the crown be finished?

Wood crown molding is one of the few interior details that can change the way a room feels without changing its floor plan. Installed where the wall meets the ceiling, it creates a deliberate transition between vertical and horizontal surfaces, adds shadow and depth, and gives the room a clearer architectural hierarchy.
In U.S. terminology, wood crown molding is the primary phrase for this type of ceiling trim. The word cornice is still used in architecture and millwork, while wood cove molding describes a related but more specific concave profile. Those terms overlap, but they should not be treated as interchangeable in every situation.
STAVROS offers wood crown molding and cornice profiles within its wood-and-MDF trim collection. Individual examples include the KZ-001-4 wood cornice and KZ-001-11 wood cornice, both available in solid oak or beech according to the current STAVROS catalog.
This guide explains how to choose wood crown molding for American interiors: how profile size changes a room, when to use oak or beech, how stained crown differs from painted crown, why projection and drop matter, how crown interacts with cabinets and wall trim, and what installers need to know about spring angle, coping, scarf joints, uneven ceilings, and finish sequencing.


What Is Wood Crown Molding?
Crown molding is trim installed at the junction of a wall and ceiling. Unlike a flat strip applied directly to one surface, most crown profiles bridge the corner and project into the room at an angle.
Its visual function is to:
- finish the wall-to-ceiling transition;
- create a shadow line;
- make the ceiling edge feel intentional;
- connect door, window, baseboard, and wall molding into one trim system;
- add Classical, Traditional, Transitional, or contemporary character depending on the profile.
Its practical role is more limited than the Russian source sometimes suggests. Crown can visually cover small finish irregularities at the wall-ceiling junction, but it should not be used to conceal active structural cracks, water damage, major settlement, or unstable substrates.




Crown Molding vs. Cornice vs. Cove Molding
Наша фабрика также производит:


Смотреть весь Каталог продукции
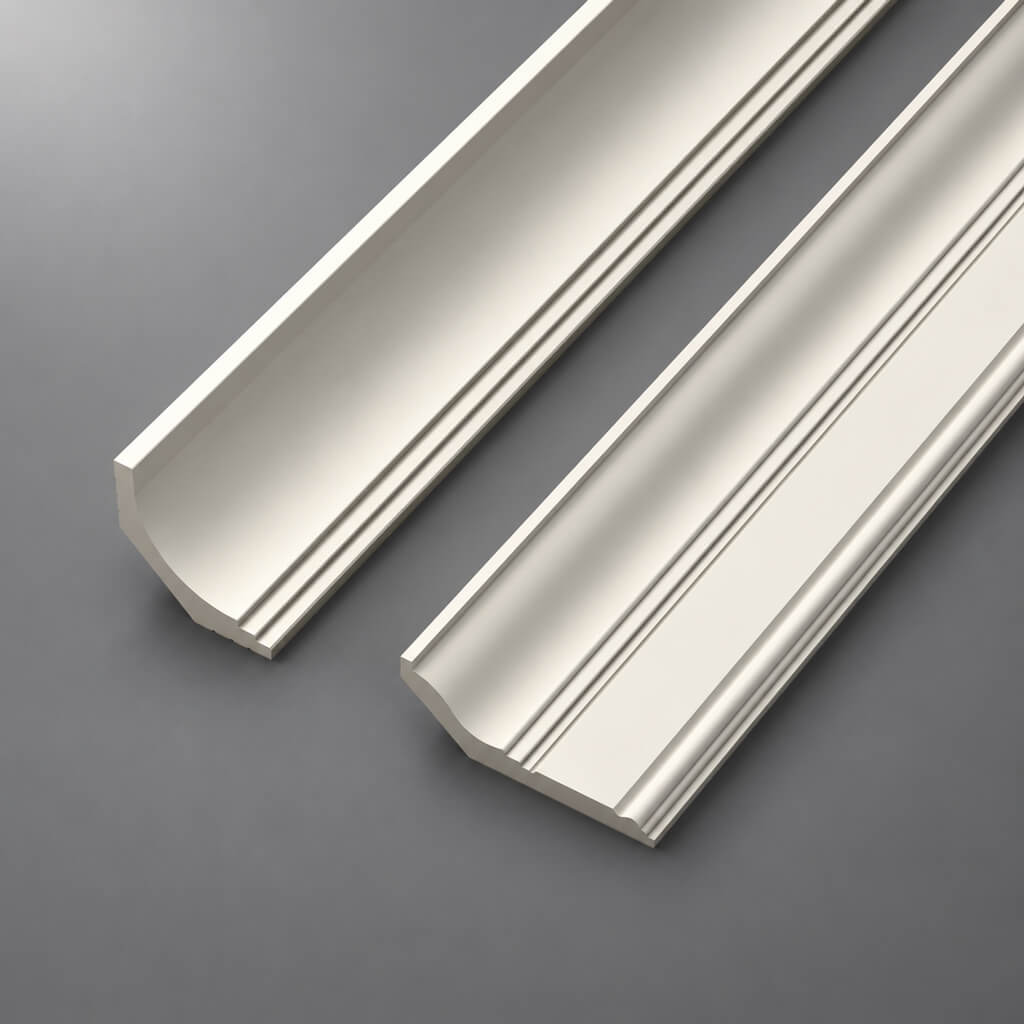
Crown molding
The broad U.S. term for decorative trim at the wall-ceiling junction.
Получить консультацию
Cornice
An architectural term for an upper projecting trim element. In interior millwork, a wood cornice can function as crown molding, but “cornice” may also describe more complex built-up compositions.
Cove molding
A concave molding profile. Wood cove molding may be used by itself at a ceiling junction or as one component of a larger crown assembly.
Why Wood Crown Molding Is Different From Paint-Grade Synthetic Crown
Real wood brings grain, color variation, and finish behavior into the design. That makes the material itself part of the visual composition.
With painted polyurethane, polystyrene, or MDF crown, the profile often matters more than the underlying material because the surface is covered with opaque paint. With stain-grade wood crown molding, the grain can be as important as the profile.
Choose real wood when:
- visible grain is desired;
- the room already contains natural-wood doors, cabinetry, paneling, flooring, or furniture;
- the crown will be stained, oiled, or clear-finished;
- the project requires authentic wood millwork;
- repairability and refinishing are important.
When Painted Wood Crown Molding Makes Sense
Wood crown molding does not have to remain natural.
Painted wood is useful when:
- the profile is more important than the grain;
- the crown needs to match painted doors and casing;
- the room is Traditional or Transitional;
- the designer wants a seamless wall-to-ceiling trim system;
- a durable wood substrate is preferred over a synthetic alternative.
Wood Crown Molding vs. MDF Crown
MDF can be a strong paint-grade option, especially for smooth, consistent profiles. Real wood is more appropriate when the finish should expose natural grain or when the project specifies solid wood millwork.
The decision should be based on:
- finish;
- profile complexity;
- humidity conditions;
- available lengths;
- installation method;
- budget;
- matching requirements with other trim.
Oak Crown Molding
Oak is one of the strongest choices for stain-grade crown because its grain remains visible from a distance and works well with other architectural woodwork.
Oak crown molding is particularly useful in:
- libraries;
- formal dining rooms;
- home offices;
- Traditional interiors;
- rooms with oak paneling;
- interiors with oak doors or stair components.
If the grain is the reason for choosing oak, approve the actual finish on a real sample rather than relying on a digital color swatch.
Beech Crown Molding
Beech typically has a quieter, more uniform grain than oak. That makes it useful for profiles where shape matters more than dramatic grain.
Beech works well for:
- carved or machined profiles;
- paint-grade crown;
- light stained crown;
- rooms with beech furniture or millwork;
- projects that need a more restrained wood texture.
Other Wood Species
The Russian source discusses ash, pine, and larch. Those species can be used for trim in the broader market, but this article should not imply that STAVROS currently offers every crown profile in every species.
For STAVROS product selection, verify the exact material listed on the product page. The currently identified KZ examples are oak and beech.
Stain-Grade vs. Paint-Grade Crown
Stain-grade wood crown
Use when grain remains visible. Quality control should focus on:
- color consistency;
- grain character;
- surface defects;
- joint quality;
- finish compatibility;
- how separate lengths match one another.
Paint-grade crown
Use when an opaque finish will unify the profile. Surface smoothness, joint preparation, and dimensional consistency matter more than natural grain matching.
Wood Crown Molding Profiles
The profile determines how the crown catches light and how formal the room feels.
Common profile families include:
- simple angled crown;
- flat stepped crown;
- cove crown;
- cyma or S-curve profiles;
- beaded crown;
- dentil crown;
- multi-piece built-up crown;
- carved ornamental crown.
Simple Wood Crown Molding
Simple crown has fewer transitions and works well in Modern, Transitional, Scandinavian, and restrained Traditional interiors.
It can be:
- flat;
- slightly beveled;
- softly rounded;
- shallow cove;
- clean stepped profile.
Traditional Wood Crown Molding
Traditional crown typically includes more curvature, steps, beads, or built-up layers.
It works well with:
- wide door casing;
- tall baseboards;
- wall paneling;
- chair rail;
- coffered ceilings;
- formal cabinetry.
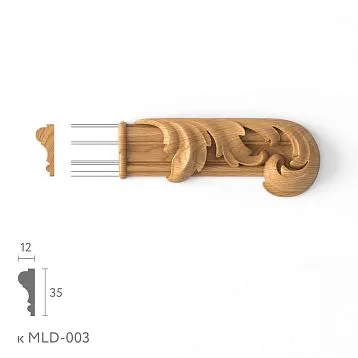
Carved Wood Crown Molding
Carved crown turns the ceiling edge into a focal architectural element.
Use it where the room can support:
- strong symmetry;
- substantial trim hierarchy;
- large wall surfaces;
- formal furniture;
- Classical, Baroque, Neoclassical, or historically inspired detailing.
Do not use deeply carved crown simply because it looks impressive in a catalog. At room scale, a highly ornamental profile can overwhelm simple doors, low ceilings, and minimal furnishings.
Wood Cove Molding
Wood cove molding creates a concave transition between wall and ceiling. It can feel softer and less formal than a complex crown profile.
Cove works well in:
- Craftsman-inspired interiors;
- Transitional rooms;
- natural-wood interiors;
- rooms where the ceiling edge should be subtle;
- built-up crown assemblies.
Built-Up Wood Crown Molding
A built-up crown is created from two or more trim pieces rather than one large profile.
For example, a system may combine:
- a wall backing strip;
- a central crown profile;
- a smaller ceiling molding;
- a bead or cove;
- a frieze board below.
This approach allows the designer to create a larger architectural effect using several coordinated pieces.
Why Built-Up Crown Is Useful
Built-up crown can:
- adapt to high ceilings;
- create custom proportions;
- coordinate with wall paneling;
- allow different wood species or finishes;
- hide minor differences between wall and ceiling geometry more gracefully than one rigid oversized profile.
Profile Size: Drop and Projection
In U.S. crown-molding terminology, two dimensions are especially useful:
- drop — how far the crown extends down the wall;
- projection — how far the crown extends across the ceiling.
The visible face dimension alone does not tell you how large the crown will feel.
Why Projection Matters
A crown with greater projection creates a stronger shadow and occupies more ceiling area.
That can make the crown feel heavier even if its wall drop is moderate.
Why Drop Matters
A larger drop creates a stronger horizontal band at the top of the wall.
This can be useful in tall rooms but can feel visually heavy in compact rooms with low ceilings.
Do Not Use One Universal Ceiling-Height Formula
The Russian source gives exact crown sizes for specific ceiling heights. Those ranges can be useful as examples, but they should not be presented as universal rules.
Choose crown size based on:
- ceiling height;
- room width;
- door casing width;
- baseboard height;
- wall paneling;
- crown projection;
- profile complexity;
- viewing distance;
- architectural style.
Small Rooms
In a compact room, use crown that is visually controlled.
Good strategies include:
- simple profile;
- moderate drop;
- small projection;
- same-color crown and ceiling;
- limited carving.
Large Rooms
Large rooms can support:
- deeper projection;
- multi-piece crown;
- stronger shadow lines;
- carved details;
- stained wood;
- larger frieze elements.
High Ceilings
High ceilings often need a stronger upper trim line so the wall does not feel visually unfinished.
Instead of choosing an arbitrarily tall single profile, consider whether a built-up crown system gives better proportion and more control.
Low Ceilings
Low ceilings do not automatically mean “no crown molding.” They mean the profile needs to be scaled carefully.
A shallow wood crown can work if it:
- has limited projection;
- uses clean geometry;
- matches the ceiling or wall color;
- does not compete with oversized casing or baseboards.
Spring Angle: A Critical Installation Dimension
Traditional crown molding is often installed at a spring angle rather than lying flat against the wall.
The spring angle describes how the crown sits between wall and ceiling. Common crown profiles may use different spring angles, so installers should not assume every profile cuts the same way.
Before installation, verify:
- profile orientation;
- wall contact point;
- ceiling contact point;
- spring angle;
- drop;
- projection.
Why Spring Angle Matters for Miter Cuts
If the crown is placed incorrectly against the saw fence, inside and outside corners will not close cleanly.
The correct cutting method depends on whether the crown is:
- nested against the saw fence;
- cut flat using compound miter/bevel settings;
- part of a built-up system.
Inside Corners: Coping vs. Mitering
For many wood crown installations, coping is the preferred method for inside corners.
A coped joint can:
- handle walls that are not perfectly square;
- reduce visible opening at the corner;
- allow one profile to follow the contour of the adjoining piece.
A simple miter can still work when wall geometry is very accurate and the profile is straightforward.
Outside Corners
Outside corners are usually mitered because both pieces need to form a clean external edge.
Check:
- actual wall angle;
- spring angle;
- profile symmetry;
- grain direction;
- finish condition.
Do Not Assume Corners Are Exactly 90 Degrees
Even in new construction, inside and outside corners can deviate from a perfect right angle.
For precise stain-grade crown, measure the real angle rather than relying on a theoretical 45-degree cut.
Scarf Joints on Long Runs
Where one wall is longer than the available crown stock, join pieces with a scarf joint rather than a square butt joint whenever appropriate.
A scarf joint:
- creates a longer bonding surface;
- can be less visible;
- aligns more naturally with the direction of the trim;
- can be easier to blend in paint-grade work.
Where to Place a Scarf Joint
Choose a location that is:
- away from the strongest focal point;
- away from extreme grazing light if possible;
- supported by suitable framing or fastening;
- easy to clamp or fasten accurately.
Wood Crown Molding on Uneven Ceilings
One of the biggest installation challenges is a ceiling that waves up and down.
Rigid wood crown cannot magically follow severe irregularities without creating visible gaps or distortion.
Possible strategies include:
- repairing the ceiling first;
- using a built-up crown with a separate upper trim piece;
- scribing selected components;
- using paint-grade caulk only for small finish gaps where appropriate;
- changing profile size if the original choice exaggerates the irregularity.
Uneven Walls
Walls can bow inward or outward, especially in older homes.
Before installing stain-grade crown, check long walls with a straightedge or laser. Large irregularities should be corrected rather than hidden with excessive filler.
Wood Crown Molding Around Beams
Ceiling beams create a natural stopping point for crown.
Options include:
- terminate the crown cleanly into the beam;
- wrap the beam with a matching trim system;
- continue crown through the room while beams remain visually separate;
- use beam trim and crown as one built-up composition.
Wood Crown Molding With Coffered Ceilings
Coffered ceilings often use several layers of wood trim.
Crown can appear:
- around the room perimeter;
- inside each coffer;
- at the lower edge of beams;
- as a transition between coffer structure and wall.
The profile hierarchy should remain consistent so the ceiling does not become visually chaotic.
Wood Crown Molding on Vaulted Ceilings
Vaulted ceilings require more complex geometry because the wall-ceiling angle changes.
Do not assume a standard crown profile will automatically work at every slope transition.
Installation may require:
- custom blocking;
- transition blocks;
- special compound cuts;
- built-up trim;
- custom profile adaptation.
Crown Molding on Sloped Ceilings
Sloped ceilings can produce awkward crown transitions where horizontal wall runs meet angled ceiling planes.
Mock up the corner at full scale before cutting expensive stain-grade material.
Cathedral Ceilings
In cathedral spaces, crown is optional rather than automatic.
Use it when the trim helps define the architecture. Skip it when the ceiling geometry itself is the dominant design feature.
Wood Crown Molding Over Kitchen Cabinets
Wood crown molding for cabinets is an important U.S. use case, but cabinet crown is not always the same as room crown.
Cabinet crown can be used to:
- finish the top of upper cabinets;
- close a small gap below the ceiling;
- make cabinets appear taller;
- connect cabinet runs to ceiling architecture;
- create a Traditional or furniture-like appearance.
Room Crown vs. Cabinet Crown
Room crown runs around the wall-ceiling perimeter.
Cabinet crown is part of the cabinetry.
They can match, coordinate, or intentionally differ.
When Cabinet Crown Should Match Room Crown
Matching works well when:
- cabinetry is built-in and architectural;
- the room uses one consistent painted trim color;
- the crown sizes are compatible;
- the cabinet run reaches close to the ceiling.
When Cabinet Crown Should Be Different
A different profile can work when:
- cabinets are natural wood but room crown is painted;
- cabinetry has a furniture-like design;
- room crown is much larger;
- the kitchen needs a separate millwork identity.
Crown Molding Above Built-Ins
Libraries, wardrobes, entertainment centers, and custom shelving often need a crown strategy similar to kitchen cabinets.
Decide whether crown should:
- wrap the room continuously;
- stop at the built-in;
- become part of the built-in top;
- step forward over the cabinetry.
Wood Crown Molding in a Living Room
Living rooms can support a wide range of crown styles.
Use:
- painted simple crown for a clean Transitional room;
- stained oak crown with wall paneling;
- built-up crown for high ceilings;
- carved crown in a formal Classical interior.
Wood Crown Molding in a Dining Room
Dining rooms are especially suited to crown because they often already have:
- chair rail;
- wainscoting;
- picture-frame molding;
- decorative lighting;
- formal furniture.
The crown should complete that hierarchy rather than become an unrelated decorative strip.
Wood Crown Molding in a Bedroom
Bedrooms generally benefit from quieter crown.
Use:
- small cove profiles;
- simple painted crown;
- light natural wood;
- same-color crown and ceiling;
- restrained projection.
Wood Crown Molding in a Home Office or Library
This is one of the strongest contexts for stained crown.
Dark or medium stained wood crown can connect:
- bookcases;
- desk cabinetry;
- wall paneling;
- door casing;
- baseboards.
Wood Crown Molding in Entry Halls
Entry halls often benefit from crown because the first sight line establishes the architectural character of the house.
Coordinate crown with:
- front-door casing;
- stair details;
- baseboards;
- wall paneling;
- ceiling fixtures.
Wood Crown Molding in Kitchens
Kitchen crown must coordinate with cabinetry, ceiling conditions, exhaust hoods, soffits, and tall units.
Do not choose the room crown independently from the cabinet elevations.
Wood Crown Molding in Bathrooms
Wood crown can be used in selected bathroom conditions, but humidity and condensation must be considered.
For bathroom-specific planning, see the STAVROS guide to bathroom molding and wall trim.
Do not assume every unfinished or stain-grade wood crown is suitable for persistent high-humidity exposure.
Modern Wood Crown Molding
Modern crown relies on proportion and material more than ornament.
Good choices include:
- flat stepped profiles;
- simple cove;
- dark stained wood;
- natural oak;
- painted monochromatic crown.
Traditional Wood Crown Molding
Traditional crown can use:
- more curvature;
- multiple steps;
- larger drop;
- larger projection;
- built-up profiles;
- dentil or carved detail.
Craftsman Wood Crown Molding
Craftsman interiors usually benefit from simpler wood trim with clear joinery and less ornamental curvature.
Consider:
- flat boards;
- small cove transitions;
- built-up square-edged profiles;
- stained oak;
- consistent relationships with window and door casing.
Colonial and Federal-Inspired Crown
These interiors can support refined curved crown and more formal built-up assemblies.
Use the profile in combination with:
- traditional casing;
- chair rail;
- paneled doors;
- baseboards;
- mantels.
Neoclassical Crown Molding
Neoclassical rooms use Classical structure with cleaner ornament.
Good strategies include:
- large simple crown;
- strong symmetry;
- white or warm-white paint;
- limited carving;
- coordinated wall molding.
Scandinavian Wood Crown
Scandinavian interiors may use:
- light oak;
- beech;
- small cove profiles;
- white-painted crown;
- minimal projection.
Rustic and Country Crown
Rustic crown can use:
- visible grain;
- simple wide profiles;
- matte natural finishes;
- coordination with beams and plank ceilings.
However, “rustic” should not become an excuse for unstable or poorly dried wood.
Loft and Industrial Interiors
The Russian source proposes very rough timber-like cornices for loft spaces. In U.S. projects, that can work as a deliberate beam or trim detail, but it should be distinguished from conventional crown molding.
If the section is large enough to read as a beam, treat it architecturally as a beam or heavy trim member—not simply as standard crown.
Stained Wood Crown Molding
Stained crown is appropriate when the wood itself is meant to be visible.
It can coordinate with:
- hardwood flooring;
- wood doors;
- built-in cabinetry;
- wall paneling;
- stairs;
- furniture.
The finish should be tested on the actual species because oak and beech can react very differently to the same stain.
Painted Wood Crown Molding
Painted crown can visually merge with the ceiling or create contrast against the wall.
Popular strategies include:
- white crown + white ceiling;
- crown painted the wall color;
- dark crown + light wall;
- one trim color used for crown, casing, and baseboards.
Natural Clear-Finished Crown
Clear finishes make grain the main design element.
Use them when the room already contains natural wood in a related tone.
Oil, Wax, and Clear Coatings
The Russian source gives fixed maintenance intervals for oil, wax, and lacquer. Those should not be treated as universal because coating chemistry, indoor climate, cleaning frequency, and sunlight exposure vary.
Instead:
- follow the finish manufacturer's maintenance instructions;
- inspect the crown periodically;
- refresh the finish when the surface actually needs it;
- avoid adding incompatible coatings over an unknown existing finish.
Matte vs. Satin vs. Gloss
Finish sheen changes how strongly the crown reads.
Matte
Softens reflections and works well with natural wood and contemporary interiors.
Satin
Offers a little more definition and can be practical for painted trim.
Gloss
Emphasizes profile detail but also reveals surface imperfections and joint inconsistencies more clearly.
Color Matching Across Multiple Crown Lengths
For stain-grade work, sort all lengths before cutting.
Group pieces by:
- tone;
- grain density;
- figure;
- sapwood/heartwood contrast;
- surface character.
Use the most consistent pieces on long focal walls.
Acclimation Before Installation
Wood trim should be allowed to reach appropriate conditions for the installation environment before final fastening.
The source specifies a universal 48–72-hour period, but the correct acclimation approach depends on:
- wood species;
- initial moisture content;
- packaging;
- jobsite humidity;
- HVAC operation;
- manufacturer guidance.
The better rule is: store the material properly and follow the product or millwork supplier's acclimation recommendations.
Jobsite Conditions
Do not install crown while the room is undergoing extreme moisture swings from:
- wet plaster;
- fresh concrete curing;
- major painting operations without ventilation;
- non-operational HVAC;
- water damage.
Surface Preparation
Before installation, check the wall-ceiling junction.
The surfaces should be:
- stable;
- clean;
- dry;
- free from loose paint;
- reasonably straight;
- ready to accept fasteners, blocking, or adhesive as required.
Do Not Use Crown to Hide Structural Problems
Crown molding can cover a normal finish joint. It should not be used to conceal:
- active cracks;
- water staining from unresolved leaks;
- moving drywall joints;
- loose plaster;
- serious framing movement.
Layout Before Cutting
Measure every wall and identify:
- inside corners;
- outside corners;
- chimney breasts;
- cabinet runs;
- beams;
- soffits;
- vault transitions;
- built-ins;
- window bays.
Then plan where full-length pieces and joints will go.
Measure the Room Twice
Do not assume opposite walls are identical.
Measure each run separately and record the actual corner condition.
Calculate Crown Quantity With a Cut List
The Russian source recommends a flat 10–15% allowance. That can be reasonable in some jobs, but a cut list is more accurate.
For each wall, record:
- finished run length;
- inside/outside corner;
- left and right cut type;
- stock length;
- whether a scarf joint is required;
- grain/color requirements.
Then optimize the cuts before ordering.
Why Waste Varies
Waste increases when:
- the room has many short wall segments;
- there are many outside corners;
- the crown has repeating carved ornament;
- long uninterrupted stain-grade pieces are required;
- grain matching matters;
- vaulted ceilings create specialty cuts.
Pattern Repeat in Carved Crown
For carved crown molding, measure the ornamental repeat before final cutting.
The pattern should not end awkwardly at focal corners or create visibly truncated motifs.
Fastening Wood Crown Molding
The installation method depends on:
- profile size;
- weight;
- wall and ceiling construction;
- available framing;
- whether backing or blocking is installed;
- finish type.
Finish Nails
Finish nails are common for wood crown where suitable framing or blocking is available.
Fastener length and spacing are project-specific.
Adhesive
Adhesive can supplement mechanical fastening, but it should not automatically be described as the primary method for every wood crown installation.
Use a product compatible with:
- wood;
- painted drywall;
- plaster;
- masonry if applicable;
- the finish system.
Blocking and Backing
Large or built-up crown often benefits from dedicated backing.
Backing can:
- provide a consistent fastening surface;
- simplify installation;
- control the spring angle;
- support heavier multi-piece trim.
Clip Systems
Some specialty crown products can use hidden clips, but that is product-specific. Do not assume all wood crown can be installed this way.
Installing Prefinished Crown
Prefinished crown requires especially careful cutting because joints and fastener repairs are harder to hide.
Plan:
- touch-up stain;
- matching finish;
- small fastener holes;
- clean glue control;
- protected surfaces during handling.
Installing Paint-Grade Crown
Paint-grade crown is more forgiving because joints, nail holes, and small surface imperfections can be blended before the finish coat.
Still, good carpentry should come first. Filler is not a substitute for accurate cuts.
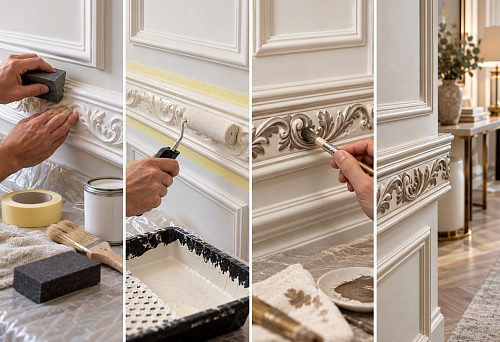
Finishing Crown After Installation
A typical paint-grade sequence may include:
- complete fastening;
- finish approved joints;
- fill fastener holes;
- sand repairs;
- prime where required;
- apply finish coats.
For stain-grade work, the sequence may differ because some contractors prefer shop finishing before installation.
Shop-Finished vs. Site-Finished Crown
Shop-finished crown
Advantages:
- controlled environment;
- better spray finish;
- less masking on site;
- consistent coating.
Challenges:
- joint touch-up;
- cut-edge finishing;
- repair after fastening.
Site-finished crown
Advantages:
- easier blending of joints;
- better matching with other site-finished woodwork;
- final color adjustment in the actual room.
Challenges:
- more protection and masking;
- more site labor;
- greater dependence on jobsite conditions.
Wood Crown Molding and Baseboards
Crown and baseboards form the upper and lower boundaries of the wall.
They do not need to be identical, but they should share a design language.
Coordinate:
- profile complexity;
- material;
- finish;
- visual weight;
- relationship to door casing.
For floor-level trim selection, see the STAVROS guide to wood baseboards and baseboard trim.
Wood Crown Molding and Decorative Wall Trim
Wall molding, crown, baseboards, and casing should feel like one system.
For the broader wood-profile hierarchy, see decorative wood molding and trim.
Wood Crown and Wall Panels
Where wall panels run to full height, crown can:
- cap the panel system;
- sit in front of the panel face;
- integrate with a top rail;
- form part of a built-up frieze.
For panel-specific planning, see decorative wood wall panels.
Wood Crown and Doors
Door casing does not have to repeat crown literally. It should coordinate in:
- material;
- finish;
- profile complexity;
- scale.
A deeply carved crown over extremely minimal door casing can look disconnected unless that contrast is intentional.
Wood Crown and Windows
Window casing, especially in formal rooms, should relate to the crown rather than compete with it.
For window-specific trim design, see interior window trim molding.
Wood Crown and Fireplace Architecture
In formal living rooms, crown can coordinate with a wood fireplace mantel or surround.
Do not simply repeat the same profile everywhere. Use a family of related profiles with clear hierarchy.
Wood Crown Molding With Hidden Lighting
The Russian source suggests using crown for indirect lighting. This can work, but only when the profile or built-up assembly is designed to create a proper light pocket.
Consider:
- LED strip location;
- heat management;
- driver access;
- wire routing;
- light cutoff;
- distance from the ceiling;
- whether the crown is intended for this application.
Do Not Hide Electrical Components Without Access
LED drivers, connectors, and serviceable electrical components should remain accessible as required.
Wood Crown Molding and Recessed Lighting
Large projecting crown can affect the way recessed fixtures wash the wall.
Check:
- fixture setback;
- beam spread;
- crown projection;
- shadowing.
Wood Crown and Ceiling Fans
Crown typically has little direct interaction with a central ceiling fan, but large built-up ceiling trim should not interfere with electrical boxes, canopy dimensions, or service access.
Wood Crown and Sprinklers, Detectors, and Vents
Do not allow decorative trim to obstruct:
- sprinkler coverage;
- smoke detectors;
- HVAC grilles;
- return-air openings;
- service panels.
Common Mistake #1: Using “Cornice” and “Crown Molding” as Exact Synonyms Everywhere
Use crown molding as the primary U.S. term and cornice where the architectural context supports it.
Common Mistake #2: Choosing by Face Width Only
Drop and projection determine how large the crown actually feels.
Common Mistake #3: Ignoring Spring Angle
It affects both installation position and cutting geometry.
Common Mistake #4: Assuming Every Corner Is 90 Degrees
Measure the actual condition.
Common Mistake #5: Using Straight Miters for Every Inside Corner
Coping may produce a better joint in many wood crown installations.
Common Mistake #6: Using Square Butt Joints on Long Focal Walls
Plan scarf joints where appropriate.
Common Mistake #7: Using Crown to Hide Active Cracks
Repair the underlying condition first.
Common Mistake #8: Installing Stain-Grade Crown Without Color Sorting
Natural wood variation needs intentional placement.
Common Mistake #9: Choosing a Profile That Is Too Ornate for the Room
Profile complexity should match the architecture.
Common Mistake #10: Choosing a Profile That Is Too Small for a Large Room
Use room scale, not one universal ceiling-height chart.
Common Mistake #11: Making Cabinet Crown and Room Crown Compete
Design them as one elevation.
Common Mistake #12: Assuming Every Wood Species Is Available in Every STAVROS Profile
Verify the actual product page.
Common Mistake #13: Claiming Wood Will Never Move
Wood responds to moisture. Stable detailing and proper jobsite conditions matter.
Common Mistake #14: Treating Pine, Larch, Ash, Oak, and Beech as Interchangeable
Species differ in grain, machining, finishing, availability, and movement behavior.
Common Mistake #15: Using Fixed Maintenance Intervals as Universal Rules
Maintain the actual finish according to its condition and manufacturer guidance.
Common Mistake #16: Using a Large Crown Without Proper Backing
Heavy or built-up crown needs a reliable fastening strategy.
Common Mistake #17: Assuming Adhesive Alone Is Always Enough
Fastening depends on profile, weight, substrate, and construction.
Common Mistake #18: Ignoring Pattern Repeat in Carved Crown
Plan the ornament before cutting.
Common Mistake #19: Installing Around Lighting Without Planning Service Access
Decorative trim should not make electrical maintenance impossible.
Common Mistake #20: Choosing From a Product Photo Without a Full-Scale Sample
Crown is viewed at a distance and at an angle. Test the real profile in the room.
Designer Checklist
Before specifying wood crown molding, confirm:
- room size;
- ceiling height;
- profile family;
- drop;
- projection;
- spring angle;
- wood species;
- stain-grade or paint-grade;
- finish;
- door casing;
- baseboard;
- wall paneling;
- cabinet crown;
- beams or coffers;
- lighting;
- ventilation and humidity conditions;
- inside/outside corner strategy;
- sample approval.
Installer Checklist
Before cutting, verify:
- actual wall lengths;
- actual corner angles;
- spring angle;
- profile orientation;
- stock lengths;
- joint locations;
- grain/color sorting;
- backing or framing;
- fastening method;
- finish sequence;
- vaulted or sloped transitions;
- cabinet and built-in conditions.
SEO Intent: Wood Crown Molding
This article should own the wood-specific crown cluster rather than the broader crown-molding category or the material-comparison intent.
Primary and supporting phrases include:
- wood crown molding;
- wood crown moulding;
- wood crown molding trim;
- wood ceiling molding;
- wood ceiling trim;
- wood molding ceiling;
- wood cove molding;
- wood cornice molding;
- wood cornice;
- oak crown molding;
- stained wood crown molding;
- painted wood crown molding;
- carved wood crown molding;
- wood crown molding for cabinets.
Close variants belong on one page and should not be treated as separate additive search volumes.
Internal Linking Strategy
Use wood crown molding for the main commercial crown category.
Use oak and beech wood cornice KZ-001-4 as a product-level example.
Use oak and beech wood cornice KZ-001-11 as another crown-profile example.
Use wood and MDF trim when explaining the complete millwork hierarchy.
Frequently Asked Questions
What is wood crown molding?
Wood crown molding is trim installed at the wall-ceiling junction to finish the transition and create an architectural upper edge.
What is the difference between crown molding and cornice?
Crown molding is the common U.S. interior trim term. Cornice is a broader architectural term and can describe more complex projecting upper trim assemblies.
What is wood cove molding?
Wood cove molding has a concave profile. It can be used alone at a ceiling junction or as one component of a built-up crown system.
Is oak good for crown molding?
Yes, especially when visible grain and stain-grade millwork are important.
Is beech good for crown molding?
Yes. Its more uniform grain can work well for machined, carved, stained, or painted crown profiles.
Can wood crown molding be painted?
Yes. Painted wood crown can coordinate with doors, casing, walls, ceilings, and other trim.
Can wood crown molding be stained?
Yes. Use stain-grade material and approve the finish on a real sample of the actual species.
How large should crown molding be?
There is no universal size. Consider ceiling height, room scale, drop, projection, casing, baseboard, wall paneling, and profile complexity.
What is crown molding projection?
Projection is how far the crown extends across the ceiling from the wall.
What is crown molding drop?
Drop is how far the crown extends down the wall.
What is crown molding spring angle?
It is the angle at which a traditional crown profile sits between wall and ceiling. It affects both layout and cutting.
Should inside crown corners be mitered or coped?
Both are possible, but coping often handles imperfect wall angles more effectively for profiled wood crown.
How do you join crown molding on a long wall?
A scarf joint is commonly used where two lengths meet along a long run.
Can wood crown molding be used on vaulted ceilings?
Yes, but transitions can require custom blocking, compound cuts, or special detailing.
Can wood crown molding go above kitchen cabinets?
Yes. Cabinet crown can finish the top of upper cabinets, but it should be designed in coordination with room crown and ceiling conditions.
Should cabinet crown match room crown?
Not necessarily. They can match, coordinate, or intentionally differ depending on cabinetry, finish, and scale.
Can crown molding hide an uneven ceiling?
It can visually soften small finish irregularities, but severe unevenness should be corrected or addressed through an intentional built-up detail.
Can crown molding hide cracks?
Only after the cause of the crack has been evaluated and repaired. Crown should not conceal active structural or moisture-related damage.
Can wood crown molding include LED lighting?
Yes when the profile or built-up assembly is designed for indirect lighting and wiring, drivers, heat management, and service access are handled correctly.
How much extra crown molding should I order?
Base the allowance on a cut list, stock lengths, corner count, pattern repeat, and grain matching rather than relying on one universal percentage.
What makes wood crown molding look high-end?
Correct scale, clean joints, appropriate grain and finish, coordinated trim hierarchy, and precise installation matter more than simply choosing the largest or most ornate profile.
Final Design Principle: Crown Molding Should Complete the Architecture
The best crown molding does not look like a decorative strip added at the end of a project. It looks like the room was designed around it.
Choose wood crown molding when natural material, stain-grade millwork, visible grain, or a coordinated wood trim system is part of the design. Use oak or beech according to the actual profile and finish requirements. Choose simple crown for restrained interiors, built-up crown for larger rooms, carved crown only where the architecture can support it, and cove molding where a softer ceiling transition is more appropriate.
Most importantly, treat crown as part of a system. Its size should relate to the room, its projection should relate to the ceiling, its profile should relate to doors and baseboards, and its finish should relate to the rest of the millwork.
When those relationships are correct, wood crown molding does exactly what architectural trim should do: it makes the room feel complete without needing to explain why.
Wood Crown Molding vs. Polyurethane Crown Molding
These materials can create a similar visual effect, but they solve the problem differently.
| Factor | Wood Crown Molding | Polyurethane / Synthetic Crown |
|---|---|---|
| Visible grain | Yes, if stain-grade | No natural wood grain |
| Best finish | Stain, clear finish, oil, or paint | Usually paint |
| Millwork integration | Excellent with wood doors, cabinetry, panels | Excellent in paint-grade decorative systems |
| Joint repair | Carpentry and finish dependent | Usually filler/paint dependent |
| Moisture behavior | Depends on species, finish, and conditions | Depends on exact product and installation system |
| Best reason to choose | Material authenticity and visible wood | Paint-grade relief and lightweight decorative work |
For a full material comparison, see the STAVROS guide to polyurethane crown molding vs. wood crown molding.
Wood Crown Molding vs. MDF Crown
MDF is often the more rational option if every inch of the crown will be painted. Real wood makes the strongest case when grain, stain, or clear finish matters.
Choose MDF when:
- the final surface is opaque paint;
- the room is dry and the product is appropriate for the environment;
- profile consistency matters more than grain;
- the project needs a clean paint-grade appearance.
Choose wood when:
- the material itself should be visible;
- the crown needs to match other real-wood millwork;
- staining is part of the design;
- future refinishing is desirable.
Wood Crown Molding vs. Polystyrene Crown
STAVROS also has a separate crown-molding category that currently includes HIWOOD polystyrene products. That is a different material system from the wood crown discussed in this article.
Do not describe the current HIWOOD crown category as solid wood or polyurethane.
Wood Crown Molding With Wall Molding
When the room uses picture-frame molding, the crown should be designed with the wall-frame layout rather than selected independently.
Coordinate:
- frame width;
- distance from crown;
- door casing;
- baseboard height;
- panel rhythm;
- profile complexity.
For wall-frame planning, see wall molding ideas.
Wood Crown Molding With Wainscoting
Wainscoting creates another horizontal line lower on the wall. The crown should not compete with it.
A strong hierarchy is:
- substantial baseboard;
- controlled panel field;
- clear chair rail or cap;
- calmer upper wall;
- crown with enough weight to finish the room.
For lower-wall proportion, see wainscoting and chair rail molding.
Wood Crown Molding Around a Fireplace Wall
A fireplace wall may already contain mantel trim, wall panels, stone, built-ins, or a mirror.
Use crown to complete that elevation rather than adding another unrelated profile.
For fireplace-specific coordination, see fireplace surround molding and decorative trim.
Wood Crown Molding and Mirror Walls
Large mirrors, especially in dining rooms and formal living rooms, can visually compete with crown.
Keep enough wall field between:
- mirror frame;
- crown;
- wall molding;
- sconces.
For mirror-framing principles, see mirror frame molding.
Wood Crown Molding in Renovations
Renovation projects often involve ceilings and walls that are less straight than new construction.
Before ordering crown:
- check ceiling level;
- check wall bowing;
- measure actual corner angles;
- identify old plaster repairs;
- check whether existing trim is truly level or simply follows the ceiling;
- decide whether the new crown should align visually with the ceiling or establish its own level datum.
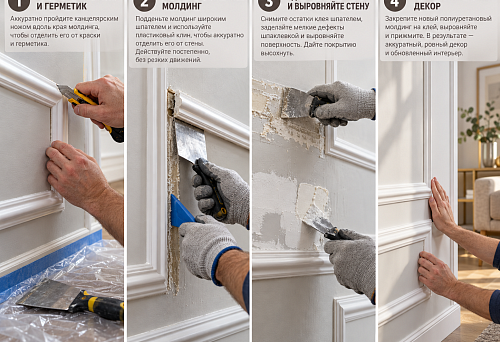
Replacing Existing Crown Molding
Removing old crown may expose:
- unfinished drywall;
- old wallpaper edges;
- paint ridges;
- fastener damage;
- gaps at the ceiling;
- older blocking or nailers.
Do not assume the new crown can simply cover everything. Repair and prepare the substrate first.
Making New Crown Larger Than the Old Crown
A larger replacement profile can cover old paint lines and minor finish damage, but it also changes:
- ceiling proportion;
- window-top clearances;
- cabinet clearances;
- distance to vents;
- relationship to wall molding.
Making New Crown Smaller Than the Old Crown
A smaller profile can reveal unfinished areas that the previous crown concealed.
Plan for wall and ceiling repair before installation.
Crown Molding Around Full-Height Cabinets
Full-height cabinets create one of the most difficult crown transitions.
Possible solutions include:
- run room crown into the cabinet side;
- stop room crown before cabinetry;
- step the crown forward over the cabinet;
- use cabinet crown independently;
- build a continuous soffit or frieze.
Crown Molding and Refrigerator Panels
In kitchens with paneled refrigerators or tall appliance cabinets, crown height must account for:
- appliance clearance;
- cabinet door swing;
- service access;
- ceiling irregularity;
- filler panels.
Crown Molding and Range Hoods
Decorative range hoods often become the center of a kitchen elevation.
Decide whether crown:
- passes behind the hood;
- terminates into the hood;
- wraps the hood;
- steps around a taller hood surround.
How to Specify Wood Crown Molding
A good specification should include:
- manufacturer or supplier;
- profile/SKU;
- wood species;
- grade if relevant;
- nominal dimensions;
- drop and projection;
- spring angle if applicable;
- finish;
- prefinished or site-finished condition;
- joint expectations;
- fastening method;
- sample approval requirement.
Sample Specification
Wood crown molding: selected STAVROS profile, oak or beech as scheduled, stain-grade where exposed wood is required, finish to approved sample, joints tight and visually aligned, material color-sorted on continuous runs, installation coordinated with wall and ceiling conditions.
Buying Wood Crown Molding Online
Before ordering from photographs alone, confirm:
- actual profile drawing;
- material;
- length;
- drop;
- projection;
- finish condition;
- whether corner accessories exist;
- whether the product is stocked or made to order;
- packaging and shipping requirements.
Why Samples Matter More for Crown Than for Flat Trim
Crown is viewed at an angle and high above eye level. A profile that looks subtle on a screen can cast a much stronger shadow after installation.
Hold the sample at the intended spring angle near the ceiling—not flat on a table.
Test the Crown Under Real Lighting
Check it:
- in daylight;
- with ceiling lights on;
- with wall sconces on;
- under grazing light;
- next to the actual paint color.
Crown Molding and Shadow
The deeper the projection, the stronger the shadow line. That shadow can make the crown more visually prominent than its dimensions suggest.
This is one reason a full-scale mockup is more reliable than choosing from dimensions alone.
Maintenance of Wood Crown Molding
Crown receives less physical contact than baseboards, but it collects dust and can be affected by sunlight, humidity, and finish aging.
For routine maintenance:
- dust with a soft cloth or vacuum brush;
- avoid saturating the wood with water;
- use cleaners compatible with the finish;
- inspect joints if the building experiences seasonal movement;
- repair damaged finish as needed.
Repairing Open Joints
If a joint opens, first determine why.
Possible causes include:
- wood movement;
- poor initial fit;
- substrate movement;
- fastener failure;
- building settlement.
Do not simply fill repeatedly opening joints without understanding the cause.
Repairing Finish Damage
Stain-grade crown may require local color repair and topcoat blending. Painted crown can usually be patched and repainted more easily, but matching aged paint sheen can still be difficult.
Five Questions to Answer Before Ordering
1. Is the crown supposed to look like wood?
If yes, choose stain-grade material and approve the actual grain and finish.
2. How large should the crown feel, not just measure?
Check drop, projection, shadow, room scale, and ceiling height.
3. How will it meet cabinets, beams, and openings?
Draw the entire perimeter before ordering.
4. How will corners be cut?
Resolve coping, miters, corner blocks, and vaulted transitions before fabrication.
5. How will the crown be finished?
Decide between shop finish, site stain, paint, clear coat, oil, or another specified system.
Final Buying Rule
Do not buy wood crown molding only because the profile looks impressive in isolation.
Buy it because its scale, species, finish, projection, installation geometry, and relationship to the rest of the trim all work in the actual room.
That is the difference between decorative trim and architecture.
DIY finishing allows saving 20-30% of the cost. Purchasing sanded moldings and applying oil, wax, or paint yourself requires time and care, but the result can be very high quality at minimal expense.
Buying directly from the manufacturer eliminates the trade markup.molding wholesaleFor large volumes, it allows obtaining a significant discount. Even for small volumes, direct purchase is more advantageous than buying through intermediaries.
Common mistakes in selection and installation
Experience shows typical mistakes made when working with wooden moldings. Knowing these mistakes helps avoid them.
Errors in Selection
Mismatch of molding size to room scale — a common mistake. A too thin molding disappears in a large space, while an overly bulky one overwhelms a small room. The size should correspond to ceiling height and room area.
Style conflict arises when attempting to install classical carved moldings in a modern minimalist interior or simple rails in a luxurious classical space. The molding style must match the overall interior concept.
Saving on material quality leads to problems. Moldings made from raw wood deform after installation, and those with abundant knots and defects require additional processing. Quality material costs more but lasts for decades without issues.
Installation errors
Mounting on an unprepared surface leads to molding detachment and gaps. Walls and ceilings must be flat, clean, and primed. Ignoring preparation leads to defects.
Failure to acclimate causes deformation after installation. Moldings brought from a cold warehouse into a warm room must rest for at least 48 hours. Installation immediately after delivery is not allowed.
Incorrect corner processing — the most noticeable installation error. Gaps in corners are obvious and spoil the impression of even the highest-quality moldings. Corners require special care, precise fitting, and use of special tools.
Insufficient mounting of heavy moldings leads to detachment. Large oak elements cannot be held solely by adhesive — additional mechanical fastening with screws or anchors is required.
Questions and answers
What distinguishes a ceiling molding from a ceiling baseboard?
In essence, these are synonyms — both terms denote a decorative element at the junction of wall and ceiling. The term 'molding' is more commonly used for heavier, more complex-profiled elements typical of classical interiors. 'Ceiling baseboard' or 'gallet' — usually simpler, thinner elements. In professional contexts, the distinctions are conditional, and the choice of term often depends on regional or corporate traditions.
Can wooden moldings be installed in a bathroom?
Yes, but with reservations. Use moisture-resistant species — oak, larch, teak. Quality protective treatment is mandatory — multi-layer coating with water-resistant varnish or special oil for humid areas. Good bathroom ventilation is essential to prevent constant high humidity. Installing wooden moldings in shower zones is undesirable due to direct water contact.
How to choose the molding color to match the interior?
There are three main approaches. First — molding in ceiling color, creating a unified plane effect and visually increasing height. Second — molding in wall color, emphasizing vertical lines and making the ceiling appear higher. Third — contrasting molding, creating a clear boundary and structuring the space. The choice depends on desired effect and overall style. In classical interiors, moldings often match door and baseboard colors.
Can wooden moldings be painted after installation?
Yes, and it is even recommended if the molding was purchased without final finish. Painting after installation allows hiding joints, putty, and mounting points, creating a uniform finish. The surface is pre-sanded and primed, then painted in two to three layers with intermediate drying. If the molding already has a finish, painting is possible but requires prior preparation — sanding to remove gloss and improve adhesion.
How long after installation can one move into the room?
It depends on the type of coating and mounting adhesive. With eco-friendly water-based materials — PVA glue, water-based varnishes and paints — the room can be used 24-48 hours after completion of work, once materials are fully dry. Polymer adhesives and organic solvent-based varnishes require longer airing — 3-5 days. Odor must completely dissipate before moving in, especially in children's rooms and bedrooms.
How to calculate the molding height for a specific room?
Basic rule — the higher the ceiling, the heavier the molding can be. For ceilings 2500-2700 mm — optimal molding height 40-60 mm, for 2700-3000 mm — 60-90 mm, for 3200-3500 mm — 90-120 mm, for rooms over 4000 mm — 120-150 mm and more. These are approximate values, adjusted according to interior style, room area, and personal preferences. In a store, it is useful to attach a molding sample to the wall at the desired height and evaluate the visual impression.
Wooden or polyurethane molding — which is better?
Each material has its advantages. Wood — a natural, eco-friendly, warm material with unique texture. Wooden moldings are noble, respectable, and long-lasting.Buy polyurethane wall moldingsConsidered for humid areas, complex curved sections, when very intricate carved profiles are needed. Polyurethane is lighter, cheaper, moisture-resistant, and easy to install. In residential spaces with normal humidity, wood is preferable; in bathrooms and kitchens, polyurethane is more practical.
Do moldings need to be treated with antiseptics?
Quality moldings from the manufacturer are already treated with protective compounds during production. Additional antiseptic treatment may be required for use in humid areas or if the elements were purchased untreated. Modern water-based antiseptics are eco-friendly, safe for indoor use, and effectively protect wood from biological threats. For high-humidity areas, antiseptics based on organic solvents with deep penetration are recommended. Antiseptic treatment is performed before applying the final finish — oil, wax, or varnish. It is important to choose compatible compounds so that protective layers do not conflict with each other.
What tools are needed for self-installation of cornices?
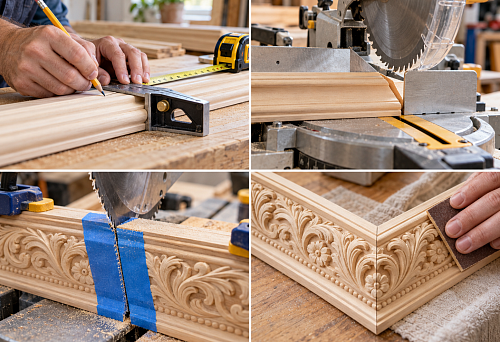
The basic tool set includes a miter saw with a rotating table for precise corner trimming, a laser or water level for marking, a tape measure and pencil for measurements. A mounting adhesive and glue gun are required, a drill or screwdriver for mechanical fastening, a miter box for manual trimming of small elements. For finishing, sandpaper of various grits, a putty knife and wood putty are needed. Professional installation requires a compressor with an air spray gun for even application of protective coatings.
Is it possible to combine wooden and polyurethane cornices in one room?
Combining is allowed and often used to optimize costs or solve technical issues. For example, wooden cornices on straight wall sections and polyurethane elements for complex curved zones. It is important to select profiles as similar in size and configuration as possible. After installation and painting in a single color, the difference in materials becomes imperceptible. This approach allows combining the advantages of both materials — the naturalness of wood in visible areas and the practicality of polyurethane in complex areas.
How does a cornice affect room lighting?
A cornice creates a horizontal projection that casts a shadow on the upper part of the wall. This visually reduces the room's height, making it more intimate. Wide projecting cornices create deep shadows, which is suitable for south-facing sunny rooms — the shadow softens bright lighting. In north-facing rooms, less projecting profiles are preferred, as they do not create shading. Cornices with a special groove for hidden lighting become a source of soft diffused light, visually increasing ceiling height. An LED strip installed behind the cornice creates a floating ceiling effect.
How long do wooden cornices last?
With proper selection of wood species, quality treatment, and regular maintenance, wooden cornices last for decades. Oak cornices in dry rooms are practically eternal — 70 to 100 years or more. Beech and ash last 50 to 70 years, pine lasts 40 to 50 years with good care. Critical to longevity are the conditions of use — stable temperature and humidity extend the material's life. In rooms with humidity fluctuations, service life is reduced, requiring more frequent renewal of protective coatings. Mechanical damage, direct water exposure, and contact with heating appliances shorten durability.
Conclusion
Choosing a wooden cornice is a decision that defines the character of the interior for decades to come. A correctly selected profile completes the architectural composition, creates harmony between wall verticals and ceiling horizontals, and fills the space with the nobility of natural material. Classic multi-level cornices with carved details transform a room into an example of respectability, modern minimalist profiles emphasize clean lines and functionality, while intermediate options allow finding a balance between tradition and current trends.
Wood remains the unrivaled material for creating cornices. Its warmth, living texture, and ability to age gracefully make wooden elements a value that only grows over time. Oak, beech, ash, pine, larch — each species offers a unique combination of strength, beauty, and character. The choice of species is determined by usage conditions, interior style, and project budget, but in any case, natural wood remains the standard of quality and eco-friendliness.
Technical aspects are no less important than aesthetic ones. Profile dimensions must match the room's scale, the mounting method must ensure structural reliability, and protective treatment must guarantee longevity. Proper installation, following all technological nuances, transforms a cornice from a mere decorative element into an architectural detail that serves generations without losing functionality or appearance.
Care for wooden cornices does not require heroic efforts, but requires consistency. Regular dust cleaning, periodic renewal of protective coatings, and monitoring of indoor microclimate — these simple measures preserve the beauty of wood for decades. Wooden cornices do not merely decorate interiors — they live with the house, change with it, acquire the patina of time, and become part of family history.
STAVROS offers a full range of wooden cornices for any interior solutions. The assortment includes classic multi-level profiles with rich detailing, modern minimalist solutions, and universal medium-complexity options. Production on our own facilities using high-precision equipment guarantees flawless quality of each element. Premium wood without knots or defects, precise dimensions, and quality treatment — standards that STAVROS strictly adheres to.
STAVROS professional consultants will help you select a cornice perfectly suited to your project. All parameters are considered — ceiling height, room area, interior style, usage conditions, budget. Wide selection of wood species — from affordable pine to premium oak — allows finding the optimal solution for any project. Various finishing options — from unfinished blanks to fully ready-painted elements — allow choosing the desired product readiness level.
STAVROS offers not just cornices, but comprehensive interior solutions. Baseboards, moldings, window casings, decorative elements from unified collections create stylistic unity in space. All elements are made from the same wood species, have coordinated profiles, and a unified finish. This allows creating complete interior compositions where each detail complements the other, where the whole is greater than the sum of its parts.
Delivery to Moscow, Saint Petersburg, and all of Russia ensures STAVROS product accessibility for any region. Reliable packaging protects elements during transport, preventing damage. Warehouse program allows immediate dispatch of popular items, production facilities enable rapid manufacturing of custom solutions.
STAVROS — the choice of those who understand the value of natural wood, who are not willing to compromise on quality, who create interiors for decades. Wooden cornices from STAVROS — an investment in beauty, longevity, and prestige of your home. This is a choice in favor of traditional carpentry craftsmanship, modern production technologies, and impeccable service. Choose STAVROS — choose quality, proven by time.