Article Contents:
- First screen: what to buy for closing joints and junctions
- Where gaps and junctions most often remain
- Built-in wardrobe side panel and wall
- Furniture top panel and ceiling
- Decorative panel and wall joint
- Doorway and wall
- External corner
- Baseboard and built-in furniture
- Decorative niche and adjacent wall
- After installing the moldings
- Wooden batten: when strength is needed
- What is a batten and how it differs from molding
- Where wooden batten is used
- Parameters for choosing a wooden batten
- Wooden trim: thin batten with a decorative function
- Wooden corner: protection and decor for external corners
- When a corner is needed
- Where is the wooden corner used
- Wooden corner or polyurethane corner element: what to choose
- Solid wood molding: the universal language of wooden profiles
- What solid wood molding includes
- Fillet: an elegant solution for internal corners
- Polyurethane moldings for decorative junctions
- Moldings as a tool for covering wall and ceiling junctions
- Where polyurethane moldings cover junctions
- Polyurethane molding: technical profiles for painting
- What to choose by situation: decision table
- Ready-made kits for different zones
- Built-in wardrobe: kit for furniture junctions
- Decorative panel on the wall: perimeter framing
- Hallway: joints in all areas
- Living room: decorative junctions of moldings and frames
- Furniture up to the ceiling: top junction
- Installation nuances: how the profile holds and covers the joint
- Wooden profile: mechanical fasteners or glue
- Polyurethane profile: glue and sealant
- Sealant: the final step that solves everything
- Profile color: matching furniture, wall, or contrasting
- Three strategies
- Mistakes when choosing a trim and molding
- Sealing a large gap only with sealant
- Buying a profile without precise measurement
- Not accounting for the thickness of the trim strip
- Taking molding without a reserve for trimming
- Installing polyurethane in a high-impact zone
- Using wood where it needs to be painted the wall color
- Forgetting about sealant for the finishing joint
- Mixing different profiles without an overall scheme
- Complete order checklist for closing junctions
- STAVROS: one source for wood and polyurethane
- Frequently Asked Questions
The repair is finished. The cabinet is in place. The panels are installed. And yet something is wrong: somewhere between the side of the cabinet and the wall there is a half-centimeter gap. The decorative panel meets the wall unevenly. There is an unsightly junction near the doorway. The ceiling cornice does not reach the corner. The baseboard does not align with the side of the built-in cabinet.
This is not a disaster. This is a normal situation in any real renovation — because walls are not perfectly flat, ceilings are not perfectly horizontal, and corners are not perfectly square. The goal is not to achieve zero gaps (that's impossible), but to cover them with the right profile so that the interior looks finished.
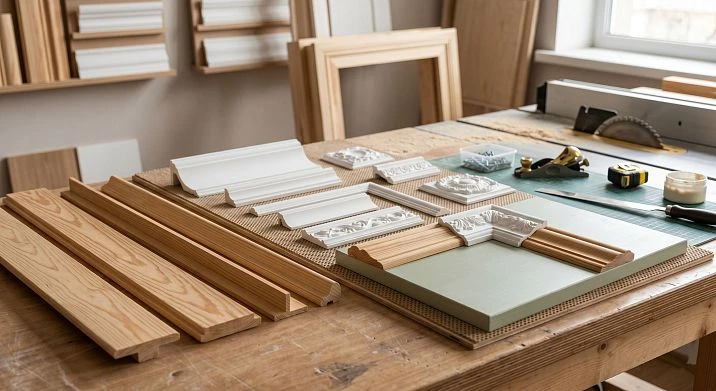
Wooden trim, wooden floor, Pogonazh iz massiva, Moldings made of polyurethane — are tools for solving this problem. Each one is for its own area and type of junction. Choosing the wrong profile is just as bad as having no profile at all: a thin trim on a wide gap, a large molding in a narrow gap, polyurethane where strength is needed.
This article is a practical breakdown: what to put where, which set is needed for each case, and how to avoid mistakes that cannot be fixed later without redoing.
First screen: what to buy for covering joints and junctions
Before the detailed breakdown — a list of what might generally be needed. A real shopping cart when working with junctions:
Wooden elements:
-
Wooden trim and solid wood moldings — trims, strips, fillets, flat planks, transition profiles;
-
Wooden angle — external and internal corner profiles made of solid wood;
-
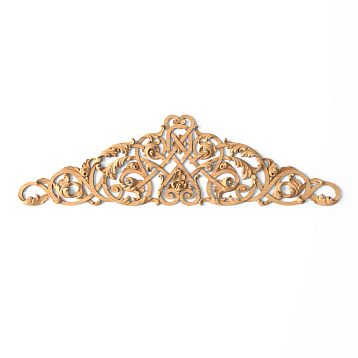
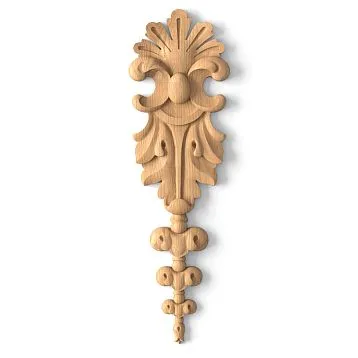
Wooden decor and overlays — decorative strips for side panels and ends.
Polyurethane elements:
-
Moldings made of polyurethane — decorative lines and frames on walls and ceilings;
-
Polyurethane trim — friezes, transition profiles, baseboards;
-
Polyurethane moldings — cornices, elements for ceiling junctions;
-
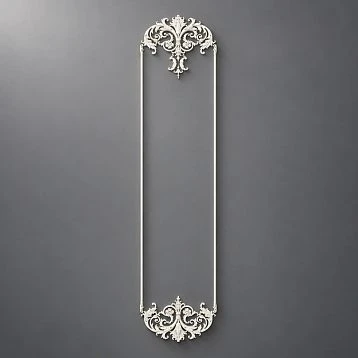
Decorative stucco / overlays — point accents in junction areas.
Mounting materials:
-
Fasteners for wooden profiles — finishing nails, screws, liquid nails;
-
Mounting adhesive for polyurethane profiles — more about selection;
-
White acrylic sealant — finishing seam, closing gaps and joints;
-
Primer — for painting polyurethane;
-
Paint or varnish — finishing coating;
-
Profile allowance of 10–15%.
Main idea: a gap is not only a problem but also a place for a solution. Wooden nashchel and wooden layout — for durable furniture zones. Polyurethane moldings — for walls, ceilings, and decorative surfaces for painting. The right choice of material for the type of junction is the difference between a neat result and chaos.




Where gaps and junctions most often remain
Before choosing a profile, you need to understand what kind of gap we are talking about. Because different types of junctions require different solutions.
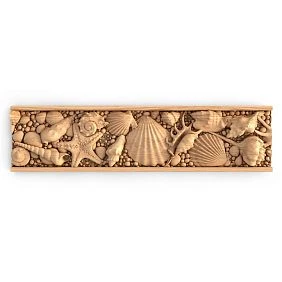
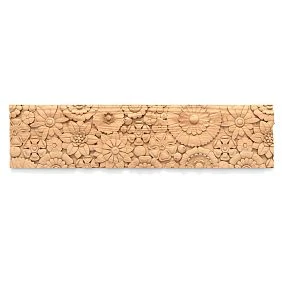
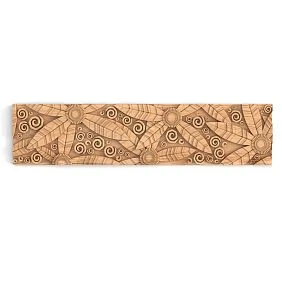
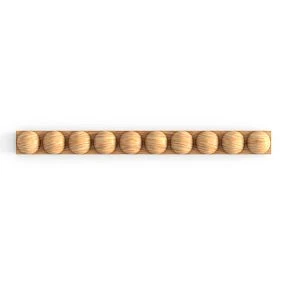
Our factory also produces:
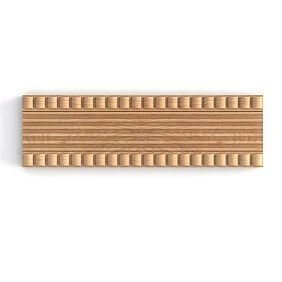
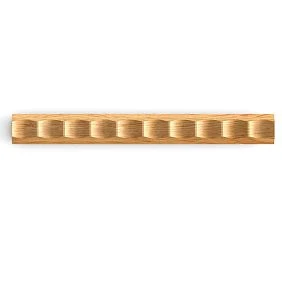
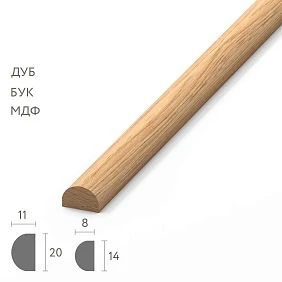

Side panel of built-in wardrobe and wall
This is the most common situation. A built-in wardrobe is installed from wall to wall or from wall to corner. The side panel of the wardrobe adjoins the wall — and if the wall is uneven (and it is always uneven), a gap of 5–15 mm remains between the side panel and the wall.
This gap cannot simply be sealed with sealant: when the wall shrinks or furniture moves, the sealant cracks. A profile is needed that covers the gap with a margin and allows for slight movement.
Get Consultation
Top panel of furniture and ceiling
Furniture 'up to the ceiling' in real conditions means 'almost up to the ceiling': a gap of 5–30 mm, which forms due to unevenness of the ceiling. This is a place where you want to make a neat transition — so that neither the gap nor an extra baseboard is visible.
Joint of decorative panel and wall
Decorative panels — wooden, MDF, cork, vinyl — are mounted on the wall and inevitably leave a perimeter gap. This gap needs to be closed around the entire perimeter of the panel: on the sides, top, and bottom.
Doorway and wall
After installing the door block, a mounting gap filled with foam remains between the frame and the wall. The foam is trimmed, but the open joint still remains — it is covered with a casing. However, the casing does not fit perfectly: a gap of 1–3 mm often remains between it and the wall. This is a place for acrylic sealant or a thin profile.
External corner
External corners — where the wall protrudes into the room — require protection. A bare corner quickly chips and gets damaged. The corner profile covers the edge of the corner and protects it.
Baseboard and built-in furniture
When a cabinet is placed flush against the wall, a standard baseboard does not fit behind it. Either the baseboard is cut, or a pedestal is made for the cabinet. In any case, a technological gap forms at the joint of the baseboard and the cabinet side, which needs to be closed.
Decorative niche and adjacent wall
Decorative niches — especially with LED lighting — have side planes that adjoin the main wall. This joint is visible if the niche is inset. It is closed with a layout, a cover strip, or a molding — depending on the material and style.
After installing moldings
Moldings on the wall are mounted flush to the ceiling, baseboard, and corners. Micro-gaps of 1–3 mm often remain at the junctions. This is a place for acrylic sealant, which disappears without a trace when painted. More about the technology: installing polyurethane molding.
Wooden cover strip: when strength is needed
What is a cover strip and how it differs from a molding
A wooden batten is a flat or profiled wooden strip that covers the gap between two surfaces. The batten is mounted over the gap, covering it on both sides. The width of the batten ranges from 20 to 100 mm, and the thickness from 5 to 20 mm.
Unlike molding (which is mounted as an independent decorative element on a clean surface), a batten solves a specific functional task: to close a gap. But this does not mean that a batten is unattractive — a well-chosen wooden batten made of beech or oak, coated with oil or varnish, can become part of the wooden theme of the interior.
Where is a wooden batten used
-
Side of a built-in wardrobe and wall — the batten is mounted on the side of the wardrobe, covering the gap to the wall;
-
Joint of two panels — between two wooden or MDF panels, the batten covers the installation seam;
-
Transition from wood to wall — at the junction of wooden cladding and a plastered wall;
-
Horizontal seam of wooden slats — horizontal transition strips when installing slatted wall panels;
-
Gap near a door opening — if a gap remains after installing the casing, a thin batten matching the door color covers it;
-
Transition of a wooden niche to the wall — in the area where the wooden frame and wall surface meet.
Parameters for choosing a wooden batten
Width: must overlap the gap by at least 5–8 mm on each side. Gap 10 mm — batten 20–25 mm. Gap 25 mm — batten 40–50 mm. A batten that barely covers the gap is an unstable solution: at the slightest movement of the wall or furniture, the gap will become visible again.
Thickness: for furniture applications — 8–12 mm. For wall applications — 5–8 mm. A thick batten creates a noticeable relief, which can be both an advantage (visual boundary) and a disadvantage (protruding from the plane).
Wood species: for a natural look — oak or beech, oiled; for painting — beech or birch. Pogonazh iz massiva STAVROS is made from solid beech, oak, and other species with precise geometric tolerances.
Wooden trim: thin batten with decorative function
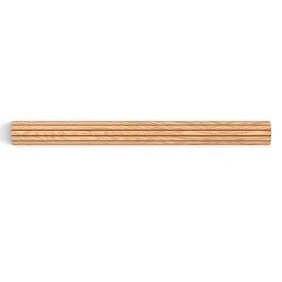
wooden floor — is a thin decorative strip (usually 3–8 mm thick), used both as a batten (covering gaps) and independently — as a decorative line on furniture facades, wall panels, or door leaves.
Trim is lighter than a batten — it does not carry a structural function, but rather covers and decorates. For small gaps (up to 5 mm), wooden trim is the optimal solution: thin, flexible, and takes paint and varnish well.
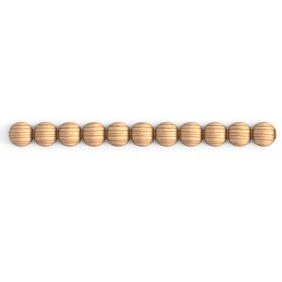
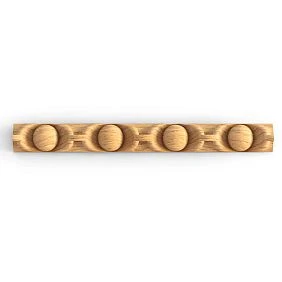
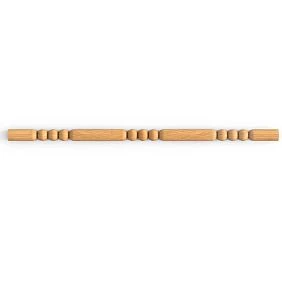
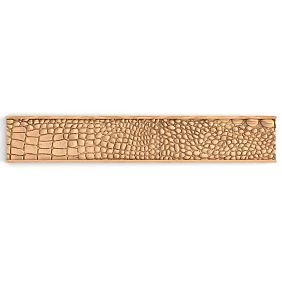
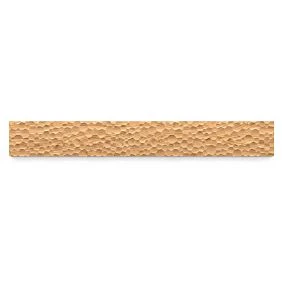
Decorative Wooden Tiling — trim with a shaped cross-section profile — this is no longer just gap closure, but a decorative element. A small quarter-round, semicircular profile, fine rustication — such trim turns a boring joint into a detail.
Wooden corner: protection and decor for external corners
When a corner is needed
Wooden angle — L-shaped corner profile — solves two problems at once.
First — protection of the corner from chips and mechanical damage. External corners are the most vulnerable places in the interior. The corner edge cracks upon accidental impact, plaster chips off, the surface gets damaged. A wooden corner piece mechanically protects the edge.
Second — decorative. A neat wooden corner piece turns the technological edge of the corner into a clean geometric line that visually 'pulls together' the interior.
Where the wooden corner is used
-
External wall corners in hallways and corridors are high-traffic zones (impacts from furniture, bags, equipment);
-
Corners of wall panels — where the panel wraps around a corner or meets another surface;
-
Corners of furniture side panels — visible edges of built-in furniture;
-
Corners of wooden structures — stair railings, podiums, mezzanines;
-
Corners of decorative niches — where the niche protrudes from the wall.
Wooden corner piece or polyurethane corner element: which to choose
Wooden corner piece — for areas with load, impacts, contact. Where the corner will be touched by hands, objects, furniture — only wood, which will withstand it.
Polyurethane corner element (part of polyurethane molding) — for decorative areas without mechanical load: molding transitions in corners, decorative frames, areas on walls above the touch line.
Solid wood moldings: the universal language of wooden profiles
What solid wood moldings include
Pogonazh iz massiva — a broad category of linear wooden profiles for all tasks: battens, baseboards, coves, quarter rounds, tongue-and-groove planks, divider strips, handrails, glazing beads, transition strips.
In the context of closing joints and junctions, the following moldings are most commonly used:
-
Batton — a flat strip covering a gap;
-
Cove — a quarter-round profile for closing an internal corner (between wall and panel, step and riser);
-
Glazing bead — a thin strip of triangular or rectangular cross-section for fixing glass, inserts, panels;
-
Quarter round — an angular profile for internal transitions;
-
Wooden baseboard — for the lower junction of wall and floor.
All this millwork is made from solid beech and other species, with precise geometric tolerances. It is the accuracy of the cross-section that determines the quality of the junction: an imprecise profile creates gaps at joints and corners.
Cove molding: an elegant solution for the internal corner
Cove molding — a small profile with a quarter-round or semi-circular cross-section — is installed in the corner between two planes. The purpose of cove molding: to eliminate an open corner with an inevitable gap and create a smooth transition between surfaces.
Classic application areas for cove molding: the corner between the tread and riser, the corner between a wall panel and the floor, the corner between wood cladding and a wall. The cove molding is glued to the corner, the joint is filled — and the corner becomes clean and invisible.
Polyurethane moldings for decorative junctions
Moldings as a tool for covering junctions on walls and ceilings
Moldings made of polyurethane — not just decorative frames on walls. They are also a tool for covering junctions in areas that require painting. A molding placed along the joint of a decorative panel and a wall covers that joint while simultaneously creating a decorative line.
Key difference from a wooden batten: a polyurethane molding is installed with adhesive (no through fasteners) and is painted in a single tone with the wall or ceiling. This means: the joint visually disappears — the profile blends into the color of the surface.
Where polyurethane moldings cover junctions
-
The junction of the decorative panel and the painted wall — a molding along the perimeter of the panel, matching the wall color;
-
The junction of the built-in wardrobe with the ceiling — a molding along the top edge of the wardrobe, matching the ceiling color;
-
The joint of the molding frame with the ceiling or baseboard — a transition profile hides the technological gap;
-
The junction of the cornice with the wall — at the corners, the cornice meets the wall, and this joint requires sealant or a thin transition element;
-
The joint of the niche and the wall in the decorative area — a polyurethane molding around the perimeter of the niche creates a clean decorative frame;
-
Horizontal divider between wallpaper and paint zones — a molding at a height of 80–100 cm covers the bottom edge of the wallpaper and the top edge of the paint, hiding the uneven joint.
Polyurethane linear profiles: technical profiles for painting
Polyurethane trim — linear transition profiles without decorative relief or with minimal relief — used where a neutral profile is needed that should 'disappear' after painting: friezes, transition strips, background dividing lines.
Unlike moldings (with a characteristic relief profile), polyurethane linear profiles are neutral. This is exactly what is needed when the task is to cover a joint, not to create a decorative accent.
What to choose by situation: decision table
| Situation | Material | Profile type |
|---|---|---|
| Gap between cabinet and wall | Wood | Batten, trim |
| Wood panel joint | Wood | Trim, batten |
| Furniture-to-ceiling junction | Polyurethane | Molding, PU trim |
| Decorative panel-to-wall joint | Polyurethane or wood | Molding or trim |
| External corner with load | Wood | Wooden corner |
| External corner without load | Polyurethane | Corner PU profile |
| Wallpaper and paint separator | Polyurethane | PU molding or trim |
| Inner corner of wall and panel | Wood | Solid wood cove molding |
| Joint of baseboard and cabinet side | Wood | Wooden corner, batten |
| Panel to ceiling transition | Polyurethane | PU cornice or molding |
Use this table as quick navigation. The main principle: where there is load and contact — wood; where there is decor and painting — polyurethane.
Ready-made kits for different zones
Built-in wardrobe: kit for furniture junctions
A built-in wardrobe from wall to wall in a hallway or bedroom is a typical case. After installation, junctions remain around the perimeter: side panels to walls, top to ceiling, bottom edge to baseboard.
Side panels to walls: trim strip from molding 30–50 mm wide, matching the wardrobe. Mounted on the side panel with finishing nails or liquid nails.
Top to ceiling: Polyurethane molding — a small lightweight profile, glued to the ceiling and covering the gap between the ceiling and the top edge of the wardrobe.
Bottom to baseboard: if the baseboard does not reach the wardrobe, its end is covered with wooden corner piece or a thin molding.
Kit: solid wood batten + PU molding for top abutment + wooden corner for baseboard transition + liquid nails + PU glue + acrylic sealant + varnish or paint.
Decorative panel on the wall: perimeter framing
A decorative panel (wooden, MDF, slat, cork) is mounted on the wall as an accent area. Around the perimeter — a gap of 3–10 mm between the edge of the panel and the wall.
Solution: wooden floor around the perimeter of the panel — covers the gap and simultaneously creates a decorative frame. If the panel is wooden, the trim is made of the same material or paintable. If the panel is painted to match the wall — thin polyurethane molding, painted together with the wall.
Kit: wooden trim or PU molding + liquid nails or glue + sealant + primer + paint or varnish + 10% spare.
Hallway: joints in all areas
The hallway is the area richest in abutments. Here, the cabinet meets the wall, the doorway meets the wall, the baseboard meets the furniture side, and the decorative panel meets the wall.
Hallway logic: everything must be durable and easy to clean. Wooden battens and corners — for furniture areas. Polyurethane moldings — for wall and ceiling transitions.
Kit: battens for cabinet sides + wooden corners for external corners + Moldings made of polyurethane for wall transitions + Polyurethane trim baseboard + sealant + glue + washable paint + spare.
Living room: decorative joints of moldings and frames
In the living room, joints are more decorative than functional. Molding frames on the walls. Cornice along the ceiling. Decorative overlays on the piers.
Here all joints are polyurethane: Moldings to the ceiling, to the baseboard, in the corners. Decor for Molding covers corner joints of frames. Sealant is for micro-gaps.
Kit: PU moldings + decor for moldings (corner inserts) + cornice + PU baseboard + glue for PU + sealant + primer + paint.
Furniture under the ceiling: top joint
Cabinets "under the ceiling" — a standard solution where the top edge of the cabinet is 20–50 mm from the ceiling (due to unevenness). This gap needs to be closed, and closed beautifully.
The optimal solution is Polyurethane molding 40–60 mm wide, painted in the ceiling color. It is mounted on the ceiling, overhanging the cabinet, and completely hides the gap. When properly painted, this molding becomes part of the room's ceiling architecture, not just a "plug."
Kit: PU molding of required width + mounting adhesive + sealant + primer + paint (matching ceiling color) + 10% spare.
Installation nuances: how the profile holds and covers the joint
Wooden profile: mechanical fasteners or adhesive
Wooden batten, layout, and corner piece are installed using one of three methods: finishing nails (with subsequent puttying of heads), liquid nails (without fasteners), or a combined method (liquid nails + finishing nails for fixation until the adhesive sets).
Liquid nails are the optimal choice for wooden battens on MDF or wooden furniture. The profile is pressed down and secured with masking tape while the adhesive sets. The finishing seam along the edge of the batten is acrylic sealant.
Finishing nails are used for battens on frame structures where the profile must be mechanically held. The heads are countersunk, puttied, and painted over.
Polyurethane profile: adhesive and sealant
Polyurethane moldings are installed exclusively with mounting adhesive (acrylic, acrylate, or polyurethane, depending on the substrate). Nails and screws are not used for polyurethane: the material is brittle under point impact.
Key rules: the substrate must be clean and dry; adhesive is applied not in a continuous layer but in a 'snake' pattern or in dots (5–7 points per 1 meter); the profile is pressed and held with masking tape for 30–60 minutes; joints between profiles must be tight, without gaps; around the perimeter, acrylic sealant is applied before painting.
Detailed technology: what to glue polyurethane molding with.
Sealant: the final step that solves everything
Acrylic sealant is the final element of any joint. It is applied as a thin bead along the seam between the profile and the surface, smoothed with a wet finger or spatula, and dries in 2–4 hours. After that — primer and paint on top. Sealant in the color of the paint becomes invisible.
Without sealant, any joint, even the most precise, will have a shadow gap. With sealant — a clean, "cast" line. This is the last step that takes 30 minutes but completely determines the final appearance.
Profile color: matching the furniture, the wall, or contrasting
Three strategies
The first — matching the furniture. A wooden trim is painted or tinted to match the color of the cabinet side. The joint visually disappears — the furniture is perceived as monolithic. This is the best option for built-in cabinets.
The second — matching the wall. A polyurethane molding is painted in the color of the wall. The molding works as a clean line, the relief of which is only visible in the light. The joint of the decorative panel "dissolves" into the wall surface.
The third — a contrasting accent. A trim or profile in a contrasting tone — as a decorative line separating the furniture and the wall. This is a design technique that requires confidence in the correctness of the chosen contrast: a dark profile on light furniture, a white molding on a beige wall.
For most cases — the first or second strategy. A contrasting accent is a deliberate design choice, not an accident.
Mistakes when choosing trim and molding
Closing a large gap only with sealant
A 15–20 mm gap between the cabinet and the wall cannot be filled with sealant — it will sag, crack when structures move, and create an unsightly seam. Gaps from 5 mm — only a profile.
Buying a profile without precise measurement
A 20 mm wide trim strip will not cover an 18 mm gap if installed asymmetrically. An allowance of 5–8 mm on each side is mandatory overlap. Start selecting only after measuring the gap and calculating the required width.
Not considering the thickness of the trim strip
A 12 mm thick trim strip on the cabinet side creates a 12 mm protrusion. This means the cabinet door will now hit this protrusion when opening — if the cabinet is close to another surface. The profile thickness must be calculated considering door opening and drawer extension.
Buying molding without allowance for trimming
Trimming at an angle, installation errors, chips from careless handling — all this reduces the actual material yield by 10–15%. Order with a reserve.
Installing polyurethane in a high-impact area
Polyurethane is a durable and elastic material, but it is not designed for point impacts and scratches. A trim strip on the cabinet side in the hallway — where it is constantly bumped — should be wooden, not polyurethane.
Use wood where it needs to be painted the color of the wall
A wooden batten for painting works worse than a polyurethane molding: wood shows texture under paint when painted, requiring several coats of primer and paint for an even finish. If the goal is to blend the profile into the wall color, polyurethane is preferable.
Forgetting sealant for the finishing joint
The profile is purchased, installed, painted — but there's a thin shadow gap along the edge. This is the result of missing sealant. Always: installation → sealant → primer → paint. No other way.
Mixing different profiles without a unified scheme
A batten from one manufacturer, molding from another, trim from a third — different geometry, different proportions, different stylistic nuances. The interior looks like a collection of random purchases. It's better to order everything from one place, from one manufacturer.
Complete order checklist for closing junctions
Wooden profiles:
-
Pogonazh iz massiva — battens, coves, beads, baseboards;
-
Wooden angle — for external corners;
-
wooden floor — for narrow gaps and decorative perimeters;
-
Wooden decor and overlays — for decorative transitions on furniture.
Polyurethane profiles:
-
Moldings made of polyurethane — for wall transitions and decorative junctions;
-
Polyurethane trim — neutral transition profiles for painting;
-
Polyurethane moldings — cornices for wall and ceiling junctions;
-
Decor for Molding — corner inserts for frame junctions.
Mounting materials:
-
Liquid nails or finishing nails — for wooden profiles;
-
assembly adhesive — for polyurethane profiles;
-
Acrylic sealant — white or paintable;
-
Primer — for polyurethane surfaces;
-
Paint or varnish — finishing coating;
-
Masking tape — for fixing during installation;
-
Profile allowance of 10–15%.
STAVROS: one source for wood and polyurethane
The key convenience when working with junctions — ordering wooden and polyurethane moldings from one manufacturer. This ensures profiles are coordinated in proportions, relief style, and thickness. A solid wood strip and a polyurethane molding next to each other do not compete but complement each other.
STAVROS is a Russian manufacturer operating since 2002. The company produces both solid wood products (moldings, trims, corners, handles, legs, decorative overlays) and polyurethane decor (moldings, cornices, baseboards, rosettes, overlays, moldings). Everything — at one production facility in St. Petersburg, within a unified system of tolerances and proportions.
STAVROS's history began with restoration: Konstantinovsky Palace, Alexander Palace, the Hermitage. Restoration is working with junctions in the literal sense: historical profiles must sit next to new ones so that the seam is invisible. This experience is in every profile the company produces.
Showrooms in Saint Petersburg and Moscow. Delivery across all of Russia. Order from one piece. In-stock items — from 3 working days.
Choose Pogonazh iz massiva, Moldings made of polyurethane and the entire range moldings from polyurethane in the STAVROS catalog on the website stavros.ru.
Frequently asked questions
What to cover the gap between the cabinet and the wall?
The optimal option is a wooden strip made of solid wood trim matching the cabinet side panel. The strip width — gap plus 5–8 mm on each side. Installation with liquid nails, finishing seam — sealant. If the area is decorative and will be painted together with the wall — Polyurethane molding matching the wall color.
What is better: a wooden trim or a polyurethane molding?
Depends on the area. Wooden trim is for furniture, doors, and areas with mechanical load. Polyurethane molding is for walls, ceilings, and paintable surfaces. Where hands touch or objects hit — only wood.
Can the joint be sealed only with sealant?
A small gap of 1–2 mm — yes, sealant will work. A gap of 5 mm or more — a profile is needed. Sealant without a profile on a large gap cracks and falls out when structures move. Profile + sealant along the edge is the correct and durable construction.
What to buy for closing junctions after renovation?
Determine the type of junction, choose a profile: trim, insert, corner, molding, or linear profile. For the profile — glue or liquid nails, sealant, primer, paint, and a 10–15% spare.
How to choose the color of the trim or molding?
Three options: matching the furniture (for furniture zones), matching the wall (for wall zones), or a contrasting accent (designer choice). In most cases — the first or second option. A contrasting profile requires a confident design decision.
Can a wooden insert be used for the decorative perimeter of a panel?
Yes. wooden floor around the perimeter of a decorative panel, it closes the gap and simultaneously creates a decorative frame. Decorative Wooden Tiling adds a classic character to the joint.
How to properly join moldings at corners?
Use Decor for Molding — corner inserts. The molding is cut at the end (without a 45° cut) and abuts the corner insert. This is simpler, cleaner, and gives a professional result. Detailed technology — in the article about installing polyurethane moldings.