Article Contents:
- The rosette shape is chosen based on the geometry of the field, not separately from the furniture
- How to get a real working field
- How to account for a panel with multiple levels
- If the central area is offset
- The geometric center is the starting point
- A round rosette in a square field
- Square rosette and square field
- Horizontal application
- A rectangle is best compared by two coefficients
- Oval shape
- Decision tree for initial selection
- Why depth changes the visual scale
- A panel with an angled profile requires a separate check
- The mounting plane of the back side is more important than a beautiful front contour
- Finishing and installation must be coordinated in the order of operations
- Hand check
- Chest of drawers with drawers of different heights
- Furniture frieze and repeating rhythm
- How to calculate a row on several identical fronts
- What to apply to the template
- Why you should not stretch the socket image in the visualization
- For multiple sizes of the same model
- Quantity should be counted after all facade types are approved
- When a reserve is needed
- R-001
- R-012
- R-058
- When it is better not to install a socket
- Final check before purchase
- Purchasing a single part before the batch
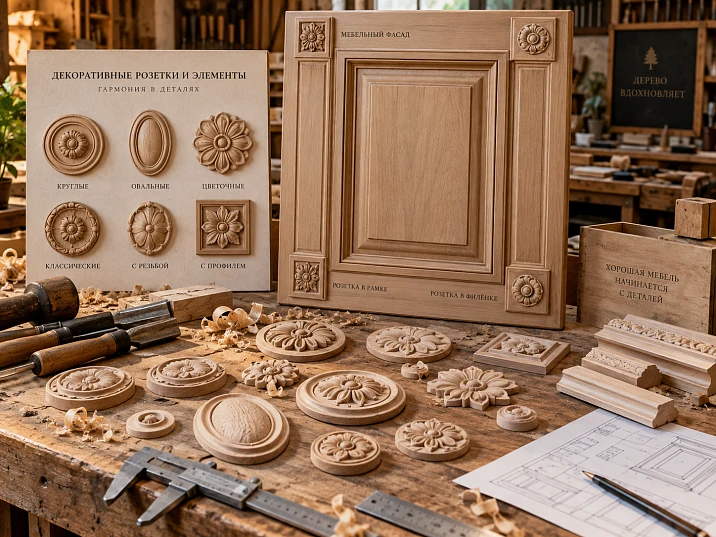
A rosette can look perfect in a photograph and completely out of place on a specific facade. The reason is almost always the same: first they choose the ornament, and then they try to find a place for it. For furniture, it is better to do the opposite. First you need to determine the actual field where the decor will sit, understand its proportions, and only then choose the shape and size of the rosette.
The working sequence is as follows:
facade field → field geometry → center and axes → allowable dimensions → rosette shape → dimensions A/B/C → free margins → relief depth → material → finish → actual SKU → 1:1 fitting → order.
This is not an article about what kinds of rosettes exist in general. The task is narrower: to help a furniture maker decide when a circle is appropriate, when a square is, when an elongated rectangle or oval is, how to compare the size of a rosette with the frame and panel, and how to avoid getting decor that physically fits but visually looks alien.
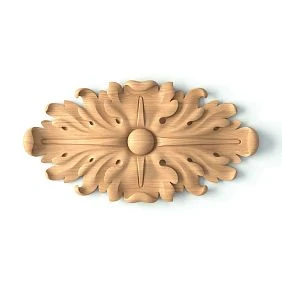
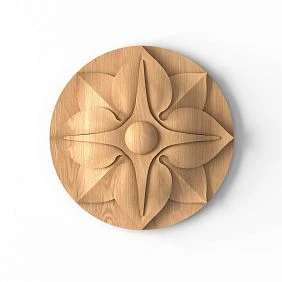
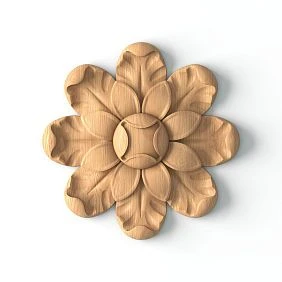
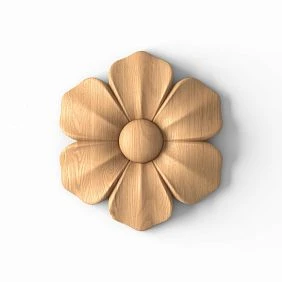
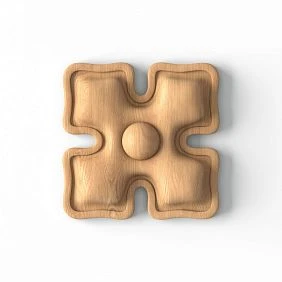
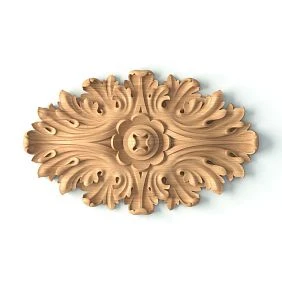
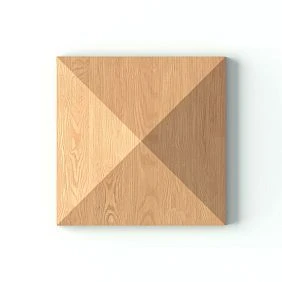
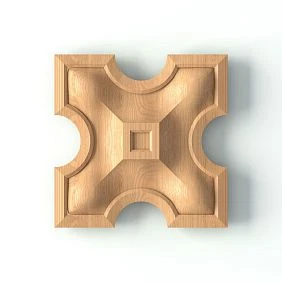
The shape of the rosette is chosen based on the geometry of the field, not separately from the furniture
A facade has its own geometry even before decor appears on it.
The field can be:
- square;
- tall rectangular;
- wide rectangular;
- narrow vertical;
- almost circular inside the medallion;
- limited by the frame;
- defined by the panel;
- partially occupied by the handle.
Each of these cases perceives the central decorative element differently.
Incorrect sequence:
you liked the rosette → we look for a place on the facade.
Correct:
facade → working field → field shape → allowable size → rosette.
The same ornament can look different in different fields.
Let's imagine a square field of 400 × 400 mm.
A round rosette with a diameter of 120 mm will be perceived as a compact center.
The same diameter within a 400 × 800 mm field already looks much smaller, because the vertical space around it has doubled.
The physical size of the rosette has not changed.
Its scale relative to the composition has changed.
That is precisely why one cannot discuss the size of a product without the size of the field it will be placed in.
The shape of the facade and the shape of the rosette do not have to match.
A square facade does not require only a square rosette.
On the contrary, a circle within a strict square can work very convincingly: the straight lines of the frame emphasize the round central form.
A tall rectangle can receive:
- a circle;
- oval;
- a vertical rectangular rosette.
The difference will be in the character of the composition.
Therefore, the shape of the field is not an order, but the first filter.
It is useful to first exclude shapes rather than choose the "best" one.
At an early stage, negative selection works faster.
For example:
- the field is very narrow and tall — a large square is immediately excluded;
- the drawer is low and wide — a tall vertical rosette is out;
- the frame has a strict square grid — an elongated horizontal decor can disrupt the rhythm;
- the handle already occupies the center — a large round rosette in the same zone becomes questionable.
After such filtering, two or three real forms remain.
They can already be compared by ornament and material.
This is much more productive than browsing dozens of cards without any connection to the furniture.




How to get the real working area
The overall size of the facade is almost never equal to the working area of the decor.
Part of the area may be occupied by:
- a frame;
- a molding;
- a panel;
- a handle;
- Milling;
- an edge margin;
- an adjacent overlay;
- the joint between two doors.
If the front is 600 × 900 mm, this does not yet mean that the socket is selected relative to all 600 × 900 mm.
Example with a moulding frame.
Facade:
600 × 900 mm.
Outer contour of the frame:
500 × 800 mm.
Moulding width on the plane:
35 мм.
Inner field of the frame approximately:
500 − 2 × 35 = 430 mm
in width and:
800 − 2 × 35 = 730 mm
by height.
These ones 430 × 730 mm are already much closer to the actual socket field.
If there is additionally a handle at the bottom and a free zone needs to be left for it, the usable field is reduced even further.
The panel field and the facade field are not the same thing.
On a framed facade, the central panel may be noticeably smaller than the outer dimensions.
If the socket must be located specifically on the panel, it should be compared with the panel.
Not with the entire door.
This is especially important for large square and oval elements: on the overall facade they may seem moderate, but inside the panel they can take up almost the entire space.
How to record the working field in the project.
It is convenient to record:
FIELD-01 = 430 × 730 mm
and then select the socket relative to it.
If there are several types of fronts:
FIELD-01 — large door;
FIELD-02 — drawer;
FIELD-03 — top cabinet.
This way, decorative selection becomes part of the drawing, rather than a subjective trial.
The working area must be calculated based on the narrowest actual boundary.
If the facade contains both a moulding frame and a panel, you should not rely on the larger of the two zones, but on the one that actually limits the rosette.
For example:
- the inner field of the moulding — 440 × 720 mm;
- the flat part of the panel inside it — 360 × 620 mm.
If the rosette must lie on the flat part, the working area is exactly 360 × 620 mm.
Buying an element 400 mm wide based on the size of the moulding frame will cause the edges of the rosette to fall on the transition of the panel profile.
Physically, the facade is large.
There is no installation space.
If the field has a complex contour.
Not every panel is a clean rectangle.
Common cases:
- arched top sections;
- beveled corners;
- shaped frames;
- radiused transitions;
- intersections with vertical trim.
In this case, it is useful to construct an inscribed rectangle within which the decor definitely does not touch the adjacent profile.
And this rectangle should be considered a safe area for the initial selection.
After choosing the item, an exact fit is performed along the actual contour.
The minimum clearance around the element should be intentional, not accidental.
If the calculation results in:
8 mm on the left, 42 mm on the right, 15 mm on top, 60 mm on the bottom,
this is no longer a centered composition.
It may be intentional, but the craftsman must understand the reason for such an offset.
For a symmetrical task, the margins are compared in pairs:
left ↔ right
top ↔ bottom.
The difference must either be absent or have an explanation in the overall geometry of the facade.
Our factory also produces:
How to account for a panel with multiple levels
A paneled facade rarely consists of only one flat central area. It often includes:
- outer frame;
- sloped transition;
- central recess;
- additional inner frame.
For a socket, what matters is the surface it will sit flush against with its entire back side.
If a decorative element lies partly on a flat area and partly extends onto a slope, two problems arise at once:
- there is no full mounting surface;
- the edge of the socket starts to "hang" over the transition.
Therefore, for a complex panel it is useful to take three measurements:
overall front
inner field of the frame
actual flat mounting area.
It is this last dimension that becomes the main constraint for the socket.
Get Consultation
If the central area is offset
Sometimes the panel itself is asymmetrical due to a handle, a vertical profile, or an adjacent decorative element.
In that case, the socket does not need to be forced to align with the geometric center of the entire door.
It can be centered relative to the flat mounting area.
This is especially important for fronts where one side is visually occupied by a pilaster or a handle.
In such a case, the drawing must explicitly specify:
center of the socket relative to POLE-02
and not just:
centered on the front.
The geometric center and the visual center may not coincide
If the facade is perfectly symmetrical, the geometric center is easy to determine:
width / 2
и
height / 2.
But furniture often has other focal points.
The composition is changed by:
- handle;
- upper cornice;
- bottom drawer;
- pilaster;
- asymmetrical frame;
- the adjacent door;
- large molding;
- different heights of the panels.
Geometric center — the starting point
First, it is useful to establish it.
It provides an objective baseline.
On a 600 × 900 mm front, the center is located:
300 мм from the side edges;
450 мм from the top and bottom.
After that, you can assess whether a visual offset is needed.
When the socket should be offset.
Let's imagine a tall door where the handle is below the middle.
If the socket is placed strictly at the geometric center, there may be less visual breathing room between it and the upper part of the frame than between the socket and the handle.
Sometimes a slight shift up or down makes the composition calmer.
But it should be done deliberately.
Bad:
roughly by eye, slightly higher.
Better:
the center of the rosette is 30 mm above the geometric center.
This solution can be repeated on the second door and on a series of fronts.
A round wooden rosette works through contrast with the straight lines of the furniture
The round shape is one of the most understandable for a central accent.
It reads well inside:
- a square field;
- a rectangular panel;
- molding frames;
- a central medallion;
- panels with symmetrical geometry.
A separate selection round wooden rosettes is especially convenient when the project already calls for a round center.
Why a circle is especially visible inside a frame.
The frame is built with straight lines.
The circle breaks this system with a single soft shape.
The result is a clear contrast:
a rectangular field ↔ a round center.
If the rosette ornament is also radial, the composition reads even faster.
Round rosette in a square field
Conditional field:
360 × 360 mm.
Let's compare three diameters:
- 80 mm;
- 140 mm;
- 220 mm.
Free space on each side:
for 80 mm: (360 − 80) / 2 = 140 mm
for 140 mm: (360 − 140) / 2 = 110 mm
for 220 mm: (360 − 220) / 2 = 70 mm
All three physically fit.
But the character differs:
- 80 mm — a pinpoint accent;
- 140 mm — a pronounced center;
- 220 mm — a large medallion that begins to dominate.
No option can be declared universally correct.
The calculation is needed to compare scenarios before ordering.
A circle inside a tall panel.
If the field is 360 × 720 mm, the same 140 mm circle will leave:
- 110 mm on the left and right;
- 290 mm on the top and bottom.
Visually, it becomes much more isolated vertically.
If the goal is a strong central accent, you can:
- increase the diameter;
- switch to an oval;
- add another element vertically;
- change the position.
The key is to see not the outlet plate, but the entire proportion of the field.
When a round outlet looks too small.
On a tall facade, a small circle can turn into a random dot.
For example:
working field 500 × 900 mm;
socket diameter 80 мм.
In terms of width, it occupies:
80 / 500 = 16%
By height:
80 / 900 ≈ 9%.
This is not a standard or a judgment of "bad."
But the numbers show the scale: vertically, the element is very small relative to the field.
If there is also a large molding and handle nearby, a small socket can visually get lost.
When the circle becomes too large.
Field:
300 × 300 mm.
Rose:
220 мм.
Free space on each side:
(300 − 220) / 2 = 40 mm.
Physically, the product fits.
But 40 mm to the frame may be too tight for a deep carved relief.
Here you already need to consider the depth C and the character of the ornament.
Square rosette: when to support the geometry of the frame
The square shape is especially noticeably connected with the lines of the furniture.
It works well:
- in a square panel;
- inside a strict rectangular frame;
- on a geometric facade;
- in a composition with a straight molding;
- in the repeating rhythm of several sections.
For such a scenario, you can use a separate selection square wooden rosettes.
A square's rotation error is immediately visible.
A circle can be rotated slightly, and no one will notice.
A square has:
- verticals;
- horizontals;
- corners;
- parallelism to the frame.
Even a slight rotation creates the impression of an error.
Especially if there is rectangular molding around it.
Therefore, a square rosette must be installed using a template.
Square socket and square field
If the working field 300 × 300 mm, and the socket 120 × 120 mm, the remaining margin around it is:
(300 − 120) / 2 = 90 mm
on each side.
The composition reads as a square within a square.
If you take 240 × 240 mm, only 30 mm will remain on each side.
In this case, the socket almost turns into an inner panel and ceases to be perceived as a separate accent.
This can be interesting on geometric furniture, but for deep classical carving, there may be too little free air.
A square is especially sensitive to unequal margins.
If there is 70 mm on the left and 80 mm on the right, the misalignment is more noticeable than with a circle.
The reason is simple: the vertical edge of a square element runs parallel to the vertical line of the frame, and the eye constantly compares the two distances.
Therefore, marking should be based on the common axis of the facade, not on a random edge.
On a series of facades, axes are more important than manual marking.
If a cabinet has four identical doors and each has a square socket, it is better to make a mounting template once.
It should define:
- center;
- vertical axis;
- horizontal axis;
- turn;
- offsets.
Marking each door separately increases the risk of accumulated error.
A square within a rectangle.
A square rosette does not require a square field.
In a tall rectangle, it can act as a calm center if there is enough air around it.
The main thing is that it does not look too small relative to the height of the field or too wide relative to the side margins.
Rectangular and oval rosettes: when you need to emphasize one axis
The rectangular shape naturally works where the decorative area itself is elongated.
For example:
- furniture frieze;
- long drawer;
- wide panel;
- upper part of the wardrobe;
- narrow vertical door;
- central module.
For such cases, there is a separate selection rectangular wooden rosettes.
Horizontal application
On a wide drawer, a rectangular rosette can support the horizontal line.
Working area:
700 × 220 mm.
Decor:
260 × 80 mm.
Free field by width:
(700 − 260) / 2 = 220 mm.
By height:
(220 − 80) / 2 = 70 mm.
Such a composition has plenty of air on the sides and a moderate margin at the top/bottom.
If the socket is enlarged to 500 × 120 mm, the character will change completely.
Vertical application.
The same geometric idea can work on a narrow tall door.
But you can rotate a specific product by 90° only after checking the ornament.
Some designs:
- have a top;
- have a bottom;
- contain leaves pointing upward;
- are built as a horizontal frieze.
Therefore, a rectangular rosette cannot automatically be considered interchangeable in two orientations.
A rectangle is best compared using two coefficients
For the working field, one can assume:
Kr = rosette width / field width
Kv = rosette height / field height
These are not standards.
They show how much the element fills the field along each axis.
For example:
Field 600 × 220 mm;
socket 300 × 90 mm.
We get:
Kh = 300 / 600 = 0.50
Kv = 90 / 220 ≈ 0.41
Another option 420 × 70 mm:
Kh = 0.70
Kv ≈ 0.32
The first socket is more compact in width and taller.
The second stretches the horizontal more, but takes up less height.
Such numbers help discuss the real proportion rather than "this one seems bigger".
For a narrow vertical door, the logic is the same.
Field:
220 × 900 mm.
Vertical socket:
90 × 300 mm.
By width:
90 / 220 ≈ 0,41
By height:
300 / 900 = 0,33.
If you rotate it horizontally, it may simply not fit into 220 mm.
Here the shape of the field immediately rules out some options.
Rectangular socket and furniture frieze.
On the frieze, it is especially important to look not only at A/B, but also at C.
A deep relief may protrude more than the adjacent molding and disrupt the overall profile.
That is, the front view is only half of the check.
A side section is also needed.
What to look at in the side section.
The side view should show:
- the plane of the facade;
- the thickness of the molding;
- protrusion of the socket;
- the handle;
- the adjacent panel;
- a possible mounting substrate.
If the rosette protrudes beyond the handle, fingers may pass too close to the thread.
If the molding is above the center, on the contrary, the rosette may visually "sink" inside the frame.
Depth is especially important on a small front.
On a large door, a protrusion of 20–25 mm may be perceived as normal relief.
On a drawer 150 mm high, the same protrusion becomes very noticeable.
The smaller the front, the more depth affects the overall mass.
Therefore, for small drawers, C is often more important than an extra 10–20 mm in width.
Oval shape
An oval sits between a circle and a rectangle.
It retains a soft shape, yet has a pronounced axis.
Therefore oval wooden rosettes useful where you need to emphasize:
- vertical;
- horizontal;
- elongated central panel;
- medallion composition.
Vertical oval.
Works well on:
- narrow door;
- tall panel;
- central post;
- small portal.
It maintains height but looks softer than a rectangle.
Horizontal oval.
Suitable for:
- drawer;
- frieze;
- wide panel;
- center of the long frame.
When the circle is too static.
In a tall field, the circle remains the same along both axes.
An oval responds better to elongated geometry.
But again: this is not a design law.
If a circle deliberately creates contrast with a tall field, it can be more interesting than an oval.
How to compare shapes and proportions on a single facade
It is convenient to use a simple starter table.
| Geometry of the working field | First candidate | What to check next |
|---|---|---|
| Square | round or square | scale, depth, free fields |
| Tall rectangular | oval or vertical rectangle | vertical axis, pattern orientation |
| Wide rectangular | rectangle or horizontal oval | connection with handle and frieze |
| Small central | compact circle or square | so the element doesn't take up the whole field |
| Strict frame | Square | parallelism, rotation |
| Soft classic composition | circle or oval | relief, material, finish |
This table is not a rule.
It is meant to narrow down the search.
After choosing a shape, there are still:
- size;
- depth;
- ornament;
- the material;
- finishing;
- position.
A good choice sometimes goes against the shape of the field.
For example, a circle inside a very strict rectangle can become the main accent precisely because it does not repeat the frame.
And conversely, a square inside a square can create a particularly strict, almost architectural composition.
Therefore, geometry helps to start the search, but does not replace trying it out.
Compare not only the shape, but also the character of the ornament.
A round shape may contain:
- a strict geometric pattern;
- a floral motif;
- a deep acanthus;
- an almost flat medallion.
A square rosette can also be soft in design.
Therefore, shape and style are not the same thing.
First, the shape is responsible for the relationship with the field.
Then the ornament is responsible for the relationship with the rest of the furniture decor.
If there is a molding with a floral pattern next to it, a geometric rosette may look too rigid.
If the facade is minimalist, a deep classic acanthus may appear visually alien even with a perfect size.
Compare two options on the same drawing.
Do not make a separate image for each rosette with a different facade scale.
Use the same facade, the same frame, the same handle, and change only the decor.
This makes the comparison fair.
This is exactly where it often becomes clear that a rosette that is "beautiful in itself" works worse in a specific composition.
Decision tree for initial selection
If there are too many options, it helps to go through a short sequence.
Is the field approximately square?
Yes — first compare the circle and the square.
No — let's move on.
Is the field clearly elongated along one axis?
Yes — compare the oval and the rectangle.
Is there a large molding frame?
Yes — pay more attention to the free field and depth C.
Is there already a handle in the center?
Yes — either reduce the rosette, change its position, or abandon the central decor.
Is the relief very deep?
Yes — check the side view and do a physical mockup before discussing the finish.
This algorithm does not choose a product instead of the craftsman. It simply quickly narrows down dozens of options to a few truly suitable ones.
Sizes A/B/C and relief depth: what really affects the facade
In the catalog, sockets are compared by three main dimensions:
- A — one linear dimension;
- B — the second;
- C — depth.
The specific direction of the letters should always be checked in the product card of the selected item.
All three matter for the composition.
A and B are responsible for filling the field.
They determine:
- how much space will remain on top;
- how much from the bottom;
- how much from the left;
- how much from the right.
If the field is symmetrical and the socket is centered:
field on the left = (field width − socket width) / 2
field on top = (field height − socket height) / 2
C is responsible for the relief.
Two parts with the same facade size can have different depths.
And be perceived completely differently.
For example, R-001 in one of its versions has the size 70 × 70 × 13 mm, while R-012 at size 60 × 60 mm has a depth 25 мм.
That is, a part with a smaller face dimension can protrude almost twice as much.
R-001 и R-012 clearly show why depth cannot be ignored.
The overall outline of the ornament is also important.
Two rosettes 100 × 100 mm can fill the field differently.
In one, the ornament almost reaches the edge.
In the other, the edges are visually light.
Therefore, even after dimensional verification, a photograph or physical sample is still required.
Why depth changes the visual scale
The deeper the carving, the more:
- shadow;
- contrast;
- side surfaces;
- a sense of volume;
- visual mass.
Therefore, a smaller deep rosette can look more active than a larger flat one.
Side lighting enhances the relief.
Under frontal diffused lighting, the relief reads softly.
For a cabinet near a window, side light creates a stronger shadow.
The same rosette becomes visually deeper.
This is especially important for:
- dark tinting;
- patinas;
- deep floral ornament;
- large panel.
A deep rosette and a handle can physically compete.
If the handle is located nearby, check:
- is it comfortable to grasp with your fingers;
- does the hand catch on the decor;
- is a cramped area being created;
- is there too much relief on a small area.
That is, C affects not only the appearance but also the use of the facade.
Depth relative to the molding.
If the molding protrudes by 12 mm and the rosette by 25 mm, the center of the facade will be significantly more active than the frame.
This can be correct.
But the decision must be deliberate.
Socket inside the frame, panels, and frieze: how to leave the correct free margin
Fitting physically is not enough.
If the socket almost touches the frame, the calm flat surface between the two reliefs disappears.
The composition becomes heavy.
Check:
- margin at the top;
- at the bottom;
- on the left;
- on the right.
Symmetric variant.
Inner field:
400 × 400 mm.
Rose:
160 × 160 mm.
Free field:
(400 − 160) / 2 = 120 mm
on each side.
This creates a large, calm space.
If the socket 320 × 320 mm:
(400 − 320) / 2 = 40 mm.
Physically, everything fits.
Visually, the socket and frame begin to interact closely.
Rectangular field.
Field:
420 × 700 mm.
Round socket:
160 мм.
On the sides:
(420 − 160) / 2 = 130 mm.
Vertically:
(700 − 160) / 2 = 270 mm.
The socket "floats" a lot vertically.
Perhaps the circle here is too small, or the field requires an oval.
There is no need to look for a universal percentage.
For different ornaments, identical margins are perceived differently.
Deep carving requires more breathing room.
A small flat geometric element can safely sit closer to the frame.
Therefore, formulas are needed for comparison, and the final decision is for fitting.
A panel with an angled profile requires separate verification
If the central plane ends with a bevel or a shaped transition, the rosette must lie entirely on a stable mounting area.
An area where the edge of the decor already falls on the raised part of the panel cannot be considered a free field.
To check:
- measure the flat central zone;
- construct the outline of the rosette;
- add the actual thickness of the product;
- check the fit across the entire back plane.
If the mounting surface is insufficient, a smaller rosette or a different facade unit is needed.
A double molding frame sharply reduces the field.
In the visualization, two thin frames appear light.
But each one takes up:
- its own width;
- the gap;
- additional offsets.
As a result, the central field may decrease by 100–150 mm along each axis relative to the original facade.
Therefore, the socket for the double frame is chosen only after the final calculation of both molding lines.
The mounting plane of the back side is more important than a beautiful front contour
The photograph shows the front carving.
During installation, the craftsman works with the back side.
Need to check:
- whether there is enough flat area for contact;
- whether the edge falls on the panel profile;
- whether the existing molding interferes;
- how the adhesive or other intended fastener will be applied;
- whether surface access remains after finishing.
If the face of the socket is 120 × 120 mm, this does not mean that the entire back area has the same continuous contact.
A complex openwork element may have a smaller actual contact area.
Therefore, for non-standard installation, a physical sample is more useful than any dimension table.
Finishing and installation must be coordinated in terms of the order of operations
Two routes are possible:
the socket is finished separately → then installed
Or:
the socket is installed → the facade and decor are finished together.
They produce different results at the junction line.
If the socket is painted together with the facade, the transition may be perceived as a single whole.
If the finishing is done separately, the boundary of the part reads more strongly.
Which option is better depends on the project and the workshop's technology.
But the sequence must be known before purchasing the entire batch.
Socket and handle on the same front: how to avoid two competing centers
A central socket and a furniture handle often claim the same area.
This is especially noticeable on:
- drawers;
- small doors;
- chests of drawers;
- sideboards.
Handle below the socket.
Classic layout.
The rosette works as the center.
The handle is positioned lower.
You need to check the distance between them and the comfort of the grip.
The handle is on the side.
The composition becomes asymmetric.
This is not necessarily bad.
But the geometric center of the rosette is no longer equal to the visual center of the entire door.
The rosette and the decorative handle are similar in scale.
competition arises.
A person sees two centers.
Sometimes it's better:
- reduce the rosette;
- choose a more understated handle;
- remove the rosette;
- shift the handle.
Hand check
Do a simple test fit.
The socket is applied 1:1.
The handle is installed temporarily.
After that, the person actually opens the front.
If the fingers touch the thread, the composition needs to be revised.
The handle and the socket should have different priorities.
If the handle is decorative and large, the socket can become a secondary element.
If the handle is simple and almost unnoticeable, the central decor can dominate.
It is bad when both elements are equally active and are placed too close.
It is useful to decide:
main center — socket
Or:
main center — handle
Or:
both elements work as a single unit.
After that, it is easier to choose the size.
Do not forget about the handle's mounting area.
Even if the handle itself does not touch the socket, the holes and fasteners may end up close to the decorative mounting area.
On a thin panel, this is especially important.
Therefore, the drawing must show not only the outline of the handle, but also the mounting points.
Repeating sockets on doors, drawers, and furniture frieze
On a single front, a small mistake may go unnoticed.
On four identical doors, repeating it enhances the effect.
Sockets can be used:
- as a single central accent;
- on each cabinet door;
- on each dresser drawer;
- in a row of furniture trim;
- on several items of the same series.
When repeating, coordinates are critical.
It is necessary to record:
- center height;
- horizontal axis;
- orientation;
- the material;
- finishing.
Not:
approximately in the center.
But:
center 240 mm from the top edge.
Rhythm matters more than a single detail.
If four identical sockets are placed in one line, a person perceives them as a row.
Any misalignment stands out immediately.
That is why serial placement requires a template.
Repetition can be uniform or hierarchical.
Uniform option:
- all four doors receive the same socket;
- same size;
- the same height.
Hierarchical:
- the central doors receive larger decor;
- side ones — the smaller one;
- upper drawers — a compact option.
Both approaches are acceptable.
The main thing is that the system reads immediately.
Random alternation of sizes looks like a packing error.
Paired doors are best checked as a single composition.
Two adjacent sockets can:
- each stand in the center of its own door;
- form a shared visual center;
- be shifted toward the outer edges;
- work together with central handles.
Therefore, a sketch of one door is insufficient.
A view of the pair is needed.
Dresser with drawers of varying heights
Let's imagine four drawers:
- 140 mm;
- 180 mm;
- 240 mm;
- 300 mm along the height of the front.
If you put the same 100 mm socket on all of them, on the top drawer it will take up most of the height, while on the bottom one it will become noticeably smaller relative to the field.
There are two approaches.
One size — one rhythm.
All sockets are the same.
Advantages:
- strong repeatability;
- simple procurement;
- one geometry.
Cons:
- the relative scale differs.
The size adapts to the facade.
A single ornamental line is used, but in several sizes, if the specific model allows it.
This way, the upper drawer gets a smaller element, and the lower one gets a larger one.
Which approach to choose.
It depends on the design.
But you cannot mix the two principles randomly.
If the first two drawers are the same size, the third is a different size, and the fourth is yet another size with no clear system, the dresser looks inconsistent.
Furniture frieze and repeating rhythm
A frieze is usually elongated horizontally.
Therefore, a large round rosette in it can visually stop the line.
A rectangular or oval one will support the direction.
Central frieze.
If the decor is placed exactly in the center, check:
- the length of the frieze;
- height;
- side margins;
- adjacent capitals;
- Mouldings.
Repetition along the length.
Several rosettes can form a rhythm.
Then it's important to calculate:
- spacing;
- distance from the edges;
- number of elements;
- symmetry.
For example, the length of the frieze 1200 мм.
You need to place 3 sockets with a width of 120 мм.
If you keep the same spacing between centers, the composition is calculated as a row rather than as three independent elements.
Depth relief.
On the upper frieze, a deep socket can cast a strong shadow.
This is especially noticeable under the upper lighting.
Therefore, depth C here is sometimes perceived more strongly than on a vertical facade.
How to calculate a row across several identical facades
Let's imagine four identical doors 500 mm wide.
Each socket is placed in the center.
If the doors are on the same cabinet, the centers form a horizontal row.
The distance between the centers of adjacent sockets no longer depends on the socket itself, but on the width of the front and the gaps between fronts.
With identical doors, the row turns out regular.
But if one section is wider, a different spacing automatically appears.
Then there are two options:
- save center each
the sample rosette must go through the same sequence.
Otherwise, the comparison will not show the true result.
For a clear finish, similarly:
preparation → stain or oil → protective layer.
Compare the sample next to the facade, not separately.
A rosette lying separately may appear too dark.
On a light facade, it will be the right accent.
Or vice versa.
Therefore, the sample is evaluated:
- on the real background;
- in daylight;
- under primary artificial lighting;
- with the handle installed, if it is close.
1:1 template and physical fitting before ordering the batch
Even a good drawing on a screen does not always give a sense of scale.
A simple paper outline helps faster.
Working scheme:
product code → actual dimensions → 1:1 outline → front → frame → handle → check → approval.
What to put on the template
Minimum:
- outer contour of the socket;
- central axes;
- top direction, if any;
- article number;
- Size.
For a square or rectangular shape, it is especially important to indicate the orientation.
Template on the facade.
Attach it with painter's tape.
Look from several distances:
- up close;
- from two meters;
- from the point where the furniture is usually seen.
This way you can tell whether the element looks too small or too large.
For deep relief, a paper template is not enough.
The outline shows A/B.
But not C.
If the depth is large, it helps to add temporary volume:
- a piece of cardboard;
- foam material;
- a small block.
This makes the protrusion of the socket from the facade clear.
A full-size mockup is especially useful for three questionable cases.
The first is a socket that is too large.
On the screen it looks striking, but on paper it almost touches the frame.The second is too small.
In the card the ornament looks detailed, but on a large facade it gets lost.The third is a conflict with the handle.
In two separate images, the elements look good, but together they end up too close.One 1:1 fitting resolves all three issues before purchasing the batch.
For the series, keep the approved template.
After approval, sign:
- article number;
- size;
- the material;
- orientation;
- position;
- date.
This sheet becomes part of the production kit.
If four more fronts need to be manufactured a month later, the craftsman does not repeat the selection from scratch.
Why you should not stretch the image of a socket in a visualization
In the program, it is easy to take the image of a socket and stretch it to any size.
But a physical carved part doesn't work that way.
When stretched:
- the proportion of the ornament changes;
- the leaves thicken or stretch;
- the shape of the center changes;
- the result is an image of a product that is not in the catalog.
Therefore, visualization must use the actual dimensions of a specific item.
If a different size is needed, look for:
- a different version of the same model;
- a different SKU;
- a different shape.
It is especially dangerous to change only one axis.
A round rosette cannot be turned into an oval by simply stretching the image.
A square one — into a rectangular one.
this is already a different geometry.
The client should see what can actually be ordered.
How to add a rosette to a drawing, specification, and serial list
Bad:
wooden rosette — 4 pcs.Good:
ROS-01 | STAVROS | R-001 | 100 × 100 × 19 mm | beech | enamel | 4 pcs.If orientation matters:
top according to the drawing arrow.If the rosette is centered:
FAS-01 zone, center along axes.What must be recorded.
- internal code;
- article number;
- size;
- the material;
- quantity;
- finish;
- orientation;
- installation zone;
- link;
- sample status.
For multiple sizes of one model
Each size — a separate row.
Avoid writing:
R-001 — 8 pcs.if four parts are 80 mm and four are 120 mm.
Better:
ROZ-01A | R-001 | 80 mm | 4 pcs.ROZ-01B | R-001 | 120 mm | 4 pcs.So the supply doesn't guess the configuration.
The quantity is counted by facade types.
For example, a wardrobe has:
- 2 large doors;
- 4 drawers;
- 2 top cabinet doors.
The large socket is used only on doors:
2 pcs.The small one — on drawers:
4 pcs.The top cabinet remains without decor.
In the specification, these should be two separate items, even if they belong to the same model.
For a small batch, keep the quantity per item and the quantity per batch.
If 6 identical cabinets are being produced:
РОЗ-01 | 2 pcs. per cabinet | 6 cabinets | 12 pcs.РОЗ-02 | 4 pcs. per cabinet | 6 cabinets | 24 pcs.If a reserve is needed, it is specified separately.
This way, changing the batch size does not change the structural logic of a single cabinet.
The quantity must be calculated after all facade types are approved
Before the final design, you cannot write:
sockets — 20 pcs.First, it is determined which facades actually receive decor.
For example:
- 2 large doors — one large socket each;
- 6 drawers — one small socket each;
- 2 top cabinets — no sockets;
- 1 central frieze — 3 rectangular.
Then the calculation:
SOC-01: 2 pcs.SOC-02: 6 pcs.SOC-03: 3 pcs.In total, 11 physical parts, but these are three different items.
This calculation is much safer than a single line “11 sockets”.
When a reserve is needed
A universal reserve percentage is not needed here.
A spare makes sense if:
- the series is stretched out over time;
- the socket undergoes its own finishing;
- there is a risk of damage during installation;
- reordering takes time;
- the item is used in a repeated furniture model.
For a single chest of drawers, a reserve may not be needed at all.
For a series of twenty cabinets, one or two additional parts of a specific size may be a reasonable production decision.
The reserve is recorded separately from the quantity per item.
Actual STAVROS dimensions: why the front overall size is not enough
Several current STAVROS product cards clearly show the depth difference.
R-001
R-001 is available in several size options.
For example:
- 70 × 70 × 13 mm;
- 80 × 80 × 15 mm;
- 90 × 90 × 17 mm;
- 100 × 100 × 19 mm;
- 132 × 132 × 24 mm;
- 160 × 160 × 29 mm.
As the face size increases, the depth also increases.
R-012
R-012 in the current product page is available in the following options:
- 60 × 60 × 25 mm;
- 80 × 80 × 25 mm;
- 100 × 100 × 25 mm;
- 120 × 120 × 25 mm.
Here the depth remains 25 mm with different face sizes.
This is a completely different scaling character.
R-058
R-058 also has a wide range of sizes, for example:
- 60 × 60 × 12 mm;
- 80 × 80 × 16 mm;
- 100 × 100 × 20 mm;
- 120 × 120 × 24 mm;
- 150 × 150 × 30 mm.
These examples show the main point:
two items of the same width can have different overhang, and one model can change depth within its row as the size increases.
Therefore, A/B without C is not enough.
How to compare two real models on the same field.
Let's imagine a square working field
300 × 300 mm.Option 1:
R-001, 100 × 100 × 19 mm.Free field:
(300 − 100) / 2 = 100 mm
on each side.
Option 2:
R-012, 100 × 100 × 25 mm.The free space in front is the same:
100 мм.But the protrusion is 6 mm larger.
On the front elevation, there is almost no difference.
In side lighting and next to the handle, it is already noticeable.
This is exactly the kind of example that shows why a furniture maker should look at the drawing before ordering.
Typical mistakes and cases where an outlet is not needed at all
First choose the outlet, then look for a place.
Why it happens: you like the ornament.
Consequence: the facade has to be subordinated to a random detail.
How to avoid it: first define the working area.
Treat the entire facade as the working area.
Consequence: after the frame and handle are added, the decor turns out to be too large.
How to avoid: subtract all occupied areas.
Approve based on the photo only.
Consequence: the actual scale differs.
How to avoid: use a 1:1 template.
Ignore depth C.
Consequence: the socket turns out to be too bulky or interferes with the handle.
How to avoid: check the side view.
Rotate a rectangular ornament without checking.
Consequence: the pattern looks illogical.
How to avoid: check the specific product code.
The square socket is installed with a slight rotation.
Consequence: the error is noticeable relative to the frame.
How to avoid: use a template with axes.
Multiple sockets are marked out separately.
Consequence: the row looks uneven.
How to avoid: use a common template or a coordinate table.
The material was chosen before the finish.
Consequence: the wood species does not produce the desired visual result.
How to avoid: coordinate the material and finish together.
When it's better not to install an outlet
Sometimes the best option is to leave the central field empty.
This is especially reasonable if the facade already has:
- a large frame;
- an active panel;
- a decorative handle;
- a carved molding;
- a noticeable wood texture.
Adding another center can overload the composition.
Necessity test.
Remove the socket from the sketch.
If the front is without it:
- it looks more cohesive;
- lighter;
- it shows the material better;
- it doesn't lose its meaning,
decor doesn't need to be added.
An expert choice isn't always a purchase.
Sometimes it's better to replace the socket with a different type of overlay.
If the field is too elongated, a small socket may get lost, while a large one may look heavy.
Then it makes more sense to consider:
- a horizontal carved overlay;
- vertical decor;
- a small molding;
- leave the field empty.
There is no need to keep exactly the rosette type at any cost.
Sometimes it is better to move the central decor to the frieze.
The door may already have an active handle and a complex panel.
In that case, a rosette at the top of the cabinet or on the furniture frieze may work better than a third decorative center on the door itself.
This is especially useful for furniture where it is important to keep the fronts calm.
Final check before purchase
Before ordering the entire batch, go through one line:
field → shape → size → depth → orientation → material → finish → installation → quantity.
If even one item is not yet determined, the choice is not complete.
Particularly dangerous are the wordings:
- "the size is roughly suitable";
- "we'll decide the orientation on site";
- "we'll pick the color later";
- "if anything, we'll shift it a little."
For a single decorative element, this seems like a trifle.
For a series of 20–40 fronts, each such uncertainty is repeated many times.
Buying a single piece before a batch
If the rosette is being used for the first time, a sensible approach:
- select the article;
- order one piece;
- check it on the facade;
- perform a test finish;
- check the installation;
- only then order the quantity.
This is especially useful for deep, large, and directional ornaments.
One trial piece gives more information than ten more images on a screen.
Where to buy decorative wooden rosettes
The main selection is gathered in the section carved wooden rosettes STAVROS.
By shape:
For coordinated decor:
The main principle of selection:
not the shape of the rosette first, but the field of the facade.
After that:
field → axes → shape → A/B/C → free fields → depth → material → finish → 1:1 template → specific article number → quantity.
Then a circle, square, rectangle, or oval is chosen not as an abstract style, but as a geometrically justified part of a specific piece of furniture.