Article Contents:
- Antique furniture needs not a "similar applique" but a suitable element of the composition
- Restoring a loss and decorative alteration are different solutions
- What to check before taking measurements: a loss or ongoing deterioration
- How to record the location of the loss: photographs, traces, and measurements
- If a paired piece survives, it matters more than stylistic assumptions
- Dimensions A, B, and C: why three numbers are not enough without a drawing
- Scale of the ornament and depth of the relief: how to avoid a foreign accent
- Carved applique on an old cabinet or sideboard: when a ready-made piece is truly suitable
- Example: why N-421 cannot be selected by name and photo
- Example of calculating a new closed frame
- Sideboard: one of the two upper decorative corners is missing
- Chest of drawers: the central rosette on one drawer is missing
- Display cabinet: a fragment of the shaped molding on the door is missing
- Can a modern wooden appliqué be installed on 19th-century furniture?
- What should be done if the area of loss is covered by several layers of old paint?
- Can I order an appliqué slightly larger and trim it to the required contour?
- Is it worth removing the remaining old decor in order to match a replica?
- What should be done if the new part matches in color but looks too new?
- Can carved decor be attached over old lacquer?
- Is it necessary to buy the entire set if only one part is missing?
- How does ready-made wooden decor differ from an exact restoration of the original carving?
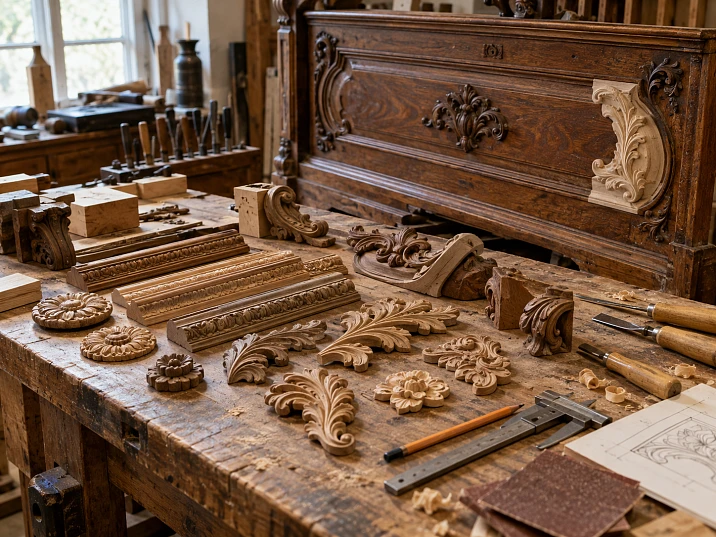
An old buffet has two carved appliqués preserved on the upper corners, while the third is missing. A lighter contour is visible on the wood, old holes remain in places, and along the edge there is a trace of the former finish. A similar appliqué can be found in a few minutes. It is harder to understand whether it will actually fit: whether the direction of the leaves will match, whether the relief will turn out to be too high, whether the part will cover the trace of loss, and whether it will disrupt the preserved composition.
Decorative elements for antique furniture are selected based on the area of loss and the surviving evidence, not only on the beauty of the pattern. First, the role of the missing part is determined, measurements are taken, and symmetry and method of attachment are checked. Then ready-made carved wooden elements are compared by dimensions, material, and depth of relief. A trial part is placed without final installation; only after that is the question of finishing and ordering the remaining parts decided.
There is also a fundamental limitation. For an ordinary old chest of drawers, a neat decorative replacement is appropriate if the owner wants to restore the piece to a finished look. With antique, designer, or museum furniture, the approach is different: the original surface and traces of time may have value in their own right. A modern mass-produced applique cannot automatically be passed off as a historically accurate copy of lost carving.
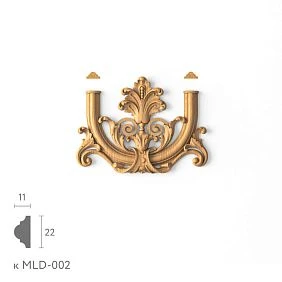
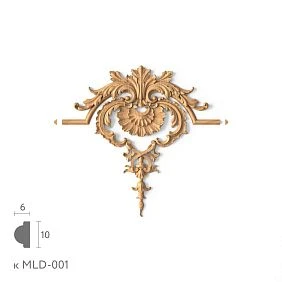
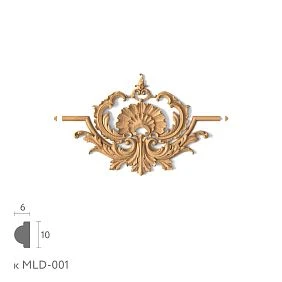
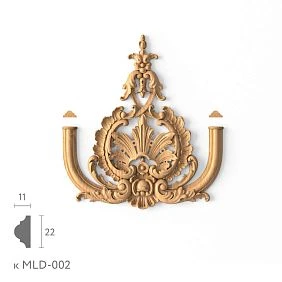
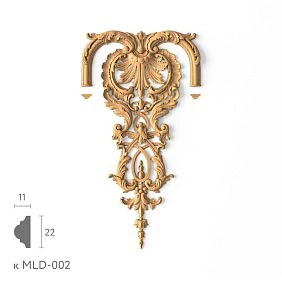
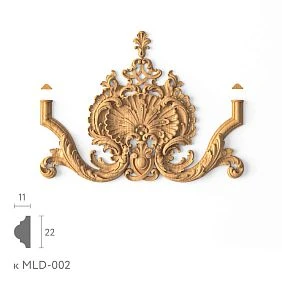

Antique furniture needs not a "similar applique," but a suitable element of the composition
On furniture, a decorative detail rarely exists in isolation. An applique on a door may continue the line of a molding, a rosette may anchor the center of a panel, and a bracket may complete the transition from a side post to a cornice. If they are replaced without taking neighboring parts into account, the new decor will stand out even if the pattern is similar.
Let's imagine a cabinet with two tall doors. On each, in the upper part, there was once a vertical carved applique. One has survived. At first glance, it is enough to find an element of the same length. But if the leaves on both details are supposed to diverge from the central axis, buying two identically oriented appliques will break the mirror symmetry. The facades will look as if they were assembled from different sets.
Another piece presents the opposite situation: in the center of the sideboard, a round rosette is missing, while horizontal carved lines have been preserved on the sides. Here, the determining factors will be the diameter of the central element, the height of its relief, and its position relative to the existing frame. Looking for a vertical applique just because it resembles an old ornament is pointless.
Before opening the catalog, determine exactly what has been lost:
- The central accent — a rosette, cartouche, or applique on the shared axis of the facade.
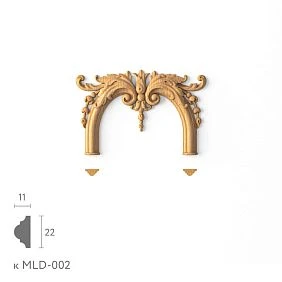
- A paired element — two side appliques, symmetrical brackets, or corner ornaments.
- A linear part — molding, carved trim, a fragment of a frame or frieze.
- The completion of the structure — a capital, decorative finial, or applique on a post.
- A working part with a decorative shape — a furniture leg, handle, or bracket that may participate in load transfer.
The last group is assessed especially strictly. A lost supporting leg and a missing decorative overlay require different restoration methods: one affects the stability of the furniture, the other primarily its appearance. The load-bearing capacity of a new bracket or leg cannot be judged by appearance alone.




Restoring a loss and decorative reworking are different solutions
The word "restoration" is often used to describe any work on old furniture. To choose parts, it is more useful to immediately divide the situation into three cases.
Careful repair of household furniture. The item should continue to be used. For example, a mass-produced sideboard has a damaged carved overlay that has no known independent historical value. A suitable modern wooden decoration can restore the facade's completeness. If there is no exact match, the craftsman can agree with the owner on a meaningful replacement of a pair of elements without affecting the remaining parts.
Decorative reworking. The owner deliberately changes the design: adds moldings, chooses new handles, repaints the furniture, or redistributes carved elements differently. This is a permissible creative project, but the new design no longer has to repeat the original composition. It is more accurate to call it an update or reworking, not restoration of the original.
Restoration of a historically significant item. Here the priority is preserving authentic parts, finishes, traces of processing, and construction. The decision to fill a loss is made after studying the item itself, documentation, and surviving analogues. Sometimes it is better to preserve an empty space than to install an inauthentic part. If filling is necessary, the specialist provides for its documentation and, where possible, the possibility of subsequent removal without damaging the original.
It is impossible to distinguish these cases by age. Furniture made a hundred years ago is not necessarily museum-quality, and a younger item may be authorial and valuable. If there are doubts about the origin, original finish, or cultural significance, it is worth obtaining an assessment from a specialized restorer before any intervention.
This is not a formality. Irreversible stripping of old varnish, new holes, or a strong bond with unsuitable glue can destroy information about how the item looked and was assembled. Good decoration should not be achieved at the cost of such a loss.
Our factory also produces:
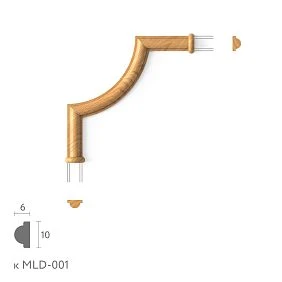
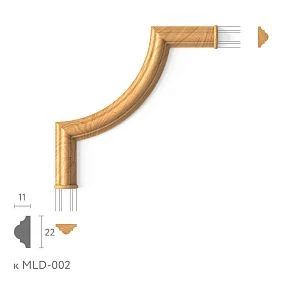
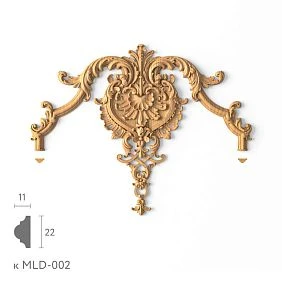
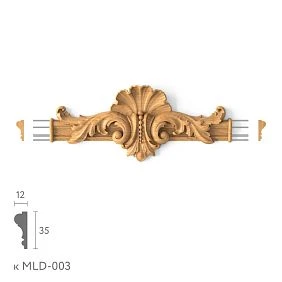
What to check before taking measurements: loss or ongoing deterioration
Sometimes a craftsman sees only the absence of a carved element, though the cause of the problem lies deeper. If the wood near the attachment point is loose, the veneer is peeling, or the base is covered with cracks, a new overlay will not fix the problem. It will merely cover the damaged area, making it harder to observe.
Inspect the furniture in natural side light. Check whether there are any loose joints, peeling finish, traces of moisture, or fresh wood dust near insect holes. The presence of old holes does not yet prove active infestation. But fresh dust and new signs of damage are a reason to postpone installation and carry out a separate diagnosis.
On a cabinet with a curved door, another problem is noticeable: the surface may have deformed over years of use. A ready-made flat overlay does not have to fit against it with its entire back side. Removing the old lacquer and grinding down the historic facade for the sake of a new part is a poor sequence of actions. First, assess the geometry of the area and the possibility of a coordinated, gentle installation.
For a working item, it is also necessary to establish the cause of the previous element falling out. If a frequently opened door caught the overlay with the adjacent facade, a new part with the same protrusion will again be at risk. If a leg broke off due to a destroyed fastening, replacing only the visible part is not enough.
Get Consultation
How to document the location of the loss: photographs, traces, and dimensions
Before cleaning, touching up, or removing adjacent decor, take photographs. They are needed not for record-keeping, but so as not to lose information that may later prove decisive.
First, photograph the item as a whole. In the overall shot, the axis of symmetry, the position of the loss, the repetition of the ornament, and the proportions of the furniture are visible. Then photograph the area close-up, placing a ruler next to it, but not resting it on fragile carving. Separately capture a side view: it helps assess the protrusion of the surviving elements. If there is an intact mirrored element, photograph it straight on and at an angle.
Traces from old decor can reveal more than a photograph of a catalog item. A light spot under the overlay shows the approximate contour of its adjoining. Holes help reconstruct the fastening axis. The difference in the paint layer indicates whether the part was installed before a subsequent repainting. At the same time, a trace may turn out to be a remnant of a later repair rather than the original decoration; conclusions must be verified across the entire item.
It is useful to create a simple loss record:
| What we record | Example entry | Why this is needed |
|---|---|---|
| Location | Upper left corner of the door | Determine orientation |
| Free area | 170 × 90 mm | Filter out oversized decor |
| Trace of the previous part | 148 × 62 mm | Assess contour proximity |
| Maximum protrusion nearby | 12 мм | Compare relief depth |
| Axis | 45 mm from the outer post | Repeat the composition |
| Adjacent elements | Right carved corner, two moldings | Match motif and scale |
| Finishing | Dark toning under old varnish | Plan a color sample |
All numbers in the table are a conditional measurement example, not the characteristics of a specific STAVROS product. For a real item, use your own measurements.
Do not drill or sand anything until this fixation is complete. Even if the owner does not set museum-level goals, photos of the initial condition will help later to check the quality of the repair and explain why this particular part was chosen.
If a paired part has survived, it matters more than stylistic assumptions
Loss on the right with the left element preserved is one of the most convenient cases. Instead of searching by the vague definition of “classical-style carving,” you can measure a specific sample.
Measure the width, height, and greatest thickness of the surviving overlay. Trace its outer contour onto transparent film or make a photo template with a scale ruler; do not attach marking materials to the old finish. Note which side has the larger leaves, where the scroll begins, and in which direction the sharp end of the ornament points.
Then three outcomes are possible.
First: the catalog contains an exact geometric and mirrored counterpart of a suitable scale. All that remains is to check the material, installation, and finish. Second: the motif is very close, but the left and right orientations do not match. In this case, it is sometimes wiser to replace both overlays as a matched pair — if the condition and value of the piece allow it. Third: the carving is unique, and there is no close mirrored part. Careful restoration will require a custom copy based on the surviving sample, or preserving the loss without a questionable replacement.
Mirroring cannot be achieved by simply rotating any overlay. For a symmetrical floral pattern, a 180-degree rotation may change the direction of the leaves, the position of the stem, and the transition pattern to the frame. It is important to compare not only the overall frame but also the silhouette in the working orientation.
Dimensions A, B, and C: why three numbers are not enough without a drawing
In the STAVROS carved decor catalog, the designations used for overlays are A — width, B — height, C — thickness. But their meaning must be verified against the drawing of the specific selected product: brackets sometimes have additional dimensions characterizing the support and mounting areas. The scheme for one product type cannot be transferred to another.
Suppose a rectangular free field on a door is 420 mm wide and 310 mm high. At the edges, at least 35 mm must be left for the existing frame and visual margin. The working rectangle will be 350 × 240 mm: subtract two 35 mm margins from 420, and the same from 310. An overlay 330 mm wide and 220 mm high fits geometrically: 10 mm remains inside the working field on each side. However, such a tight approach leaves almost no room for measurement error, an uneven frame, and the perception of the relief. A paper template will show whether the fill looks excessive.
Thickness C is a separate check. Imagine that the old moldings protrude 8 mm above the facade, while the new overlay protrudes 24 mm. Even with a similar pattern, it may cast a much stronger shadow and begin to dominate the neighboring details. This is not a ban on high relief: in large furniture portals, voluminous decor can be appropriate. But for a small door with thin old carving, the difference will be noticeable.
Finally, the visible overall size is not equal to the mounting area. A carved element may have protruding leaves and a narrow base that contacts the furniture. When choosing the installation method, one should know the actual contact contour and the condition of the base. This information is determined from the product, the drawing, and a trial fitting, not calculated from its outer width.
Scale of the ornament and depth of relief: how to avoid a foreign accent
Two overlays of the same size can be perceived completely differently. One element consists of several broad leaves, while another consists of dense fine carving. At a distance of two meters, the first reads as a large silhouette, while the second may turn into a heterogeneous spot. For old furniture, this difference is significant: the surviving decor sets the character of the lines, the density of the pattern, and the rhythm of repetitions.
Look at the piece as a whole, then up close. If the carving on a sideboard is shallow and the neighboring moldings are thin, an overly voluminous central overlay will change the hierarchy of the facade. But if a large console is decorated with deep acanthus leaves, a small flat rosette will be lost against its background.
Checking proportions can be simple. Take the width of the overlay and divide it by the width of the free field. For example, 140 mm on a 400 mm field gives 35%. But 35% cannot be considered an "ideal norm." This figure only helps compare candidates: an overlay 280 mm wide will already occupy 70% of the same field and will work as a completely different accent.
With side lighting, the relief reads more strongly. Therefore, it is useful to place a trial element where the furniture will actually stand, rather than only examining it under bright, even workshop lighting. It also matters how the lines of the ornament sit next to each other: floral branches, laurel garlands, geometric carving, and cartouches may belong to different compositional systems. The single word "classic" does not yet make them compatible.
Carved overlay for an old cabinet or sideboard: when a ready-made piece truly fits
Carved wooden overlays for furniture are convenient because they allow you to restore a single decorative area without making an entirely new facade. But this advantage only appears when the new piece is correctly matched to the surviving base.
A decorative corner may be missing on the door of an old cabinet. If an overlay has survived on the opposite side, first compare the contours. When there is no exact pair, it is sometimes possible to find a ready-made element with a similar shape and a suitable direction of the pattern. If you have to cut off its protruding parts significantly, the result is no longer predictable: the proportions of the ornament change, unsuitable areas of wood may be exposed, and the pattern will no longer conclude naturally.
On the lower rail of a sideboard, an overlay works differently. Here the horizontal axis matters, not filling a corner. A narrow, elongated element can tie the composition together better than a voluminous central ornament. For the upper frieze, a decorative branch with developed width and small height is sometimes needed. The dimensions for these three tasks may match in one parameter, but the pieces themselves do not become interchangeable.
The STAVROS catalog offers Carved decorative inserts for furniture with different shapes, pattern directions, and sizes. When selecting for an antique item, it is convenient to immediately filter out unsuitable shapes. A central overlay should not be considered a replacement for a corner one just because it contains the same acanthus leaves.
Example: why N-421 cannot be chosen by name and photo
У wooden decor N-421 there are options 250 × 250 × 13 mm, 350 × 350 × 18 mm, and 405 × 405 × 21 mm. For a restoration task, these dimensions are crucial.
Let's take the working area of 350 × 240 mm from the previous example. Even the smallest overlay N-421 with a height of 250 mm does not fit there. Trying to rely on an "approximately suitable width" would have led to purchasing an unsuitable part. If, however, a large sideboard has a free zone of 450 × 460 mm, the 250 × 250 mm option can be assessed on site — but whether it matches the old pattern and the thickness of the relief still remains an open question.
This is not a claim that N-421 was created specifically for antique furniture. The item code serves as an example of how to read a finished product card and verify its compatibility before ordering.
A rosette instead of a lost central ornament
A central wooden rosette often seems like the simplest replacement case: there is a round or square area — you just need to match the size. However, in old sideboards the center of the composition may be offset relative to the geometric center of the door due to handles, panels, or the division of the facade. If you rely only on the outer width of the door, the new rosette will end up noticeably higher or lower than the previous axis.
First, restore the position of the old center using the surviving traces. If there are no traces, compare with the second door, adjacent drawers, or repeating elements of the cabinet. Determine not only the diameter or width, but also the distances to the frame, cornice, and handle. Look separately at the depth of the relief: a small rosette with a strongly protruding center can appear more massive than a larger but flatter ornament.
To check the size range, you can use the product card wooden rosette R-024. It includes, for example, versions 40 × 40 × 7 mm and 60 × 60 × 10 mm. These are parts of different scale and thickness, although the item code remains the same. For a small old drawer, a 20 mm difference in width can change the entire composition.
If the original ornament has not survived at all, a ready-made wooden rosette from the STAVROS catalog can serve as a solution for a coordinated decorative replacement. But one cannot claim from the appearance of a single element that such a rosette was historically present on the given piece. If the task is scientific reconstruction, additional confirmation will be required.
Bracket, corbel, or capital: we check not only the carving, but also the joint
A missing bracket under the cornice of an old cabinet can disrupt the composition more than a vanished overlay on the facade. Especially when the second bracket has survived and immediately reveals the mismatch. Here, height, width, projection depth, and the configuration of the adjoining surface are all equally important.
Let us imagine a furniture portal with two side uprights. The surviving right carved bracket draws the eye toward the cornice. The left part is empty. A new bracket in the same ornamental direction, but 30 mm deeper, will project forward relative to the cornice and become noticeable in profile. At the same time, even an exact match in height will not solve the installation problem if its mounting pad differs from the existing one.
In the of wooden carved brackets there are models with several geometry options. For example, KR-026 is offered, among others, in a size of 156 × 50 × 43 mm, and the drawing separately specifies two more dimensions of the mounting areas. Comparing only the first three numbers with the location of the loss is not enough: the entire drawing must be studied.
A decorative bracket cannot automatically be considered a load-bearing support. If the former element actually carried the weight of the shelf or cornice, check the furniture's structure and the way the load is transferred. Without confirmed data on the permissible load of the specific product and its fastening, it is unacceptable to replace calculation by choosing a larger bracket. If necessary, the structural function should be performed by a separate engineered assembly, while the carved element should remain decorative.
In classical furniture, pilasters, capitals, and overlays are often located next to a bracket. Replacing them requires coordinating the overall line. A capital may complete the vertical of an upright; a bracket may transition from it to the cornice. If an unsuitable bracket is installed in place of a lost capital, the individual carved detail may be beautiful, but the architecture of the facade will become illogical.
Broken wooden leg: when to replace one, and when the whole set
An old chest of drawers has three carved legs surviving, and the fourth is broken at the attachment. From a photograph, a similar silhouette can be selected, but similarity alone is not enough: the furniture must rest on all four points without skewing and remain stable when the drawers are used.
Measure the height of each surviving leg from the attachment point to the floor surface. Compare the upper mounting dimensions, the method of connection to the body, and the shape of the lower support. For wooden parts repaired earlier, the external height may differ due to old foot pads or trimming. Therefore, it is necessary to assess not only one broken leg, but also the actual condition of the entire base.
Next, choose between three options:
- Restore the original leg if a significant part has survived and structural repair is justified. For a valuable antique item, this is often preferable to completely replacing the original part.
- Make one exact copy based on the surviving supports if it is necessary to preserve the authentic appearance and repair is impossible.
- Replace the set with ready-made legs if this is a household decorative alteration, the owner accepts the change in design, and the new supports have been checked for construction and stability.
In the third case, new wooden furniture legs are selected by height, shape, material, mounting, and operating conditions. Without testing, one cannot assume that any carved solid wood leg will support a table, buffet, or heavy chest of drawers: the load is determined by the specific item and the method of installation.
Replacing all four supports solves the problem of visual mismatch, but it is not always a careful restoration. For a historically significant item, four original legs, three of which have survived, may be more valuable than an aesthetically uniform set of new ones. The decision is made taking into account the purpose of the furniture and its value.
A new wooden handle on an old facade: the problem of old holes
A handle differs from a pull in that its position is determined not only by the compositional center, but also by the holes, ease of grip, thickness of the facade, and the opening mechanism. If one element on a chest of drawers is lost, the first thing to do is measure the existing holes and look at the other handles on the same item.
When choosing a new knob handle, it may turn out that the old mounting does not match its installation. If the handle is placed in a new position, the previous hole will remain open or will need to be filled. For a finish with historical patina, such filling will sometimes be more noticeable than the replacement itself. For a bail handle, you need to check the center-to-center distance, not the overall length of the body.
When an exactly suitable handle could not be found, there are two options: have a copy made individually from a surviving sample, or replace all handles in one row in a coordinated way. The second path makes sense for furniture being updated for everyday use; it may be undesirable when preserving an original set.
In the section wooden furniture handles STAVROS you can select items for a new design. But each model is checked individually against the old holes and historical shape. Replacing a wooden handle does not mean that all fronts must be repainted at the same time or that the other furniture elements must be changed.
If a section of old molding or frame is missing
The most unpleasant feature of linear trim is that it reveals a mismatch in profile at the joint. Two moldings may have the same visible width but differ in the height of the convex part, the position of the groove, the radius of curvature, or the thickness at the edges. Under side lighting, even a small step becomes noticeable through its shadow.
Before looking for a replacement, take a cross-section profile of the surviving strip. If it is acceptable and safe, use an already exposed end for assessment, without sawing off a fragment of the old item for a sample. Measure the height of the relief, the overall width, and the contact plane. Look at where the joint can be made without disrupting the pattern. Complex carved trim also requires the repeat spacing of the ornament to match.
For everyday furniture, two scenarios are possible. If a truly compatible profile is found in the catalog, it is sometimes possible to replace only a short section. If no such profile exists, the new insert will reveal the repair from any angle. Then, with a coordinated alteration, the entire closed frame can be replaced with a single modern profile. However, this changes the amount of original material, and for valuable furniture this path should not be the first choice.
In the section wooden trim and moldings different sections are presented. They should be considered according to the drawing, not only from photographs of the finished interior.
Example of calculating a new closed frame
Suppose that after agreeing on a decorative alteration, the frame on the door leaf measuring 480 × 630 mm needs to be replaced. These are the dimensions at the outer points of four pieces with miter joints at 45°. Two vertical segments of 630 mm and two horizontal segments of 480 mm are required. The total length along the long edge is 2220 mm.
If a 2400 mm strip is available, it would theoretically be enough for such a frame: 180 mm remains. But before ordering, you need to account for the saw kerf width, end trimming, possible defects in individual sections, and the need to maintain the grain direction. For a plain smooth profile, a 180 mm margin may be sufficient; for moulding with a continuous ornament, the result depends on whether the repeat and the cutting pattern align. The length in this calculation is conditional: for the selected article number, the actual available length must be checked.
This is an example not of restoring an arbitrary historical frame, but of calculating a new agreed replacement of an entire closed contour, when a local insert is unacceptable due to the pattern.
Beech, oak, and finish: why the same shape does not yet guarantee a match
If the original sideboard is made of oak, at first glance it seems logical to order the new decor also in oak. With a clear finish, this is often a justified option: the open texture and character of the wood pores affect the perception of the surface. But the shade of two oak pieces may differ due to age, grain direction, coating composition, and service conditions. The same species name does not guarantee a color match.
If the furniture is coated with opaque enamel, the situation is different. Here, under the layer of paint, the wood texture is less noticeable, and a beech overlay of suitable geometry may be a rational alternative. At the same time, requirements remain for the strength of the substrate, surface preparation, and compatibility of the coating system. For a support leg or a structural element, the species cannot be chosen solely by how convenient it is to paint.
For visible carved decor under tinting, it is advisable to first test a sample of the selected species. Stain reveals end grain, face grain, and fibers around complex relief differently. One should not assume that two coats of a dark composition will inevitably make the new piece indistinguishable from the old one. Sometimes the recess becomes darker while the protruding leaves remain noticeably lighter — and the new carving begins to stand out even more.
A separate issue is preparing the item for finishing. Product pages for ready-made carved decor may offer different options for sanding and wood preparation. These specifications must be recorded when ordering along with the species and size. Otherwise, a piece selected by the correct article number will require unexpected additional work.
How to select color, sheen, and patina without crude imitation of age
A new carved piece differs from an old item in several respects at once: surface cleanliness, color, sheen, and relief contrast. An attempt to solve everything with a single very dark coating rarely looks convincing. First of all, you should determine which of the parameters actually does not match.
Evaluate the surviving decor in diffused daylight. It may be almost matte across the flat surface, but more glossy on the raised areas from years of handling. The recesses sometimes look darker not because of a special patina, but because of accumulated dust and old finish. There is no need to mechanically replicate this grime on a new piece.
For a household repair, a test finish on a separate new piece or an offcut of the same wood is appropriate. After it has fully dried, compare the tone and sheen next to the furniture. The test should show the result of the entire system: preparation, the chosen stain, varnish, or other topcoat. You cannot judge the final color from a single wet coat of stain.
For valuable old pieces, the rule is stricter: do not match the original finish to a new applique. Removing the authentic finish, repainting adjacent elements, or using an unknown solvent for the sake of a “perfect match” is unacceptable without a prior restoration decision. A moderately distinguishable new insert is better than an irreversibly altered original surface.
Patina only makes sense when it can be explained by the existing finish. If the original decor has light wear on the raised areas, and the new applique is painted completely evenly, the contrast can indeed stand out. But excessive dark patina in all the recesses makes the carving look visually dirty. The goal is to bring the new piece closer to the overall system of color and relief, without inventing an “age” for it.
How to choose three to five suitable options without buying the first one you come across
Once the measurements are ready, the catalog usually contains more than one visually suitable item. You do not necessarily have to buy several expensive pieces for testing right away. First, make a short list and compare them by the same criteria.
Divide the parameters into mandatory and desirable. Mandatory ones include the type of item, the direction of the pattern, the maximum dimensions, the fit conditions, and installation restrictions. Desirable ones include the similarity of individual leaves, the possibility of a close finish, and minor shade differences. An item that fails a mandatory criterion is eliminated, even if its photo seems the most convincing.
An example of a comparison table using real product codes shows why items cannot be grouped together under one category of “wooden decor” without specifying the purpose:
| STAVROS product | One of the available sizes, mm | What to compare when selecting | Where an error may occur |
|---|---|---|---|
| Overlay N-421 | 250 × 250 × 13 | Contour, central composition, thickness | Too large for a small free field |
| Rosette R-024 | 40 × 40 × 7 | Size of the central accent, relief | Does not cover the elongated trace of the lost overlay |
| Bracket KR-026 | 156 × 50 × 43, plus additional dimensions according to the drawing | Protrusion, mounting pads, side view | The mating geometry does not match |
All three models exist in different versions or size variants. The values given serve to compare selection principles, not to assert that these products are historically compatible with a particular piece of furniture. Detailed drawings are provided in the cards of the corresponding products.
In the working table, add your own columns: "contour match", "is a mirrored part needed", "what is the contact area", "can the old holes be preserved", "what will the trial finish look like". Two candidates that are identical in price and outer width often turn out to be unequal after such a check.
The "reason for rejection" column is especially useful. A week later, it is hard to remember why a liked overlay did not fit. A short note such as "the scroll faces inward instead of outward" or "the relief covers the keyhole" prevents a repeat search for a product that is obviously unsuitable.
Trial fitting: the new part must pass the check without glue or drilling
The selected item number does not yet mean an approved replacement. For ordinary furniture, you can first cut a paper template to the actual dimensions. It will show whether the decor fits within the frame, does not cover the handle, and does not interfere with opening the door. But a template says nothing about the depth of the carving or the back side of the product. Therefore, for a responsible repair, an inspection of the actual part will be needed.
Before trial fitting, protect the old surface in a suitable non-adhesive way; if the coating is fragile, the contact method should be chosen by a restorer. Do not attach the template with tape to cracked lacquer. Place the item itself stably, and hold the trial decor so that it does not slip or damage the old protrusions.
Check sequentially:
- Whether the actual overall dimension matches the measured space.
- Does the new part overlap the surviving moldings, hinges, handles, and locks?
- Does the three-dimensional relief interfere with the movement of the door or drawer?
- Does the direction of the ornament match the paired element?
- Is there a noticeable gap between the back side of the overlay and the furniture?
- Can the existing mounting point be used without damaging the original?
- How does the relief look in normal lighting and from the distance at which the furniture is perceived?
After a dry fit, evaluate the color on a separate sample and only then approve installation. If many parts are required, check the first fully prepared composition before purchasing or installing the entire batch. For particularly valuable furniture, even a trial installation may require professional restoration supervision.
STAVROS product samples are useful for studying materials and profiles, however the availability of a sample of the required item number and the possibility of ordering it are confirmed separately. Not every demonstration fragment can replace checking the full size of a carved overlay or bracket.
How to install a replacement without damaging the surviving decor
The mounting method depends on the condition of the base and the purpose of the item. There is no universal recipe here like “glue the wooden overlay to old furniture.”
On a household item without historically significant finish, a new decorative element can be attached using woodworking joints or a suitable adhesive after checking material compatibility and preparing the surface. But even then, it is important to understand what the joint is holding onto. A sturdy applique glued over peeling varnish may come off together with the coating. Too rigid a fastening to a base that changes dimensions with humidity fluctuations also creates a risk of damage.
If there were pins or hidden fasteners under the old applique, new holes cannot automatically be relocated elsewhere. First, the existing joint is examined. On old veneer, a thin panel, and a carved facade, the material margin for drilling may be small, and hidden cracks may be significant.
For collectible or author-made furniture, the initial requirement is different: minimize intervention in the original material, document the new insert, and choose a solution agreed with a restorer that allows it, if necessary, to be distinguished from the authentic element. Durability “forever” is not an end in itself if such installation deprives a future specialist of the ability to safely remove the added part.
Old coatings of unknown composition are considered separately. Dry sanding and removing old paint without diagnostics can be unsafe, including because of the possible presence of hazardous pigments. Work on an old surface must not be started merely so that a new applique adheres better. In doubtful cases, limit yourself to measuring and agreeing on further actions with a specialist.
When it is better not to buy a ready-made part
The range of ready-made decor is wide, but there are situations in which a mass-produced item is an unsuitable solution.
Unique author-made carving has been preserved. If the missing part must repeat a complex individual pattern and there is no exact analogue, it is better to consider reproduction from the original. Similarity of the general theme—for example, acanthus leaves—does not guarantee that their modeling will match.
The original composition of a valuable item is unknown. If there are no old photographs, traces of attachment, or paired elements, an arbitrary applique will create only a modern guess. Refusing replacement may be professionally justified.
The part bears a load. For a leg or bracket, a suitable appearance is not enough. Without checking the furniture structure, the installation method, and the product characteristics, the purchase is postponed.
The area is damaged more than it seems. If the facade is delaminating and the base has lost strength, the applique must not conceal the problem. The issue of preserving the base is addressed first.
A new part requires removing a large amount of original material. If, to match a ready-made profile, you have to cut away the old frame or enlarge the seat, the savings on making a copy may prove illusory.
Sometimes it is more sensible to preserve one surviving original overlay and carefully mark the place of loss than to replace it along with its pair with two new ones. Especially if the furniture is valuable not only for its appearance but also for its own history.
Three cases in which the decision will differ
Sideboard: one of the two upper decorative corners is lost
The right corner has survived; the left one is missing. The area has old mounting marks, the finish is stable, and the sideboard itself is in everyday use. The first task is to take measurements of the surviving part and check for mirroring. If ready-made carved overlays match in contour shape and direction, a trial replacement of one side is possible. If there is no mirrored pair, the decision to replace both corners is made only after agreement with the owner and an assessment of the value of the original part. Buying two new pieces does not automatically become the best option.
Chest of drawers: the central rosette on one drawer is missing
Three identical rosettes remain on four drawers. The craftsman has both the place of loss and three reference samples. Here, size, relief height, distance to the handle, and color are compared first. If a modern rosette matches in dimensions but its pattern differs greatly, updating only one drawer will disrupt the repeating rhythm. For an inexpensive household item, replacing the entire set can be considered. For an antique chest of drawers with original parts, it is preferable to make one copy or preserve the loss until a suitable solution is found.
Display cabinet: a fragment of the shaped molding on the door has disappeared
The surviving frame has a complex cross-section, and the modern strip matches only in visible width. Inserting it will create a step at the joint. If the item is being carefully restored, the required profile will need to be reproduced. If the owner has specifically ordered a decorative makeover of ordinary furniture, a new frame can be installed entirely — after agreement, cutting calculations, and checking the new composition. That way there is no need to mask a poor match in one small area.
These examples show why it is impossible to compile a universal list of “best overlays for restoration.” The same catalog helps solve several tasks, but the criterion for choice is dictated by the item itself.
What to include in the order to get exactly the verified execution
In a small joinery workshop, the selection is often made by one person, while the order is placed by another. Because of this, it is easy to lose nuances: the required wood species, the execution for a specific finish, the exact size of a particular item. To avoid misunderstandings, pass a brief specification to the purchaser.
| Order field | What to specify |
|---|---|
| Item and location | Sideboard, upper left part of the door |
| Part name | Carved overlay / rosette / bracket |
| Article number | Exact number from the catalog |
| Link | Full address of the specific product page |
| Dimensions | Execution A × B × C and additional drawing parameters |
| Material | Beech, oak, or another confirmed option |
| Processing | Selected sanding, preparation for finishing |
| Quantity | One insert, a pair, or a set at the craftsman's discretion |
| Orientation | Left, right, central; a mirrored pair if required |
| Installation | A scheme requiring confirmation after fitting |
| Status | Candidate / tested on a sample / approved |
If it is decided to replace, for example, two overlays on three identical fronts, the base requirement will be six items. But if some of the original overlays are retained, the order may be for just one or two pieces. You cannot automatically add a “10% reserve” to a restoration purchase: for unique elements, extra copies often have no use. The need for a spare part is decided separately, taking into account the availability of reordering and the risk of damage during preparation.
It is also useful to keep photographs of the area of loss before intervention and of the final result. For routine household repairs, this helps to repeat the agreed finish. For a historically significant item, documenting replacements and the materials used is part of the responsibility to future owners and restorers.
Where to buy wooden decor for restoring old furniture
В STAVROS carved decor catalog various types of wooden elements are presented: overlays, rosettes, brackets, and other items. It is best to start the search with the type of the lost part, and then compare actual dimensions and material options. For example, for a missing central rosette, first open the corresponding category rather than the general list of all furniture ornaments.
If you need to buy carved wooden decor for a household repair of a wardrobe or chest of drawers, first determine the free area, the pattern of adjacent parts, and the mounting conditions. For wooden overlays, filters by shape and ornament are especially useful. When choosing a new leg or handle, the geometry is supplemented by checking the working purpose and mounting location.
The cost of restoration is not limited to the price of the decorative piece. It may require measuring, creating a test sample, manufacturing fastening elements, surface preparation, finish matching, and careful installation. For a single piece with simple geometry, these operations are minimal; for a complex mirrored pair requiring individual fitting and matching of the old finish, the work may end up costing more than the applique itself.
Therefore, the query "buy wooden furniture decor" is better turned into a specific task: which element is missing, what size fits, what type of finish is needed, and how many pieces will actually have to be installed. In the STAVROS catalog you can find ready-made items, but the final suitability for an old piece is confirmed by fitting, not by the product name.
Before placing an order, it is useful to review the section materials and product quality и payment and delivery terms. For unique or historically valuable pieces, a ready-made item should only be considered after assessing its admissibility for the specific restoration task.
Frequently asked questions when selecting a replacement
Can a modern wooden applique be installed on 19th-century furniture?
Technical feasibility of installation and restoration admissibility are different questions. If an item has historical or collectible value, the origin and condition of the decoration must first be assessed. A mass-produced applique does not become a reliable replacement for a loss simply because it is made in a similar style. For ordinary furniture that the owner is deliberately altering, a different approach is possible.
What should be done if the area of loss is covered by several layers of old paint?
Do not strip the finish blindly in search of an old outline. Take photographs, note visible traces, study matching areas and the history of the piece. If information is hidden under potentially original finish, the methods of investigating it should be agreed with a restorer.
Can I order an overlay slightly larger and trim it to the required outline?
Sometimes minor adjustment of a finished element is technically possible, but it cannot be considered a universal solution. Trimming can destroy the ornament, alter the strength of the part and expose an unsuitable surface. It is far more reliable to initially look for a compatible size or order an exact copy.
Is it worth removing the remaining old decor in order to match a copy?
Only if dismantling is safe and justified. Often a photograph with a scale ruler, measurements of accessible surfaces and a careful template are enough. With valuable furniture, removing the original carving yourself can cause more harm than the absence of the second part.
What should I do if the new part matches in color but looks too new?
Compare the depth of the relief, the character of the sanding, the sheen and the contrast between raised and recessed areas. The reason for the difference is not always the tone. Do not try to correct it with crude artificial patina: first determine which visual parameter actually diverges.
Can carved decor be attached over old lacquer?
This depends on the strength and composition of the coating, the geometry of the new part and the method of attachment. Weak lacquer does not become a strong base after adhesive is applied. On a historically significant surface, it is unacceptable to choose an adhesive system without examination and assessment of the consequences of installation.
Is it necessary to buy the whole set if only one part is missing?
No. For careful restoration, the priority is usually preserving the surviving original parts. A complete replacement of the set can be justified in a coordinated decorative redesign of a household item, when a single new part does not allow for a cohesive composition.
How does ready-made wooden decor differ from an exact restoration of the original carving?
A ready-made element has a manufacturer-defined shape and finish options. A historically accurate copy is created based on reliable information about a specific lost part and must take into account its size, pattern, material, construction, and installation location. These tasks may overlap, but they are not the same.
How to make the final decision
For furniture that is used daily, ready-made decorative elements can be a practical way to replace lost wooden decor. But they should be chosen after measuring, comparing the surviving parts, and evaluating the future finish. If there is no suitable mirrored pattern, the profile does not match, or the old base would need to be destroyed, it is better to postpone the purchase.
If, however, we are talking about an item of historical value, it is not necessary to make it look "like new" at any cost. A preserved authentic overlay, a documented location of loss, and a properly planned replacement often matter more than perfectly symmetrical but inauthentic modern decor.
The practical order is unchanging: study the loss, determine the purpose of the part, take measurements, compare several options, check a real sample, and only then choose the method of finishing and installation. That way, buying decorative elements becomes a meaningful stage of restoration rather than an attempt to hide the problem with the first carving that comes to hand.