Article Contents:
- Can polyurethane moldings be glued directly onto tiles?
- Glazed ceramic tiles
- Porcelain stoneware: density does not equal readiness for gluing
- Relief tiles and incomplete adhesion of the profile
- When it is better to avoid gluing
- How to choose between a thin and a more pronounced profile
- Why regular adhesive for stucco molding is not always suitable
- Hybrid adhesives and acceptable alternatives
- Is primer needed on tile
- Why you should not use a random solvent
- Checking the strength and condition of the joints
- Removing grease and soap film
- Should smooth tile be sanded
- Test adhesion
- Along the wall axis or along the tile joints
- Calculating the length of the 1400 × 900 mm frame
- Step 1. Check the layout and do a dry fit
- Step 2. Prepare the profiles and corners
- Step 3. Apply the adhesive according to the instructions
- Step 4. Press the molding and check its position
- Step 5. Set up temporary fixing
- Step 6. Finish the corners and joints
- Step 7. Perform the final finishing
- Bathroom away from direct water jets
- Guest toilet
- Kitchen
- Hallway and transition between materials
- Can polyurethane molding be glued to glazed tile?
- Which adhesive is suitable for porcelain stoneware?
- Should tile be primed before installation?
- Can moldings be installed on porcelain stoneware without drilling?
- How to attach molding to textured tile?
- Is polyurethane decor suitable for a bathroom?
- How to treat the joint between molding and tile?
- Can glued molding be removed without damaging the cladding?
The tile is already laid, the grout is finished, the renovation is almost complete. Can polyurethane molding now be glued directly onto the cladding without removing the tile or drilling the wall? Yes, such installation is possible, but not on every surface and not with every adhesive. Smooth glaze and dense porcelain stoneware absorb almost no moisture, so a compound that reliably holds stucco on plaster may be unsuitable for a finished tiled wall.
The decision depends on four things: how firmly the cladding itself is held, what its surface is like, whether the mounting adhesive is compatible with both the tile and the polyurethane at the same time, and where the decor will be located. The dry area of the bathroom and the inside of the shower have different operating conditions. The moisture resistance of the molding does not turn a decorative joint into waterproofing.
Before installation, you need to check the tile, choose a profile with a suitable mounting surface, test the adhesive system, and draw up a layout. Then the framing can be done without unnecessary holes, and the junctions can be finished without rough adhesive buildup or damage to the glaze.
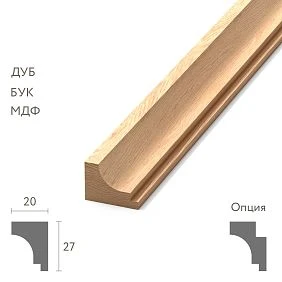
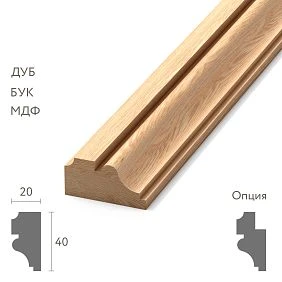

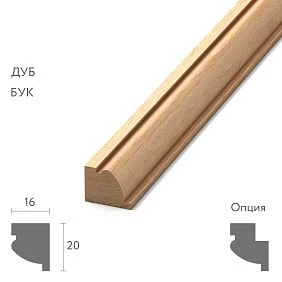
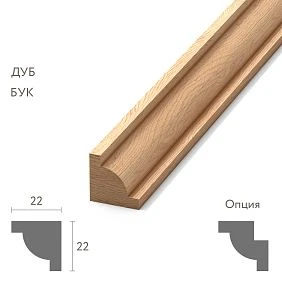
Can polyurethane moldings be glued directly onto tile




Glazed ceramic tile
The glaze forms a relatively smooth, low-absorbing layer. This is convenient for cleaning, but it changes the bonding conditions. Many conventional water-dispersion mounting adhesives require an absorbent base through which water can escape from the adhesive layer. Between the glaze and the dense profile, drying of such a compound may be too slow or incomplete.
Therefore, the phrase "suitable for stucco" is not sufficient on its own. The technical description of the adhesive must specify a bond between the selected polymer and the non-porous ceramic surface. It should also clarify whether special cleaning or priming is required.
The mirror-like gloss of the tile does not answer the question of bond strength. Two visually similar glazes may differ in coatings, contamination, and service conditions. The final decision is made after checking according to the adhesive system's instructions and performing a test bonding.
Our factory also produces:





Porcelain stoneware: density does not equal readiness for bonding
Porcelain stoneware typically has low water absorption, but its face surface may be polished, matte, structured, or additionally treated during production. The installation compound must be suitable for that specific surface. Test results obtained on matte tiles cannot be transferred to polished porcelain stoneware without verification.
A separate issue is the impregnations and protective agents that may have been used during maintenance. Sometimes they are almost invisible, but they reduce adhesive grip. Before decorative installation, you need to determine what the cladding was treated with and whether its manufacturer permits the chosen cleaner.
Get Consultation
Relief tiles and incomplete profile contact
On structured tiles, the molding touches the surface only at the peaks of the relief. Air gaps remain between them; near the joints, recesses are added. If you simply fill them with a thick layer of installation adhesive, the bond will have unpredictable geometry, and the profile may end up wavy.
First, dry-fit the strip. If it rocks on the protrusions, does not hold a straight line, or leaves large open cavities, it is better to avoid direct bonding. A different design is possible — for example, a separate prepared mounting strip, if it is permitted for this cladding assembly. But you must not level the relief with an arbitrary adhesive thickness without the manufacturer's approval.
| Cladding | Main difficulty | What to check before installation |
|---|---|---|
| Smooth glazed tiles | Low absorbency | Adhesive compatibility with the glaze, cleanliness and adhesion |
| Polished porcelain stoneware | Dense surface, possible protective treatments | Acceptable cleaning method and test bonding |
| Matte porcelain stoneware | Different nature of the surface and contaminants | Suitability of the composition specifically for this coating |
| Structured tiles | Uneven installation area | Actual fit of the profile without bending |
| Cladding with cracks or delamination | Unreliable substrate | The cause of the defect and whether the tile can be repaired |
When it is better to avoid gluing
Do not install the molding over tiles that are separating from the substrate, move when pressed, or have opening cracks. The adhesive will bond the decor to the face surface, but will not restore the strength of the entire cladding.
The second limitation is permanently wet areas, especially when the waterproofing behind the tiles is in questionable condition. A decorative profile does not eliminate a leak and must not cover an area that requires repair or inspection. It is also not permitted to cover functional expansion joints, inspection hatches, or openings for utility systems.
Which STAVROS polyurethane moldings to choose for a tiled wall
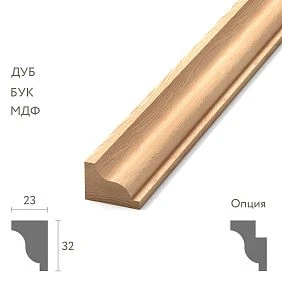
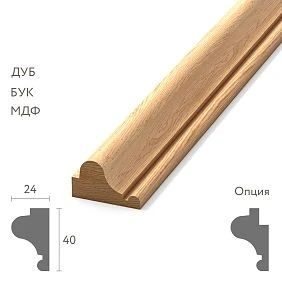
A narrow decorative frame on large-format porcelain stoneware and a wide relief band next to small tiles are perceived differently. The size should be chosen according to the scale of the wall, the cladding pattern, and the distance to neighboring elements. But there is another criterion in installation: the visible width of the molding is not always equal to the width of its adhesive area.
A semicircular profile can appear voluminous even though its contact area with the substrate is small. Therefore, before purchasing, it is useful to study the cross-section drawing and, if possible, check a sample at the installation location.
| Model STAVROS | Size, mm | Suitable decorative task |
|---|---|---|
| MLDPU-001 | 10 × 6 × 2600 | A thin outline of a small frame or a neat dividing line |
| MLDPU-004 | 15 × 8 × 2600 | A restrained decorative framing on the wall |
| MLDPU-027 | 14 × 9 × 2600 or 20 × 12 × 2600 | A convex line in two different scales |
These dimensions refer to the products, not to the permissible adhesive thickness or suitability for installation in a shower. The possibility of fixing each profile on a specific tile is determined separately.
How to choose between a thin and a more pronounced profile
Let's imagine a tiled wall with a narrow pier 300 mm wide. If two vertical lines of a wide relief molding are placed on it, the space between them will visually contract. Here, the thin MLDPU-001 or MLDPU-004 may be more appropriate. On a wide wall, on the contrary, the more noticeable option MLDPU-027 will allow you to get a readable frame without an additional second contour.
When choosing, also consider the projection of the profile. In a hallway or near a passage, an overly bulky strip more often comes into contact with bags, furniture and cleaning equipment. Polyurethane wall moldings should not be regarded as protective bumpers: they are intended primarily for decorative finishing.
The range for comparing patterns and dimensions is presented in the section STAVROS polyurethane mouldings. If additional corner pieces are needed, first check the geometric compatibility of the decor with the selected profile.
What to use to glue polyurethane moulding to tile
Why ordinary adhesive for stucco is not always suitable
On plaster and glazed tile, the same adhesive composition works under different conditions. On a porous substrate, some of the moisture or solvent can escape into the thickness of the wall; on two low-absorbency surfaces, the curing mechanism is different. Therefore, an adhesive that holds molding perfectly on prepared plaster cannot automatically be transferred to porcelain stoneware.
You should choose not by the single word "mounting" but by the technical description: whether polyurethane and ceramic tile are permitted, whether work on a non-porous surface is possible, and whether the composition is suitable for vertical application and a wet room.
Hybrid adhesives and acceptable alternatives
There are hybrid polymer mounting adhesives intended for certain non-porous substrates, including tile. However, the name of the chemical group itself does not guarantee compatibility with any polyurethane, glaze, or protective coating. Checking the pair of materials remains mandatory.
Another nuance concerns curing. Some one-component adhesives use moisture from the air for the chemical reaction. If such a composition is thoughtlessly spread as a continuous impermeable film between two dense surfaces, its inner layer may cure incorrectly. The application pattern — in strips, beads or separate sections — is chosen solely according to the instructions for the specific product.
For a detailed comparison of installation and jointing material classes, the STAVROS guide is useful on choosing adhesive for polyurethane stucco mouldings. When working on tiles, a check of the non-porous substrate is added to the general recommendations.
| Criterion | What must be confirmed |
|---|---|
| Compatibility | Indication of polyurethane and ceramics or porcelain stoneware of the appropriate type |
| Non-porous substrate | Approved for use on glaze and other dense surfaces |
| Initial fixing | Need for holding or temporary support of the profile |
| Curing method | Permitted thickness and application pattern between low-absorption materials |
| Moist areas | Direct instruction from the manufacturer regarding the relevant conditions |
| Painting | Possibility and timing of applying the finish coat |
| Removing excess | Removal method before and after curing without damaging the tile |
Is priming over tile necessary?
Not always. Some adhesive systems do not require preliminary priming of non-porous surfaces. Others provide for a special adhesion promoter or treatment with a cleaner-primer. A universal primer for plaster does not become suitable just because the packaging says "for walls".
If the instructions permit installation without primer, you should not apply an extra layer just in case: instead of bonding to the tile, the adhesive may end up bonded to a film of unknown strength. If priming is mandatory, use exactly the compatible system and follow its technology.
Why you should not use a random solvent
An aggressive solvent can damage the varnish, decorative glaze, factory coating of the profile, or the polymer itself. Do not use acetone, strong strippers, or other products without confirmed compatibility. For cleaning, first choose a product recommended by the tile or adhesive manufacturer and test it on an inconspicuous area.
How to prepare tile and porcelain stoneware before installation
Checking the strength and condition of the joints
Inspect the intended fixing strip. The tile should be free of delamination, cracks, loose areas of glaze and unstable joints. Careful tapping can help identify suspicious areas, but sound alone cannot reliably determine the condition of the adhesive layer. If the tile moves, cracks or there are signs of water penetrating behind the cladding, diagnostics and repair are carried out first.
Check the position of the tile joints relative to the back of the profile. A standard grout joint does not necessarily prevent installation, but a recess under the moulding reduces the actual contact. If the frame crosses an expansion joint, the layout must be changed: such a node must not be rigidly bridged.
Removing grease and soap film
In the kitchen, ceramic tiles are often covered with a thin film of grease, especially near the stove. In the bathroom, soap residue, limescale and previously applied water-repellent agents get in the way. A surface that looks clean is not always suitable for bonding.
Remove contamination with products compatible with the cladding. After washing, thoroughly remove any cleaner residue and wait until fully dry. Pay particular attention to old silicone: many installation adhesives bond unreliably to its residue. It should be removed in a way permitted for the surface, without scratching the glaze.
Should smooth tiles be sanded?
You must not automatically matte the glaze with sandpaper. The abrasive will leave irreversible scratches, especially noticeable on glossy cladding. For some adhesives, special surface preparation is indeed specified, but its conditions must be set by the manufacturer of the adhesive system. If such an operation is required, first assess whether treatment is acceptable for the specific tile and carry out a test.
Test bonding
Before marking out the entire wall, test a small offcut of the chosen moulding on an inconspicuous area of tile that is comparable in condition, or on a sample of the same cladding. Prepare the surface and apply the adhesive exactly according to the instructions. Allow the full curing time at the required temperature and humidity.
After that, assess not only the peel force but also the nature of any failure: whether the adhesive comes away from the glaze, from the polyurethane, or whether the tile coating itself is damaged. Testing on an existing wall may leave marks, so spare tiles are preferable. A home test helps to rule out obviously unsuitable solutions, but it does not replace engineering testing for critical structures.
How to mark out mouldings on a tiled wall
Along the wall axis or along the tile joints
A decorative frame can be centered relative to the visible part of the wall or tied to the tile layout pattern. These solutions do not always coincide.
For example, a wall 2800 mm wide is clad with offset-pattern tiles. If the edge of one row is taken as the axis of the entire composition, the frame may appear visually shifted relative to the mirror or vanity. First determine the main reference point: the center of the plumbing fixture, the actually visible wall field, or the symmetrical axis of the room. Then check how the moldings cross the joints.
You should not try to mask every grout line with a decorative profile. Often a straight frame, positioned independently on large-format tiles, is perceived as calmer than a composition that follows the random run of the joints.
Calculating the length of a 1400 × 900 mm frame
For a rectangular frame whose outer dimensions are specified at the long points of the corner cuts, the required total length of the sides is:
L = 2 × (1400 + 900) = 4600 mm.
The STAVROS profile of the models under consideration has a length of 2600 mm. Two profiles give 5200 mm, and for such a frame the following preliminary cutting plan is possible:
| Plank | First part | Second part | Nominal remainder before cuts |
|---|---|---|---|
| No. 1, 2600 mm | 1400 мм | 900 мм | 300 мм |
| No. 2, 2600 mm | 1400 мм | 900 мм | 300 мм |
Cutting is possible provided that the lengths are specified according to the correct extreme cut points, and the total losses for kerfs and trimming do not exceed the remaining allowance. If 1400 × 900 mm is the inner opening of the frame, the outer dimensions must first be recalculated taking into account the cross-section of the selected profile.
For multiple frames, do not divide the total linear meters by 2600 without a cutting plan. A segment that formally fits into the sum may not be obtainable from short offcuts. The placement of corner cuts and the saw blade width also affect actual consumption.
Step-by-step installation of polyurethane moldings on tile
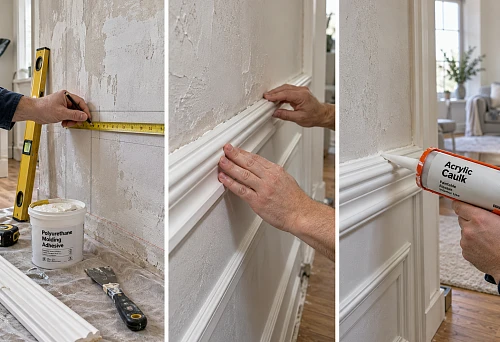
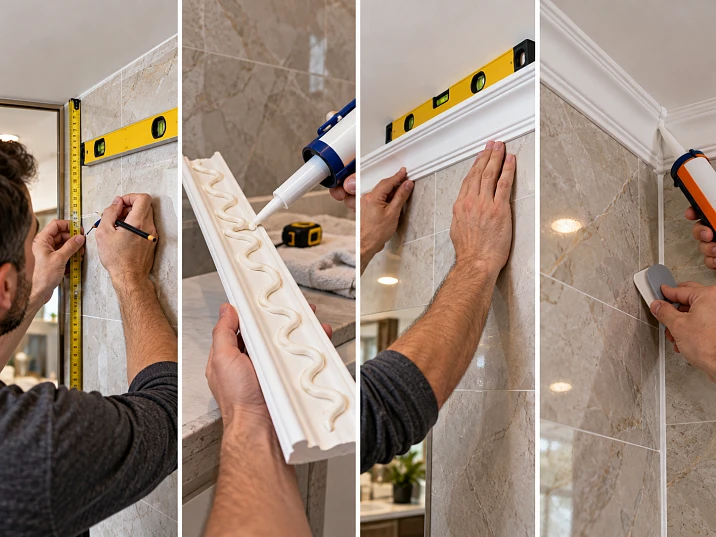
Step 1. Check the markings and perform a dry fit
Transfer the frame outline to the wall using a level and pencil or temporary marks that are safe for the glaze. Place the parts without adhesive. Check the straightness of each section and the position relative to the joints, adjacent sockets, faucets, and cabinet doors.
If the profile passes over recessed joints, assess the actual contact area. The molding should not visibly wobble, sag, or bend when pressed. Any problem found must be resolved before gluing.
Step 2. Prepare the profiles and corners
Check that the item codes and cross-sections match. Different sizes of MLDPU-027 must not be accidentally mixed within a single continuous frame. Cut the pieces with a miter saw or a suitable fine-tooth tool, avoiding chipping. For a standard rectangle, the top and side elements are fitted with paired 45° cuts.
Dry-fit the frame on a flat surface. If the corners do not meet, correct the cutting rather than planning to fill a large gap with finishing putty. If necessary, make the end joints with a compatible compound specified by the mounting system manufacturer.
Step 3. Apply the adhesive according to the instructions
Clean dust from the back side after cutting. Apply the adhesive only using the pattern permitted by the manufacturer: in strips, as separate beads, or by another specified method. Observe the thickness and consumption limits. For non-porous substrates, it is especially important not to disrupt the curing mechanism of the compound.
Do not rely on the universal rule that "the more adhesive, the more reliable." Excess can squeeze out onto the face surface, contaminate the tile joints, or leave the molding raised above the tile.
Step 4. Press the molding and check its position
Install the first element according to the markings, press it evenly along the designated mounting area, and check with a level. Depending on the chosen system, holding or re-pressing may be required at the time specified in the instructions.
Immediately remove fresh adhesive residue with an approved cleaner. Do not scrape it off the glaze with a metal blade and do not rub it into porous grout. Once cured, adhesive can sometimes only be removed mechanically, which risks damaging the finish.
Step 5. Set up temporary fixing
If the initial adhesion is insufficient, use the temporary supports specified by the technology. Masking tape is acceptable only if it is compatible with the tile and the profile coating: strong-adhesive tape can leave marks or damage the decorative layer.
The temporary fixative must not bend the strip or pull it toward the cladding protrusions. Remove it only after the holding time specified by the adhesive manufacturer. The absence of visible displacement immediately after installation does not yet mean full curing.
Step 6. Finish the corners and joints
Join the ends using the method suitable for the selected profile and adhesive system. The mounting adhesive for bonding to the tile, the jointing compound for the ends, and the material for cosmetic filling of a small abutment may be three different products.
After installation, check the frame lines and corners. If a joint is moving or opening up, do not proceed straight to filling — first find out why the parts have not been secured.
Step 7. Carry out the finishing
After the main adhesive joint has fully cured, check the edges of the moulding. Small, stable gaps may be finished with a compatible finishing material. Protect the tile and joints with tape intended for the specific surface, and remove it within the time appropriate for the compound used.
Paint only when the adhesive, jointing and finishing materials are appropriately ready. If the profile has a factory primer, this does not exempt you from checking the compatibility of the finishing paint. General techniques for fitting, joining and painting are described in the STAVROS material on installing polyurethane moulding.
How to seal the abutment of moulding to tile
A decorative abutment and a waterproofing detail serve different purposes. A thin finishing seam along the edge of the profile removes the visible gap but does not make the wall waterproof. In a bathroom, waterproofing must be provided by the cladding construction regardless of whether polyurethane decor is present.
It is especially dangerous to cover movement joints with moulding. They are designed to compensate for movement of the cladding or substrate. A rigid decorative overlay glued simultaneously to both sides of such a joint can interfere with its operation and may itself crack. Here the composition must be changed, or a special structural solution developed that does not block movement.
For an ordinary small fixed joint, choose a compound compatible with both tile and polyurethane, taking into account its paintability and the operating conditions. Not every waterproof silicone can be painted; not every paintable acrylic sealant is suitable for a permanently wet area. Preference is given to a documented system rather than a promise of “permanently sealed.”
To preserve a clean glaze, first test the residue remover on an inconspicuous area. Avoid spreading the product widely over the grout: porous joints can retain dirt noticeably more strongly than the tile face.
Where moldings are appropriate on tiled walls
Bathroom away from direct water jets
The wall above the vanity unit or a free area near the mirror can be decorated with thin frames if the cladding is dry and sturdy and the fastening system is approved for the relevant humidity. Access to utilities, switches and inspection elements should be maintained.
Inside the shower, the requirements are stricter: direct and regular exposure to water, wet cleaning and limescale removers increase the load on the joints. If the suitability of all materials is not confirmed, it is wiser to move the decor to a less wet area. The choice of profile for such conditions is further covered in the article about stucco decor for the bathroom and toilet.
Guest bathroom
A small guest bathroom often has limited space and narrow wall sections. Here, a concise frame made of a thin profile works better than several massive contours crossing the tile joints. Before mounting, make sure the decor will not interfere with opening furniture and cleaning behind the sink.
Kitchen
In the kitchen, moldings can be placed on part of the tiled wall outside the immediate area of intense heat and constant grease splashes. Near the stove, check the temperature limits of the specific product and adhesive, the requirements for distances to heated surfaces, and the care conditions. If cleaning involves frequent use of strong degreasers, an open relief profile may prove impractical.
Hallway and transition between materials
In a hallway, porcelain stoneware sometimes covers the lower part of the wall, with paint or decorative plaster starting above. A molding can frame the boundary, but it must not automatically be used to cover a structural joint or an unstable edge of the cladding. Such connections require their own technique. Transition scenarios are discussed separately in the article about moldings for joints between tiles and other finishing materials.
Seven mistakes when gluing moldings to tiles
1. Choosing adhesive based only on the label “for stucco”. The composition may be designed for porous plaster, but not for glaze. The consequence is weak adhesion or incomplete curing. The solution is to check the technical tolerances for both surfaces and make a test bond; re-glue an already detached profile after removing the failed layer.
2. Installation over silicone, grease, and soap film. These contaminants separate the adhesive from the tile. The problem is prevented by cleaning, followed by removing detergent residue and drying. If the molding has already come off, simply adding adhesive over the contamination will not help.
3. Trying to fill deep tile relief with adhesive. The profile rises, waves, and part of the joint remains weak. Before installation, a dry fit and an assessment of the actual mounting area are needed. If the fit is unsatisfactory, choose another location or change the design solution.
4. Gluing to poorly secured tile. Even strong adhesive will not hold cladding that is separating from the substrate. Before decorative work, the tile must be restored; if the decor is already installed, repairs begin by identifying the cause of detachment.
5. Covering an expansion joint. The molding prevents the intended movement, which creates a risk of cracks and detachment. The decor line must be moved or a special movable assembly must be agreed upon.
6. No dry fit. After applying adhesive, mismatched miters or a conflict with the tile pattern are discovered. Prevention is to assemble the frame dry, check its diagonals and layout. If the part has already been fixed incorrectly, removal may sometimes be required, with a risk of damaging the tile.
7. Painting before full curing. Defects at the joints may appear under the finish layer, while fresh compounds are still changing state. Observe the curing times for each material; after painting, first diagnose a crack rather than hiding it with another coat of enamel.
Frequently asked questions
Can polyurethane molding be glued to glazed tile?
Yes, if the glaze is clean and sound and the selected fastening system allows polyurethane to be bonded to non-porous ceramic. Ordinary adhesive for stucco molding without such approval is risky to use. Before the main installation, it is best to test the bond on a spare tile or in an inconspicuous area, observing the full curing time.
Which adhesive is suitable for porcelain stoneware?
A product is required that has explicitly confirmed compatibility with polyurethane and the corresponding porcelain stoneware surface. Some hybrid polymer adhesives are designed for dense substrates, but you cannot choose based on the name of the chemical group alone. Consider the curing method between non-porous surfaces, vertical fastening, and room humidity.
Should the tile be primed before installation?
Only if this is specified by the selected adhesive system. Some products are applied to prepared glaze without primer, while others require a special adhesion promoter. A random universal primer may create an additional weak layer. Before work, study the adhesive instructions and verify the compatibility of all products used.
Can moldings be installed on porcelain stoneware without drilling?
In many decorative applications this is possible with a suitable adhesive fastening. However, the absence of holes does not by itself guarantee that the repair is reversible: during removal, the glaze, grout, or decorative coating may be damaged. For a heavy or load-bearing structure, the solution must take into account calculations and manufacturers' requirements, not just ease of installation.
How to attach molding to textured tile?
First you need to check how evenly the mounting side of the profile sits against it. If contact remains only on the tops of the raised areas and the strip rocks or flexes, ordinary gluing may be unreliable. A thick layer of adhesive is acceptable only within the technical requirements of the chosen system; sometimes it is better to abandon such an installation.
Is polyurethane decor suitable for a bathroom?
The material itself can be used in rooms with high humidity, but the reliability of the finish also depends on the adhesive, the coating, the condition of the tiles and the location of the element. For areas with constant direct exposure to water, confirmed suitability of the entire system is required. Moulding does not replace waterproofing and does not eliminate defects in the tiling.
How should the joint between moulding and tile be treated?
For a small, non-moving gap, use a compatible finishing compound suited to the conditions of the room and to subsequent painting. It should not be confused with installation adhesive or with material for a full waterproofing detail. Movement joints in the cladding must not be rigidly sealed with an ordinary decorative filler.
Can glued moulding be removed without damaging the cladding?
This cannot be guaranteed. Strong mounting adhesives can bond so well to the tile that removal will require mechanical separation, which may leave marks or damage the glaze. If the possibility of future removal matters, this must be taken into account before choosing the fastening system and, possibly, a continuous decorative adhesive application should be avoided.
What to check before ordering and installation
Polyurethane moulding on a tiled wall should be part of a pre-planned design, not a way to hide a defect in the tiling. For a reliable result, first check that the tile is sound and that there are no functional joints under the future frame. Then compare the profile cross-sections, calculate the length of each piece and draw up a cutting plan. Separately, select an adhesive with confirmed compatibility with polyurethane and the chosen ceramic surface.
If the surface is textured, constantly wet, or damaged, it is better to change the mounting location or abandon the decorative element. On a sound base, after a test joint, you can proceed to marking, dry fitting, gluing, and careful finishing of the abutments. You can choose a suitable pattern and product length in the STAVROS polyurethane decor catalog, checking the characteristics of a specific molding before placing an order.