Article Contents:
- Can polyurethane moldings be installed on uneven walls?
- Which defects actually get in the way
- Why you shouldn't force a rigid profile to follow curves
- Checking with a straightedge and side light
- Dry fitting — a check you can't skip
- Remove coatings that won't hold the adhesive
- Fix bumps and hollows
- Sand, remove dust and prime
- 1. Mark out the composition
- 2. Calculate the parts and do a dry fit
- 3. Apply adhesive and install the profile
- 4. Check the joints before the adhesive sets
- 5. Fill small gaps and paint
- A small, even gap with a secure fastening
- The molding is pulling away from the wall
- A crack at the painted joint between two pieces
- Can molding be glued without fully leveling the wall?
- Should the surface be primed before installation?
- Are liquid nails suitable?
- How to fill the gap between the molding and the wall?
- What should I do if the molding has come unglued after painting?
- Can ordinary polyurethane molding be bent?
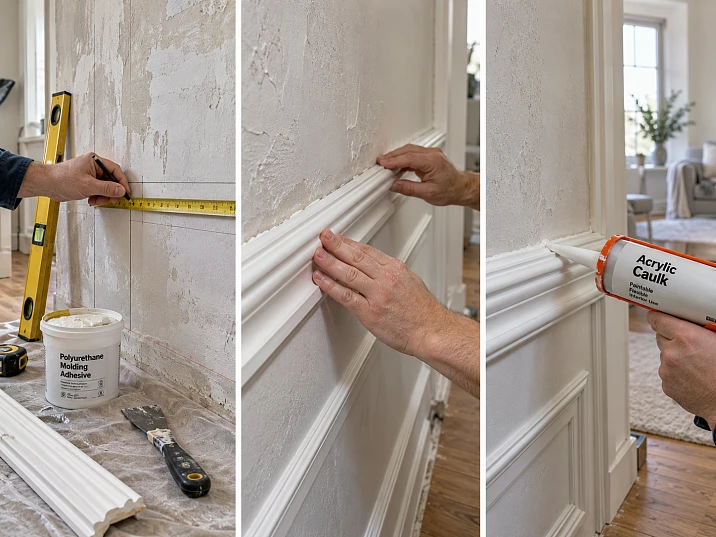
A long molding was placed against the wall, and gaps appeared between its back side and the plaster. In one place the profile touches the base, half a meter away it pulls away from it, then it fits snugly again. If you apply adhesive right away and press the strip, the defect will not disappear: the line may turn out wavy, and in places of loose contact the fastening will be unreliable.
Polyurethane wall moldings can be installed on a base with small local irregularities if these areas are prepared in advance and the profile can be fixed without noticeable bending. In cases of pronounced waves, fragile plaster, or peeling paint, the wall is repaired first. Mounting adhesive does not replace leveling compound.
Below is the procedure from checking the wall to painting. It will help determine which gaps may be finished after installation and when it is better to postpone gluing so as not to redo the entire frame.




Can polyurethane moldings be installed on uneven walls?
The decision depends not on the fact of unevenness itself, but on its location relative to the future fastening line. A small depression away from the profile will not interfere with the work. A narrow protrusion that ends up directly under its mounting area can rotate the entire strip and create a gap in the adjacent section.




Which defects actually interfere
Plaster protrusions form individual support points. When pressed, the molding touches the protrusion, but its adjacent sections remain raised. Depressions reduce the contact area with the adhesive. A wavy surface is especially noticeable under a long straight profile: the eye perceives the difference between a straight decorative line and an uneven wall boundary.
There is another situation: the wall as a whole deviates from the vertical, but within the area under the frame it remains flat. The tilt itself does not yet mean poor fit. However, next to a door casing, furniture panel, or in a corner, it can disrupt the geometry of the composition. Therefore, both the plane of the base and the position of the future lines are checked.
| Surface condition | What happens during installation | What to do before installation |
|---|---|---|
| Small protrusion in the mounting strip | The profile rests on a single point and lifts at the edges | Remove the protrusion, then check with a straightedge |
| Local shallow depression | Reduces contact between the mounting area and the wall | Fill with suitable putty, dry and level |
| Alternating protrusions and depressions | The long strip runs in a wave or is held under tension | Level the installation strip along its entire length |
| Peeling paint or loose filler | The adhesive is holding onto a weak layer that may come away from the wall | Remove the unstable coating down to a solid base |
| Uneven angle between walls | The trimmed ends do not meet without a gap | Check the actual angle and fit the parts on site |
| Damp surface | Adhesion and drying of materials become unpredictable | Eliminate the source of moisture and wait for the substrate to dry |
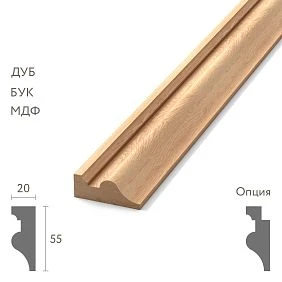
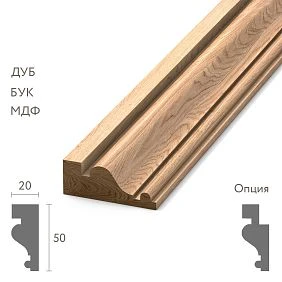
Our factory also produces:






Why you shouldn't force a rigid profile to follow curves
A standard polyurethane wall molding is a molded piece designed to retain its geometry. Slight elastic compliance does not turn it into a flexible strip. If a rigid profile is pressed against a wavy wall with force, it may tend to return to its original position once the temporary fastening is removed. The load will fall on the adhesive, the butt joints, and the thin layer of finish along the edge.
So the goal is not to hide the gap by any means possible, but to ensure stable adhesion without forced bending. For a curved surface, look for a flexible profile specifically designed for it and check the permissible bending radius against the manufacturer's data.
Get Consultation
How to check the wall before buying adhesive
For an initial diagnosis, a long spirit level, a level, or a laser line projector, a pencil, and a flashlight are enough. Check specifically along the strips where the moldings will run, not just in the middle of the wall.
Checking with a spirit level and side light
Place the level against the surface along the intended top line of the frame. Do not press it so hard that it bends. Look for where a gap appears and where the tool rests against a protrusion. Repeat the check on the vertical sides and the bottom line. Mark the problem areas with a pencil: "protrusion," "depression," "weak paint."
Move the level slightly above and below the installation line. This is necessary because the profile has width, and the adhesive contacts the wall not along the drawn axis but within the installation area. Direct the light along the wall — side lighting will reveal small waves that are almost invisible under general ceiling light.
A level serves a different purpose: it shows the horizontal and vertical alignment of the decorative frame. A straight line relative to the floor and a flat surface under the adhesive are different checks. A well-aligned strip may be tilted; geometrically correct marking will not eliminate a depression under the profile.
Dry fitting — a check you can't skip
Attach a whole strip or a piece of suitable length without glue. Align it with the markings and press it lightly with normal installation force. Look at both edges, not just the front face. If one end fits snugly while the other has to be held in place by hand, the base is not ready yet.
Pay especially close attention to the areas near the door casing and in the inner corners. There, even a small protrusion is more noticeable, since a second straight line is nearby for the eye to compare the molding against.
There is no universal allowable gap in millimeters. It depends on the geometry of the specific profile, the width of its contact surfaces, and the requirements of the chosen adhesive. A practical criterion is more reliable: after correcting the base, the profile should seat into place without noticeable bending, and the mounting area should provide the contact intended by the manufacturer.
Which polyurethane molding to choose for a difficult wall
The width of the front face and the mounting area are not the same thing. Two profiles with the same visible width can have a different shape on the back. That is why, when choosing, you look not only at the pattern but also at the cross-section of the product: where the support surfaces are located, whether there are technical recesses, and how the adhesive will be applied.
A narrow decorative wall molding creates a fine line, but it can sometimes be more sensitive to small lateral distortions. A wide profile covers a larger strip of the wall, but it may simultaneously run into several protrusions. Therefore, one cannot promise that one of the options will automatically hide unevenness better.
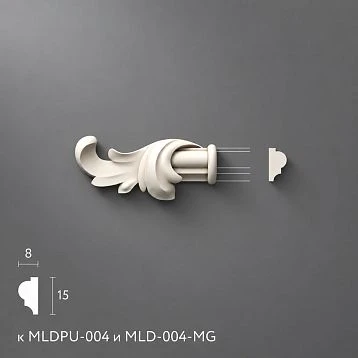
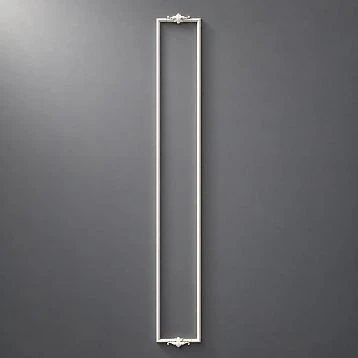
For rectangular compositions, the STAVROS catalog offers, in particular, the following products. Dimensions are given according to the manufacturer's product cards; the first value is the width of the front profile, the second is its projection, and the third is the length of the strip.
| Model | Size, mm | Which composition to consider |
|---|---|---|
| MLDPU-004 | 15 × 8 × 2600 | Thin frames and additional inner contours |
| MLDPU-002 | 22 × 11 × 2600 | Base frames with more pronounced light and shadow |
| MLDPU-003 | 35 × 12 × 2600 | Large frames where a wide relief contour is needed |
This comparison refers to the scale of the pattern, not to the permissible curvature of the walls. Before ordering, it is useful to place a sample of the chosen profile against the base. The full range is available in the section of polyurethane moldings.
Preparing an uneven wall for installation
Remove coatings that will not hold the adhesive
Run a putty knife along the edges of old cracks, blisters and peeling paint. Remove anything that is loosely attached. If the wall is covered with wallpaper, it is safer to clear a strip for the future attachment and work on the prepared mineral base: the strength of wallpaper adhesive is not equal to the strength of the installation bond.
A strong painted coating does not always need to be removed completely, but its compatibility with the installation compound must be checked. Glossy and poorly wettable surfaces may require special preparation. A questionable area is best tested by trial bonding on a small offcut, following the adhesive instructions.
Fix protrusions and depressions
Remove the protrusion neatly and carefully with a suitable tool, without damaging the adjacent plaster. Apply filler to the recess, one intended for the given substrate and required layer thickness. If the waves repeat along the entire frame, spot patches often create new steps. In that case, level a continuous strip wider than the future profile.
Check the result with a rule before it is completely dry only in the way permitted for the mix used; assess the final geometry after it has fully dried. A thick layer of a randomly chosen finishing filler can crack. Significant differences will require a material and technique designed for such leveling, and sometimes a full plaster repair.
Sand, remove dust and prime
Carefully sand the dried surface until the protruding transitions disappear. Remove dust with a vacuum cleaner and a clean brush. If you wiped the substrate with a damp cloth, let it dry. A dusty wall, even a perfectly flat one, remains a poor substrate for adhesion.
Choose the primer based on both the wall type and the requirements of the mounting adhesive. A porous plaster layer, durable old paint and a dense non-absorbent surface each need different preparation. Do not consider any deep-penetrating primer a universal solution. Observe the drying time from its instructions; only after that, repeat the dry fitting of the molding.
What to fasten moldings with: three materials with different purposes
The query “filler for polyurethane moldings” often comes up after installation, when a gap is visible. But choosing the finishing compound before the mounting adhesive is a mistake: they do not replace each other.
| Material | What it is for | What they should not do |
|---|---|---|
| Construction adhesive | Fixes the profile to the prepared surface | Compensate for significant curvature with a thick adhesive layer |
| Joint adhesive or compound | Joins the ends if this is provided for by the mounting system | Substitute it for wall fastening without the manufacturer's instructions |
| Compatible filler or paintable sealant | Finishes small fixed defects and junctions | Hold a detaching molding or cover a moving joint |
Check whether the manufacturer permits the specific adhesive for polyurethane and your substrate. The label "liquid nails" alone guarantees nothing: products with different chemical bases and purposes are sold under this name. For joining ends and finishing gaps, also choose materials recommended for the system in use.
Manufacturers of decorative profiles separately emphasize the need for a dry, clean, strong and even surface. At the same time, instructions for mounting and jointing compounds may differ: rely on the documents for the materials actually purchased, not on universal times and consumption rates.
Step-by-step installation of moldings on a prepared wall
1. Mark out the composition
Mark the outer dimensions of the frames and check the verticals and horizontals. If there is a noticeably sloped ceiling or floor near the wall, decide in advance which line should be the visual reference. Blindly copying the floor slope can make the frame look crooked, while a strictly horizontal bottom edge will emphasize the difference in distance to the baseboard. Verify the decision on site using temporary markings.
Keep in mind the actual distance to sockets, switches, door casings and furniture. A few millimeters of clearance on the drawing can disappear due to the width of the profile's face.
2. Calculate the parts and do a dry fit
Calculate the length of each side of the frame taking into account the chosen joining method, then draw up a cutting plan. The sum of lengths does not equal a guaranteed sufficient number of strips. For example, you need five separate vertical parts of 1400 mm each. Their total length is 7000 mm. Three strips of 2600 mm give 7800 mm — mathematically there is enough material. But each strip will yield only one whole 1400 mm part; five parts will require five strips if cross joints cannot be used.
On frame compositions, waste can be reduced by combining long and short sides on one blank. Take into account the kerf width and the possibility of re-trimming the ends. Additional diagrams are provided in the guide how to calculate moldings and stucco decor for a wall.
Lay out the cut elements on the floor in the order of installation. Dry-fit the corners. The angle between walls is not always exactly 90°, so final fitting is best done against the actual location, not just by the miter box graduations. Detailed techniques for trimming and joining corners are collected in a separate guide for installing polyurethane molding.
3. Apply adhesive and install the profile
Prepare the adhesive according to the manufacturer's instructions. Apply it to the mounting areas provided on the back side, following the application pattern and quantity. Do not spread the compound arbitrarily over the decorative surface and do not try to fill a deep wall recess with it.
Align the molding with the marking line, press it evenly along its length and check the position with a level. If the instructions allow temporary fixing, use a suitable method that does not damage the surface. Do not try to force a separate section of the strip against the remaining protrusion: this easily results in a crooked frame and a stressed joint.
4. Check the joints before the adhesive sets
Look along both edges of the installed profile. At this point you may notice a shift relative to the markings, a loose corner, or a section that does not hold without pressure. If the defect is related to the wall geometry, it is too early to fix it with finishing putty. Stop work and eliminate the cause in the manner permitted by the adhesive being used.
Remove excess adhesive using the method specified by the manufacturer and within the established time. After hardening, some compounds can only be removed mechanically, at the risk of damaging the relief.
5. Seal small gaps and paint
After the installation joint has cured, check whether the profile moves under light pressure. Only treat stable small joints: a compatible paintable sealant may be suitable for a narrow boundary between the wall and the molding, and a suitable finishing compound for a small immobile defect at the joint. The specific choice depends on the width, mobility, and manufacturer's recommendations.
Apply the compound carefully, remove excess without smearing it over the relief. After complete drying and any permitted treatment, prepare the surface for painting. The procedure for working with paints and primed products is covered in the material about painting polyurethane moldings.
Five mistakes that cause gaps and cracks
Gluing over weak paint. At first the result may look neat. Later the profile comes away together with the paint film. Prevention — remove peeling layers and check the strength of the substrate before gluing.
Trying to level the wall with adhesive. Thick areas of adhesive set and behave differently from the layer specified in the instructions. The fastening turns out uneven, and the molding may shift. Prevention — level the wall with a separate suitable material and only then install the profile.
Forcibly bending a rigid strip. Before painting, the line appears straight thanks to temporary supports. After they are removed or over time, the joints open up and the ends crack. Prevention — dry fitting and correcting the surface; for real bends, use a special flexible profile.
Cutting all corners without checking against the wall. The frame corners are formally made identical, but on a real base the end faces diverge. Prevention — test-fit the elements in pairs and refine the geometry on site before applying adhesive.
Painting too early. The mounting and finishing compounds are still changing state as they dry, which causes a crack or a visible stripe at the junction line. Prevention — follow the curing and painting times for each compound used, rather than choosing a single waiting time "by eye".
How to fix gaps on already installed moldings
First, distinguish the three defects. They look similar but require different repairs.
A small even gap with a secure fastening
If the strip does not move, the edge does not lift, and the gap is superficial, remove dust and remnants of weak old compound. Check whether filling is permitted with the chosen material. Carefully finish the junction, wait for it to dry, and paint the area if necessary. Do not fill the gap before checking the fastening: the decorative seam must not become the only holding element.
The molding is pulling away from the wall
If the gap closes with light pressure and opens again when released, the problem is probably not cosmetic. Check where the failure occurred: the adhesive came off the wall, off the profile, or together with the paint and filler. This will point to the cause — an unprepared base, an incompatible compound, or stress from bending.
If the bond is broken, you usually need to carefully remove the problem section, remove adhesive residue in accordance with its properties, restore the base, and reinstall. Simply patching the edge on top can only delay repeated detachment.
A crack at the painted joint between two parts
A narrow, non-moving crack may be a defect in the finishing layer: it is removed locally and restored with a compatible compound. But if the ends diverge, are movable, or sit at different heights, painting alone is not enough. You need to check the joint, the fit, and the cause of the movement, and then restore the assembly according to the rules of the chosen installation system.
It is useful to inspect such a defect in side light. A dark strip of paint often looks like a deep gap, whereas a genuine open joint is noticeable by the change in the distance between the parts when lightly pressed.
When it is better not to install moldings
Postpone installation if the wall remains damp, the coating is crumbling, the surface is noticeably wavy along the entire length of the frame, or the strip has to be constantly held in a bent position. If the distance to sockets and architraves is insufficient, it is sometimes wiser to change the dimensions of the composition than to trim the relief in random places.
If the task is to hide a significant wall defect, molding is often not suitable as a standalone solution. A straight decorative line can even emphasize the curvature of the adjacent surface more strongly. First bring the base into order, then choose the pattern and dimensions of the profile.
Questions and answers
Can molding be glued without fully leveling the wall?
Yes, if the defects are local, the mounting strip is prepared, and a dry fit shows stable contact without bending. It is not necessary to level the entire room for the sake of one frame, but protrusions directly under the profile must not be left.
Should the surface be primed before installation?
Usually yes, after cleaning and the necessary leveling. The type of primer and its compatibility with the adhesive are determined by the base and the instructions of the selected installation system.
Are "liquid nails" suitable?
Only a specific formulation, if it is expressly intended for the polyurethane profile being used and the given base. Relying on a general trade name without checking the formulation is not acceptable.
How do I fill the gap between the molding and the wall?
For a small, stable joint, use a compatible paintable sealant or another recommended finishing compound. If the molding is coming away and moving, restore the fastening first.
What should I do if the molding has come unstuck after painting?
Determine what has delaminated: the adhesive, the paint, or the filler. Remove the weak layers, restore the base, and re-glue the area with a suitable compound. New paint over the defect will not strengthen the bond.
Can an ordinary polyurethane molding be bent?
A standard rigid profile should not be considered flexible. For a curved wall, choose a special version with a confirmed permissible bending radius.
What to Check Before Ordering
Start with three questions: can the substrate withstand gluing, does the chosen profile match the actual lines of the frame, and does the cutting plan allow all parts to be obtained at the required length. Only after that should you determine the number of strips, the adhesive, and the materials for finishing the joints. If the check reveals waves or a weak coating, the cost of preparing the wall should be included in the work in advance.
Polyurethane moldings on walls look neat where a straight line rests on a properly prepared surface. After removing protrusions and depressions, dry-fitting, and reliable fastening, small finishing gaps can be closed without trying to mask serious unevenness. You can choose a profile of the required width and pattern in the STAVROS catalog by comparing cross-sections and the length of the blanks before purchasing.