Article Contents:
- What to measure before buying moldings
- Wall width
- Wall height
- Furniture placement
- Doors, windows, outlets, and switches
- Baseboard and crown molding
- How to calculate a simple frame from moldings
- How to choose offsets
- Indent from floor and baseboard
- Indent from ceiling
- Indent from corners
- Distance between frames
- Centering relative to furniture
- When to choose a ready-made set
- Which elements to add to moldings
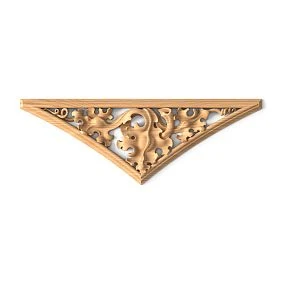
- Corner decor
- Central overlays
- Vertical elements
- Decor for moldings
- Accent wall kits
- Practical formulas: calculation table
- Example calculation for a real wall
- Calculation errors
- Didn't account for margin
- Didn't account for corner trimming
- Didn't check symmetry
- Didn't account for furniture
- Bought elements from different styles
- What to buy after calculation
- Frequently asked questions
Good news: how to calculate moldings for a wall— это задача с чёткой логикой и несколькими простыми формулами. Никакой высшей математики. Только замеры, пропорции и внимательность к деталям — и результат будет точным с первого раза.

What to measure before buying moldings
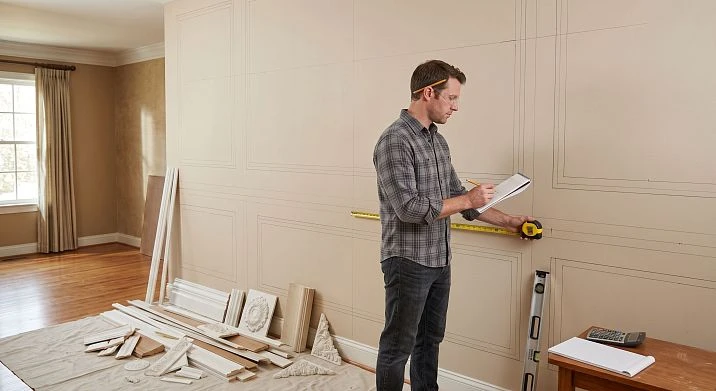
Before opening the catalog and adding items to the cart, sit down with a tape measure and notepad, and go through each wall parameter. It takes twenty minutes — but saves a day of returns and delivery surcharges.




Wall width
Wall width is the horizontal dimension of the surface being decorated. Measure with a tape measure from corner to corner, from corner to door opening, or between two openings. If the wall is divided by a door or niche into several separate sections — measure each zone separately, do not combine them into one number.
Record: the width of the wall (or each zone) in centimeters. This will be the basis for calculating the width of frames and distances between them.
Our factory also produces:


Wall height
Height is measured from the finished floor level to the ceiling. Important nuance: if you plan to install a ceiling cornice and floor baseboard — subtract them from the total size. Molding frames are placed in the working area of the wall: between the top edge of the baseboard and the bottom edge of the cornice.
For example: ceiling height is two hundred seventy centimeters, cornice is ten centimeters, baseboard is eight centimeters. Working height: 270 – 10 – 8 = 252 centimeters.
Record: the working height of the wall in centimeters.
Get Consultation
Furniture placement
If a sofa, bed, console, or cabinet will be placed against the wall being decorated, the molding frames should be aligned with these objects, not placed arbitrarily. Measure the width of the furniture and its planned position relative to the wall. A frame centered on the sofa is perceived as a planned design detail. A frame accidentally shifted to the side is seen as an installer's error.
This is especially critical for the headboard of a bed: frames and decorative overlays must be perfectly symmetrically centered relative to the bed, not relative to the wall as a whole.
Doors, windows, outlets, and switches
These are "exclusion" zones — areas that must not be covered by moldings. Measure the location of each outlet, switch, door, and window opening. Mark them on the wall diagram. Moldings should bypass these elements or account for them when constructing the frame grid.
Important: molding never covers an outlet. If an outlet falls within the frame area, the frame must be redesigned by moving the molding to the side.
Baseboard and ceiling cornice
If the baseboard and cornice are already installed, measure their height and record the distance from the ceiling and floor. If not yet installed, decide on the planned dimensions. These parameters affect the working height of the wall and the position of the lower horizontal line of the frames. The molding frame should not be flush against the baseboard — an indentation of at least five to eight centimeters is needed.
How to calculate a simple molding frame
Let's start with the basic formula for a single rectangular frame. This is the simplest case — one frame per wall or zone.
Frame perimeter = (frame width × 2) + (frame height × 2).
For example: a frame 80 cm wide and 180 cm high. Perimeter: (80 × 2) + (180 × 2) = 160 + 360 = 520 centimeters = 5.2 linear meters.
Add a margin for corner trimming: 15–20% of the total perimeter. Total: 5.2 × 1.2 = 6.24 linear meters. Round up — order 6.5 meters.
If there are multiple frames — calculate each separately, then sum them up and add a single margin of 15–20%.
Formula for multiple frames: (Σ perimeters of all frames) × 1.2 = total molding length in linear meters.
Molding is sold by linear meters or standard lengths (most often 2 meters). Convert the obtained meters into the required number of lengths and always round up, not down.
Calculating moldings for a wallit is most convenient to do on a paper diagram: draw the wall to scale, place the frames, measure each side — and only then take the calculator.
How to choose margins
Proper margins are what distinguishes professionally executed decor from amateur work. It is the proportions of the margins that determine whether the frame will look organic or hang on the wall like a random rectangle.
Indentation from the floor and baseboard
The minimum indentation of the lower horizontal of the frame from the top edge of the baseboard is five to eight centimeters. This creates "air" between the baseboard and the frame, preventing them from visually merging.
In classic and neoclassical interiors, this indentation is often increased to ten to fifteen centimeters — especially with high baseboards from eight to twelve centimeters. Rule: the higher the baseboard, the larger the indentation from it to the frame.
Indentation from the ceiling
The upper horizontal of the frame should not touch the ceiling cornice. The indentation is at least five to eight centimeters from the lower edge of the cornice. In rooms with high ceilings (three meters and above), the indentation can be increased to fifteen to twenty centimeters — so the frame does not "stick" to the ceiling and maintains spatial independence.
Indentation from corners
The indentation of the side verticals of the frame from the internal corners of the wall is at least seven to ten centimeters. This is the standard for apartment spaces. In country houses with wide walls, the indentation from the corner can be larger — up to twenty to thirty centimeters, especially if pilasters are planned at the corners.
For walls adjacent to doorways, the indentation from the edge of the door frame to the side vertical of the frame is at least ten to fifteen centimeters. This way, the frame is not "cut off" by the door and is perceived as an independent, complete form.
Distance between frames
If there are several frames on the wall, the distance between them should be a multiple of the molding width or visually proportional to the width of the frames. The typical distance between adjacent frames is three to five centimeters for tightly packed systems and ten to fifteen centimeters for more free compositions.
Key principle: the distances between all frames on the wall must be equal. Any discrepancy immediately catches the eye — especially if there is a repeating pattern or straight horizontal lines nearby that serve as a reference.
Centering relative to furniture
As already mentioned, the frame is centered not on the wall, but on the piece of furniture — a sofa, bed, or console. This means that the central axis of the frame must align with the central axis of the furniture. Measure dimensions symmetrically from this axis in both directions. More about building symmetrical systems in the topic symmetric polyurethane wall decor.
When it's better to choose a ready-made set
Here is an honest answer to a question many are shy to ask: when the calculation becomes complicated, it's better not to struggle — it's better to choose a ready-made set.
ready-made sets of stucco decor for walls solve the selection problem for you. The set already includes moldings of the required length, corner elements in the needed quantity, overlays for accent zones — everything is calculated for a specific wall or decorative area format.
A ready-made set is optimal in the following situations:
-
You are working with stucco decor for the first time and are unsure about calculations
-
Standard wall format — three meters wide, two fifty to two seventy high
-
You want guaranteed stylistic unity of all elements
-
No time to manually select each item
For non-standard walls — very wide, very high, with non-standard geometry — manual calculation is preferable because kits are designed for standard formats.
Buy a ready-made set of stucco decor — this is not a compromise, but a reasonable choice that saves time and eliminates assembly errors.
Which elements to add to moldings
Moldings are the structure. But a complete decorative system consists of several types of products, each performing its own role.
Corner decor
Decor for Molding — corner blocks installed at profile intersections. Number of corner elements: four pieces per rectangular frame. For a wall with three frames — twelve corner blocks. This is a fixed number, independent of the frame size.
Corner blocks are selected from the same collection as the moldings — this ensures matching relief and scale. Buying different corner blocks for the same molding is a mistake that is immediately visible during installation.
Central overlays
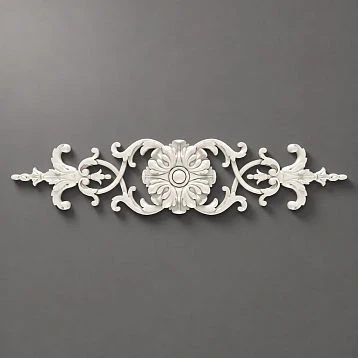
decorative wall overlays — one piece per frame where a decorative accent in the center is intended. The overlay is chosen so that its height does not exceed twenty to thirty percent of the frame's internal height.
Overlays are not required in every frame — sometimes it's enough to place them only in the central frame of the wall, leaving the side ones clean. This creates a hierarchy: the main accent is the center, the side frames are support.
Vertical elements
Vertical decorative inserts inside frames are an additional tool for adjusting proportions. If the frame is too wide — a vertical insert divides it into two narrower sections. If it's too "square" — it visually stretches it upward. More on this in the articleVertical wall decor made of polyurethane.
Decor for moldings
In addition to corner blocks, there are decorative inserts for the center of horizontal and vertical planks — the so-called "molding decor." These are small relief details installed in the center of long molding runs — especially relevant for large frames with long sides.
Kits for an accent wall
If the goal is to create a full decorative accent wall, rather than just a few frames — refer toReady-made molding frames for the wall. There, ready-made solutions for different accent wall formats are collected, indicating all necessary elements.
Practical formulas: calculation table
For convenience — a summary calculation logic in a structured form:
| Element | Calculation formula |
|---|---|
| Molding (linear meters) | Σ perimeters of all frames × 1.2 (20% reserve) |
| Corner blocks | 4 pieces × number of frames |
| Decorative overlays | 1 piece × number of frames with accent |
| Reserve for trimming | +15–20% of the calculated molding quantity |
| Indent from baseboard | Minimum 5–8 cm |
| Indent from cornice | Minimum 5–8 cm |
| Distance between frames | 3–15 cm (same for all) |
Calculation example for a real wall
Let's take a specific case: a living room, the wall behind the sofa, width 380 cm, working height (without baseboard and cornice) — 240 cm. We plan three vertical frames in a row.
Step one. Indent from each side edge: 10 cm. Indent between frames: 10 cm. Total: (10 × 2) + (10 × 2) = 40 cm goes to indents between three frames and on both sides. Available width for frames: 380 – 40 = 340 cm. Width of one frame: 340 ÷ 3 = ~113 cm.
Step two. Frame height: working height 240 cm minus bottom indent 8 cm and top indent 8 cm = 224 cm.
Step three. Perimeter of one frame: (113 × 2) + (224 × 2) = 226 + 448 = 674 cm = 6.74 m. Perimeter of three frames: 6.74 × 3 = 20.22 m. With a 20% margin: 20.22 × 1.2 = 24.26 m. We order 25 linear meters of molding.
Step four. Corner blocks: 4 × 3 = 12 pieces. Overlays: 1 for the central frame. Total to order: molding 25 linear m, corner blocks 12 pcs., overlay 1 pc.
Errors in calculation
Did not include a margin
The most common mistake. "I calculate exactly" — and at the first cut, ten centimeters are missing for the last strip. Always order with a 15–20% margin. Molding from the same batch will be identical in color and relief — the remainder will go into reserve in case of damage during installation.
Did not account for corner cutting
When installing moldings without corner blocks, the profile is cut at forty-five degrees at each corner of the frame. This means that additional profile length is spent on each corner — from two to five centimeters depending on the width. With eight corners (two frames), this is already sixteen to forty centimeters beyond the calculated perimeter. If corner blocks are not used — add another five percent to the margin.
Did not check symmetry
It would seem everything is calculated correctly, but the frames on the wall are asymmetrical. Reason: symmetry must be checked relative to the furniture, not just the wall. Before installation, apply markings with a pencil, stretch a plumb line and a spirit level — and only then apply the glue. The principles of symmetrical systems are discussed in detail in the topicpolyurethane wall moldings.
Did not account for furniture
The frames were calculated from the edge of the wall, but the sofa is not at the very edge — and the central frame ended up shifted. Always tie the calculation to the furniture, not just the architectural boundaries of the wall.
Bought elements from different styles
Moldings from the "Neoclassic" collection, corner blocks from "Versailles Light", overlays without a collection. This is not just an aesthetic mistake — elements from different collections may differ in profile height and not match at the joint. Always buy everything from one collection — this principle has no exceptions.
What to buy after calculation
When the calculation is ready and all numbers are fixed, it's time to move on to the purchase. Here is what should be in your order:
Polyurethane moldings — the main consumable material.Buy moldings for wall framestaking into account the calculated quantity and a 20% reserve.
Decor for moldings — corner blocks, four pieces per frame.Buy Decor for Moldingsfrom the same collection.
Decorative overlays — for frames with a central accent.decorative wall overlays— one or two pieces depending on the scheme.
Ready-made kit — if you don't calculate manually.Buy stucco wall decoras a ready-made kit — faster and more reliable.
Installation materials — polyurethane glue, acrylic sealant for joints, painter's tape for fixing until dry. Installation is impossible without them — don't forget to include them in your order. Full installation instructions are in the articleinstalling polyurethane molding.
Frequently Asked Questions
How to calculate the number of moldings for a wall?
Calculate the perimeter of each frame: (width × 2) + (height × 2). Add the perimeters of all frames. Multiply by 1.2 (20% reserve). Convert to linear meters — that's your order.
How many meters of molding are needed for one frame?
For a frame 100 × 200 cm, the perimeter will be (100 × 2) + (200 × 2) = 600 cm = 6 meters. With a 20% reserve: 7.2 meters. Round up to 7.5 or 8 meters.
What indents should be made for moldings?
From the baseboard and cornice — at least 5–8 cm. From the corners of the wall — 7–10 cm. Between frames — 5–15 cm, the same for all gaps.
How to calculate moldings for a living room?
Determine the number and sizes of frames considering the position of the sofa or TV. Calculate the perimeter of each frame, add them up, add a 20% reserve. Corner blocks: 4 pieces × number of frames.
How to avoid mistakes with the quantity?
Always draw a diagram to scale. Don't estimate by eye. Add a 20% reserve. Check symmetry before installation. Take all elements from the same collection.
What is better: manual calculation or a ready-made kit?
For standard walls, a ready-made kit is faster and more reliable. For non-standard formats, manual calculation offers more flexibility. Regardless of the choice, all elements must be from the same collection in the catalog.Polyurethane wall decor.
Can I buy moldings according to a ready-made scheme?
Yes. Ready-made schemes and recommendations for assembly are collected in the topicready-made sets of stucco decor for walls— there are options for different wall formats and interior styles.