
























































Article Contents:
- What you need to know about wooden moldings before installation
- Oak, beech and MDF moldings: how the installation technology differs
- Why wooden trim should acclimatize to the room
- Which profiles are easier to install yourself
- How to check the evenness and strength of the base
- Concrete and plastered wall
- Installing wooden moldings on drywall
- Mounting on wooden panels and MDF
- Construction adhesive for wooden moldings
- Finishing nails for concealed fastening
- Screws and combined fastening
- How to choose a fastening method
- Calculating a single rectangular frame
- How much material is needed for multiple frames
- Why total square footage is sometimes not enough
- How to reduce waste
- Step 1. Check the received items
- Step 2. Mark the frames on the wall
- Step 3. Cut the wooden profiles
- Step 4. Assemble the frame without glue
- Step 5. Apply mounting adhesive
- Step 6. Secure the elements
- Step 7. Check the geometry
- Step 8. Treat the joints and fastening holes
- 45° miter cut for a rectangular frame
- What to do if the angle is not 90°
- Joining moldings along the length
- How to prepare joints for painting
- Moldings for enamel
- Clear lacquer, oil and tinting
- Paint before or after installation
- 1. Installing wood with unsuitable moisture content
- 2. Fastening to a weak substrate
- 3. Using unsuitable adhesive
- 4. Installation without a dry fit
- 5. Incorrect miter cuts on corners
- 6. Overly rigid fastening
- 7. Careless hole finishing
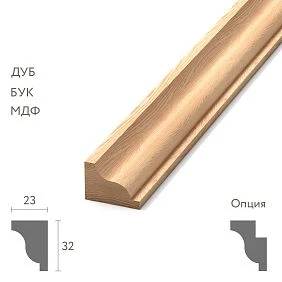
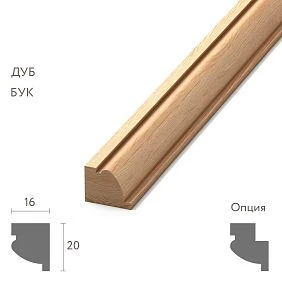
- MLD-002 — compact profile 22 × 11 mm
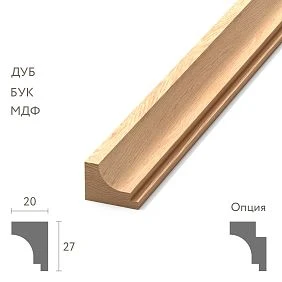
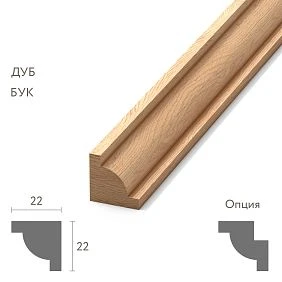
- MLD-028 — profile 25 × 11 mm
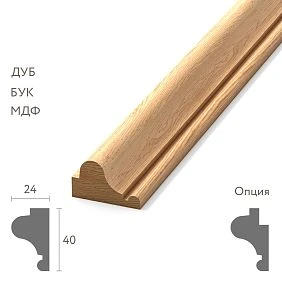
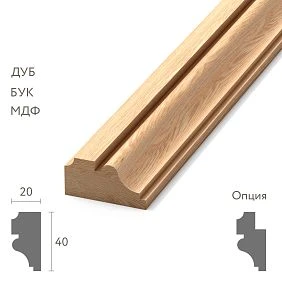
- MLD-024 — profile 40 × 25 mm
- Can wooden moldings be attached with glue only?
- What should I use to glue an oak molding to a painted wall?
- How do I attach a wooden molding to drywall?
- Should moldings be painted before installation?
- How do I properly join wooden moldings at 45°?
- What should I use to fill holes from finish nails?
- Why did gaps appear between the profiles after installation?
- Can wooden moldings be used in a room with high humidity?
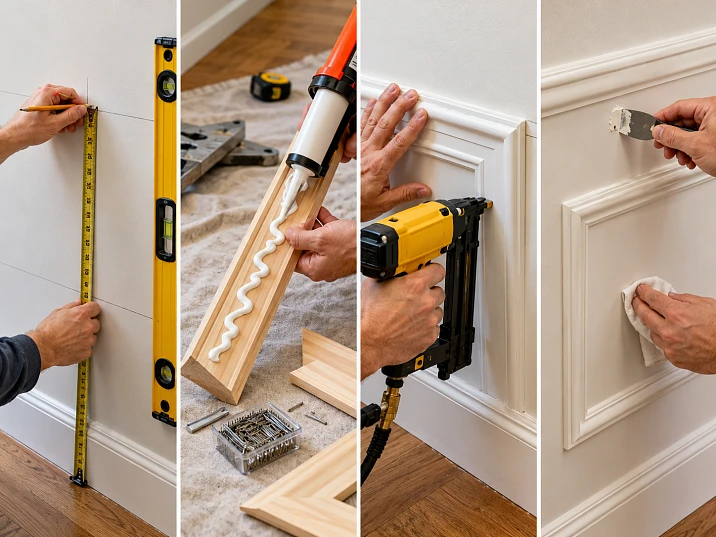
A wooden molding can be perfectly sanded, have a precise profile and a beautiful wood grain, yet gaps still appear on the wall after installation. Most often the problem is found in the corners of decorative frames: at first the pieces fit tightly together, but after some time a dark gap becomes noticeable between them. Sometimes a long strip begins to pull away from the base, or the painted seam cracks along its edge.
The reason is not always the quality of the adhesive. Natural wood changes dimensions with fluctuations in humidity, and a rigid strip cannot follow the unevenness of plaster without creating internal stresses. If incorrect cutting or a weak substrate is added to this, even carefully executed installation turns out to be short-lived.
To properly attach wooden moldings to a wall, three things must be coordinated: the condition of the wood, the substrate material, and the method of fixation. A small beech profile on a solid painted wall is sometimes sufficiently secured with a compatible mounting adhesive. For a large oak molding, especially on a drywall partition, a combined fastening with mechanical fixation may be required.
The future finish also matters. Small fastener holes can be hidden under opaque enamel. Under clear varnish or oil, any poorly placed fastening point will remain visible.
Therefore, the installation of wooden moldings begins long before the adhesive is applied — with checking the profiles, the wall, humidity conditions, and the layout of the future composition.

What you need to know about wooden moldings before installation




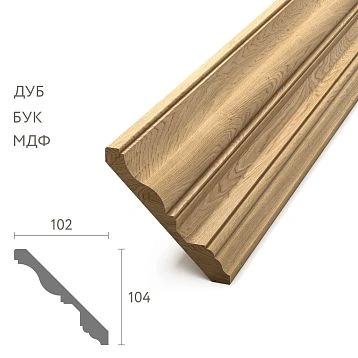
Oak, beech, and MDF moldings: how the installation technology differs
Externally identical decorative wall moldings can behave differently depending on the material.
Oak is distinguished by high density, pronounced texture, and clearly visible pores. It is often chosen for finishes that preserve the natural wood pattern. When fastening oak profiles, the hardness of the material should be taken into account: a finish nail set too close to a thin end can cause splitting. For critical locations, it is preferable to pre-drill pilot holes of a suitable diameter.
Beech has a more uniform texture and is well suited for coating with opaque enamel. At the same time, beech is sensitive to changes in humidity. If a product has been in a cold or damp room for a long time and then ends up in a dry heated room, its dimensions may change. This is especially noticeable on tightly fitted corner joints.
MDF is a wood-fiber material, more uniform in structure than solid natural wood. It has no pronounced direction of wood fibers, so the nature of dimensional changes and processing differs from oak and beech. However, MDF is also sensitive to moisture, especially on untreated ends. With improper fastening, the edge can crumble, and excessively moistened material can swell.
| Material | Installation specifics | What to pay attention to |
|---|---|---|
| Oak | High density, durable profile, possible splitting at the end | Pre-drilling, careful trimming, color-matched filler |
| Beech | Uniform surface, suitable for enamel, reacts to moisture | Stable room conditions, precise joining, end protection |
| MDF | Uniform geometry, easy to process for painting | Protection of end sections, careful fastening, adhesive compatibility |
It is necessary to distinguish between solid and glued wood. In a glued blank, individual wooden elements are joined together during production. This design allows for efficient use of material and produces long profiles, but does not eliminate the natural ability of wood to change dimensions.
When choosing products for a clear finish, check in advance the grain direction, shade differences, and the nature of the lamella joints. After lacquering, these features become more noticeable.
Our factory also produces:
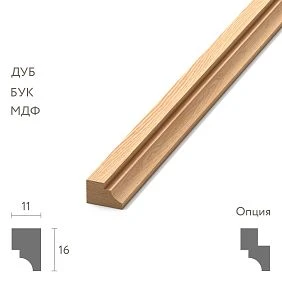
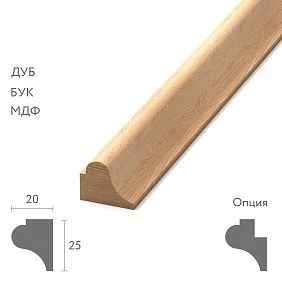
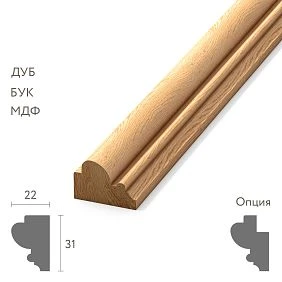
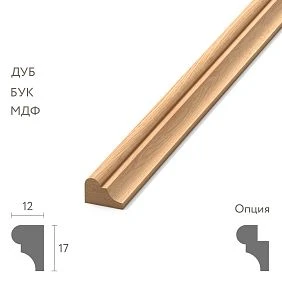
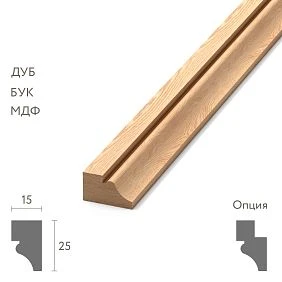
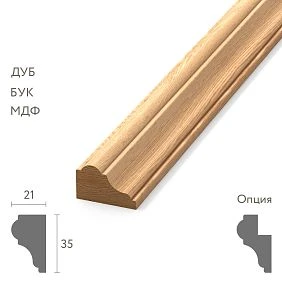
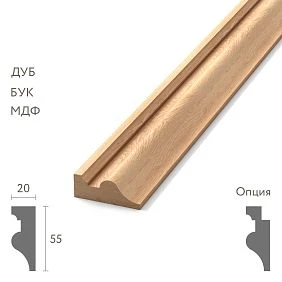
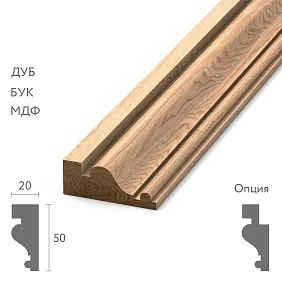
Why wooden mouldings must adapt to the room
Imagine two identical beech planks. One has been kept for several days in a heated room with stable humidity, while the other was stored in a cold warehouse. After installation, they may react differently to the room's microclimate.
Wood tends to reach equilibrium with the humidity of the surrounding air. If it releases moisture, its dimensions decrease; if it absorbs moisture, they increase. Changes in cross-sectional dimensions are usually more pronounced than in longitudinal ones. However, even small changes in geometry can affect the precision of decorative joints.
Before installation:
-
Inspect the packaging and make sure the products have not become wet during transport.
-
Place the moldings in a dry room where they will be used.
-
Store long planks on a flat support that prevents sagging.
-
Do not place wood directly against heating appliances.
-
Check the humidity of the room and, if necessary, of the wood itself.
-
Follow the manufacturer's recommendations for storage conditions and acclimatization before installation.
There is no universal number of days after which any wooden molding becomes ready for installation. What matters is the initial moisture content of the product, its dimensions, the wood species, and the conditions of the room.
If the finishing work still involves intensive drying of plaster or screed, it is too early to install wooden trim.
Get Consultation
Which profiles are easier to install yourself
Straight moldings of small cross-section with a sufficiently wide and even mounting surface are the easiest to work with.
A narrow profile is convenient for small frames, but it requires careful placement of fasteners: the distance from the hole to the edge may be insufficient.
A wide relief molding is more noticeable on the wall, but it is harder to press against a base with local irregularities. Additional protrusions and recesses complicate corner treatment and hole masking.
For a first DIY installation, it is reasonable to choose a profile without complex ornamentation, with well-defined geometry and a back side that is easy to fasten.
Preparing the wall for installing wooden moldings
How to check the evenness and strength of the base
A long wooden strip acts as a kind of straightedge. Where a short decorative overlay may fit without problems, a two-meter molding immediately reveals the waviness of the wall.
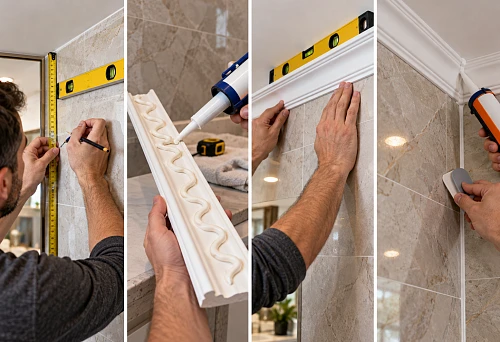
Place a spirit level against the future fastening line. Check several positions: horizontal, vertical, and diagonal. Mark the protrusions, depressions, and areas where the surface is crumbling.
Then do a dry fit of the molding itself.
If the profile fits in the middle but pulls away at the edges, the cause may be a convex wall or a warped strip itself. To distinguish between these situations, place the molding against a surface known to be flat.
You cannot expect mounting adhesive to correct significant wall unevenness. A thick, uneven layer of adhesive does not replace plaster and does not provide a predictable bond strength.
Concrete and plastered wall
Concrete must be cleaned of dust, construction dirt and weak coatings. Smooth, dense substrates may require special preparation suited to the chosen adhesive.
The plastered surface must be sound. If the top layer crumbles when scraped with a putty knife, gluing the molding will not solve the problem: the bond will rely on material that is poorly connected to the wall.
The preparation procedure is as follows:
-
Remove peeling paint, filler and weak areas of plaster.
-
Repair local irregularities with a suitable leveling compound.
-
Wait until the repaired areas are completely dry.
-
Sand the transitions and remove dust.
-
If necessary, apply a primer compatible with the mounting system.
-
Recheck the plane with a straightedge.
If decorative wooden moldings are installed on the wall after the renovation is complete, separately check the strength of the existing paint.
On a poorly adhering coating, the adhesive may peel off together with the paint layer. A test bonding of a small offcut helps assess the compatibility of materials, although it does not replace following the manufacturer's instructions.
Installing wooden moldings on drywall
A drywall partition requires particular attention to load distribution.
A lightweight decorative profile may sometimes be glued directly to the prepared cladding if its condition and the chosen adhesive allow such use.
For more massive products, long protruding elements, or structures subject to additional load, fastening to the frame or to pre-installed backing may be required.
It should be taken into account that a finish nail driven only into the drywall sheet is not a full replacement for fastening to the load-bearing base.
Before drilling or mechanical fastening, determine the location of the frame profiles and concealed utilities.
Fastening to wooden panels and MDF
For a wooden base, adhesive bonding, finish nails, and combined installation are possible.
But first check the panel's finish. An adhesive that bonds well to untreated wood may be unsuitable for a lacquered or laminated surface.
There is one more limitation: if the panel itself is installed with allowance for temperature and humidity movement, you must not blindly connect adjacent moving parts with molding. The fastening scheme must account for the design of the entire cladding.
| Base | What to Check | Possible fastening method |
|---|---|---|
| Concrete | Strength, cleanliness, geometry, adhesive compatibility | Installation adhesive, and suitable anchor fasteners if needed |
| plaster | No loose or peeling layers | Adhesive; mechanical fixation through the base if needed |
| Painted wall | Paint strength and adhesion of the selected adhesive | Compatible mounting adhesive, test bonding |
| Gypsum board | Sheet condition, frame and insert placement | Adhesive or combined fastening per project |
| Wooden panel | Panel strength, coating condition | Adhesive, finishing nails or self-tapping screws |
| MDF | Coating condition, edge and base strength | Compatible adhesive, specified mechanical fasteners |
How to attach wooden moldings to the wall: adhesive, nails or self-tapping screws
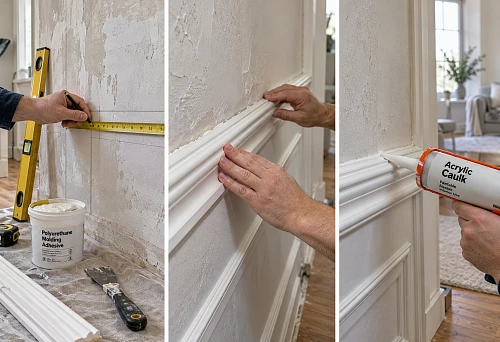
Mounting adhesive for wooden moldings
Adhesive fastening is attractive primarily because there are no visible holes on the front surface. It is especially convenient for small wall frames that will be painted or coated with a clear finish.
However, not every adhesive is suitable for solid wood.
When choosing, it is necessary to check:
-
Suitability for use on oak, beech, or MDF.
-
Compatibility with the specific wall substrate.
-
Ability to attach vertical decorative elements.
-
Requirements for the absorbency of surfaces.
-
Permissible adhesive layer thickness.
-
Need for temporary fixation.
-
Conditions and timeframes for full curing.
-
Possibility of subsequent painting of adjoining areas.
For example, a compound designed to bond porous surfaces may require at least one absorbent substrate. When gluing a lacquered molding to a painted wall, both surfaces may turn out to be weakly absorbent.
Therefore, the material should be selected according to the technical instructions, not according to the word "universal" on the packaging.
Apply the adhesive to the back side of the molding as specified by the manufacturer. Press the piece evenly, without allowing its straightness to change. If the adhesive requires mechanical fixation during setting, this condition must be met.
Finishing nails for concealed fastening
Finishing nails are used to secure wooden profiles to a suitable substrate. Their small heads can be countersunk below the surface and covered with a finishing compound.
When working with oak and beech, it is especially important to take into account the risk of splitting.
Do not drive the nail flush against the end or thin edge of the product. If the profile is narrow or the wood is dense, pre-drill a pilot hole of the appropriate diameter.
Countersink the head carefully using a nail set. Too strong a blow can leave a dent around the hole or split the decorative protrusion.
When installing on a concrete wall, a standard finishing nail without a suitable fastening system is not used. For such a substrate, the fastening elements specified by the technology are required.
Self-tapping screws and combined fastening
Self-tapping screws are suitable where additional controlled fastening is required and the profile dimensions allow a hole and a countersink for the head to be made safely.
This method can be used for a wide range of wooden mouldings and elements installed on wooden blocking.
The sequence is as follows:
-
Determine the permissible fastening points based on the profile cross-section.
-
Mark the holes, avoiding thin decorative edges.
-
Drill pilot holes.
-
If necessary, prepare countersinks for the heads.
-
Fasten the profile without overtightening the fasteners.
-
After checking the geometry, cover the holes with a suitable material.
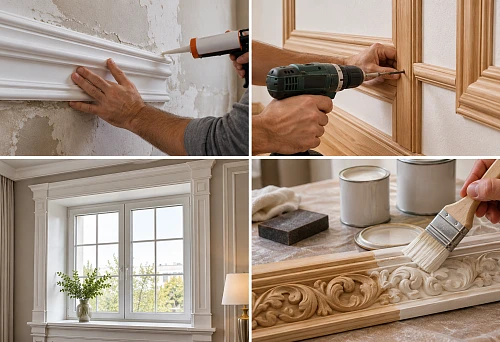
The combined system combines mounting adhesive and mechanical fastening. The adhesive ensures contact with the prepared substrate, while the fasteners hold the product at the designated points.
But additional screws will not fix a warped profile or an improperly prepared wall.
How to choose a mounting method
| Installation conditions | Preferred approach |
|---|---|
| Small lightweight molding, solid even surface | Compatible mounting adhesive |
| Narrow profile on a wooden panel | Adhesive or suitable finishing nails |
| Long profile made of dense solid wood | Assess the need for combined mounting |
| Large molding on drywall | Check the possibility of mounting into the frame or blocking |
| Molding for clear lacquer | Minimize visible fastening points |
| Need for subsequent disassembly | Provide mechanical fastening if the design allows |
When choosing, consider not only the weight of the product, but also the shape of its cross-section, the contact area with the wall, the condition of the substrate, and the appearance requirements.
What tools are needed for installation
Installation quality is largely determined by the accuracy of measurement and cutting. Even a correctly selected adhesive will not fix a miter joint whose ends do not align from the start.
| Tool | Purpose |
|---|---|
| Tape measure and metal ruler | Measuring lengths and marking parts |
| Spirit level or laser level | Checking horizontals and verticals |
| Square and angle finder | Checking straight and non-standard angles |
| Miter saw | Precise cutting of moldings at a specified angle |
| Miter box with a suitable saw | Cutting a small amount of trim |
| Builder's rule | Checking base evenness |
| Assembly gun | Applying adhesive |
| Clamps and temporary fasteners | Holding parts during assembly |
| Drill bit, nail set, fastening tool | Preparation and installation of mechanical fasteners |
| Abrasive materials | Finishing edges and finishing areas |
You will also need the selected adhesive, mechanical fasteners if required, materials for treating holes, and a suitable finish coating.
When sawing, wear safety glasses and arrange for the removal of wood dust. The strip being worked on must be securely fixed, especially if it is short or has a complex profile.
How to calculate the number of wooden moldings
Calculation for one rectangular frame
For a simple frame, the length of the molding is calculated using the formula:
L = 2 × (H + W)
Where:
-
L — total profile length;
-
H — frame height;
-
W — width of the frame.
For example, a frame measuring 800 × 1200 mm requires:
L = 2 × (800 + 1200) = 4000 mm.
That is, 4 linear meters excluding waste.
But here it is necessary to clarify along which line the dimensions were measured: along the outer contour, the inner contour, or a specific axis of the profile.
For a frame with 45° mitered corners, the length of the blank is usually determined by the distance between the corresponding extreme points of the cuts. If you measure the inner opening and then order material without accounting for the width of the molding, the parts may not be enough.
How much material is needed for several frames
For two frames measuring 800 × 1200 mm, you will need:
2 × 4000 = 8000 mm.
Total — 8 linear meters of profile excluding waste.
Suppose a wooden moulding is chosen, supplied in strips 2400 mm long.
Each of the four blanks can accommodate one vertical piece 1200 mm long and one horizontal piece 800 mm long. The total is 2000 mm. Space remains for the saw cut and a technological allowance.
For eight pieces, four factory strips will be needed:
4 × 2400 = 9600 mm.
The purchased length is 9.6 m, and the difference from the total length of the pieces is 1.6 m before accounting for saw cuts.
This is a normal situation. One cannot expect that all purchased linear stock will be used without remainder.
Why the total linear meterage is sometimes insufficient
Suppose five solid segments of 1300 mm each must be obtained from strips 2600 mm long.
Their total length is 6500 mm. Dividing by 2600 mm shows that theoretically three strips are sufficient.
However, two full-length segments of 1300 mm cannot be obtained from one strip: their sum already equals the factory length, and the saw blade removes some material.
Therefore, only one such piece can be obtained from each strip. Five solid segments will require five strips.
Mathematically, three strips are sufficient in terms of total length. In terms of actual cutting, they are not.
Therefore, before ordering, you need to create a cutting plan.
For each element, specify its final length, the type of cut, the profile direction, and the suitable factory blank. Parts with visible joints are additionally matched by wood grain pattern.
How to reduce waste
Do not start cutting with the shortest elements. First, distribute the long parts that cannot be obtained from offcuts. Then match the short frame sides to them.
When calculating, take into account the kerf width, the need to trim the factory ends, and possible re-cutting.
If profiles with pronounced texture are used, check whether the placement of the wood grain will require an additional blank.
Step-by-step installation of wooden moldings on a wall
Step 1. Check the received products
Unpack the profiles and inspect them under good lighting.
Check for straightness, the condition of the decorative surface, the absence of cracks, damaged edges, and noticeable differences in cross-section.
Separately compare the moldings that will form adjacent sides of the same frame. If the pieces have a different shade or grain direction, it is best to determine their placement before cutting.
Do not use fastener force to correct noticeable warping of the strip.
Step 2. Mark out the frames on the wall
First, determine the actually visible part of the wall.
For example, between the door casing and a tall cabinet there is a section 2900 mm wide. It is planned to place two frames with an outer width of 900 mm each, with a gap of 200 mm.
Free space:
2900 − 900 − 900 − 200 = 900 mm.
With a symmetrical composition, the side margins will be:
900 ÷ 2 = 450 mm.
The result is a layout:
450 mm — frame 900 mm — gap 200 mm — frame 900 mm — 450 mm.
This layout is oriented to the visible wall rather than to the geometric center of the room, which may end up hidden by furniture.
Mark the outermost points and check the horizontals and verticals. For complex compositions, it helps to temporarily outline the contours with painter's tape that is compatible with the wall finish.
Step 3. Cut the wooden profiles
Before cutting, confirm which dimension the frame is specified by: outer or inner.
This is especially important for a profile 40 mm wide. If you take the inner dimension as the outer one, the overall composition will increase by twice the width of the molding in the corresponding direction.
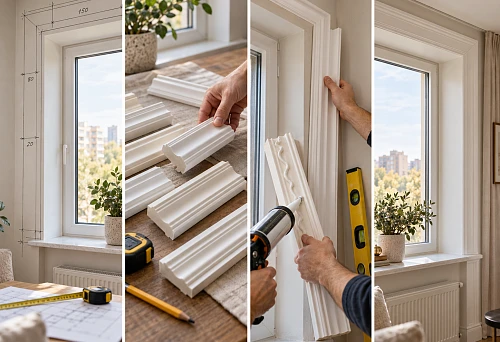
Cut the pieces according to the chosen miters. On the back side, mark which frame each belongs to and its position: top, bottom, left or right side.
When using a miter saw, make sure the profile is in the same position relative to the stop. Rotating the piece or supporting the profiled section incorrectly can change the actual geometry of the cut.
Step 4. Assemble the frame without glue
Lay out the elements on a flat surface.
Align the ends, check the outer dimensions and diagonals. For a rectangular frame, the diagonals must be equal, allowing for measurement accuracy and specified tolerances.
If the diagonals differ, the frame may be skewed even if the corners look neat.
After checking, hold the parts against the wall. Make sure none of them rests against a plaster protrusion or requires forced bending.
Step 5. Apply mounting adhesive
Clean dust off the back of the molding.
Apply the compound to the designated mounting surface in accordance with the technical instructions. Do not randomly fill all the recesses of the profile with adhesive.
Hold the part against the markings and press evenly.
If the system requires joining the ends with a special adhesive, do so in the sequence specified by the manufacturer. The adhesive for wall mounting and the woodworking compound for joining wooden ends may serve different purposes.
Step 6. Secure the elements
Check whether the profile is held in the specified position without shifting.
If necessary, use the provided temporary fixation or mechanical fasteners. Clear-coated wooden moldings are best secured so that visible holes are minimized.
For heavy profiles, the fastening method is determined before applying adhesive. Do not attempt to add fasteners at random after the strip has begun to slide.
Step 7. Check the geometry
Before the adhesive sets, check all sides of the frame.
Compare the distances between adjacent decorative elements, the position of the top and bottom lines, the accuracy of the joints, and how evenly the frame sits against the wall.
A slight misalignment of one side is especially noticeable with several repeating frames: the eye compares their lines with each other.
Do not proceed to the finishing stage until the fastening materials have fully cured.
Step 8. Treat the joints and fastening holes
After fixing, remove any adhesive residue using the method recommended by the manufacturer.
Fill nail and screw holes with a compound compatible with the wood and the chosen finish.
For enamel, a suitable repair wood filler can be used. For a clear finish, a more precise match of material by color and texture will be required.
After drying, carefully treat the repaired areas without altering the shape of the decorative relief.
How to properly join wooden moldings at corners
45° cut for a rectangular frame
If the sides form a 90° angle, both ends are usually cut at 45°.
But the geometry of the wall and the geometry of the frame itself are different things.
For a rectangular decorative frame installed in a single plane, the specified right angles of the frame serve as the initial reference. If it is a matter of joining profiles that transition from one wall to another, the actual angle of the room must be measured.
When cutting, precise saw setup, a stable position of the molding, and alignment of the decorative faces are important.
First, test the joint on short trial offcuts.
What to do if the corner is not 90°
Suppose the actual angle between the surfaces is 94°.
With a symmetrical joint, half of it equals 47°. However, this does not mean that you can set any miter box to the corresponding mark without checking: tool scales may use a different way of indicating the cut angle.
Determine the geometry of the joint, make test cuts, and check them directly on site.
If the ends do not match, do not try to correct a significant misalignment with a thick layer of filler. It is better to refine the marking and re-trim the parts.
Joining moldings along the length
If the length of the factory strip is not enough, you have to make an intermediate joint.
A straight butt joint is easier to cut, but its line may be noticeable, especially on a profile under clear varnish.
An angled joint increases the contact area of the ends and, with careful fitting, often allows the transition to be made less noticeable.
However, the strength of such a joint depends not only on the shape of the cut, but also on the glue, the support of the base, and the method of fixing both parts.
It is better to place the joint outside the most noticeable part of the composition. On oak moldings, additionally compare the grain direction and the pattern of adjacent pieces.
You cannot expect a decorative joint to compensate for significant seasonal movement of wooden elements.
How to prepare joints for painting
After the joint has cured, assess its condition.
If the ends are immovable and fit tightly, a small surface defect can be corrected with a suitable finishing material.
If there is noticeable movement, first determine the cause: insufficient fastening, stress in the profile, a cutting error, or a change in humidity conditions.
Then treat the area with abrasive material, remove the dust, and apply the primer specified by the system.
Painting and finishing of wooden moldings
Moldings for enamel
Opaque painting makes it possible to create a unified surface in which the wooden profile and the wall are perceived as an integral architectural composition.
Before painting, it is necessary to close the fastening holes, eliminate minor acceptable defects and prepare the wood.
The usual sequence includes sanding, dust removal, priming, light interlayer treatment and application of the finish coat.
The number of coats and drying times are determined by the selected paint system.
If glued solid wood with lamellas of differing shades is used, opaque enamel allows these color differences to be hidden.
Clear lacquer, oil and tinting
Under a clear coating, the natural grain of the wood becomes the main feature.
Oak profile with pronounced texture requires especially careful joining of the end faces. A difference in fiber direction or a filler of unsuitable color immediately attracts attention.
Before applying oil, stain or lacquer, it is useful to perform a test finish on an offcut of the same material.
Some repair compounds react differently to tinting and may form noticeable spots. Therefore, masking of fasteners under a clear coating is planned even before installation.
Paint before or after installation
Pre-finishing is convenient when thorough treatment of the relief, side surfaces and exposed end faces is required.
However, during cutting, new unprotected areas inevitably appear. They must be treated according to the chosen system.
Painting after installation simplifies creating a unified color contour and allows covering fastener marks. At the same time, it is more difficult to neatly treat the boundary between the molding and the already painted wall.
For a transparent finish, preliminary preparation of the profile with final restoration of the coating at the joints after installation is often convenient.
For opaque enamel, both options are possible.
Common mistakes when installing wooden moldings
1. Installing wood with unsuitable moisture content
The molding is installed immediately after delivery without checking storage conditions.
After moisture changes, the wood may shrink in the transverse direction, slightly change shape, or create stress in the joints.
How to prevent: keep the material under suitable conditions and follow the manufacturer's requirements.
How to fix: first stabilize the indoor climate. Then assess whether the joint can be restored locally or whether the deformed part needs to be replaced.
2. Mounting on a weak substrate
Adhesive is applied over old peeling paint or crumbly filler.
Over time, the molding begins to come away along with this layer.
How to prevent: first check the strength of the wall and remove weak coatings.
How to fix: remove the problem area, restore the substrate, and reinstall the profile.
3. Using unsuitable adhesive
The product is chosen by name or by a promise of high strength, without checking compatibility with the wood and the wall.
As a result, the bond may fail to set properly or lose strength.
How to prevent: study the technical specifications and perform a test bond in doubtful conditions.
How to fix: remove the failed adhesive bond and reinstall using a suitable system.
4. Installation without a dry fit
The cut elements are glued to the wall immediately.
On the last side of the frame, it turns out that the corner does not meet or the length differs from what is required.
How to prevent: fully assemble the composition dry and check the dimensions before installation.
How to fix: if possible, remove the incorrect piece and re-cut it.
5. Incorrect corner cuts
The ends are cut at 45° without checking the actual geometry of the joint.
The result is a wedge-shaped gap, especially noticeable on a wide textured profile.
How to prevent: make test cuts and check the angle on site.
How to fix: re-fit the joint if a length allowance remains; otherwise, replace the piece that is too short.
7. Overly rigid fixation
The profile is forcibly pulled to a curved surface or rigidly connected to structural elements that need to move independently.
Stresses, opening of joints and cracks in the finishing layer occur.
How to prevent: level the base and take into account the cladding construction and the natural behavior of wood.
How to fix: identify the source of the stress and repair the problematic joint rather than hiding the crack with filler.
8. Careless treatment of holes
Fasteners are placed on a visible face, and the holes are filled with a compound of unsuitable color.
After painting or varnishing, the fastening points form a noticeable pattern.
How to prevent: mark the fastening locations in advance and choose a filler taking into account the future coating.
How to fix: carefully remove the unsuitable material, restore the surface with a compatible compound and repeat the local finishing.
Which STAVROS wooden moldings are suitable for wall decor
The STAVROS range includes Wood and MDF moldings various profiles. For a practical comparison of installation methods, three profiles can be considered.
MLD-002 — a compact profile 22 × 11 mm
Wooden Moulding MLD-002 is available in beech, oak and MDF versions.
Its profile allows the product to be used in relatively small frame compositions.
For solid wood, strips are available in lengths of 1000 and 2400 mm; for the MDF version — 2600 mm. These lengths must be taken into account when calculating an order: the same item code does not mean the same length for all materials.
The compact profile requires careful selection of mechanical fastening points. Before installation, the shape of the back of the profile should be examined.
MLD-028 — profile 25 × 11 mm
Molding MLD-028 is made from oak and beech. The catalogue lists a length of 2400 mm.
This profile can be used for decorative contours where a more pronounced line is required compared to very narrow moulding.
When installing on a wall, the method of future finishing must be taken into account. For a transparent finish, adjacent parts are selected especially carefully by shade and grain direction.
MLD-024 — profile 40 × 25 mm
Wooden Molding MLD-024 has a larger cross-section and is supplied in oak and beech variants with a length of 2400 mm.
Its pronounced relief creates a noticeable shadow on the wall surface. However, compared to more compact profiles, it requires careful checking of the fit and space for reliable fastening.
The wide cross-section also increases the importance of accurate mitre cutting: misalignment of the decorative faces becomes noticeable even with a minor joint defect.
When choosing a wooden moulding for a specific composition, compare not only the face width, but also the shape of the back side, the actual length of the product and the finishing method.
If a complex composition with additional decorative elements is planned, it is useful to study separately carved wooden moulding and options for combining profiles.
When it is better to avoid DIY installation
Not every installation of wooden moldings should be carried out without professional assistance.
Difficulties arise if the base has significant unevenness, mechanical fastening through the cladding to a hidden frame is required, or the project includes large, heavy profiles.
Particular attention is required for rooms with unstable humidity, walls with unknown locations of utility lines, and structures in which the decorative trim must interface with moving elements.
If it is impossible to confirm the strength of the base or determine an acceptable fastening method, work should not begin based only on the appearance of the adhesive or the profile.
In some rooms, it is more appropriate to choose a different material suited to the operating conditions instead of solid wood. This is especially relevant with regular surface wetting and when it is impossible to maintain a stable indoor climate.
Frequently asked questions
Can wooden moldings be attached with adhesive only?
Yes, if the profile is suitable for adhesive installation, the base is sufficiently strong and level, and the chosen compound is compatible with both surfaces. Typically, this approach is considered for small decorative elements that do not bear additional load.
However, the weight of the product, its cross-section, and the condition of the wall may require mechanical fastening. The decision is made based on the conditions of the specific installation.
What adhesive should be used to glue an oak molding to a painted wall?
Use a mounting adhesive whose technical documentation permits bonding wood to the corresponding painted substrate.
Before installation, check the strength of the paint. If the coating is separating from the wall, the strength of the adhesive itself no longer matters.
For questionable substrates, it is useful to make a test bond and check the result after full curing.
How do you attach wooden molding to drywall?
A small, lightweight profile can sometimes be glued to a sturdy, prepared drywall facing.
For more massive products, it is necessary to check the possibility of fastening to frame elements or blocking.
Ordinary finish nails held only by the drywall sheet should not be considered a universal solution for heavy wooden trim.
Should moldings be painted before installation?
Both methods are acceptable.
Pre-painting is convenient for complex relief profiles and transparent finishes, since it allows the details to be treated before installation.
Painting after installation helps conceal holes and finish the joints.
Regardless of the chosen method, it is necessary to protect the open ends formed after sawing and to restore the coating on the fitting areas.
How to properly join wooden moldings at 45°?
Mark the parts taking into account the outer dimensions of the frame, make cuts on a securely fixed profile, and check the joint without glue.
For a right angle of 90°, two 45° cuts are used. If elements are joined on walls with a non-right angle, first measure its actual value.
If the ends do not match, adjust the cutting rather than masking a serious error with a thick layer of putty.
How to fill holes from finish nails?
For products under opaque enamel, use suitable repair wood fillers compatible with the primer and finish coating.
Under clear lacquer or oil, a material is required that best matches in shade and behavior during finishing.
Before filling face holes, it is advisable to test the result on an offcut of the same profile. Some compounds differ noticeably in color after lacquer application.
Why did gaps appear between the profiles after installation?
There are several reasons: changes in the moisture content of the wood, inaccurate fitting of the ends, deformation of the strip, or insufficiently secure fastening.
If the joint is loose, cosmetic filling will not solve the problem.
First, the condition of the fastening and the room conditions are checked. Then it is determined whether a local repair is sufficient or whether one of the parts needs to be reinstalled.
Can wooden moldings be used in a room with high humidity?
The possibility depends on the operating conditions, the wood species, the profile design, and the protective coating.
Ordinary interior wooden molding should not automatically be considered suitable for regular contact with water or sharp fluctuations in humidity.
For such rooms, it is necessary to choose products and finishing systems whose use in the relevant conditions is confirmed by the manufacturer. The ends and joints are protected especially carefully.
How to achieve a durable fastening of wooden moldings
A well-installed wooden molding should not be held in place by a randomly chosen thick layer of adhesive, constant stress from a bent strip, or a large number of fastening holes.
A reliable system starts with dry wood, a prepared base and precise geometry. The next step is choosing the adhesive and mechanical fastening, taking into account the wall material, the profile cross-section and the future finish.
Before ordering, you need to measure all sides of the decorative frames, create a cutting plan and check the length of the factory-made strips. For oak and beech products, the grain pattern and possible dimensional changes under humidity fluctuations are additionally taken into account.
In the STAVROS catalogue you can select wooden mouldings of various cross-sections and lengths, compare options in oak, beech and MDF, and after checking the drawings, order the required amount of linear stock for a specific wall composition.