
























































Article Contents:
- What decorative framing of a window opening provides
- Interior decoration and facade architraves — different tasks
- Proportions, axes and visual rhythm
- A thin contour for a small opening
- A more pronounced profile for a large window
- Layout 1. Simple U-shaped framing
- Scheme 2. Window with a decorative frame on the side pier
- Scheme 3. Two windows and the shared rhythm of the pier
- Scheme 4. Tall window with an accent top line
- Scheme 5. Minimalist outline in the wall color
- Six dimensions you need to measure
- How to choose the offset from the reveal
- Linear meters for a U-shaped composition
- Allowance for cuts and pattern matching
- Can molding be glued directly onto the reveal
- The "wall — reveal — molding" transition
- Adjacency to a plastic frame
- Deep opening and the risk of condensation
- Step 1. Check the geometry
- Step 2. Prepare the base
- Step 3. Transfer the layout onto the wall
- Step 4. Cut the parts and do a dry fit
- Step 5. Apply construction adhesive
- Step 6. Finish the joints and abutments
- Step 7. Prepare the surface and paint
- Lower ends near the windowsill
- Curtains and the curtain rod mounting location
- Radiator under the window
- Unity with the other wall frames
- Can polyurethane moldings be used near plastic windows?
- What width should the molding around the window be?
- Can moldings be attached to window slopes?
- What should be used to glue polyurethane molding next to a window frame?
- How do I decorate a narrow wall section between two windows?
- Can moldings be painted to match the window frame color?
- How do I join moldings in the upper corners of a window?
- Should the lower part of the windowsill be finished with moldings?
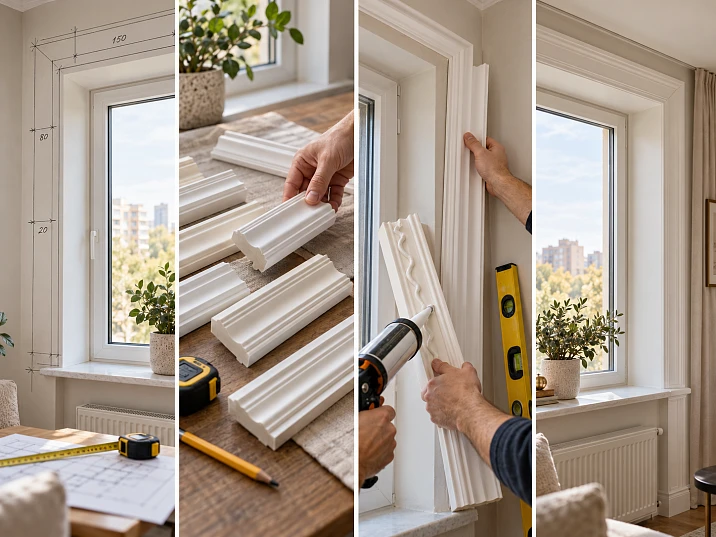
For a window 1200 mm wide, 180 mm of wall was left on each side. In the drawing, the wide decorative casing looks convincing, but when tried on site it turns out that the trim almost completely fills the wall piers, runs into the curtain cornice, and comes too close to the protruding windowsill. A narrower molding does not have these problems. It preserves the visible wall surface and makes the window outline neater.
Decorating a window with moldings inside an apartment begins not with choosing a pattern, but with measuring the free space around the opening. You need to decide where the decorative line will run — along the wall outside the reveal or along the reveal itself — and check how the sashes open, the position of the windowsill and curtains. Then select the profile cross-section and draw up a cutting plan. The same polyurethane molding will look different on a narrow wall pier and next to a tall window in a spacious living room.
Polyurethane moldings create an architectural outline, connect the window with wall frames, and help visually organize an asymmetrical wall. But they do not replace sealing of the window assembly, thermal insulation, the windowsill, or finishing of a damaged reveal. The decor is installed after these works have been completed and checked.
What decorative framing of a window opening provides




Interior decoration and facade casings are different tasks
Exterior window decor works under the effects of rain, sun, and temperature changes. Inside an apartment the conditions are usually milder, but the scale of the details, the quality of the corners, and the distances to neighboring objects are much more noticeable. Here the decorative molding is within arm's reach: its relief, uneven joints, and incorrect position are clearly visible.
There is also a structural difference. The reveal, the window frame, and the installation seam form a functional assembly that provides heat and air protection. A frame glued to the wall does not belong to this assembly. If there is a draft near the frame or the plaster is getting wet, first eliminate the cause; covering up the problem with a decorative strip is unacceptable.
STAVROS is covered in a separate article window framing with polyurethane stucco for facade and interior. For interior finishing, the main question is already: how to precisely position a thin profile on the wall and join it with the reveal, windowsill and the rest of the trim.
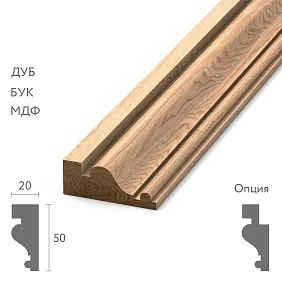
Our factory also produces:
Proportions, axes and visual rhythm
A window rarely exists separately from the room. On one side there may be a doorway, on the other a wardrobe; above the opening a narrow strip remains up to the ceiling, below it a radiator. Framing helps to connect these elements into a common system of lines.
On a tall window, vertical moldings reinforce the sense of height. A top horizontal line placed too close to the ceiling can have the opposite effect: almost no free space will remain above the window. In a room with two windows, identical top lines unite the composition, even when the side piers have different widths.
In neoclassicism, relief contours that repeat the architecture of wall panels are usually appropriate. Modern classics allow a calmer pattern. For a laconic interior, a thin line in the color of the wall is often enough: it is visible thanks to shadow, not contrasting paint.
Get Consultation
Which polyurethane moldings to choose for a window
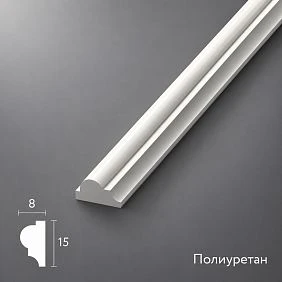
Compare not only the width of the face, but also the depth of the projection. In side daylight, the relief near a window reads especially clearly. A 15 mm wide strip with an 8 mm projection can cast a more noticeable shadow than its small width would suggest. The more complex the section, the more carefully the pattern must be aligned at the corners.
For small windows, it is preferable to try a narrow contour first. A wide profile is not forbidden, but with a small distance to the wall corner it can turn the pier into a dense series of stripes. In a spacious room with tall openings, a wide molding, on the contrary, can hold the required scale.
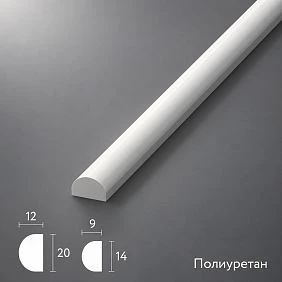
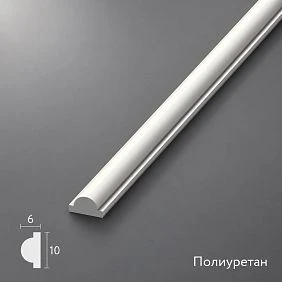
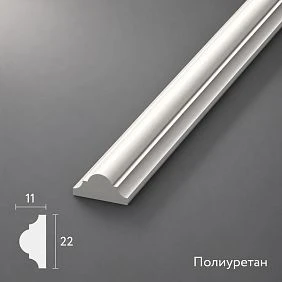
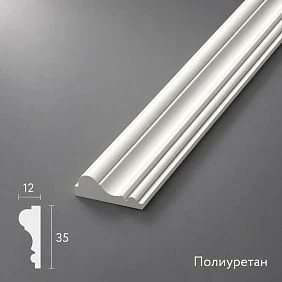
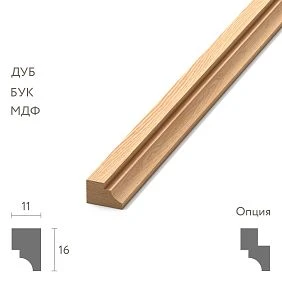
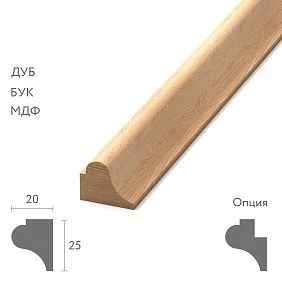
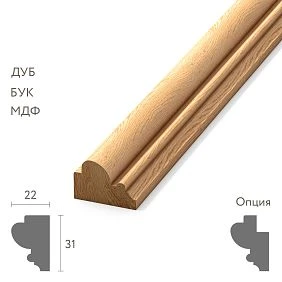
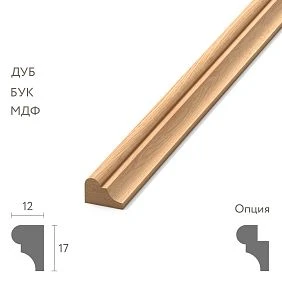
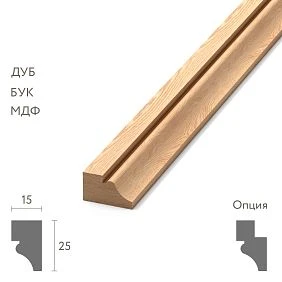
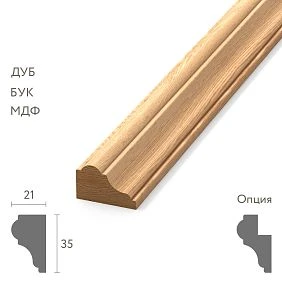
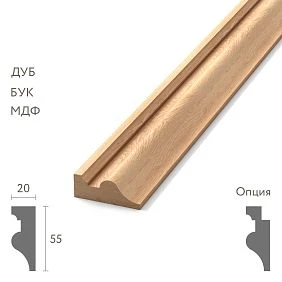
The STAVROS catalog features four interior profiles that can be considered for such compositions:
| Profile | Size, mm: width × projection × length | Possible role at the window |
|---|---|---|
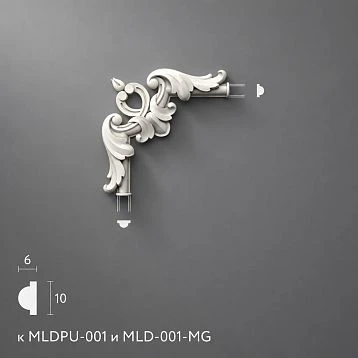
| MLDPU-001 | 10 × 6 × 2600 | A thin line, a second contour, a minimalist finish |
| MLDPU-004 | 15 × 8 × 2600 | A clean-lined frame at the reveal or on the adjacent wall |
| MLDPU-002 | 22 × 11 × 2600 | A primary surround with a pronounced classical relief |
| MLDPU-003 | 35 × 12 × 2600 | A more defined contour for a tall window and a wide wall |
The dimensions are given according to the STAVROS product cards. All four options are made of polyurethane. Their length is 2600 mm, which is convenient for many interior layouts, but the number of strips must be determined by cutting layout, not just by the total linear footage.
A thin contour for a small opening
MLDPU-001 10 mm wide is well suited when there is little space from the window to the corner of the room, or when there is already an expressive windowsill and elaborate curtains. It does not pretend to be a massive architrave: the task of such a profile is to draw a precise line across the wall plane.
MLDPU-004 a width of 15 mm makes the outline slightly more defined. This option is worth placing against the wall if you want the trim to be noticed even without a contrasting color. If positioning it directly on a narrow reveal, check whether there is enough room for the entire mounting surface of the profile.
A more pronounced profile for a large window
MLDPU-002 a width of 22 mm can become the main outline around the window, next to which frames of a similar scale are located on the wall. Here a distinct light-and-shadow effect appears, which means any steps at the joints will be more visible.
MLDPU-003 a width of 35 mm is appropriate to consider for tall windows and open surfaces. However, a profile of such a cross-section should not automatically be placed on all sides of a small opening. First draw its actual width on the wall with painter's tape or hold up a sample.
The full selection of cross-sections is available in the section moldings from STAVROS polyurethane. When ordering, check the drawing of the back side: the decorative width is not equal to the width of the adhesive contact.
Five window design schemes with polyurethane moldings
The diagrams below show the wall from the room side, front view. The rectangle represents the window opening, and the lines around it indicate the intended position of the molding. The dimensions in the examples serve as initial data for calculations, not as mandatory standards for all apartments.
Scheme 1. Simple U-shaped framing
Two vertical moldings are installed on both sides of the window, and a third above it. The lower ends terminate at the windowsill or at a pre-selected height. This composition does not overload the lower part of the wall, where the radiator and furniture are usually located.
       Top detail — W
       ┌────────────────────┐
       │                    │
       │   ┌────────────┐   │
  H    │   │            │   │   H
       │   │   WINDOW   │   │
       │   │            │   │
       │   └────────────┘   │
       │    WINDOW SILL     │
       └                    ┘
       ↑                    ↑
    Left                Right
    molding             molding
Here the outer contour runs along the wall around the reveal. If the design is intended directly on the reveal surface, the geometry is different: first measure its depth and the width of the available plane, then select a profile that will not reach the frame and will not interfere with the sash. You cannot simply transfer the same scheme into the opening without re-measuring.
Scheme 2. Window with a decorative frame on the side wall section
When a window is shifted toward one corner of the room, trying to install identical large frames on both sides makes the imbalance more noticeable. It is better to work with the wall that is actually available.
  WALL CORNER                              FAR WALL
  │                                              │
  │  ┌─────────┐    ┌──────────────────┐        │
  │  │ WINDOW  │    │                  │        │
  │  │         │    │ DECORATIVE       │        │
  │  │         │    │ FRAME IN WALL    │        │
  │  └─────────┘    │                  │        │
  │                 └──────────────────┘        │
  └──────────────────────────────────────────────┘
In this scheme, the side frame does not have to match the width of the window. Its position is determined by the width of the wall section, the distances to the corner, and the furniture. The top of the frame can be aligned with the upper decorative line of the window; the bottom — with the window sill or the common axis of other wall frames. This creates a visual connection without artificial symmetry.
Scheme 3. Two windows and the shared rhythm of the wall section
Two windows on the same wall usually benefit from frames of the same scale. The main difficulty is the central wall section: two vertical lines fall on it at the same time, and enough wall must remain between them.
             COMMON TOP AXIS
  ───────────────────────────────────────────────
  ┌─────────────┐       ←─ S ─→      ┌─────────────┐
  │             │                    │             │
  │   WINDOW 1  │    WALL SECTION    │   WINDOW 2  │
  │             │                    │             │
  └─────────────┘                    └─────────────┘
     WINDOW SILL                       WINDOW SILL
The common top axis here means a single installation height for the upper profiles, not a continuous strip running across the glass or window openings. For example, the central wall section is 360 mm. The axes of the two nearest moldings are marked at a distance of 80 mm from the respective edges of the openings, and the width of each profile is 35 mm. Between their outward edges facing each other, 360 − 2 × (80 + 17.5) = 165 mm will remain. This is the actual width of the open wall, not the full 360 mm of the wall section. If such a strip seems too narrow, it is better to forgo additional frames on it. Two verticals on the sides of the windows already create a rhythm; a third contour may make the surface too fragmented.
Scheme 4. Tall window with an accent top line
With a large opening height, the upper part can be highlighted with a slightly wider profile. For example, make the sides with a calm molding, and emphasize the top with a separate element matched by cross-section. It is important to decide in advance how the different profiles will join: a simple butt joint is not suitable for every pair.
         Accent horizontal
       ═════════════════════════
         ┌─────────────────┐
         │                 │
         │   TALL          │
         │    WINDOW       │
         │                 │
         │                 │
         └─────────────────┘
              WINDOW SILL
For such a solution, there is no need to copy a facade pediment with large protruding details. Inside the room, the upper frame is located next to the ceiling, the curtain cornice, and the window handle when the sash is open. Too deep a relief can create unnecessary conflicts.
Scheme 5. Minimalist outline in the wall color
A single thin line runs along three sides of the window or as a separate rectangular frame on the surrounding wall. The molding is painted in the color of the surface, preserving the distinction through a slight shadow.
          Thin line without a second contour
               ┌───────────────┐
               │  ┌─────────┐  │
               │  │ WINDOW  │  │
               │  └─────────┘  │
               └               ┘
                 WINDOW SILL
Straightness is especially important for this kind of finish. On a smooth painted wall, a small error in the position of the profile is more noticeable than on a wall with a complex ornament. First, mark the contour with a level, and then evaluate the composition in daylight from a normal viewing point in the room.
How to calculate dimensions and the number of strips
Six dimensions that need to be measured
Before purchasing, measure the width and height of the window opening, the distance from its side edges to the corners of the room, the clear strip above the reveal up to the ceiling or curtain track, the position of the windowsill, and the distance to the radiator. For each side separately, check whether there are switches, curtain system fasteners, or other obstacles.
Be sure to record along which line the future contour is measured. If the dimension 1400 mm is given between the outer vertices of the mitre cuts, it cannot be used without adjustments as the length between the inner corners of the profile. With a 35 mm wide moulding, this difference is already significant.
How to choose the offset from the reveal
There is no single offset in millimetres. First determine the width of the free wall section, then mark two vertical lines on the wall at an equal distance from the side edges of the opening. Check whether the moulding falls on the outer corner of the reveal and whether there is enough surface for gluing.
Example: from the opening to the left corner of the room there is 180 mm left, to the right — 420 mm. If you choose an offset of the moulding axis from the reveal of 90 mm and a profile width of 35 mm, you need to check where its outer edges will end up and what strip will remain to the left corner. Such asymmetry of the wall does not always require an asymmetric frame for the window itself: it is usually more reasonable to keep the same offset relative to the opening and separately decorate the right wall section.
Linear metres for a U-shaped composition
The calculation for three straight parts is simple:
L = 2H + W, where H is the length of the vertical moulding, W is the length of the top part along the accepted measurement line.
For two verticals of 1500 mm each and a top element of 1400 mm we get:
L = 1500 + 1500 + 1400 = 4400 mm.
The total requirement is 4.4 linear metres. At first glance, two factory strips of 2600 mm each are enough: together they give 5200 mm. But this is the wrong conclusion for three solid parts.
| Plank 2600 mm | The part cut from it | Remainder before accounting for the saw kerf |
|---|---|---|
| № 1 | Left vertical 1500 mm | 1100 мм |
| № 2 | Right vertical 1500 mm | 1100 мм |
| № 3 | Top horizontal 1400 mm | 1200 мм |
For such a layout without joined sections, three strips are needed, even though the total length fits within two. The 1100 and 1200 mm offcuts are not necessarily waste: they can be allocated to small wall frames if the project includes additional elements.
Allowance for cuts and pattern matching
A strip is not cut to size without clarifying which side of the cut must align with the marking. At 45° corners, the saw cut vertices and the kerf width must be taken into account. Relief profiles are installed in a single orientation: an accidentally flipped element may have a different light-and-shadow effect, and the bead will not match the adjacent part.
It is convenient to draw up a cutting map in advance: record the length, purpose and direction of each part; distribute the longest sections first, then the short ones. A more detailed method is given in the article how to calculate moldings and stucco decor for a wall.
Window reveal finishing: where decor ends and the window assembly begins
Can molding be glued directly onto the reveal
Yes, if there is enough space for the selected profile, the surface is strong, dry and even, and the mounting system used is designed for this material. But a plastered reveal, drywall cladding and a finished plastic panel are different substrates.
On plaster, check the adhesion of the finish layer and the absence of loose areas. On drywall, check the strength of the coating and the condition of the edges. On a finished plastic panel, the compatibility of the adhesive with the non-absorbent surface must be established separately, and make sure the panel is not a movable part of the window trim.
It is better not to turn a narrow reveal into a set of parallel stripes. If the profile takes up almost its entire width, the scale is disrupted and cleaning becomes difficult. In this case, it is neater to run a decorative contour along the wall outside the opening.
The "wall — reveal — molding" transition
The most difficult spot is often not at the frame but at the outer edge of the reveal. It may be slightly uneven, and the angle between the wall and the reveal surface may differ from a right angle.
  SECTION, TOP VIEW

  WALL PLANE
  ───────────────────┐
       MOLDING       │ ← outer edge of reveal
        ╭──╮         │
  ──────╯  ╰─────────┘
                     │ REVEAL
                     │
                     └───── WINDOW FRAME
The diagram is schematic: the exact position of the molding is chosen based on the product cross-section and the condition of the edge. If the profile is designed for a flat mounting surface, it cannot be assumed that it will bond reliably to two angled faces at once without an appropriate structure. It is more reliable to place its mounting area entirely on the prepared wall or on a sufficiently wide part of the reveal.
Adjacency to the plastic frame
The decorative profile must not overlap the seals, glazing beads, functional clearances, ventilation elements, or drainage openings of the window system. Do not cover areas that require access for maintenance and part replacement. Even if the drainage is located primarily on the outside, carefully inspect the specific window unit before gluing.
Fully open each sash and check its movement path, including the handle rotation and the tilt position. Molding positioned too close to the frame can interfere with opening or get caught during cleaning.
Do not glue the decorative strip over an unknown seam between the frame and the reveal. This seam must be made according to the window system technology; cosmetic trim does not replace its airtightness and its ability to accommodate the specified movements.
Deep reveal and risk of condensation
In a deep window reveal, the illuminated part of the reveal changes throughout the day. A relief that is too wide on its inner surface can create a heavy shadow and visually narrow the window. It is often enough to decorate the outer contour on the wall, leaving the reveal smooth.
If condensation appears near the window, a corner becomes damp, or the finish turns black, the installation of moldings should be postponed. First, check the causes of moisture: ventilation, the condition of the window junction, the temperature of internal surfaces, and the airtightness of the assembly. The water resistance of the polyurethane product itself does not make damp plaster a reliable base for adhesive.
Step-by-step installation of polyurethane moldings around a window
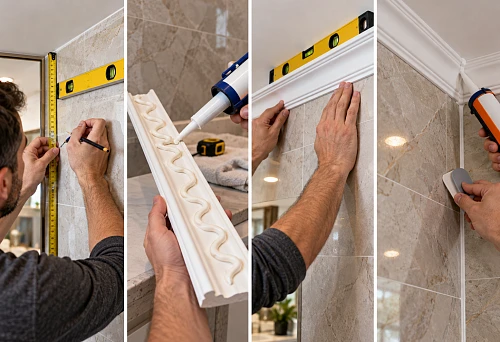
Step 1. Check the geometry
Measure the window at several points: top, middle, and bottom for width; left and right for height. Check the diagonals, verticals, window sill level, and outer edges of the reveals. If the opening is slightly skewed, decide which lines must be strictly vertical and which distances may be visually corrected.
Step 2. Prepare the base
Remove dust, loosely adhering paint and remnants of old filler. Repair local depressions with a suitable compound and eliminate protrusions. Once dry, sand the repair areas and remove dust from them. Use a primer according to the requirements of the specific substrate and adhesive.
Dry-fit the molding to each intended line. If it has to be noticeably bent to fit, the wall needs to be prepared again. Mounting adhesive is not intended for arbitrary leveling of unevenness.
Step 3. Transfer the layout to the wall
Mark the upper horizontal line and both verticals. Check that the offsets relative to the window are equal and the distances to the surrounding corners of the room match. Do not rely on the edge of the windowsill as a guaranteed horizontal line: check the level separately.
Step 4. Cut the parts and dry-assemble
Determine the lengths taking into account the outer or inner cut points. Make the corners with a suitable fine-toothed saw and miter box, or with a miter saw if this complies with the manufacturer's recommendations. Align the profile pattern and make sure the parts form a continuous contour and do not overlap functional parts of the window.
Step 5. Apply the mounting adhesive
Use a compound intended for the selected polyurethane product and wall material. Apply it only according to the specified pattern on the rear mounting surface. Press the elements to the markings and, if necessary, provide temporary fixing according to the adhesive instructions. Remove excess in a way that is compatible with the profile and adjacent finishes.
Step 6. Finish the joints and abutments
The jointing compound, if provided by the system, connects the ends of the profiles. A compatible paintable finishing material covers small stable gaps along the wall. These are different operations. Do not expect the sealant to hold a detaching molding or to correct an incorrect cut of the upper corner.
Step 7. Prepare the surface and paint
After the adhesive has fully cured, clean the decorative contour, make any necessary local corrections, and wait for all finishing compounds to dry. Protect the frame, glass, and windowsill from paint. Keep in mind that the readiness of the product for painting is determined by the recommendations for specific materials, not by a uniform drying time for all compounds.
The general technique for trimming, concealed joints, and painting is described in detail in the STAVROS guide on installing polyurethane molding. Near a window, the usual installation rules are supplemented by checking the working elements of the window unit.
How to align the trim with the windowsill, curtains, and radiator
Lower ends near the windowsill
The windowsill often protrudes beyond the wall plane and has its own side ends. If you lower the vertical molding right up to the protruding edge, you can end up with an unattractive intersection of two different profiles. Before gluing, try out where the vertical line should end: above the windowsill, at the level of its top surface, or higher, with its own neat termination.
Do not leave a randomly cut open end at a visible height. It can be properly finished using the method provided for the chosen system, or the layout can be changed so that the end abuts another decorative boundary. The windowsill itself and its connection to the window remain functional elements.
Curtains and the curtain rod mounting location
Measure the distance from the top edge of the opening to the curtain rod. When open and gathered, the fabric occupies a different volume. If the side decorative line ends up directly behind a thick fold, part of the trim will be permanently hidden. This is not necessarily a mistake, but it is not advisable to buy complex relief that cannot be seen.
For wall-mounted brackets, check the drilling and fastening points. The moulding must not replace the load-bearing area for the curtain system unless such a load is provided for by the design.
Radiator under the window
The window sill trim must not block the warm air outlet, the heating appliance's adjustment elements, or access to the connections. A standard interior moulding must not be installed directly on a hot surface without confirmed suitability for such use. Even if polyurethane retains its shape under normal room conditions, the requirements for surface temperature and adhesive bonding are determined by the characteristics of the specific system.
Unity with the other wall frames
If the wall already has mouldings, the window trim is best subordinated to their overall geometry. For example, the top sides of the side frames can be aligned with the top of the window trim, and the bottom ones tied to the height of the window sill or another stable architectural axis.
It is not necessary for all frames to have the same width. Repeated height, the spacing between lines, and an identical profile section often create sufficient order.
Six mistakes that ruin window decoration
A moulding that is too wide on a narrow wall pier. After installation, the free strip of wall almost disappears. The solution is to check the actual profile width and the offsets on the wall before ordering; if necessary, choose a narrower section.
Different offsets on the left and right of the window with no intent. The composition looks accidentally shifted. The solution is to first build a symmetrical outline relative to the opening, not relative to the entire wall. Account for the asymmetry of adjacent furniture and wall piers with a separate layout.
Cuts made before checking the geometry. Wedge-shaped gaps and steps in the relief appear in the upper corners. The solution is a dry fit and adjustment of each joint before applying adhesive.
Molding is used to hide a faulty installation seam. Drafts or moisture remain under the decorative strip; the finish gets damaged again. The solution is to first restore the window assembly, dry it, and prepare the reveal.
Incompatible adhesive or incorrect final sealing. The strip pulls away from a painted or plastic surface, and joints crack. The solution is to check the adhesive's compatibility with the substrate and not substitute it for leveling, nor use the finishing compound for fastening.
The decor interferes with the sash or window maintenance. The handle catches on the profile, and it is difficult to remove the screen or clean the frame. The solution is to check all opening modes and required access zones during a dry fit, before final fixing.
Frequently asked questions
Can polyurethane moldings be used near plastic windows?
Yes, on a prepared wall or a suitable reveal, if the profile does not interfere with the window unit's operation. Do not cover seals, drainage openings, ventilation elements, or access for maintenance. The frame material and the installation substrate material should be distinguished: having a plastic window does not mean the decorative molding must be glued directly to the plastic.
What width of molding should I choose around a window?
Start with the actual width of the wall sections and the distance to the windowsill and curtains. For a thin outline, you can try profiles of 10–15 mm; for a more prominent line, 22 mm; 35 mm is worth considering when the composition has enough space. These are not mandatory standards but the dimensions of specific products, which need to be checked on the wall at full scale.
Can moldings be attached to window reveals?
Yes, if the substrate is strong, dry, level, and compatible with the adhesive, and the mounting area of the chosen profile fits entirely on the reveal. For ready-made plastic panels, a separate check of the material and the mobility of the cladding is required. On a very narrow or deep reveal, a contour along the wall outside the opening is often more practical.
What should I use to glue a polyurethane molding next to a window frame?
Use an adhesive compound that explicitly permits use with the chosen polyurethane and the specific substrate — plaster, paint, drywall, or another finish. Do not choose an adhesive based only on the common name "liquid nails." Take into account the requirements for surface dryness, layer thickness, and curing time.
How do you decorate a narrow pier between two windows?
First, mark the outer boundaries of both frames on the wall. See how much free strip remains between them. If a separate decorative frame in the center creates too many closely spaced verticals, abandon it. Often, two coordinated window outlines are quite enough to make the wall look orderly.
Can moldings be painted to match the window frame color?
Yes, if the chosen coating is compatible with the profile surface. However, a color that matches according to the catalog may look different on polyurethane and on a plastic window under different lighting and texture. Make a test paint sample, compare it in the morning and evening, and also decide whether the molding should match the frame or the wall.
How do you join moldings in the upper corners of a window?
For a rectangular frame on a single plane, coordinated 45° miters are usually used. The length of the pieces depends on whether the outer or inner joint points are measured. On a real reveal, the angle and position of the surfaces may differ, so each upper joint is first dry-fitted. After that, use the joining system recommended by the profile manufacturer.
Should the lower part of the windowsill be decorated with moldings?
Not necessarily. A U-shaped composition often benefits precisely from the absence of a bottom line. If the windowsill already has an expressive profile, an additional strip beneath it may create an excessive number of horizontals. A lower molding is needed only when it supports the overall composition and does not interfere with the radiator, cleaning, and window maintenance.
How to prepare an order without excess material
For a single window, first choose a layout: a U-shaped contour, separate side frames, or a thin line along the wall. Then measure the installation locations, determine the cross-section, and draw the actual outer boundaries of the profile. After a dry fit, create a cut map: which solid pieces will come from the 2600 mm strips, where the offcuts can be used, and whether an allowance is needed for re-trimming.
When decorating two windows, repeat this check for the central pier and the overall height of the decorative lines. Pay special attention to the window frame, reveals, windowsill, and curtain attachment points: good decor should not impair the window's operation.
You can find a profile for this layout in the STAVROS catalog. It is best to make the purchase decision after measurements and a cross-section trial fit — then the number of moldings will be determined by the actual framing structure rather than the approximate wall area.