Article Contents:
- Why carved moulding is harder to paint than smooth moulding
- Where paint accumulates and why the pattern disappears
- Oak and beech: differences that affect finishing
- What "for enamel" means in a product card
- Check storage conditions and wood moisture content
- Inspect the profile before sanding
- Sand flat surfaces and ornamentation differently
- Remove dust not only from raised areas
- Prepare end faces and joints
- How to choose a primer for oak and beech
- How to apply primer to carvings
- When intercoat sanding is needed
- How to tell the part is ready for painting
- Brush: control the recesses, not just the face surface
- Spray gun: thin pass and control of side faces
- Why thin controlled layers preserve the ornament
- How to paint a long plank without visible transitions
- Why cracks appear at joints
- K-125 “Kosichka”: how to preserve a small repeating pattern
- K-002 “Bolotny List”: how to paint a floral ornament
- K-016 “Ionika”: how to preserve the rhythm of a classic design
- Dust removal
- Wet cleaning without damaging the coating
- Local touch-up of a chip
- Can wooden moulding be painted with regular wall paint?
- Which primer is suitable for carved oak decor?
- Do you need to sand beech before painting?
- How to paint carved baguette without hiding the pattern
- Can moulding be painted after installation?
- Why does enamel collect in the recesses of the carving?
- How does opaque painting differ from tinting?
- How do I fix drips on molding that has already been painted?
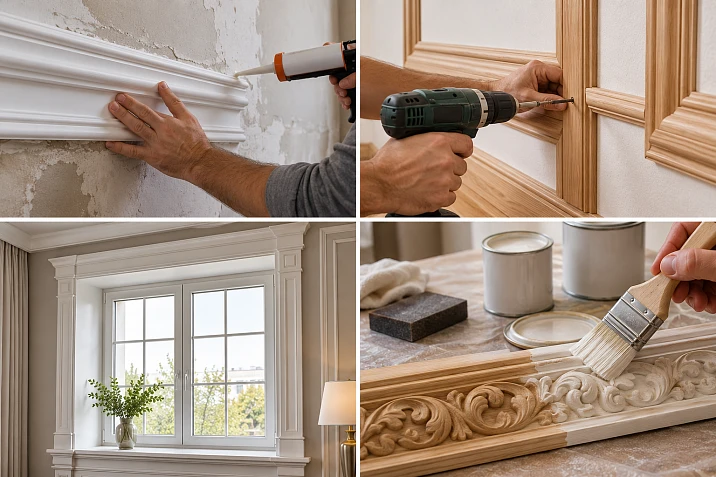
On a smooth wooden strip, uneven coverage is usually visible immediately. Carved trim is more difficult: the protruding parts of the ornament are already painted, while unpainted areas remain at the bottom of the recesses. Paint is added, and within a few minutes sags appear in the grooves. After drying, the fine lines of the braid become soft, and the leaves stop standing out from each other with a clear shadow.
To paint carved wooden trim and preserve the pattern, you need to prepare the wood, select a compatible primer and enamel, and then apply the coating in controlled layers, avoiding any accumulation of material in the recesses. The result should be checked not only by color: in side light it should be clear that the boundaries of the ornament remain distinguishable. One attractive photograph of the flat front surface is not enough for such a check.
The technology depends on the wood species and the initial condition of the product. Oak may require isolating substances that can bleed through light paint; with beech, attention is often focused on the quality of sanding and the evenness of absorption. End faces, joints and the installation method need to be considered separately: a painted baguette on a furniture facade and a long carved profile on a wall experience different loads.
Why carved moulding is harder to paint than smooth moulding




Where paint accumulates and why the pattern disappears
A carved pattern consists of raised areas, recesses, side faces and sometimes very thin bridges. When painting with a brush, its bristles carry the material onto several surface levels at once. The excess remains in the lowest points of the ornament. Spraying creates a different problem: the protruding parts may receive enough enamel while the shaded recesses remain partially uncovered. Trying to fix this with a single heavy pass again leads to runs.
Dried excess coating rounds off sharp edges. In a pattern with repeating elements, even a slight thickening of the film changes the character of light and shadow. Therefore, the quality criterion is opaque colour without flooded recesses, not a maximally thick smooth film.
The relief is best inspected under side lighting. Light directed straight at the product hides runs and irregularities. A lamp from the side reveals dried drips, bridges between pattern elements and uneven gloss.
Our factory also produces:
Oak and beech: differences that affect finishing
Oak has large pores and a pronounced natural texture. Even under opaque enamel, this structure may be partly visible if the coating is not designed to fill the pores. This is not always a defect: sometimes the customer wants painted wood with a noticeable pattern. If a smooth furniture finish is expected, however, a priming and pore-preparation system compatible with the chosen enamel will be required.
A separate risk with oak is the migration of colouring wood substances, including tannins. On a light finish, this can appear as yellowish or brown spots. This may not happen with every paint job, but a simple white primer is not always able to isolate the problem. Before working on oak with white or very light enamel, make a test with the specified isolating primer system.
Beech is denser and visually more uniform in texture. It is often convenient for opaque painting, but it reacts to changes in humidity and can raise the grain after contact with a water-based product. Therefore, after the first compatible primer coat has dried, careful intercoat sanding may be required.
The difference between wood species does not make one enamel suitable for any oak or beech. The entire system is evaluated: the wood, the preparation, the primer, the enamel and the operating conditions.
Get Consultation
What "for enamel" means in the product card
STAVROS wooden mouldings may list the gluing quality options "for enamel" and "for tinting". The first assumes that when assembling the glued blank, differences in shade and pattern between the lamellas are allowed — an opaque coating will hide them. The second assumes selecting lamellas with the visible wood texture in mind.
The "for enamel" marking is not equivalent to factory priming or readiness for immediate painting. Before finishing, you still need to check the quality of sanding, the cleanliness of the wood, the condition of the ornament and the coating requirements. It is also not allowed to apply a new product over an already lacquered profile without checking adhesion and material compatibility.
What to choose for carved wood: enamel, lacquer, oil or stain
| Finish | What is visible after finishing | When to use | Limitation |
|---|---|---|---|
| Opaque enamel | A uniform color, the natural texture is mostly hidden | Decor matched to the color of furniture, doors or walls | With a thick layer, the crispness of the carving is lost |
| Transparent varnish | Wood fibers, tone, and grain pattern | Oak or beech moulding with texture-matched lamellas | Preparation and sanding marks remain visible |
| Oil or oil-wax | Emphasized natural surface | Products for which such a finish is specified by operating conditions | System compatibility and careful removal of excess from recesses are required |
| Stain with protective finish | Altered tone while preserving the texture | Tinting of oak or beech decor | Absorption may differ on end faces and threaded areas |
For a fine ornament that should become white, graphite, or painted in the color of the furniture facade, a high-opacity enamel for wood is usually considered. On complex relief, it cannot be replaced with a random wall paint: such compositions differ in purpose, coating durability, adhesion, and behavior during application.
If the decorative goal is to show the oak structure, opaque painting may be unnecessary. In that case, it is more useful to study the selection of oak moldings for tinting and compare finishing options that preserve the wood grain.
Neither lacquer nor oil should be chosen solely by the visual effect in a photograph. A furniture door, a decorative wall frame, and an element near a heat source have different operating conditions. In addition, not all types of oils and lacquers are compatible with already applied primers and colorants.
Preparing carved wooden moulding for painting
Check storage conditions and wood moisture content
A profile that has just been moved from a cold warehouse to a warm workshop should not be coated with enamel right away. Condensation may form on it, and the wood has not yet reached equilibrium with the room conditions. Painting damp material or working in an unsuitable microclimate increases the risk of drying defects, poor adhesion and changes in the product's geometry after finishing.
Place the strips on a level support in a dry room. Ensure the temperature, relative humidity, and ventilation specified by the coating system manufacturer. If in doubt, measure the wood moisture content with a suitable moisture meter. A universal holding time or a single acceptable moisture value cannot be assigned for all systems: requirements may differ.
Pay attention to the future operating conditions. Painted carved decor for furniture should not be stored before installation next to wet plaster or a running humidifier if the actual conditions go beyond those recommended for the wood and the coating.
Inspect the profile before sanding
Carry out the inspection under directional light. Look for chips on thin leaves, raised grain, tool marks, unglued areas of the blank, and noticeable steps at the joints of the lamellas. Pay special attention to the protruding peaks of the ornament: after painting they catch the light and make damage more noticeable.
Do not try to hide a deep chip with several coats of enamel. If the damage affects the shape of the pattern, a suitable repair compound and careful restoration of the geometry will be required before finishing. On fine carvings it is sometimes wiser to replace the damaged part than to turn a complex ornament into an area of solid filler.
Sand the flat surface and the ornament differently
Smooth longitudinal sections can be worked with a sanding block or a suitable abrasive along the grain. On carvings, such a block will easily sand down protruding edges without touching the recesses. Use soft abrasive sponges, fine abrasive folded to shape, and tools that allow you to work without excessive pressure.
First remove obvious burrs, then even out the surface quality. Choose the grit based on the initial condition of the wood and the recommendations of the coating system. The finer the ornament, the more important it is not to chase absolute smoothness at the cost of losing the geometry.
On a repeating pattern, check the result after every few processed sections. If one area has become noticeably more rounded than the neighboring ones, the sanding is already too aggressive.
Remove dust not only from the raised areas
Wood dust gets trapped in the grooves and at the bases of the relief. After priming it turns into rough inclusions that are difficult to remove without damaging the pattern.
Go over the profile with a vacuum cleaner with a soft attachment and a clean brush, paying attention to deep recesses. If you use a special dust-removal cloth, make sure it does not leave wax or oil traces that are incompatible with subsequent painting. Use compressed air only with proper safety measures and without contaminating the surface with oil or moisture from the equipment.
Dust must also be removed from the workbench: after the first pass with the sprayer, it can get back onto the painted part.
Prepare the end faces and joints
End-grain wood often absorbs materials more actively than the longitudinal surface. On carved moulding this is especially noticeable on sawn ends: after the same number of passes, the end face may look more matte or darker.
Before painting, plan to treat the exposed end faces with a compatible primer and, if necessary, additionally equalize absorption. Do not pre-prime the areas of future glued joints if the chosen woodworking adhesive requires clean wood. The order of "gluing — finishing" or "finishing — gluing" must be decided before starting work.
When joining the ornament at the corners, the main thing is to preserve the continuation of the pattern. A separate STAVROS article is devoted to this, on how to join shaped wooden moulding. Painting should complete a properly prepared joint, not mask a cutting error.
Priming carved moulding: how to prepare the base for enamel
How to choose a primer for oak and beech
A primer solves several tasks at once: it improves the adhesion of the finish, evens out absorption, sometimes fills pores, and, when correctly selected, limits the migration of wood colorants. But a single product does not necessarily perform all of the above.
For oak under white enamel, the risk of tannins bleeding through is first assessed and the possibility of using an isolating primer is checked. The required scheme is determined by the coating manufacturer's instructions and the result of a test painting. For beech, adhesion and surface evenness are also important, and when using water-based materials, the reaction of the fibres to moisture.
If a part already has a factory finish, a completely different system may be required for priming. It cannot be assumed that any water-based primer is equally reliable on untreated wood, lacquer, and an unknown old enamel.
How to apply primer to carving
Begin by checking the consistency and the manufacturer's instructions: do not dilute the primer arbitrarily to make application easier. With a brush, first carefully distribute the material into the recesses, then remove excess and go over the raised areas. When spraying, use several coordinated pass directions to cover the side surfaces of the relief without flooding the lower points.
After application, inspect the ornament from different angles. If a visible droplet sits in a groove or a "bridge" begins to form between adjacent elements, remove the excess using a method suitable for the material before it sets.
The thickness of the primer layer is just as important as the thickness of the enamel. The pattern can be ruined even before the final coating.
When interlayer sanding is needed
After the primer has fully dried, some wood fibers become noticeably rough. Careful interlayer sanding removes the raised grain, improving the quality of the next layer.
On flat side panels, use a flat abrasive. On carvings, use a soft sponge without pressure. Do not try to reach the deepest recesses with a hard tool: the risk of chipping or smoothing the pattern may outweigh any possible benefit.
Sanding is permissible only after the condition specified in the primer instructions has been reached. If the material is still soft and rolls up, further processing will damage the surface. Remove dust before the next stage.
How to tell the part is ready for painting
Check four signs: the primer has dried according to the instructions, there are no uncoated areas or runs on the surface, the relief has retained clear boundaries, and after careful permitted intercoat processing no loose dust or peeling film remains.
For light-colored enamel, additional monitoring of a test sample after full intermediate drying is useful: if yellow or brown spots appear on it, the isolation scheme should be revised before painting all the strips.
How to paint carved wooden trim with a brush and a spray gun
Brush: control the recesses, not just the face surface
For a small volume of work, a quality brush recommended by the enamel manufacturer is suitable. The size should allow working inside the pattern without bending the thin elements of the carving. A brush that is too wide transfers more material into the recesses than required.
Pick up a small amount of the product and distribute it over several adjacent fragments of the ornament. First coat the hard-to-reach areas, then, with smooth movements along the length of the profile, level the open surfaces. Periodically return to the recesses: if excess paint has collected there, remove it with an almost dry clean brush while the coating still allows correction.
On a long profile, move in successive sections, maintaining a working wet edge of the layer according to the properties of the material. Do not rub the drying enamel repeatedly: this can leave brush marks and disrupt the forming film.
If the strip will be painted on all accessible sides, secure it on supports so that the decorative surface does not touch the table. The contact point between the support and the part being painted should be planned in advance.
Spray gun: thin pass and control of side faces
Spraying helps achieve an even coating on a series of identical parts, but by itself does not guarantee that the carving is preserved. Equipment settings are chosen based on the viscosity and requirements of the specific enamel. Do not set universal values for pressure, nozzle, and thinning: they depend on the material and the spray system.
Start with a test sample. Hold the sprayer in a suitable position relative to the profile, make smooth passes with the specified overlap. For a deep pattern, one frontal pass is not enough: assess how the side faces are covered and, if necessary, adjust the direction of subsequent passes.
Do not hold the spray over a single recess. If sprayed too close or moved too slowly, paint accumulates in the lower points. If the distance is too great, the risk of dry spray and roughness increases. Both defects are first checked on a sample, not on a finished batch.
Work with organized ventilation and protection of the respiratory organs, eyes, and skin in accordance with the material safety data sheet. Solvent-based products require equipment and premises that meet fire safety requirements; a domestic room without suitable extraction is not suitable for such work.
Why thin controlled layers preserve the ornament
Opacity is achieved through the properties of the system and the cumulative coating, not by trying to lay down all the enamel in a single pass. Several coats of acceptable thickness with the necessary drying allow the wood to be gradually covered while you watch for the buildup of material in the recesses.
At the same time, "thinner" does not mean arbitrarily diluted paint. Too little material also violates the manufacturer's recommendations and can impair the protective properties of the film. Follow the permissible application thickness, number of layers, and overlap intervals from the technical documentation.
After each coat, compare the same section of the pattern with an unpainted sample. If the boundary between two scrolls becomes blurred, the next coat must not be applied automatically: first determine the cause of the coating buildup.
How to paint a long strip without visible transitions
Prepare the supports, lighting, and a working path along the entire workpiece before opening the can. A long molding is inconvenient to reposition once painting has begun: an accidental touch on a wet area will leave a mark, and stopping in the middle of the face side will create a visible boundary.
When working with a brush, finish a continuous section up to the natural end of the profile or a technological joint. When spraying, ensure a consistent speed of movement and distance to the surface; maintain the same position of the parts within a batch.
Check not only color saturation but also gloss. On a repeating carved pattern, a spot with a different gloss is often more noticeable than a slight difference in shade.
Test coat: a small check before finishing the entire batch
For the first check, take an offcut of the same molding with a characteristic carving depth. It must have the same species, quality of processing, and surface condition as the main products. If the order includes oak and beech, prepare a separate sample for each species.
- Prepare the sample in the same way as the main strips: sanding and dust removal.
- Apply the selected primer and allow the specified time.
- Assess the emergence of wood substances, grain raising and pattern retention.
- Apply the enamel with the same tool and in the same sequence planned for the batch.
- After the specified drying time, inspect the surface under normal and raking light.
- Check adhesion and serviceability only by the method and after the period recommended by the system manufacturer: a premature scratch test does not show the true strength of a fully cured coating.
It is useful to make two control samples: one according to the recommended technology, the other deliberately with excessive application on a small area. The comparison helps to see exactly how the depth of a specific ornament is lost. The second sample is not used for installation.
Painting the moulding before or after installation
Pre-painting gives access to the side faces and complex carving. The part can be turned, checked under light and the ends treated. This method is especially convenient for serial finishing of furniture decor. But after cutting, new exposed ends will appear, and local coating restoration will be required at joints and fastening points.
Painting after installation helps to achieve a uniform color with adjacent elements of the composition and to cover the fastening marks. However, the risk of touching the furniture facade or the wall is higher, and deep relief near internal corners becomes less accessible. It is more difficult to maintain a uniform layer thickness along the entire length of the profile.
A reasonable compromise for many projects is to pre-prepare and prime the available surfaces, carry out installation in compliance with the adhesive requirements, and then finish the joints and the final coating. But this sequence is not suitable for every adhesive system: some bonds require clean, unpainted wood.
Why cracks appear at joints
Even a high-quality enamel does not eliminate changes in the dimensions of wood when humidity fluctuates. If parts are assembled under stress, fixed to a weak base, or have poorly fitted end faces, the finish layer at the joint may crack.
Before painting, check the dry assembly, the quality of the joint, the chosen adhesive and the condition of the wood. On wide elements, take into account the structure of the entire construction and possible movement. Do not fill a moving joint with rigid filler in the hope that it will stop the movement of the solid wood. Cosmetic repair is possible only after the cause of the defect has been eliminated.
Three examples of STAVROS carved moulding: different challenges in painting
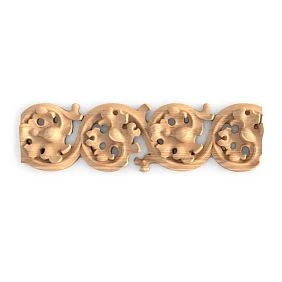
K-125 "Braid": how to preserve a fine repeating pattern
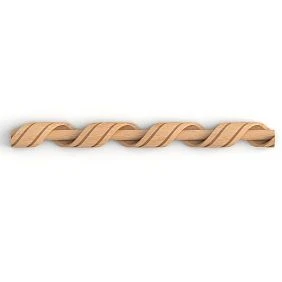
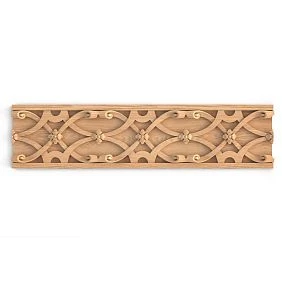
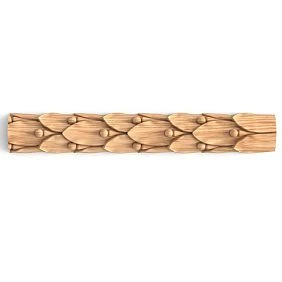
Carved moulding K-125 is made with the “Braid” pattern and is available in oak and beech options. The product card lists compact sections, including 9 × 4, 14 × 7 and 20 × 10 mm. For painting, the thinnest version is especially telling: the volume of paint that is almost imperceptible on a wide baguette can fill the small gaps between the links.
When working with a brush, choose a tool that allows you to meter the material, and check each group of interlacements in side light. If paint collects between adjacent links, remove the excess before it sets. For series spraying, first set the mode on a cut-off piece so as not to lose the repeatability of the contour along the length.
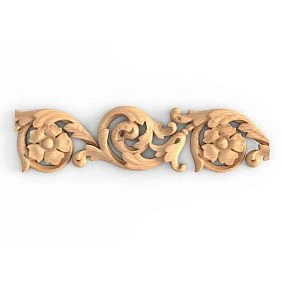
K-002 “Swamp Leaf”: how to paint a plant ornament
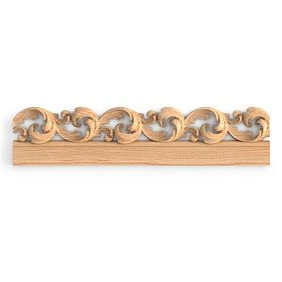
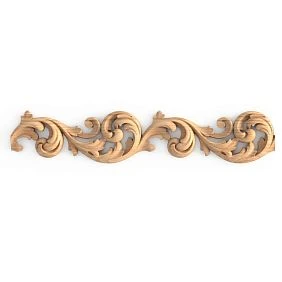
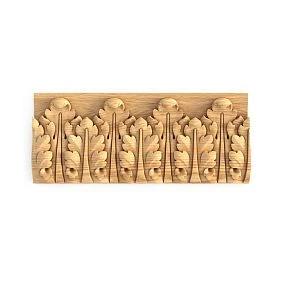
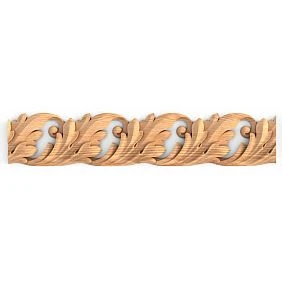
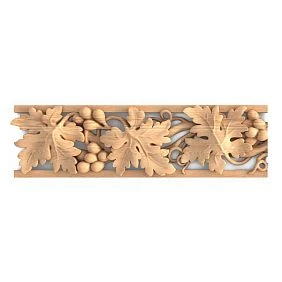
У carved moulding K-002 the pattern is built on a marsh-leaf motif. The catalog presents various sections, for example 25 × 16 and 40 × 26 mm, in oak and beech. In the plant ornament, the curves of the side surfaces and the base of the leaf are important: these are exactly the places where it is easy to miss an area or leave excess primer.
Prime the relief so that the material reaches the side faces, not just the tops of the leaves. Then inspect the profile at an angle. If a build-up is visible at the bottom of a recess, it must be removed before moving on to the enamel. For finishing in an opaque colour, choose a suitable blank version, and do not take the “for enamel” marking as meaning that primer is already present.
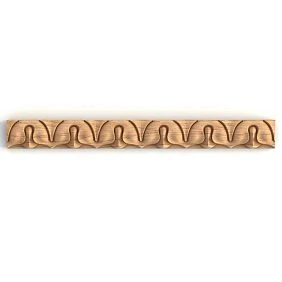
K-016 “Ionic”: how to preserve the rhythm of a classic design
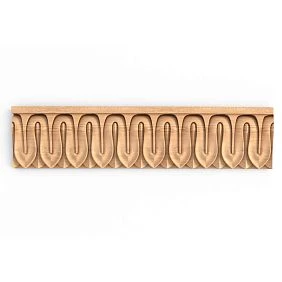
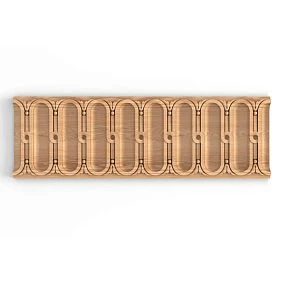
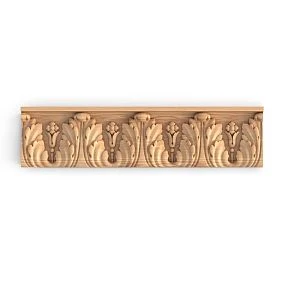
Carved molding K-016 has an "Ionica" ornament with relatively shallow detailing. Among the options in the catalog there are sections of 23 × 17, 30 × 22 and 40 × 30 mm. Such a pattern is perceived as a sequence of identical elements. If one area is covered by a thicker layer of enamel, the disruption of the rhythm becomes noticeable.
For K-016, it is useful to select a control fragment of several repeats in advance. Compare it after priming and after each coat of enamel, especially at the transitions between the convexities and the background. The goal is to preserve the same depth and illumination of adjacent elements, not to achieve a visually solid smooth strip.
Other variants of carving and sections are presented in the section STAVROS carved wooden molding. When choosing a product, compare the size of the ornament with the real scale of the furniture or wall composition and assess in advance the access to the recesses during finishing.
Seven mistakes when painting carved wooden decor
| Mistake | What the result looks like | Reason | What to do |
|---|---|---|---|
| Skipping the test coat | An unexpected shade, uneven gloss or spots showing through | The system has not been tested on the specific wood | Test the primer and enamel on an offcut from the same batch |
| Incompatible primer | Peeling, poor wetting, stains | Error in selecting the system or preparing the surface | Remove the defective layer and use a compatible primer |
| Enamel too thick | Softening and disappearance of fine pattern lines | Excessive wet film thickness | After the permitted drying time, assess whether careful reworking is possible; in case of deep flooding, coating removal may be required |
| Paint accumulation in recesses | Frozen drips, "bridges" between parts | Excess not distributed before setting | Remove excess in time; remove hardened runs carefully, taking the coating into account |
| Insufficient drying | Tackiness, support marks, wrinkles or damage to the next layer | Overlap interval or drying conditions violated | Stop work and follow the manufacturer's instructions for correction |
| Untreated end faces | Stains, uneven gloss and increased absorption on cut ends | End-grain fibers are not prepared | Prepare and prime the exposed end grain using a compatible method |
| Installation before the coating is fully cured | Marks, chips and damage at clamping points | The enamel has not yet reached the required strength | Allow the full curing time and use gentle fastening |
It is especially risky to correct a defect without first determining its origin. A yellowish stain from wood substances cannot be reliably eliminated by adding another thick coat of the same enamel. It is pointless to keep smearing a moving crack at a joint. And a chip in the relief should not be filled with a material that, after sanding, will turn the sheet or scroll into a shapeless mass.
How to care for painted carved mouldings
Dust removal
Dust settles in the recesses of the pattern more noticeably than on a flat surface. For regular cleaning, use a soft dry brush, a brush, or a vacuum attachment that does not scratch the coating. Move along the pattern without pressing hard. Stiff bristles can damage the sharp painted peaks of the ornament.
Wet cleaning without damaging the finish
Whether wet cleaning is permissible depends on the type of topcoat and its degree of curing. If the manufacturer permits such cleaning, use a slightly damp soft cloth and a compatible product. Do not leave water in recesses or at the joints of wooden parts.
Aggressive solvents, abrasive sponges and concentrated household chemicals without a compatibility check can cause clouding, a change in gloss or softening of the film.
Local touch-up of a chip
First remove loose edges of the damaged finish and dust. Make sure the wood and the surrounding film are dry and sound. Then restore the primer layer and enamel according to the manufacturer's scheme, affecting the adjacent ornament as little as possible. Check the color and gloss after drying: fresh paint may differ from the old finish even with the same shade name.
If a long moulding has numerous chips or uneven gloss, local touch-up may create patchiness. In that case, it is more sensible to renew the finish of an entire continuous section after proper surface preparation.
Frequently asked questions
Can wooden mouldings be painted with ordinary wall paint?
It should not be chosen without confirmed suitability for wood and the relevant operating conditions. A coating for mineral walls may differ in adhesion, resistance to cleaning and behavior on furniture parts. For carved moulding, a system is preferable that the manufacturer approves for painting wood and that allows the desired finish appearance to be achieved without loss of detail.
Which primer is suitable for carved oak decor?
A primer compatible with the enamel and the prepared wood is required. For light finishes, check the risk of tannins bleeding through: a special isolating primer may be needed. The choice should be confirmed by technical documentation and a test coat on the same oak. The word "universal" on the packaging does not guarantee isolating properties.
Does beech need to be sanded before painting?
The surface is usually prepared by sanding, but its intensity depends on the factory finish and the condition of the item. On carvings you cannot work as vigorously as on a flat board. After the first water-based primer, raised grain may appear; it is removed by careful intercoat sanding only after the required drying time.
How to paint a carved baguette without hiding the pattern?
Choose a compatible system, make a test coat and control the thickness of each layer. Use a brush to remove excess from the lower points, and when spraying, do not hold the jet over one fragment. Check the pattern contours from the side. If the relief starts to look rounded or the recesses become bridged with paint, further application must be stopped.
Can mouldings be painted after installation?
Yes, especially if a uniform color with the frame or wall panel is needed. But next to finished furniture it is harder to treat the side parts of the ornament, and the ends and glued joints may become inaccessible. Before installation, agree the sequence of priming and painting with the adhesive requirements, and after installation remove the fastening marks and carry out the final finishing.
Why does enamel collect in the recesses of carvings?
The cause is more often related to an excess of wet material, the application method or the position of the profile. On the lower areas of the pattern, excess paint is not distributed and forms runs. The solution is to reduce the material feed within the permitted technology, change the direction of passes and promptly remove the accumulated layer before it sets.
What is the difference between opaque painting and tinting?
Enamel forms an opaque color and largely hides the wood texture. Stain or another tinting system changes the shade while preserving the grain pattern; it often requires a separate protective coating afterwards. For oak with matched lamellae, a transparent finish may make more sense than opaque painting. For a blank with non-uniform lamella color intended for enamel, an opaque finish is often more rational.
How to fix drips on already painted molding?
While the compound can still be adjusted, carefully spread or remove the excess with a suitable tool. A hardened drip cannot simply be covered with new enamel: it must be carefully treated or removed in a way compatible with the specific coating. On delicate carving, aggressive sanding can damage the wood. In cases of severe flooding, a complete redo of the coating on the damaged area is sometimes required.
What determines the quality of the final result
Carved wooden trim is judged not only by even color. A good finish preserves the spacing between ornament elements, leaves no drips on the lower edges, and does not arbitrarily alter the shape of leaves, scrolls, and repeating links. To achieve this, the wood is inspected before work, gently sanded, cleaned of dust, and a compatible primer and enamel pair is tested on a sample.
Oak and beech require attention to different properties, while end grain, joints and fastening points need separate preparation. After painting, the specified drying and curing times are observed before installing the decor and subjecting it to load.
A profile suitable in pattern and cross-section can be selected in the catalog STAVROS carved wooden molding, after first comparing the finish of the blank for enamel or tinting and the conditions of the future finishing.