Article Contents:
- Which shaped moulding requires pattern matching
- What to check on a whole stock strip
- Repeat: how to find the repeat and not mistake it for the finished part size
- Where to start the layout: from the center, the corner, or a large motif
- How to mark out a symmetrical furniture frame
- Why the four sides cannot be cut independently
- 45° cut: geometry and ornament separately
- What to do if the pattern does not align at all four corners
- How to continue the pattern at a lengthwise joint
- Paired fronts: one scheme for two products
- Drawers of different widths: a common principle instead of identical segments
- Relief direction and wood grain are checked separately
- What to add to the cutting map for shaped moulding
- What a template, a short sample and a test angle will show
- Post-finishing check: which mistakes become more noticeable
- When carved moulding is needed and when standard moulding is enough
- How to repeat an approved pattern in a small batch
- Where to buy shaped wooden moulding for a specific frame
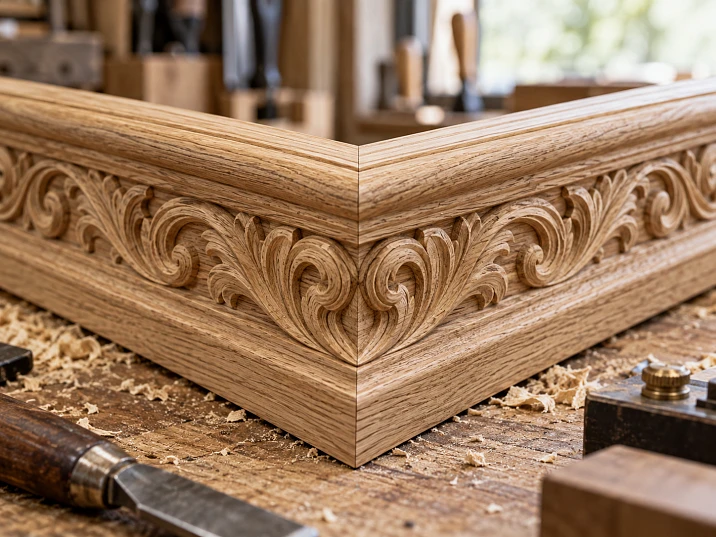
Four pieces are cut precisely, the frame diagonals match, and there are no gaps at the miters. But in one corner two whole strips meet, in another half a scroll remains, and the bottom rail begins quite differently from the top one. This happens when the dimensions were checked before cutting, but the position of the ornament was checked afterwards.
For a profile with a repeating pattern, the cut position is determined by two conditions at once: the geometry of the frame and the section of the relief that will fall on its edge. First you need to align the center, the ends, and the adjacent sides, then transfer the markings to the specific strips. This order is especially important for cabinet fronts, furniture frames, paired nightstands, and several identical items: a slight shift of the motif becomes noticeable when comparing them.
Which shaped moulding requires pattern alignment
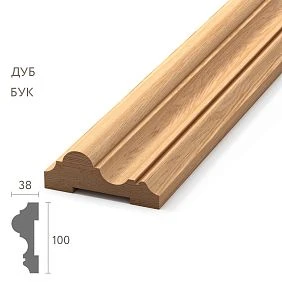
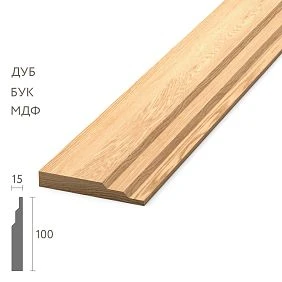
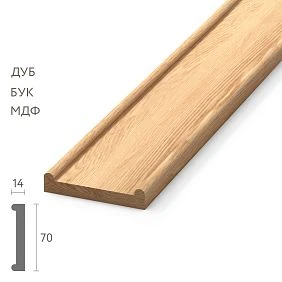
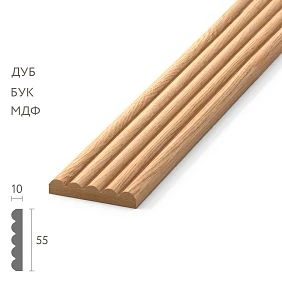
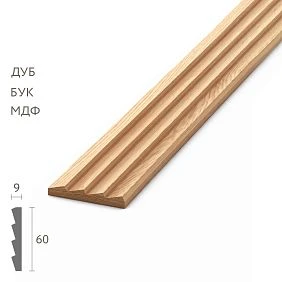
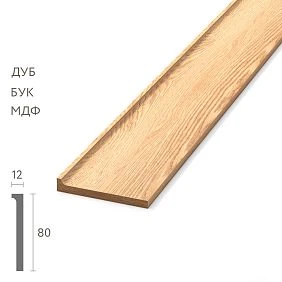
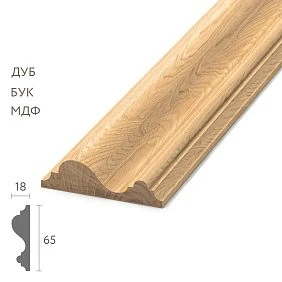
The word "shaped" can describe the cross-section: a bead, a groove, a step, a combination of convex and concave sections. At the same time, along the entire strip the profile remains the same. For such a piece, the position of the section, the dimensions, and the quality of the joint are important, but there is no need to look for a repeating leaf or bead.
Another task arises when a decorative wooden profile has an ornament along its length. On the face surface, elements alternate, there are intervals between them, and some motifs have different beginnings and ends. Randomly cut pieces of equal length may look different.
Choosing shaped wooden moulding, determine what exactly will need to be aligned: only the section lines or also the longitudinal pattern. Not every shaped profile is carved, and the presence of relief does not in itself mean a strict repeat. This determines the marking method: by dimensions, by repeat, or by individual recognizable points of the decor.




What to check on a whole stock strip
Photos of a small fragment are enough for an initial selection, but not enough for laying out the frame. You need a clear picture of the entire length: where the large elements are, how they repeat, whether there is a direction, and which sections can be used for a calm ending.
On the resulting blanks, mark the strip number, the face side, and the edge that should face inside the frame. Markings are placed on the back or on removable labels, without damaging the surface under the future finish. A separate arrow indicates the direction of the ornament. It will come in handy when the short pieces are taken off the table and moved to assembly.
Even for identical product codes, the start of the product strip should not automatically be taken as the same point in the pattern. Compare the actual blanks and choose your own reference points. If you need the information before purchasing, request a full image of the desired version and the available dimensions.
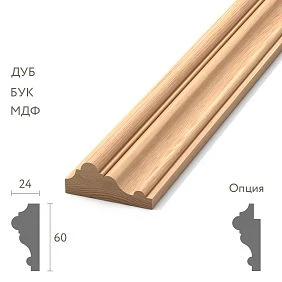
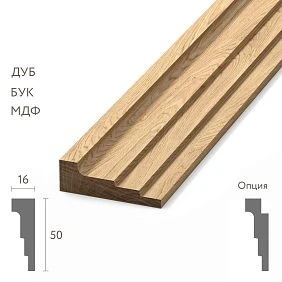
For example, in the product page wooden moulding K-097 various widths and materials are available. Specifying the length of the item does not indicate the repeat of its pattern. For a wooden frame, you must separately select the solid wood version and check the relief of the specific size chosen.
Our factory also produces:
Repeat: how to find the repetition and not mistake it for a finished part size
A repeat is a recurring section of an ornament. For marking out, it is convenient to measure the distance between identical points of adjacent repeats: for example, between the centres of two identical rosettes. Checking several consecutive intervals helps to understand whether the pattern is truly regular.
Let us consider a conventional profile with a 60 mm repeat. On the same longitudinal reference line, points located 420 mm apart are separated by seven repeats. The second will be in the same position of the motif. At a distance of 440 mm, there will be a 20 mm offset relative to this position.
This is an example of checking the pattern, not a formula for the external length of any frame. An angled cut crosses the entire width of the profile, so matching points on one line does not yet mean the entire relief matches at the corner. You cannot simply make the sides multiples of the repeat and consider all four joints solved.
If there is no strict repeat, use visual reference points: the centre of a large leaf, the start of a groove, the gap between scrolls. They are marked on a photograph or template. There is no need to invent a numerical step for an irregular pattern.
Get Consultation
Where to start the layout: from the centre, corner or a large motif
The starting point is chosen based on what should look most convincing on the finished furniture. For a front with a handle on the central axis, this is often the middle of the frame. For a surround with expressive corners, the priority may be different.
| Layout starting point | When it fits | What to check additionally |
|---|---|---|
| Central axis | Symmetrical facade, frame around the central decor | Both ends and adjacent sides |
| Most prominent corner | The joint is visible and determines the impression of the piece | Center and opposite corner |
| Large ornament element | The pattern has a main leaf, rosette, or other accent | Its position relative to the handle, overlay, and edges |
The chosen starting point sets the priority but does not cancel the other checks. If a beautiful center leads to poor ends, the solution is sought before cutting: the position of the motif, the allowable frame dimensions, or the profile itself are changed.
It is useful to write down right away what has been agreed with the customer. The wording "the main motif is on the axis, the ends are symmetrical" is clearer than the wish to "make it beautiful": it can be used to check the sample and repeat the result on the next facade.
How to lay out a symmetrical furniture frame
First, the boundaries of the frame and its axes are marked on the facade or on a full-size drawing. This refers to the dimensions of the frame itself, not just the width of the door: the offsets from the edges should already be determined. Then the profile is placed against the top side and the position of the central motif is chosen.
The working sequence looks like this:
- Align the axis of the frame with the selected point of the pattern.
- Measure from it the distances to the left and right ends along the accepted measurement line.
- Mark both proposed cut lines, keeping an allowance for final processing.
- Assess which fragments will end up at both corners.
- Select the adjacent vertical sections and check the joints.
- Transfer the agreed scheme to the remaining sides and only then prepare the parts for sawing.
Equal distances from the center give geometric symmetry. Mirror symmetry of the ornament will only be achieved when the pattern itself and the chosen position allow it. A directional scroll cannot be made mirror-symmetrical by a single measurement.
If the top of the frame must align with the overlay, check them together. Otherwise, the central rosette of the moulding may end up partially covered by the decor, even though the individual strip was marked out correctly.
Why the four sides cannot be cut independently
For a frame, it is not enough to produce two long and two short pieces. The sections of the pattern must be distributed in advance between the top, bottom, left and right sides. It is convenient to lay out the blanks around the drawing and mark each future corner with a separate number.
Then it is clear what will happen after assembly: whether the verticals are finished identically, whether the top and bottom are consistent, and whether two large elements collide in the same corner. Such a check is especially useful for a profile with several bands of relief. Matching wide ornament does not mean that the fine chain along the edge will also continue without displacement.
Keep the chosen distribution when cutting. Moving a short offcut from the bottom side to the top is sometimes possible, but only after re-comparing the pattern. Equal length does not make the blanks interchangeable.
In the workshop, a photograph of the full layout with labels helps. It should show the direction of the pieces and the corner numbers. Such a photo supplements the dimensions and allows the assembler to reconstruct the intent without guessing which side was considered the top.
45° cut: geometry and ornament separately
For a flat rectangular frame made of the same profile, a mitre joint usually involves two 45° cuts. The blanks must be in the correct position relative to the base and the stop. For three-dimensional cornices, inclined profiles and non-right angles, the cutting scheme will be different.
The geometric check is carried out on the mating plane, the angle and the alignment of the edges. The decorative check is based on how the grooves run, where the raised areas end and what happens to the main motif. A tight joint can remain visually unsuccessful if one large element is cut through by accident.
Before the final cut, mark the mitre lines on the two selected sections and compare the pattern along the entire joint line. Then make a test corner from the same profile. A flat image helps to choose the location, but a real sample shows how the volumes and shadows meet.
If the tip of the leaf turns out to be too thin at the cut exit, consider shifting the layout or using another solution for the corner. Sanding down the adjacent relief until it matches without checking is risky for the appearance: the lines will become different, and the removed material cannot be put back.
What to do if the pattern does not align in all four corners
With a fixed frame, a given profile width and a directional ornament, perfect alignment of all motifs may be unattainable. Moving the strip changes the position of the pattern at both ends at once. Fixing one corner can easily make the opposite one worse.
In such a situation, the permissible changes are determined first. If the frame dimensions can still be adjusted, check the other dimension while preserving the required facade margins. If the dimensions are fixed, compare options with different positions of the central element and choose a consistent completion of the pattern. Sometimes the project benefits from a calmer profile.
Another option is a separate corner element, if a compatible solution exists for the chosen molding. It must match in cross-section, scale, material and method of joining. An arbitrary rosette placed over the problem area does not automatically become a correct joint.
Material savings are assessed after the composition is chosen. An additional piece may be needed to start the part with the required motif. But even a large reserve will not fix a fundamentally incompatible scheme: first the pattern is approved, then the consumption for repeating it is determined.
How to continue the pattern at a lengthwise joint
When one strip is not enough, the two sections are selected so that the sequence of the ornament is preserved after joining. Check the direction, the position of the motif and the cut lines. If two identical halves are placed next to each other instead of continuing the pattern, an extra doubling will appear at the joint.
The joint location is assessed along the entire finished side. The center of a long strip is often especially noticeable, so it is not worth choosing it merely for equal segments. A calmer area between large elements may turn out better if it is suitable for the intended joint and fastening to the base.
A straight or mitered joint is chosen taking into account the profile and construction. A mitered cut does not guarantee invisibility: differences in relief, grain, shade and quality of fit remain. On a narrow convex area, the line may be more noticeable than on a wide flat surface.
First assemble a trial continuation dry, then check it with the planned finish. Inspect from a normal distance and under side lighting. If the joint becomes an independent accent, its position should be changed or the division of the framing reconsidered while the main parts have not yet been manufactured.
Paired fronts: one scheme for two items
Two doors side by side allow the position of the pattern to be compared instantly. Even if each frame is neat in itself, a shift of large elements between them creates the impression of random selection. Therefore, wooden moulding for furniture on paired fronts is laid out simultaneously.
First establish the general rule: the same position of the motif on both doors or a mirrored composition relative to the middle of the cabinet. These are different tasks. For identical frames, the centres, ends and direction of all corresponding sides are compared. For a mirrored pair, it is additionally checked whether the ornament allows the required reflection to be obtained.
Rotating a strip by 180° in the plane of the front is not equal to mirror reflection. In addition, with an asymmetrical section, such a rotation can swap the inner and outer edges. The decision must be assessed on the full profile, not just on a single sheet.
Mark the sets before cutting: front number, top, bottom, left and right sides. If solid wood furniture profile is planned for a transparent finish, select the corresponding parts immediately and by wood as well. Mixing up the sets after a successful layout will reduce this work to zero.
Drawers of different widths: a common principle instead of identical segments
Narrow and wide fronts may sit side by side on a chest of drawers. The same fragment of an ornament cannot always be placed on them identically: the distance between the corners and the number of repeats change. Here a common logic of composition is needed.
The first option is to align a recognisable motif with the centre of each drawer. Its position is repeated, and the edges are checked separately for each width. The second is to maintain the same principle for the design of the ends and allow different filling of the middle. The choice depends on what is more noticeable: the central decor, the handles or the corners of the frames.
In a conditional project with one wide drawer under two narrow ones, each upper front will have its own axis. The axis of the entire chest of drawers cannot be automatically transferred to them. At the same time, the lower frame should be perceived as part of the same system: with a coordinated scale, margins and direction of the relief.
Check the fronts on the general drawing in the closed position. A single frame may look balanced, but next to neighboring ones an unwanted step of large motifs or too dense a row of accents near the handles may become apparent.
The direction of the relief and the wood grain pattern are checked separately
A wooden strip has a decorative ornament and its own material texture. The first is set by the shape of the product, the second is tied to the wood. Matching carved elements do not guarantee a close shade and a similar grain pattern on adjacent sides.
For tinting, oil or clear lacquer, lay out the entire set in advance. Assess whether there is a sharp transition between a calm and a very expressive area, especially on the top side and on adjacent fronts. The angle itself changes the direction of the parts; the task of matching is to achieve a consistent impression, not to promise continuous grain around the entire frame.
Oak moulding is often chosen for its pronounced texture. Beech allows for a calmer base, including under enamel, but the choice of species does not solve the issue of joining and does not replace surface preparation.
For STAVROS, the parameters of lamination under enamel and under tinting are described in the section quality of wooden products. They should be considered separately from the quality of sanding. The availability of the required finish is confirmed for a specific article, and the final appearance is approved on a sample of the selected wood.
What to add to the cutting map for shaped moulding
A usual entry of “two parts of such-and-such length” does not convey the position of the pattern. The cutting map includes information that links the finished side to a specific section of the original strip. Size and decorative landmarks must be read together.
| Entry field | How to mark | What it's for |
|---|---|---|
| Item and side | Front No. 1, top | Save part assignment |
| Finish length | Size per drawing, between outer tips of the miters | Avoid confusion between outer and inner dimensions |
| Source plank | Blank number | Find the selected area |
| Start and end of the pattern | Marks on the photo or template | Reproduce the position of the motif |
| Orientation | Ornament arrow, inner edge mark | Do not flip the profile during assembly |
| Cuts and allowance | Sketch of the left and right ends, allowance amount | Distinguish the rough and finished part |
| Adjacent sides | Numbers of the two joints | Check the frame as a whole |
This is the record structure; actual values are taken from the agreed layout. The "45°/45°" mark alone does not show the direction of both cuts and the position of the long edge.
Available STAVROS drawings and models help verify the cross-section and dimensions. The availability of the required file is confirmed by the item code. Custom pattern marks are still matched to the resulting strips, and the kerf width is taken into account when placing adjacent blanks.
What a template, a short sample, and a test corner will show
A full-size paper layout lets you assess the frame contour, the facade margins, and the position of the motifs. The image must be at a verified scale: a stretched photograph will create a false match. Such a template is convenient for choosing a composition, but it does not show how the three-dimensional relief meets after cutting.
The catalog includes Samples of linear products 100 mm long. A short section helps you see the cross-section, the surface, and the execution details. However, it may not accommodate the full repeat of the ornament or the required sections for two mating sides.
To check a complex corner, you will need material from which both selected end profiles can actually be produced. If the task involves staining oak, a sample of another species will not confirm the result. The composition of the samples and the availability of the required material should be confirmed in advance.
Try the finished test corner against the facade: next to the base plane and the handle, the scale is perceived more accurately. For a series of paired doors, after checking the corner, assemble the first full frame. Only it will show the simultaneous result at the center and at all four joints.
Checking after finishing: which errors become more noticeable
An unfinished joint and the same area after finishing may be perceived differently. Staining emphasizes differences in absorption, patina highlights recesses, and side lighting reveals unevenness on convex lines. Therefore, approving only an untreated corner is not enough if the appearance of the product is determined by the coating.
The test joint is prepared according to the adopted technology: with the same wood preparation, gluing sequence, and application of finishing materials. No glue should remain on the face side that would interfere with uniform coloring. The method of its removal is chosen taking into account the adhesive composition and the future coating; accidental sanding may damage fine relief.
When selecting Mounting and finishing materialscheck compatibility with the base and the adopted coating system. The presence of a composition in the catalog does not mean that it is suitable for any joint. Practical recommendations can also be clarified in the section installation and finishing tips.
Putty does not restore a displaced ornament. If a bead has disappeared or a leaf has been torn off at one end, the layout or the part must be corrected. Finishing should complete an agreed form, not mask its random breaks.
When carved moulding is needed, and when a moulding is sufficient
An expressive ornament is justified if it participates in the furniture composition: supports a carved overlay, emphasizes a large frame, sets the character of the facade. In such a project, selecting sections and trial joints become part of manufacturing, which is taken into account already when estimating labor intensity.
Before buy carved wooden molding, check whether its characteristic motif fits on the shortest side. If a significant part of the ornament constantly goes under the cut, only a set of fragments may remain on a small facade. Reducing the number of repeats affects the impression no less than the width of the strip.
For calm framing, suitable are Wooden moldings for furniture with a longitudinally constant cross-section. They preserve the volume and expressiveness of the edge, but do not require coordinating a repeating ornament. Cutting accuracy, wood selection and installation quality remain essential.
Compare options on the same facade, with identical margins. This helps to understand whether complex decorative wooden moulding is really needed or whether a simpler profile fully solves the task.
How to repeat an agreed pattern in a small batch
After approving the first frame, save its diagram, photographs of the joints and markings of control points. For identical products, it is necessary to repeat not only the lengths of the sides, but also the selected position of the ornament. With a new batch of blanks, first compare the actual pattern with the reference.
A stop on the machine helps maintain the dimension, but by itself does not determine where the pattern begins. If the pattern on the source strips is positioned differently, the same distance from the factory end will produce different parts. Before serial cutting, each strip is referenced to an agreed datum.
It also makes sense to label the offcuts. A short piece with a good ending may be useful for a test or a small side, whereas a longer one may not suit because of the position of the relief. The usefulness of an offcut is determined by both length and pattern.
When purchasing for a workshop, review STAVROS terms for manufacturers and agree on the configuration of the selected item. Material for the corner test, the first front and repeat parts is counted separately in the order so that trial work does not use up blanks already allocated to finished products.
Where to buy shaped wooden moulding for a specific frame
Selection in the STAVROS catalogue should begin with the frame dimensions and a photo of the desired pattern. Then choose the item, material, cross-section, length and available finish option. Before ordering, you need to understand which sections will be needed for the centre, corners and paired sides.
To buy shaped wooden moulding for a specific project, prepare a drawing of the frame with the measurement line marked, the number of fronts and the symmetry requirement. Attach the chosen orientation scheme: identical frames or a mirrored composition. This makes it easier to discuss a suitable profile and the volume of material than with just one total length of the perimeters.
Lead times, configuration and availability of the required option are checked against the specific order. If the pattern has not yet been tested in a joint, first provide material for a sample. Base the decision on the batch on the assembled joint and the approved layout: these are what show how the decorative wooden moulding will look on the finished furniture.