Article Contents:
- Can stucco decor be used in the bathroom and toilet
- Where stucco decor looks best in the bathroom
- Wall with mirror
- Area above the sink
- Wall above the hanging vanity
- Guest toilet
- Bathroom niche
- Wall section next to the door
- Accent wall without direct contact with water
- What to choose for the bathroom: moldings, overlays, or a ready-made set
- Moldings for frames and zoning
- Decorative overlays for accent
- Decor for moldings
- Ready-made sets for a large wall
- How to combine moldings with tiles, paint, and porcelain stoneware
- Moldings on the painted part of the wall
- Moldings next to tiles
- Decor around the mirror
- Moldings in wall color
- White decor on a colored wall
- Contrasting decor for a guest bathroom
- Which styles are suitable for the bathroom and toilet
- Neoclassical
- Neoclassic Light
- Jatoba
- Versailles Light
- Mistakes when choosing stucco decor for the bathroom
- Using decor in an area of direct constant wetting
- Do not account for ventilation and base preparation
- Choosing too large a pattern for a small bathroom
- Mixing moldings, tiles, and mirrors without a common axis
- Not planning the color of moldings before painting
- Not coordinating decor with baseboard, door, and lights
- Installation of polyurethane decor in the bathroom: key points
- Calculation and planning of decor for the bathroom
- What to buy for decorating a bathroom or toilet
- Mirror area: analysis of one solution
- Features of designing niches and non-standard areas
- Frequently asked questions
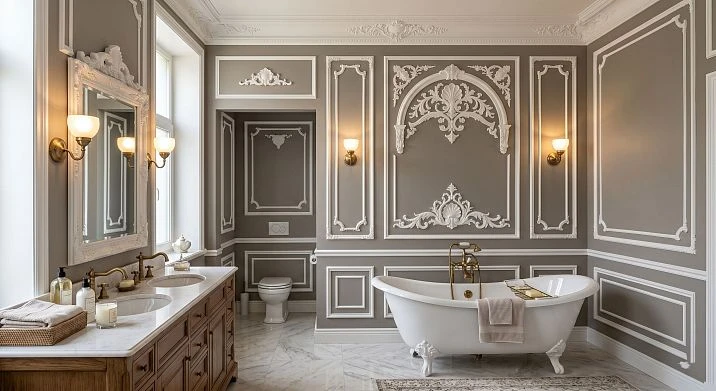
The bathroom is one of the most personal spaces in the home. A place where the morning begins and the evening ends. Yet, it is the bathroom and toilet that most often remain in the shadow of design attention: homeowners furnish the living room, bedroom, kitchen, while the bathroom gets only tiles and standard plumbing. But addingstucco decor for the bathroom— and everything changes. Walls gain depth, the mirror turns into a picture frame, and a small bathroom begins to feel like a thoughtful, complete interior.
Can stucco decor be used in the bathroom and toilet
This is the main question almost everyone starts with. And the answer is not as straightforward as it seems at first glance. Many think that any decor in a wet area is a risk. In reality, it all depends on the material, placement, surface preparation, and finish coating.
Traditional plaster stucco is indeed not intended for bathrooms: it absorbs moisture, swells, crumbles, and becomes covered with mold. Butpolyurethane decor for the bathroom— is a fundamentally different solution. Polyurethane does not absorb water, does not deform with temperature and humidity changes, does not rot, and does not react to steam. It is a closed-cell material where water simply finds no entry point.
The density of polyurethane profiles in the STAVROS catalog ranges from 150 to 420 kg/m³ — this means a dense, monolithic structure without porosity, which ensures the moisture resistance of the products. The decor easily withstands regular fluctuations between hot steam after a shower and cool air during ventilation, without losing shape or peeling off the wall.
However, there are several conditions that must be observed. First, polyurethanestucco decor for the bathroom must be located outside the zone of direct constant wetting — not under the shower, not above the edge of a bathtub without a rim. Secondly, the wall before installation must be dry, level, and primed. Thirdly, after installation, the decor surface is coated with acrylic or latex paint in 2–3 layers — this creates an additional protective barrier. And fourthly, joints and connections to the wall are treated with moisture-resistant acrylic sealant without gaps.
If all these conditions are met, moisture-resistant moldings for the bathroom last for decades — no worse than in the living room or bedroom. Room ventilation also plays a role: in a bathroom with good exhaust and regular airing, the decor will perform significantly better than in a room with constantly condensing moisture on the walls.




Where stucco decor looks best in the bathroom
The bathroom is not a monolithic space. It has zones with different functional and visual potential. Understanding exactly where to place the decor is more important than simply knowing that it can be used.
Our factory also produces:
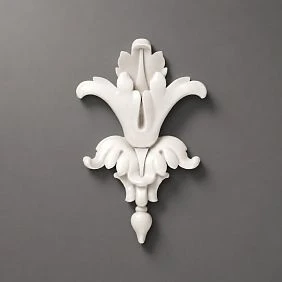
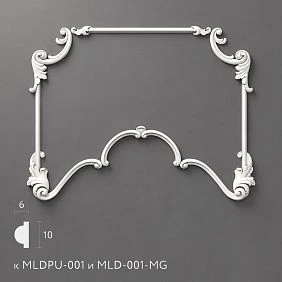
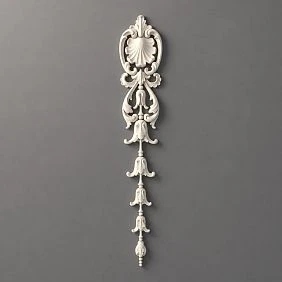
Wall with mirror
The wall with the mirror is the main visual center of any bathroom. It is where the gaze is directed upon entry, and where the daily ritual is concentrated. Decorating the decor of the wall with the mirror in the bathroom is the first and most effective step towards making the space work as a well-thought-out interior.
Moldings around the bathroom mirror create the effect of an object embedded in the wall. The mirror ceases to be just a functional item — it becomes part of the decorative composition. The frame made ofbathroom moldings emphasizes the mirror's proportions, sets the axis of symmetry, and connects it with other wall elements.
Get Consultation
Area above the sink
The wall directly above the sink is a relatively dry surface if the splash zone is covered with tiles or a glass backsplash. Moldings above the bathroom vanity create a horizontal boundary between the "working" tiled area and the painted upper part of the wall. This solution immediately gives the interior architectural quality and completeness.
Wall above the wall-hung vanity
The wall above the wall-hung vanity is a popular area forbathroom wall decor. Here, there is usually a painted surface that visually "sags" if not structured. A frame of moldings or vertical panels elegantly solves this problem: they give the wall the necessary depth, visually connecting the vanity, mirror, and wall into a single system.
Guest bathroom
A guest bathroom is a special case. It is a small, often compact space that is seen by all guests of the house. That is why a more expressive decor is appropriate here than in the main bathroom.Wall decor in the bathroomcan be more accent: contrasting moldings, a decorative frame above the vanity, or a wall insert — all of this creates a memorable, "dressed-up" look.
Niche in the bathroom
A niche in the bathroom is an ideal place for decorative design. The inner surfaces of the niche can be decorated withmoldings for niches and piers, highlighting it as an accent element of the interior. The decor integrates the niche into the overall concept of the space, removing the feeling of "just a hole in the wall."
Pier next to the door
A pier next to the door is a narrow, often empty surface that is difficult to fill with furniture. A narrow vertical molding or several wall panels turn this pier into a decorative accent without visually reducing the already small space.
Accent wall without direct contact with water
Any bathroom wall not directly bordering the water area is an excellent surface for a full decorative solution. Symmetrical frames made of moldings, decorative panels, or a combination of horizontal and vertical zoning turn it into a complete design element. About the principlesof symmetrical polyurethane wall decor it is worth thinking about in advance — before choosing moldings and marking.
What to choose for the bathroom: moldings, overlays, or a ready-made kit
Before going to the catalog, it is worth understanding: what type of decor you need. The task, the scale of the wall, and the desired result determine the choice.
Moldings for frames and zoning
Moldings for the bathroom are a basic tool for wall decor. Profiled strips are used to create rectangular or square frames on the wall, frame a mirror, divide the wall horizontally into "belts" or vertically into sections.
The STAVROS catalog features both laconic profiles with minimal relief and more complex moldings with a multi-step profile for classic solutions. The width of the strips varies — from narrow 20–30 mm to more voluminous profiles suitable for high walls. The choice of molding width depends on the room height: the smaller the bathroom, the thinner and more delicate the profile should be to avoid overloading the space.
For a small bathroom, moldings with a width of 20–40 mm work optimally: they structure the wall without visually reducing it. For a spacious bathroom in a country house, you can use wider profiles and create multi-level frame compositions.
More details about the principles of working with profiles — in the article aboutpolyurethane wall moldings, which discusses the principles of choosing width, corner joints, and options for assembling frames.
Decorative overlays for accent
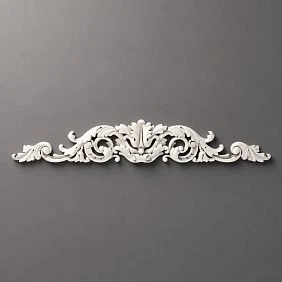
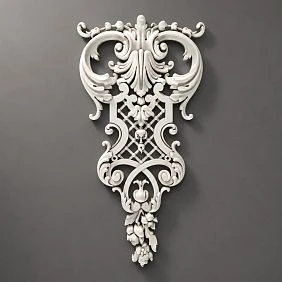
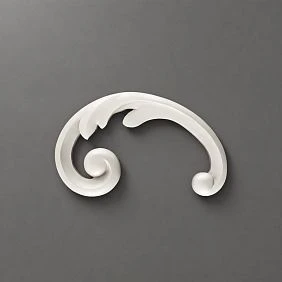
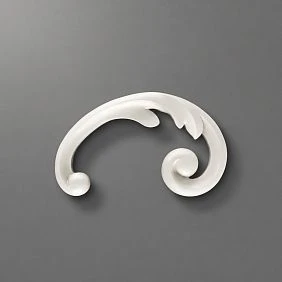
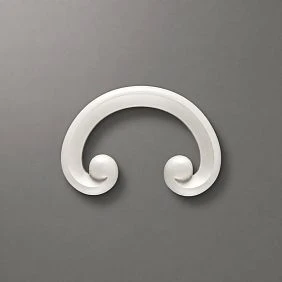
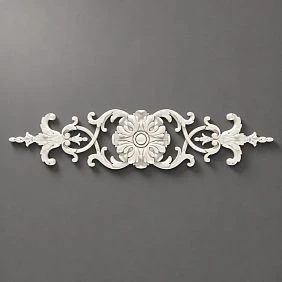
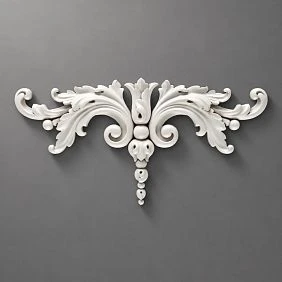
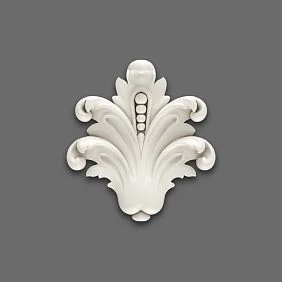
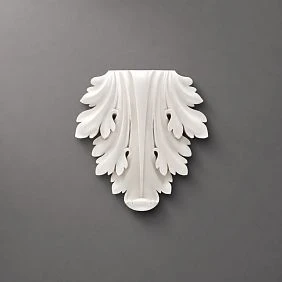
Decorative overlays for the bathroom are three-dimensional elements with floral, geometric, or ornamental relief. They do not create a frame on their own but complement moldings, set accents, and add depth and detail to the decor.
Overlays can be used:
-
near the mirror — as side accents;
-
above a console or vanity — as a central ornament;
-
at the top of the wall — as a frieze or decorative band;
-
on a free wall section — as a standalone element that does not require a molding frame.
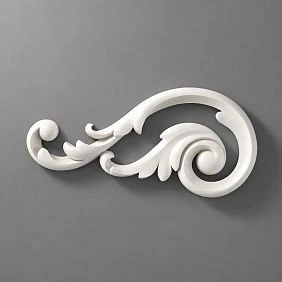
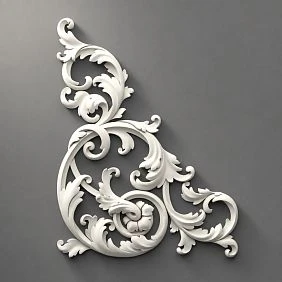
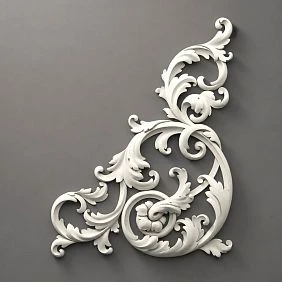
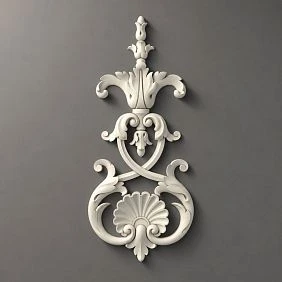
In the STAVROS catalog, in the section decorative inserts are available in various sizes — from miniature corner pieces to large relief panels. This makes it possible to choose overlays for both a delicate, almost imperceptible accent and an expressive, "statement" detail.
Decor for moldings
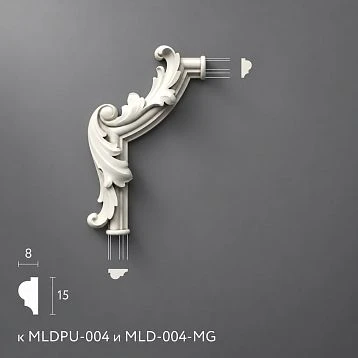
Decor for bathroom moldings are corner and center elements that are installed at the joints of the strips: in the corners of the frame, at the intersections of moldings, in the center of the decorative composition. They solve two tasks at once: decorative and technical.
From a decorative perspectivecorner elements for frames in the bathroomgive the frame a finished, professional look. From a technical standpoint, they cover the joints of moldings, eliminating the need for a perfect 45-degree angle cut. This is especially valuable for DIY installation: instead of complex trimming, a simple straight cut is sufficient, and the decorative element covers the corner.
Ready-made sets for a large wall
If the bathroom is spacious — a country house, large apartment, or hotel room — it makes sense to consider ready-made wall system kits. In the "Neoclassic" collection by STAVROS, the kits are designed as complete wall systems where elements are matched in proportions, scale, and style. There is no need to independently calculate the ratios of moldings, overlays, and corner elements — everything is already done for you.
For an accent wall with a mirror, sconces, and a symmetrical vanity, a ready-made kit reduces both the selection time and the risk of proportion errors. How to properly assembleReady-made molding frames for the wall, is detailed in a separate article — which also includes examples of calculating the number of elements.
How to combine moldings with tiles, paint, and porcelain stoneware
It is in the bathroom that the question of combining decor with different surfaces most often arises. Tiles on the lower part of the wall, paint on top, porcelain stoneware on the floor, a mirror — all of this needs to be tied into a single system. Moldings handle this task better than any other decorative technique.
Moldings on the painted part of the wall
The most common scheme in the bathroom is that the lower part of the wall is tiled to a height of 120–150 cm, and the upper part is painted. Moldings work on the painted part. The horizontal profile at the transition point from tile to paint visually "closes" this joint, making it a deliberate design decision rather than a forced boundary.
Above this line on the painted surface, you can build frames, frame a mirror, add a horizontal belt under the ceiling. Decor on the painted wall is glued with acrylic glue, the seams are sealed with sealant, after which the entire surface is painted together with the moldings in a single color — or the moldings are highlighted with a contrasting tone.
Moldings next to tiles
The molding can be glued directly next to the tile field — along its upper edge. This creates a clear decorative frame around the tiled area and at the same time "lifts" the gaze, directing it to the painted part of the wall. It is important that the joint of the molding to the tile is glued with a moisture-resistant sealant.
On the principles ofcombinations of moldings with tiles and porcelain stonewareit is worth reading separately — it covers common mistakes and working solutions for different tile formats.
Decor around the mirror
The mirror in the bathroom is an object around which all decorative work is concentrated. A frame of moldings around the mirror is not just a decoration, it is a way to include the mirror in the overall wall system.Moldings around the mirror in the bathroomshould match the scale of the mirror in profile width: a delicate narrow molding for a small mirror, a more expressive one for a large one.
The frame should not be flush with the mirror — leave a small gap of 5–10 mm between it and the edge of the mirror sheet, which creates a visual gap and makes the decor look more professional.
Moldings in the color of the wall
Moldings painted in the same tone as the wall are "invisible decor." They structure the surface, add volume and architectural quality, but do not stand out. This technique works well in small bathrooms where bright contrasting decor would be overwhelming. For more on the principles of this approach, see the article onstucco decor in wall color or contrasting.
White decor on a colored wall
White moldings on a wall of dark blue, graphite, khaki, or dusty green is a powerful design move. Contrast makes the decor expressive and turns the wall into an independent art object. This technique works especially well in a guest bathroom, where bolder design presentation is appropriate.
Contrasting decor for a guest bathroom
A guest bathroom is a place where maximum decorative boldness is acceptable. Here you can install contrasting color moldings, create an expressive frame around the mirror with decorative corner elements, and use ornamental overlays.Wall decor in a bathroomin such a space works as a complete design statement.
Which styles are suitable for a bathroom and toilet
Polyurethane stucco decor is not tied to one style — it adapts to any interior language. But each style has its own patterns: in the bathroom they work especially precisely.
Neoclassical
Bathroom with moldings in neoclassical style — this is a space with clear symmetry, calm light tones, and a sense of balanced luxury. The wall with a mirror, sconces on the sides, a vanity with a sink — all fit into a frame system where moldings set horizontal and vertical axes.
In neoclassicism, proportionality is important: frames should be neither too thin nor too massive. A profile with a soft stepped relief, corner elements with simple ornamentation, finishing in a single white or cream color — such a bathroom reads as an interior with history and culture.
Neoclassic Light
Light neoclassicism in the bathroom — this is a lighter version of classical solutions, created specifically for small spaces. Thin moldings, simple frames, minimal decorative elements. Here, decor does not dominate but only hints at classical tradition, making the interior a bit warmer and more complex.
For a guest bathroom of 3–5 m², the "Neoclassic Light" collection works perfectly: it adds depth without visually reducing the space. Narrow profiles 20–30 mm wide with a delicate relief — exactly the decor that speaks just enough in a small room. About how to work with small spaces — in the article about stucco decor for a small apartment.
Japandi
Bathroom decor in Japandi style — this is a Japanese-Scandinavian synthesis: calmness, naturalness, strict geometry, and absence of excess. STAVROS describes the "Japandi" collection as stucco decor with moldings, corner elements, and interior kits, executed in a laconic, almost meditative aesthetic.
In the bathroom, this style works especially well: soft tones of terracotta, beige, gray, and wood, minimalist straight moldings without relief ornamentation, an emphasis on horizontal lines. Here, decor serves the role of structuring space, not decorating. No curls or floral overlays — only clean lines and precise rhythm.
Versailles Light
Bathroom decor in Versailles Light style— for those who are ready for a more expressive, festive look. This is not full-blown palace luxury, but its delicate, modern version: complex profiles, decorative overlays with ornamentation, possibly gilding of individual elements.
This style works great in a country house bathroom or in an apartment with high ceilings, where there is room for more complex decorative solutions. In a small city bathroom, it's better to use "Versailles Light" selectively — for example, only on the wall with the mirror, without spreading the heavy ornament throughout the entire space.
Mistakes when choosing stucco decor for a bathroom
It would seem you bought moldings, glued them on — and it's done. But it is in the bathroom that the cost of a mistake is higher than in other rooms: redoing decor in high humidity conditions is more difficult. Let's look at what most often goes wrong.
Using decor in an area of direct constant wetting
Polyurethane moldings and overlays are moisture-resistant, but not waterproof under conditions of constant direct water flow. Gluing them inside the shower stall, under the faucet, or on a surface that gets splashed every time you shower is wrong. Bathroom decor works in areas of moderate humidity: the wall with the mirror, the area above the vanity, the partition wall, an accent wall.
Not considering ventilation and surface preparation
Even the most moisture-resistant decor adheres poorly to an unprepared surface. If the wall is damp, unprimed, or painted with glossy paint without matting, the glue will not provide the necessary adhesion. In a bathroom without proper ventilation, condensation will accumulate under the decor elements and gradually destroy the adhesive bond. Proper surface preparation and installation are described in detail in the article aboutinstalling polyurethane moldings.
Choosing too large an ornament for a small bathroom
One of the most common mistakes is that the scale of the decor does not match the scale of the room. Large overlays with lush ornamentation, wide profiles with multi-level relief in a bathroom of 2–3 m² create a feeling of crowding and overload. The smaller the room, the thinner and more delicate the decor should be. The principles of working with limited vertical space are described in the material aboutwall decor with low ceilings.
Mixing moldings, tiles, and mirrors without a common axis
Bathroom decor should be built around a common vertical and horizontal axis. If the molding frame is not aligned with the center of the mirror, if the horizontal band does not match the top edge of the tile field, if the overlays are glued chaotically — the interior looks careless, despite expensive elements. Symmetry and axis are the foundation. More details in the article about symmetrical polyurethane wall decor.
Not planning the color of moldings before painting
Polyurethane moldings are sold white and are painted after installation. If you don't decide in advance what color the decor will be relative to the wall — white, contrasting, or 'matching' — you can get an unpredictable result. The color scheme needs to be planned before purchase, not after installation. The principles of selection are described in the material about stucco decor for painting.
Not linking decor with baseboard, door, and light fixtures
Wall decor in the bathroom does not exist in a vacuum. Moldings should echo the profile of the baseboard, relate to the door frame, and take into account the position of sconces or built-in lighting. When this connection is missing — the decor looks glued 'on top' of the interior, rather than integrated into it. About how to build this system — in the article about combining stucco decor with baseboards and cornices.
Installation of polyurethane decor in the bathroom: key points
The technology for installing decor in the bathroom is fundamentally no different from other rooms — but has several important nuances dictated by the humid environment.
First, after preparing the wall (cleaning, priming, drying), the decor is glued using a special polyurethane adhesive. Not mounting foam, not PVA, not regular tile adhesive — specifically a polyurethane compound that provides an elastic joint and moisture resistance.
Second, all joints between decor elements and connections to the wall, tiles, or mirror are sealed with moisture-resistant acrylic sealant. This prevents moisture accumulation under the decor and ensures a long-lasting result.
Third, final painting is not an option but a mandatory step. Two to three coats of acrylic or latex paint create a protective film that shields the material from direct contact with moisture and steam. For bathrooms, it is better to use paints labeled "for wet rooms" or "anti-mold."
A detailed work procedure and all technical nuances are in the article about installation of polyurethane molding, which describes all stages from preparation to final painting.
Calculation and planning of bathroom decor
Beforebuy moisture-resistant moldingsorbuy polyurethane stucco for bathroom, you need to clearly understand what and how much is required. An error at the calculation stage means either a shortage of material or unnecessary expenses.
Start with measurements: the width and height of each wall where decor is planned. Then draw a layout of frames, moldings, or overlays — it can be done by hand, but it is important to maintain proportions. On the layout, mark the axes of symmetry, frame sizes, and distances between elements.
The total perimeter of each frame = (width + height) × 2. This is the linear footage of molding for one frame. Add 10–15% extra for trimming and possible errors. If corner decorative elements are used, calculate them separately based on the number of corners.
A detailed calculation algorithm, including diagrams and examples for different wall formats, is described in the article abouthow to calculate moldings and stucco decor for a wall.
What to buy for decorating a bathroom or toilet
If you have already decided on the zone and style, all that remains is to select specific elements. Here is a basic list of what you may need:
-
Polyurethane moldings for the bathroom — for frames, zoning, and framing the mirror.
-
Decorative Inserts — for accents near the mirror, above the vanity, and on free wall surfaces.
-
Decor for Molding — corner and center elements for completing frames.
-
polyurethane interior items — full catalog for choosing everything you need.
-
Moldings from the collection«Neoclassic» — for classic and neoclassical solutions.
-
Moldings from the collection"Neoclassic Light" — for small bathrooms and light decor.
-
Moldings from the collection"Japandi" — for a minimalist, calm style.
-
Moldings from the collection"Versailles Light" — for an elegant classic look.
If necessary, complement the decor with baseboards and cornices in a unified style — this will close the decorative system around the entire perimeter of the room.
Mirror area: analysis of one solution
The wall with the mirror deserves a separate analysis, because this is where the decor works most intensively. Let's consider a typical solution for a medium-sized bathroom.
Initial data: mirror 80×60 cm, above the vanity, on a wall 260 cm high. The wall is painted light gray, tiles go from the bottom to a height of 120 cm.
Step one: a horizontal molding along the top edge of the tile field at a height of 120 cm. This is the boundary between zones, visually meaningful, not random.
Step two: a frame around the mirror made of moldings. The frame is slightly larger than the mirror — a 5 cm offset from the edge of the mirror on each side. Decorative corner elements in the corners of the frame.
Step three: a horizontal belt molding at a height of 210–220 cm — at the level of the upper third of the wall. It visually raises the ceiling and creates a third horizontal line.
Step four: everything is painted together — the wall and moldings in one color. The decor works 'from within,' structuring the surface without shouting about itself.
Result: the wall reads as an architectural object, the mirror is built into it, not hanging separately. All this takes half a day of work and a few meters of molding. A more detailed analysiswall decor with a polyurethane mirror — in the corresponding article.
Features of designing niches and non-standard areas
Niches, piers, ledges — in bathrooms they are more common than in any other room. And they are most often left unfinished because homeowners don't know how to approach them.
A niche for towels or cosmetics is essentially a small "frame" in the wall.Moldings for a niche in the bathroom frame it around the perimeter, turning a utilitarian recess into a decorative element. The inner plane of the niche can be highlighted with color — slightly darker or lighter than the main wall — and then the molding becomes a frame for this color accent.
A narrow pier next to a door 20–30 cm wide is not a dead end, but an opportunity. One vertical molding in the center of the pier or a frame fitted within its dimensions solves the issue. The principles of working with such areas are discussed in detail in the article aboutdecor for niches, ledges, and piers.
Frequently Asked Questions
Can moldings be used in a bathroom?
Yes, polyurethane moldings can be used in the bathroom and toilet. Polyurethane does not absorb moisture, does not deform with temperature changes, and is resistant to steam exposure. It is important to follow three conditions: place the decor outside the zone of direct constant wetting, properly prepare the base, and coat the decor with acrylic paint after installation.
Which moldings to choose for the bathroom?
For a small bathroom, thin profiles with a width of 20–35 mm and a delicate relief are optimal — they structure the wall without visually reducing it. For a spacious bathroom, wider profiles and multi-level frame systems can be used. Focus on the "Neoclassic Light" collection for compact spaces and "Neoclassic" for spacious ones.
Can polyurethane stucco be glued next to a mirror?
Yes. The area around the mirror is one of the most popular places formoldings around the mirror in the bathroom. There is no direct wetting here, and the decor works most effectively, creating a visual frame for the mirror. After installation, the joint between the molding and the wall is sealed with moisture-resistant sealant.
Are moldings suitable for a tiled wall?
Moldings are glued not to the tile, but to the painted part of the wall — above the tile field. A horizontal molding along the top edge of the tile creates a decorative border between zones. The joint between the molding and the tile is treated with acrylic moisture-resistant sealant.
What is better for the bathroom: moldings in the color of the wall or white?
Depends on the task and the size of the room. In a small bathroom, moldings in the color of the wall create volume without visual heaviness. White moldings on a colored wall provide an expressive contrast that works well in a guest bathroom and spacious bathrooms. In a small space, white decor on a white wall is the safest choice.
Can polyurethane decor for the bathroom be painted?
Yes, and this is a mandatory step. Polyurethane accepts acrylic and latex paint perfectly, does not deform, and does not lose its relief. For the bathroom, use paint labeled "for wet rooms" — it contains antiseptic additives and is resistant to steam and moisture. The decor is painted in 2–3 layers with intermediate drying.
What to buy for the wall above the sink?
For the wall above the sink, the optimal choice is: a horizontal molding along the top edge of the tile backsplash, a frame around the mirror made ofbathroom moldingsand, if desired,Decorative Insertsin the upper part of the wall or on the sides of the mirror. All elements are selected from a single collection — this ensures consistency of profiles and proportions.
How to correctly calculate the number of moldings for the bathroom?
Measure the perimeter of each planned frame (width + height) × 2 and sum up all frames. Add 10–15% for trimming. Corner and center elements are counted separately — by the number of corners and joints. The full calculation algorithm is in the article aboutcalculating moldings and stucco decor for the wall.