Article Contents:
- What wall transition molding actually does
- A quick decision table for common transitions
- Chair rail molding is a location and design language
- Panel cap finishes a raised field
- A divider molding can remain purely decorative
- A tile termination is a technical detail
- The five dimensions worth recording
- Which profile for a subtle wallpaper-to-paint line?
- Which profile for a more obvious horizontal band?
- Which profile above existing panels?
- Start with the supporting surface
- Mark the line, not the wallpaper edge
- Consider whether the trim should match paint, wallpaper or another element
- What if both sides are wallpaper?
- The clean two-part approach
- A more tailored wainscoting look
- When panels do not meet the wall evenly
- A dry backsplash ending on painted drywall
- Do not bridge a movement joint as though it were a crack
- A shower, tub surround or wet wall is a different project
- A useful comparison before ordering
- Dining room with a two-tone lower wall
- Entryway with lower-wall paneling
- Living room with an accent-wall finish change
- Bedroom with paint above and wallpaper below
- Powder room with partial tile
- Home office with two paint colors
- Continuous line or a line that stops?
- Keep trim families coherent
- Example A: one 18-foot-6-inch uninterrupted wall
- Example B: six 60-inch runs with two short returns
- Example C: three decorative frames using 24- and 36-inch sides
- Ordering table for the examples
- Step 1: confirm the wall and finish are suitable
- Step 2: let the finish and materials acclimate as specified
- Step 3: establish the reference line
- Step 4: lay out every termination and joint
- Step 5: cut with the profile fully supported
- Step 6: use a compatible adhesive on the right substrate
- Step 7: fill joints and finish carefully
- Step 8: review the installation from normal sightlines
- A small visual sample can save a large mistake
- A compact order worksheet
- Can polyurethane molding hide the line between wallpaper and paint?
- Is polyurethane molding the same thing as chair rail molding?
- Can the same polyurethane profile cap a beadboard wall?
- What should I use between tile and a painted wall?
- Can polyurethane molding be used in a bathroom?
- Which size works for a subtle wall divider?
- What is the difference between MLDPU-027 sizes?
- How many 102.36-inch strips do I need for an 18-foot-6-inch wall?
- Why is dividing total inches by stock length sometimes wrong?
- Should I paint the trim before or after installation?
- Do I need special tools for installing a horizontal wall divider?
- Can I attach molding directly on top of vinyl wallpaper?
- Can I bend straight polyurethane trim around a curved wall?
- Is polyurethane or MDF better for a transition detail?
- Can decorative molding cover an uneven tile-to-drywall step?
- Should the trim color match the upper wall, lower wall, or baseboard?
- Can I use one molding everywhere in an open-plan home?
- Where can I compare actual STAVROS polyurethane profiles?
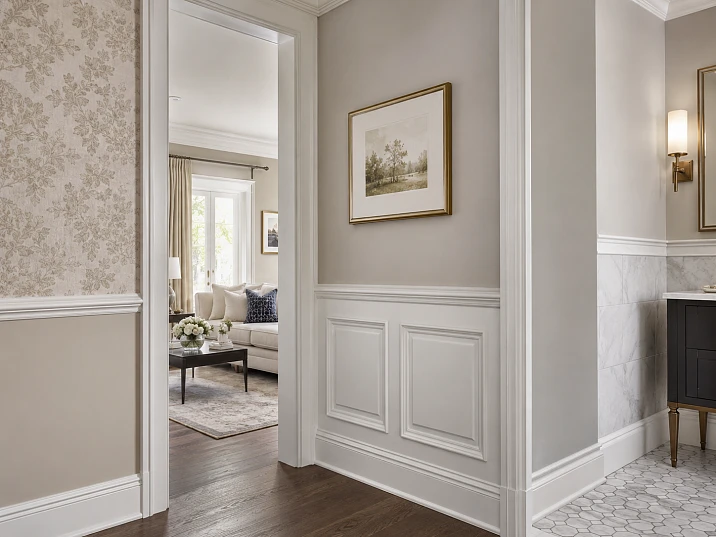
A painted wall meets wallpaper at chair-rail height. Beadboard stops below a smooth upper wall. A backsplash ends where drywall begins. Each of these transitions looks simple on a drawing, yet the finished room exposes every crooked cut, uneven edge, and unexpected difference in surface thickness. Polyurethane wall transition molding can give a deliberate architectural outline to many of these boundaries—provided the trim is used for a job it is actually designed to do.
In American renovation terminology, this work is usually described as wall transition trim, chair rail molding, panel cap molding, or decorative wall molding. The name depends on the location and function. A decorative polyurethane profile can visually separate wallpaper from paint or make a panel top read as a finished detail. It is not automatically a tile edge protector, waterproofing system, expansion-joint cover, or protective crash rail. Recognizing that distinction is the first step toward a finish that will look good and remain serviceable.
This guide shows how to choose a profile for different wall coverings, compare real STAVROS sizes in inches, measure long horizontal runs, develop a practical cut list, and install trim without compromising the materials underneath. The approach fits dining rooms, living rooms, entryways, bedrooms, powder rooms, and dry sections of kitchens in homes across the United States. Product availability, adhesive compatibility, and delivery should always be confirmed for the particular order and project.

What wall transition molding actually does
A finish transition is the visible boundary where two wall treatments end or meet. It may occur at a change of color, a wallpaper edge, the top of beadboard, the end of decorative wall panels, or the side of an accent feature. Molding makes the line intentional by adding a consistent raised contour. On a two-tone wall, that contour can connect the lower and upper colors. Above wainscoting, it can complete a panel composition. At a vertical paint-and-wallpaper boundary, it can establish a clean stopping point.
Three different problems often appear at the same location. Appearance concerns whether the line looks straight and proportioned. Substrate compatibility concerns whether the molding can bond securely to the surface supporting it. Technical protection concerns moisture, movement, exposed tile edges, or building details. Decorative trim addresses appearance first. It may help shield a finished edge from casual contact, but its presence does not prove that the underlying assembly is protected or code-compliant.
For example, a polyurethane bead on painted drywall can be an attractive divider. Installed over loose wallpaper, however, its adhesive bond might depend on paper that is already peeling. At the upper end of a tiled backsplash, a decorative bead may look attractive but will not replace a properly selected tile termination profile or movement accommodation. At a damp wall, it cannot substitute for a waterproof assembly. These are separate design decisions that should be made before shopping for trim.




A quick decision table for common transitions
| Location | What the trim is meant to do | Usually suitable approach | Important limitation |
|---|---|---|---|
| Wallpaper meets painted drywall | Create a straight, decorative boundary | Narrow or medium polyurethane wall molding bonded to sound substrate | Do not depend solely on loose wallpaper for adhesion |
| Painted wall above beadboard | Finish the top of a panel field | Decorative profile plus a compatible panel cap detail | Allow for panel movement and actual surface thickness |
| Two paint colors meet | Add depth to an otherwise flat line | Small relief molding or chair-rail-style accent | A raised profile adds visual weight, not structural protection |
| Tile meets painted wall in a dry area | Coordinate the visual transition | Proper tile edge/termination first; decorative trim only if compatible | PU molding is not a substitute for tile edging or waterproofing |
| Vertical accent-wall boundary | Frame the change of finish | Straight polyurethane molding, carefully aligned | Test the sightline and returns at ceiling/baseboard |
| High-traffic hallway | Organize the wall with a horizontal band | Durable finish and correctly located decorative trim | Small decorative PU profiles are not impact-rated handrails |
The easiest way to choose is to write down which of these jobs the installation must perform. If it needs to conceal a paint edge and look beautiful, polyurethane trim may fit. If it needs to carry loads, manage water, bridge a moving joint, or protect a sharp tile corner, that technical task requires its own appropriate system.
Наша фабрика также производит:

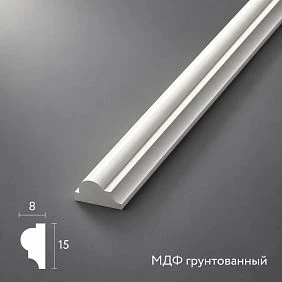
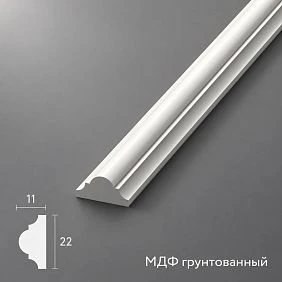


Смотреть весь Каталог продукции
American trim terms: chair rail, panel cap, divider and transition
Получить консультацию
Chair rail molding is a location and design language
A chair rail is a horizontal wall trim feature traditionally associated with dining rooms and lower-wall paneling. In current American interiors, it is often a visual divider between two colors or finishes. A polyurethane wall profile can create a chair-rail-inspired appearance, but not every decorative profile is intended to withstand contact from chairs. Before labeling a product as protective chair rail, examine its section, projection, fastening method, and manufacturer's intended use.
Panel cap finishes a raised field
A panel cap sits at the top of a panel installation such as beadboard, applied wall boards, or some wainscoting systems. Its job can be more complex than a flat decorative divider: the panel has thickness, its edge needs an intentional termination, and some materials change dimensions with temperature or moisture. A narrow relief molding mounted to the flat wall above a panel is not necessarily a replacement for a shaped cap with sufficient depth to cover the panel's actual edge.
A divider molding can remain purely decorative
A divider or accent molding is a good way to describe a profile that separates wallpaper and paint, or two paint colors, on the same flat plane. It does not have to carry a panel edge. If both surfaces are level and stable, a narrow profile can be effective without dominating the composition. This is the most straightforward application for the STAVROS polyurethane molding collection.
A tile termination is a technical detail
At an exposed tile edge, American installers may use a purpose-made metal, PVC, or other approved tile trim, bullnose tile, or an installation method specified for that tile assembly. These components solve problems of exposed edges, thickness, and sometimes movement. A decorative polyurethane strip may complement the finished wall beyond the tile field but should not be presented as the tile termination itself unless the exact system is approved for that use.
Plan the transition before choosing a profile
A successful transition begins with a drawing, not a shopping cart. Sketch the wall as one rectangle and mark every change of material. Include doors, windows, built-ins, tile boundaries, light switches, outlets, return corners, and wall sections interrupted by furniture. Identify the exact elevation of each horizontal line, then decide whether that line should carry through the room or end at a natural architectural break.
In a dining room with an 8-foot ceiling, a chair-rail-style band somewhere around 30–42 inches above the finished floor may be a starting point for a visual mock-up, not a universal standard. The right placement depends on baseboard height, windowsills, dining furniture, and the proportions of the lower wall. In a tall living room, the transition may sit higher. A powder room with partial wall tile may be governed by the tile layout and waterproofing plan rather than an arbitrary decorative proportion.
Mark the boundary with painter's tape at full scale, step into the doorway, and view it from a seated position. A divider that looks proportionate on graph paper may run awkwardly through a window apron or leave a tiny gap over a light switch. Adjust the design before cutting any material. For multiple walls, check that the tape line appears level relative to floor and ceiling; neither of those building surfaces is guaranteed to be perfectly level.
The five dimensions worth recording
For every transition, record the run length; the intended line height above the finished floor; the height difference between adjacent finish materials; the clear distance to nearby casing or outlets; and the chosen profile's visible width and depth. These last two dimensions matter in different ways. A profile's face width is how broad the decorative line appears on the wall. Its projection is how far it stands off the surface. Neither number alone establishes the size of the flat bonding area on its back.
If a border must cover an irregular wallpaper cut, compare the actual irregularity with the product's backing geometry and desired overlap. Do not assume a 0.59-inch-wide molding has 0.59 inch of usable coverage on each side of the line: the center bead and edge details consume part of that width. A full-size sample or section drawing is preferable to guessing from a front-view photo.
Polyurethane profiles from STAVROS: confirmed product dimensions
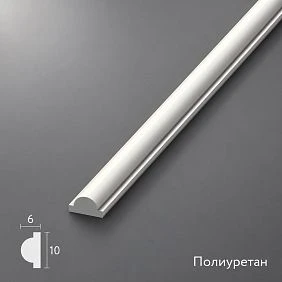
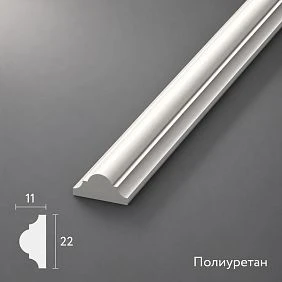
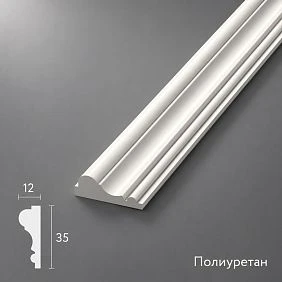
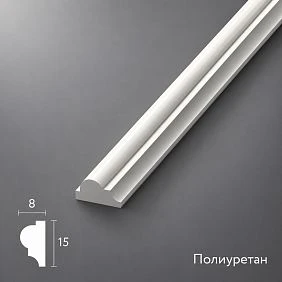
STAVROS lists several rigid polyurethane wall moldings with a stock length of 2,600 mm, approximately 102.36 inches (8.53 feet). The table below is based on the published product specifications. Dimensions are face width × projection; they do not represent the size of a notch, tile overlap, or clearance for thicker panel edges.
| STAVROS profile | Face width × projection | Stock length | A practical design role |
|---|---|---|---|
| MLDPU-001 | 0.39 × 0.24 in (10 × 6 mm) | 102.36 in | Very fine divider between flat wall finishes |
| MLDPU-004 | 0.59 × 0.31 in (15 × 8 mm) | 102.36 in | Delicate shaped border with more visible relief |
| MLDPU-002 | 0.87 × 0.43 in (22 × 11 mm) | 102.36 in | Stronger chair-rail-inspired decorative line |
| MLDPU-003 | 1.38 × 0.47 in (35 × 12 mm) | 102.36 in | More pronounced border on a large, calm wall |
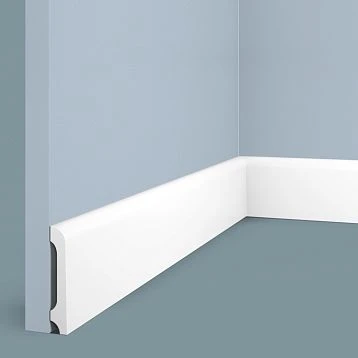
| MLDPU-027 | 0.55 × 0.35 in (14 × 9 mm), or 0.79 × 0.47 in (20 × 12 mm) | 102.36 in | Rounded divider available in two distinct scales |
MLDPU-027 needs particular care when ordering because the same series has two cross-sections. Specify the dimension as well as the code. For the other products, check current technical drawings before committing to the final wall line. Product photographs and rendered scale diagrams help with style, but field measurements and the actual profile section determine fit.
Which profile for a subtle wallpaper-to-paint line?
For a quiet two-tone bedroom or home office, start by comparing MLDPU-001 polyurethane wall trim with the 14 mm version of MLDPU-027. The first produces a small bead-like line, while the latter has a rounded face and a somewhat different projection. Both read more like a finished edge than a prominent architectural band. That may be ideal where patterned wallpaper already supplies the visual interest.
Which profile for a more obvious horizontal band?
A dining room or broad entry wall can often accommodate a more visible contour. MLDPU-002 polyurethane molding gives the dividing line more weight without taking on the scale of a substantial wood chair rail. The wider MLDPU-003 is a candidate for large, uninterrupted walls, but it can feel heavy in a narrow hallway. Place a sample on the wall at the actual height and view it under the room's normal lighting before deciding.
Which profile above existing panels?
Here appearance alone is not enough. Measure how far the panel projects from the drywall and inspect whether the selected molding has a flat rear surface large enough to attach. If the panel cap must physically cover or retain the top edge, choose a purpose-designed cap system compatible with the panel rather than pretending that a flat-back decorative polyurethane molding provides the same detail. You can still install a decorative polyurethane molding on the sound wall immediately above a separately finished panel edge.
Wallpaper to paint: a clean transition that stays attached
The classic problem is a lower field of wallpaper and an upper field of paint—or the reverse. Wallpaper may have a subtle texture, the paint is smooth, and the junction catches light differently. A narrow decorative divider makes the design feel deliberate. It may also help disguise minor visual irregularities if its back surface and installed overlap are suited to that job.
Start with the supporting surface
Before deciding where to apply adhesive, investigate the edge. If wallpaper was installed over paint, it may be possible to leave a narrow, clean band of exposed painted drywall where the molding will bond. That can be more reliable than attaching the entire strip to the face of textured wallpaper. If the wallpaper already lifts, repair or replace the loose section before adding trim. A molding installed on a weak finish transfers the weak finish's failure into the decoration.
When the wallpaper comes up to the trim, cut it according to the wallcovering manufacturer's instructions. Keep paste and adhesive residues off the bonding surface. Allow the wallcovering to dry and settle as required before fitting the profile; freshly installed paper may continue to relax. For a peel-and-stick wallcovering, confirm the product's compatibility with adjacent adhesives and finishes rather than relying on a generic rule.
Mark the line, not the wallpaper edge
Use a laser or a carefully checked level to establish a new, deliberate line. Do not follow a wavy wallpaper cut and assume molding will make it look straight. At outside corners, decide where the divider turns or terminates before using adhesive. A decorative line should reinforce the room's architecture, not exaggerate the fact that one wall meets the next at an imperfect angle.
Consider whether the trim should match paint, wallpaper or another element
A molding painted to match the upper wall tends to visually belong to that upper field. Matching the lower wall makes the lower treatment appear taller. A third, contrasting color can emphasize the border, but the stronger the contrast, the more precise the layout and joint work must be. Matte and satin finishes often reveal relief differently; sample both in the actual room. For people searching for a wallpaper-to-paint transition, the right finish is often more important than making the profile larger.
What if both sides are wallpaper?
Two wallpapers can meet at a vertical or horizontal boundary, especially in a nursery, dining nook, or accent wall. Determine first whether the junction needs a visual accent at all. When the patterns are busy, a simple MLDPU-001 or smooth MLDPU-027 can provide separation. Maintain each wallcovering's installation requirements and avoid trapping poorly adhered or moisture-sensitive paper beneath a broad glued profile. Do not claim that a decorative molding will prevent wallpaper seams from moving or peeling.
Wall panels and beadboard: where decorative molding ends and a panel cap begins
Applied beadboard, MDF panels, solid-wood wainscoting, and manufactured wall panels create depth on the lower portion of a wall. A horizontal line above them is therefore not the same condition as wallpaper meeting paint on a flat surface. The panel's thickness, top-edge treatment, expansion allowances, finish, and manufacturer-approved fastening method all matter.
The clean two-part approach
One dependable design is to give the panel its correct termination detail first, then locate a decorative polyurethane profile on the wall just above it. This separates the technical cap from the architectural shadow line. The result can look like a single composed trim feature without forcing a small flat-backed molding to do a job for which it was not made. Where a single larger panel-cap component is desired, look for a purpose-made cap with sufficient geometry for that exact panel assembly.
The gap and fastening method at the top of beadboard may depend on whether it is solid wood, MDF, engineered material, or a moisture-resistant panel product. Follow its installation instructions. Simply sealing every edge with caulk is not a universal answer; some systems need movement space or specific treatments. A polyurethane decorative strip is generally dimensionally stable, but the adjacent materials may not be.
A more tailored wainscoting look
For a formal dining room, consider a light decorative line above simple painted panels, repeating the same shape in smaller picture-frame elements on an adjacent wall. A compact profile such as MLDPU-004 can coordinate those details without becoming a tall crownlike element. Keep the main chair-rail-height feature continuous across the wall where practical, then make deliberate stops at doors and tall cabinets.
In a casual kitchen or hallway, one straight, clean trim line often looks better than multiple stacked bands. Extra profiles make more cuts, more joints, and additional horizontal ledges that can collect dust. The right solution follows the amount of visual texture already present in the panels.
When panels do not meet the wall evenly
If the panel surface is irregular, do not force rigid molding against it and rely on caulk to conceal a large step. Determine whether the issue is a bowed wall, a panel that was installed out of plane, or the expected texture of the material. Correct major substrate irregularities first. If a shaped cap is needed, specify the cap based on measured thickness and the manufacturer's detail; do not use the decorative molding's face width as a substitute for that measurement.
Tile to painted wall: use decorative molding in the right place
A tile-to-drywall transition is common around a backsplash, an entryway wall, or a powder room. It is also where a superficially attractive finish can hide a real technical problem. Ceramic and porcelain tile assemblies have their own edge, movement, adhesive, and moisture requirements. A polyurethane relief profile is not inherently an approved tile edge trim or sealant system. Do not let aesthetic preferences override the tile installation specification.
A dry backsplash ending on painted drywall
If tile terminates on a dry, vertical section of wall, the tile installer should determine the edge treatment first. A bullnose tile, properly specified termination profile, or other detail may provide the needed exposed-edge finish. A decorative STAVROS wall molding can then be positioned on the painted surface nearby as a coordinated design line. Confirm that the decorative profile does not interfere with outlet plates, countertop clearance, cabinet doors, or cleaning.
Do not bridge a movement joint as though it were a crack
A rigid decorative strip should not be used to lock together surfaces that require independent movement. For tile transitions, follow the tile system's instructions and applicable professional guidance on movement accommodation. A caulk line that looks attractive is not necessarily the specified flexible joint. Where a transition must move, preserve the intended movement space and select compatible components.
A shower, tub surround or wet wall is a different project
Inside a shower or at another direct-water exposure area, the wall assembly needs purpose-designed waterproofing and appropriate materials. Do not use decorative polyurethane molding as a waterproof flashing, grout replacement, or patch for failed waterproofing. Even if a polyurethane component tolerates some humidity, that does not guarantee that its primer, paint, adhesive, and concealed wall surfaces will perform in a continuously wet location. Use the approved wet-area detail first and add decoration only where permitted by the system manufacturer.
A useful comparison before ordering
| Question | Decorative PU molding | Purpose-made tile edge or movement detail |
|---|---|---|
| Creates a raised architectural line | Yes, when suitable for the surface | Sometimes, but design is secondary |
| Protects a sharp exposed tile edge | Not an assumed function | May be a specified function |
| Accommodates prescribed movement | No general claim | Depends on the selected joint system |
| Replaces waterproofing | No | No; waterproofing is a separate assembly |
| Can be painted to coordinate with a room | Usually with compatible coating and preparation | Depends on material and finish |
The point is not that a decorative profile cannot sit near tile. It is that the correct sequence is technical edge detail, substrate preparation, decorative layout. This makes the design safer and usually produces cleaner work.
Vertical transitions between two wall finishes
Vertical dividers appear beside a wallpaper accent panel, at an alcove entrance, or where a painted niche ends. The line is less familiar than a chair rail, but often especially effective: it can make an intentional composition out of what otherwise looks like an unfinished change of materials. Alignment is the main challenge. A vertical that starts a fraction of an inch away from the casing at the bottom and finishes somewhere else at the top will draw attention to the irregularity.
Use a plumb reference independent of crooked corners. Decide whether the profile should run from finished baseboard to ceiling, between two horizontal trim bands, or only around the accent area. Full-height runs should be measured at several points because ceiling and floor can be uneven. When the line meets baseboards, a neat return or planned termination is generally more intentional than a raw sawn end. Avoid routing decorative trim across an outlet, service panel, or access point.
For a narrow, contemporary accent-wall edge, the 0.39-inch MLDPU-001 may be an appropriate starting point. A larger relief can be used when the border is meant to echo substantial casing. If the wall finish changes thickness, however, a flat-profile divider may not sit securely without substrate adjustments or a purpose-designed transition. Always examine the section at full scale.
Where this approach works in American homes
Dining room with a two-tone lower wall
Imagine a dining room with a painted upper wall and dark botanical wallpaper below a horizontal dividing line. The room already has a baseboard and window casing. A medium decorative trim can tie those elements together while providing enough visual contrast to organize the wall. Test whether the band should align with a doorway detail or sit clearly below the windowsills. The height is a design choice; it should not be assigned by formula alone.
The most convincing approach often uses one profile for the dividing line and one restrained color for the surrounding trim. Try a paint match to the upper wall before assuming white is required. In a darker room, the molding can share the lower field's color and appear as part of a continuous lower-wall composition. The MLDPU-002 profile is an option to examine for a visible but compact decorative band.
Entryway with lower-wall paneling
An entryway needs a calm visual rhythm. A panel cap and modest decorative molding can provide one clear horizontal line above lower-wall panels. Where coats, bags, and furniture frequently contact the wall, select a robust panel and paint finish appropriate to the traffic. Do not assume a small polyurethane bead provides the mechanical protection of a substantial chair rail or bumper. A better design may use a stronger cap for function and a smaller relief profile for appearance.
Living room with an accent-wall finish change
In a living room, the boundary may occur behind a sofa or along a wall containing open shelving. The designer can use decorative molding as a subtle transition between a smooth painted wall and a wallpaper accent. Large rooms tolerate broader profiles, but that does not mean every surface needs ornament. Try placing a strip of painter's tape in the intended width, then hold a physical sample at eye level to see whether the relief complements the seating, lighting, and doors.
Bedroom with paint above and wallpaper below
A bedroom often benefits from the quieter end of the range: a small rounded profile between matte paint and patterned wallpaper. The trim should not compete with the bed, headboard, or window fabric. Soft contrast can make the boundary legible without appearing as a bright stripe across the room. Consider a small polyurethane wall trim profile where a smooth curved face is more appropriate than an ornate outline.
Powder room with partial tile
Partial-height tile may benefit from a decorative element elsewhere on the wall, but tile termination and moisture control should be decided first. In a powder room without direct shower spray, a separate painted-wall profile can coordinate with mirrors, sconces, and cabinet hardware. Test adhesive and coating compatibility with the actual humidity conditions. If the project includes a sink backsplash, maintain the specified water-resistance detail at the countertop and wall junction.
Home office with two paint colors
A home office can use an understated horizontal molding to separate a darker lower color from a lighter upper field. This is an economical way to add structure without full wall paneling. Because both surfaces may be painted drywall, the decorative installation is comparatively simple, assuming the finish is sound and fully cured. Check the wall for cable routes and ensure the divider does not cross an outlet or interfere with built-in shelving.
Design proportions: width, projection and sightlines
The right molding size depends on context, not a fixed rule for each room. A profile that looks delicate on a close-up product page may read as barely visible on a twenty-foot-long wall. Conversely, a 1.38-inch relief can become a powerful stripe in a narrow room. Face width controls visual emphasis; projection controls the shadow cast by nearby windows or lighting. The same profile can look understated on a matte wall and comparatively dramatic when painted in a glossy contrast color.
A useful method is to prepare two mock-ups. First tape the intended width across a few feet of the wall to judge placement. Then place an actual molding sample so you can evaluate projection. Work in daylight and under the room's nighttime lighting. Check the result from the doorway, the seated viewpoint, and the main circulation path. If the line makes the room feel shorter or emphasizes an awkward window height, change the transition rather than forcing the chosen profile to solve a proportion problem it did not create.
Continuous line or a line that stops?
A continuous divider around several walls can unify a room; it also multiplies corners and requires careful planning at doors and window returns. A stopped divider can be more appropriate on a single accent wall. Decide based on the architecture, not on the desire to use every piece purchased. In American homes with open-plan spaces, a line should end at a legible boundary: a full-height opening, return wall, major casing, or furniture feature that genuinely defines a zone.
Keep trim families coherent
A transition molding does not have to match door casing exactly, but its degree of ornament should feel related. Pairing an ornate, deep-relief molding with completely flat, narrow casing can create a visual conflict. If the home uses simple baseboards and flat doors, a smooth or lightly shaped polyurethane profile is usually easier to integrate. If it uses traditional millwork, a more developed contour may fit. The STAVROS polyurethane moldings catalog includes different scales that allow that comparison without treating every listed item as the same material.
Measure the trim run and create a real cutting plan
A common purchasing mistake is to add all the linear feet, divide by stock length, and order that number of pieces. That provides a theoretical lower bound, not necessarily the number of stock lengths from which the required parts can be cut. A project consisting of many independent long sections can use more pieces than its total linear length suggests. The difference comes from offcuts, mitering, and whether visible splices are acceptable.
The STAVROS polyurethane profiles compared here are approximately 102.36 inches long. Do not assume they come as standard 96-inch U.S. sticks. Check transportation and handling constraints for these long lengths before ordering, especially for a residential renovation or freight delivery. For every run, measure between the relevant finished points, define how any corner is measured, and label whether the dimension is to the long point of a miter.
Example A: one 18-foot-6-inch uninterrupted wall
An accent wall measures 18 feet 6 inches, or 222 inches, between planned trim terminations. Three stock lengths are required because two stock lengths total only 204.72 inches. One straightforward cut plan uses two pieces at 96 inches each and one piece at 30 inches: 96 + 96 + 30 = 222. Each piece fits within a 102.36-inch stock length before allowing for saw kerf and final fitting.
This is a planning example, not a mandate to position joints exactly 96 inches apart. Move joints away from visually sensitive points where practical, and confirm whether the profile's shape permits a clean scarf joint or another manufacturer-approved splice detail. For precise fitting, make final cuts at the wall, accounting for corner geometry and the actual saw kerf. A spare strip may be sensible if no replacement stock will be readily available during installation.
Example B: six 60-inch runs with two short returns
Suppose a hall has six separate 60-inch runs between door casings and two additional 34-inch returns. The total length is 6 × 60 + 2 × 34 = 428 inches. Dividing 428 by 102.36 gives a theoretical minimum of five strips. But two 60-inch pieces cannot fit in the same 102.36-inch stock length. Without visible splices in those six primary runs, you need at least six strips—one for each long section. The two 34-inch returns can be cut from two of the approximately 42-inch offcuts, leaving room for normal kerf and fitting.
This example illustrates why a materials list should include exact pieces, not just linear footage. A contractor willing to introduce additional joints into some 60-inch runs might build another cutting strategy; the six-strip calculation assumes each main run is one uninterrupted piece. State that assumption on the order sheet so the result is reproducible.
Example C: three decorative frames using 24- and 36-inch sides
Three small wall frames need six 36-inch sides and six 24-inch sides. Their total is 6 × 36 + 6 × 24 = 360 inches. Four 102.36-inch strips can accommodate the pieces if the corner measurements are planned consistently. Cut three stock strips into 36 + 36 + 24 = 96 inches each; that supplies six 36-inch pieces and three 24-inch pieces. From the fourth strip, cut the remaining three 24-inch pieces, or 72 inches of stock.
The resulting layout uses four strips without relying on combining small scraps into long visible sides. Verify each measurement against how the miters are laid out and how much material your saw removes. A decorative frame's outside dimension is not necessarily the same as the length measured along the back of its molding. Label the measuring convention before cutting six supposedly identical pieces.
Ordering table for the examples
| Project | Total required length | Math-only lower bound | Cut-plan requirement described above |
|---|---|---|---|
| 18 ft 6 in continuous run | 222 in | 3 strips | 3 strips before optional spare |
| Six 60-in runs + two 34-in returns | 428 in | 5 strips | 6 strips without splices in 60-in runs |
| Three frames, 24 × 36 in | 360 in | 4 strips | 4 strips with the stated cutting pattern |
A waste allowance is a planning choice, not a universal industry rule. It depends on how many corners, returns, miter cuts, and damaged pieces you expect. Calculate the required pieces first, then add a clearly labeled reserve based on the project and replacement logistics. The reserve should be based on the actual cutting plan, not applied as a substitute for making one.
A step-by-step installation workflow for decorative PU molding
Step 1: confirm the wall and finish are suitable
Inspect for loose paint, damaged drywall, wallpaper lifting, chalky primer, greasy kitchen residue, and uneven patches. A decorative trim installation is only as sound as the surface underneath it. Remove contaminants and repair unstable finishes before attaching anything. If the surface is tile, glossy laminate, textured wallpaper, or another unusual material, follow the adhesive manufacturer's instructions for that specific combination. Do not treat all adhesives labeled “construction adhesive” as interchangeable.
Step 2: let the finish and materials acclimate as specified
Paint, wallpaper paste, primers, adhesives, and trim products may all have specific cure or conditioning requirements. Observe the published instructions for the actual products in use. A wall that feels dry to the touch may not be ready for adhesive installation. Store long profiles flat and protected from damage, and check them for damage before cutting. Do not expose rigid polyurethane moldings to heat to force a radius or an irregular substrate shape.
Step 3: establish the reference line
Measure the desired height from a consistent datum. A laser level is convenient for a room-wide horizontal transition, but confirm the instrument's setup. On long walls, mark several reference points and check their relationship to the nearest openings. For vertical trim, use a plumb reference rather than assuming a corner or casing is vertical. Painter's tape can help visualize the entire run before adhesive is opened.
Step 4: lay out every termination and joint
Start with doors, windows, corners, and obvious visual centers. Determine where the line stops at casing and whether a returned end is needed. Avoid creating very short filler pieces at a doorway simply because you began with an unplanned full-length stock strip. For inside and outside corners, test-fit the pieces. Real walls are often not exactly 90 degrees; use the measured corner angle for a clean joint rather than automatically cutting both pieces at 45 degrees.
Step 5: cut with the profile fully supported
Use a fine-tooth saw or other appropriate cutting tool compatible with the particular profile. Support the workpiece to prevent twisting, mark the correct face orientation, and perform a test cut with scrap. Follow appropriate eye and dust protection guidance. Keep left and right miter pieces labeled; a symmetrical-looking profile can still have a front/back or orientation detail that changes the result. Dry-fit the pieces before bonding them to the wall.
Step 6: use a compatible adhesive on the right substrate
Choose an adhesive explicitly suitable for the polyurethane product and actual supporting surface. Follow the product's instructions on bead placement, open time, temperature, mechanical support, cleanup, and curing. Product pages sometimes mention acrylic or solvent-free mounting adhesives, but that does not establish universal compatibility with every paint, wallpaper, tile glaze, or primer. When uncertain, test a short piece on a concealed area or obtain written guidance from the manufacturer.
Apply adhesive to the designated bonding areas, then seat the molding along the reference line with even pressure. Keep squeeze-out from spreading over patterned wallpaper or a tile finish. Some assemblies may require temporary tape, bracing, or other support during curing; follow the adhesive instructions. Do not attach an entire long run and only afterward discover that the final miter does not fit its corner.
Step 7: fill joints and finish carefully
Once the adhesive is sufficiently cured for the next operation, address joints using a filler or sealant compatible with the molding, substrate, and finish. A small paintable flexible caulk may be suitable at certain decorative wall-to-trim interfaces, but it should not replace a specified tile movement joint. Sand and prime only as instructed for the polyurethane surface and selected coating. Use a paint system approved for the substrate; test color and sheen because raised profiles reflect light differently from flat drywall.
Step 8: review the installation from normal sightlines
Look along the trim under raking light, not only straight at the wall. Check for glue marks, inconsistent paint sheen, open corners, and a wandering horizontal line. Confirm that outlets, service openings, cabinet clearances, and necessary movement joints remain accessible. Small defects are easiest to correct before the room is fully furnished. A visual inspection from the doorway and seated height is especially important for chair-rail-style bands.
Adhesive and substrate questions that cannot be skipped
The word “polyurethane” identifies the trim material, not the glue beneath it. Adhesives vary in chemistry and suitability for painted gypsum board, primed drywall, bare plaster, glass tile, glazed ceramic, MDF, engineered panels, and vinyl wallcoverings. A product that performs well on clean, painted drywall can fail when bonded to dusty plaster or to a washable wallpaper coating. The adhesive manufacturer should identify the appropriate substrate preparation and compatible finishes.
| Supporting surface | What to verify before installing |
|---|---|
| Sound, fully cured painted drywall | Paint adhesion, cleanliness and adhesive compatibility |
| Primed but unpainted gypsum board | Primer requirements, dust removal and bond testing |
| Wallpaper or vinyl wallcovering | Whether the adhesive is approved for the covering; preferably bond to sound substrate where practical |
| MDF or engineered wall panels | Panel movement, coatings and whether a separate cap detail is required |
| Ceramic or porcelain tile | Approved adhesion to glaze; technical edge detail and water exposure remain separate |
| Plaster or textured wall | Surface soundness, flat contact area and whether leveling/repair is needed |
Never use an adhesive recommendation from a decorative article as a substitute for the product label, technical data sheet, or the local professional responsible for the assembly. It is especially important to confirm the system when installations are near heat sources, above occupied areas, or in environments with elevated moisture. Decorative PU trim is a finish material, not a structural bracket or electrical cover.
Paint and finish strategies that work with mixed materials
A transition trim can either disappear into the wall or become a focal line. In a white-on-white interior, shadow from the molding's projection often creates enough detail. For a two-tone wall, using the trim in the upper field's color can visually lift the boundary. Using it in the lower field's color can make the lower treatment feel more substantial. A third color may be suitable in a highly composed room, but it makes every corner and joint more visible.
Consider sheen as carefully as hue. A glossy strip against matte paint catches light strongly. A satin trim painted in a matching wall color can be a quieter compromise. Check how the paint behaves on the polyurethane primer and whether the finish requires additional preparation. Avoid saying that any interior paint will automatically adhere to every formulation of polyurethane. The safest path is the coating manufacturer's compatibility guidance and a test panel.
Where wallpaper has a strong pattern, reduce contrast or choose a calmer contour so the border does not compete with the design. Where the lower field is paneling, try a finish that relates to the panel cap and baseboard, rather than treating the decorative line as an isolated stripe. Where tile and painted drywall meet, keep the decorative treatment subordinate to cleaning, moisture exposure, and the performance of the tile edge assembly.
A small visual sample can save a large mistake
Paint a short section of the intended molding using the actual coating and hold it against the planned transition. Inspect it from several distances. A 0.59-inch profile may look minimal in the hand but become quite visible when repeated across four walls. A rounded profile may produce a softer shadow than a stepped one of similar width. This test reveals whether the line is creating the calm architectural rhythm you wanted or merely drawing attention to the wall's awkward dimensions.
Complex conditions: corners, niches and changes of plane
A straight wall transition is a relatively simple job. A line that runs through a recess, across a projecting chimney breast, or around a curved wall is not. Establish how the decorative line will terminate and whether the profile can physically follow the plane changes. Most standard rigid polyurethane moldings should be treated as rigid products unless their technical specifications explicitly identify an approved bending radius. Heating or forcing them around a curve is not a sound substitute for a purpose-designed flexible system.
Inside corners may be out of square, so measure the actual angle. At outside corners, a slight offset becomes highly visible; plan the seam location and consider a test fitting. At a niche, decide whether to turn the band into the recess or stop it at the front face. Both approaches can be intentional, but mixing them randomly looks accidental. A particularly narrow recess may not have the space for the projection of a decorative profile.
For walls with uneven levels of finish, the priority is to establish an appropriate supporting plane. A flat-backed polyurethane profile can bridge a modest visual border only if the adhesive and substrate arrangement provide continuous support. If the difference in finish thickness leaves most of the backing unsupported, redesign the detail or use a system engineered for that transition. Do not build a deep, unstable glue bed as a substitute for a properly sized transition component.
Choose a complete set of materials, not just the molding
When shopping, begin with the polyurethane wall molding collection at STAVROS and note the exact SKU, size, length, and product drawing. Select the finish profile based on the actual boundary. If the project includes beadboard or tile, specify its technical cap or edge system separately. Then prepare the installation supplies according to the selected product instructions, not merely according to an article's general shopping list.
A typical project may require accurate measuring tools, a level or laser, painter's tape, a suitable fine-tooth saw and cutting guide, the approved adhesive, temporary support where instructed, and compatible filler, primer, and paint. Your exact selection depends on the wall and finish. The STAVROS site also maintains installation and finishing advice, which can be reviewed alongside the current product's technical information. For installation materials, do not assume that every product sold under a general hardware category is suitable for polyurethane wall trim.
Before ordering, ask whether the finished strips can be delivered in their full stock length and how they are packaged for transport. A profile approximately 8.53 feet long may require more planning than an ordinary short parcel. Verify current inventory, shipping geography, lead times, taxes, and return conditions directly with the seller. This article does not assume a U.S. warehouse, guaranteed domestic delivery, fixed prices, or universal availability.
A compact order worksheet
| Item to record | Example or instruction |
|---|---|
| Exact STAVROS SKU | MLDPU-001, MLDPU-004, MLDPU-002, MLDPU-003 or MLDPU-027 |
| Exact cross-section | Record metric size and rounded inch conversion; MLDPU-027 has two size options |
| Stock length | Confirm 102.36 in / 2,600 mm for selected polyurethane strip |
| Required cut pieces | List each cut in inches, with miter conventions marked |
| Minimum strips | Determine from actual cut plan, not total footage alone |
| Extra stock | Add separately if desired for damage, fitting or replacement |
| Adhesive and coating | Verify compatibility for the trim and supporting finish |
| Adjacent technical edge details | Include panel caps, tile trim, movement details or waterproofing where needed |
| Delivery and handling | Confirm shipping destination, packaging and long-piece access |
Common mistakes and how to avoid them
Mistake 1: selecting a profile only by front-view width. A face measurement does not reveal the flat backing or the profile's ability to hide a thickness difference. Ask for the technical drawing and test the actual detail.
Mistake 2: sticking trim to wallpaper that is already peeling. Adhesion to a weak finish is not a reliable foundation. Repair the wallcovering or attach the decorative profile to a sound substrate using an approved method.
Mistake 3: calling every horizontal band a protective chair rail. A narrow polyurethane decorative bead creates a visual divider but is not necessarily suitable for repeated chair impacts. Keep structural and protective functions distinct from decoration.
Mistake 4: treating polyurethane molding as a tile edge or waterproofing product. Tile systems may need proper termination, movement spaces, sealant details, and water management. Solve those technical problems before adding ornamental trim.
Mistake 5: guessing the border height. A band may collide visually with windowsills or door hardware. Tape the layout at full scale and view it from everyday positions in the room.
Mistake 6: measuring only the linear footage. Six long sections cannot necessarily be cut from the theoretical minimum number of strips. Produce a labeled cut list and consider where splices are acceptable.
Mistake 7: painting without checking compatibility. The finish may not bond to the factory primer, or it may reveal seam filler differently. Use approved products and prepare a sample.
Mistake 8: overusing caulk. Caulk should finish small, appropriate joints, not conceal a badly fitted miter, bridge an expansion joint, or fill large missing substrate areas. Check the intended joint type first.
Mistake 9: forcing a rigid profile around a curve. A standard straight polyurethane molding is not automatically flexible. Verify the product's permitted radius or use a compatible flexible system designed for the shape.
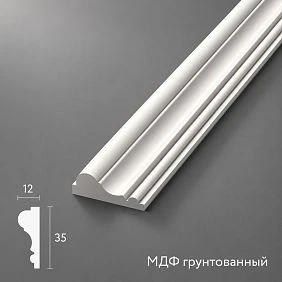
Mistake 10: mixing materials without noticing. A STAVROS catalog section can include polyurethane, primed MDF, and polystyrene products. Check each SKU rather than assuming the entire category is the same material. Their shapes may coordinate, but installation, finishing, and movement details can differ.
Frequently asked questions about polyurethane wall transition molding
Can polyurethane molding hide the line between wallpaper and paint?
Yes, it can create a clean decorative line over or next to the boundary when the profile's geometry and attachment method are suitable. The important part is to establish a straight line and secure the trim to a sound surface. Do not expect a small decorative profile to correct a severely uneven substrate or remain secure when glued only to wallpaper that is coming loose.
Is polyurethane molding the same thing as chair rail molding?
Not exactly. Chair rail describes a horizontal trim feature and sometimes implies a protective role. A polyurethane profile can be used in a chair-rail-style composition, especially to separate colors or finishes, but its ability to take impacts is product-specific. Do not assume that a compact decorative bead provides the performance of a heavier protective rail.
Can the same polyurethane profile cap a beadboard wall?
Sometimes a decorative profile can form part of the visual composition, but the actual panel cap must account for beadboard thickness, exposed edges, and panel movement. A flat-backed molding installed on the upper wall does not automatically finish a raised panel edge. Confirm the panel manufacturer's details and consider a separate compatible cap.
What should I use between tile and a painted wall?
First specify a correct tile edge or termination detail for the particular tile and location. A decorative polyurethane molding may sit on the adjacent painted area when compatible, but it should not replace a purpose-designed tile edging, movement joint, or waterproofing component. Direct-water areas require especially careful assembly design.
Can polyurethane molding be used in a bathroom?
Some polyurethane decorative products may be suitable for rooms with normal humidity, provided the adhesive, primer, coating, substrate, and installation details are compatible. That does not imply suitability for continuous direct-water exposure. A shower or tub surround must use its own approved waterproofing and finish system; confirm any decorative component with the relevant manufacturers.
Which size works for a subtle wall divider?
For a subtle line, compare narrow profiles such as MLDPU-001 at approximately 0.39 inches wide or MLDPU-027 at approximately 0.55 inches in its smaller option. The actual visual result also depends on relief, paint sheen, wall color, and lighting. Test a physical sample rather than selecting purely from the width number.
What is the difference between MLDPU-027 sizes?
The published versions are approximately 0.55 × 0.35 inches (14 × 9 mm) and 0.79 × 0.47 inches (20 × 12 mm). Both are listed at approximately 102.36 inches long. Specify the exact cross-section when ordering; “MLDPU-027” by itself does not distinguish those alternatives.
How many 102.36-inch strips do I need for an 18-foot-6-inch wall?
The wall is 222 inches long. Two strips total only 204.72 inches, so at least three are required. A simple cut strategy could use two 96-inch pieces and one 30-inch piece, adjusted for actual joint and miter details. Whether to order a fourth as a spare depends on project risk and replacement logistics.
Why is dividing total inches by stock length sometimes wrong?
That calculation gives a mathematical minimum. Individual cuts cannot always be combined within a stick. Six 60-inch runs need six unspliced pieces because two 60-inch cuts do not fit into one 102.36-inch strip. Short offcuts may still be useful for returns or smaller frames; a cutting diagram shows where.
Should I paint the trim before or after installation?
A carefully planned process may include sample finishing or early coats before installation, followed by joint finishing and final touch-ups afterward. The correct sequence depends on the paint, adhesive, and product finish. Check manufacturer instructions and test how primer, filler, and final paint behave together. Avoid coating bonding surfaces in a way that compromises adhesion.
Do I need special tools for installing a horizontal wall divider?
At minimum, accurate measurement, a reference level, a safe cutting method, and the correct adhesive are needed. Longer rooms benefit from a laser level and a written cut list. Test cuts are valuable for unfamiliar profile shapes. Follow equipment safety instructions and consider a qualified installer if the wall is irregular or includes technically sensitive tile or wet-area details.
Can I attach molding directly on top of vinyl wallpaper?
Only when the adhesive and wallpaper manufacturers permit that combination and the wallcovering itself is firmly bonded. Many installations are better served by bonding the trim to a prepared, sound wall surface rather than relying on the wallcovering film. A small adhesion test cannot replace explicit manufacturer guidance for difficult substrates.
Can I bend straight polyurethane trim around a curved wall?
Do not assume so. The STAVROS straight MLDPU profiles compared here should be treated as rigid unless the particular manufacturer's specification says otherwise. An approved flexible molding system may be needed, with a stated permissible radius and compatible installation method. Heating a rigid strip to force a bend risks damage and is not a reliable installation plan.
Is polyurethane or MDF better for a transition detail?
Both materials can create attractive millwork effects, but they have different substrate, moisture, movement, finishing, and fastening considerations. The correct choice depends on room conditions and the actual product. STAVROS carries polyurethane profiles as well as primed MDF and some polystyrene options; read each SKU description rather than inferring the material from the category name.
Can decorative molding cover an uneven tile-to-drywall step?
It may visually relate two surfaces, but it should not be used to hide a large unsupported gap or bypass a technical tile termination. The necessary edge profile, substrate plane, and any movement detail come first. If an exposed step remains, consider a compatible transition design or correct the substrate rather than building up an excessive layer of adhesive under decorative molding.
Should the trim color match the upper wall, lower wall, or baseboard?
All three are viable aesthetic approaches. Matching the upper wall tends to connect the divider to the upper field; matching the lower wall extends the lower field visually; matching baseboard or casing creates a more continuous trim language. Sample the choices in the actual room. The best solution depends on the wall proportions, available light, nearby millwork, and wallpaper pattern.
Can I use one molding everywhere in an open-plan home?
Repeating a profile can unify connected spaces, but that does not mean every wall needs a line. Use the same contour where transitions genuinely share a design logic; stop it cleanly at meaningful architectural boundaries. Keep technical requirements separate: a dry painted wall, panel cap, and tiled area may need different support details even if their visible trim language is coordinated.
Where can I compare actual STAVROS polyurethane profiles?
Start with the STAVROS polyurethane molding catalog and open each relevant product card for its exact dimensions. Compare MLDPU-001, MLDPU-002, MLDPU-003, and both size options of MLDPU-027. Confirm the finish, length, material, and current ordering details before purchasing.
The best transition is an intentional one
Polyurethane trim is most successful when it gives a well-built wall a clear visual hierarchy. A wallpaper-to-paint boundary can become a quiet chair-rail-style line; the top of a paneled wall can gain a composed decorative accent; a vertical material change can become part of a deliberate architectural layout. None of these designs requires pretending that decorative molding solves problems belonging to waterproofing, tile edging, structural support, or expansion details.
Choose the profile for its real size and relief, verify the surface and adhesive, draw the entire run, and plan every cut before ordering. Once those decisions are correct, paint and lighting can complete the effect. For a first comparison, explore polyurethane wall trim and decorative molding at STAVROS and match each model to the exact transition your wall needs.