
























































Article Contents:
- What Is Picture Frame Molding on Walls?
- Why Polyurethane Works for Applied Wall Frames
- Compare Four Actual STAVROS Polyurethane Wall Moldings
- MLDPU-001: fine outlines that do not overwhelm the wall
- MLDPU-004: a more defined transitional border
- MLDPU-002: a clear primary panel border
- MLDPU-003: use scale deliberately
- Find the usable wall area, not merely the overall wall width
- Use full-size tape or paper templates
- Example: three equal frames on a 12-foot dining-room wall
- Determine the frame height from the finished room, too
- Compare the two schemes before buying
- Onlays inside the panel
- One oversized frame
- Two balanced frames
- Three equal frames
- One wide frame with narrow flanking panels
- Two-tier picture-frame molding and wainscoting
- Living room: behind a sofa or on the main accent wall
- Bedroom: a framed headboard wall
- Dining room: repeated formal wall panels
- Hallway and entry: narrow, regularly spaced panels
- Home office or library: a restrained feature behind shelving
- Staircase: follow the viewing sequence, not a level floor line
- Tone-on-tone wall molding
- White or cream molding against a colored wall
- Dark profiles and selective metallic detail
- Add wallpaper, artwork, or a mirror inside the frames
- 1. Inspect the substrate
- 2. Record the layout and mark reference points
- 3. Cut the pieces using one dimensional convention
- 4. Dry-fit an entire frame
- 5. Use an approved attachment method
- 6. Treat joints without blurring the profile
- 7. Prime and paint as specified
- 8. Inspect the finished wall from normal viewing positions
- A note for U.S. buyers
- What is the difference between picture frame molding for walls and picture frames?
- What type of polyurethane molding works for a modern accent wall?
- Is a wide profile better for high ceilings?
- How many linear feet do I need for three 32 × 79-inch wall frames?
- How many strips do three 24 × 60-inch frames need?
- Can I install wall molding over wallpaper?
- Should the wall molding be painted before or after installation?
- Are panel molding corner blocks necessary?
- Is picture frame molding the same as wainscoting?
- Can polyurethane moldings be used in bathrooms?
- Can decorative molding form circles or curved frames?
- Where can I compare individual polyurethane moldings with complete wall molding kits?
- Can I order STAVROS molding for a project in the United States?
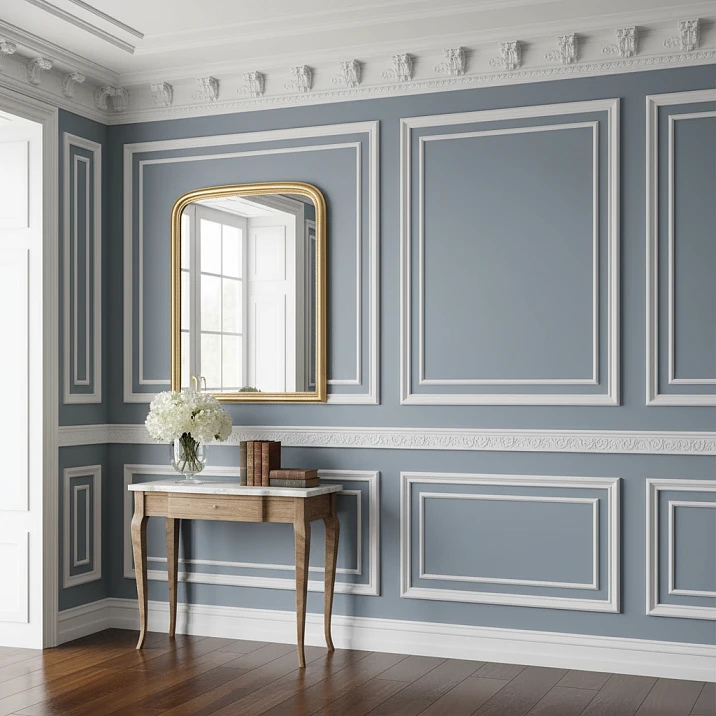
A plain wall is not necessarily an unfinished wall. In many American homes, a clean painted surface is exactly what the room needs. But when a living room, dining room, bedroom, or hallway lacks architectural definition, picture frame wall molding can introduce structure without building a full paneled wall. A few accurately placed rectangles establish a visual rhythm, create shallow relief, and give the room a more deliberate relationship between its walls, furniture, and ceiling trim.
The principle is simple: individual decorative molding profiles are attached directly to an existing wall to form raised frames. The painted surface inside each frame remains the wall itself. It can stay monochromatic, receive a contrasting paint color, or become a setting for artwork, wallpaper, or a mirror mounted independently. The outcome can be traditional, transitional, or notably contemporary, depending more on the proportions and spacing than on how much ornament is added.
The difficult part is turning inspiration into a repeatable installation. How wide should each frame be? How much space should remain between them? Which polyurethane molding has the right face width and projection? How many complete 102.36-inch strips must be ordered when every corner needs a miter? And when does a ready-made wall molding kit make more sense than building custom panels?
This U.S.-focused guide answers those questions using actual STAVROS polyurethane wall molding profiles, compatible decorative molding corners, and a practical approach to measurement, layout, cutting, installation, and finishing. Examples use inches, linear feet, and common 8-, 9-, 10-, and 12-foot ceiling heights. The recommendations are design starting points, not universal architectural codes or guaranteed installation tolerances.

What Is Picture Frame Molding on Walls?
Picture frame molding for walls means linear decorative trim arranged to create a geometric outline, usually a rectangle or square, directly on the wall surface. Unlike a conventional picture frame, it does not hold a photograph. Unlike raised-panel wood joinery, it does not create a structural framed panel. Instead, the thin raised border gives the illusion of wall paneling through proportion, depth, and light.
In American architectural and remodeling terminology, several related expressions describe different things:
| Term | What it usually means | Main distinction |
|---|---|---|
| Picture frame wall molding | Rectangular or square applied trim on a wall | The painted wall remains the field inside the frame |
| Panel molding | Decorative profile defining panel boundaries | Can be used for picture-frame-style layouts or alongside genuine paneling |
| Wall molding design | Overall arrangement of raised lines and panels | Includes panel count, proportion, furniture alignment, and finish |
| Wainscoting | Lower-wall treatment or paneling system | May use applied molding, but can also involve boards, cap rails, and other materials |
| Chair rail molding | A horizontal molding typically installed along a wall | Its intended performance and impact resistance depend on the exact product |
| Wall molding kit | A coordinated group of profiles and ornaments | Finished dimensions and component materials are defined by its SKU |
These terms overlap in interior-design photographs, but they should not be treated as equivalent products. A polyurethane MLDPU strip is not automatically an impact-rated chair rail, and a decorative rectangle is not a load-bearing or protective wall panel.
An applied picture-frame composition can create visual order in a room without changing its framing. That makes it an attractive option for paint-grade interiors, provided the substrate is sound and the selected profile and attachment system are appropriate.




Why Polyurethane Works for Applied Wall Frames
Polyurethane allows manufacturers to produce consistent decorative cross-sections ranging from very narrow rounded beads to more pronounced multi-level profiles. These are useful for repeated panels because each piece of a particular SKU has the same intended shape. A restrained raised line may be all that is required; more traditional rooms can use a stepped border with a deeper shadow.
There are limits. Ordinary rigid polyurethane trim is not automatically flexible, waterproof as an entire installed system, impact-proof, or suitable for exterior walls. Performance depends on the actual formulation, substrate, adhesive, coating, and environment. The fact that a piece is light does not make failed overhead or wall attachment harmless. Nor does it mean that wallpaper or unstable paint is an acceptable bonding surface.
The most relevant benefits for polyurethane picture frame wall molding are controlled profile geometry, multiple paint-grade decorative styles, and the ability to create an architectural outline without installing full solid panels. In a contemporary bedroom, a slim profile can disappear into a tone-on-tone finish until side lighting reveals it. In a traditional dining room, a slightly wider bead or step can produce stronger definition against colored paint.
Other materials have their place. Solid wood is useful when natural grain is central to the design. MDF can be suitable for specific primed paint-grade work, where the environment and mounting method allow it. Polystyrene also appears in architectural-decor catalogs but has different physical characteristics. The general STAVROS molding category lists products in more than one material, so buyers requiring polyurethane should check the exact MLDPU SKU rather than assuming every result in that category is PU.
Наша фабрика также производит:


Смотреть весь Каталог продукции
Compare Four Actual STAVROS Polyurethane Wall Moldings
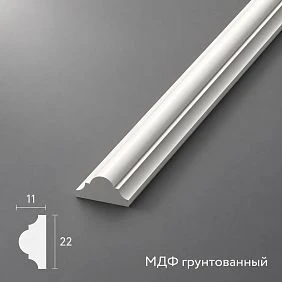
The four profiles below are individually listed as polyurethane. All share an approximately 102.36-inch (8.53-foot) stock length, but their face widths and projections create distinctly different visual results.
| STAVROS profile | Face width × projection × stock length | Profile character | Best design role |
|---|---|---|---|
| MLDPU-001 | 0.39 × 0.24 × 102.36 in. | Fine semicircular bead | Slim wall frames, small panels, secondary inner borders |
| MLDPU-004 | 0.59 × 0.31 × 102.36 in. | Compact raised bead with stepped edges | Restrained transitional frames and layered compositions |
| MLDPU-002 | 0.87 × 0.43 × 102.36 in. | More pronounced, multi-level classical profile | Main framing on dining, bedroom, and living-room walls |
| MLDPU-003 | 1.38 × 0.47 × 102.36 in. | Wide profile with bead, concave relief, and defined edges | Large architectural panels where stronger shadows are desired |
These are approximate inch measurements shown on the product listings; check the current drawing and size option before purchasing. Face width tells you how much of the wall is visibly covered by the border. Projection tells you how far the profile stands proud of the surface and how strongly it can cast a shadow. The two measurements do different jobs.
Получить консультацию
MLDPU-001: fine outlines that do not overwhelm the wall
The MLDPU-001 polyurethane molding is approximately 0.39 inches wide. Its compact bead can be repeated across several narrow wall sections without making each border visually dominant. It is a good dimensional reference for a modern bedroom, a restrained hallway scheme, or the inner line of a double-frame composition.
Narrow should not be confused with invisible. Contrast paint will make even a small profile highly graphic; matching the trim to the wall color emphasizes its relief instead. Because every strip has a physical 0.24-inch projection, the design should also avoid moving door leaves and other nearby obstructions.
MLDPU-004: a more defined transitional border
At roughly 0.59 inches wide, MLDPU-004 produces a stronger raised line while remaining comparatively delicate. The central rounded section and stepped edges lend it to updated traditional and transitional wall panels. It is also a candidate for a secondary frame around one larger feature panel.
A moderately detailed profile is useful when a room already has some door casing and baseboard detail but not elaborate classical ornament. It creates an architectural response to those existing elements without necessarily copying their cross-section.
MLDPU-002: a clear primary panel border
MLDPU-002 polyurethane panel molding has an approximately 0.87-inch face and a 0.43-inch projection. That makes it easy to read in a full-height wall frame. It can serve as the main profile in a three-panel dining-room composition or the outer line of a layered wall scheme.
Its stronger relief is worth examining with the room's actual lighting. A side-facing window or nearby wall sconce can reveal a beautiful stepped shadow but also expose imperfect miters, uneven mounting, and inconsistent paint coverage.
MLDPU-003: use scale deliberately
The MLDPU-003 wide polyurethane molding is about 1.38 inches wide and 0.47 inches deep. It is more appropriate when the design calls for a visible architectural frame across a larger wall bay. It may overwhelm a compact narrow panel where the molding itself takes up too much of the visual field.
The goal is not to use the widest profile available. It is to create the right relationship among panel width, wall area, furniture scale, and projected shadows. A wider profile can be effective in a large foyer even if a narrower one would be more refined in a standard bedroom.
Plan the Architecture of the Wall Before Selecting a Frame Size
Picture-frame paneling succeeds when its divisions relate to the architecture and furniture. A wall is rarely an uninterrupted blank rectangle: it contains door casings, windows, baseboards, outlets, switches, wall lights, radiators, vents, and furniture that may cover the bottom half. All these elements belong in the initial drawing.
Start with a straight-on elevation. Measure the actual finished wall width and height. Show every opening and the visible edges of fixed cabinetry. Indicate the main furniture group—the sofa, bed, sideboard, dining table, or console—and decide whether the composition should be centered on that group or on the overall wall.
A picture frame wall molding design generally has three organizing decisions:
An axis: the centerline of the wall, furniture, architectural opening, or selected feature.
A rhythm: repeated panel widths and consistent gaps, or a deliberate central panel with smaller flanking panels.
A hierarchy: one main outline, with any inner border or ornament used sparingly and purposefully.
Do not treat the golden ratio, an odd panel count, or a prescribed fraction of wall width as a universal requirement. These are aesthetic options, not technical rules. Two frames can balance a narrow wall beautifully; three can organize a broad dining wall; one large frame can anchor the wall behind a king bed. The right solution emerges from the dimensions and sightlines.
Find the usable wall area, not merely the overall wall width
For example, a wall may be 144 inches wide, but 24 inches at one end may be interrupted by a door return. A centered three-panel layout across all 144 inches could crowd the doorway. Instead, establish a usable 120-inch decorative field, then set panel widths and gaps inside that field. The result should feel aligned to the room rather than forced into a perfect geometric formula.
The same applies vertically. A wall with a 96-inch ceiling, a 5-inch baseboard, and a crown molding that drops 3 inches has an 88-inch clear area between those two trims, before you account for any intended visual margins. A 90-inch-high decorative frame cannot simply be squeezed into that space without revisiting the arrangement.
Use full-size tape or paper templates
A drawing is essential, but a full-scale mockup is where the scheme becomes convincing. Mark the outside edge of each frame with painter's tape. View it from the doorway, from the sofa, and from the adjoining room. Check the wall at night with the lighting that will illuminate the finished profiles.
In many cases, one mockup reveals the central problem: the planned frame looks elegant on an empty elevation but disappears behind a tall sofa, or its top edge collides visually with a wall sconce. Revising the tape is easier than removing glued trim.
How to Calculate Panel Widths and Spacing
For an equal-panel arrangement, use a simple arithmetic layout rather than a guessed design rule.
Panel width = (usable wall width − left margin − right margin − total inter-panel gaps) ÷ number of panels.
If the scheme has equal end margins S, a consistent gap G, total usable width W, and n panels, the formula becomes:
Panel width = [W − 2S − (n − 1)G] ÷ n.
This gives the outside width of each molding frame when you use outside dimensions as the reference. It does not say how far the inner painted field extends; that depends on the molding's face width. Maintain one reference convention throughout the cutting schedule.
Example: three equal frames on a 12-foot dining-room wall
Suppose the usable wall is 144 inches (12 feet) wide. You want a 16-inch margin at each side and 8-inch gaps between the frames. With three equal frames:
Panel width = [144 − 2(16) − 2(8)] ÷ 3 = 32 inches.
The finished layout is therefore:
16-in. margin | 32-in. frame | 8-in. gap | 32-in. frame | 8-in. gap | 32-in. frame | 16-in. margin.
That is an exact geometric layout, not a universal recommendation that 8-inch gaps are ideal. If the door casing or sideboard position calls for a different centerline, adjust the margins or panel count before choosing material quantities.
Determine the frame height from the finished room, too
Assume this room has a 9-foot (108-inch) ceiling, a 5-inch baseboard, and crown molding extending 3 inches down the wall. If you want a 12-inch clear gap above the baseboard and 9 inches below the crown, the outside frame height is:
108 − 5 − 3 − 12 − 9 = 79 inches.
Each decorative panel is therefore 32 × 79 inches, with dimensions taken at the outside long points of the mitered corners. The design can be evaluated with a tape mockup and with the dining furniture drawn into the elevation. The following cut list uses these exact dimensions.
Cutting and Ordering: Three 32 × 79-Inch Frames
One 32 × 79-inch frame consists of two 79-inch vertical pieces and two 32-inch horizontal pieces.
Installed length per frame = 2(79) + 2(32) = 222 inches = 18.5 linear feet.
For three frames:
Installed length = 3 × 222 = 666 inches = 55.5 linear feet.
That does not mean you can necessarily buy 55.5 feet of product. STAVROS MLDPU-001, MLDPU-004, MLDPU-002, and MLDPU-003 are listed in complete strips of approximately 102.36 inches. The order has to produce six 79-inch members and six 32-inch members.
| Cutting requirement | Quantity | Cutting strategy |
|---|---|---|
| Vertical pieces, 79 in. | 6 | Cut one from each of six full 102.36-in. strips |
| Horizontal pieces, 32 in. | 6 | Cut three pieces from each of two additional full strips |
| Total | 12 cut pieces | 8 complete stock strips |
Each vertical strip leaves 23.36 inches nominally after a 79-inch cut—too short for a 32-inch horizontal. Each of the remaining two strips can supply three 32-inch lengths, using 96 inches and leaving room for a normal saw kerf and end trimming. This makes eight complete strips a feasible baseline for the illustrated design.
Eight strips contain 818.88 inches (68.24 linear feet) of stock, against 666 inches installed. The difference of 152.88 inches (12.74 feet) is nominal offcut before kerf, trimming, or damage allowance. You may want an extra strip for a first-time installation or future repairs, but decide that from real risk and material availability, rather than applying an unexplained universal 10–15% markup.
The same piece-count strategy works for any of these 102.36-inch STAVROS MLDPU profiles. The cost and visual outcome differ, but the lengths in this example do not.
A Second Cut-List Example: Three Frames on a 10-Foot Wall
Smaller wall sections can be more economical in the cutting room. Imagine a 120-inch-wide wall with three equal frames, 15-inch side margins, and 9-inch gaps:
Frame width = [120 − 2(15) − 2(9)] ÷ 3 = 24 inches.
Choose a 60-inch frame height after checking the actual baseboard and ceiling treatment. Each frame uses two 60-inch pieces and two 24-inch pieces, or 168 inches of molding. Three frames need 504 inches = 42 linear feet of installed trim.
On a 102.36-inch strip, one 60-inch member and one 24-inch member can be cut from the same stock length. Six complete strips can therefore supply the six long and six short pieces required. Each strip uses 84 inches nominally and leaves 18.36 inches before kerf and trimming.
This example requires only six complete strips even though its installed quantity is 42 linear feet. The taller 32 × 79-inch design needs eight strips for 55.5 feet. Both calculations show why the number of individual cuts and their fit within full stock lengths is more useful than simply adding 10% to the installed perimeter.
Compare the two schemes before buying
| Design | Number and outside size of frames | Installed molding | Feasible minimum stock strips, 102.36 in. each |
|---|---|---|---|
| Wider, tall dining-room wall | 3 frames × 32 × 79 in. | 55.5 linear ft | 8 |
| Compact 10-ft-wide accent wall | 3 frames × 24 × 60 in. | 42 linear ft | 6 |
Both examples assume plain mitered 90-degree corners, usable full strips, and no pattern matching, corner blocks, or unusual damage allowance. Change the dimensions or the product and you must redo the piece-by-piece schedule.
Double Picture Frame Wall Molding: Add Depth Without Filling the Wall
A layered wall composition has an outer decorative frame and a smaller inner frame, with a visible painted band between them. It can look neoclassical when the outer border has a stronger profile, or more contemporary when both lines are slim and painted to match the wall.
Consider the earlier three 32 × 79-inch outer frames. Suppose you want an inner line 4 inches inside each outer long-point boundary. The proposed inner frames will measure:
32 − 2(4) = 24 inches wide; 79 − 2(4) = 71 inches tall.
One inner frame requires two 71-inch members and two 24-inch members, a nominal 190 inches. Three inner frames therefore need 570 inches, or 47.5 linear feet of additional molding.
For a 102.36-inch MLDPU-001 slim polyurethane profile, a single stock strip can provide one 71-inch member plus one 24-inch member (95 inches total). Six strips supply all six long and six short pieces, with appropriate allowance for normal kerf and end trimming.
Combining both layers gives a useful purchasing model:
Outer frames in MLDPU-002: 8 complete strips.
Inner frames in MLDPU-001: 6 complete strips.
Total: 14 full strips across two different SKUs, before any deliberate contingency or additional ornament.
The 4-inch offset in this example is measured consistently between the outside long-point boundaries of the rectangles. Its visible painted separation will depend on the profile widths. In the mockup, evaluate the gap between the visible relief edges, not just two pencil lines. A visually crowded double border often looks worse than a confident single line.
Double frames create additional cuts, joints, and painting work. They are not automatically more elegant. If the room already has detailed crown molding, carved furniture, or patterned wallpaper, one clearly defined frame may be the more sophisticated solution.
Panel Molding Corners: When to Use Coordinated PU Accessories
Many picture-frame wall molding installations use simple 45-degree miters at the four corners. Decorative corner elements offer another vocabulary. They may soften a small geometric border, add classical emphasis, or establish a matched turn between compatible profiles. But corners should not be treated as universal connectors or something to purchase automatically for every frame.
STAVROS lists, for example, the MLDPU-001U polyurethane molding corner at approximately 3.39 × 3.39 × 0.28 inches. It is intended for the slim MLDPU-001 profile family. The MLDPU-002U corner element is much larger, approximately 6.77 × 6.77 × 0.51 inches, and is associated with the more substantial MLDPU-002 line.
A frame with four individual corner accents needs four pieces if the selected detail is designed to be installed that way. Three frames would need 12 corner elements. However, a corner that replaces part of the straight profile changes the straight lengths and the cut schedule. A corner that overlays a miter works differently. Consult the product drawing and confirm the intended construction before ordering either type.
The STAVROS molding decor assortment also contains other shaped accents. Use them where their motif and scale enhance the composition. A 6.77-inch corner may be perfectly balanced on a large panel yet visually overwhelm a narrow 24-inch frame.
Onlays inside the panel
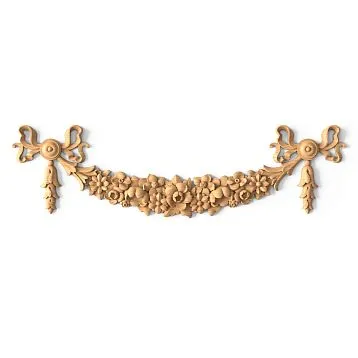
A separate polyurethane decorative onlay can establish a focal point inside a larger wall frame. Examples include floral relief, scrolls, and geometric motifs. The right placement may be the center of one feature frame, above a doorway, or at a transition between repeated panels.
An onlay is not a hanging hook or a substitute for furniture or mirror support. Any photograph, wall mirror, or other object placed inside a decorative frame needs independent, suitable attachment to the underlying wall. The ornamental component itself should serve only its documented decorative role.
Single, Double, and Two-Tier Panel Layouts
A wall molding design is a system of relationships, not a compulsory grid. The most appropriate layout depends on the shape of the wall and the architecture around it.
One oversized frame
One large centered frame gives the wall a calm architectural focus. It works particularly well behind a bed, sofa, sideboard, or console when the furniture establishes a strong centerline. A single frame can be left empty and painted to match the wall, or used as a visual backdrop for independently mounted artwork.
Two balanced frames
A pair of panels can be appropriate on a narrow wall or in a room where furniture is organized symmetrically. For example, a pair of vertical frames behind matching bedside tables may balance a headboard without placing molding immediately where someone sits or leans. Two does not look less professional than three; the important question is whether the two-panel arrangement relates to the actual objects in the room.
Three equal frames
Three panels are useful for a long dining-room or living-room wall. Equal frame widths and gaps create repetition that the eye can follow. If a sideboard is centered below, its position may determine the middle frame. If the table or sofa is deliberately offset, a strict wall-centered trio may be less attractive than a composition that acknowledges that offset.
One wide frame with narrow flanking panels
A large center panel with narrower side panels can give a formal room a more pronounced hierarchy. Instead of forcing all the widths to match, establish the central focal area and use the smaller side frames to complete the architecture. Plan the outer margin and gaps as carefully as in an equal-panel arrangement. The central frame should feel intentionally dominant, not simply accidentally oversized.
Two-tier picture-frame molding and wainscoting
A lower row of smaller panels beneath a horizontal visual break can evoke wainscoting; a taller upper row can make the room appear more layered. The horizontal line may be described as a chair-rail-style division, but ordinary decorative PU profiles should not be presumed to provide the impact protection of a purpose-designed chair rail. If the lower wall needs physical protection from chairs or carts, specify materials and construction for that function rather than relying on ornament alone.
Align the vertical axes of upper and lower frames where that gives the wall a coherent rhythm. A two-tier composition also needs coordination with outlet heights, furniture and chair backs, existing baseboards, and any horizontal cap. In an 8-foot room, this can become visually crowded; on a tall wall it may feel natural.
Picture Frame Molding Ideas by Room
Living room: behind a sofa or on the main accent wall
The sofa is often the dominant horizontal object in the space. A single wide rectangular frame, two balanced frames, or three taller wall panels can strengthen its visual setting. Choose whether the frame grouping should track the sofa width or organize the entire elevation including side tables and floor lamps.
In a living room with neutral upholstered furniture, a tone-on-tone MLDPU-004 panel molding can add subtle relief. For a more classical room with a substantial baseboard and crown molding, MLDPU-002 may provide a clearer architectural line. If the sofa back hides the lower portion of the frames, rethink their vertical placement rather than adding more trim where it will not be seen.
Bedroom: a framed headboard wall
A bedroom generally benefits from quiet proportions and controlled contrast. One central decorative field can frame the headboard visually. Alternatively, a row of tall panels may extend across the entire wall, with the central one aligned to the bed. A narrow MLDPU-001 bead profile creates shallow shadows without becoming too decorative.
Avoid projecting decorative accents where occupants may strike them, and keep wall sconces, outlets, switches, and headboard-mounted lighting accessible. A perfectly symmetrical plan is less important than a comfortable, usable bedroom.
Dining room: repeated formal wall panels
Dining rooms often have a natural architectural rhythm set by the table, sideboard, windows, and lighting. Three repeated tall frames or a central dominant bay with two smaller ones can reinforce that structure. A more substantial MLDPU-003 polyurethane molding may suit a generous room, but its 1.38-inch face should be assessed at full scale.
If chairs regularly touch the wall, applied picture-frame molding should not be assumed to prevent surface damage. A durable lower-wall treatment or a properly specified protective rail may be appropriate independently of the decorative frames.
Hallway and entry: narrow, regularly spaced panels
In a corridor, doors and openings establish the effective panel rhythm. Use the uninterrupted wall sections as natural bays, and maintain consistent framing where the sections allow it. Narrow profiles are useful when the corridor itself is compact. Large projecting ornaments next to circulation routes can be impractical even when they look attractive in a catalog.
Where the wall turns a corner, decide whether the panel system stops intentionally before the turn or continues on the next wall as a separate layout. Do not force a rectangular molding profile to wrap an out-of-square corner without a verified joint design.
Home office or library: a restrained feature behind shelving
Architectural frames can give an office a more settled appearance, especially when related to a desk or bookcase. A wall with many shelves and artwork may need fewer molding frames, not more. Use a line or two to structure the surface and let the furniture carry the rest of the visual detail. For classically influenced spaces, one appropriately sized STAVROS polyurethane decorative onlay may be enough to identify the central bay.
Staircase: follow the viewing sequence, not a level floor line
A staircase gallery is a separate geometry problem. Individual molding rectangles generally remain level, while their centers can step upward with the stair flight. Preserve handrail access and safe travel width, and test the arrangement from both landings. A hallway grid should not simply be rotated or stretched to fit a sloping staircase wall.
How to Choose for 8-, 9-, 10-, and 12-Foot Ceilings
Ceiling height changes how much vertical rhythm is available. The same set of four wall frames may look calm in a 12-foot foyer and busy in an 8-foot bedroom. There is no reliable rule that a certain face width or frame height is mandatory for a given ceiling; these are starting points for design evaluation.
| Ceiling height | Practical emphasis | What to check |
|---|---|---|
| 8 ft / 96 in. | Favor clear margins and controlled detail | Baseboard and crown take a significant share of height; avoid overloading the wall with two tiers |
| 9 ft / 108 in. | Tall rectangular frames can develop a strong rhythm | Coordinate top and bottom gaps with furniture, casing, and fixtures |
| 10 ft / 120 in. | Large frames or a carefully composed two-tier system may work | Keep broad profiles in scale with the wall bay and existing trim |
| 12 ft / 144 in. | Larger features, nested frames, and more expressive relief become possible | Check the view from the floor and avoid small ornaments disappearing on a very tall wall |
Use the actual finished area, not the nominal ceiling height alone. A 9-foot wall with deep crown molding may have a smaller usable field than a simpler room with a slightly lower ceiling.
Color and Finish: Let the Wall Molding Establish the Rhythm
The character of decorative wall molding changes significantly with paint. A crisp white frame against navy, charcoal, or deep green is immediately recognizable as a classical architectural outline. The same frame painted the wall color becomes a quieter pattern of highlights and shadows. Neither method is inherently better; the right choice depends on what else competes for attention.
Tone-on-tone wall molding
Painting the trim and surrounding wall the same color is especially effective in modern and transitional interiors. It allows the shallow polyurethane relief to create dimension without strong contrast. Muted sage, warm taupe, cream, pale gray, or dark blue can all work when the rest of the room supports the palette. The result depends on sheen as well as pigment: a satin profile on a matte wall may stand out even at an identical color code.
With a slim MLDPU-001 polyurethane profile, tone-on-tone paint can make a series of rectangles look integrated rather than pasted on. A deeper MLDPU-002 creates a stronger shadow even with no color contrast. Make a small finished sample and view it in both daylight and evening light before approving the entire room.
White or cream molding against a colored wall
For a traditional dining room or entry, white or warm ivory borders can establish a clear, readable grid. Contrast emphasizes every miter, every margin, and every difference in spacing. It therefore rewards careful layout and highlights poor workmanship. A deep blue wall with warm-white molding may feel formal; a dusty green wall with narrow cream frames can feel softer and more residential.
Do not treat bright white as universally correct. A room with creamy door casing and warm oak floors may benefit from a coordinated off-white instead.
Dark profiles and selective metallic detail
Dark-colored borders on a pale wall can create a graphic contemporary effect, but the strong lines can make irregular panels feel accidental. A restrained gold, brass, or bronze highlight on a central onlay may support a traditional room; covering all the molding in metallic paint can overwhelm the architecture. Use an approved coating system and preserve fine relief instead of allowing thick paint to pool in recesses.
Add wallpaper, artwork, or a mirror inside the frames
Wallpaper within a painted border can give the appearance of inset decorative panels. If the paper is applied inside the outlined field, its surface preparation and the attachment of the molding remain separate questions. Do not assume construction adhesive is suitable over old wallpaper.
A photograph, painting, or mirror can sit within the molding's visual boundary, but it must be hung from independent hardware suitable for its weight and the actual wall substrate. Decorative polyurethane trim is not a picture rail, mirror hanger, or shelving support.
Installation: A Measured DIY Sequence for Polyurethane Picture Frames
Picture-frame molding is approachable as a DIY design project, but the quality depends on geometry and compatibility. The installation procedure must fit the exact polyurethane product, receiving wall, and adhesive or fastening system. The following is a planning workflow, not a replacement for manufacturer instructions.
1. Inspect the substrate
The proposed mounting path should be sound, clean, dry, and sufficiently even for the selected rigid profile. Loose paint, damaged plaster, failing joint compound, wallpaper adhesive, grease, or condensation can compromise the bond. Repair unstable areas before proceeding. Test the entire frame perimeter with a straightedge; a narrow molding can reveal a wall's waviness under grazing light.
Rigid MLDPU profiles should not be bent around an arch or forced across a severely irregular surface simply because they are polyurethane. Flexible molding is a distinct product characteristic and must be confirmed on the exact SKU.
2. Record the layout and mark reference points
Start with an elevation and outside dimensions of each frame. Locate the vertical centerlines, top and bottom edges, wall obstacles, and finished frame corners. Use a laser level or an appropriately accurate conventional level. For repeated frames, a story stick—a strip marked with the approved gaps and dimensions—can help prevent small measurement errors from accumulating across the wall.
Check the entire arrangement with painter's tape. Confirm the planned frame edges do not cross switches, receptacle cover plates, HVAC grilles, door swings, or other components that must remain accessible.
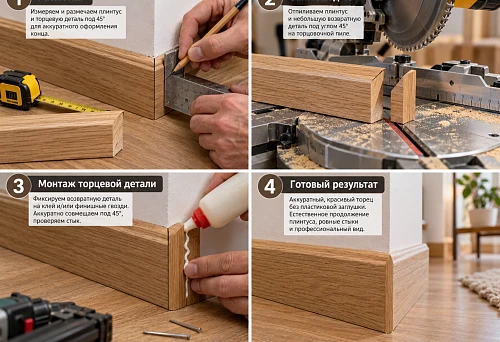
3. Cut the pieces using one dimensional convention
For the ordinary rectangular examples in this article, the specified widths and heights are measured at the outside long points of the 45-degree miters. If an inside-edge dimension or a molding centerline is used instead, the cut lengths must be recalculated. Label pieces by panel number and position, such as “Frame 2 — top, 32 in.”
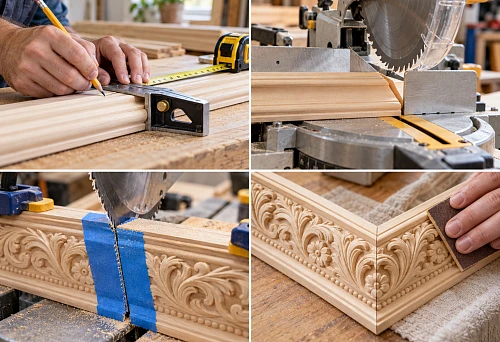
Use appropriate cutting tools, support the profile so it cannot shift, and test the first miter before repeating the cut across the project. A true 90-degree corner typically uses two 45-degree cuts. Existing walls and some special designs may require field-specific adjustments.
4. Dry-fit an entire frame
Assemble the four sides on a clean, flat surface or carefully position them against the wall before bonding. Confirm the corners, outside dimensions, and diagonals. A rectangle can have four nominally correct side lengths and still be out of square if its miters or placement are inaccurate. Correct the geometry now rather than relying on filler to disguise the difference.
For double-frame designs, position both borders together during the dry fit so that the space between their visible edges can be evaluated.
5. Use an approved attachment method
Choose mounting adhesive or another attachment system based on the actual polyurethane product and receiving substrate. Follow the specified application method, temporary-support requirements, working time, and cure conditions. The STAVROS installation and finishing materials catalog provides a useful starting point for related supplies, but a catalog listing alone does not establish compatibility.
Painter's tape may be suitable for temporarily holding some small strips in place, but it is not a universal substitute for required support or mechanical attachment. Large, projecting, or overhead elements need an installation method appropriate to the application. Do not glue over wiring, cover electrical access, or use the trim as a mounting bracket for other objects.
6. Treat joints without blurring the profile
A clean miter begins with accurate cutting and correct alignment. Where the manufacturer requires a special joint adhesive, use that specified system. Cosmetic filler or suitable paintable caulk may be appropriate for certain small gaps along the wall, but it cannot substitute for the required bond. Excessive caulk over a visible relief makes the frame look soft and poorly finished.
On a stepped MLDPU-002 profile, check that every horizontal ridge flows through the corner without a face-height change. A flashlight held at a shallow angle to the wall can reveal stepped joints or gaps before the final paint is applied.
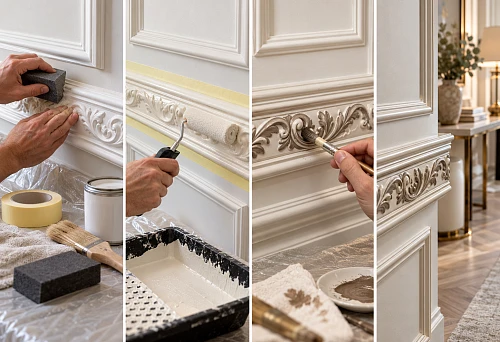
7. Prime and paint as specified
Confirm the compatibility of the product's factory surface, joint materials, and desired coating. Some finishes require a specific primer or preparation step. Avoid blanket claims that every paint or adhesive works with every PU formulation. Two controlled finishing coats may preserve detail better than one overloaded coat, but follow the actual coating instructions for coverage and recoat time.
Choose whether the molding should appear integrated with the wall or in deliberate contrast. Paint preparation and finishing should be planned before installation so that repaired joints do not stand out as patches.
8. Inspect the finished wall from normal viewing positions
Step back to the entry, sofa, bed, or dining table. Confirm that the panel rhythm makes sense from the positions in which the room is used. Check alignment under daylight and artificial light. A slightly imperfect corner that is irrelevant from the seating position may be less important than an entire frame visibly misaligned with a doorway.
The goal is a coherent architectural composition, not the accumulation of more ornament.
Is a Ready-Made Wall Molding Kit Better Than Individual PU Strips?
A wall molding kit can reduce selection effort when its published overall dimensions, materials, and ornamental layout suit the space. But custom picture-frame molding built from individual profiles has a key advantage: you control the exact width, height, number of panels, and relationship to the room's furniture and openings.
The STAVROS wall molding kit collection includes coordinated designs, but their materials are not all identical. For example, the CPU-3-1 Japandi wall decor set uses polyurethane moldings and corner components, while CPU-2-2 Neoclassic Light combines polyurethane decorative elements with primed MDF profiles. A kit should not be described as completely polyurethane unless its itemized component list supports that statement.
A ready-made composition may also be much taller than the usable wall field between baseboard and crown. If the finished kit does not fit, choose another product or a custom layout. Do not cut away ornamental sections without verifying that the design and installation remain suitable.
For an irregular wall with several doors, an off-center fireplace, or an unusually tall ceiling, an individual STAVROS polyurethane molding profile often provides a more adaptable design starting point. Custom does not mean unplanned: it makes the cut schedule and precise elevation even more important.
Budget Your Project From the Whole Design, Not a Price per Foot
A professional-looking estimate separates the visible trim from the supplies and labor needed to complete it. Material price comparisons are meaningful only when they account for the number of full pieces you actually need to purchase.
| Budget component | Correct way to calculate |
|---|---|
| Straight MLDPU profiles | Number of complete 102.36-inch strips required by the actual cut list × current SKU price |
| Decorative corner pieces | Matching corner SKU × required quantity, after revising straight lengths if needed |
| Onlays and ornaments | Exact product dimensions and quantity per panel |
| Adhesives, primers, fillers and paint | Product-specific compatibility and actual coverage |
| Wall preparation | Repairs to unsound paint, plaster, drywall, wallpaper, and other surfaces |
| Installation labor | Layout complexity, number of cuts, wall condition, access, and finishing scope |
| Shipping and import | Written destination-specific freight quote, customs responsibilities, and damage procedures |
The equivalent straight-profile cost per linear foot is the full strip price divided by 102.36 ÷ 12 = 8.53 feet. But do not multiply that number by the installed footage and assume the result is the final purchasing cost. The 32 × 79-inch design needs eight full strips because the offcuts are too short to supply the horizontal members.
Likewise, a double-frame design uses different SKUs for the main and inner borders. Buying only one profile and hoping the proportions work can produce unnecessary waste or an unwanted appearance.
A note for U.S. buyers
STAVROS presents an English catalog with inch dimensions and U.S.-dollar pricing, but this does not prove that routine delivery to the United States is available. The published payment and delivery information primarily describes Russia and CIS destinations. Before placing an order for an American project, confirm availability, freight to the specific ZIP code, packaging for long molding strips, payment terms, import responsibilities, and how damaged pieces are handled.
For specification and contractor coordination, consult the STAVROS product catalogs and drawings and the samples and catalogs assortment. Work from the exact product's geometry rather than a generic catalog image.
Common Picture Frame Wall Molding Mistakes
Starting with the wrong reference axis. A perfectly centered wall grid can look off-center relative to the sofa or dining table. Decide which object should govern the composition before marking the wall.
Using a universal frame proportion. A 1:1.62 rectangle is not inherently superior to a tall 1:2 frame or a broad horizontal one. Use the wall's actual shape and the furniture scale to decide.
Ignoring face width. A frame's outside dimensions do not tell you the dimensions of its painted center. A 1.38-inch-wide profile occupies noticeably more space than a 0.39-inch bead.
Ordering by total linear footage. Stock-length nesting determines how many complete strips you buy. Make the individual cut list before purchasing.
Mixing incompatible corners and profiles. MLDPU-001U and MLDPU-002U belong to different profile families and have very different footprints. Their compatibility should not be assumed with unrelated KPU trim or decorative strips.
Treating wallpaper as a reliable bonding substrate. Wallpaper can detach even if an adhesive grips its surface. Prepare a suitable receiving surface using the mounting system's instructions.
Forcing rigid polyurethane around curves. A standard molding does not become a flexible product merely because it is made from polyurethane. Curved walls and arches require an appropriate documented solution.
Using decorative trim as actual protection or support. Applied frames are primarily decorative. They do not automatically protect the lower wall from chair impacts, support mirrors, or replace structural or electrical components.
Skipping the lighting check. Grazing light can reveal gaps, steps, and wavy lines invisible under diffuse ambient illumination. Inspect before the final finish.
Overdecorating the wall. Several small nested frames, strong contrasts, busy floral accents, and prominent wall lights can compete with one another. A little intentional empty space gives the design room to breathe.
Frequently Asked Questions About Picture Frame Wall Molding
What is the difference between picture frame molding for walls and picture frames?
Picture frame wall molding is decorative architectural trim fixed to a wall in rectangular outlines. It does not hold or support artwork. A conventional picture frame holds a print or photograph. Artwork displayed inside a molding rectangle should have independent appropriate hanging hardware.
What type of polyurethane molding works for a modern accent wall?
A slim profile such as MLDPU-001 or MLDPU-004 provides a restrained raised line. Tone-on-tone paint and a small number of carefully proportioned frames often create the most contemporary result.
Is a wide profile better for high ceilings?
Not necessarily. A stronger profile such as MLDPU-003 may read more clearly on a tall wall, but frame dimensions, existing trim, light direction, and the number of panels matter as much as face width. Always test the profile in the intended location.
How many linear feet do I need for three 32 × 79-inch wall frames?
Each frame requires 222 inches of installed molding, so three need 666 inches or 55.5 linear feet. With STAVROS 102.36-inch MLDPU strips, the illustrated cut schedule uses eight complete strips for six vertical and six horizontal members.
How many strips do three 24 × 60-inch frames need?
The total installed length is 42 linear feet. Because one 60-inch piece and one 24-inch piece fit within a 102.36-inch strip, six complete strips can supply the twelve required members under the example's assumptions.
Can I install wall molding over wallpaper?
Do not assume that the wallpaper or its adhesive can support the decorative trim over time. The receiving surface should be prepared according to the selected product's installation system; removing the wallpaper in bonding areas may be necessary.
Should the wall molding be painted before or after installation?
Either approach may be used when supported by the finishing system, but joints and filled areas generally require finish coordination after mounting. A final uniform coat can help the entire composition read consistently. Follow the actual coating and cure instructions.
Are panel molding corner blocks necessary?
No. Ordinary picture-frame rectangles can use accurate miters. Matched polyurethane corner details are optional ornaments or designed transitions, and they must be compatible with the chosen profile and cut strategy.
Is picture frame molding the same as wainscoting?
They can be related. Applied frames are sometimes used to create the appearance of lower-wall paneling, but wainscoting can also involve actual boards, cap rails, and protective detailing. An ornamental polyurethane strip should not automatically be described as a protective chair rail.
Can polyurethane moldings be used in bathrooms?
The suitability of a complete installation depends on the exact product, substrate, finish, adhesive, moisture exposure, and ventilation. Polyurethane alone does not make the wall assembly waterproof or suitable for direct wet exposure. Obtain application-specific approval where needed.
Can decorative molding form circles or curved frames?
Only with a product and construction method suitable for the required radius. The ordinary rigid MLDPU profiles described here should not be assumed flexible. A curved frame may require specially manufactured curved sections or another verified system.
Where can I compare individual polyurethane moldings with complete wall molding kits?
Browse the STAVROS polyurethane molding profiles for individually cut custom frames, or compare the coordinated wall decor kits when a standard composition fits your wall. Check materials and finished dimensions for every SKU.
Can I order STAVROS molding for a project in the United States?
The English-language site offers relevant product information, but published delivery terms primarily describe Russia and the CIS. Confirm U.S. shipping, full landed cost, packaging, and timing with the supplier before committing to a project schedule.
Build the Wall Around the Room, Then Choose the Molding
Picture-frame molding is most convincing when the architecture feels inevitable: the frames relate to the furniture, the margins are deliberate, the profile suits the room, and the repeated outlines look consistent from one end of the wall to the other. Polyurethane is the decorative material; the design comes from the elevation and the cut list.
Start by comparing STAVROS MLDPU polyurethane wall moldings: MLDPU-001 for the finest outlines, MLDPU-004 for restrained detail, MLDPU-002 for a more pronounced primary frame, and MLDPU-003 for wider architectural emphasis. Add compatible panel molding corners or polyurethane decorative onlays only where they improve the hierarchy rather than complicate it.
Measure the usable wall, sketch the frame count and spacing, tape the design at full scale, and translate every side into an exact cutting schedule. Verify the substrate and installation system, inspect the lighting, and confirm the purchasing and shipping terms for your location. That sequence turns an ordinary wall molding design into a realistic, repeatable architectural finish.
Visiting showrooms.Moldings shopOften has demonstration stands where you can see how different moldings look in reality and how they combine with each other.
Collect images you like, analyze what is common in interiors you enjoy. This will help you form your own vision and create a unique composition.
Conclusion: the art of transformation
The wall — is a space for creativity.Buy polyurethane wall moldings— it is not just about purchasing construction material. It is about obtaining a tool that can transform a plain surface into a piece of interior art.
Picture frames and decorative panels made of moldings — this is classic, proven over centuries. This technique works in any style — from baroque palace interiors to minimalist simplicity. The scale, complexity, color may change, but the principle remains: geometry, structure, rhythm, proportions.
Polyurethane has made this technique accessible. What once required the work of skilled plasterers and sculptors, enormous time and money, is now accessible to everyone.Decorative stuccoPolyurethane molding is lightweight, strong, easy to install, durable, and aesthetically pleasing.
But the material is only a tool. The result depends on the concept, understanding of composition, and attention to detail. Before starting, plan your concept. What do you want to achieve? The rigor and symmetry of classicism? The luxury of the Empire? The minimalism of simplicity? The coziness of Provence? Each style requires its own approach to selecting moldings, their placement, and color solutions.
Do not be afraid to experiment, but maintain a sense of proportion. Moldings are accents and structure; they should not overwhelm the space. Less is more — a few well-placed frames will create a greater effect than a chaotic accumulation of decor.
Pay attention to details. Quality corner joints, neat painting, smooth seams — these are what distinguish professional work from amateur work. Spend time on preparation, marking, and fitting. The result will reward you.
Remember: interior design reflects your personality.Molding Moscow, Stucco SPB— wherever you are, moldings and other decorative elements are available. But how you use them, how you combine them, how you integrate them into your space — this is unique. Create interiors that speak about you, that create an atmosphere, in which you want to live.
The company STAVROS has been working in the field of production and supply ofmoldings from polyurethanewooden panel products, decorative elements for interior and facade. The STAVROS assortment includes hundreds of itemsof polyurethane moldingsof various profiles, sizes, styles. From simple, sleek planks to complex ornamented pieces in baroque and rococo styles. From narrow moldings 3-4 cm wide to wide cornices 20-30 cm wide.
All STAVROS products are made from high-quality polyurethane with a density of at least 350 kg per cubic meter. This ensures strength, shape stability, and longevity. Moldings are supplied primed, ready for installation and painting. Relief detailing is at the highest level, every line and swirl reproduced with precision to the original models.
In addition to moldings, STAVROS offers a full range of elements for creating harmonious interiors: ceiling cornices, baseboards, corner elements, rosettes, consoles, pilasters, columns, domes, decorative panels. Everything needed to realize the most ambitious design projects.
The company's catalog also featureswooden baseboards for floor, Wooden cornices, balusters for staircases, Furniture legs, Decorative Inserts, Carved Elementsmade of natural wood. Combining polyurethane moldings with solid wood products allows creating interiors where modern technologies harmoniously blend with traditional materials.
STAVROS works with both private clients and professional designers, construction companies, architectural firms. Standard items can be supplied from stock, or custom-made according to individual drawings and sketches. Company specialists are ready to advise on product selection, material quantity calculation, and installation techniques.
The STAVROS website features a catalog withphotos of polyurethane moldingsdetailed descriptions, dimensions, prices. An intuitive filter system allows quickly finding the desired item by style, size, and application. Regularly published articles on interior design, installation techniques, and new products — everything that will help make the right choice and realize your ideas.
Create interiors that inspire. Transform your space withmoldings for wallsfrom STAVROS — where quality meets tradition, and classic style blends with innovation.