Article Contents:
- Why preparation for transportation begins before the table is manufactured
- What is the FUR-031 mounting plate
- How the load passes through the demountable joint
- Why the 12° angle cannot be ignored
- A removable leg is not a folding or quick-release one
- For which items FUR-031 is suitable in terms of the project's concept
- Preliminary kit for one small table
- How to select wooden legs for the plate
- MN-145 as an example of a system with FUR-031
- Why the case material affects the choice of fasteners
- How to lay out four plates
- Why a single measurement is not enough
- How to make a template that will survive multiple assemblies
- Test assembly before finishing
- How not to mix up the legs after transportation
- How to remove the legs before transport
- How to protect the M8 stud
- Packaging the case with plates left in place
- How to check that the table fits through the elevator and door
- Reassembly at a new location
- How to eliminate play in the removable leg
- Can the legs be unscrewed frequently
- Can one plate be replaced
- When FUR-031 should not be chosen without a separate calculation
- How FUR-031 differs from a random furniture plate
- What to buy together with FUR-031
- Scenario: coffee table for an apartment with a narrow elevator
- Scenario: wall console between locations
- Scenario: exhibition furniture
- Scenario: shipping by transport company
- Scenario: storage of disassembled furniture
- What not to do from scratch if you have ready-made STAVROS elements
- Consider FUR-031 as a fastener for any table
- Order four plates, but forget the studs and screws
- Turn one plate the other way
- Do not take into account the floor dimension
- Remove plates during every move
- Do not mark identical supports
- Pack wood and metal together
- Tightening the leg with the tool by force
- Promising an unlimited number of cycles
- Mixing legs from different sets
- Assembling furniture on an uneven surface
- Ignoring the condition of the base after transportation
- How many FUR-031 plates are needed for one table?
- What thread is used in FUR-031?
- What angle does the plate provide?
- Can I use the 1 × 1 × 1 mm size from the card?
- Will FUR-031 work for a heavy stone countertop?
- Can I install the plate on particleboard?
- What screws are needed?
- Do I need to remove the plates during transportation?
- Why do the legs need to be labeled?
- Can I swap the legs around?
- How do I align four plates in the same direction?
- How do I protect the M8 studs during transportation?
- Can I unscrew the legs frequently?
- What to do if the leg is loose?
- Does MN-145 fit FUR-031?
- How to check if the table will fit through the door?
- Are glides needed?
- Can only one plate be replaced?
- Is a test assembly necessary?
- What should be included in the packaging?
- Should plates and legs be purchased in one batch?
- Can the leg be screwed in with a tool?
- Why does the table wobble after assembly?
- Can the legs be left screwed in for a short transport?
- Do I need to store the template after installation?

A good coffee table can look great in an interior and yet turn out to be inconvenient on the very first transport. Long legs increase the package dimensions, catch on doorways, hinder turning the furniture on a landing, and take random hits in the truck. The problem is especially noticeable with trestle tables and wall consoles: their bodies are relatively compact, but protruding supports make transport more difficult than it seems in a photo.
Removable table leg mounting solves this problem only when it is planned at the design stage. It is not enough to simply screw in the legs before shipping and hope that after the move the furniture will assemble with the same geometry. You need to choose a compatible plate in advance, check the material and thickness of the base, align all supports in the same direction, secure M8 studs, number the components, and prepare the packaging. In this case, the body is transported separately, and the wooden legs are removed without disassembling the entire piece of furniture.
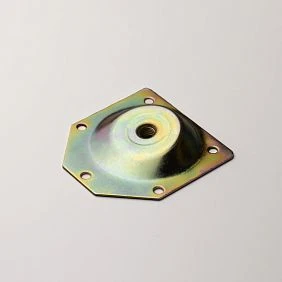
As the central element of such a component, the following is considered Mounting Plate FUR-031. According to confirmed card data, it is made of steel, has a "yellow zinc" coating, is attached to the furniture body with self-tapping screws, and accepts the leg through a threaded connection with an M8 stud. The plate forms a 12° angle, so it not only makes the support removable but also sets its direction relative to the tabletop.
This article will help you put together a project scheme for a light coffee table, a small console, or another lightweight structure. There are no universal promises here about allowable load, number of disassembly cycles, or suitable fasteners: such parameters depend on the body material, base thickness, chosen leg, and operating conditions. The task of the material is to show how to consciously select a kit, prepare the layout, organize transport, and reassemble the furniture without accidentally changing the angle.
Why preparation for transport begins before making the table
Transport is often remembered after the furniture is already assembled. In the workshop, the table looks compact, and there is enough space around to approach it from any side. The problem appears at the front door, in a small elevator, or on a staircase with a turn. The body fits through, but the lower points of the angled legs increase the actual dimensions. Trying to carry the furniture at an angle transfers the load to one support, and a random impact can damage the wood, the threaded joint, or the plate mounting point.
A project with removable legs changes the very logic of delivery. Instead of one bulky item, you get a compact body and four separately packed supports. This is more convenient for a transport company, exhibition installation, temporary interiors, furnishing an apartment with narrow passages, and moving between locations. However, compactness does not appear automatically. If the legs cannot be quickly removed after assembly, if the studs remain unprotected, and the direction of the plates is not fixed anywhere, the disassemblable structure turns into a source of new errors.
Therefore, even before manufacturing, several questions need to be answered: where the furniture will stand, how often it is planned to be moved, who will perform reassembly, what the body is made of, whether the plates can be securely fastened, what tilt the supports provide, and how the table's outline on the floor will change. The earlier these questions are included in the project, the lower the likelihood that the finished item will have to be redone before the first delivery.




What is the mounting plate FUR-031
FUR-031 is a metal transition element between the furniture body and a wooden leg. The plate is attached to the underside of the tabletop or another base specified in the project. An M8 stud installed in the end of the leg is screwed into the threaded seat. This connection allows the support to be removed separately from the body without unscrewing the screws during each transport.
| Parameter | Confirmed value | Practical significance for the project |
|---|---|---|
| Model | FUR-031 | The article number must be specified in the specification, marking, and hardware order |
| Purpose | Attaching furniture legs to tabletops and lightweight structures | The plate cannot be transferred to heavy tables and structures with high dynamic load without calculation |
| Threaded assembly | M8 | The leg must be prepared for a compatible M8 stud |
| Installation angle | 12° | All plates must be oriented consistently relative to the center of the furniture |
| Material | Steel | The metal part should be insulated from the decorative surface of the leg during packaging |
| Finish | Yellow zinc | The appearance of the coating is important when the unit is exposed, although the plate is usually hidden underneath |
| Attachment to the body | With self-tapping screws | The type and length of self-tapping screws are selected based on the material and thickness of the base |
| Self-tapping screws included | Not included | Fasteners must be added to the specification separately |
| Exact dimensions of the plate | Must be checked against the technical drawing | The value of 1 × 1 × 1 mm from the product card should not be used for marking. |
The main advantage of the plate in the scenario under consideration is the detachability of the threaded connection. But FUR-031 does not turn any leg and any tabletop into a safe collapsible table. It works as part of a system. The quality of the entire structure is determined not only by the metal, but also by how the stud is secured in the wood, how strong the body is in the area of the self-tapping screws, whether the tilt is correctly directed, and whether the base receives a load it was not designed for.
Before purchasing, it is useful to open the product card and buy the FUR-031 mounting plate only after coordinating it with the selected legs and the table design. If the project is not yet defined, first draw up a diagram of the joint, and then order all related elements in one specification.
Our factory also produces:




How the load passes through the collapsible joint
To properly evaluate the connection, you need to see not just the individual plate, but the full load path:
tabletop or body → self-tapping screws → FUR-031 plate → M8 internal thread → stud → wooden leg → floor.
The weak point can be at any section. A dense steel plate does not compensate for a loose base, too short self-tapping screws, or damaged wood around the stud. Similarly, a strong leg will not fix an orientation error: with an incorrect rotation, one support will deviate in the other direction, and the furniture outline will become asymmetrical.
For the buyer, this diagram is important for two reasons. First, it shows which items need to be included in the kit: plates, legs, studs, fasteners to the body, and, if necessary, floor glides. Second, it separates the decorative task from the structural one. The shape and wood species are responsible for the appearance, but the body material, fastener length, and expected load determine reliability.
When ordering mounting for table legs M8, the manager or craftsman needs to convey information not only about the number of plates. It is useful to specify the leg model, base thickness, material of the bottom panel, tabletop weight, expected use, and frequency of disassembly. Without this data, a separate part does not turn into a finished project.
Get Consultation
Why the 12° angle cannot be ignored
The plate angle affects the furniture's footprint on the floor. The top point of the leg is near the corner of the body, while the bottom extends outward. The longer the support, the more noticeable the offset. Therefore, a table may fit through a door without legs but not when assembled, even though the tabletop width remains the same.
Before drilling, you need to check not only four identical offsets but also the direction of each plate. Conventionally, the tilt arrow should point from the center to the corresponding corner. The front left support is directed outward in one direction, the front right is mirrored, and the rear ones are similar. If one plate is rotated 180°, the leg will go inward or cross the intended outline of the adjacent support.
The angle also affects visual perception. In a properly assembled table, the legs form a consistent silhouette, and the distances between their bottom points appear equal. The slightest error is more noticeable than with vertical supports because the eye reads diverging lines. That is why marking cannot be done with individual random measurements. A single template, central axes, and a control layout of all four plates simultaneously are needed.
The exact dimensions of the plate base and the location of mounting holes must be taken from the current technical drawing. The product card may show a nominal size of 1 × 1 × 1 mm, which is not suitable for project marking. It is intentionally not used in the article.
Removable leg — not folding and not quick-release
The terms must be distinguished. A folding leg changes position on a hinge and remains connected to the furniture. A quick-release solution usually involves a special mechanism designed for regular opening without tools. In the case of FUR-031, it is a threaded connection: the leg is unscrewed from the plate via an M8 stud.
For a home move, delivery of a finished table, or a rare transport to a site, this is sufficient. The body does not need to be disassembled, the plates remain in place, and the bulky wooden supports are removed. However, the threaded joint cannot automatically be considered rated for daily unscrewing. Frequent disassembly can affect the tightening of the stud, the condition of the wood at the end of the leg, and the accuracy of re-seating.
If the furniture is intended for regular exhibitions, rentals, a mobile photo studio, or a commercial space where the table is disassembled every week, the furniture designer must separately assess the resource of the joint. A different system or additional control measures may be required. The article demonstrates the organization of a detachable connection but does not replace calculations for intensive use.
For which items FUR-031 is suitable in terms of the project's concept
| Scenario | Why a detachable joint is useful | What to check before ordering |
|---|---|---|
| Light coffee table | Removed legs reduce the package dimensions and the risk of damage during lifting | The weight of the tabletop, the material of the base, the height of the legs, and the floor contour |
| Wall-mounted console | Long supports can be transported separately from the narrow body | Stability, wall mounting if necessary, and compatibility of leg lengths |
| Exhibition table | Furniture is convenient to transport between sites | Frequency of disassembly cycles and service life of threaded connection |
| Furniture for temporary interior | The body is easier to store and move between objects | Marking of components, packaging, and instructions for the assembler |
| Small frameless construction | The plate allows connecting the leg directly to the prepared base | Sufficient thickness and strength of the attachment area |
The phrase "lightweight construction" requires caution. The card does not have a universal allowable load that could be applied to any project. A light wooden table, a product with a heavy stone slab, and an item that will be leaned on with full weight create different conditions. Therefore, the purpose should be linked to a specific construction, not just the furniture name.
Preliminary set for one table
For the classic four-support scheme, the preliminary specification looks like this:
- 4 mounting plates FUR-031;
- 4 compatible wooden legs;
- 4 M8 studs of suitable design;
- self-tapping screws for attaching the plates to the specific base;
- support pads, if provided by the project;
- one marking template or four identical control cards;
- marking stickers or another labeling system;
- protective caps or packaging for exposed studs;
- individual wrapping for each leg;
- Reassembly diagram.
This list shows the project composition but does not automatically confirm compatibility. The exact stud type depends on the leg preparation, and screws are selected based on the material and thickness of the body. Glides are not always needed and must also match the shape of the lower end of the support and the floor covering.
It is useful to first select hardware for furniture legs, and then compile a unified specification. In the category, you can check related items, but the final assembly must be coordinated with the designer or craftsman responsible for the furniture.
How to choose wooden legs for a plate
Compatibility is not limited to the presence of M8 thread. The leg must match in height, cross-section, shape, and purpose. A too-long thin support will increase the load arm and floor footprint. A short massive leg may visually weigh down a small body. The shape of the upper end must allow correct stud installation and ensure a tight fit to the plate after tightening.
It is more convenient to start the selection with the furniture, not with a separate attractive leg. Determine the height of the finished table, subtract the body thickness, and get a reference for the support length. Then check how the 12° angle will change the lower contour, whether the legs will protrude into the walkway, and whether the furniture remains stable under intended use.
In this section you can buy wooden legs for furniture, but they should be chosen together with the hardware. For a clear finish, the wood species and grain pattern matter. For painting, surface preparation and compatibility of the future coating matter. Four supports of one table should preferably be ordered simultaneously and with identical processing parameters.
MN-145 as an example of a system with FUR-031
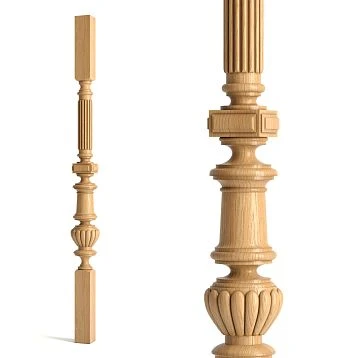
The turned furniture leg MN-145 is useful as a visual example because its card includes FUR-031 in the list of required hardware. The leg has a cross-section of 44 mm and is offered in a wide range of heights. For long variants, the manufacturer separately associates their use with light consoles and coffee tables.
This does not mean that any height of MN-145 fits any tabletop. The longer the support, the more pronounced the tilt, the wider the floor contour, and the higher the stability requirements. Therefore, buying turned legs MN-145 for a light table is reasonable after choosing the body height, checking the plate drawing, and preparing the overall layout.
If a different shape or scale is required, MN-145 should not be perceived as the only acceptable support. It demonstrates the principle of the "wooden leg — M8 pin — FUR-031 plate" combination, and the specific model is chosen according to design, dimensions, and operating conditions.
Why the body material affects the choice of fasteners
The plate is held by self-tapping screws, so the base must withstand the load from each support. Solid wood, plywood, MDF, and particleboard differ in density, edge behavior, and resistance to fastener pull-out. The same screw cannot be considered universal for all materials.
Special attention is required for a thin bottom panel. Fasteners must not go through, fall into a void, split the edge, or be too close to a cutout. If the body has a decorative bottom, internal cavities, or hidden wiring, the placement of the plates is coordinated before manufacturing.
The article deliberately omits the sizes and types of self-tapping screws. The card only confirms that they are used and are not included in the kit. The length, diameter, and head shape are chosen by the craftsman based on the actual plate, base material, and calculated load. Substituting this step with a general recommendation creates false confidence and may lead to furniture damage.
How to build the layout for four plates
Marking begins with the geometry of the body. On the underside, longitudinal and transverse central axes are drawn. Then equal indents from the edges are determined, taking into account mounting zones, the shape of the tabletop, and the position of internal parts. The four mounting points must be mirrored relative to the center.
After that, the contour of the plate and the tilt direction are transferred to each position. It is convenient to use one rigid template on which the mounting holes, the thread axis, and the "outward" arrow are marked. The template is sequentially rotated for the four corners, but not accidentally flipped face side. If the direction is difficult to read, a separate copy with a label is made for each position.
| Position | Marking | Tilt direction |
|---|---|---|
| Front left leg | 1 / FL | From center to front left corner |
| Front right leg | 2 / FR | From center to front right corner |
| Rear right leg | 3 / ZP | From center to rear right corner |
| Rear left leg | 4 / ZL | From center to rear left corner |
Before drilling, the four plates are laid out in place and photographed from below. The photo becomes part of the assembly map. If the table is to be assembled at another site, the diagram helps understand how the nodes were originally oriented.
Why a single measurement is not enough
With a rectangular tabletop, there is a temptation to measure the same distance from two edges and drill immediately. This method does not account for the actual contour of the plate, the direction of tilt, the position of holes, and possible internal reinforcements. An error of a few millimeters may be unnoticeable at the body but manifest in the divergence of the lower points of long legs.
Control is performed in two stages. First, the coordinates of the threaded centers are compared relative to the tabletop axes. Then the plates are installed without final tightening, or leg mockups are used to check the direction. Only after the four supports form a symmetrical contour is the fastening finally secured.
How to make a template that will survive multiple assemblies
For a one-off home project, thick cardboard or thin sheet material is sufficient. The outer contour of the plate, holes, M8 center, and tilt arrow are transferred to the template. Be sure to indicate the article number FUR-031 and the position of the template relative to the edge of the body.
For serial furniture or exhibition projects, a more rigid template is useful. It does not deform, is stored with the documentation, and allows the layout to be restored during repairs. However, the working template does not replace the technical drawing: if the hardware supply changes or the part is replaced, the actual holes are compared before reuse.
It is convenient to leave space on the template for the date, project number, and the craftsman's signature. Then, after several years, you can understand which furniture the layout belongs to. This is especially important when there are several similar tables at the site.
Test assembly before finishing
The first assembly is best done before the final decorative finish, if the project technology allows. At this stage, it is easier to correct the layout, replace a damaged stud, or adjust the preparation of the leg end. After painting, any intervention may leave a visible mark.
The test assembly includes installing all four legs, checking the fit at the plates, and placing the furniture on a flat surface. Assess the absence of wobbling, the same visual tilt, equal distances from the lower points to the axes, and free rotation of the legs during disassembly. Then each unit is marked.
If one leg requires excessive force, it should not be tightened with a tool all the way. The cause may be a misaligned stud, dirty threads, or mismatched units. Force tightening can damage the wood, so the problem is eliminated before finishing and transportation.
How not to mix up legs after transportation
Theoretically, four identical legs can be swapped. In practice, wood has natural differences, studs may be installed with small tolerances, and each support has already been checked in a specific corner. Marking preserves the original combination and speeds up assembly.
The number is applied to the hidden part of the leg or on a removable tag. The same number is placed next to the corresponding plate on the underside of the body. Marking should not damage the finish. For painted products, tags, soft stickers on a protected area, or packaging labels are used.
The simple 1-2-3-4 scheme is clear to any assembler. The letter designations PL, PP, ZP, ZL provide an additional check. A photo of the underside of the table with labels is included in the packaging.
How to remove the legs before transportation
Disassembly begins on a clean, flat surface. The table is turned over so as not to damage the tabletop and edges. Each leg is unscrewed, holding it closer to the upper part rather than at the very bottom end. This reduces the lateral moment on the stud.
Do not use the decorative part as a long lever. If the connection does not give way, first check whether it is additionally secured and whether there is any contamination. Strong rocking can disrupt the fit of the stud in the wood.
After removal, the leg is immediately placed in individual protection and the number is checked. The exposed plates on the body do not require dismantling: they are left in place to avoid loosening the screws with repeated cycles. This is how the advantage of FUR-031 in transportation manifests itself — the threaded pair is disconnected, while the base layout remains unchanged.
How to protect the M8 stud
The protruding metal stud is vulnerable during transportation. An impact can damage the thread or create force at its installation point in the wood. Therefore, the open end is covered with a suitable protective cap or packed so that the metal does not touch the adjacent leg or the box wall.
Do not place all four supports in one bag without separators. The studs will strike the wood and the finish. Each leg is wrapped separately and then secured inside the common box so that it does not move.
Do not apply adhesive tape directly to varnish, enamel, or tinted surfaces. Glue residue and coating peeling can damage the part more than the transportation itself. Tape is used only to secure the outer packaging material.
Packaging the body with the plates left in place
The plates remain on the underside of the furniture and may protrude relative to the plane. Therefore, the body cannot simply be placed on them in the box. Between the metal and the packaging base, a protective layer or support frame is made that takes pressure onto safe zones of the body.
Fasteners and studs, if any elements are removed separately, are placed in a labeled bag. The bag is secured inside the packaging so that it does not get lost or hit the tabletop. The assembly diagram is placed in a transparent pocket or attached to the inside of the box.
On the outer packaging, it is useful to indicate that inside there are wooden legs with metal studs and a furniture body with installed plates. This does not replace standard carrier requirements but helps organize careful handling.
How to check that the table fits through the elevator and door
The calculation is performed in two states: assembled and disassembled. For assembled furniture, the maximum contour of the lower points of the legs, height, width, and length are measured. For disassembled furniture, only the body and individual packages of supports are measured. Then the dimensions are compared with the doorway, elevator cabin, stair turns, and transport container size.
You cannot rely only on the tabletop size. At a 12° angle, the lower points of the legs may be noticeably wider than the upper ones. The exact offset depends on the length of the support and its geometry, so it is better to measure it on a test assembly rather than calculate from an approximate photo.
Reassembly at a new location
Before assembly, the body is inspected from below. Check whether the plates have shifted, whether cracks have appeared near the screws, and whether the threads are dirty. Then the legs are laid out by numbers and the direction is checked against the photo.
Each support is screwed in by hand without skew. The first turns should go freely. After seating, the leg is brought to the working position without excessive force. If the number and orientation are preserved, the wood grain pattern and tilt return to the original scheme.
After installation, the table is placed on a flat floor and checked for stability. Rocking cannot be masked by randomly tightening one leg: first, the cause is determined. It could be uneven floor, dirty threads, plate displacement, or differences in the glides.
How to eliminate play in a removable leg
Play is a signal for inspection, not a reason to tighten the connection with maximum force. First, determine where exactly the movement occurs: between the plate and the body, in the M8 threaded pair, or at the point where the stud is installed into the wood. Each cause requires its own solution.
If the plate moves, check the fasteners and the condition of the base. If play is felt in the thread, inspect the stud and the internal seating area. If the stud moves relative to the leg, stop further use until repair. Continued use may increase damage to the wood.
Homemade shims and random adhesive compounds should not replace professional diagnostics. Be especially careful with furniture that will be regularly disassembled.
Can legs be unscrewed frequently
The threaded design allows for removal of supports, but the FUR-031 card does not specify a confirmed number of cycles. Therefore, unlimited disassembly cannot be promised. For a home table that is disassembled during a move, the requirements are one thing; for exhibition furniture with weekly assembly, they are another.
Frequency affects not only the metal thread. Each cycle transfers force to the stud and the wood. Precision of installation, absence of misalignment, and the assembler's habit of tightening the leg without excessive torque are important. For an intensive scenario, the connection's service life must be confirmed by the designer.
Can one plate be replaced
Technically, an individual element can be replaced, but the new plate must match the model, angle, and holes. Before replacement, check whether the base is damaged and whether the new fastening will require different markings. You cannot simply install a similar plate with a different angle: one leg will change direction, and the table will lose symmetry.
Therefore, keep the exact article number FUR-031, photos, and drawings in the specification. During repair, this helps select the same component. If the current version of the product differs, compatibility must be rechecked.
When FUR-031 should not be chosen without a separate calculation
- for a heavy stone countertop;
- for a large dining table;
- for a workbench and work furniture;
- for a structure with dynamic or impact load;
- for a table that people may stand or sit on;
- for a very thin, loose, or damaged base;
- for commercial furniture with daily disassembly;
- for a project where angled legs create insufficient stability;
- for furniture where screws go into voids or close to the edge;
- for supports not prepared for a compatible M8 stud.
In these cases, first perform a structural calculation or select another system. On the website, you can compare mounting plates for table legs and understand how the options differ, but the final choice is still tied to the specific furniture.
How FUR-031 differs from a random furniture plate
Similar parts may differ in thread, angle, direction, mounting holes, and purpose. Visual similarity in a photo does not guarantee compatibility. For the project in question, three confirmed features are important: M8 thread, 12° angle, and purpose for lightweight structures.
The error is especially dangerous when purchasing an incomplete batch. If three plates have one angle and the fourth has another, the bottom contour of the legs will not match. Therefore, it is better to order the entire set at once, check the marking, and lay out the parts before installation.
What to buy together with FUR-031
| Element | Why it's needed | What to Check | Selection route |
|---|---|---|---|
| Mounting plates FUR-031 | Create four identical threaded assemblies with a 12° incline | Quantity, article number, current drawing | Card FUR-031 |
| Wooden legs | Form the height and appearance of the furniture | Height, cross-section, wood species, preparation for M8 | Category of furniture legs |
| MN-145 | Example of a turned leg, for which FUR-031 is specified in the card | Specific height and compliance with a light construction | Card MN-145 |
| M8 studs | Connect the leg to the threaded place of the plate | Type, length, and method of installation into a specific leg | Furniture fitting category |
| Self-tapping screws | Attach the plate to the body | Material and thickness of the base; screws are not included with the plate | Selected by the craftsman according to the project |
| Floor protectors | Protect the lower end of the leg and the floor covering, if provided by the project | Size and method of installation | Furniture fitting category |
| Template and marking | Preserve orientation and speed up reassembly | Matching leg and plate numbers | Made to order for a specific project |
Purchasing as a set reduces the risk of mismatch. A separate plate without a leg and pin does not solve the problem, and four legs without coordinated markings do not guarantee the same tilt. The commercial route should lead to a finished specification, not a random set of parts.
Scenario: coffee table for an apartment with a narrow elevator
For an apartment, the key criterion is the passage of the body and packaging along the route from the entrance to the room. Doors, elevator, and turns are measured. Then the tabletop and legs are chosen so that the disassembled body passes through separately. Four FUR-031 remain at the bottom, and the supports are transported in a long narrow box.
In the apartment, the legs are assembled by numbers, stability is checked, and only then is the item placed in its permanent position. For this scenario, a detachable connection is especially convenient because disassembly is rarely needed but significantly reduces the risk of damage during delivery.
Before ordering, it is useful to check not only the dimensions of the body but also the packaging dimensions. If the tabletop is round, its diameter may fit through the opening, but the box with protective corners will be wider. If the body is rectangular, consider the possibility of turning in the vestibule. The collapsible design solves the problem of protruding legs but does not eliminate the calculation of the route for the tabletop itself.
Scenario: wall console between objects
A console often has long thin legs and a small body. When assembled, it is inconvenient in a car and vulnerable during carrying. Removing the supports allows the body to be packed flat and the legs separately.
At the same time, the stability of the tall structure must be considered. A 12° tilt changes the support contour, and long legs increase the lever arm. If the console must be attached to the wall, this is included in the project regardless of the plates. FUR-031 is responsible for connecting the legs but does not eliminate other stability measures.
For an object with an uneven floor, it is useful to determine in advance whether leveling feet will be used and whether their shape allows for the bottom end of the leg. A significant misalignment cannot be compensated only by tightening one support more. Geometry is checked after the furniture is installed in its permanent place.
Scenario: exhibition furniture
At exhibitions, assembly speed is valued, but regular cycles create increased demands. Each leg must have a number, a packing location, and clear instructions. The assembler should not have to guess the direction of the plates or search for a compatible support.
Before serial use, several control cycles are conducted under the supervision of the designer, assessing the condition of the studs and the base. If the assembly shows signs of wear, the design is adjusted before active use begins.
For an exhibition set, it is useful to keep one spare set of markings, a photo of the underside, and information about the exact article number. However, a spare plate cannot be considered a ready replacement without checking: even if the model matches, the base may have sustained damage, and the new part may differ in actual hole positions.
Scenario: shipping via transport company
When shipping, not only dimensions matter, but also protection of parts from vibration. Wooden legs are separated from each other, studs are covered, and the body is not placed directly on the plates. There should be no free space inside the boxes where the supports could move around.
The assembly instructions should be understandable to a person who has not seen the furniture before disassembly. A photo, numbers, and a short sequence are more reliable than a long verbal explanation.
The fastener package is labeled with the product name and the number of elements. If several identical tables are in one shipment, the kit for each item is packed separately. Mixing legs between products complicates assembly and may result in visual color variation in natural wood.
Scenario: storing disassembled furniture
Removable legs are useful not only on the road. A disassembled table takes up less space in a warehouse, workshop, or utility room. But long-term storage requires the same discipline as transportation: studs are protected, wood is not placed on a damp surface, and the body is not loaded through protruding plates.
Store the legs horizontally on a flat support or in the provided packaging. Do not use them as spacers under other objects. Documentation and labeling must be kept near the kit, otherwise after a few months employees may not understand which cabinet corresponds to which supports.
What not to make from scratch if there are ready-made STAVROS elements
A DIY project does not mean that all metal and wooden parts need to be made by hand. The hardest part is ensuring the same angle for all four legs, compatible threading, and repeatable connections. The ready-made FUR-031 provides an M8 threaded joint and a 12° tilt, while ready-made furniture legs allow you to focus on choosing height, shape, and finish.
There is no need to cut four random metal plates, try to cut mismatched threads, or pick similar legs from different batches. The rational approach is as follows: choose a furniture task, check the cabinet design, select FUR-031, then understand how to choose wooden legs for The card links the product to lightweight structures. Heavy tabletops, large dining tables, and furniture with dynamic loads require a separate solution. The plate is not a complete kit. Screws are not included in the delivery, and M8 studs and leg preparation must be coordinated separately. Due to the 12° angle, one incorrectly oriented part changes the position of the leg's bottom point. Therefore, the direction is marked with arrows and checked with a general layout. Slanted legs make furniture wider at the bottom. The tabletop size does not show the maximum transport footprint. The purpose of the threaded joint is that the plates remain on the body. Repeated unscrewing of self-tapping screws may weaken the base. After transport, legs get mixed up, and the assembler loses the original combination. Numbers eliminate this problem almost at no cost. An exposed stud can scratch a neighboring leg. Each support needs individual protection. Resistance may indicate misalignment. Force damages the thread or wood, so the cause should be determined before final tightening. The card does not contain such a resource. For regular commercial disassembly, the node checks the constructor. Even identical SKUs may differ in wood grain pattern and actual dowel installation. For one item, it is better to keep the original set of four. An uneven floor distorts the stability assessment. The control assembly is performed on a verified flat surface, and then the actual installation location is evaluated separately. Before reassembly, inspect the screw areas. If cracks, swelling, or displacement appear, the legs are not installed until checked by a specialist. FUR-031 should not be chosen solely for convenient disassembly if the furniture is heavy, the base is not strong enough, or the 12° tilt does not suit the design. For a large dining table, an apron construction, a different plate, or another connection method may be required. Another solution is also needed for daily transformation. The threaded leg is designed for deliberate assembly, not for instant folding. If the item must be stored away after each use, a special folding mechanism should be considered. An alternative is also needed when the furniture must have strictly vertical supports. The FUR-031 angle is part of the geometry, not a decorative detail. It cannot be neutralized by randomly cutting the leg or rotating one plate.Consider FUR-031 as a fastener for any table
Order four plates but forget the studs and screws
Turn one plate the other way
Do not account for floor dimensions
Remove plates during each move
Do not mark identical supports
Pack wood and metal together
Tighten the leg with a tool by force
Promise an unlimited number of cycles
Mix legs from different sets
Assemble furniture on an uneven surface
Ignore the condition of the base after transportation
Who this solution is suitable for
When it is better to choose a different design
What to pass to the master or furniture designer
| Data | What to specify |
|---|---|
| Furniture fitting model | FUR-031 |
| Quantity | Usually 4 for a four-legged table, but depending on the actual design |
| Carving | M8 |
| Angle | 12° according to the current card; verify with the technical drawing |
| Legs | Article number, height, cross-section, wood species, finish |
| Housing | Material and thickness in the area where the plates are installed |
| Tabletop | Dimensions, material, and weight |
| Usage | Home, exhibition, frequency of transportation and disassembly |
| Fastening | Selected by the master; screws are not included in the FUR-031 kit |
| Markup | Indents, axes, direction arrows, numbers 1–4 |
| Transportation | Dimensions of openings, elevator, packaging, and delivery route |
| Documentation | Drawing, template, photos of test assembly |
Such a technical specification turns the purchase of fittings into a manageable project. The master sees not an abstract wish to "make removable legs," but a specific unit with usage conditions.
How to buy a set on STAVROS
The first step is to open the product card and check the current FUR-031 data: thread, angle, material, coating, and technical drawing. Then legs are selected and it is determined whether they are prepared for an M8 stud. After that, a general list is compiled, including screws that are not included in the plate kit.
For one table, it is advisable to order the kit at the same time. The four plates must be identical, the legs must be from one agreed batch, and the fittings must be compatible. If the design is non-standard, a drawing and compatibility questions are sent to the manager before payment.
The transition to purchase should come from the project: buy the FUR-031 mounting plateselect legs, check studs and fasteners, make a template, conduct a test assembly, and only then prepare the furniture for transportation.
Acceptance of the set before starting work
Before drilling and installation, you need to check not only the number of parts, but also their compliance with a single task. Four plates are laid out side by side, and the article number, angle, threaded seat, and hole positions are compared. If at least one part differs, it is not included in the common set until the reason is clarified. An attempt to "fit" a mismatched plate already on the furniture risks disrupting symmetry and damaging the base.
The legs are also checked as a set. The height, shape of the upper end, position of the studs, surface quality, and wood grain pattern are compared. For transparent or tinted finishes, differences are more noticeable, so it is better to evaluate the four supports under the same lighting. If one leg differs in shade or geometry, this needs to be resolved before installation, not after painting.
The hardware is counted separately: plates, studs, floor glides, and fasteners prepared by the craftsman. Self-tapping screws are not included in the FUR-031 set, so their absence is not a shortage of the plate, but is a gap in the overall specification. Acceptance ends with a photo of the complete set and recording the project number.
How to store parts before test assembly
Plates and studs are stored in a dry room in labeled packaging. Metal parts are not scattered into a common workshop box, where they could mix with similar hardware. For the project, it is important to preserve exactly the FUR-031 set, not four externally similar plates of unknown origin.
Wooden legs are not left standing on one end for a long time and are not leaned against a damp wall. They are placed on a flat support, protected from direct sunlight, sharp temperature changes, and accidental impacts. If the supports are already painted or varnished, soft pads are left between them. The studs should not press against adjacent parts.
The table body also needs to be stored flat before mounting the plates. Warping of the bottom panel or accidental wetting changes the mounting conditions. Before marking, the craftsman re-inspects the base and confirms that the actual condition matches the project.
Why it is better to agree on the finish before installing the hardware
The sequence of finishing depends on the design, but the decision must be made in advance. If the plates are installed before painting, the metal and threads are protected from the coating. If after, the craftsman must not damage the finished surface during marking and drilling. Both options are possible, but randomly changing the sequence during the process creates unnecessary risks.
For the legs, it is important to maintain clean and precise operation of the threaded assembly. Paint, varnish, or tinting compound must not get onto the working thread of the stud. Contamination increases resistance during assembly and can create a false impression that the leg needs to be tightened more.
After final finishing, a repeated control assembly is performed. A changed coating thickness, accidental runs, or damage to the end face can affect the fit. Such issues must be corrected before packaging, while the furniture is still in the workshop and accessible to a specialist.
Geometry check after final finishing
The final check is carried out on a flat surface and under good lighting. The table is inspected from the front, side, and diagonally. The four legs must have a consistent tilt, and the lower contour should look symmetrical. Then the height is measured at several points and stability is assessed.
Visual symmetry does not replace a structural check, but it helps to detect an orientation error. One incorrectly rotated plate is usually noticeable by the direction of the leg. If a deviation appears after finishing, it cannot be hidden by filing the lower end without analyzing the cause. The problem may lie in the marking or the fit of the stud.
After a successful check, final photographs are taken: general view, underside of the body, leg numbers, and plate positions. These images become part of the reassembly instructions.
Responsibility map in the project
| Participant | What it is responsible for | What should be received |
|---|---|---|
| Buyer or designer | Usage scenario, furniture dimensions, transportation requirements, and appearance | Clear specification and warnings about limitations |
| Furniture constructor | Base, load, stability, plate placement, and assembly compatibility | Data on the body, legs, tabletop, and disassembly frequency |
| Master | Marking, drilling, screw selection, pin installation, and test assembly | Current drawing FUR-031 and approved scheme |
| Finisher | Thread protection and agreed coating sequence | Information about work surfaces and areas that must not be painted |
| Packer | Protection of wood, metal, pins, and frame | Markings 1–4 and a set of assembly documents |
| Assembler on site | Inspection, installation of legs by numbers, and stability check | Photo, diagram, and brief instructions |
Such a map is useful even for a single home table. It shows why you cannot delegate all decisions to the seller of an individual plate or to the installer on the last day. Each participant is responsible for their part, and the specification serves as the binding document.
What to check after each transport
After delivery, inspect the packaging, then each leg and the frame. There should be no cracks in the wood near the pin, and the thread should have no visible damage. Check the plates for displacement and tightness of attachment to the base. If the frame has been hit, postpone assembly until a master evaluates it.
After installing the legs, do not load the furniture immediately. First, place it on a level floor, lightly check stability, and compare the position of the supports with the photo of the control assembly. If an unusual sound, play, or misalignment occurs, stop using it.
For rare home moves, this check is sufficient before each new use. For exhibition furniture, a cycle log is useful: date, object, responsible assembler, and remarks. Such tracking does not confirm the service life, but helps to notice changes in the behavior of the assembly in time.
How to hand over the table to the customer
Along with the furniture, the customer should receive not only four legs and the body. The minimum package includes a layout diagram 1–4, a photo from below, indication of M8 thread, a warning about the 12° tilt, packaging instructions, and a recommendation not to apply excessive tightening.
It is useful to separately note that the plates should not be removed during normal transportation, and the screws should not be unscrewed without reason. The customer must understand: the detachable section is between the stud and the plate, not between the plate and the body.
If the furniture is designed only for lightweight structures, this limitation is recorded in the documentation. It cannot be left at the level of verbal communication. Clear handover reduces the risk that the table will later be used as a stand for excessively heavy equipment or as a seat.
Removable or permanent mounting: what to choose
| Criterion | Removable connection via FUR-031 | Permanent structure |
|---|---|---|
| Transportation | Legs are removed, the body becomes more compact | Furniture is transported assembled or disassembled in another way |
| Reassembly | Requires marking, clean threads, and inspection | Not required if the furniture is not disassembled |
| Geometry | The 12° tilt is set by plates and must be mirrored | Depends on the design and method of attachment |
| Service frequency | The joint is checked after transportation and disassembly cycles | Inspection is performed based on the overall condition of the furniture |
| Suitable scenario | A lightweight table or console that needs to be transported compactly | Furniture that permanently stays in one place and does not require disassembly |
Removability is not an unconditional advantage. If the table never leaves the room and the body allows for a simpler permanent connection, additional disassembly may be unnecessary. FUR-031 is chosen when the logistical benefit justifies the need for marking and inspection of the threaded joint.
Final checklist before ordering
- it is determined that the furniture is of light construction;
- the dimensions and weight of the tabletop are known;
- the material and thickness of the base have been checked;
- legs have been selected and preparation for M8 has been confirmed;
- the 12° angle and the furniture contour on the floor have been taken into account;
- the current drawing FUR-031 has been received;
- the dimension 1 × 1 × 1 mm is not used as a working size;
- a list of four plates, legs, studs, and self-tapping screws has been compiled;
- a template with a tilt arrow has been prepared;
- marking 1–4 is defined;
- a test assembly is planned before shipping;
- individual packaging for legs and protection for studs are prepared;
- an instruction for reassembly has been created;
- for frequent commercial disassembly, separate confirmation from the designer has been obtained.
If at least one item remains unknown, it is better to clarify it before purchase and drilling. This approach saves more time than trying to fix finished furniture before transportation.
FAQ: questions about removable legs and FUR-031
How many FUR-031 plates are needed for one table?
For a standard table with four legs, four plates are required—one for each support. If the design has a different number of legs, the set is calculated according to the actual configuration.
What thread is used in FUR-031?
The card specifies a threaded mounting seat for an M8 stud. The leg and stud must be prepared for a compatible connection.
What angle does the plate provide?
The current FUR-031 card indicates 12°. Before marking, the value must be verified against the technical drawing of the specific delivery.
Can the size 1 × 1 × 1 mm from the card be used?
No. It looks like a technical placeholder and is not suitable for project marking. Exact dimensions and holes are taken from the drawing or measured from the actual part.
Will FUR-031 be suitable for a heavy stone countertop?
Without separate engineering confirmation, such a conclusion cannot be made. The card associates the plate with lightweight structures, and the allowable load is not specified.
Can the plate be installed on particle board?
The possibility depends on thickness, density, material condition, distance to the edge, and the chosen screws. The decision is made by a furniture designer or a craftsman for the specific cabinet.
What screws are needed?
There is no universal answer. They are selected based on the plate holes, material, and base thickness. Self-tapping screws are not included in the FUR-031 kit.
Do I need to remove the plates during transportation?
Usually not. The plates are left on the body, and the legs are unscrewed from the threaded connection. This helps preserve the original markings.
Why should the legs be labeled?
Marking returns each support to its verified position and speeds up reassembly. It is especially useful with differences in wood grain and small tolerances in stud installation.
Can the legs be swapped?
Theoretically, identical supports can be interchangeable, but after a test assembly it is better to keep their positions. This reduces the likelihood of wobbling and visual inconsistency.
How to orient four plates identically?
On the template, an arrow indicates the tilt direction. For each corner, it should point outward from the center of the tabletop. Before drilling, all four parts are laid out simultaneously.
How to protect M8 studs during transportation?
Open ends are covered with protection and are not allowed to come into contact with wood. Each leg is packed separately.
Can the legs be unscrewed frequently?
The confirmed number of cycles is not specified. For rare transportation, the connection is convenient, but for regular commercial disassembly, the resource should be assessed by a designer.
What to do if the leg is loose?
It is necessary to determine the location of movement: the plate, the M8 thread, or the stud in the wood. The looseness should not be eliminated by excessive tightening without diagnostics.
Is MN-145 suitable for FUR-031?
The MN-145 card includes FUR-031 in the list of required hardware. However, the specific leg height, tabletop weight, and system stability need to be agreed upon separately.
How to check if the table will fit through the door?
Measure the maximum contour of the assembled furniture at the lower points of the legs and separately the dimensions of the body without supports. When transporting, focus on the disassembled state and packaging.
Are floor glides needed?
They are applied according to the project, depending on the lower end of the leg and the floor covering. They are not included in the standard FUR-031 package.
Can only one plate be replaced?
Only after checking that the article number, angle, thread, and holes match. A similar part with a different angle will disrupt symmetry.
Is a test assembly necessary?
Yes. It helps to check the direction of the supports, stability, smooth operation of the thread, and marking before final finishing and transportation.
What should be included in the packaging?
A diagram with leg numbers, a photo of the underside of the table, a parts list, and a brief assembly sequence. This is especially useful if someone else assembles the furniture.
Should plates and legs be purchased in one batch?
For one item, this is reasonable. Ordering at the same time simplifies compatibility checks, helps maintain uniform leg treatment, and reduces the risk of mixing different versions of hardware.
Can the leg be screwed in with a tool?
The main installation is done manually, without skew. Tools and excessive torque can damage the thread or the stud installation, so the final tightening method is coordinated with the foreman.
Why does the table wobble after assembly?
The cause may be an uneven floor, different seating of the glides, dirty threads, plate misalignment, or a damaged base. First, find the source, rather than compensating for it by randomly over-tightening one leg.
Can the legs be left screwed in for a short transport?
This depends on the route, packaging, and risk of impacts. If protruding supports increase the dimensions or may take lateral load, it is safer to remove them and pack them separately.
Do I need to keep the template after installation?
Yes, especially for serial, exhibition, or commercial furniture. The template, drawing, and photo help restore the assembly during repairs and avoid confusing the orientation.
Conclusion
The mounting plate FUR-031 is useful not just as a metal fastener for the leg. In a properly designed lightweight table, it helps organize a detachable assembly: the plates remain on the body, the wooden supports are removed via M8 threads, and the furniture is transported in a more compact form. The 12° angle sets an expressive tilt, but at the same time requires precise mirrored marking of four parts.
A reliable result is built on a sequence: check the current FUR-031 drawing, agree on the body material, select legs and studs, choose screws, make a template, conduct a test assembly, number the supports, and prepare individual packaging. The allowable load and cycle frequency cannot be invented—they are evaluated based on the specific furniture.
STAVROS allows you to assemble related elements in one product route: view the plate, select furniture legs, and choose hardware. This approach is more useful than randomly buying individual parts, because the buyer gets not just four plates, but a clear system for a lightweight table that can be disassembled, transported, and reassembled in the original geometry.