Article Contents:
- Why veranda and terrace are a special zone for decor
- Veranda and terrace: what is the difference for a decorator
- Where exactly carved decor is used on veranda and terrace
- Windows of a glazed veranda
- Door to terrace or veranda
- Open openings of the terrace
- Veranda and terrace pillars
- Canopy and its braces
- House facade near the veranda
- Veranda railings and balustrades
- Which carved architraves to choose for a glazed veranda
- Casing width
- Architrave ornament
- Top piece: to install or not
- Carved architraves for open openings: how to design without glass
- Architrave framing
- Eaves under the canopy
- Decor of posts in the opening
- Carved brackets for veranda and terrace
- Where to install brackets
- How to combine brackets with architraves
- Bracket sizes: how to choose
- Decorative overlays and wooden baguette for the veranda
- Decorative appliqués
- Wooden frame
- Color and finish of architraves for the veranda: how not to miss
- White color
- Trims matching the facade color
- Contrasting door casings
- Color to match the roof, railings, and door
- How not to overload the veranda with carved decor
- Rule of Scale
- Accent rule
- Unity rule
- Veranda in different architectural styles
- Veranda in traditional Russian style
- Veranda in Scandinavian style
- Country veranda
- Modern country veranda
- Practical calculation of decor for the veranda: example
- Windows (4 pieces, 900 × 1200 mm)
- Entrance door (900 × 2100 mm)
- Brackets for the canopy
- Overlays for posts
- Decorative valance under the cornice
- Final list with a 10–15% margin:
- Mistakes when decorating a veranda with carved decor
- Choosing different trims for different windows
- Not accounting for posts and canopy
- Placing overly wide decor on small windows
- Not planning the color before installation
- Overloading the veranda with carving
- Mixing different ornamental styles
- Not looking at examples of completed projects
- Material and Durability: What You Need to Know
- How to Treat Decor for a Veranda
- FAQ: Answers to Popular Questions About Veranda and Terrace Decor
- Which Trim Fits a Veranda with Multiple Windows in a Row?
- Can Carved Elements Be Used for Open Terrace Openings?
- Are Brackets Needed for a Veranda?
- Which Decor to Choose for a Glazed Veranda with Plastic Windows?
- Can a Veranda Be Decorated with Ready-Made House Carving Elements?
- How Not to Overload a Veranda with Decor?
- What Is the Optimal Trim Width for Veranda Windows?
- About the Company STAVROS
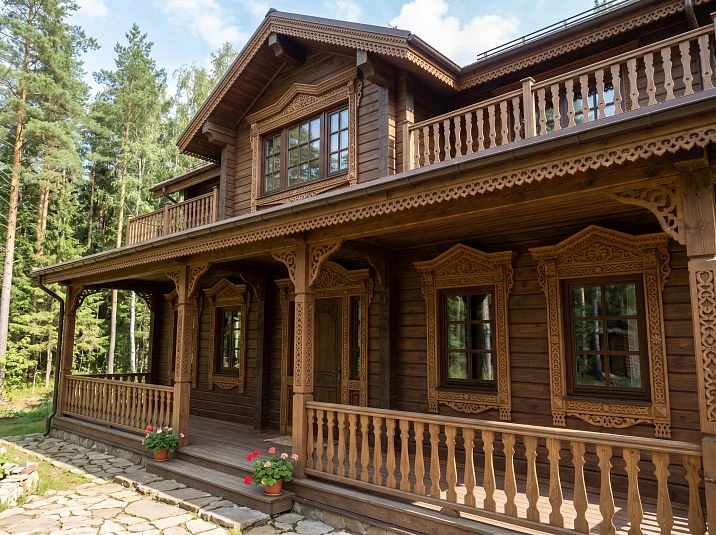
That is why the query "how to decorate a veranda with carved trim" is not idle curiosity. It is a specific task that thousands of owners of wooden houses, cottages, and country estates are solving. And this article is a practical answer: what to choose, how to select, what to combine with, what mistakes to avoid, and where to find carved trim for the veranda, brackets, and the entire necessary set of decor.
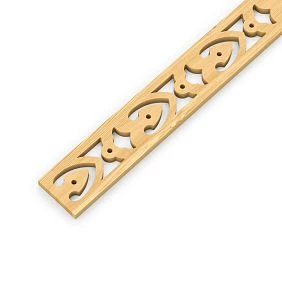
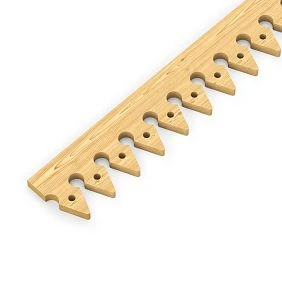
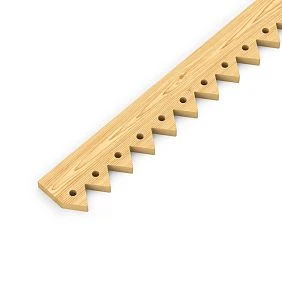
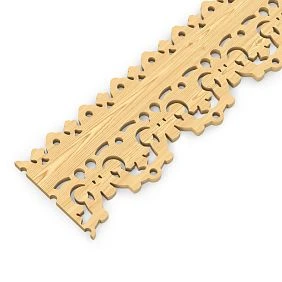
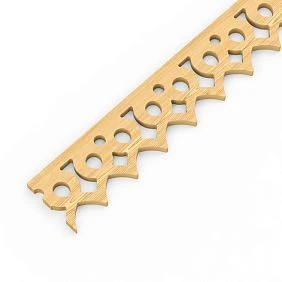
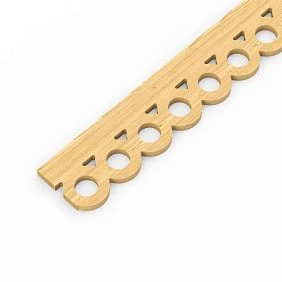
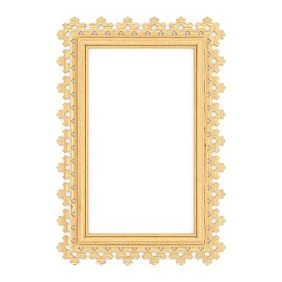
Why the veranda and terrace are a special area for decor
It would seem that a veranda is just a part of the house. Why does its decor require a "separate approach"? Because the veranda is a transitional zone between the house and the property, between closed and open space. Its architectural features make the design task more complex than simply "putting trim on windows."
Firstly, a veranda often lacks solid walls—there are posts, openings, and glazing sections. Here, the decor should work not as a frame around a single window, but as a system that covers the entire structure: posts, canopy, horizontal beams, and transitions between sections.
Secondly, the veranda is in the zone of maximum visual attention—especially if it faces the main facade or a recreation area. Here, any carelessness in details is immediately noticeable.
Thirdly, the veranda and terrace are areas with increased load on decor: temperature changes, precipitation, direct sunlight, condensation—all of this requires the correct choice of material and treatment.
carved facade decor verandas and terraces are not just trim. They are a comprehensive solution that includes several types of products that together create a unified and expressive image.




Veranda and terrace: what's the difference for a decorator
Before talking about decor, let's define the terms — because for choosing trim and other elements, the difference between a veranda and a terrace is fundamental.
A veranda is a glazed or partially glazed extension to a house, having walls (at least partially), a roof, and typically windows or window-doors. It has window openings, a doorway, and a facade plane — everything that is framed with trim in the usual sense.
A terrace is an open or semi-open platform, often without full walls. It may have posts, a canopy, a railing — but it does not have enclosed window openings in the traditional sense. Here, decor works differently: not through window trim, but through brackets under the canopy, overlays on posts, carved railing elements.
In many houses, a veranda and terrace coexist or transition into one another. The decor's task is to create a unified look for this entire area, so it appears as a cohesive architectural story, not a collection of randomly connected elements.
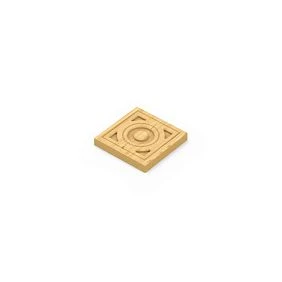
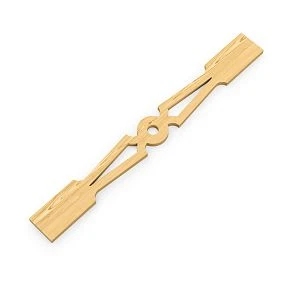
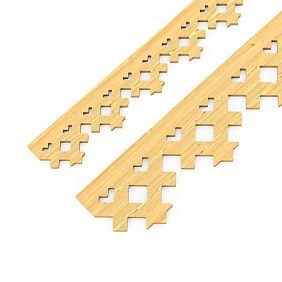
Our factory also produces:
Where exactly carved decor is used on the veranda and terrace
Let's go through all the areas that can be decorated — this will help form a complete understanding of what and where is needed.
Get Consultation
Windows of a glazed veranda
The veranda windows are the main 'canvases' for trim. There can be from two or three to ten or more, depending on the size of the structure. An important point: on a veranda, windows are often placed in a row — identical, with the same spacing. This creates a rhythm, and the decor should support that rhythm.
carved trim for the veranda In such a case, they are chosen with the same ornament and same width — they create a single framing ribbon along the entire facade. A mix of different ornaments or widths in a row of windows looks sloppy and unprofessional.
Door to terrace or veranda
A doorway is a key element of a veranda. If the door faces the main facade, its design should be richer than that of ordinary windows: a wider casing, a pediment, possibly paired brackets on the sides of the opening.
If the door faces the courtyard or garden, the design can be more modest, but still consistent with the rest of the decor.
Open terrace openings
An open opening — an arched or rectangular entrance to the terrace without a door or glazing — can and should also be decorated. A carved architrave (horizontal element above the opening) with side casings creates the effect of a "gate" — a beautiful, ceremonial entrance to the relaxation area.
For open terrace openings, slotted openwork carving is especially good: it does not block air and light, but creates a decorative frame that adds architectural expressiveness.
Veranda and terrace posts
Posts — vertical load-bearing elements of a veranda or terrace — can be decorated with applied carved elements. This is one of the most effective techniques: an ordinary wooden pillar turns into a decorative column with ornament.
Wooden decorative inlays for posts are selected according to the width and height of the pillar. They are attached to the front and side faces, creating the feel of a relief surface without structural changes.
Canopy and its braces
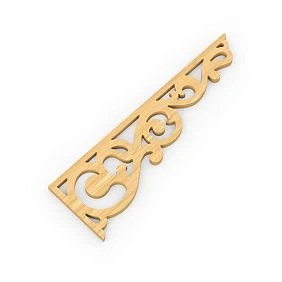
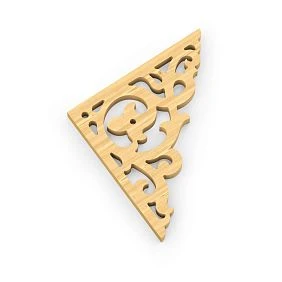
The canopy of a veranda or terrace is an area where carved brackets show themselves in full force. A bracket is a decorative support that imitates a load-bearing element. It is installed in the corner between the post and the horizontal beam of the canopy, adding volume, depth, and richness to the detail.
buy house carving for a canopy — means first of all to pay attention to the brackets: they create the strongest decorative effect on open structures where there is no wall and the architraves "do not work."
The facade of the house next to the veranda
The wall of the house to which the veranda or terrace adjoins is also a decorative area. The windows of this wall are decorated with architraves in a unified style with the veranda decor. If the facade has piers or blank sections, here are appropriate Wooden decorative inlays or Wooden Picture Frame, creating horizontal belts and a visual connection between the veranda and the main volume of the house.
Veranda fencing and railings
Fencing is the perimeter of the veranda or terrace at floor level. Carved balusters, posts with applied decor, a decorative top handrail — all these are parts of the fencing that form a unified decorative program with the architraves and brackets.
Balusters for veranda fencing are calculated per linear meter: the standard spacing is 100–150 mm between elements. For a veranda 5 m long with a spacing of 120 mm, about 35–40 balusters plus corner posts are needed.
Which carved architraves to choose for a glazed veranda
A glazed veranda with several windows in a row is the most common type. Here the key principle is unity. All architraves in one ornament, one width, one color.
Casing width
For veranda windows, the typical width is 80–120 mm. A wider casing (140–160 mm) is appropriate for large windows or the main entrance opening. A very wide casing on small veranda windows visually reduces the glass and makes the facade look heavy.
If the veranda has several openings of different sizes (e.g., a double window and a single window), it is better to make the casing width the same for all — this preserves the rhythm. The length will differ, but the width should be uniform.
Casing ornament
Three types of ornament work well for a veranda:
Geometric — diamonds, lattices, waves, crosses. This ornament is readable from a distance, does not overload the facade, and looks equally good on both classic and modern buildings.
Openwork (cut-out) — ornament with through cutouts. Especially good for open verandas and terraces: the lightness of the pattern emphasizes the openness of the architecture. White openwork casings on dark timber — an impeccable combination.
Floral — shoots, leaves, curls. A traditional ornament of Russian house carving. Suitable for wooden houses in folk or country style. On modern buildings, it is better to combine with a more restrained scale of the pattern.
Pediment: to install or not
On the veranda, a pediment is appropriate above the main entrance opening and above the central window — if it is a visual accent of the facade. On all other veranda windows, pediments create redundancy and overload the facade.
The exception is a small veranda with two or three windows: here, a pediment on each window looks organic and creates a sense of richness without overload.
Carved architraves for open openings: how to design without glass
An open opening on a terrace or in a gazebo area is no less interesting a task than a window opening. Here, the decor works differently: not as a frame around glass, but as an architectural portal — marking an entrance, transition, or visual accent.
Architrave framing
The simplest solution for an open opening: two side architraves and a horizontal element on top. This is an architrave — a classic form of framing an opening without a door. The horizontal element can be supplemented with a pediment — especially if the opening is wide and tall.
For open terrace openings, the horizontal element is often made through and openwork — it lets light through but marks the boundary of the space. carved facade decor includes elements of exactly this type: horizontal friezes and valances that can be used above open openings.
Valance under the canopy
A valance is a horizontal decorative detail installed under the roof overhang or under the horizontal beam of a canopy. On an open terrace, the valance creates a "ceiling" accent: it outlines the upper boundary of the space without enclosing it.
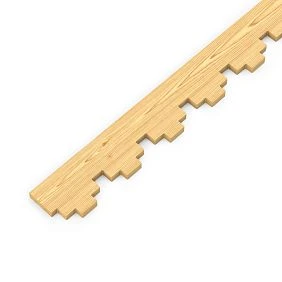
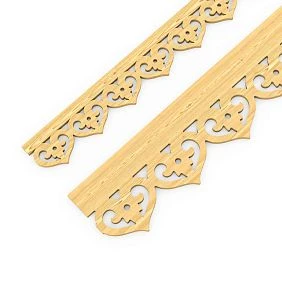
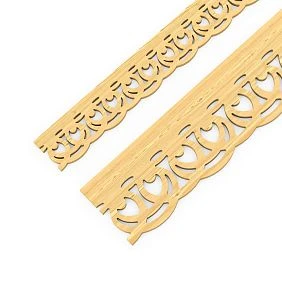
An openwork valance is one of the most elegant elements of wooden decor. On an open terrace, it looks light, airy, and creates a sense of handcraft and tradition — even if made on a modern CNC machine.
Decor of posts in the opening
If the opening is framed by posts (wooden pillars), they can be decorated with applied carved elements. Overlays on the front face of the post create the illusion of a relief column. For two posts of the opening, four to eight applied elements are needed (two to four per post, depending on the height and chosen scheme).
Carved brackets for veranda and terrace
Brackets are perhaps the most "architectural" of all wooden decor elements. They work not on a plane, but in volume: they are installed in the corner between vertical and horizontal, creating a visual accent exactly where the structure turns.
Where to install brackets
On the veranda and terrace, brackets are appropriate:
-
Under the canopy at the posts — in the corners between the post and the horizontal roof beam. This is a classic placement: the bracket seems to "hold" the beam, creating a sense of structural logic and decorative richness simultaneously.
-
On the wall at the house exit — on both sides of the doorway, below the veranda roof level. Here, the brackets work as decorative supports for the awning.
-
At the corners of the canopy — on the outermost posts where the canopy ends.
-
On the house facade near the veranda — by windows, under the eaves, in the area where the wall and veranda roof meet the main volume of the house.
Carved brackets for canopy are produced in different sizes and ornaments. They are selected based on the height of the post and the depth of the canopy overhang: the bracket should be proportionate to the structure, neither getting lost nor dominating.
How to combine brackets with architraves
The key rule: brackets and architraves should be from the same ornamental collection. This does not always mean an identical pattern — a similar style, close detailing, and the same color are sufficient.
If the architraves are geometric — the brackets are also geometric. If the architraves have a floral ornament — the brackets have the same or a complementary pattern. Inconsistency in ornaments creates the feeling that the decor was chosen in separate pieces, without an overall concept.
The color of the brackets always matches the color of the architraves: this is the main rule of unity in facade decor.
Bracket sizes: how to choose
The standard range of brackets: 200, 250, 300, 350, 400 mm in overhang. For a canopy with a small roof overhang (300–400 mm), a bracket of 200–250 mm is sufficient. For a deeper overhang or tall posts — 300–400 mm.
The height of the bracket (vertical dimension) is usually equal to or slightly greater than its overhang. This creates harmonious proportions.
Decorative overlays and wooden baguette for the veranda
In addition to architraves and brackets, the facade of the veranda can be enriched with two types of flat decor: overlays and baguette.
Decorative appliqués
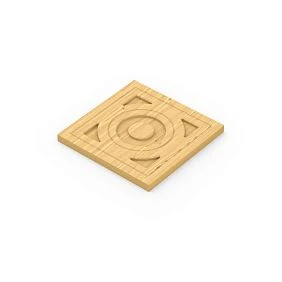
Wooden decorative inlays — these are flat carved elements that are attached directly to the surface of a wall, post, or horizontal beam. They add an ornamental accent where there is no opening — on piers, beam ends, and cornice soffits.
Overlays are especially appropriate for a veranda:
-
on the piers between windows — if the windows are not placed close together but with a gap;
-
on the ends of canopy beams — the front face of the beam, visible from the street, can be decorated with a carved overlay;
-
on the horizontal band above the windows — creating a continuous decorative strip across the entire veranda facade.
Wooden molding
wooden baguette for facade decoration — a narrow carved profile used to create frames, bands, and graphic lines on a flat surface. On the veranda facade, a baguette can frame the perimeter of the glazing, create a horizontal band at the windowsill level, or link all the veranda windows into a single horizontal line.
A baguette is a delicate decoration. It does not catch the eye, but creates a sense of refinement and completeness. It is not noticed immediately — but its absence is always felt.
Color and finish of trim for a veranda: how not to miss the mark
Color is what ties together or destroys the entire decorative ensemble. For a veranda and terrace, this is especially important: here the decoration is in constant interaction with nature, with changing light, with the greenery of the site.
White color
White is an impeccable choice for a veranda. White carved architraves against dark timber or logs are a classic that never ages. White maximally emphasizes the ornament: every cut, every curve of the milled pattern is readable in sharp shadows.
White also works well on glazed verandas with white frames: the architraves continue the color of the frame, creating a unified white border.
For outdoor use, white requires high-quality primer (antiseptic) and facade enamel with UV protection — otherwise, the color quickly yellows under direct sunlight.
Trim in the color of the facade
On a large veranda with many windows, contrasting decor can overload the facade. In this case, architraves in the tone of the wall create a calm, cohesive design — the ornament is only readable up close due to the relief.
This technique is popular in Scandinavian style: the entire veranda is in a single shade of gray or dark blue, and the decor 'dissolves' into the facade, creating a monolithic look.
Contrasting door casings
Contrast works well on the entrance opening and the main facade of the veranda. Dark architraves on a light wall, bright ones on a neutral one — this is a confident accent that makes the veranda the center of the facade composition.
For open terraces, the contrasting color of brackets and overlays works especially effectively: against the backdrop of the open sky and the greenery of the plot, dark carved details look graphic and expressive.
Color to match the roof, railings, and door
Thoughtful color scheme for the veranda and terrace involves linking the architraves with other details: the color of the roof, the color of the railings, the color of the front door. Repeating one shade in two or three details creates a sense of intent and style.
Example: dark green roof → dark green railings → dark green brackets → dark green architraves. The facade is light (white or beige). This color scheme looks rich, natural, and very modern.
How not to overload a veranda with carved decor
The paradox of veranda decor: the richer you want to make it, the easier it is to overload. An excess of carved details creates visual noise — especially on small verandas with small windows.
Rule of Scale
The scale of the ornament should match the scale of the object. For a small country veranda of 3 × 4 m, a large rich ornament with wide architraves, massive brackets, and overlays on every post is too much. Lighter solutions are needed here: a narrow architrave with a fine openwork pattern, small brackets.
For a large veranda of a country house with an area of 20–30 m², high posts, and a deep canopy, on the contrary, modest decor will be lost. Here the scale allows for wide architraves, large brackets, and rich overlays.
The rule of accent
You don't need to decorate everything the same. Create a hierarchy: the main entrance — maximum decor, main facade windows — medium, side and rear windows — minimal. This is not stinginess, it's a competent placement of accents.
The rule of unity
All elements of veranda decor should be from the same ornamental collection or a similar style. Different ornaments on architraves, brackets, and overlays create chaos, even if each element is beautiful on its own.
Veranda in different architectural styles
Veranda in traditional Russian style
A traditional wooden veranda with carved architraves is an image familiar to everyone from old photographs of village houses. Rich floral ornamentation, finials with a semicircular or pointed top, openwork friezes under the eaves, balusters with a turned silhouette — all these are components of the traditional look.
For such a veranda buy house carving means choosing a collection with a traditional ornament and white paint color. White on a dark log frame is an unchanging classic.
Scandinavian-style veranda
A Scandinavian wooden veranda is laconic, monochrome, with a clear rhythm and a minimum of details. A geometric architrave, a bracket with straight lines, a single color for all decor — usually dark gray, anthracite, or dark blue.
On such a veranda, a rich floral ornament would be alien. Here, clear shapes, precise proportions, and confident monochrome are needed.
Country house veranda
A dacha is a space where strict rules work more softly. Blue architraves on white paneling, yellow brackets, carved railings with an openwork pattern — at the dacha, this is not inconsistency, but character. The main thing is that all details are still connected by a common tone or a common ornament.
For a country house veranda, light openwork architraves and small brackets with floral ornamentation are especially good: they create an image of a "rural idyll" without pretensions to monumentality.
Modern country veranda
A modern country house with an open or glazed veranda is a space where wooden decor is used consciously and selectively. One or two accent brackets under the canopy, a geometric architrave on the entrance opening, Wooden Picture Frame along the horizontal belt — enough to add warmth and materiality without archaism.
In modern architecture, wooden decor is not a tribute to tradition, but a conscious choice of natural material and handcrafted form in a world of standardized surfaces.
Practical calculation of decor for a veranda: example
Let's break down a specific example. A glazed veranda 6 × 3 m, facing the main facade of the house. On the veranda facade — four windows 900 × 1200 mm and one door opening 900 × 2100 mm. Posts — four pieces, canopy with an overhang of 400 mm.
Windows (4 pieces, 900 × 1200 mm)
For each window — full framing without a pediment (pediment — only for the door):
-
Side architraves: 2 pcs. × 4 windows = 8 pcs.
-
Upper horizontal: 1 pc. × 4 windows = 4 pcs.
-
Lower horizontal (optional): 1 pc. × 4 windows = 4 pcs.
-
Corner sockets: 4 pcs. × 4 windows = 16 pcs.
Entrance door (900 × 2100 mm)
-
Side trims: 4 pcs. (2 per side, considering the joint)
-
Top horizontal: 1 pc.
-
Top piece: 1 pc.
-
Connecting plates for side joints: 2 pcs.
-
Corner sockets: 2 pcs.
Brackets for canopy
Four posts × 2 brackets (on each side of the post) = 8 brackets. Size — 300 mm with a canopy overhang of 400 mm.
Post covers
Four posts × 2 overlays (front and one side) = 8 overlays.
Decorative soffit under the cornice
Total length of the veranda cornice — 6 + 3 + 3 = 12 m. With a standard soffit element length of 2000 mm, 6 elements are needed + 1 spare = 7 elements.
Final list with a 10–15% margin:
| Element | To stock | With margin |
|---|---|---|
| Side trims | 12 pcs. | 14 pcs. |
| Top horizontal | 5 pcs. | 6 pcs. |
| Bottom horizontal | 4 pcs. | 5 pcs. |
| Finial | 1 pc. | 2 pcs. |
| Corner rosettes | 18 pcs. | 22 pcs. |
| Connecting plates | 2 pcs. | 3 pcs. |
| Brackets | 8 pcs. | 10 pcs. |
| Post overlays | 8 pcs. | 10 pcs. |
| Soffit elements | 6 pcs. | 7 pcs. |
This calculation is a starting point for ordering. Specific items are to be coordinated with the assortment of the selected collection.
Mistakes when decorating a veranda with carved decor
Decorating a veranda is a task where mistakes are clearly visible from a distance. Let's list the most common ones.
Choosing different trims for different windows
Four veranda windows with four different patterns is not 'variety', it's chaos. On a veranda where windows are in a row, a single pattern is mandatory.
Not accounting for posts and canopy
Buying window trims and forgetting about posts and brackets means getting a half-finished veranda. The decor should work for the entire structure, not just the window openings.
Installing too wide decor on small windows
A wide trim on a small window 600 × 800 mm will cover a significant part of the glass and make an already small window look tiny. Maintain the proportion: trim width — no more than 10–12% of the opening width.
Not planning the color before installation
Installing trims and only then thinking about color is a path to repainting or 'it'll do'. The color should be chosen before ordering, tested with a sample, and all elements should be painted before installation.
Overloading the veranda with carving
Brackets at every post, overlays on all edges, trims with pediments on every window, rich cornices, carved railings — all together can create a feeling of excess. Start with the main points: the entrance door, brackets, trims on the facade windows. The rest — to taste.
Mixing different ornamental styles
Folk-style window casings + Art Nouveau brackets + geometric ornament overlays — three different languages that don't form a dialogue. Stick to one ornamental vocabulary.
Not looking at examples of completed projects
Before placing an order, be sure to study examples of real projects — this eliminates 90% of doubts. On the page Ideas for using carved decor you can see ready-made solutions for different types of houses and buildings: from modest country verandas to grand entrance groups of country estates.
Material and durability: what's important to know
A veranda and terrace are areas with maximum atmospheric load. Rain, sun, temperature changes, morning frost — all this tests the decor daily. The right choice of material is the foundation of durability.
All high-quality wooden window trims for outdoor use are made from glued pine furniture board with removed knots and resin pockets. This material is geometrically stable, does not warp with humidity changes, and accepts any finish well.
Regular pine board with knots is unsuitable for outdoor decor: knots create unstable zones through which cracking begins, and resin pockets show through any paint.
More details about the materials used to make the products can be found on the page Materials and quality of STAVROS products.
How to treat decor for a veranda
-
Priming with an antiseptic is a mandatory first layer. It closes pores, protects against fungus and mold, and improves adhesion of the topcoat.
-
Topcoat — facade enamel or acrylic paint for exterior use. At least two coats, preferably three.
-
Sealing ends and joints — after installation, all open ends and joints are treated with acrylic sealant. Without this step, moisture penetrates the wood through the most vulnerable points.
-
Maintenance — every 5–7 years (more often on the south side) the topcoat is renewed. With regular care, wooden decor lasts 20 years or more.
FAQ: answers to popular questions about veranda and terrace decor
Which trim will suit a veranda with several windows in a row?
For row windows of a veranda, choose trims of the same pattern and equal width. This creates a uniform rhythm across the entire facade. Width — 80–120 mm for standard windows 900–1200 mm. The top piece is optional; it is better to limit it to the entrance opening.
Can carved elements be used for open openings of a terrace?
Yes. For open openings, side trims, a horizontal architrave (top element) and, if necessary, a pediment are used. Openwork ornament is especially good here: it marks the opening without blocking air and light.
Are brackets needed for the veranda?
Brackets are not a mandatory element, but they significantly enrich the decor of open structures. Under the canopy at the posts, at the corners of the cornice — a bracket creates volume and depth that flat trims cannot provide.
What decor should I choose for a glazed veranda with plastic windows?
For a glazed veranda with plastic frames — trims for painting in white (to match the frames) or in the color of the facade. Ornament — geometric or openwork, of moderate width. Pediment — on the entrance opening.
Can I decorate the veranda with ready-made house carving elements?
Yes, and this is the optimal path. Ready-made trims, brackets, overlays, and connecting elements from one collection ensure compatibility of parts, a unified ornament, and a predictable result.
How not to overload the veranda with decor?
Place accents: the main entrance — maximum decor, regular windows — medium, side areas — minimal. Stick to one ornament and one color. Do not install pediments on all windows at once.
What width of trim is optimal for veranda windows?
For standard veranda windows 900–1200 mm, the optimal trim width range is 90–120 mm. A narrower trim (60–80 mm) looks concise and modern. A wider trim (140–160 mm) is for large windows and formal openings.
About the company STAVROS
Designing a veranda or terrace is a project where the quality of details is crucial. Any inaccuracy in the geometry of the trim, a mismatch in the ornament, or material instability is immediately visible on the facade: the veranda is constantly in sight.
STAVROS produces wooden carved decor on CNC milling machines. This ensures precise repetition of geometry in every product: trims, brackets, overlays, and connecting elements from the same batch match to within a millimeter. Installation becomes predictable — without on-site adjustments and without gaps at the joints.
All products are made from glued pine furniture board with knots removed, sanded, and supplied without a finish coating — in perfect readiness for any type of finishing. In the catalog of carved decor for the facade — trims, brackets, Decorative Inserts, Wooden Picture Frame and the entire necessary set for decorating a veranda, terrace, porch, and facade.
If you want to see how it looks in real projects, check out the section ideas for using carved decor. It contains examples that inspire and help you make the right decision even before ordering.
If you already know what you want, start with the catalog STAVROS house carving: here is everything you need for a beautiful, durable, and stylish veranda.