Article Contents:
- Entrance group as an architectural accent: why different rules apply here
- What is included in the concept of "entrance group"
- Which architraves to choose for the front door
- Architrave width: wider than for windows
- Ornament: stricter or richer?
- Rosettes: a mandatory element
- Brackets above the door: how to create an architectural portal
- How to choose brackets for the front door
- Brackets on the canopy over the porch
- Porch: decor from steps to cornice
- Porch railing: balusters and carved panels
- Canopy posts: carved overlays and capitals
- Canopy cornice area
- Facade wall around the door
- How to connect door decor with window trim
- Unified ornamental language
- Hierarchy of decor on the facade
- Unified painting
- Bathhouse door decor: special scale and requirements
- Door trims for a bathhouse
- Protective treatment: specifics of a bathhouse door
- Entrance group decor for different styles of wooden houses
- Traditional Russian wooden house
- Country house in modern classic style
- Summer cottage and garden buildings
- How to assemble a complete entrance group decor set
- Step 1. Measuring the doorway and adjacent areas
- Step 2. Choosing the trim width
- Step 3. Choosing the ornament and collection
- Step 4. Forming the list of elements
- Step 5. Calculating the quantity
- Step 6. Painting before installation
- Installing architraves on a door opening: key points
- Mistakes in designing the entrance group: what not to do
- Frequently asked questions and answers
- STAVROS — carved decor for the entrance group, porch, and facade
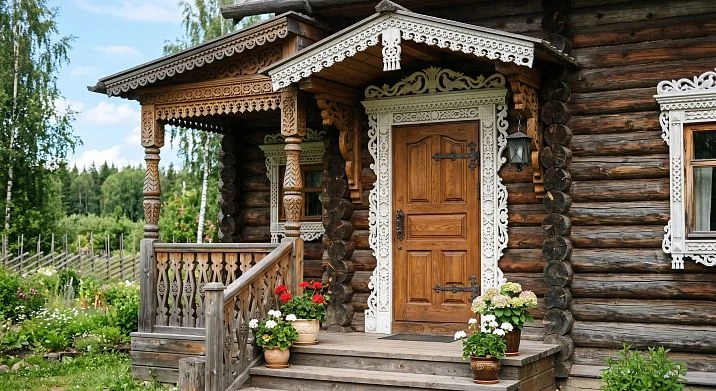
In the architecture of a wooden house, there is one place that under no circumstances can be left unattended. This is the entrance group. The door, the porch, the canopy over the threshold — everything that greets a guest before they cross the threshold. This is where the first and most lasting impression of the house, of the owner, and of how much thought was given not only to the walls and roof but also to the character is formed.
carved door casings — this is not just the framing of a door opening. It is a declaration of style. It is the point where the architecture of a wooden house speaks loudest. Where the ornament works not as a background, but as the content. That is why a fundamentally different approach is needed for designing the entrance group than for choosing decor for side windows or utility buildings.
In this article — in detail and honestly about how to design the entrance area of a wooden house with carved decor. Which architraves to choose for the door, how to complement them with brackets and decorative elements, how to connect the door decor with windows and the facade, and what mistakes to avoid when selecting a set.
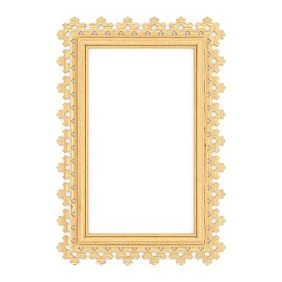
Entrance group as an architectural accent: why different rules apply here
Look at any richly decorated wooden house. The windows may be modestly framed, the side facades almost ascetic. But the entrance area — the porch, the canopy, the doorway — always stands out. This is no coincidence. It is an architectural tradition centuries old.
In traditional wooden architecture, the front door was the owner's main decorative statement. The wealth of carving around the entrance indicated the house's prosperity. Carved architraves, brackets above the threshold, figured canopy beams — all of this was concentrated right here, at the doorstep.
A modern wooden house follows the same logic. The entrance group is the zone of maximum decorative emphasis. Here, wider architraves, more expressive brackets, and richer connecting elements are appropriate than anywhere else on the facade. It is the area where 'more' is almost always 'better' — provided the elements are coordinated with each other.




What is included in the concept of 'entrance group'
Before choosing decor, it is worth understanding exactly what needs to be designed. The entrance group is not just a single doorway. It is a system of elements:
-
doorway with architraves around the perimeter;
-
horizontal area above the door — a place for brackets and decorative beam overlays;
-
porch — steps, platform, side railings;
-
canopy or awning over the porch — cornice area, posts, front beam;
-
side posts or pylons of the entrance area;
-
section of the facade wall around the door — a place for decorative elements that symmetrically frame the opening.
Each of these elements can carry its own level of decoration. Together they form an architectural portal — the main entrance of the house.
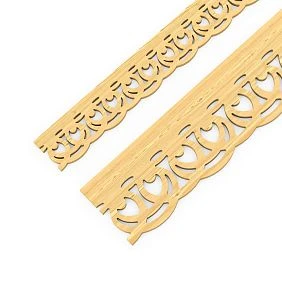
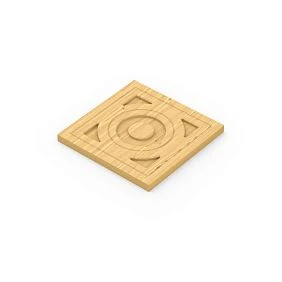
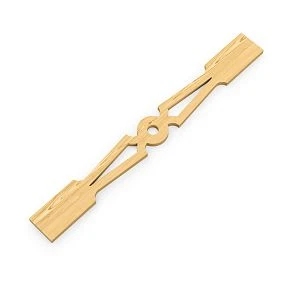
Our factory also produces:
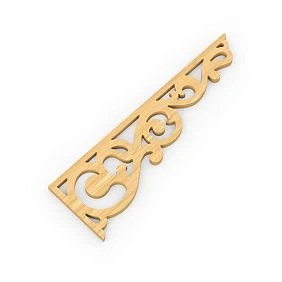
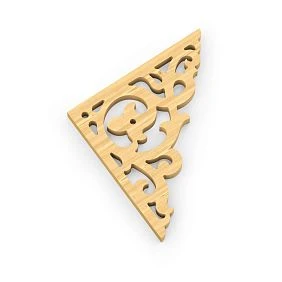
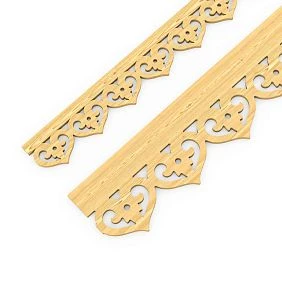
Which architraves to choose for the front door
The standard doorway of a country house is 900×2100 mm. This is significantly higher than most window openings. The vertical architraves on the sides of such a door are long panels with ornamentation that work differently than short window ones.
Get Consultation
Architrave width: wider than for windows
For the front door, it is customary to choose an architrave of the same width as for the main facade windows, or one step wider. If the windows have 140 mm architraves, you can take 164 mm for the door. If the windows have 164 mm, 185 mm is appropriate for the door.
Why wider? Because the doorway is higher. A long vertical panel with a narrow ornament will visually "stretch" and lose its decorative weight. A slightly wider architrave compensates for this effect and maintains the right balance between the proportions of the opening and the decoration.
If the main facade already has 185–250 mm architraves, the same format is used for the door. There is no point in "saving" on decoration for a few centimeters: the entrance area should be proportional, not more modest than the rest of the facade.
Ornament: stricter or richer?
For the front door, two approaches work well, diametrically opposite in logic.
The first approach is a unified ornament. The trim on the door and windows from the same collection, one ornament, one size. The facade looks integral, systematic, without accents. This is a modern, slightly Scandinavian view of architecture: 'everything is equal, everything is connected.'
The second approach is an accent ornament on the door. Windows have medium or narrow trim with a laconic pattern. The door has wide trim with a rich, detailed ornament. The door stands out, becoming the main focal point of the facade. This is a traditional approach, rooted in folk architecture.
The second option is more expressive and more complex to execute — you need to select ornaments that echo each other but do not compete. A good solution: a more detailed version of the same ornamental motif. The same plant pattern — but on the door it is larger and deeper.
Rosettes: a mandatory element
For a doorway, rosettes at corner joints are not an option but part of the system. Door trims create a rectangular frame around the opening, and in each of the four corners of this frame, a rosette must be placed to cover the joint.
The rosette is selected according to the width of the trim: for a 164 mm plank, a rosette of approximately 150–180 mm. The ornament of the rosette should visually coordinate with the ornament of the trim: either a direct match (same collection) or neutral geometry that does not conflict with anything.
Brackets above the door: how to create an architectural portal
This is where the entrance group transforms from just a 'decorated opening' into a full-fledged architectural accent. Brackets above the door are decorative braces installed on the sides of the upper horizontal trim, creating the effect of a three-dimensional portal.
A properly selected pair of brackets radically changes the entrance area. Depth appears. Shadow appears. There is a feeling that the house has a 'face' — not just a facade, but character.
How to choose brackets for an entrance door
The bracket is selected by height and reach. The height of the bracket should correspond to the width of the casing: for a 164 mm casing — a bracket 180–220 mm high. For a 185 mm casing — 200–250 mm. A mismatch in scale creates an imbalance: a small bracket on a wide casing looks toy-like, a large one on a narrow one looks heavy.
The bracket's reach (how far it protrudes from the wall) affects the depth of the portal. For the entrance area of a residential building, the optimal reach is 80–120 mm. This is enough to create a noticeable shadow and volume, but not so much that the bracket obstructs the passage.
Carved brackets for the porch from the STAVROS collections are made from the same material as the casings — glued pine board with CNC processing — which ensures an exact match in ornament and a single mounting plane.
Brackets on the canopy over the porch
A separate and very important area is the bracket-struts that connect the vertical canopy posts with the horizontal beam. This is a structural element that simultaneously serves a decorative function.
Brackets on the porch canopy are perceived from a distance of 3–5 meters. They should be large enough to be readable from this distance, and light enough in ornament so as not to weigh down the canopy structure. The optimal solution is a bracket with an openwork or floral ornament of medium detail.
See how brackets combine with casings on the entrance group of real houses in the section ideas for using carved decor — there are examples of different architectural solutions with specific product sets collected.
Porch: decor from steps to cornice
A porch is an architectural transition between the street and the house. It exists in two spaces simultaneously: outside (visible from the street) and at the threshold (perceived up close, tactilely). This creates a dual requirement for decor: readability from a distance and delicacy up close.
Porch railing: balusters and carved panels
If the porch is raised by 2–4 steps and has a railing, this is the first place for expressive wooden decor. Carved balusters immediately set the ornamental tone for the entire entrance area: they are visible when approaching the house, examined up close, and form the rhythm of vertical decor.
Balusters are selected to match the ornament of the window casings. Not necessarily identical: the ornament can be more concise — the baluster primarily carries rhythm and form, not complexity of pattern. But the overall stylistic "language" — geometry, vegetation, folk motif — must match.
Canopy posts: carved overlays and capitals
The load-bearing posts of the porch canopy are the vertical dominants of the entrance area. A bare timber column next to a richly decorated doorway looks unfinished. Several decorative solutions for posts:
-
carved overlay strips along the edges of the column;
-
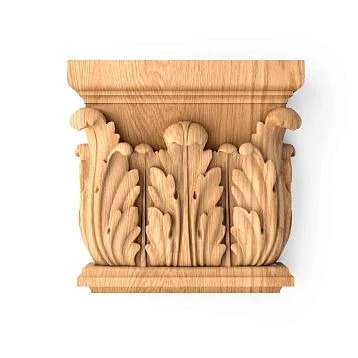
decorative capitals at the top (the transition point from post to beam);
-
corner carved overlays that create the illusion of a turned or classic column;
-
vertical overlays with ornamentation along the entire height of the post.
Wooden decorative inlays from the STAVROS catalog — this is exactly the type of product needed for decorating posts and end zones of structural elements. They are installed without modifying the structure, adding decor selectively.
Canopy cornice area
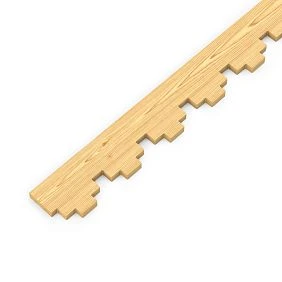
Horizontal front beam of the canopy — another decorative plane. The end of the beam can be finished with a shaped cut or an applied decorative element. Along the lower plane of the cornice overhang, you can run wooden baguette for facade decoration — a horizontal profile strip that creates a clear cornice line.
On the sides of the front beam — another place for brackets. Here they are installed horizontally, supporting the roof overhang, and create a rhythm of "post — bracket — cornice."
Facade wall around the door
The wall area on the sides and above the door opening — this is space that can be left empty or enhanced with decor. A few practical solutions:
Symmetrical decorative overlays on both sides of the door — small ornamented elements that "rhyme" with the trim. They carry no functional load but create a sense of a rich, well-thought-out facade.
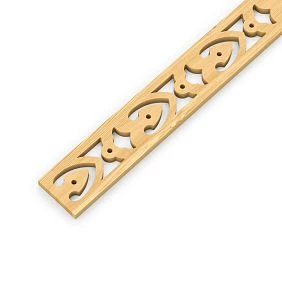
Horizontal decorative belt above the door trim — a strip of baguette or connecting elements at the level of the upper part of window trims. It connects the door and window zones into a single horizontal line.
Vertical elements from the level of the upper casing to the cornice — "pilasters" made of wooden overlays, denoting architectural posts on the sides of the entrance portal.
How to tie door decor with window casings
This is one of the most important architectural questions when designing a facade. The door and windows exist on the same wall surface. They either form a single decorative system — or they compete.
Unified ornamental language
Window casings and door casings should speak the same ornamental language. This does not mean being identical. It means belonging to the same aesthetic tradition. If the windows have a geometric pattern — the door should not have baroque scrolls. If the windows have a folk floral motif — the brackets at the entrance should not be in the Art Nouveau style.
Good practice: choose everything from one catalog collection. If the windows have geometric patterns, the motifs are coordinated by the manufacturer — this guarantees stylistic unity without extra effort. If the windows have geometric patterns...
Hierarchy of decor across the facade
The rule of hierarchy is simple: the front door is the richest, the main windows are slightly more modest, the side and rear windows are even more modest. This creates an architectural narrative: the facade "tells a story," and this story begins at the entrance.
Practically: if the entrance has a 185 mm casing with rich ornamentation and a pair of brackets, the main windows are suitable with 164 mm casings with the same ornamentation but without brackets. On the side facades — 140 mm with a more laconic design.
Unified painting
Color is the final and very important unifying element. All facade trims, including door trims, must be painted in one color or within a single color scheme. If the windows are white, the door trims are also white. If the windows are painted in ochre, the door uses the same ochre.
An exception is a contrasting accent on the door: the entrance trims can be slightly darker or lighter than those on the windows for additional emphasis. This is a subtle technique that only works with a unified style for the rest of the facade.
Bathhouse door decor: special scale and requirements
The entrance door of a bathhouse is a separate scenario. The bathhouse is smaller, its door is lower and narrower. But even here, the entrance area deserves decorative attention.
Trims for the bathhouse door
A standard bathhouse door is 700–800 mm wide and 1800–2000 mm high. For such an opening, trims of 114–140 mm are optimal. Wider planks may take up too much space on the small facade wall of the bathhouse.
The ornament is concise and well-readable. For a traditional-style bathhouse, folk or geometric patterns are suitable. For a modern Scandinavian-style bathhouse, a minimalist geometric motif works.
Brackets for the bathhouse door are small and proportionate. One small bracket above the entrance changes the overall impression of the building, making it not just a "shed with a steam room" but a full-fledged architectural object with character.
Protective treatment: specifics of the bathhouse door
The door area of the bathhouse is particularly vulnerable to moisture. Steam, condensation, water from the canopy, and direct precipitation. Wooden trims here must be treated as thoroughly as possible: primer, impregnation, and a final coat of paint or varnish with a water-repellent effect. The lower ends require an additional layer of protective compound.
Material matters: the glued pine shield from which STAVROS products are made is more resistant to deformation under cyclic humidity changes than solid board. This is fundamental for bathhouse use. More about the material's properties on the page Materials and quality of STAVROS products.
Entrance group decor for different styles of wooden houses
The architectural style of the house dictates the character of the entrance decor. Let's break down three main scenarios.
Traditional Russian wooden house
A log or timber house in folk style — maximum decorativeness of the entrance area. Wide architraves with rich folk ornament (185–250 mm), large brackets with plant motifs, carved balusters of the railing, a frieze under the canopy cornice. The decor is dense, rich, hierarchical: the closer to the door, the richer.
Ornament — traditional: plant curls, solar motifs, floral rosettes, geometric weaves. Color — most often white or cream against the dark wood of the walls.
Country house in the "modern classic" style
A wooden house with clear geometry, a gable roof, large windows, a plastered or wooden plinth. The entrance group is expressive but without excess. Door architraves of medium format (164–185 mm) with moderate ornament. Brackets — one or two, without baroque details. Porch railing — carved but restrained.
Color — either monochrome (architraves matching the wall) or white. Ornament — geometric or simple plant. Style — clean, with respect for details, without overload.
Country house and garden buildings
A dacha is a place for lightness. The entrance area here does not require architectural monumentality, but should be pleasant and cozy. Platbands 114–140 mm, one small bracket above the door, possibly a small decorative overlay on the front beam of the canopy.
The color is bright, lively: green, blue, ochre, white. The ornament is simple, folk, easily readable. It is this design that gives the country house that very "grandmother's house" — an image that many are drawn to.
How to assemble a complete set of decor for the entrance group
This is a practical algorithm for those who are ready to act. Everything step by step — without unnecessary words.
Step 1. Measuring the doorway and adjacent areas
-
doorway height;
-
doorway width;
-
distance from the edge of the doorway to the nearest window or wall corner;
-
width of the canopy side posts;
-
length of the canopy front beam;
-
canopy height from porch platform to eaves
This data allows you to accurately calculate the quantity and length of all elements.
Step 2. Selecting the width of the casing
Based on the wall width around the opening and the scale of the facade — 140, 164, or 185 mm. For most country houses with a door opening of 900 mm — 164–185 mm is optimal.
Step 3. Selecting the ornament and collection
Focus on the style of the house. If there are already casings on the windows on the facade — choose the same collection. If you are designing from scratch — first select the entrance area, then match the window casings to it.
Step 4. Forming the list of elements
Minimum set for one entrance door:
-
2 vertical casings (length = opening height + 50 mm allowance);
-
1 horizontal top element (length = opening width + 2 × casing width);
-
4 corner sockets;
-
2 brackets (optional, but recommended).
The extended kit for complete entrance group finishing additionally includes:
-
overlay elements for canopy posts;
-
decorative end of the canopy front beam;
-
horizontal cornice molding along the eaves;
-
decorative overlays for side wall sections;
-
balusters for porch railing (if present);
-
connecting elements for the horizontal frieze.
All this set of products is available in the catalog house carving — with filtering by product type, collection, pattern, and size.
Step 5. Quantity calculation
Always add a 10% reserve. For trimming, for possible replacement in case of damage, for repairs in a few years — when this item may be discontinued.
Step 6. Painting before installation
All kit elements are processed before installation. Primer → finish paint (2 coats). The back side and ends — mandatory. Special attention to the bottom ends of vertical slats.
Installing architraves on a door frame: key points
Installing carved architraves is no more difficult than regular carpentry work. But there are a few nuances that affect the result.
Gap from the frame. The architrave is not pressed tightly against the door frame: a gap of 3–5 mm. This allows the frame to slightly "breathe" during temperature changes without creating pressure on the architrave.
Fastening. Finish nails or screws with a countersunk head. Nails are preferable on wooden walls (do not split fibers under horizontal force). Screws hold better on log walls with uneven surfaces. Fasteners are covered with putty for painting.
Horizontal level. The top horizontal architrave is installed strictly level. Even a slight deviation is noticeable — especially if there are horizontal lines of the facade nearby (foundation belt, cornice, window sill belt).
Rule "sides first". Side trims are installed first. The horizontal element lies on top of them or joins under the socket. This ensures the correct order of covering joints.
Seasonality of installation. Wood is best installed in dry weather at temperatures from +5 to +25°C. In frost, adhesive and paint materials work worse, and the wood itself may be slightly deformed by humidity.
Mistakes when designing the entrance group: what not to do
Mistakes here are the most noticeable on the entire facade. The entrance area is in full view of everyone.
Trims without connection to window decor. Door trims from one collection, window trims from another. The facade looks disjointed, "patchwork".
Overload of a small porch. Wide trims 250 mm, large brackets with heavy ornament, dense openwork frieze, balusters — all at once on a small porch 2×2 meters. Instead of beauty, decorative chaos.
Brackets without scale matching. A small bracket on a wide trim looks like a decorative accident. A large bracket on a narrow one looks like a burden. The scale of the bracket and trim must match each other.
Ignoring canopy posts. A richly decorated doorway next to bare timber posts — an unfinished look. Minimum for posts: overlay decorative elements that create a visual transition.
Installation without painting. We already discussed it — we'll repeat for clarity. Wood without a finish coating on an open facade degrades in one season. Especially critical for the entrance area, where the load from precipitation and use is maximum.
Different ornaments on trims and brackets. "From the same collection" is a condition that is easiest to meet when ordering from one catalog. That is why it is important to form the entire entrance area set in one go.
Frequently asked questions and answers
Can carved architraves be used for the front door?
Yes, this is one of the best uses of wooden facade decor. The front door is a priority area for decoration, where wider architraves and additional elements—brackets, rosettes, overlays—are appropriate.
Which architraves are best to choose for the porch?
For the porch, architraves of the same width as those on the main windows, or one step wider, are suitable. For a country house—164–185 mm. The ornament should match the architectural style. Additionally—brackets and decorative overlays on the posts.
Are brackets necessary for the entrance group?
Not mandatory, but highly recommended. Brackets above the doorway dramatically change the impression of the entrance area—creating volume, depth, and an architectural portal. This is one of the most effective decorative techniques for a wooden house.
Can door and window architraves be combined?
Yes, and this is a rule of good taste in architecture. All facade architraves should belong to the same collection or at least the same ornamental tradition. A unified decorative language creates a cohesive facade.
Are carved architraves suitable for a bathhouse door?
Yes, architraves are perfectly suitable for a bathhouse door. For a compact bathhouse—width 114–140 mm, a laconic ornament, mandatory finishing treatment with moisture protection. One small bracket above the entrance will complete the look.
What are STAVROS carved architraves made of?
They are made from glued pine panels with defects removed. This material is more stable than solid board during humidity changes, has a uniform structure, and perfectly accepts any finishing coatings. All products are manufactured on CNC equipment and hand-sanded.
What color should I choose for architraves in the entrance area?
Classic — white on a dark facade creates a clear contrast and a traditional look. Monochrome (architrave matching the wall) — a modern, architectural approach. Contrasting color (ochre, green, blue) — for cottages and houses in folk style.
STAVROS — carved decor for the entrance group, porch, and facade
Everything needed for a complete design of a wooden house entrance group — from architraves to brackets, from decorative overlays to balusters — is produced by STAVROS. Products made from glued pine panels, processed on CNC machines and hand-sanded, are supplied without a finish coating, allowing any color scheme to be implemented.
The STAVROS catalog features several collections with different ornamental styles — from folk to modern geometric. All elements are compatible within collections: architraves, brackets, rosettes, connecting inserts, overlays, and baguettes are coordinated in ornament, thickness, and proportions. Catalog filters allow you to select a complete set by product type, ornament, width, and collection — without the need to manually match incompatible elements. Start building your entrance group set in the section carved architraves for doors — and give your house a worthy face.