Article Contents:
- Why order a single piece before a full set
- What exactly to buy as a sample
- What a photo leaves out of frame
- How to read dimensions A, B, and C
- You need to measure the free area of the facade
- A paper template helps rule out the wrong size
- How to test a single overlay on real furniture
- The back surface must align with the base
- A symmetrical part and a mirrored pair are checked differently
- First the main ornament, then the surrounding decor
- How to check a single wooden rosette
- Beech and oak are compared with the future finish in mind
- The execution of the blank and sanding are part of the selection
- A test stain is applied after checking the fit
- The installation test is planned separately from the color test
- What to record after approving the sample
- How to move from a single part to an order for six cabinets
- When the sample is worth keeping in the workshop
- What to check in the next delivery
- When a separate trial order is not needed
- Additional questions before approval
- Can the outermost sheet be trimmed if the overlay does not quite fit?
- How to approve a sample with the customer remotely?
- Will one model work for two doors of different widths?
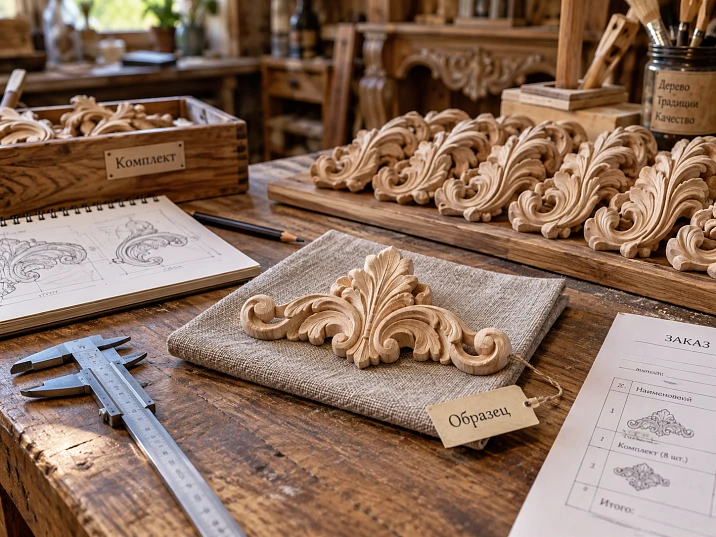
In the drawing, the overlay fits between the handle and the moulding frame. During a test fit, it turns out that the edge of the sheet gets in the way of gripping the handle, and the protruding scroll ends up higher than the adjacent profile. Before ordering the remaining parts, it is enough to change the size or position of one overlay. After purchasing the full set, the same decision will affect all fronts.
Buying carved elements individually is convenient precisely at this stage: order one piece of the chosen model, test it on the actual base, do a trial finish, and record the approved version. For a directional ornament, an additional check of the mirrored piece will be needed. One left element does not yet confirm that the whole pair suits the furniture.
The sample must answer a specific question: whether the overlay fits, how the relief looks after painting, whether the back surface matches the base. Then the first purchase ends with a decision by which you can order a pair, a set, or a small batch.
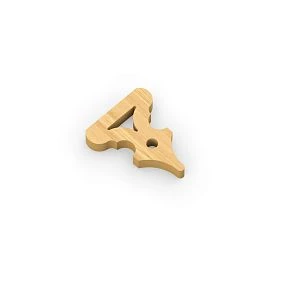
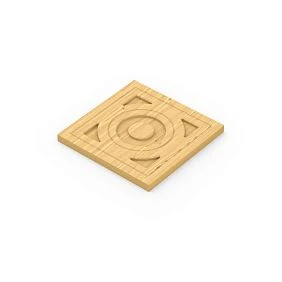
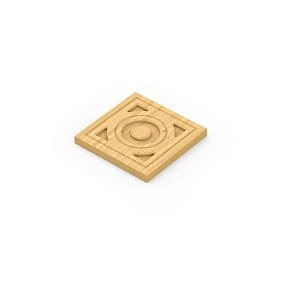
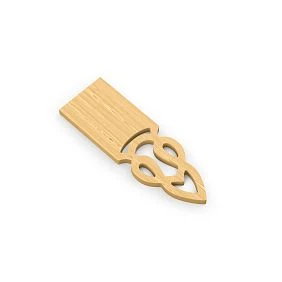
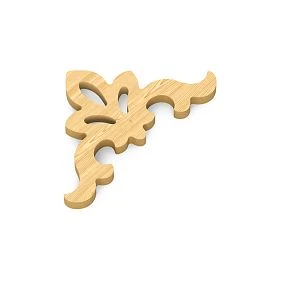
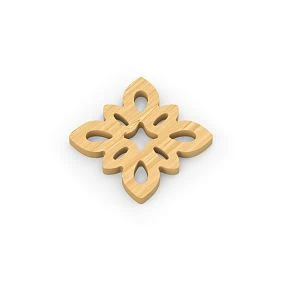
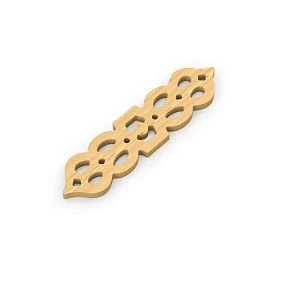
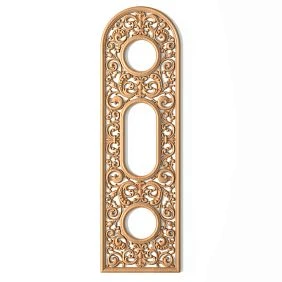
Why order a single piece before a full set
A wardrobe may require two matching overlays and four rosettes, while a chest of drawers series may need twelve identical central elements. The quantity is already known, but the decorative option itself has not yet been approved. At this point, it is useful to separate the choice of model from purchasing the entire volume.
A single piece allows you to verify what currently exists only as an assumption. For example, whether the ornament will fit on a narrow panel without trimming; whether there will be room for fingers between the scroll and the handle; whether the carved piece can be painted in the same color as the facade. The result of the check may change not only the product code but also the placement of the decoration.
This approach is suitable for new furniture, the development of a custom series, and the preparation of a trial facade. Replacing a lost ornament is a separate task: there, the original shape is dictated by the existing piece. Here, the craftsman can still choose a different size option and coordinate it before assembly.
The first order does not have to consist of a single piece under all circumstances. If you need to compare beech with oak, check two scales, or assemble a mirrored composition, several pieces with different purposes will be required. Savings appear when the purchase resolves a specific uncertainty, not when the quantity is artificially reduced to one.




What exactly to buy as a sample
To check a specific overlay, order one piece of the product code, size, and material you are considering for the furniture. A small wooden board will show the color of the wood, but not the shape of the end, the depth of the recesses, or how the chosen ornament fits.
In the section product samples individual samples and sets are available. They are useful for an initial introduction to the range. However, a set of profiles or rosettes replaces the needed piece only when it contains the exact model being checked in the required version.
Before paying for the first purchase, confirm:
- the full product code and all letters in its designation;
- selected dimensions according to the product diagram;
- type of wood;
- preparation option for the blank for future finishing;
- surface finish quality;
- quantity — one unit of the selected version.
Check that the product card and the invoice refer to the same configuration. The page may show several sizes at once, while the photo illustrates the model as a whole. If you choose a smaller version for a cheaper trial order, it will not confirm the scale and thickness of the version required for the project.
Buying a serial product by the piece also does not mean manufacturing any shape from a personal sketch. Changing dimensions, making a mirrored version of a model that does not exist, or creating new carving require separate approval. For an initial comparison, it is reasonable to choose from options that actually exist.
Our factory also produces:
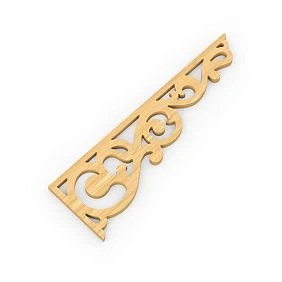
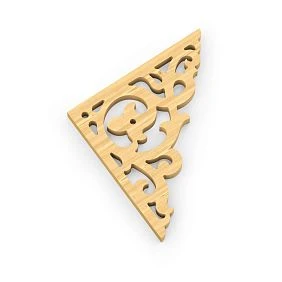
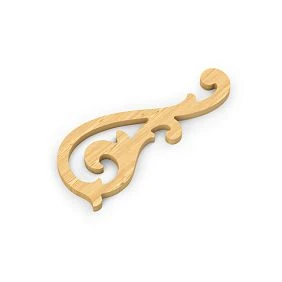
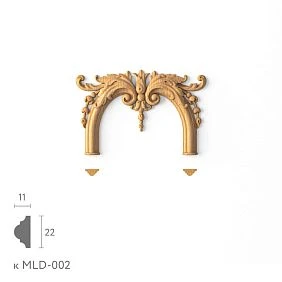
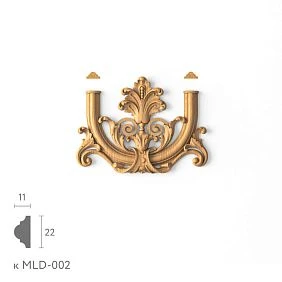
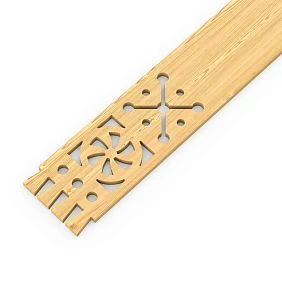
What the photo leaves out of frame
A photo helps you select the ornament and the direction of the composition. It conveys poorly how it relates to a specific facade, especially if the item is shot close-up against a plain background. A small rosette in such a photo looks like a standalone object; on a wide facade it may almost get lost.
The second question is depth. Frontal light can smooth out shadows, while side light makes recesses more noticeable. Reliefs with the same outer dimensions may differ in the height of the protrusions, the density of the pattern, and the proportion of gaps. Because of this, two wooden carved elements occupy a similar place but are perceived differently next to the frame and handle.
The back surface is not always visible. From the front side, it is impossible to determine how large the contact area is, whether there is a recess, and whether the part can sit flush against a profiled base. Separate photos from the back and side are useful, but the final fitting is done on a surface with real geometry.
After receiving it, inspect the part before sanding, drilling, and painting. Compare the marking with the order, check the protruding leaves, thin bridges, and edges. If damage is found or there is doubt about the version, keep the packaging and record the condition to contact the supplier before further processing.
Get Consultation
How to read dimensions A, B, and C
Letter designations are read from the drawing of the specific model. First, determine which dimensions describe the frontal overall size and which describe the protrusion from the rear surface. Do not assign the letter A the meaning "width" just because that was the case for the previous overlay.
In the product card wooden decor N-106 several versions are listed. For example:
| Version A × B × C | What changes when selecting |
|---|---|
| 311 × 70 × 8 mm | The smallest overall dimensions among the options listed here |
| 400 × 90 × 10 mm | Both frontal dimensions and the thickness increase |
| 488 × 110 × 13 mm | More space is required on the facade and in front of it |
These are the dimensions of a real model, not universal proportions for applied decor. The table shows why choosing the longer version requires rechecking the entire assembly: not only the length of the ornament changes.
On the resulting part, measure the distances between the same points marked on the diagram. For a complex contour, it is convenient to place the product on a flat backing and check its outer dimension at the extreme protrusions. Do not press the measuring tool against thin carving with force.
Dimension C, if it denotes the overall thickness, cannot automatically be considered the depth of the carved recesses. The overlay may retain a base beneath the relief. For checking adjacent parts, the most protruding point of the installed product matters, and for evaluating the pattern, the difference between the peaks and recesses matters as well.
Measure the installed protrusion from the facade surface. If the diagram provides for a backing or another intermediate layer, its dimension is added to the thickness of the part. For a temporary trial fit, do not use a random thick spacer: it will change the position of the relief and may create a conflict that does not exist in the actual assembly.
Record the nominal dimensions from the product card and the sample measurement results separately. Any difference requires comparison with the manufacturer's tolerances and the project conditions. One measured specimen does not justify assigning your own tolerance to the entire future batch.
The free field of the facade must be counted
The outer width of the door is rarely equal to the space available for carving. Part of the surface is occupied by the frame, moldings, handle, and necessary clearances. For the trial fit, identify specifically the free field between these constraints.
A conditional example: the facade width is 500 mm, and the frame sections occupy 60 mm on each side. That leaves 500 − 60 − 60 = 380 mm. If the project requires another 20 mm of free field near the overlay, its permissible width under this condition is 380 − 20 − 20 = 340 mm.
With an overlay width of 311 mm, after centering there will be (380 − 311) / 2 = 34.5 mm on each side. The horizontal condition is met. A 400 mm wide version no longer fits within the same field. All facade and clearance dimensions in this calculation are taken as an example; there is no universal 20 mm standard here.
Such a comparison is valid when the selected size is positioned horizontally. If the overlay is intended to be rotated, check its overall dimensions in the new position against the contour or a sample. Do not automatically carry over the previous width value into the calculation.
Then check the height and protrusion. If the handle overhangs the installation location, compare distances from the same facade plane. Exceeding the clearance over the decor thickness only means there is no geometric intersection in the static position. For a comfortable grip on the handle, additional space will be required, which is checked by hand on a mockup.
For the adjacent hinged door, check the entire opening trajectory. Overlays may not touch when the facades are closed and may collide when one of them is rotated.
A paper template helps rule out an unsuitable size
Before ordering, you can print the contour at full scale or cut out a rectangle using the extreme dimensions. When printing, disable automatic page scaling and verify the reference dimension with a ruler. Otherwise, the template will be neat but incorrect.
The rectangle shows the occupied field. The ornament contour additionally helps you see where the leaves are directed and how close they come to the handle. For a first assessment, lay out such templates on all facades included in the composition, not just on one door.
Paper does not convey protrusion, shadow, or contact of the back surface with the base. If the doubt is specifically about thickness, you can supplement the template with a conditional volumetric mockup based on known dimensions. It will help detect intersection, but it still will not confirm the shape of the actual overlay or its suitability for finishing.
Use the template as a preliminary screening. Ordering a sample that already does not fit within the available field by its flat contour only makes sense if a decision has been made in advance to modify the facade itself.
How to test-fit one overlay on real furniture
For the first fitting, place the front horizontally on a protected surface. Position the handle or its exact mock-up, and attach the intended profiles. An area without adjacent parts will give an incomplete idea of the future location of the carving.
Mark the axis and basic offsets on a protective carrier that does not damage the surface. Place the overlay without glue and evaluate not only the distances to its extreme points, but also the position of the center of the pattern. The geometric center of the overall rectangle of an asymmetrical ornament does not necessarily coincide with the place around which the composition is perceived.
After choosing the position, check the front in its working orientation. For a vertical fitting, secure the decor in a way that is safe for the part and the base. Do not count on thin leaves supporting the overlay's own weight on a random strip of tape. Adhesive tape can also leave a mark on the wood or remove a fragile finish.
It is useful to take three photos: the whole item from the front, the area with the handle and frame, and a side view of the joint. The first preserves scale, the second preserves distances, and the third preserves protrusion. In each photo, it should be clear which option and position were being checked.
If the customer is choosing between two positions, record both offsets and show them on the same front under identical lighting. Comparing a close-up of one version with an overall view of the other does not give a reliable idea of the difference.
The back surface must align with the base
Carved wooden overlays for furniture can be installed on a flat panel, a framed front, or a profiled part. In each case, a sufficient contact area is needed that matches the chosen fastening method. Matching face dimensions do not confirm this.
Place the sample at the installation site without adhesive. See where it touches the base, whether it wobbles, and whether any unintended gaps remain. Consider the design of the element itself: a recess or groove on the back may be provided by the manufacturer, so the absence of contact over the entire area is not always a defect.
A framed facade can present various situations:
- The overlay rests entirely on one flat part. Check the available area and the method of attachment.
- The ornament extends from the panel onto the protruding frame. The height difference must be compared with the geometry of the back surface.
- The part covers the joint of components that the design allows to move. The attachment of the decor must not block this movement.
The last case is especially easy to miss in a beautiful frontal photo. The overlay looks good, but it connects areas that must not be rigidly joined by the chosen method.
Do not try to compensate for poor fit with an arbitrary amount of adhesive. The permissible layer thickness and fixation method depend on the specific compound and base. If a different back surface is required, first agree on the possibility of processing or choose another model. Sanding the base can change the thickness of thin relief areas.
A symmetrical part and its mirrored pair are checked differently
For a central symmetrical element, one instance is usually enough to assess the shape and initial fit. In a paired composition, the direction of the ornament must also be established: where the leaves face, how the scroll opens, and which way the top edge rises.
The catalog contains separate cards overlays N-221L и N-221R. Such designations must be carried over into the order in full. Two parts with the same letter at the end of the article number do not form the required left and right pair.
For the first scale selection, you can start from one side. Before purchasing a set, check the card of the opposite model, the corresponding size, and the availability of the required version. If the thread direction is essential to the composition, try both actual parts at the same time.
Rotating the overlay 180° does not create its mirror image. Along with the scroll, the position of the upper and lower parts of the ornament will change. Flipping it face down toward the base also does not solve the problem: the working and back surfaces have different purposes.
There is another difference in the designations. In the N-221L card, the dimensions are written as A × B × C × L; one of the options is 60 × 70 × 6 × 82 mm. The letter L in the dimension chain refers to a separate dimension on the diagram, while the letter at the end of the article number refers to the model designation. When copying the order, do not mix up these two fields.
On the assembly drawing, indicate the location of the pair when viewed from the front side of the furniture. Leave the article number itself in the manufacturer's designation: if the craftsman mentally views the front from the back, that is not a reason to rename the left part as the right one.
First the main ornament, then the surrounding decor
For a front with a central overlay, start with it: its size and protrusion determine the remaining field. Carved decorative inserts for furniture convenient to compare within this specific task — on the same door, next to the same handle.
After choosing the main element, you can refine the frame made of wooden moldings for furniture and a suitable one Decor for Molding. At the same time, the profile on which the fit of the overlay depends must already be present at the trial assembly. Its verification cannot be postponed until the final order.
For a furniture portal, the same principle applies at scale. A sample wooden bracket is assessed together with the protruding part of the carcass; wooden capital — with the one pilaster or columnthat it completes. A single match in width at the front is not enough if the depth of adjacent elements differs.
After successful verification, the central overlay can become part of the finished furniture. But first determine whether it will remain suitable for installation after all planned trials. A part with several stain stripes or experimental drilling cannot be considered a finished production item in advance.
How to check a single wooden rosette
Wooden sockets often repeat on several fronts. It is convenient to place one specimen in turn against all locations: the central panel, the corner of the frame, the intersection of profiles. The same location name does not mean the same available surface.
In the center of a flat panel, check the scale and position of the pattern. At the intersection of the moldings, also check what the back of the rosette rests on: the panel, the tops of the profiles, or a specially prepared base. If the piece rocks on two protrusions, the adhesive layer should not be applied by eye.
A photo of a single rosette on the facade helps you evaluate it on its own. To understand the repetition frequency, lay out the remaining outlines across the entire piece. Four dense ornaments on a small door can fill the field more than it seems when trying on a single instance.
For a rosette with a pronounced pattern direction, keep the top and bottom on the diagram. A round outer contour does not yet mean that the element looks the same at any rotation.
Beech and oak are compared with the future finish in mind
Beech is often chosen for opaque painting, when the overlay should receive the same color as the facade. Oak is considered when you want to preserve a noticeable texture under oil, stain, or clear lacquer. These are working scenarios, not a prohibition on clear finishing beech or painting oak with enamel.
On a carved piece, the wood looks different than on a flat panel. The fibers cross the protrusions and recesses, and the pattern may change along the leaf or scroll. Therefore, a sample of the same species but with a different relief shape gives only a preliminary idea of the result.
For a clear finish, compare the overlay with the material of the facade itself. The same species name does not promise the same shade after the same stain: the source wood, grain direction, and surface preparation differ. The test should be done on both components of the future furniture.
A single successful instance also does not show the full possible range of texture. If the order includes a clearly visible pair, agree in advance on the requirements for their visual matching. A geometric match of article numbers and a match of wood grain are different conditions.
The preparation of the blank and sanding are part of the choice
On the page quality of wooden products STAVROS separates blanks for enamel and for tinting. In the first case, the lamellas are not matched by color and texture; in the second, they are matched, although tonal differences between items are still possible.
Surface treatment is selected separately. The "Standard" category includes milling and machine sanding, while "Prestige" also includes detailed hand sanding. This is an independent order parameter that cannot be replaced by an entry such as "beech" or "oak".
If the sample overlay was finished by hand before painting, record the preparation performed. Otherwise, a batch of the same article will appear different simply because the sample received additional treatment. When planning a series, take into account the time this operation will require for each part.
It is worth inspecting not only large flat surfaces. Check narrow recesses, leaf edges, and areas where the sanding tool must preserve the clarity of the pattern. An attempt to quickly remove roughness from the raised areas can round off the edges that define the character of the carving.
The test paint application is performed after checking the fit
First measure the part and complete the dry fit. Then proceed to the coating. This order preserves the ability to calmly examine the back surface and avoids wasting time painting a variant that does not fit geometrically.
Use the finishing system intended for furniture: preparation, primer, tinting composition, topcoat. If instead of the future technology you simply apply a paint similar in color, the sample will confirm only an approximate color solution.
Carved relief is especially revealing with patination. The composition may remain in the recesses, while the raised areas are cleaned according to the chosen technology. Changing the depth of the ornament or the method of removing excess alters the pattern. Approving such a finish based only on a smooth board is not sufficient.
Check the result after the necessary holding times established by the material manufacturers. Look at the part under frontal and side light, then next to the facade under the intended lighting. A dark shadow in a recess and a darker wood stain may look similar in one photo, but different when the part is rotated.
In the test record, save the compositions, color, sequence of layers, and preparation. For patinated relief, add close-up photographs and an overall image. If one of the coating materials changes, the previous result cannot be considered automatically reproduced.
Several tests on different areas of one overlay are convenient for an initial comparison of shades. But such a part does not show how the entire ornament will look in the chosen system. After selecting the color, a complete test application is needed, especially if the boundary of the tests passes through leaves or scrolls and interferes with evaluating the pattern.
The assembly test piece is planned separately from the color
A shade check does not confirm bond strength. If the fastening method has not yet been determined, assemble a test joint based on the same material and with the same surface preparation that the furniture will have.
The adhesive is chosen for compatibility with the wood, substrate, and finishes, as well as for the conditions in which the product will be used. In the product instructions, check the preparation, layer thickness, fixing, and holding time. Do not transfer the regime from one assembly material to another just because both are intended for wood.
Plan the order of finishing and installation. An overlay glued to an open substrate and painted together with it, and a pre-painted part on a finished facade, create different bonding conditions. The test piece must reproduce the actual future assembly.
If the check involves pull-off, cutting, or drilling, set aside the part for testing in advance. A single color reference should not be used simultaneously for a destructive test. After such a test, the sample may still be useful for analyzing the joint, but no longer for installation on finished furniture.
What to record after the sample is approved
The phrase “I like the overlay” leaves too many questions for the purchaser and assembler. What is needed is a record that links the specific execution, position on the furniture, finish, and test result.
It is convenient to create a single approval card. It does not have to use a complex production system — a clear table and drawing are enough.
| Field | What to fix |
|---|---|
| Position in the project | For example, DEK-01; this is the workshop’s internal designation |
| Supplier SKU | Fully, including the designation of the left or right model |
| Dimensional version | All dimensions from the card with a reference to the diagram |
| Control measurements | Actual dimensions of the sample and measurement conditions |
| Installation location | Facade, side, axis, offsets from selected datums |
| Material and preparation | Species, blank finish, sanding quality |
| Finishing | Workshop code, compositions, and link to the signed color sample |
| Connection | Base, installation method, and verified work sequence |
| Result | What is approved: shape, fit, color, mounting assembly |
| Quantity per product | Separately for each model and orientation |
| approval date | Together with the drawing version and the name of the person responsible |
| Link | Product page address and saved variant parameters |
Separate intermediate decisions. For example: geometry approved, color requires another sample, the right part has not yet been checked. This status is more precise than a general "approved" and prevents accidentally ordering the entire pair before verification is complete.
After final approval, sign the sample itself or its packaging. The marking must link the physical part to the record, especially if several similar overlays of different thicknesses are lying on the table.
How to move from one part to an order for six cabinets
Suppose that for one cabinet, one left overlay, one right overlay, and two identical sockets are approved. For six cabinets, the calculation according to the specification looks like this:
| Position | For one cabinet | For six cabinets |
|---|---|---|
| Left overlay | 1 pc. | 6 pcs. |
| Right overlay | 1 pc. | 6 pcs. |
| Rosette | 2 pcs. | 12 pcs. |
| Total | 4 pcs. | 24 pcs. |
Suppose that initially only one left overlay was purchased. If it is decided to keep it as the reference, the production purchase still includes 6 left, 6 right, and 12 sockets. In total, 25 parts will be purchased, of which one is intended for inspection and 24 are for the furniture.
If the sample has passed the checks, matches the approved finish, and will go on one of the cabinets, then 5 left + 6 right + 12 sockets = 23 parts need to be purchased additionally. Together with the first overlay, this will make a complete set of 24 pieces.
After checking an additional right part or socket, the calculation is updated according to the same rule. Only those instances that are actually suitable and allocated for production assembly are subtracted from the requirement. A painted test piece left in the workshop is not counted as a remainder for installation.
Reserve is specified as a separate line with a reason: allowance for damage during processing, future repair, or an additional sample. A universal 10% addition poorly describes an order where whole parts of a specific side matter. One extra left overlay will not replace a missing right one.
When a sample should be kept in the workshop
For a repeatable series, it is useful to keep an approved part as a reference for shape and finish. Store it so that thin protrusions do not bear load from neighboring items, and the face side does not rub against packaging. Storage conditions are chosen taking into account the requirements for the wooden product and the applied coating.
Keep the approval card and photographs of the finished furniture nearby. After a few months, it is difficult to reconstruct from a single overlay at what distance from the handle it was positioned and which part of the relief was facing up. A photograph of the entire front complements the physical reference.
Distinguish between the appearance reference and the untreated control sample. A coated part is convenient for color comparison; a sample before painting allows you to compare the original surface. If both tasks are essential for production, one sample does not always fully cover them.
For a new batch, compare parts under the same lighting. A random phone snapshot of the sample should not become the sole basis for demanding an exact shade match. The wooden reference itself and its coating can also change during storage, so keep the date and the process record.
What to check in the next delivery
An approved sample helps decide on the model, but it does not replace incoming inspection of the batch. Before finishing, recount the parts by individual article numbers and sides. For a mirrored pair, a total of “twelve overlays” says nothing about the correct ratio of left and right.
Verify dimensions, species, preparation, and processing quality against the approved card. Inspect fine carving and the mounting surface separately. Check control dimensions using the same scheme that was used for the sample and according to the agreed accuracy requirements.
For a transparent finish, lay out the parts by future products before painting. This allows you to assess the combination of texture within a visible pair or a single front. If the difference exceeds the agreed requirements, resolve the issue before applying the coating, while the original condition of the parts is still available for comparison.
When replacing the item code or changing the design of the base, repeat the corresponding check. A new model may match in outer dimension but have a different back surface. For it, the old fit approval is no longer sufficient.
When a separate trial order is not needed
If the workshop repeats the same furniture model, keeps a current reference, uses the previous base and an unchanged finishing system, a new purchase of a single part may not add useful information. In that case, you can proceed to the set with standard incoming inspection.
A new check is needed when a significant parameter changes: size, wood species, finish quality, coating, frame profile, or handle position. You do not necessarily have to repeat the entire process. For example, moving the handle requires a new fit check of the available space, while changing the stain requires a new color test.
A separate delivery of a sample is also not always justified if the required item is already in the workshop and exactly matches the future order. First check its marking and processing history. A similar overlay without a size designation is not considered a confirmed sample.
Additional questions before approval
Can the edge sheet be cut if the overlay does not quite fit?
Trimming changes the contour and may weaken a thin section or expose end grain that would otherwise accept the stain. First check whether a smaller version is available and whether the position can be changed. If the modification remains part of the project, agree on its acceptability and test it on a separate piece. The specification will need a note about the modification: a standard applique by itself no longer describes the finished result.
How can a sample be approved with the customer remotely?
Photograph the entire front, the piece next to a ruler, and the relief from the side; label the item code, size, and position. A short video while rotating the front will help show shadows and protrusion. However, color may differ on different screens. If an exact color match is a condition of the order, send a physical color sample or arrange an in-person comparison before approval.
Will one model work for two doors of different widths?
Check the available field of each door separately. On a narrow door, a size suitable for a wide applique may leave insufficient space to the frame. The solution depends on the overall composition: sometimes one model is kept and the position is changed, sometimes other versions are chosen. Both fronts need to be shown together, because individually successful fit checks do not yet confirm the relationship of the elements as a pair.
Where to buy carved elements individually
In the STAVROS catalog you can select Carved wooden elements for a sample facade. On the page conditions for manufacturers shipping from one piece is indicated. For the selected model, please check the availability of a specific size, wood species, and finishing option.
To buy one carved element as a sample, provide the supplier with the full designation and the purpose of the check. For example: one overlay of a specific size in oak for a clear finish is needed; first the fit to the front will be checked, then a test finish will be applied. If necessary, attach a front view and a section of the installation area. Available drawings and product models will help clarify the geometry in advance.
The cost of the sample stage includes the price of the part, delivery, and the necessary work with the sample. If another shipment is required after approval, account for it separately. Compare options of the same readiness: an inexpensive blank with additional hand preparation and a more carefully finished part will require different workshop time.
In the schedule, leave room for receipt, fitting, finishing with the required curing times, and the customer's decision. The ability to buy carved decor by the piece does not mean that any version is immediately available. Before approving the sample, it is useful to also find out the lead time for the future set.
For ordering the remaining parts, proceed with a completed specification: article number, side, size, material, preparation, finish, and quantity. Separately specify the fate of the first part — installation in furniture, storage as a reference sample, or use for testing. Then the trial purchase will provide a clear basis for the next order.