Article Contents:
- When the kitchen requires an accent ceiling
- Open plan: a kitchen without walls needs boundaries from above
- High-ceilinged kitchen or private house: the ceiling as a resource
- Kitchen with non-standard structural features
- Kitchen as the main room
- Which slatted solutions are suitable for a kitchen ceiling
- Material requirements for a kitchen ceiling
- Lacquer coating: maximum practicality
- Batten direction: horizontal and vertical
- Partial batten ceiling over the work area
- Partial ceiling over the dining area
- Batten ceiling and ventilation: compatibility
- How molding works on a kitchen ceiling
- Why polyurethane is the only right choice for the kitchen
- Cornice as a mandatory minimum
- Moldings on a kitchen ceiling: zoning and structure
- What definitely not to do with molding in the kitchen
- Combining light, ventilation, and decor: technical integration
- Lighting in a slatted ceiling: three solutions
- Ventilation: integration without compromise
- Points for a chandelier and pendant light
- Approaches for modern kitchens
- Minimalism: slats as the only accent
- Scandinavian style: light wood and white decor
- Loft: dark wood, metal, minimal decor
- Approaches for classic kitchens
- Modern classic: balance of nature and architecture
- Provence: wood with patina and delicate relief
- Neoclassical style in a spacious private house kitchen
- Mistakes that make a ceiling feel heavy
- First mistake: dark slatted ceiling with low ceilings
- Second mistake: too many slats without gaps
- Third mistake: cornice disproportionate to the room
- Fourth mistake: everything dark or everything identical
- Fifth mistake: underestimating lighting
- Table: solutions by kitchen type
- Practical algorithm: from concept to installation
- Step 1: Define the slatted ceiling area
- Step 2: Choose material and finish
- Step 3: Design lighting
- Step 4: Address ventilation
- Step 5: Choose cornices and moldings
- Step 6: Install in the correct sequence
- FAQ: Questions and Answers
- About the Company STAVROS

The kitchen is a space that does not forgive ill-considered decisions. Steam, grease, temperature fluctuations, daily active use—this is an environment where only the right materials survive. But the kitchen is also a room where a significant part of life is spent. Cooking, socializing, having breakfast, gathering as a family. And it is here that the ceiling, which one almost never thinks to pay attention to, can create or destroy the atmosphere of the entire space.
A ceiling made of slatted panels in the kitchenis a solution that simultaneously answers the practical question (what to cover the kitchen ceiling with?) and the aesthetic one (how to make the kitchen beautiful?). AndCeiling molding—ceiling cornices, moldings, relief elements—are the architectural frame that completes any space and gives it character.
How to combine these two solutions in the kitchen—competently, without conflicts and without mistakes that make the ceiling visually heavy or technically problematic? This is exactly what we will discuss—in detail and honestly.


When the kitchen calls for an accent ceiling
Not every kitchen needs a complex ceiling solution. But there are situations where working with the ceiling becomes not a whim, but an architectural necessity.


Open floor plan: a kitchen without walls needs boundaries from above
An open kitchen-living room is the most popular layout scheme in modern apartments. The space is unified, furniture is arranged by zones, but without visual boundaries it is perceived as one large undivided area. A slatted ceiling over the kitchen area is one of the most elegant ways to create zoning 'from above'. A wooden ceiling 'island' over the work surface or dining area clearly defines the functional space without a single partition.
This works on a simple principle: when the ceiling over two adjacent zones differs in material or texture, the brain reads them as different spaces—even in the complete absence of walls.
Our factory also produces:


High kitchen or private house: the ceiling as a resource
In private houses, kitchens often have ceilings of 3 m and higher. This is a resource that, when used correctly, creates a sense of scale and generosity of space. But without elaboration, a high ceiling looks empty and non-functional.
Slatted panels for the kitchen ceilingcombined with an expressive cornice create a vertical architectural structure that 'works' the entire volume of the room—from floor to ceiling. This is especially important in kitchens with high wall cabinets: slats above them create a horizontal boundary and visually 'close' the space.
Get Consultation
Kitchen with non-standard structural features
Beams, uneven ceilings, level differences, utility ducts—all of these are the reality of most kitchens, especially in older buildings. A slatted ceiling is the perfect tool to conceal all these imperfections behind a single decorative plane, without resorting to drywall cladding.
Kitchen as the main room
There are houses and apartments where the kitchen is the center of life. Large, bright, with a dining table for 8–10 people. In such a space, the kitchen deserves the same attention to detail as the living room. And the ceiling is no exception: it becomes part of the architectural concept, not just 'what's up there.'
Which slatted solutions are suitable for a kitchen ceiling
The kitchen is a specific environment. Not every slatted panel that works well in a living room is suitable for a kitchen ceiling. Let's examine the options specifically.
Requirements for kitchen ceiling material
A kitchen ceiling is an environment with constant exposure to steam, grease particles from cooking, and temperature fluctuations between a 'working stove' and an 'open window.' This means:
-
The material must allow for wet cleaning without damaging the surface
-
The coating must be resistant to grease stains
-
The design must allow access to utilities (ventilation, electrical)
From these requirements follows a direct conclusion: for a kitchen ceiling, slatted panels with lacquer coating or oil coating with a high degree of protection are suitable. Open (unvarnished) wood on a kitchen ceiling will absorb grease contamination and darken within several months of active use. MDF without moisture-resistant treatment will swell under systematic exposure to steam.
Lacquer coating: maximum practicality
Slatted panels with matte or semi-matte lacquer coating are the optimal choice for a kitchen ceiling. The lacquer creates a barrier between the material and the contaminated environment: grease is removed from the lacquer coating with a damp cloth, the surface does not absorb vapors.
For a kitchen in a light interior — MDF slats with white matte lacquer. For a kitchen in a natural style — oak or ash slats with clear matte lacquer, which protects the fibers and preserves the natural texture.
Slat direction: horizontal and vertical
On the ceiling, slats are always positioned horizontally — in one of two directions:
Across the long axis of the room — slats are perpendicular to the main direction of movement in the kitchen. Visually expand the space, make it wider.
Along the long axis — slats are parallel to the direction of movement. Create a sense of depth, 'stretch' the kitchen lengthwise. Good for narrow kitchens.
The choice of direction is a design decision that must be made taking into account the proportions of the specific room and the location of the dining area.
Partial slatted ceiling above the work area
Above the work surface and stove, a slatted ceiling acts as a functional 'roof' for the work zone. Directional lighting can be integrated directly into the structure—between the slats or at the ends of the panel field. This creates uniform task lighting without a separate system under the shelf.
A limited slatted ceiling area (only above the work counter, without extending across the entire kitchen) is a more delicate approach that avoids a sense of overload in small kitchens.
Partial ceiling over the dining area
Above the dining table, a slatted ceiling acts as a 'dome' for the dining area—visually unifying the space where the family gathers. In an open plan, it's a zoning technique; in a separate kitchen with a large dining area, it's an architectural gesture that emphasizes the importance of the space.
For the dining area, the choice of material can be more flexible than above the stove: exposure to steam is significantly less. Natural oak with an oil finish above the dining table is appropriate and beautiful.
Slatted ceiling and ventilation: compatibility
This is a practical issue that needs to be resolved before installation. If the kitchen is equipped with a range hood and forced ventilation, the slatted ceiling design must include ventilation openings or leave areas uncovered for ventilation ducts.
Gaps between the slats provide a certain degree of air permeability for the ceiling structure. With a gap of 15–20 mm or more, the slatted ceiling practically does not impede ventilation—air passes freely through the gaps. With tightly spaced slats (gap of 5–8 mm), special ventilation grilles must be provided.
How molding works on a kitchen ceiling
Ceiling molding—cornices, moldings, relief elements—on a kitchen ceiling: is this realistic? Yes. With the correct choice of material, shape, and placement.
Why polyurethane is the only right choice for the kitchen
Plaster molding on a kitchen ceiling is a problem. Plaster is hygroscopic: it absorbs moisture, turns yellow, loses relief clarity. Under kitchen steam conditions, a plaster cornice will start to 'melt' within a few years.
Polyurethane Ceiling MoldingsPolyurethane is a fundamentally different story. Polyurethane is waterproof, doesn't react to steam, doesn't yellow from moisture, doesn't crumble. With proper varnish or acrylic coating, a polyurethane cornice in the kitchen will survive several renovation cycles without replacement.
Ease of cleaning is also important for the kitchen: a polyurethane cornice can be wiped with a damp cloth. Grease deposits, which inevitably settle on all kitchen surfaces, are removed from polyurethane decor without effort.
Cornice as the essential minimum
In the kitchen, as in any other room, a cornice is the boundary between the wall and ceiling that creates completeness. Without a cornice, the wall/ceiling transition looks like an unfinished renovation.
For the kitchen, choose a cornice with practical logic:
-
Smooth profile without ornament - easier to clean: no relief indentations where grease accumulates
-
Width 50–80 mm - sufficient to create an expressive horizontal line, doesn't create extra surface for contamination
-
Semi-matte finish - doesn't glare under directional lighting
For kitchens in a classic style, the cornice can be more expressive—with a moderate profile of 90–120 mm. But the ornament should be minimal: deep relief on a kitchen cornice means regular cleaning with a toothbrush.
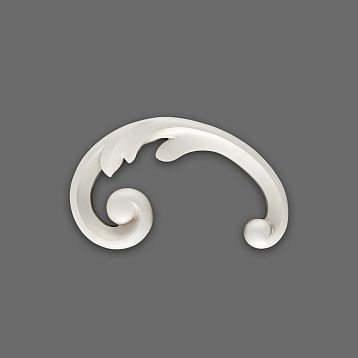
Moldings on the kitchen ceiling: zoning and structure
Moldings on the kitchen ceiling create several effects:
Zoning. A molding ring around the area of a slatted ceiling above the dining table turns the slatted 'island' into a finished architectural object. The border between the smooth ceiling and the slatted area, framed by molding, looks like a thoughtful solution, not like a 'glued-on piece.'
Hidden lighting. A molding along the perimeter of the kitchen, 15–20 cm from the walls, creates a 'shelf' for hidden LED strips. Diffused light behind the molding is an elegant way to emphasize the volume of the ceiling and create warm background lighting.
Structuring a smooth ceiling. If the slatted ceiling covers only part of the kitchen, moldings on the remaining part of the ceiling create symmetry and balance: a smooth ceiling with moldings + a slatted area = a unified architectural concept.
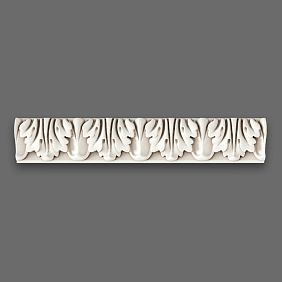
What definitely should not be done with stucco in the kitchen
Rich stucco decor with acanthus leaves, intricate rosettes, and ornamental friezes is not for the kitchen. The reason is simple: grease buildup in complex relief is a problem that turns beautiful decor into a source of constant irritation. Kitchen decor should be such that it can be wiped with a cloth in 30 seconds.
The simpler the relief—the more practical. The more geometric the shape—the easier to maintain. In the kitchen, the principle is 'architectural expressiveness without ornamental complexity.'
Combining light, ventilation, and decor: technical integration
This is the section that most articles skip over - and completely in vain. The kitchen ceiling is not just a decorative surface, but also a place for lighting fixtures, ventilation, and often for hidden utilities. All of this needs to be integrated before installation, not after.
Lighting in a slatted ceiling: three solutions
Directional fixtures between the slats. The most common solution. The fixture is mounted in the opening between the slats: the cable is routed along the MDF base even before the slats are installed. This requires pre-calculated placement of fixtures and cable routing.
Important point: choose fixtures with a diameter that fits within the gap between the slats. With a 20 mm gap - these are narrow track lights or small-diameter spotlights. With a 30-40 mm gap - the possibilities are significantly wider.
Backlighting behind the slats (backlight). An LED strip on the MDF base behind the slats creates diffused glow through the gaps. The effect is a warm, even backlight that 'dissolves' the slatted ceiling in light. Especially beautiful in the evening when the main lighting is dimmed.
Perimeter lighting in molding. An LED strip in the 'shelf' of the ceiling molding illuminates the ceiling with diffused light. Combined with directional fixtures in the slatted area, it creates multi-layered lighting - different zones are illuminated with different intensity.
Ventilation: integration without compromise
For a kitchen with forced ventilation - the ventilation duct must be integrated into the ceiling structure before installing the slats. Standard scheme: load-bearing frame → ventilation duct in the frame space → grille in the area between the slats.
If the ventilation grille ends up in the slatted ceiling area, it needs to be selected to match the style: a wooden grille matching the color of the slats, a matte metal one matching the cornice color. A white plastic ventilation grille against a dark oak background is not a solution.
Points for a chandelier and pendant light
Above the dining table—typically a central pendant light or a group of pendant lights. If a slatted ceiling is installed over this area, the cable outlet point must be planned to fall exactly in the gap between the slats or in a specially provided opening.
This is a critically important point that needs to be designed on paper before installation begins. Shifting the cable by 5 cm after installing the slats means dismantling part of the structure.
Approaches for modern kitchens
A modern kitchen encompasses a wide range of styles: minimalism, Scandinavian style, loft, modern classic. Each has its own logic for working with the ceiling.
Minimalism: slats as the sole accent
In a minimalist kitchen with white fronts, a work surface without ornament, and neutral walls, a slatted ceiling over the work or dining area is the only decorative accent. It carries the entire visual load, and that is why its execution must be flawless.
Oak slats 60–80 mm in a natural tone or with a light gray tint + a smooth, laconic cornice 50–60 mm in white + directional lights between the slats. No moldings, no sockets, no additional elements. One pure idea—expressed through material and form.
Scandinavian style: light wood and white decor
A Scandinavian kitchen features light wood species (birch, ash without tinting, bleached oak) + whiteCeiling molding in the form of a delicate cornice + functional lighting.
Slatted ceiling in Scandinavian style — made of light ash with clear varnish or birch with milky tint. Gap is small — 15–20 mm. Cornice — clean geometric profile. Overall room tone — light, airy, with emphasis on natural light.
Loft: dark wood, metal, minimal decor
Loft kitchen — industrial aesthetics: dark materials, metal accents, exposed structural elements. Slatted ceiling made of dark oak or thermowood — an organic part of the loft language. Cornice — minimal or absent entirely: in a loft, the wall/ceiling boundary often remains 'raw'.
If a cornice is still used — smooth profile in anthracite or dark gray tone. No ornaments, no white elements.
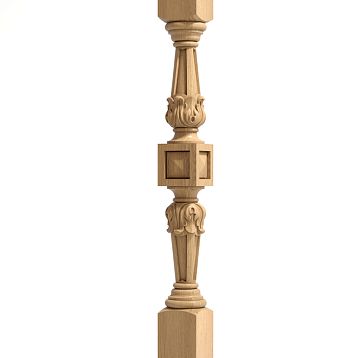
Approaches for classic kitchens
Classic kitchen — a completely different aesthetic logic. Here, slatted panels and moldings work together, creating an architectural interior with pronounced historical references.
Modern classic: balance of nature and architecture
Classic kitchen with wooden facades in a warm tone, countertop made of natural stone or imitation — a space where the slatted ceiling and polyurethane cornice work as a unified architectural system.
Oak slats in honey or tobacco tone over the dining area + classic cornice with moderate profile 100–120 mm around the perimeter + molding framing of the slatted island. White or cream decor on warm wood — contrast creating depth.
Provence: wood with patina and delicate relief
A Provencal-style kitchen features milk-painted or lightly aged wood, pastel tones, and soft relief. In this context, a slatted ceiling: MDF slats in milky white or light beige, narrow (40–50 mm) with a small gap.Ceiling moldings— a cornice with a soft floral or ribbon ornament, in a delicate shape.
For Provencal style, a 'historical touch' is important: lightly aged surfaces, a warm creamy shade for all elements. A sharp contrast of white slats and a white cornice is not Provencal, but modern minimalism. For a Provencal mood, a warm, unified tone with soft transitions is needed.
Neoclassicism in a spacious kitchen of a private house
A spacious kitchen with a ceiling of 3 m or more offers an opportunity for a full architectural statement. A slatted ceiling over the dining area (a 3×3 m or 4×4 m zone) with an expressive framing molding + a rich classical cornice along the entire perimeter of the room + a ceiling rosette above the center of the dining table.
Oak slats in a dark walnut-toned finish. A cornice with a full classical profile — a shelf, cyma, cavetto, ovolo. Moldings create a transition from the slatted island to the smooth ceiling. This is no longer just a kitchen — it is a formal dining room, pleasant for hosting guests.
Mistakes that make a ceiling feel heavy
A 'heavy ceiling' is a professional term for the sensation when the ceiling 'presses down.' It arises from several typical mistakes.
First mistake: a dark slatted ceiling with low ceilings
Dark wood on the ceiling in a room with a height of 2.6–2.7 m creates a powerful lowering effect. The ceiling visually 'descends.' In large, high rooms, this is appropriate — it creates coziness. In a standard apartment — it creates pressure.
Rule: for ceilings below 2.9 m — only light slats on the ceiling. Neutral white, light ash, bleached oak. Dark wood species — only on walls, not on the ceiling.
Second mistake: slats placed too frequently without gaps
A slatted ceiling with a gap of 5 mm or less is perceived as a solid wooden surface, but without the smoothness of a flat ceiling. All the drawbacks: monotony, heaviness — and none of the advantages of relief. The gap must be visible — minimum 10 mm, optimum for a ceiling is 15–25 mm.
Third mistake: a cornice disproportionate to the room
A cornice with a 150 mm projection in a 10 sq. m kitchen with a 2.7 m ceiling is architectural violence. The cornice literally looms over the space. For small kitchens — a cornice no wider than 60–70 mm.
Fourth mistake: everything dark or everything the same
A monotonous ceiling surface — be it dark slats from wall to wall or an absolutely white cornice-less ceiling — creates no architectural interest. The ceiling should have zones of different intensity: a slatted zone + a smooth zone, a relief cornice + a smooth plane.
Fifth mistake: underestimating lighting
A slatted ceiling without lighting is half the result. Slats illuminated from above or the side create an expressive play of shadows in the gaps. Without lighting, the slats lose volume and look flat. Lighting must be planned at the design stage, not after installation.
Table: solutions by kitchen type
| Kitchen type | Suspended ceiling type | Molding type | Lighting |
|---|---|---|---|
| Minimalism | 60 mm slats, 20 mm gap, white lacquer | 50 mm smooth cove | Directed between slats |
| Scandinavian | Ash 50 mm, clear lacquer | 60 mm geometric cornice | Recessed spotlights |
| Modern Classic | Oak 70 mm, honey tone | Classic cornice 100–120 mm | Suspended + LED behind molding |
| Loft | Dark oak 80 mm, matte varnish | Minimal or absent | Track lights |
| Provence | MDF 40 mm, cream tone | Soft profile with ornament | Suspended chandelier |
| Neoclassical | Oak 80 mm, walnut | Rich cornice 120–150 mm + moldings | Multilevel |
Practical algorithm: from concept to installation
Step 1: Define the slatted ceiling area
Over the entire kitchen, only over the work area, or only over the dining table? The answer depends on the kitchen area, ceiling height, and style. For small kitchens (up to 12 sq. m) — partial slatted ceiling. For spacious ones (from 20 sq. m) — full coverage is possible.
Step 2: Choose material and finish
Wood species or MDF. Varnish or oil finish. Degree of moisture resistance. Tinting shade. All this — before ordering, with samples.
Step 3: Design lighting
Location of fixtures, type of fixtures, cable routing. Before installing the frame.
Step 4: Resolve ventilation
Location of ventilation duct, type of ventilation grille. Before installation.
Step 5: Choose the cornice and moldings
According to the style, room scale, type of slatted ceiling. Order with a 10% surplus.
Step 6: Installation in the correct sequence
Frame → electrical → ventilation → slats → cornice → moldings → decorative painting → lighting fixtures.
FAQ: Questions and Answers
Can a wooden slatted ceiling be installed above a stove?
Only if there is an effective hood with good performance. The hood must fully capture the steam flow from the stove. Slats above the cooking area must have a varnish coating — an oil coating is insufficient here.
How difficult is the installationof slatted panels on a kitchen ceilingindependently?
Installing the frame and slatted panels on a level ceiling is accessible to a careful non-specialist. The difficulty lies in integrating lighting and accurately calculating the layout. It is recommended to start from the central axis of the room so that the outermost slats near the walls are symmetrical.
How often should a lacquered slatted ceiling in the kitchen be cleaned?
Preventive wiping — once every 2–3 weeks is sufficient. The lacquered surface does not absorb grease, so dirt is removed with a soft cloth and a neutral detergent. Abrasive agents — absolutely not.
Is special polyurethane needed for a kitchen cornice, or will regular polyurethane do?
Polyurethane as a material is homogeneous and moisture-resistant in itself. The difference is in the coating. For the kitchen, the cornice should be painted with acrylic paint or varnish, which create a moisture-resistant barrier. Standard water-based paint is sufficient for normal kitchen use.
How to choose the direction of the slats on the kitchen ceiling?
Across the long axis — if the kitchen is long and narrow (visually expands). Along the long axis — if the kitchen is square or wide (adds depth). In the area above the dining table — the direction of the slats may differ from the rest of the ceiling if the dining area is separated by a molding frame.
Is it possible to combine a slatted ceiling over the dining area with an ornate cornice around the entire perimeter of the kitchen?
Yes, this is one of the most expressive techniques for a classic kitchen. An ornate cornice creates an architectural frame for the entire room, and the slatted island highlights the dining area. The main condition is proportional correspondence: a 120 mm cornice should be combined with wide slats of 70–80 mm, not narrow 30 mm ones.
How to hide the joint between the slatted area and the smooth ceiling?
Molding around the perimeter of the slatted area is the cleanest method. A molding width of 40–60 mm is sufficient to hide the joint and create a neat frame. The molding is installed after the slatted ceiling and is filled with putty at the joint with the smooth ceiling.
About the company STAVROS
The kitchen is a space that demands both practicality and beauty. These two requirements are not mutually exclusive—if the materials are chosen correctly. A slatted ceiling with a lacquered finish, polyurethane cornices, and molding trim all work together as an architectural system that lasts for years without losing its appearance.
The company STAVROS manufacturesslatted panels for kitchen ceilingsmade from solid wood and MDF with various finishes—including moisture-resistant varnishes suitable for kitchen environments. The rangepolyurethane productsincludes cornices from delicate geometric profiles to rich classical forms—for any style and any ceiling height. Each product comes with a pre-finished surface ready for painting: primer is applied at the factory, the final coat is your choice.
STAVROS—because a good kitchen ceiling is not a compromise between beauty and practicality, but their skillful combination.