Article Contents:
- What is KPU-110 and why its compactness does not automatically solve the mounting assembly
- 20 mm is the face scale of the decorative line
- 4 mm is a small profile, but not proof that it will pass 'behind the pipe'
- 2000 mm is the length on which not only the quantity, but also the joint location depends
- Option 1. Move the decorative band above or below the towel warmer
- Option 2. Break KPU-110 at the mounts
- Option 3. Run KPU-110 continuously behind the towel warmer
- Dimension 1. Height of the future line from the floor
- Dimension 2. Minimum clearance from the wall
- Dimension 3. Mounting cup dimensions
- Dimension 4. Position of supply lines or connections
- Dimension 5. Actual service area
- How to perform the check
- Binding to extreme mounts
- Binding to the outer contour of the towel warmer
- Equal indents
- Do not create a gap just to avoid touching
- 1. There is actually enough space behind the equipment
- 2. The fasteners do not press the trim against the wall
- 3. Service access remains
- 4. The line is actually visible
- 5. There is no unconfirmed temperature risk
- Above the towel warmer
- Below the towel warmer
- At the level of the towel warmer center with a gap
- Layout 2000 + 1400
- Layout 1700 + 1700
- Layout with a technical gap
- Painted wall
- Tile
- Decorative Plaster
- Boundary of two materials
- Paint before installation
- Painting after installation
- If the trim is torn
- If KPU-110 runs behind the equipment but not under the mounts
- If the mounts cover or press down on KPU-110
- If the decor blocks access to the connection
- Water model
- Electric model
- Combined model
- How to build a service loop on the wall
- Why the decorative end should not fall into the key's working area
- First, fix the height around the entire perimeter
- The quantity is counted along the entire route
- The angle is more important than the hidden area behind the towel warmer
- Option A: Consider the towel warmer a full break in the composition
- Option B: Keep the pattern phase as if KPU-110 passes behind the fixture
- A broken belt is easier to maintain
- A continuous belt requires access
- A contrasting color shows dust more strongly
- Alignment to the mirror
- Alignment to the top edge of the tile
- Independent decorative mark
- Continuous line
- Line moved higher or lower
- Line broken
- Complete refusal of trim on this wall
- KPU-110 in wall color
- Contrasting KPU-110
- KPU-110 in the color of metal parts
- Two wall colors
- Mistake 1. Measuring only the distance to the pipe
- Mistake 2. Removing the towel warmer before choosing the composition
- Mistake 3. Finishing KPU-110 almost flush with the mounting cup
- Mistake 4. Placing the joint of the planks behind the equipment
- Error 5. Considering moisture resistance as permission for any thermal contact
- Error 6. Forgetting about future dismantling
- Can KPU-110 be run only between the mounts inside the towel warmer?
- What to do if the towel warmer is very close to the corner?
- Can the trim be run along the tile joint?
- Is it necessary to leave the same gap from the left and right mounts?
- What to do if one mounting cup crosses the line, but the others do not?
- Can KPU-110 be used near an electric heated towel rail?
- Can KPU-110 be repainted later without removing the towel rail?
- Do the ends of KPU-110 near the mounts need to be sealed?
- If a gap reduces the total length below 2 m, will one strip be enough?
- Where to look for an alternative if KPU-110 does not fit the mounts?
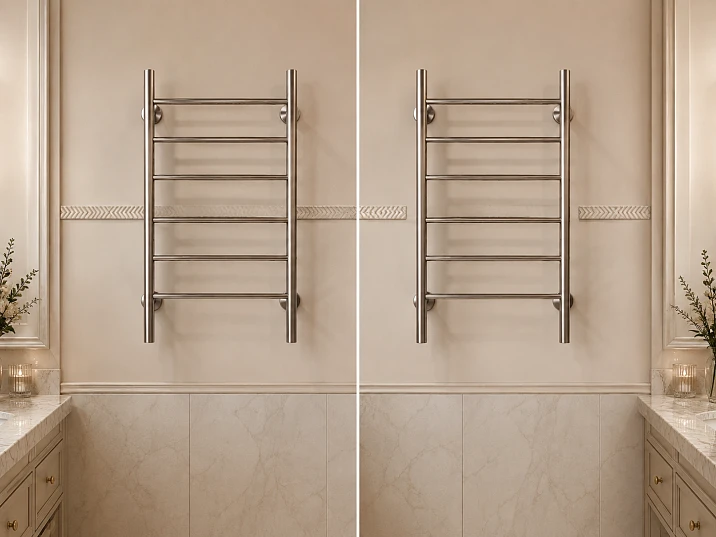
The towel rail is already installed, the wall is finished, the mounts are set, and the equipment is working. After that, you want to add a thin horizontal decorative strip to the wall. For this task, KPU-110 looks like a logical candidate: the profile is compact, its size is 20 × 4 × 2000 mm, and one strip costs 4,360 ₽. But in a finished bathroom, the main question arises not because of the wall length or even the cost. The decorative line intersects with an existing utility unit.
If the wall is 3.4 m wide, mathematically, 2 strips of KPU-110 are needed for a continuous line from corner to corner:
3400 / 2000 = 1.7 → 2 strips.
Cost:
2 × 4 360 = 8 720 ₽.
The purchased length will be 4000 mm, meaning by pure arithmetic, 600 mm will remain. But this arithmetic says nothing about whether the trim can be run behind the towel rail. Between the wall and the equipment, there are mounting cups, brackets, pipes or cables, connections, and service zones. Even a small profile cannot be considered automatically compatible just because it is 4 mm thick.
Therefore, the direct answer is: you do not need to remove an already installed towel rail just for a continuous decorative line by default. First, check whether it is even possible to safely and maintainably run KPU-110 at the chosen level. If the line hits the mounts, the most practical option is either to move the entire strip higher/lower or to make a neat, controlled gap. A continuous line behind the equipment makes sense only when the actual geometry of the mounts allows it and access to the towel rail is not compromised.
What is KPU-110 and why its compactness does not automatically solve the mounting assembly
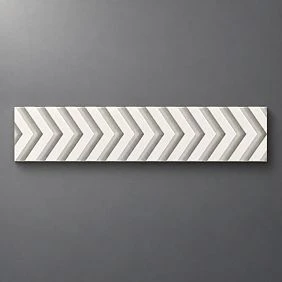
KPU-110 is a decorative polyurethane molding. It is a long-length profile, not an overlay, rosette, or separate molding. The STAVROS card indicates dimensions of 20 × 4 × 2000 mm and a price of 4,360 ₽ per piece.
| Parameter | KPU-110 |
|---|---|
| Type | decorative linear molding |
| Material | Polyurethane |
| Size | 20 × 4 × 2000 mm |
| Length of one plank | 2000 мм |
| Price | 4,360 ₽/pc. |
| For a 3.4 m wall | 2 planks |
| Cost of 2 planks | 8 720 ₽ |
The product card describes KPU-110 as a polyurethane molding for decorative interior design and notes the material's moisture resistance. This makes the profile a suitable candidate for a bathroom as a high-humidity area, but does not eliminate the need to check the specific installation zone.
Buy decorative polyurethane molding KPU-110 reasonably after the actual trajectory of the line relative to the equipment has been determined on the wall.




20 mm — the face scale of the decorative line
Such a profile is much more delicate than a large carved molding. On a bathroom wall, it can work as a thin graphic border: separate two colors, emphasize the mirror level, connect several piers, or continue the horizontal line of furniture.
For a unit with a towel warmer, this is an advantage. The more compact the profile, the easier it is to make a neat finish near the mounting, and the less the decorative line competes with the plumbing equipment.
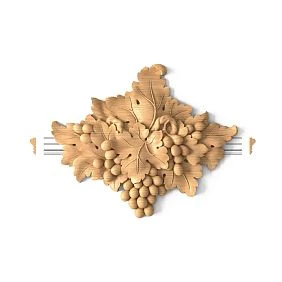
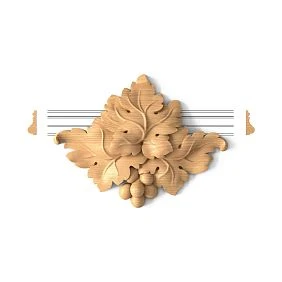
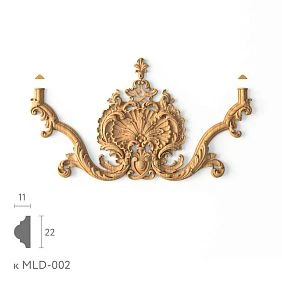
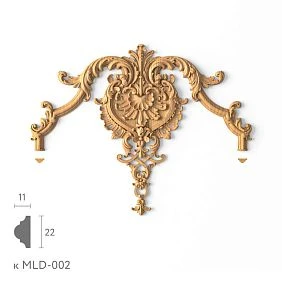
Our factory also produces:
4 mm is a small profile, but not proof that it will pass "behind the pipe"
The figure of 4 mm looks very small. But the actual gap is determined not by the distance to the pipe itself in the freest spot, but by the minimum free space in the area of all parts that the line crosses.
Need to consider:
-
decorative mounting cups;
-
wall brackets;
-
supply lines;
-
connections;
-
protruding nuts and fittings;
-
cable or connection box for an electric model;
-
the possibility of future removal of the equipment.
Therefore, the question "is there more than 4 mm behind the pipe" is too simplistic. Sometimes the pipe is far from the wall, but the mounting socket lies almost flush against it. Sometimes it's the opposite.
Get Consultation
2000 mm is a length that determines not only the quantity but also the location of the joint
On a 3.4 m wall, two planks are sufficient by length, but one joint remains. If it happens to be placed directly behind the towel warmer, access to it becomes inconvenient. It's better to design the joint in an open area of the wall, where the pattern can be neatly aligned and the connection processed.
If you like the pattern of KPU-110, but need to look at other linear elements, you can choose polyurethane trim in the general category and compare the profile on the same wall.
Three working options: move the line, break it at the mounts, or run it continuously
This task has three valid solutions. None of them is "correct in general": the choice depends on the actual position of the towel warmer, the mounts, and the role of the belt itself.
| Option | What happens to KPU-110 | Plus | Main risk |
| Move the belt | the line passes above or below the equipment | no interference with the node | the wall composition may change |
| Break at the fasteners | the profile ends before the towel warmer and continues after it | service access is maintained | need to neatly resolve the endings |
| Run continuously | the line visually continues behind the equipment | the most cohesive graphic | requires real compatibility with mounts and maintenance |
Option 1. Move the decorative belt above or below the towel warmer
This is the simplest technical scenario.
If the horizontal line can be shifted without losing the overall composition of the bathroom, there is often no point in turning decoration into a task of dismantling equipment.
Advantages:
-
KPU-110 runs continuously;
-
mounts do not have to be bypassed;
-
future access to the towel warmer remains the same;
-
the joints of the planks can be placed where it is convenient for the decor, not for the plumbing;
-
installation is performed on an open wall.
But the shift cannot be done "anywhere." You need to check what the decorative belt should be visually connected to: the top of the cabinet, the mirror, the tile joint, the door trim, the paint boundary, the height of the sconce.
Sometimes the original mark is indeed the only logical one. Then we move to the second scenario.
Option 2. Break the KPU-110 at the mounts
This is often the most reasonable option for an already finished bathroom.
The linear profile comes to the towel warmer zone, ends before it, and after the equipment starts again. With proper marking, a person perceives not a "broken profile" but a single horizontal line that is structurally overlapped by the equipment.
The main task here is to determine where exactly the profile should end.
Bad option: one end almost touches the mounting cup, the second is stopped at a random distance.
Good option: both ends follow one logic — for example, equally spaced from the extreme mounts or tied to the outer contour of the towel warmer.
The break is especially justified when:
-
the mounts are large;
-
there is little space behind the equipment;
-
the towel warmer must remain removable without destroying the decor;
-
there are already connections on the wall that need access;
-
the equipment is electrical and has a separate connection point;
-
the geometry behind the towel warmer is poorly visible, so continuity provides almost no visual benefit.
Option 3. Run KPU-110 continuously behind the towel warmer
This is the most striking but the most demanding option.
It is justified if the decorative line must be absolutely continuous: for example, a belt connects all bathroom walls or separates two finish colors.
But first, four things need to be confirmed:
-
KPU-110 physically fits in the minimum free gap.
-
The profile does not fall under the mounting cups and connections.
-
After installation, the ability to service or dismantle the towel warmer is preserved.
-
The temperature regime of a specific zone is compatible with the material and the chosen finish.
If at least one point is not confirmed, the continuity of the line is not worth interfering with the engineering unit.
Why removing a towel warmer just for decor is not a basic scenario
A towel warmer can be water-based or electric. In both cases, dismantling is no longer an ordinary decorative operation.
For a water-based model, removal may affect shut-off valves, connections, sealing, and subsequent commissioning. For an electric one, it affects the connection method and electrical safety. These tasks should not be turned into an instruction like "remove the device and glue the trim."
If a continuous line is possible only after dismantling, the correct order is as follows:
-
first, decide whether visual continuity is truly needed;
-
assess the consequences of the intervention;
-
clarify the dismantling method for your specific model;
-
if necessary, involve a qualified specialist;
-
only after that plan the installation of KPU-110.
Disassembling connected equipment on your own for the sake of a decorative strip is a poor compromise between aesthetics and safety.
Often after the mock-up, it turns out that a neat gap near the mounts is almost invisible, especially when the towel warmer covers that part of the wall.
How to measure the unit: you need a wall map, not a single "4 mm" figure
Before ordering, it is useful to take a simple set of measurements.
Dimension 1. Height of the future line from the floor
Mark it with painter's tape across the entire wall.
This will immediately show which parts of the towel warmer the belt passes through:
-
between the crossbars;
-
through the fasteners;
-
through the pipe;
-
through the thermostat;
-
below or above the entire structure.
Dimension 2. Minimum gap from the wall
Measure not the largest opening, but the tightest point exactly along the KPU-110 path.
If the profile at this mark passes 20 mm from the pipe, but after 100 mm it hits the mounting cup, the value "20 mm free" is useless.
Dimension 3. Mounting cup dimensions
You need to know how much wall each fastener actually covers.
This determines the length of the gap and the position of the decorative ends.
Size 4. Position of supply lines or connections
Even if the decorative profile does not touch the pipe, it should not obstruct access to the connection.
Size 5. Actual service area
Imagine that in two years the towel warmer needs to be removed. Will a specialist be able to do this without breaking the KPU-110 out of the wall?
This check distinguishes a beautiful installation in a photo from a proper engineering and decorative solution.
Mock-up 20 × 4 mm: a simple way to understand the assembly before purchasing
The KPU-110 is thin enough to be easily modeled.
You need a strip 20 mm wide and a small spacer layer simulating a thickness of about 4 mm. For the check, it is not necessary to reproduce the entire pattern. Geometry matters first.
How to perform the check
-
Mark the horizontal axis of the future belt.
-
Make the layout 500–800 mm long.
-
Apply it on the open part of the wall.
-
Bring it to the first mounting point.
-
Check where exactly the conflict occurs.
-
Make the second piece after the towel warmer.
-
Step back to the bathroom entrance and see how noticeable the gap is.
Then repeat the test with the line shifted above and below.
Very often the visual choice becomes obvious:
-
the shifted belt looks cleaner;
-
or the gap is almost completely hidden by the equipment;
-
or, conversely, continuity is so important that it makes sense to separately address the issue of dismantling.
Only after this should you order KPU-110 20 × 4 × 2000 mm.
Break at fasteners: how not to get two random stubs
The biggest danger of a broken line is not the break itself, but poor geometry of the ending.
Tying to extreme fasteners
If the towel warmer has multiple mounting points, the decorative strip can be ended before the leftmost support and continued after the rightmost one. This way, the equipment is perceived as a single "block" within which the line is hidden.
Tying to the outer contour of the towel warmer
Sometimes the fasteners are located deeper within the dimensions. Then it is neater to end the trim not at the cup, but along the outer vertical of the entire structure.
Advantage: the break becomes visually wider, but more logical.
Identical indents
If the line is visible from both sides of the equipment, the ends should have clear symmetry. It doesn't have to be millimeter-perfect if the towel warmer itself is asymmetrical, but a person should be able to read the visual logic.
Don't create a "gap just so it doesn't touch"
A gap that is too small between the relief and the mounting cup is difficult to paint, clean, and maintain. It's better to make a deliberate break than to leave a random narrow slit that collects dust and looks like an installation error.
Continuous line behind the towel warmer: five conditions under which it makes sense
Continuity is justified if several conditions are met simultaneously.
1. There is actually enough space behind the equipment
Not based on a photo, but on the measured minimum clearance along the entire path.
2. The mounting hardware does not press the trim against the wall
KPU-110 should not end up "pinched" between the decorative cup and the base if the mounting system does not provide for this.
3. Service access remains
During future repairs, the towel warmer must be removable without destroying the decorative strip, or this risk must be consciously accepted.
4. The line is truly visible
If almost the entire area behind the fixture is covered by pipes and crossbars, complex continuous installation may not produce a noticeable visual effect.
5. No unconfirmed temperature risk
Polyurethane is moisture-resistant, but the specific allowable temperature for KPU-110 is not stated in the available product card as a special characteristic for contact with hot pipes. Therefore, the profile should not be pressed against heated parts solely based on the material's general moisture resistance.
If this condition is critical, the manufacturer should be asked for the allowable temperature range, or a position without direct thermal contact should be chosen.
Bathroom and moisture: what is confirmed and what should not be exaggerated
STAVROS publishes separate materials about polyurethane decor in bathrooms and restrooms. There, polyurethane is considered a material for wet areas with proper substrate, installation, and finishing.
This supports the KPU-110 scenario in the bathroom.
But three erroneous conclusions cannot be drawn from moisture resistance:
-
"meaning it can be installed in any zone";
-
"meaning it can be pressed against any hot pipe";
-
"meaning the installation joint does not require protection."
A bathroom creates not one, but several loads: humidity, condensation, cleaning, splashes, temperature fluctuations, and the operation of engineering equipment.
For a general understanding of the material, the article STAVROS is useful "Stucco decor for the bathroom and toilet — how to choose moldings and polyurethane decor for walls". It analyzes the humid environment as a whole, and our task is the specific KPU-110 unit with an existing towel warmer.
You can also look at a separate material "Polyurethane stucco in the bathroom: moisture-resistant decor for restrooms" for choosing the base and finish in a room with steam and condensate.
Where to place the belt if the towel warmer is in the way: above or below
Moving the line is not a technical capitulation. Often it is the best design option.
Above the towel warmer
The belt becomes the upper architectural line.
Suitable if:
-
above there is a free painted wall;
-
the line can connect with the top of the mirror;
-
it does not conflict with the sconce;
-
the room is tall enough.
Risk: if the belt is too close to the ceiling cornice, the two horizontals begin to compete.
Below the towel warmer
The belt may connect with the cabinet, the bottom edge of the mirror, or the top of the panel.
Risk: the lower zone has more splashes, cleaning, and household contacts. The actual location relative to the sink, bathtub, and shower needs to be assessed.
At the level of the center of the towel warmer with a gap
This is the most graphic option. The line approaches the equipment from the left and continues on the right. The towel warmer itself becomes part of the composition.
If it is symmetrical and neat, the gap may look even better than a hidden continuous line.
Wall 3.4 m: how to lay out two KPU-110 slats
Mathematically, two 2 m slats are needed.
Total length:
4000 mm.
Wall:
3400 mm.
Nominal remainder:
600 mm.
There are several schemes.
Layout 2000 + 1400
One plank is used entirely, the second is trimmed to 1400 mm.
Plus — simple cutting.
Minus — the joint is asymmetric relative to the center of the wall.
Scheme 1700 + 1700
Two planks are trimmed symmetrically.
Plus — the joint is in the center.
Minus — if the center of the wall is covered by a towel warmer, this is not always convenient for installation and processing.
Scheme with a technological gap
If KPU-110 ends before the towel warmer and continues after it, lengths are calculated for individual open segments, not as one 3400 mm line.
You don't need to automatically buy less just because the central part is excluded. The cutting may be less economical due to several short sections and the need to match the pattern.
Therefore, before ordering, first measure the left and right segments, and then create a cutting plan from two-meter planks.
| Scenario | Quantity calculation |
| Continuous line 3.4 m | 2 planks |
| Belt moved up/down and 3.4 m remains | 2 planks |
| Gap at the towel warmer | calculate the sum of actual segments and cutting |
| Line only on one wall section | calculate the actual length of this section |
If after measuring a continuous option is selected, you can buy two KPU-110 planks for a 3.4 m wall.
Where to make the joint of two planks
It is better to keep the KPU-110 joint away from the engineering complex area.
Bad locations:
-
right at the mounting cup;
-
behind the pipe, where it is difficult to reach with a tool;
-
next to the towel warmer connection;
-
in a small niche between the equipment and the corner.
Better:
-
on an open wall;
-
where it is convenient to align the pattern;
-
in an area with normal access for finishing;
-
away from constant splashes.
The card does not provide a separate pattern repeat step for KPU-110 in the accessible text, so it cannot be guaranteed that any cut will result in a perfect match. Before final cutting, two planks should be laid out and checked for pattern continuation.
For comparison of other patterns and sizes, you can Buy polyurethane trim from the same product group.
Tile, paint, or decorative plaster: the substrate changes the installation method
In the bathroom, KPU-110 may run across different surfaces.
Painted wall
The paint's adhesion needs to be checked. If the coating is peeling, the trim will hold not to the wall but to a weak finish layer.
Tile
A smooth glazed surface requires a mounting system compatible with both polyurethane and tile. The adhesive method used on painted plaster cannot be automatically transferred.
Decorative plaster
The relief of the substrate can reduce the contact area. The thinner the profile, the more noticeable local gaps become.
Boundary of two materials
Sometimes KPU-110 is specifically installed along the "tile / paint" line. Then you need to check the difference in plane levels. If the top and bottom finishes are at different depths, the thin profile may not lay flat.
If the goal is not decorative trim, but a more neutral line between materials, it's worth Buy polyurethane wall moldings comparing the profile with the actual difference in levels.
Painting KPU-110 before or after installation near a towel warmer
Both methods have advantages.
Painting before installation
Advantages:
-
it's convenient to paint the relief;
-
no need to bring the brush close to the pipes;
-
less risk of staining the equipment.
Disadvantages:
-
after installation, there are joints and connections that still require final finishing;
-
you can damage the finished surface during cutting.
Painting after installation
Advantages:
-
single finish;
-
it is easier to hide mounting connections.
Disadvantages:
-
neat access is needed around the towel warmer;
-
equipment has to be protected from paint;
-
narrow areas behind pipes are inconvenient.
If a gap at the mounts is chosen, pre-painting individual segments is often more practical, and after installation only local touch-ups remain.
Color also affects the perception of the gap. KPU-110 in the wall color makes the interruption less noticeable. A contrasting band, on the contrary, emphasizes every end, so it requires particularly precise geometry.
What happens during the next repair of the towel warmer
One of the best ways to test a design is to imagine not today's installation, but a repair several years from now.
If the trim is broken
The towel warmer is removed in its area. The decor remains on the wall.
This is the most serviceable option.
If the KPU-110 passes behind the equipment but not under the mounts
The ability to remove it depends on how the brackets are arranged. If the device can be removed forward without touching the decorative line, the solution may be convenient.
If the mounts overlap or press down on the KPU-110
During dismantling, there is a risk of damaging the trim, paint, and seam.
If the decor blocks access to the connection
This option is better to exclude at the mockup stage.
The decorative line should not make routine maintenance of engineering equipment more difficult without a serious reason.
When a break looks better than a continuous line
Sometimes the technical solution turns out to be compositionally stronger as well.
A gap is good if the towel warmer:
-
is symmetrical;
-
has a clear outer contour;
-
is located approximately in the center of the wall;
-
is painted in a contrasting color;
-
is itself a noticeable interior object.
In this case, the KPU-110 fits to its left and right, and the equipment becomes an "insert" into the horizontal composition.
This can work especially effectively with a black or brass towel warmer on a light wall, if the other lines in the bathroom support the same geometry.
The gap no longer looks like a compromise. It becomes a deliberate technique.
When it is better to move the belt
Transfer above/below is stronger than a break if:
-
the mounts are located asymmetrically;
-
pipes and connections create a visually noisy unit;
-
the towel warmer is shifted toward the corner;
-
the horizontal line passes directly through the regulator;
-
the break turns out to be too wide;
-
the line should continue on adjacent walls at the same level;
-
future equipment maintenance is more important than a continuous composition.
In these cases, there is no point in forcing the KPU-110 to squeeze through the engineering unit.
When continuity truly justifies more complex installation
Continuous KPU-110 makes sense when the horizontal line itself is the main compositional principle of the bathroom.
For example:
-
the lower half of the walls is one color, the upper half another;
-
the trim connects the mirror, cabinets, and several walls;
-
the entire bathroom is built on continuous levels;
-
a break in the most visible spot really ruins the pattern.
But even then, the engineering unit takes priority.
If continuity requires a questionable modification of the towel warmer, it's better to change the decorative scheme. A good interior should not become less maintainable for the sake of a four-millimeter profile.
Water and electric towel warmers: the decorative task is the same, the service constraints are different
Externally, two towel warmers may look almost identical, but for KPU-110 they cannot be considered the same mounting unit.
Water model
A water-heated towel warmer has supply lines and connections to the system. These points must not be covered with a decorative profile in such a way that the molding would have to be broken out for maintenance.
They pay special attention to:
-
bottom or side connections;
-
decorative cups;
-
threaded connections;
-
shut-off elements, if provided by the system;
-
mounts through which the unit is removed from the wall.
If the KPU-110 runs between the crossbars but crosses the connection zone, line continuity becomes secondary. Service access is more important.
Electric model
For an electric towel warmer, the main issue may be not near the pipes, but near the cable, hidden outlet, connection block, thermostat, or the lower part of the unit.
The decorative belt must not:
-
cover the connection cover;
-
hinder access to the regulator;
-
force the wire to be routed over the trim;
-
become a reason for disassembling the decorative wall during maintenance of the electrical part.
If installing the KPU-110 requires opening the electrical connection or removing a permanently connected device, this is no longer wall decoration work. This stage is performed in compliance with the requirements of the specific equipment and, when intervention in the electrical connection is required, with a qualified specialist.
Combined model
A combined towel warmer may have more restrictions: there is both a water circuit and an electric heating element. For a decorative article, there is no point in describing the specifics of a particular model; one practical rule is sufficient: the more engineering elements the KPU-110 line crosses, the stronger the argument for breaking or moving the belt.
Service access: how much wall is better left independent of decoration
A universal service clearance size cannot be specified without a towel warmer model. Different mounts have different cup diameters, removal methods, and dismantling trajectories.
Therefore, instead of a made-up number, a service contour is used.
How to build a service contour on the wall
-
Outline the outer boundaries of the mounting cups with painter's tape.
-
Mark the connections that may require a tool.
-
See how the device is removed from the brackets: forward, up, with a shift.
-
Add a zone where the hand and tool must work without obstacles.
-
Only after this, bring the KPU-110 to the resulting boundary.
This approach is better than a fixed "leave 10 mm" or "leave 20 mm." These numbers could turn out to be both too small and meaninglessly large.
Why the decorative end should not fall into the working area of the wrench
Even if the profile itself does not cover the nut, its edge may end up where the tool needs to be turned during repairs. As a result, the molding remains formally accessible but actually interferes with maintenance.
On the mockup, this is easy to check: apply a tool of the appropriate size to the joint, or ask a specialist to show the work area before installing the decor.
If the line is broken: how to understand whether one plank is enough or two are still needed
A break caused by a towel warmer can reduce the total length of KPU-110, but does not automatically mean saving one plank.
Let us denote:
-
L1— length of the left segment; -
L2— length of the right segment; -
L3...— additional sections, if there are several.
First, calculate:
Ltotal = L1 + L2 + L3 + ...
If the sum is less than 2000 mm, one plank can theoretically cover all sections. But then the cutting layout is checked.
For example, two segments of 950 mm each give 1900 mm. By net length, one two-meter plank seems sufficient. However, only 100 mm of total allowance remains, and actual cuts, end fitting, and the pattern may make this option inconvenient.
Another example: segments of 1350 and 550 mm also give 1900 mm. Here the distribution is different, but one plank is again possible only after a real cutting plan.
Therefore, the commercial logic is as follows:
| Sum of open segments | What this means |
| up to 2000 mm | 1 plank is possible, but cutting is required |
| 2000–4000 mm | usually 2 planks are needed |
| more than 4000 mm | minimum 3, then calculate based on actual segments |
This is not a repeat of the calculation for a 3.4 m wall. Here another question is being addressed: can the gap itself reduce the order.
If according to your segment map one plank truly covers the entire line, you can buy KPU-110 by actual cut, not by the full width of the wall.
If the belt continues onto the adjacent bathroom walls
Sometimes a 3.4 m wall is only one part of the composition. KPU-110 runs along the perimeter, extends onto the wall with the mirror, then onto the wall with the bathtub, and returns to the door.
Then the towel warmer cannot be considered in isolation. The belt mark must match on all walls.
First, the height is fixed around the entire perimeter
If you shift the line upward only on the wall with the towel warmer and leave the old mark on the adjacent wall, a step will appear in the corner. This is a separate decorative technique, but it should not be accidental.
The quantity is calculated along the entire route
The formula is simple:
Ltotal = length of wall 1 + length of wall 2 + length of wall 3 + ... − excluded sections.
Then the total requirement is compared with planks 2000 mm long, and only after that are the joints laid out.
The corner is more important than the hidden area behind the towel warmer
If the choice is between a perfectly continuous line behind the appliance and a neat continuation in the corner, preserving clean corner geometry is usually more valuable. The corner is constantly visible, while the area behind the towel warmer may be almost entirely hidden.
Pattern alignment after a break: should the ornament be mentally 'continued'
KPU-110 is decorative, so the break affects not only the geometric line but also the pattern.
There are two approaches.
Option A. Treat the towel warmer as a full break in the composition
The left and right segments start the pattern independently. This is simpler during installation and makes sense if the appliance is wide and completely covers the central area.
Option B. Maintain the pattern phase as if the KPU-110 passes behind the appliance
This approach is needed if fragments of the wall are visible through the bars and the eye can 'complete' the ornament.
But this requires the repeat length of the KPU-110. It is not separately specified in the available product card, so it cannot be invented. The phase can only be maintained using the actual strip: lay out the product before cutting, mark the hidden section, and continue the pattern after the towel warmer.
This is a useful scenario for an expensive bathroom with contrasting trim, where even a slight mismatch is noticeable.
Cleaning and condensation behind the towel warmer: a continuous line creates another surface
The bathroom is a place where a decorative element should be assessed not only on the day of installation.
Behind the towel warmer, access for cleaning is usually worse. Dust, droplets, and traces of condensation can settle there. A narrow textured strip adds another horizontal edge.
A broken belt is easier to maintain
The open ends are on the outside of the appliance, while the wall behind the towel warmer itself remains plain. It is easier to wipe it down.
A continuous belt requires access
If the distance from the rungs to the wall is small, wiping the top edge of the KPU-110 behind the appliance may be inconvenient. This is not a prohibition, but the everyday cost of continuity.
A contrasting color shows dust more strongly
A dark profile on a light wall, or vice versa, makes the horizontal edge more noticeable. Before choosing a contrast, it is worth imagining not only a fresh interior, but also regular cleaning.
General operating conditions for polyurethane decor in a humid environment can be additionally verified with the STAVROS material about polyurethane wall finishing and wet areas.
What to do if the towel warmer is on tile, but the belt should run along the painted part
This is a common real situation: the lower part of the wall is finished with tile, above it is moisture-resistant paint, and KPU-110 is intended to be used as the boundary.
If the towel warmer crosses this boundary, the decorative profile simultaneously solves two tasks:
-
finishes the transition of materials;
-
passes through engineering equipment.
Here are the priorities:
-
first, check the difference in planes between the tile and the painted wall;
-
then, the position of the mounting cups;
-
then, the possibility of a continuous line;
-
only then the KPU-110 drawing.
If the tile protrudes more than the painted wall, the four-millimeter profile may not cover the difference as expected. It cannot be promised in advance that KPU-110 will become a transition profile for any tile.
If the main task is precisely to close the joint of two materials, and the decorative pattern is secondary, it is better to compare polyurethane moldings with the actual cross-section of the transition.
When KPU-110 is not needed at all on the wall with a towel warmer
Not every free section of the wall must necessarily be tied with molding.
KPU-110 can be excluded from this wall if:
-
the towel warmer is already a strong graphic accent;
-
a large mirror and a cabinet nearby form their own horizontals;
-
The tile joint already creates a sufficient line; <
Alignment to the mirror
The line can be aligned with the bottom or top edge of the mirror. But you cannot choose a mark just for the towel warmer if on the adjacent wall it passes through the middle of the mirror without logic.
Alignment to the top edge of the tile
When the tile ends at the same height throughout the room, KPU-110 can become a decorative finish for that boundary. Then moving the line due to the towel warmer on only one wall is especially undesirable: a step will appear in the overall system.
In such a case, a gap at the equipment often looks architecturally more honest than changing the mark.
Independent decorative mark
If the walls are painted entirely and there is no existing horizontal line, the height can be chosen more freely. Then the main criterion is composition: the trim should not hit the mounts, split the mirror, or conflict with the towel warmer.
A simple way to check is to stretch painter's tape across all bathroom walls at two or three possible marks and photograph the room from the entrance. This shows the overall horizontal line better than a separate mockup next to the fixture.
How much each solution option actually costs on a 3.4 m wall
The price of KPU-110 allows you to compare not only aesthetics, but also commercial results.
Continuous line
For 3.4 m, 2 slats are needed:
2 × 4 360 = 8 720 ₽.
This is a basic order without glue, painting, and labor.
Line moved higher or lower
If the wall length remains 3.4 m, the quantity does not change: the same 2 slats and 8,720 ₽. The difference is only in installation complexity: an open wall is usually simpler than working behind equipment.
Line broken
Here the order may remain the same or be reduced to one slat if the total open segments actually fit within 2000 mm and the cutting allows them to be obtained from one slat.
Therefore, a break cannot be automatically considered cheaper. Its main advantage is not material savings, but the absence of unnecessary interference with the towel warmer and better service access.
Complete refusal of trim on this wall
If KPU-110 runs along other walls and this one is excluded from the composition, the savings depend on the overall perimeter scheme. But the decision should be architectural, not just financial: a randomly broken line at a corner can look worse than a neat break right at the equipment.
Solution KPU-110 on a 3.4 m wall Main reason for choosing Continuous behind the towel warmer 2 planks solid horizontal line Move higher/lower 2 planks simple installation without intervention Break at the equipment depends on segments service access and clean node Do not use on the wall 0 on this wall the equipment is already forming the composition After such a comparison, it is easier to understand what exactly the buyer is paying for: not for "continuity at any cost," but for a specific decorative result.
Color KPU-110 and visibility of the gap
The gap at the towel warmer can be made almost invisible or, on the contrary, emphasized. This largely depends on the color.
KPU-110 in the color of the wall
The calmest option. The profile is read through relief and shadow. If the line is interrupted at the towel warmer, the eye more easily perceives the equipment as a natural reason for the gap.
Contrasting KPU-110
A black, gold, or other contrasting strip makes the horizontal line graphic. Then each end near the mounting becomes noticeable. The gap needs to be designed especially precisely.
KPU-110 in the color of metal parts
This way, you can connect the linear profile to a towel warmer, faucets, or a shower frame. But decorative polyurethane and metal have different textures, so color matching alone is not enough: the result needs to be checked on a real sample.
Two wall colors
If KPU-110 separates two paints, its gap leaves a section where the colors should meet without a decorative profile. This fragment behind the towel warmer needs to be planned in advance, otherwise, after removing the fixture, an untidy boundary will become visible.
It is precisely in a two-color scheme that the continuity of KPU-110 can be more important than in a monochrome bathroom. But if continuous installation is impossible, first you need to carefully resolve the paint transition itself, rather than mask it with engineering equipment.
To select matching bathroom elements, you can open the general catalog of polyurethane moldings and look not at a separate KPU-110, but at the entire system of lines in the room.
Mistakes that most often ruin such a joint
Mistake 1. Measuring only the distance to the pipe
Why it occurs: the pipe seems to be the main obstacle.
Consequence: KPU-110 fits behind the pipe but presses against the mounting cup.
Check: run the axis across the entire zone and find the minimum clearance.
How to avoid: remove the map of all mounts and connections.
Mistake 2. Removing the towel warmer before choosing the composition
Why it occurs: it seems that a continuous line is always "more correct."
Consequence: engineering work is done for a decorative effect that may turn out to be unnoticeable after the mockup.
Check: first create a visual mockup of the break and transfer.
How to avoid: consider dismantling as the last step, not the first.
Mistake 3. Finishing KPU-110 almost flush with the mounting cup
Why it occurs: the desire for a minimal gap.
Consequence: an inconvenient narrow gap remains, difficult to paint and clean.
Check: view the joint at a 1:1 scale.
How to avoid: make a deliberate indentation.
Mistake 4. Place the plank joint behind the equipment
Why it occurs: it seems it won't be visible there.
Consequence: the seam is difficult to treat, and access during repairs worsens.
Check: cutting plan before purchase.
How to avoid: move the joint to an open area.
Mistake 5. Consider moisture resistance as permission for any thermal contact
Why it occurs: polyurethane is suitable for the bathroom.
Consequence: the profile is placed flush against the heated part without a confirmed temperature regime.
Check: exclude direct contact or request the manufacturer's specification.
How to avoid: separate moisture resistance and thermal compatibility.
Error 6. Forget about future dismantling
Why it occurs: today the equipment is already working and seems permanent.
Consequence: in a few years, repairs will require damaging the decor.
Check: mentally walk through the scenario of removing the appliance.
How to avoid: maintain service access.
How to make a decision in 12 steps
-
Mark the horizontal line of the future belt on the entire wall.
-
Check what exactly the line crosses: pipes, mounts, regulator, connection.
-
Measure the minimum clearance along the entire path.
-
Measure the mounting cups and external boundaries of the equipment.
-
Make a KPU-110 20 × 4 mm mockup.
-
First, check the option with a break.
-
Then shift the line above and below.
-
Only if both options are worse — evaluate continuity behind the appliance.
-
Check service access and the possibility of future removal of the towel warmer.
-
Create a cutting layout for two-meter strips.
-
Determine the joint on the open wall.
-
After that, place the order.
If the final layout is confirmed, decorative molding KPU-110 can be ordered in the calculated quantity.
Decision matrix
Situation What to do The belt can be easily moved higher/lower move and maintain continuity The line crosses large fasteners make a deliberate break The break is almost completely hidden by the towel warmer do not complicate installation There is enough space behind the appliance, fasteners do not interfere, maintenance is preserved continuous KPU-110 can be considered For continuity, the connected device must be dismantled first compare the benefit with the option of breaking/relocating The profile blocks access to the connection abandon the continuous scheme There is doubt about heating do not allow direct contact without confirmed specification A calm technical separation of materials is needed consider a simpler molding Wall 3.4 m without a break 2 strips KPU-110 The line is divided into segments calculate the cutting based on actual lengths If KPU-110 is not suitable specifically for the joint, you can choose another polyurethane molding. If you need a maximally neutral profile without an active decorative pattern, it is more logical Buy polyurethane wall moldings.
Result: do not dismantle the equipment for the sake of the line until the break and relocation are verified with a mockup
KPU-110 is a decorative polyurethane molding measuring 20 × 4 × 2000 mm. At the current price of 4,360 ₽, for a continuous wall 3.4 m long, 2 strips are needed, costing 8,720 ₽.
For the bathroom, this profile is interesting precisely for its compactness. But the small size does not automatically make it compatible with the already installed towel warmer.
Before ordering, you need to check:
-
the height of the line;
-
the minimum gap behind the equipment;
-
fastening cups;
-
supplies and connections;
-
service access;
-
the joint location;
-
actual temperature conditions near heated parts.
If the line can pass above or below, that is the simplest path.
If the mark is essential but fasteners interfere, a neat symmetrical break is usually more practical than dismantling equipment.
If a continuous line is truly important and the actual geometry allows running KPU-110 without contact with fasteners and without compromising maintenance, installation behind the towel warmer can be considered. However, if the device needs to be disconnected or dismantled, such work should be entrusted to a specialist responsible for the specific water or electrical unit.
After such a check, you can buy two strips of KPU-110 decorative molding for a continuous 3.4 m wall, or recalculate the footage by individual segments if there is a break.
If you want to expand the selection for the entire bathroom, use the the general catalog of polyurethane moldings и catalog of polyurethane moldingsand check the general rules for wet areas against the article about stucco decor for the bathroom and toilet.
FAQ
Can KPU-110 be run only between the mounts inside the towel warmer?
Such a decorative segment can be considered if it is actually visible and does not interfere with the mounts, but it will be perceived as a separate insert rather than a continuous band. A 1:1 scale mockup is needed.
What to do if the towel warmer is very close to the corner?
It is better to tie the break not to the center of the equipment, but to the overall composition of the wall. Sometimes it is more logical to end KPU-110 before the entire corner area than to create a short piece between the appliance and the corner.
Can the molding be run along the tile joint?
Yes, if the surface and the mounting compound allow for a reliable attachment. But the joint should not automatically be considered the best axis: first, check the towel warmer, mirror, and furniture.
Is it necessary to leave the same gap from the left and right mounts?
For a symmetrical towel warmer, equal offsets usually look neater. With asymmetric connections, the visual logic of the overall outline is more important than mechanical equality.
What to do if one mounting cup crosses the line while the others do not?
You should not make a local "step" around just one cup without a layout. More often, it looks cleaner to shift the entire horizontal line or create a single gap across the equipment area.
Can KPU-110 be used near an electric towel warmer?
Polyurethane decor can be considered for the bathroom, but it must not cover the electrical connection, regulator, or service area. If disassembly of the electrical part is required, the work must be performed by a qualified specialist.
Can KPU-110 be repainted later without removing the towel warmer?
Yes, if access remains for preparation and painting. The smaller the gap behind the equipment, the harder it is to achieve a neat finish, so this issue is best resolved before installation.
Do the ends of KPU-110 near the mounts need to be sealed?
The treatment method depends on the substrate, paint, position relative to water, and the mounting system. The ends should not remain as an untreated random cut; they should be finished so they look like part of the composition.
If the gap reduces the total length below 2 m, will one plank be enough?
Only if the sum of all necessary segments actually fits within 2000 mm, taking into account cutting and pattern. The mere fact of a gap does not guarantee a switch from two planks to one.
Where to look for an alternative if KPU-110 doesn't fit the mounts?
First, check the polyurethane molding section and compare more suitable profiles. If the task is just a thin horizontal line, open the polyurethane moldings.
-