Article Contents:
- What self-adhesive molding is and what it is made of
- The adhesive layer is part of the construction, not the name of the material
- A polystyrene profile can be self-adhesive — but not every one
- Flexibility is another separate characteristic
- Option one: simple self-adhesive lines
- Option two: relief frames made of polyurethane
- Option three: frames with ornamental corners and central overlays
- Painted wall
- Wall with wallpaper
- Furniture front
- What is a self-adhesive molding?
- What are self-adhesive moldings made of?
- Can a self-adhesive profile be glued onto wallpaper?
- Which is better: self-adhesive polystyrene or polyurethane molding?
- How does a ready-made adhesive layer differ from installation adhesive?
- Can molding be removed without leaving marks?
- Which moldings are suitable for a classic wall frame?
- How to choose ready-made decorative corners?
- What to complement a simple molding composition with?
- Where to buy STAVROS polyurethane moldings and stucco?
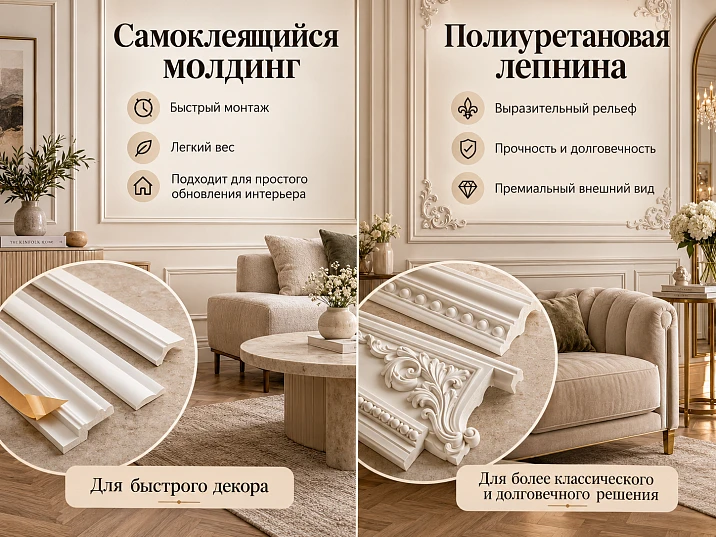
A self-adhesive molding is convenient to buy from a photo: you pick a white decorative strip, peel off the protective film, press it to the wall — done. But once you want not just one line, but four identical frames with pronounced relief and ornamental corners, the task changes. You need to check whether the paint holds on the wall, what size the profile will be, how the corners will join, and whether suitable decorative overlays exist.
It makes sense to choose a self-adhesive profile for simple lines on a solid, even surface, if its adhesive layer is designed for such a base. For classic frames with a three-dimensional cross-section and coordinated ornaments, more possibilities are offered by Polyurethane moldings in combination with suitable moldings. But this does not mean that every self-adhesive decor is worse than polyurethane: one should compare not names, but finished products and the method of attachment.
The main difference is often on the back of the profile. Self-adhesive molding is sold with an applied adhesive layer; ordinary decorative molding is installed with a separately selected mounting compound. Both solutions can turn out well — for their own task.




What a self-adhesive molding is and what it is made of




The adhesive layer is part of the construction, not the name of the material
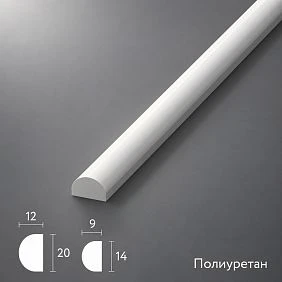
A self-adhesive decorative profile has a face side, an adhesive layer on the back, and a protective backing that is removed before installation. The quality of the result depends simultaneously on three components: the material of the strip itself, the ability of the adhesive to hold it on the given base, and correct installation.
The label “self-adhesive” says nothing about the polymer base. Decorative strips made of various plastics, foamed polymers, and other materials may be sold under this name. A double-sided adhesive base is also found on some rigid profiles if the manufacturer has provided for it. Therefore, it is incorrect to contrast “self-adhesive material” and “polyurethane” as two types of plastic.
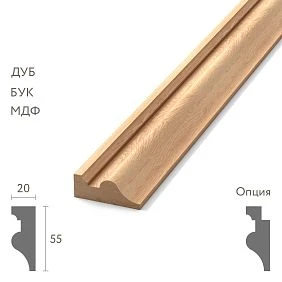
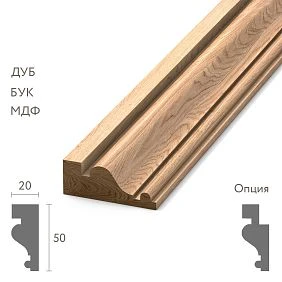
Our factory also produces:





A polystyrene profile can be self-adhesive — but not every one
Polystyrene is used both for simple foamed decorative elements and for denser rigid profiles. Some products may have a ready-to-use adhesive backing; others require a special mounting compound. Before purchasing, check the packaging or product page: whether a factory adhesive layer is specifically indicated, whether attachment to a painted wall is permitted, and which surfaces are excluded.
A polystyrene molding without an adhesive strip does not become self-adhesive simply because double-sided tape of unknown purpose is included with it. If the manufacturer does not permit such an installation method, there remains a risk of peeling or damage to the finish.
Get Consultation
Flexibility is another separate characteristic
Flexible decorative tape is convenient on certain curved surfaces. But the presence of an adhesive layer does not confirm the profile's ability to bend without creasing. A rigid self-adhesive molding may crack or come away from the wall when attempting to follow a small radius. And a flexible profile may be sold without an adhesive layer and require independent fixing.
Therefore, when decorating an arch or a radiused wall, look in the documentation for the minimum permissible bending radius rather than relying on the advertising word "flexible."
Polystyrene or polyurethane: which decor is suitable for walls
For a simple straight frame, a high-quality polystyrene profile is quite sufficient: with a clean cut and suitable adhesive, it will fulfill its function. Polyurethane becomes especially interesting when coordinated molded elements are needed — not only straight molding, but also a corner with ornament, a central overlay, or a repeating decorative motif.
| Criterion | Polystyrene decorative profile | STAVROS polyurethane decor |
|---|---|---|
| Simple straight lines | Suitable with correct selection | Suitable |
| Deep relief | Depends on technology and product | Specific profiles and overlays available |
| Ready-made corners | Depends on the manufacturer's range | There are elements designed for the corresponding series |
| Painting | Compatible paint, taking surface preparation into account | Per the instructions for the product and finish |
| Impact resistance | Depends on the type of polystyrene and the geometry | Depends on the formulation and geometry |
| Installation | Adhesive layer or a suitable mounting compound | Suitable mounting compound |
| Cost | Simple solutions are often cheaper | Determined by the cross-section and the set of parts |
You cannot assume that any polyurethane is stronger than any polystyrene: one profile may have thin, vulnerable protrusions, while another has a dense and sufficiently strong geometry. It is better to compare samples of the same purpose, the quality of the edges, the type of finish, and how they behave when test-cut.
If you only need a narrow straight contour, you can avoid paying extra for a complex molding system. But if the project includes four corners, a central ornament, and several identical panels, check the range of compatible parts in advance. This is exactly where the difference between a single strip and a complete decorative system becomes noticeable.
Self-adhesive layer or mounting adhesive: which is more reliable
Reliability cannot be reduced to the single word "glue." With a self-adhesive profile, the bond depends on the properties of the adhesive base applied by the manufacturer, its thickness, storage time and conditions, the pressure applied, temperature, and the condition of the wall. With moulding that is glued on separately, you can select a mounting compound suited to the specific product and substrate, but the wrong choice also leads to detachment.
The actual contact area is especially important. A wide, flat back surface allows the adhesive to bear against the substrate. If the reverse side has deep recesses, texture, or only narrow contact patches, the bonding area is reduced. Two mouldings of the same width can behave completely differently on the wall when viewed from the front.
A painted wall creates another weak link. Even if the adhesive holds well to the paint, the paint itself may separate from the filler. Then part of the coating will come off along with the moulding. The situation is similar with wallpaper: the load is borne not only by the new adhesive layer but also by the old wallpaper paste.
Self-adhesive moulding does not necessarily come off without a trace. After removal, adhesive residue, peeled enamel, and torn wallpaper are possible. If the finish is to be preserved, test not only the adhesion but also the removal on a discreet area, strictly following the manufacturer's instructions. For a durable classic composition, it is usually wiser to prepare a solid substrate and use the recommended mounting system.
Three design options for a single wall
Imagine a free wall 3.4 m wide and 2.7 m high. You want to place two identical vertical decorative frames on it. A visible section of wall should remain between them; at the edges, there should be free space for the composition to be perceived. For comparison, let us take the outer dimensions of the frames as 800 × 1200 mm. This is an example, not a universal standard for all apartments.
Option one: simple self-adhesive lines
The two frames are made from a narrow profile with a ready-made adhesive layer. There is relatively little work: mark out eight straight sections, prepare the joints precisely, and stick them to a solid, flat surface. A laconic outline is suitable when the wall is already finished and you do not want to carry out a full installation with additional materials.
But such a frame does not necessarily look like traditional stucco. A thin, flat strip produces almost no side shadow. If the profile is three-dimensional, however, you need to check how it joins at the corners and how securely it is held on the wall. It is possible that with complex geometry, the advantages of quick adhesion will disappear.
Option two: textured polyurethane frames
Here, instead of a simple strip, Polyurethane molding MLDPU-004 15 mm wide, with an 8 mm projection and a 2600 mm plank length, is used. Its profile creates a distinct light-and-shadow contour. The frame remains restrained in scale but is already perceived as a relief detail of the wall.
Straight sections are joined at a suitable angle and fixed with compatible mounting adhesive. If you want to change the character of the corners, this series offers a ready-made corner molding MLDPU-004U measuring 135 × 135 × 10 mm. The placement of such an element is planned according to the drawing, rather than simply trying to replace every miter cut with it without recalculating the straight sections.
Option three: frames with ornamental corners and central overlays
For the same wall, you can choose MLDPU-004, decorative corner MLDPU-4U-1.1 и molded overlay MLDPU-4-1.1. The first element measures 145 × 145 × 14 mm, the second — 232 × 124 × 14 mm. Both are designed for the decorative system of series 004.
The appearance changes not only because of the number of parts. Ornamental corners interrupt the rectilinear pattern, while the central overlay creates a focal point. Under side lighting, the relief casts a more complex shadow. To keep the composition from becoming overloaded, check the distance between ornaments on a full-size layout: on a small frame they may end up too close together.
These three solutions should be compared by the result the buyer needs. A thin line, a pronounced geometric frame, and a wall panel with ornament are not three prices for the same product, but three different decorative tasks.
Which polyurethane moldings and overlays to choose at STAVROS
The STAVROS catalog offers straight moldings of various widths, smooth corners, and molded overlays. For simple finishing, the following is suitable: polyurethane molding MLDPU-001 with a cross-section of 10 × 6 mm. A more expressive line is achieved with MLDPU-004. For a large classic frame, you can consider polyurethane molding MLDPU-002 22 mm wide with an 11 mm projection.
| Article | Dimensions, mm | Role in composition |
|---|---|---|
| MLDPU-001 | 10 × 6 × 2600 | Thin contour |
| MLDPU-004 | 15 × 8 × 2600 | Relief wall frame |
| MLDPU-002 | 22 × 11 × 2600 | Larger classic profile |
| MLDPU-004U | 135 × 135 × 10 | Smooth corner finish of the 004 series |
| MLDPU-4U-1.1 | 145 × 145 × 14 | Ornamental corner of series 004 |
| MLDPU-4-1.1 | 232 × 124 × 14 | Central decor of the 004 series |
| NPU-506 | 12 × 205 × 5 | Narrow standalone decorative overlay |
Dimensions are taken from STAVROS product cards; before ordering, check the current finishes and drawings. Pay especially close attention when choosing corner elements: a similar appearance does not necessarily mean matching cross-sections and joint locations.
Moulded decor for mouldings it makes sense to search by the straight-profile series. A separate the decorative overlay NPU-506 can serve as a standalone narrow insert, but it should not be considered a connector for an arbitrary moulding. Its placement requires a separate sketch.
How to tell whether a full decorative system is needed
Start not with the catalog, but with the future look of the wall. If the line is needed only to separate two painted zones, an ornamental set may be excessive. If the composition must support ceiling stucco, door casings, and classic furniture, a single thin self-adhesive contour sometimes looks unfinished.
Check three dimensions: the width of the visible part of the moulding, the projection from the wall, and the overall dimensions of the overlays. For example, MLDPU-004 is 15 mm wide, but the MLDPU-4U-1.1 corner is already 145 mm in both directions. The difference is almost tenfold. Because of this, ornamental corners cannot be perceived as an inconspicuous detail: they change the free field inside the frame.
There is also a lighting limitation. In a room where light falls almost frontally, the difference between a flat strip and a relief profile may look more modest. With light from a side window, an 8 mm profile is more noticeable thanks to the shadow. A full-size sample placed against the wall will give a more reliable answer than an enlarged product photo.
Calculating moldings for two 800 × 1200 mm frames
For two rectangular frames with corners joined by a miter cut, the total length along the selected measurement line is:
2 × 2 × (800 + 1200) = 8000 mm, or 8 m.
The length of the straight MLDPU-004 profile is 2600 mm. Based on the linear footage alone, the calculation would round 8000 / 2600 up to four strips. In this case, four strips are indeed sufficient under the basic cutting plan: each one yields a 1200 mm section and an 800 mm section. These use 2000 mm, leaving 600 mm before accounting for saw kerfs and allowances.
In total, four strips yield four long sides and four short sides — exactly enough for two frames. However, the 800 × 1200 mm size must be specified along the same profile line. When measuring the outer dimension, the lengths of mitered blanks differ from dimensions taken along the inner contour. Before cutting, make a test corner and confirm the measurement point.
With ready-made corner caps, the calculation is different. One frame has four corners; two frames have eight. If the project includes one central cap MLDPU-4-1.1 per frame, two more pieces will be needed. But the length of the straight strips cannot simply be reduced by the full 145 mm corner size: the drawing must be used to determine the actual joint line and the position of the ornament.
Record each part on a separate line: long side, short side, and left or right orientation where required. Only then draw up a cutting map for the 2600 mm strips. This way you can avoid the unpleasant situation where the total linear footage is sufficient but you cannot obtain the required number of full-length sections.
How much does a simple frame and a decorative composition cost?
For self-adhesive decor, it is convenient to recalculate the price per linear meter: divide the package price by its actual length. But you need to check how much profile will go into trimming, how many corner joints there will be, and whether the missing meter can be bought separately. Without choosing a specific brand and size, it would be incorrect to state a universal price.
According to the verified STAVROS product records as of October 22, 2026, one MLDPU-004 strip costs 3,190 ₽, the MLDPU-004U corner — 1,410 ₽, the ornamental MLDPU-4U-1.1 — 1,790 ₽, and the MLDPU-4-1.1 overlay — 2,990 ₽. These figures allow you to compare the contents of the set without presenting the cost of the product as the price of a fully completed renovation.
| A sample kit for two frames | Quantity | Cost of products |
|---|---|---|
| Straight MLDPU-004 frames with miter cuts | 4 strips | 12 760 ₽ |
| Frames with smooth MLDPU-004U corners | 4 strips + 8 corners | 24 040 ₽ |
| Frames with ornamental corners and central decor | 4 strips + 8 corners MLDPU-4U-1.1 + 2 overlays MLDPU-4-1.1 | 33 060 ₽ |
Here, the four strips are a nominal procurement volume for comparison: when using ready-made corners, the exact consumption must be confirmed with a separate cutting plan. The amounts do not include installation adhesive, joint materials, primer, paint, delivery, possible transport backing, or craftsman labor. Check prices before ordering — they may change.
The result is a clear difference: the additional costs do not arise because polyurethane is supposedly always more expensive than other materials. They are created by eight separate ornamental corners and two overlays, i.e., in fact a different artistic result. If such an ornament is not needed, there is no reason to buy it.
How to install polyurethane moldings instead of a self-adhesive strip
Unlike decorative tape, a regular molding must not only be positioned precisely but also secured with a suitable compound. There is no need here to apply a single universal technique to all substrates.
- Check the coating. Remove dust and assess the strength of the paint and putty. Peeling is remedied before installation. If there is wallpaper, determine whether it can be attached directly to the prepared wall.
- Mark out both frames completely. Check the verticals, horizontals, distance from adjacent objects, and the diagonals of the rectangles. For a complex composition, it is useful to temporarily mark the outlines of the corner overlays with paper templates.
- Perform a dry fit. Lay out the moldings and decorative corners without adhesive. Check the series, cross-section, and mating surfaces; adjust the lengths of the straight parts if necessary.
- Choose a compatible installation compound. Its instructions must permit the profile material and the type of substrate. Follow the directions for application, temperature, and setting time. Do not replace the installation adhesive with an arbitrary sealant.
- Install the elements in the order specified by the design. If the structure requires the decorative corners to be positioned first, check their axes, then fill in the straight sections. Hold the parts in place and use temporary fixing only by the methods provided for.
- Treat the joints. After sufficient curing, correct minor finishing gaps with a compatible material. A major geometry error should not be hidden under a thick layer of sealant.
- Prepare the surface for painting. Remove contamination, use the required primer and a suitable paint according to the instructions. Relief overlays are easier to inspect in side light: this way missed spots are visible.
Precision of the joints and a solid substrate are important for durable connections. The mere fact of using polyurethane does not prevent cracks if the wall is movable or the adhesive is incompatible with the coating.
Painted wall, wallpaper and furniture: which method is suitable
Painted wall
On a durable matte painted surface, both mounting methods may be used if the manufacturers permit it. A glossy, dirty or poorly adhering coating will require additional verification. For decorative frames, local paint peeling is especially unpleasant: after repairing the damage, it may be necessary to repaint a large part of the wall.
Wall with wallpaper
Here the strength of the wallpaper layer is what matters. Too heavy relief decor over wallpaper without checking the substrate is a risky choice, but even a thin self-adhesive strip can tear off the top decorative layer when removed. For a permanent wall finish, it is preferable to provide mounting to a solid prepared surface, and to bring the wallpaper up to the molding according to the design.
Furniture facade
The query "flexible self-adhesive furniture molding" already relates to a separate task. Laminated, painted and lacquered surfaces differ in adhesion to the adhesive, and the doors are constantly moving. Check whether installation is permitted on the specific coating, the profile thickness, and the proximity of handles and hinges. A good solution for a wall is not necessarily suitable for a cabinet door.
Why self-adhesive decor peels off
If the end of the strip began to come away after a few days, there may be several reasons. Dust or grease on the wall leaves the adhesive too little clean surface. Weak old paint comes off together with the profile. On textured plaster, contact occurs only along the raised areas — the actual contact area is reduced. Another reason is installation at a temperature or humidity not specified in the instructions.
There is also a less obvious mistake: the strip was stuck once, peeled off to correct the line, and then pressed back on. With some adhesive bases, this action reduces the bonding ability. Reuse is permissible only if the manufacturer has provided for it.
To prevent the problem, check compatibility in advance, prepare the area and perform a test. If the finish is already peeling, simply applying additional adhesive over dust and remnants of the old layer does not eliminate the cause. First the substrate is repaired, then the mounting method is selected again.
Mistakes that prevent a neat decor result
Confusing the self-adhesive mounting method with the material of the product. Because of this, the buyer does not check the chemical base of the profile and the compatibility of the adhesive. Both characteristics are needed.
Assuming all polystyrene is equally fragile. A dense molded profile and a lightweight foamed strip can differ significantly. Compare specific samples, not the general name.
Expecting a complex three-dimensional relief from a thin strip. If you need a shadow from a protrusion and several ornamental details, first define the architectural task, and then choose the product.
Assuming every polyurethane molding is impact-resistant or flexible. The strength is affected by the cross-section and material of the specific model. Arbitrary bending of a rigid profile can damage the part.
Buying corner pieces from a photo without checking the series. The corner piece may not match at the junction with the straight profile. Verify the drawings and item codes.
Installing over a fragile finish. With this type of installation, the adhesive bond holds onto the coating, which is itself already peeling away from the wall. The base needs to be reinforced or replaced.
Ordering only by the total perimeter length. When cutting, solid sections, saw cuts, ready-made corners, and the cut direction matter. Make a list of parts before paying.
Painting without checking the coating. The tape may have a finished face surface that is incompatible with the chosen paint, and polyurethane decor may require specific preparation. First do a test on a sample.
Frequently asked questions
What is self-adhesive molding?
This is a decorative profile or strip with a pre-applied adhesive layer covered by a protective backing. Before installation, the backing is removed and the product is pressed onto a prepared base. This method is convenient for simple decoration, but it does not guarantee the same durability on different walls. You need to check the profile material, the type of adhesive layer and the list of suitable surfaces.
What are self-adhesive mouldings made of?
There is no single composition. Decorative strips made of various polymers and other materials are available on the market; polystyrene may also be used in some profiles with a factory-applied adhesive base. The word “self-adhesive” describes the fixing method, not the chemical composition. If the material is not stated in the product listing, you should request information from the seller, especially when painting or installation on furniture is planned.
Can self-adhesive profile be glued onto wallpaper?
Only if the manufacturer permits the relevant type of wallpaper and base condition. On a textured or loosely adhered covering, the bond may be weak. In addition, removing the profile can damage the decorative layer. For permanent wall frames, it is more reliable to first assess the strength of the base and the possibility of attaching directly to it rather than to the wallpaper.
Which is better: self-adhesive polystyrene or polyurethane moulding?
For a simple thin line on a flat, solid wall, the self-adhesive option may be sufficient. For a classic frame with a relief profile, matched corners and a central ornament, it is more convenient to consider a polyurethane system for which the required parts exist. The quality of the adhesive bond and the mechanical characteristics should in both cases be checked for the specific product, not by the general name of the polymer.
How does a ready-made adhesive layer differ from mounting adhesive?
The ready-made layer is already built into the profile design: its properties and contact area are set by the manufacturer. Mounting adhesive is chosen separately, taking into account the material of the product and the wall, following the application and curing technology. It cannot be automatically claimed that one method is always more reliable than the other. For each, a strong base must be ensured and installation instructions must be followed.
Can molding be removed without leaving traces?
This cannot be guaranteed unless the manufacturer has expressly confirmed such a possibility for the specific substrate. The adhesive strip may leave residue or peel off a layer of paint. Removing a rigid profile attached with mounting adhesive can also damage the plaster. If temporary decor is planned, choose a product with a documented removal method and test it on an inconspicuous area.
Which moldings are suitable for a classic wall frame?
For a thin outline, MLDPU-001 with a cross-section of 10 × 6 mm can be considered; for a more pronounced one, MLDPU-004 at 15 × 8 mm; and for a large relief, MLDPU-002 at 22 mm wide. The scale is chosen based on the height and width of the wall, the distance between frames and adjacent architectural details. The same profile is perceived differently on a narrow pier and a long wall.
How to choose ready-made decorative corners?
Start with the article number of the straight molding. For the MLDPU-004 series, STAVROS offers the smooth MLDPU-004U and the ornamental MLDPU-4U-1.1. They differ in dimensions and external pattern. Check the drawings, the profile layout, the junction point, and the number of elements. A convenient scheme for a rectangular frame is four corners, but the geometry of the straight sections must be calculated separately.
How can a simple molding composition be complemented?
If, after marking out, it is clear that the frame is too minimalist for the interior, you can add a central decorative element coordinated with the selected series. For MLDPU-004, the MLDPU-4-1.1 overlay measuring 232 × 124 × 14 mm is provided. Before ordering, check the free space inside the frame. If the ornament takes up too large a share of the space, it is better to leave the frame without it.
Where to buy STAVROS polyurethane moldings and stucco?
The STAVROS website presents individual straight moldings, compatible corner pieces, and ornamental overlays. If the task is Buy moldings for the entire wall, compile a single list of item codes and the quantity of each position. To You can buy ready-made stucco matching the Baroque style. Calculate the quantity: linear meters of cornices and moldings, number of rosettes, pilasters, consoles, corner elements. Add a ten to fifteen percent allowance for trimming. for the central decor, first check the dimensions and decorative compatibility of the overlays.
What to choose for your wall
A self-adhesive molding is good where a simple decorative line is needed without complex preparation and voluminous ornament, and the base matches the conditions of its use. A dense polystyrene profile on mounting adhesive can also accomplish the task of minimalist decoration. There is no need to choose a more expensive set just for the name of the material.
But if the wall is to receive not just one strip, but a full-fledged relief composition, it is worth considering the system as a whole: the molding, four suitable corners, if necessary a central overlay, the installation method, and future painting. The STAVROS MLDPU-004 polyurethane series shows how such parts can be coordinated in geometry and purpose.
Before purchasing, check the drawings, make a full-size layout, recalculate the straight segments, and assess the strength of the wall. This will give a more predictable result than choosing solely by the price of the pack or a photo of a finished interior.